Table des Matières
Publicité
Les langues disponibles
Les langues disponibles
Liens rapides
Owner's Manual
Notice d'utilisation
Manual del Propietario
Do not use this equipment
before reading this manual!
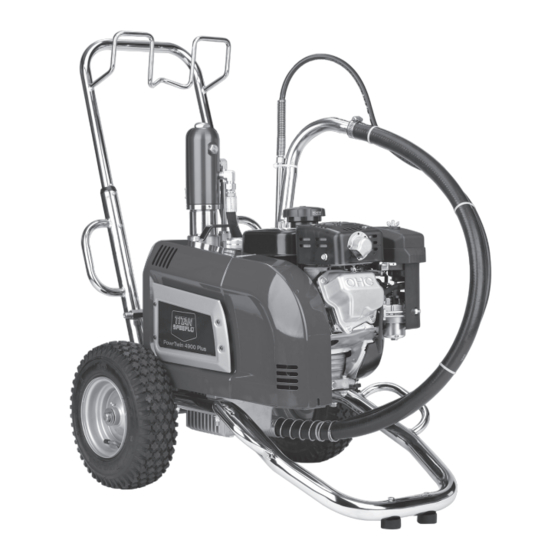
SPEEFLO
PowrTwin 4900 Plus
Model Numbers:
NOTE: This manual contains important
Gas Complete
0290012
warnings and instructions. Please
read and retain for reference.
© Titan Tool Inc. All Rights Reserved. Form No. 0290902C
0711
•
Printed in the U.S.A.
Publicité
Chapitres
Table des Matières
Dépannage

Manuels Connexes pour Titan SPEEFLO PowrTwin 4900 Plus


Sommaire des Matières pour Titan SPEEFLO PowrTwin 4900 Plus
- Page 1 SPEEFLO PowrTwin 4900 Plus Model Numbers: NOTE: This manual contains important Gas Complete 0290012 warnings and instructions. Please read and retain for reference. © Titan Tool Inc. All Rights Reserved. Form No. 0290902C 0711 • Printed in the U.S.A.
-
Page 2: Important Safety Information
(add more hose if necessary). Flammable vapors are often heavier than air. Floor area must be extremely well ventilated. The pump contains arcing parts that emit sparks and can ignite vapors. English © Titan Tool Inc. All rights reserved. -
Page 3: Grounding Instructions
If the plug will not fit the outlet, have the proper outlet installed by a qualified electrician. Grounded Outlet IMPORTaNT: Do not lift by cart handle when loading or unloading. Grounding Pin Cover for grounded outlet box © Titan Tool Inc. All rights reserved. English... -
Page 4: Table Des Matières
26 3/4” W (68 cm) x 35” H (89 cm) Fluid section wetted parts: Electroless nickel plated ductile iron, electroless nickel plated carbon steel, stainless steel, tungsten carbide, Teflon, thiokol impregnated leather, ultra high molecular weight polyethylene. English © Titan Tool Inc. All rights reserved. -
Page 5: Introduction
Congratulations on having selected the finest airless sprayer engine speed under normal load, change brands available in the world. Titan piston pumps are tireless of gasoline. If spark knock or pinging persists, workhorses — so tough they are virtually indestructible, even consult an authorized dealer of the engine under the most severe service. -
Page 6: Setup
Make sure the second gun outlet remains plugged. 4. Fill the oil cup 1/2 full with Titan Piston Lube (P/N 314-480) supplied by the factory. This extends packing life. 5. Check the hydraulic fluid level daily before starting the sprayer. -
Page 7: Preparing A New Sprayer
13. Unlock the gun by turning the gun trigger lock to the To turn off the electric motor, unlocked position. • set the pressure to minimum by turning the pressure control knob fully counterclockwise, • move the ON/OFF switch to the OFF position. © Titan Tool Inc. All rights reserved. English... -
Page 8: Painting
• turn the engine switch to the ON position, • pull the starter rope briskly until the engine starts. To start the electric motor, move the ON/OFF switch to the ON position. English © Titan Tool Inc. All rights reserved. -
Page 9: Pressure Relief Procedure
IMPORTaNT: use only compatible solvents when cleaning out oil based enamels, lacquers, coal tar, and epoxies. check with the fluid manufacturer for the recommended solvent. 4. Place the bleed hose into a metal waste container. © Titan Tool Inc. All rights reserved. English... -
Page 10: Cleaning A Clogged Tip
5. Place the thin Teflon gasket onto the step at the top of the filter body. 6. Place the thick Teflon gasket onto the top of the thin gasket. 7. Tighten the filter cap assembly onto the filter body. English © Titan Tool Inc. All rights reserved. -
Page 11: Maintaining The Hydraulic System
2. Change the hydraulic fluid every twelve months. Drain 1. Change engine oil. the old fluid from the tank and fill with 5 quarts of Titan 2. Clean the sediment cup. Coolflo™ Hydraulic Fluid (6 quarts when also replacing the hydraulic filter). -
Page 12: Replacing The Motor Brushes (Electric Motor)
Brush Holder Spring Spring Clip Place the spring on the brush as shown above. Push in and hook the spring clip. Repeat this procedure for the other side. 7. Reinstall both inspection covers. English © Titan Tool Inc. All rights reserved. -
Page 13: Troubleshooting
Hose size or length is too small or too long Increase hose size to minimize pressure drop through hose and/or reduce hose length. Solvent has caused upper packing to swell Replace packing. Pump chatters on up or down stroke © Titan Tool Inc. All rights reserved. English... -
Page 14: Hydraulic Motor
NOTE: Engine labors at stall on if the head becomes hotter. This will help determine both strokes. if center o-ring is blown on spool valve. If hot, remove and replace o-ring. Bad hydraulic pump Replace hydraulic pump. English © Titan Tool Inc. All rights reserved. -
Page 15: Spray Patterns
These products are covered by one or more of the following U.S. patents: 5,947,381 5,749,528 5,660,332 5,425,506 Material Safety Data Sheets (MSDS) are available on Titan’s website or by calling Customer Service. © Titan Tool Inc. All rights reserved. English... -
Page 16: Parts Lists And Service Instructions
1/8” NPT thread — allows the attachment of the older hose to bleed valve P/N 944-030.) 944-040 Bleed valve kit (includes items 1, 2, 4 and bushing P/N 191-211) English © Titan Tool Inc. All rights reserved. -
Page 17: Cart Assembly
Belt Guard assembly (P/N 0290518) Item Part No. Description Qty. 9805329 Screw 0290523 Cover 0290521 Belt guard, rear 9802252 Screw 0290524 Bracket 9805255 Screw 9802526 Screw 0290794 Hinge 0524318 0290522 Guard, front 0290812 Label (not shown) © Titan Tool Inc. All rights reserved. English... -
Page 18: Hydraulic System
Use blue Loctite on threads, Torque to 8 FT/LBS (11 N/m) 449-107 Mounting plate retainer Torque to 8 FT/LBS (11 N/m) 449-135 Spacer 24, 29-30 Torque to 15 FT/LBS (20,5 N/m) Torque to 20 FT/LBS (28 N/m) 451-121 Elbow (not shown) English © Titan Tool Inc. All rights reserved. -
Page 19: Dc- Electric Convertokit
Motor, DC-Electric, 2 HP, 50 / 60 Hz, 115 V 977-227 Pulley 590-068 Handle grip 335-017 Handle 860-552 Screw 0290558 Mount plate 506-255 Rectifier (not shown) 506-258 Fan (not shown) 0290408 Belt, “V” (not shown, not part of assembly) © Titan Tool Inc. All rights reserved. English... -
Page 20: Gas Convertokit
(1) 3/8” NPT(F) with 1/4 NPSM(M) hose connection (1) 3/8” NPT(F) plugged for additional gun hookup. Wetted Parts ........Carbon steel with electroless nickel and cadmium plating, stainless steel, tungsten carbide, Teflon English © Titan Tool Inc. All rights reserved. -
Page 21: Bleed Valve Assembly
103-125 Spring 944-011 Valve stem 944-038 Stem o-ring 0290502 Siphon hose assembly (includes items 1-3 and 5-7 944-009 Valve housing 944-039 Ball 944-048 Valve seat 944-044 Valve seal 944-013 Valve seat retainer © Titan Tool Inc. All rights reserved. English... -
Page 22: Servicing The Hydraulic Motor
(35 and 36 in Hydraulic System parts list) on the back of the hydraulic pump. 2. Remove the two mounting screws and two lock washers (17 and 16, in Cart Assembly parts list) that attach the motor/pump assembly to the cart. English © Titan Tool Inc. All rights reserved. - Page 23 3. Install sleeve retainer (12) followed by retainer ring (13) into cylinder head (8), which will hold valve sleeve in place. Install o-ring (9) in the o-ring groove of the cylinder head. © Titan Tool Inc. All rights reserved. English...
-
Page 24: Fluid Section
Fluid section service kit, minor (includes items 1, 3, 4, 10, 12, 15, 17, 19, and Loctite P/N 426-051) 107-015 Foot valve assembly (includes items 16–20) 107-016 Outlet valve assembly (includes items 10–13) English © Titan Tool Inc. All rights reserved. -
Page 25: Servicing The Fluid Section
IMPORTaNT: use of non-Titan service parts may void Loctite is only on the threads. warranty. ask for original parts made by Titan for best 8. Place the lower packing spring (9) onto the outlet valve services. This pump should receive a routine servicing housing (13) followed by the sleeve (8) and spring retainer after approximately 1,000 hours of use. -
Page 26: Gun Manifold Assemblies (Optional)
4 Gun 2 Gun 3 Gun 4 Gun 1/4” 1/4” 1/4” 3/8” 3/8” 3/8” 975-111 1 Gun Add-On, 1/4” 975-311 1 Gun Add-On, 3/8” 975-200 Add-A-Gun Kit, 1/4” 975-300 Add-A-Gun Kit, 3/8” English © Titan Tool Inc. All rights reserved. -
Page 27: Sae O-Ring Fitting Installation
Service Kits SaE O-Ring Fitting Installation These items may be purchased separately from your local Titan Steps 1 & 2: distributor. Lubricate Part No. Description 103-826 5 Gal. Siphon Hose Assembly w/Rock Lubricate Catcher 1” x 4.5’ 103-827 55 Gal. Siphon Hose Assembly w/Rock Catcher 1”... -
Page 28: Lire Toutes Ces Consignes Avant
3300 PSI. Ceci est valable de chiffons et autres matières inflammables. Français © Titan Tool Inc. Tous droits réservés. -
Page 29: Instructions De Mise À La Terre
13. Ne pulvérisez pas à l’extérieur par temps venteux. 14. Débranchez toujours le cordon électrique de la prise avant de travailler sur l’équipement. IMPORTaNT: Ne pas soulever par la poignée du chariot lors du chargement ou du déchargement. © Titan Tool Inc. Tous droits réservés. Français... -
Page 30: Spécifications
Pièces mouillées de la zone des liquides : Fer conducteur revêtu de nickel autocatalytique, acier au carbone revêtu de nickel autocatalytique, acier inoxydable, carbure de tungstène, téflon, cuir imprégné de Thiokol, polyéthylène à poids moléculaire ultra lourd. Français © Titan Tool Inc. Tous droits réservés. -
Page 31: Introduction
Félicitations, vous avez choisi le meilleur pulvérisateur sans sur un moteur à vitesse faible et normalement air comprimé offert au monde. Les pompes à piston Titan chargé, changez de marque de carburant. Si le sont des travailleuses infatigables — elles sont pratiquement cliquetis ou les détonations persistent, consultez... -
Page 32: Installation
4. Remplissez le collecteur d’huile à moitié avec du lubrifiant Préparation d’un nouveau pulvérisateur pour piston Titan (no de pièce 314-480) fourni en usine. S’il s’agit d’un nouvel appareil, il est livré avec du fluide d’essai Cela permet d’accroître la durée de vie de l’équipement. -
Page 33: Préparation Avant De Peindre
• placez l’interrupteur MARCHE/ARRÊT(ON/OFF) en • placez l’interrupteur MARCHE/ARRÊT (ON/OFF) en position d’arrêt (OFF). position d’arrêt (OFF). NOTa : assurez-vous qu’aucun embout ou protecteur d’embout n’est installé sur le pistolet pulvérisateur. © Titan Tool Inc. Tous droits réservés. Français... -
Page 34: Peinture
5. Ouvrez la soupape de purge en la faisant tourner comme indiqué sur la protection d’embout complètement dans le sens inverse des aiguilles d’une Blocage ou sur les manuels d’embouts. montre. de la gâchette Français © Titan Tool Inc. Tous droits réservés. -
Page 35: Procédure Relative À L'élimination De La Pression
à déchets en métal. 10. Éteignez l’appareil. 11. Fermez la soupape de purge en la faisant tourner complètement dans le sens des aiguilles d’une montre. © Titan Tool Inc. Tous droits réservés. Français... -
Page 36: Nettoyage D'un Filtre Bloqué
La maintenance de routine de cet appareil s’effectue en deux l’intérieur du filtre. Trempez- étapes, sur une base quotidienne. le dans du solvant pour 1. Lubrification des garnitures supérieures. détacher la peinture séchée ou remplacez-le. 2. Nettoyez le crépine. Français © Titan Tool Inc. Tous droits réservés. -
Page 37: Maintenance Du Circuit Hydraulique
Remplacez le filtre à tous les 12 mois. d’entretien du filtre, no de pièce 930-050. 4. La pompe hydraulique ne doit pas être entretenue sur place. Si elle doit être entretenue, veuillez la retourner à Titan. Maintenance de la section des liquides Remontage Remontez le filtre après avoir nettoyé... -
Page 38: Remplacement Des Balais Du Moteur (Moteur Électrique)
Pour les modèles approuvés par la cSa : L’interrupteur MaRchE/aRRÊT (ON/OFF) sert de bouton de RÉINITIaLISaTION. Couvercle de vérification Français © Titan Tool Inc. Tous droits réservés. -
Page 39: Dépannage
La pompe broute pendant Le solvant a fait gonfler la garniture Remplacez la garniture. la course ascendante ou supérieure. descendante. © Titan Tool Inc. Tous droits réservés. Français... -
Page 40: Moteur Hydraulique
Cela permettra de déterminer si le joint torique du centre a fondu sur la soupape à tiroir. S’il est chaud, démontez et remplacez le joint torique. Pompe hydraulique défaillante Remplacez la pompe hydraulique. Français © Titan Tool Inc. Tous droits réservés. -
Page 41: Répartition De La Pulvérisation
Ces produits sont protégés par un ou plusieurs des brevets (U.S.A.) suivants : 5,947,381 5,749,528 5,660,332 5,425,506 Les fiches signalétiques sont disponibles sur le site Web de Titan ou en téléphonant au service à la clientèle. © Titan Tool Inc. Tous droits réservés. Français... -
Page 42: Listes Des Pièces Et Consignes D'entretien
1/8 po NPT - permet l’attachement du tuyau plus ancien au soupape de purge 944-040 Kit de soupape de purge (comprend les articles 1, 2, 4, et la douille P/N 191-211) Français © Titan Tool Inc. Tous droits réservés. -
Page 43: Chariot
9805329 0290523 Couvercle 0290521 Carter de protection de la courroie, arrière 9802252 0290524 Support 9805255 9802526 0290794 Charnière 0524318 Écrou 0290522 Carter de protection de la courroie, avant 0290812 Étiquette (non illustré) © Titan Tool Inc. Tous droits réservés. Français... -
Page 44: Circuit Hydraulique
449-107 Support de plaque de montage Serrage à 8 pi/lb (11 N.m) 449-135 Entretoise 24, 29-30 Serrage à 15 pi/lb (20,5 N.m) 451-121 Coude (non illustré) Serrage à 20 pi/lb (28 N.m) Français © Titan Tool Inc. Tous droits réservés. -
Page 45: Cc - Convertokit Électrique
590-068 Attache de poignée 335-017 Poignée 860-552 0290558 Plaque de montage 506-255 Rectificateur (non illustré) 506-258 Ventilateur (non illustré) 0290408 Courroie « V » (non illustrée, ne fait pas partie de l’ensemble) © Titan Tool Inc. Tous droits réservés. Français... -
Page 46: Convertokit À Essence
(1) 3/8” NPT(F) avec raccord de tuyau 1/4 NPSM (M) (1) 3/8” NPT(F) branché pour accrochage supplémentaire du pistolet Pièces Mouillées......Acier au carbone avec nickel et cadmium autocatalytiques revêtement, acier inoxydable, carbure au tungstène, téflon Français © Titan Tool Inc. Tous droits réservés. -
Page 47: Soupape De Purge
1 á 3 et 5 á 7) 944-009 Logement de la soupape 944-039 Bille 944-048 Siège de la soupape 944-044 Joint de la soupape 944-013 Dispositif de retenue du siège de la soupape © Titan Tool Inc. Tous droits réservés. Français... -
Page 48: Entretien Du Moteur Hydraulique
2. Démontez les deux vis de montage et les deux rondelles de blocage (éléments 17 et 16 dans la liste des pièces du chariot) qui fixent le moteur/pompe au chariot. 3. Placez le bloc moteur/pompe (31) dans un étau, tenez-le fermement. Français © Titan Tool Inc. Tous droits réservés. - Page 49 2. Installez les joints toriques (5) des pièces de retenue de 15. Installez un joint torique (11) sur la fiche de la tête du la course (4). Installez les billes de retenue de course (7) cylindre (1). Vissez. © Titan Tool Inc. Tous droits réservés. Français...
-
Page 50: Section Des Liquides
IMPORTaNT : L’utilisation de pièces de rechange autres Bloc que celles fournies pas Titan peut entraîner l’annulation moteur/ de la garantie. Demandez des pièces d’origine de Titan pompe pour une meilleure maintenance. ces pompes doivent être régulièrement entretenues après 1 000 heures d’utilisation environ. -
Page 51: Remontage De La Section Des Liquides
9. Vissez la tige de déplacement (6) et le logement de la soupape de sortie (13) ensemble. Vissez dans un étau à 700 po/lbs. (58 pi./lbs.). 10. Insérez le joint torique en Téflon (3) dans la rainure supérieure du bloc moteur/pompe. © Titan Tool Inc. Tous droits réservés. Français... -
Page 52: Collecteur De Pistolet (Option)
3 Pistolets 4 Pistolets 1/4” 1/4” 1/4” 3/8” 3/8” 3/8” 975-111 Supplémentaire, pistolet unique, 1/4” 975-311 Supplémentaire, pistolet unique, 3/8” 975-200 Nécessaire d’ajout de pistolet, 1/4” 975-300 Nécessaire d’ajout de pistolet, 3/8” Français © Titan Tool Inc. Tous droits réservés. -
Page 53: Installation Du Joint Torique Sae
Des ventilateurs d’une largeur de 20 à 30 cm (8 po à 12 po) sont généralement préférables car ils permettent de mieux contrôler la pulvérisation et se bloquent moins facilement. Coupure du joint torique sur le filetage © Titan Tool Inc. Tous droits réservés. Français... -
Page 54: Información De Seguridad Importante
11. Antes de utilizar el aparato, verifique que todas las que pulverice. Lea las hojas de datos sobre seguridad conexiones son seguras. de los materiales (MSDS) y las etiquetas en los botes de Español © Titan Tool Inc. Todos los derechos reservados. -
Page 55: Instrucciones Para Conectar A Tierra
13. No pulverice al aire libre si hace viento. 14. Desenchufe siempre el cable antes de trabajar en el equipo. IMPORTaNTE: No cargue el equipo por el asa del carrito durante la carga y descarga. © Titan Tool Inc. Todos los derechos reservados. Español... -
Page 56: Seguridad Del Motor De Gasolina
Filtro de pintura de entrada ... malla 10 “separadora de piedras” Filtro de pintura de salida ....malla 50, 18 pulg. Entrada de la bomba ..... Rosca nominal del tubo (H) de 3/4” Español © Titan Tool Inc. Todos los derechos reservados. -
Page 57: Introducción
Enhorabuena por haber seleccionado el mejor atomizador sin a una velocidad constante del motor en aire que existe en el mundo. Las bombas de pistón Titan son condiciones de carga normal, cambie de marca trabajadores incansables, tan duras que son prácticamente de gasolina. -
Page 58: Configuración
IMPORTaNTE: Es obligatorio el uso del fluido hidráulico coolflo™ de Titan (P/N 430-361) en el sistema hidráulico. No utilice ningún otro fluido hidráulico. El uso de cualquier otro fluido hidráulico puede dañar gravemente el sistema hidráulico y anulará... -
Page 59: Preparación De Un Rociador Nuevo
• sitúe el interruptor del motor en la posición OFF (apagado). el final, © Titan Tool Inc. Todos los derechos reservados. Español... -
Page 60: Pintura
14. Apriete el gatillo en el recipiente metálico para desecho posición abierta) hasta que todo el aire y el disolvente usado salga de la manguera rociadora y comience a salir pintura libremente de la pistola. Español © Titan Tool Inc. Todos los derechos reservados. -
Page 61: Procedimiento Para Aliviar La Presión
8. Coloque la manguera de purga en el recipiente metálico 12. Arranque el motor de gasolina o encienda el motor para desecho. eléctrico. 9. Abra la válvula de purga girándola totalmente en sentido contrario a las agujas del reloj. © Titan Tool Inc. Todos los derechos reservados. Español... -
Page 62: Limpieza De Una Punta Obstruida
Si la bola está cortada, retire la junta tórica de Teflón utilizando una herramienta para juntas tóricas y retire el asiento de carburo. Compruebe el asiento en busca de muescas o hendiduras. Si el asiento está dañado, reemplácelo. Español © Titan Tool Inc. Todos los derechos reservados. -
Page 63: Mantenimiento Del Sistema Hidráulico
IMPORTaNTE: Es obligatorio el uso del fluido hidráulico Páginas Amarillas dentro de motores de gasolina, equipos coolflo™ de Titan en el sistema hidráulico PowrTwin. No y suministros de jardín, cortacéspedes, etc. utilice ningún otro fluido hidráulico. El uso de cualquier •... -
Page 64: Reemplazo De Las Escobillas Del Motor (Motor Eléctrico)
Sujetador del resorte 3. Afloje el tornillo del terminal. Separe el conductor de la escobilla, pero deje el conductor del motor en su lugar. Retire la escobilla y el resorte. Español © Titan Tool Inc. Todos los derechos reservados. -
Page 65: Solución De Problemas
La bomba vibra en el El disolvente ha hecho que la guarnición Reemplace la guarnición. recorrido ascendente o superior se hinche descendente © Titan Tool Inc. Todos los derechos reservados. Español... -
Page 66: Motor Hidráulico
Si está caliente, retire y reemplace la junta tórica. Bomba hidráulica en mal estado Reemplace la bomba hidráulica. Español © Titan Tool Inc. Todos los derechos reservados. -
Page 67: Patrones De Rociado
5,947,381 5,749,528 5,660,332 5,425,506 Las hojas de seguridad de los materiales (Material Safety Data Sheets - MSDS) están disponibles en la página web de Titan o llamando al servicio al cliente. © Titan Tool Inc. Todos los derechos reservados. Español... -
Page 68: Lista De Piezas E Instrucciones De Servicio
1/8”NPT - permite el accesorio de la manguera más vieja a la válvula de purga P/N 944-030.) 944-040 Kit de la válvula de purga (incluye los artículos 1, 2, 4 y el buje P/N 191-211) Español © Titan Tool Inc. Todos los derechos reservados. -
Page 69: Ensamblaje Del Carro
0290521 Protector de la cadena, parte posterior 9802252 Tornillo 0290524 Soporte 9805255 Tornillo 9802526 Tornillo 0290794 Bisagra 0524318 Tuerca 0290522 Protector de la cadena, parte anterior 0290812 Etiqueta (no se muestra) © Titan Tool Inc. Todos los derechos reservados. Español... -
Page 70: Sistema Hidráulico
Dispositivo de retención de la placa de instalación Torsión a 11 N/m (8 pies/libra) 449-135 Separador 24, 29-30 Torsión a 20.5 N/m (15 pies/libra) 451-121 Codo (no se muestra) Torsión a 28 N/m (20 pies/libra) Español © Titan Tool Inc. Todos los derechos reservados. -
Page 71: Convertokit Eléctrico Dc
Agarre del mango 335-017 Mango 860-552 Tornillo 0290558 Placa de instalación 506-255 Rectificador (no se muestra) 506-258 Ventilador (no se muestra) 0290408 Cadena, “V” (no se muestra, no forma parte del ensamblaje) © Titan Tool Inc. Todos los derechos reservados. Español... -
Page 72: Convertokit De Gasolina
(1) Rosca nominal del tubo (H) de3/8” conectada para el enganche de una pistola adicional. Piezas mojadas ......Acero al carbono con níquel y cadmio por reducción química acero inoxidable, carburo de volframio, Teflón Español © Titan Tool Inc. Todos los derechos reservados. -
Page 73: Ensamblaje De La Válvula De Purga
Ensamblaje de la manguera de succión (incluye los artículos 1-3 y 5-7) 944-009 Alojamiento de la válvula 944-039 Bola 944-048 Asiento de válvula 944-044 Sello de válvula 944-013 Retenedor del asiento de válvula © Titan Tool Inc. Todos los derechos reservados. Español... -
Page 74: Motor Hidráulico
Coloque el ensamblaje del motor/bomba en una prensa de banco, sujetándolo de un modo seguro por el bloque del motor/bomba (31). Retire la tapa de la culata del cilindro (1). Español © Titan Tool Inc. Todos los derechos reservados. - Page 75 (4). Instale las bolas de la retención de disparo (7) seguidas de los resortes (6) que, cuando estén instalados, sujetarán el juego de carrete/manguito (10) en su lugar para su ensamblaje. © Titan Tool Inc. Todos los derechos reservados. Español...
-
Page 76: Sección De Líquidos
IMPORTaNTE: La utilización de piezas que no sean de Titan para el mantenimiento puede anular la garantía. Solicite piezas originales fabricadas por Titan para un mejor mantenimiento. Debería realizarse un mantenimiento de rutina en esta bomba aproximadamente luego de 1.000 horas de uso. - Page 77 Loctite quede aplicado solamente en la rosca. 8. Coloque el muelle de las empaquetaduras inferiores (9) sobre el alojamiento de la válvula de salida (13) y a continuación la manguito (8) y el retenedor de muelle (7). © Titan Tool Inc. Todos los derechos reservados. Español...
-
Page 78: Ensamblajes De Distribuidor Para Pistolas (Opcional)
3/8” 3/8” 3/8” 975-111 1 juego de pistola añadida, 1/4” 975-311 1 juego de pistola añadida, 38” 975-200 Juego para añadir una pistola, 1/4” 975-300 Juego para añadir una pistola, 3/8” Español © Titan Tool Inc. Todos los derechos reservados. -
Page 79: Instalación Del Conector De La Junta Tórica
Se prefieren anchos de ventilador de 20 a 30 cm. (8” a 12”) debido a que ofrecen más control al rociar y es menos probable que se obstruyan. © Titan Tool Inc. Todos los derechos reservados. Español... -
Page 80: Limited Warranty
Limited Warranty Titan Tool, Inc., (“Titan”) warrants that at the time of delivery to the original purchaser for use (“End User”), the equipment covered by this warranty is free from defects in material and workmanship. With the exception of any special, limited, or extended warranty published by Titan, Titan’s obligation under this warranty is limited to replacing or repairing without charge those parts which, to Titan’s reasonable satisfaction, are shown to be defective within twelve (12) months after sale to the End User.