
Manuels Connexes pour Amann Girrbach therm 3


Sommaire des Matières pour Amann Girrbach therm 3
- Page 1 Betriebsanleitung 3 - 19 User Manual 20 - 35 Mode d‘emploi 36 - 51 Instruzioni d‘uso 52 - 68 Modo de empleo 69 - 84 Instruções de operação 85 - 101...
-
Page 3: Table Des Matières
I N H A L T S V E R Z E I C H N I S – Original Betriebsanleitung – Bedienungsanleitungde Inhaltsverzeichnis Symbolerklärung ....4 Umweltschutz . -
Page 4: Symbolerklärung
S Y M B O L E R K L Ä R U N G Symbolerklärung Warnhinweise Weitere Symbole in der Anleitung Warnhinweise im Text werden mit einem Symbol Bedeutung Warndreieck gekennzeichnet und umran- ▷ Punkt einer Handlungsbeschreibung det. Punkt einer Liste Bei Gefahren durch Strom wird das Ausru- ▪... -
Page 5: Allgemeine Sicherheitshinweise
A L L G E M E I N E S I C H E R H E I T S H I N W E I S E Allgemeine Sicherheits- HINWEIS: hinweise ▷ Das Gerät ausschalten, wenn es nicht mehr Bei der Aufstellung, Inbetriebnahme und Benut- benötigt wird oder das Gerät längere Zeit zung des Geräts sind stets die folgenden Sicher-... -
Page 6: Angaben Zum Gerät
Die Konformität wurde mit der CE-Kenn- Der Sinterofen ist herstellerseitig mit 3 Tempera- zeichnung bestätigt. turprogrammen vorprogrammiert, welche auf das EG-Richtlinien Zirkonoxid Gerüstmaterial der Amann Girrbach 2006/95/EG 2004/108/EG AG abgestimmt sind. angewandte harmonisierte Normen 247 weiterer Programmplätze sind frei program-... -
Page 7: Bauteile Und Schnittstellen
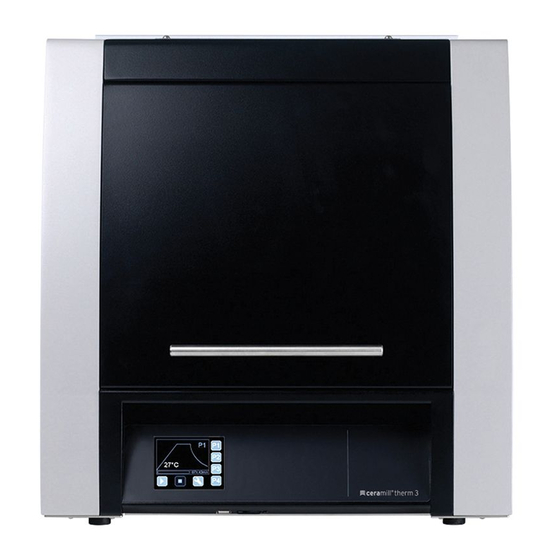
A N G A B E N Z U M G E R Ä T Bauteile und Schnittstellen Bild 1 Geräteübersicht Frontseite 1 Abluftröhrchen 6 Kragenisolierung 2 Ofenhubtür 7 SD-Karten-Steckplatz 3 Thermoelement 8 USB-Anschluss 4 Heizstab 9 Controller 5 Bodenplatte... - Page 8 A N G A B E N Z U M G E R Ä T Displayanzeigen 693°C 04h:15min Bild 2 Geräteübersicht Rückseite 1 Netzschalter 2 Netzanschluss 3 Sicherung Bild 3 Display Bedienebene 4 Schaltanlagenentlüfter Schnellwahltasten Programm 1 ... 4 Taste Programmstart Taste Programmstopp Taste Aufruf Konfigurationsebene 1 Kurve des Temperaturverlaufs...
- Page 9 A N G A B E N Z U M G E R Ä T Legende zu Bild 4, Bild 5 und Bild 6: Taste „Programm“ Taste „Funktion“ Taste „Auswahl“ Taste „Info“ Taste „Speichern“ Taste „In Liste nach oben bewegen“ Info Taste „In Liste nach unten bewegen“...
-
Page 10: Schnellwahltasten
A N G A B E N Z U M G E R Ä T _ Programm 2 [P2] – fast Programmübersicht Schnellwahl- ▪ Schnellsinterprogramm für Zirkonoxide - tasten Einzeleinheiten. Der Hochtemperaturofen verfügt über 3 fest hin- ▪ Schnellsinterprogramm nur für Einzel- terlegte Programmplätze zur Sinterung von Zir- einheiten - Ofenbefüllung max. - Page 11 A N G A B E N Z U M G E R Ä T _ Programm 4 [P4] – default ▪ Parameter frei belegbar ▪ Das Programm ist auf 1500 °C, 2 Stunden Hal- tezeit und einer Aufheizrate von 10 °C/min voreingestellt (nicht materialspezifisch).
-
Page 12: Installation
I N S T A L L A T I O N Installation _ Die Raumtemperatur während des Betriebs Aufstellung muss zwischen 5 °C und 40 °C betragen, große HINWEIS: Temperaturschwankungen sind zu vermeiden. _ Die maximale Betriebshöhe NHN beträgt Aufgrund des Gewichts von 30 kg wird empfoh- 2000 m. -
Page 13: Bodenplatte Einsetzen
I N S T A L L A T I O N Bodenplatte einsetzen HINWEIS: ▷ Die Bodenplatte einlegen. Netzstecker nicht einstecken, bevor die Heiz- elemente eingesetzt wurden. ▷ Den Netzschalter in Stellung 0 schalten. ▷ Das beiliegende Netzkabel an der dafür vorge- sehenen Buchse des Ofens anschließen. -
Page 14: Anwendung Und Bedienung
A N W E N D U N G U N D B E D I E N U N G Anwendung und Bedienung Sinterprogramm auswählen Vor Inbetriebnahme des Ofens sollte die- ▷ Um ein Programm auszuwählen: Taste drü- ser 24 Stunden am Aufstellungsort akkli- cken. -
Page 15: Sinterprogramm Programmieren
A N W E N D U N G U N D B E D I E N U N G ▷ Taste Sinterprogramm programmieren drücken. ▷ Zweiten Parameter des Segments (Temperatur Hinweise zur Programmierung / Controllerverhal- in °C) über die Zifferntaste eingeben. ten: ▷... -
Page 16: Funktionen
A N W E N D U N G U N D B E D I E N U N G Funktionen Bedienung Handhabung HINWEIS: ▷ Um eine Funktion auszuwählen: Taste Beschädigung der Heizstäbe! die entsprechende Zifferntaste drücken. ▷ Bei Füllen und Leeren des Ofens nicht an die ▪... -
Page 17: Reinigung Und Wartung
R E I N I G U N G U N D W A R T U N G Reinigung und Wartung Reinigung Tägliche Kontrollen ▷ Den Ofen auf äußerlich erkennbare Schäden GEFAHR: überprüfen. ▷ Die Funktion der Sicherheitseinrichtungen (z. B. Stromschlag! ▷... -
Page 18: Störungen, Reparaturen Und
S T Ö R U N G E N , R E P A R A T U R E N U N D G E W Ä H R L E I S T U N G Störungen, Reparaturen und Gewährleistung Darüber hinaus gilt, dass Gewährleistungs- und Risse in der Isolierung Haftungsansprüche bei Personen- und Sachschä-... -
Page 19: Umweltschutz
U M W E L T S C H U T Z Technische Daten und Im Werk wird herstellerseitig ein Testlauf Zubehöre/Ersatzteile mit jedem Ofen vorgenommen. Dieser bedingt Verfärbungen an der Brenn- Änderungen vorbehalten. kammer bzw. an den Blechteilen. Technische Daten Umweltschutz Einheit Wert... - Page 20 T A B L E O F C O N T E N T S – Translation of the original Instruction Manual – user manualen Table of Contents Explanation of Symbols ... . . 21 Environmental Protection .
-
Page 21: E N
E X P L A N A T I O N O F S Y M B O L S Explanation of Symbols Warning indications Other symbols in the Manual Warning indications in the text are marked Symbol Meaning with a triangle and boxed. ▷... -
Page 22: General Safety Instructions
G E N E R A L S A F E T Y I N S T R U C T I O N S General Safety Instructions When installing, starting-up and operating the NOTE: machine, always observe the following safety ▷... -
Page 23: Machine Specifications
CE marking. manufacturer with 3 temperature programs, EC Guidelines which are matched to the zirconium oxide frame material of Amann Girrbach AG. 2006/95/EC 2004/108/EC 247 further programming positions are freely pro- Applied harmonised standards grammable. -
Page 24: Components And Interfaces
M A C H I N E S P E C I F I C A T I O N S Components and Interfaces Fig. 1 Machine overview, front 1 Exhaust air pipe 6 Shroud insulation 2 Furnace lift door 7 SD card slot 3 Thermoelement 8 USB port... - Page 25 M A C H I N E S P E C I F I C A T I O N S Display, operating level 693°C 04h:15min Fig. 2 Machine overview, rear 1 Mains switch 2 Power supply connection 3 Fuse Fig.
-
Page 26: Program Overview, Shortcut Keys
M A C H I N E S P E C I F I C A T I O N S Legend to Fig. 4, Fig. 5 and Fig. 6: “Program” key “Function” key “Selection” key “Info” key “Save” key “Move to list up”... - Page 27 M A C H I N E S P E C I F I C A T I O N S _ Program 2 [P2] – fast _ Program 4 [P4] – default ▪ Quick-sintering program for zirconium oxides - ▪...
-
Page 28: Installation
I N S T A L L A T I O N Installation _ During operation, the room temperature must Setting up be between 5 °C and 40 °C; avoid large varia- NOTE: tions in temperature. _ The maximal operating elevation (standard ele- Due to the unit's weight of 30 kg, two persons vation zero) is 2000 m. -
Page 29: Inserting A Floor Plate
I N S T A L L A T I O N Inserting a floor plate NOTE: ▷ Insert the floor plate. Do not insert the mains plug before the heating elements have been inserted. ▷ Set the mains switch to the 0 position. ▷... -
Page 30: Application And Operation
A P P L I C A T I O N A N D O P E R A T I O N Application and Operation Selecting the sintering program Before starting-up the furnace, it should ▷ To select a program: Press the key. -
Page 31: Programming The Sintering
A P P L I C A T I O N A N D O P E R A T I O N ▷ Press the Programming the sintering pro- key. ▷ Enter the second parameter of the segment gram (temperature in °C) via the die number key. -
Page 32: Functions
A P P L I C A T I O N A N D O P E R A T I O N Functions Operation Handling NOTE: ▷ To select a function: Press the key and the Damage to the heating rods! respective number key. -
Page 33: Cleaning And Maintenance
C L E A N I N G A N D M A I N T E N A N C E Cleaning and Maintenance Cleaning Daily checks ▷ Check the furnace for any exterior damage. DANGER: ▷ Check the function of the safety devices (e.g. Risk of electric shock! the mains switch). -
Page 34: Malfunctions, Repairs And Warranty
M A L F U N C T I O N S , R E P A I R S A N D W A R R A N T Y Malfunctions, Repairs and Warranty Warranty Cracks in the insulation The warranty complies with the statutory provi- The furnace insulation consists of a high- sions. -
Page 35: Environmental Protection
E N V I R O N M E N T A L P R O T E C T I O N Technical Data and Acces- Each furnace is subject to a factory test sories/Spare Parts run on behalf of the manufacturer. The test run may cause discolouration to the Subject to changes. - Page 36 T A B L E D E S M A T I È R E S – Traduction de la notice originale – Mode d’emploifr Table des matières Explication des symboles ... 37 Protection de l’environnement .
-
Page 37: F R
E X P L I C A T I O N D E S S Y M B O L E S Explication des symboles Mises en garde Autres symboles dans le mode d’emploi Les mises en garde dans le texte sont mar- Symboles Signification quées par un triangle de signalisation et... -
Page 38: Consignes Générales De Sécurité
C O N S I G N E S G É N É R A L E S D E S É C U R I T É Consignes générales de MISE EN GARDE : sécurité L’utilisation de sources d’énergie, de produits, Respectez les consignes de sécurité... -
Page 39: Données Relatives À L'appareil
D O N N É E S R E L A T I V E S À L ’ A P P A R E I L Données relatives à l’appareil Contenu de la livraison Il faut savoir si les matériaux utilisés dans le four peuvent attaquer ou détruire l’isolation et les élé- _ Four à... -
Page 40: Composants Et Interfaces
D O N N É E S R E L A T I V E S À L ’ A P P A R E I L Composants et interfaces Fig. 1 Vue d’ensemble de l’appareil face avant 1 Tubulure d’évacuation 6 Embase d’isolation 2 Porte de four levante 7 Fente carte mémoire SD... - Page 41 D O N N É E S R E L A T I V E S À L ’ A P P A R E I L Écran niveau de commande 693°C 04h:15min Fig. 2 Vue d’ensemble de l’appareil face arrière 1 Interrupteur de réseau 2 Branchement secteur 3 Fusible...
-
Page 42: Aperçu Du Programme Touches Des Raccourcis
D O N N É E S R E L A T I V E S À L ’ A P P A R E I L Légende pour figure 4, figure 5 et figure 6: Touche « Programme » Touche «... - Page 43 D O N N É E S R E L A T I V E S À L ’ A P P A R E I L _ Programme 3 [P3] – slow Description du programme ▪ Programme de frittage avec longue durée de _ Programme 1 [P1] –...
-
Page 44: Installation
I N S T A L L A T I O N _ Une distance de sécurité minimale de 50 cm En cas de réglage sur la température maxi- latéralement, derrière et au dessus du four doit male de 1530 °C est réglée, il est recom- être respectée. -
Page 45: Insérer La Plaque De Base
I N S T A L L A T I O N Insérer la plaque de base AVERTISSEMENT : ▷ Monter la plaque de base. Ne brancher la fiche du secteur qu’après avoir monté les éléments chauffants. ▷ Mettre l’interrupteur du réseau en position 0. ▷... -
Page 46: Application Et Utilisation
A P P L I C A T I O N E T U T I L I S A T I O N Application et utilisation Choisir le programme de frittage Le four devrait disposer de 24 heures ▷ Pour choisir un programme : Appuyer sur la tou- d’acclimatation sur le lieu d’implantation avant d’être mis en service. -
Page 47: Programmer Le Programme De Frittage
A P P L I C A T I O N E T U T I L I S A T I O N Programmer le programme de frit- d’échauffement en °C/h) au moyen de la touche numérique. tage ▷ Appuyer sur la touche Instructions relatives à... -
Page 48: Fonctions
A P P L I C A T I O N E T U T I L I S A T I O N Fonctions Utilisation Manipulation AVERTISSEMENT : ▷ Pour choisir une fonction : Appuyer sur la tou- Endommagement des éléments chauffants ! et la touche numérique correspondante. -
Page 49: Nettoyage Et Entretien
N E T T O Y A G E E T E N T R E T I E N Nettoyage et entretien Nettoyage Contrôles quotidiens ▷ Vérifier si le four ne présente pas de dommages DANGER : externes visibles. ▷... -
Page 50: Dysfonctionnements, Réparations Et
D Y S F O N C T I O N N E M E N T S , R É P A R A T I O N S E T G A R A N T I E Dysfonctionnements, réparations et garantie Garantie Fissures dans l’isolation... -
Page 51: Protection De L'environnement
P R O T E C T I O N D E L ’ E N V I R O N N E M E N T _ Les pièces d’origine et les accessoires sont spé- Caractéristiques techni- ques et accessoires / piè- cialement conçus pour les installations de ce ces de rechange four. - Page 52 I N D I C E – Traduzione delle istruzioni per l'uso originali – Istruzioni d’usoit Indice Spiegazione dei simboli ... . . 53 Protezione dell'ambiente ... 68 Indicazioni generali di sicurezza .
-
Page 53: I T
S P I E G A Z I O N E D E I S I M B O L I Spiegazione dei simboli Indicazioni di avvertimento Ulteriori simboli nelle istruzioni d'uso Nel testo le indicazioni di avvertimento Simbolo Significato sono contrassegnate da un triangolo di ▷... -
Page 54: Indicazioni Generali Di Sicurezza
I N D I C A Z I O N I G E N E R A L I D I S I C U R E Z Z A Indicazioni generali di ATTENZIONE: sicurezza Non è permesso il funzionamento con fonti ener- Durante l'installazione, la messa in funzione e getiche, prodotti, mezzi di produzione, materiali l'uso dell'apparecchio devono sempre essere... -
Page 55: Dati Relativi All'apparecchio
3 programmi di temperatura adatti al _ Perline per sinterizzazione materiale delle strutture di ossido di zirconio della _ Pinza per piatto per sinterizzazione Amann Girrbach AG. _ Cavo di alimentazione _ Chiave per viti ad esagono cavo Sei ulteriori posti per programmi sono program- mabili liberamente. -
Page 56: Dichiarazione Di Conformità Ce
D A T I R E L A T I V I A L L ' A P P A R E C C H I O Dichiarazione di conformità CE Questo prodotto è stato costruito e prodotto secondo un'accurata selezione delle norme armo- nizzate da rispettare e ulteriori specifiche tecni- che. -
Page 57: Componenti Ed Interfacce
D A T I R E L A T I V I A L L ' A P P A R E C C H I O Componenti ed interfacce Fig. 1 Vista generale dell'apparecchio - lato anteriore 1 Tubicino di scarico dell'aria 6 Isolamento del collare 2 Sportello sollevabile del forno 7 Slot scheda SD... - Page 58 D A T I R E L A T I V I A L L ' A P P A R E C C H I O Display livello di comando 693°C 04h:15min Fig. 2 Vista generale dell'apparecchio - lato posteriore 1 Interruttore di rete 2 Collegamento di alimentazione...
-
Page 59: Vista Generale Del Programma Tasti Di Scelta Rapida
D A T I R E L A T I V I A L L ' A P P A R E C C H I O Legenda per figura 4, figura 5 e figura 6: Tasto «Programma» Tasto «Funzione» Tasto «Selezione»... - Page 60 D A T I R E L A T I V I A L L ' A P P A R E C C H I O _ Programma 3 [P3] – slow Descrizione del programma ▪ Programma di sinterizzazione con raffredda- _ Programma 1 [P1] –...
-
Page 61: Installazione
I N S T A L L A Z I O N E _ Lateralmente, posteriormente e verso l'alto Se si imposta la temperatura massima di deve essere mantenuto uno spazio minimo di 1530 °C si raccomanda di utilizzare un almeno 50 cm dal forno. -
Page 62: Inserimento Della Piastra Di Base
I N S T A L L A Z I O N E Inserimento della piastra di base INDICAZIONE: ▷ Inserire la piastra di base. Non inserire la spina elettrica prima che siano stati inseriti gli elementi riscaldanti. ▷ Inserire l'interruttore di rete in posizione 0. ▷... -
Page 63: Impiego Ed Uso
I M P I E G O E D U S O Impiego ed uso Selezione del programma di sinte- Prima della messa in funzione del forno lo rizzazione stesso dovrebbe essere acclimatizzato per ▷ Per selezionare un programma: Premere il tasto 24 ore sul luogo dell'installazione. -
Page 64: Programmazione Del Programma Di Sinterizzazione
I M P I E G O E D U S O ▷ Per giungere sulla definizione del segmento: Programmazione del programma di Premere il tasto sinterizzazione ▷ Tramite il tasto con cifra immettere il primo Indicazioni per la programmazione / comporta- parametro del segmento (tasso di riscalda- mento del controller: _ La possibilità... -
Page 65: Funzioni
I M P I E G O E D U S O Funzioni Comando INDICAZIONE: ▷ Per selezionare una funzione: Premere il tasto Danneggiamento delle aste di riscaldamento! e il relativo tasto con cifra. ▷ Durante il riempimento e lo svuotamento del ▪... -
Page 66: Pulizia A Manutenzione
P U L I Z I A A M A N U T E N Z I O N E Pulizia a manutenzione Pulizia Controlli giornalieri ▷ Controllare il forno in merito a danni individua- PERICOLO: bili esternamente. ▷ Controllare il funzionamento dei dispositivi di Scossa elettrica ▷... -
Page 67: Anomalie, Riparazioni E Garanzia
A N O M A L I E , R I P A R A Z I O N I E G A R A N Z I A Anomalie, riparazioni e Vale inoltre che sono esclusi i diritti a garanzia e garanzia richieste di responsabilità... -
Page 68: Protezione Dell'ambiente
P R O T E Z I O N E D E L L ' A M B I E N T E Dati tecnici e acces- In fabbrica viene effettuato da parte del sori/parti di ricambio produttore un funzionamento di prova su ogni forno. - Page 69 Í N D I C E – Traducción de las instrucciones de uso originales – Modo de empleoes Índice Simbología empleada ....70 Protección del medio ambiente ..84 Instrucciones de seguridad generales .
-
Page 70: Simbología Empleada
S I M B O L O G Í A E M P L E A D A Simbología empleada Advertencias de peligro Símbolos adicionales en el manual Las advertencias de peligro se identifican Símbolo Significado con un triángulo de señalización con el ▷... -
Page 71: Instrucciones De Seguridad Generales
I N S T R U C C I O N E S D E S E G U R I D A D G E N E R A L E S Instrucciones de seguri- OBSERVACIÓN: dad generales ▷ Desconectar el aparato siempre que no se pre- Al instalar, poner en marcha, o utilizar el aparato, cise, o al dejarlo desatendido largo tiempo, p. -
Page 72: Datos Sobre El Aparato
D A T O S S O B R E E L A P A R A T O Datos sobre el aparato Volumen de entrega Está prohibido desmontar, eludir o desactivar los dispositivos protectores. _ Horno de alta temperatura No asumimos garantía alguna en caso de acoplar _ Cartucho de calefacción (4 ×) _ Tubo de salida de aire... -
Page 73: Componentes, Puertos E Interfases
D A T O S S O B R E E L A P A R A T O Componentes, puertos e interfases Fig. 1 Componentes frontales del aparato 1 Tubo de salida de aire 6 Pieza de aislamiento 2 Puerta levadiza del horno 7 Ranura para tarjetas SD 3 Termopar 8 Puerto USB... - Page 74 D A T O S S O B R E E L A P A R A T O Display de nivel operativo 693°C 04h:15min Fig. 2 Componentes dorsales del aparato 1 Interruptor de red 2 Conexión a la red 3 Fusible Fig.
-
Page 75: Sinopsis De Programa Teclas De Acceso Directo
D A T O S S O B R E E L A P A R A T O Leyenda de figura 4, figura 5 y figura 6: Tecla “Programa” Tecla “Función” Tecla “Selección” Tecla “Información” Tecla “Guardar” Tecla “Moverse hacia arriba en la lista” Info Tecla “Moverse hacia abajo en la lista”... - Page 76 D A T O S S O B R E E L A P A R A T O _ Programa 2 [P2] – fast _ Programa 4 [P4] – default ▪ Programa de sinterización rápida de óxidos de ▪ Parámetros libremente asignables ▪...
-
Page 77: Instalación
I N S T A L A C I Ó N Instalación _ Durante el funcionamiento deberá reinar una Colocación temperatura ambiente entre 5 °C y 40 °C sin OBSERVACIÓN: cambios bruscos de la misma. _ La altitud operativa máxima NMM es de Ya que el aparato pesa 30 kg se recomienda que 2000 m. -
Page 78: Montaje De La Placa Base
I N S T A L A C I Ó N Montaje de la placa base OBSERVACIÓN: ▷ Colocar la placa base. No conectar el enchufe a la red antes de haber montado los cartuchos de calefacción. ▷ Colocar el interruptor de red en la posición 0. ▷... -
Page 79: Utilización Y Manejo
U T I L I Z A C I Ó N Y M A N E J O Utilización y manejo Selección del programa de sinteri- zación Antes de poner en marcha el horno éste ▷ Para seleccionar un programa: Pulsar la deberá... -
Page 80: Programación Del Programa De
U T I L I Z A C I Ó N Y M A N E J O ▷ Introducir con el teclado numérico el primer Programación del programa de sin- parámetro del segmento (tasa de calentamiento terización en °C/h). Indicaciones sobre la programación / comporta- ▷... -
Page 81: Funciones
U T I L I Z A C I Ó N Y M A N E J O Funciones Manejo Selección OBSERVACIÓN: ▷ Para elegir una función: Pulsar la tecla y la ¡Deterioro de los cartuchos de calefacción! tecla numérica correspondiente. ▷... -
Page 82: Limpieza Y Mantenimiento
L I M P I E Z A Y M A N T E N I M I E N T O Limpieza y mantenimiento Limpieza Controles diarios ▷ Controlar exteriormente el horno en cuanto a PELIGRO: daños manifiestos ▷ Verificar el funcionamiento de los elementos de ¡Descarga eléctrica! ▷... -
Page 83: Fallos, Reparaciones Y Garantía
F A L L O S , R E P A R A C I O N E S Y G A R A N T Í A Fallos, reparaciones y garantía dad los daños personales y materiales que se deri- Fisuras en el aislamiento ven de una o varias de las siguientes causas: El aislamiento del horno está... -
Page 84: Protección Del Medio Ambiente
P R O T E C C I Ó N D E L M E D I O A M B I E N T E Protección del medio Datos técnicos y acceso- ambiente rios/piezas de recambio Embalaje Salvo modificación. En cuestiones de embalaje el fabricante colabora con los sistemas de aprovechamiento específicos Datos técnicos... - Page 85 Í N D I C E – Tradução das instruções de operação originais – weiß nichtpt Índice Explicação dos símbolos ... . 86 Proteção do meio ambiente ..101 Indicações gerais de segurança .
-
Page 86: Explicação Dos Símbolos
E X P L I C A Ç Ã O D O S S Í M B O L O S Explicação dos símbolos Indicações de advertência Outros símbolos nestas instruções de serviço Avisos no texto são indicados por triângu- Símbolo Significado lo com um friso em volta. -
Page 87: Indicações Gerais De Segurança
I N D I C A Ç Õ E S G E R A I S D E S E G U R A N Ç A Indicações gerais de segu- NOTA: rança ▷ Desligar o aparelho se não for mais utilizado Para a instalação, colocação em funcionamento e ou se o aparelho permanecer sem vigilância utilização do aparelho devem sempre ser respei-... -
Page 88: Informações Sobre O Aparelho
CE. O forno de sinterização dispõe, a partir de fábrica, Diretivas CE de 3 programas de temperatura, adaptados para o material de suporte de zircona da Amann Girrbach 2006/95/CE 2004/108/CE Normas harmonizadas aplicadas 247 outras posições de programa são livremente... -
Page 89: Componentes E Interfaces
I N F O R M A Ç Õ E S S O B R E O A P A R E L H O Componentes e interfaces Fig. 1 Vista geral do aparelho, lado da frente 1 Tubinho de escape 6 Colar de isolamento 2 Porta do forno 7 Soquete para placas SD... - Page 90 I N F O R M A Ç Õ E S S O B R E O A P A R E L H O Indicações de display 693°C 04h:15min Fig. 2 Vista geral do aparelho, lado de trás 1 Interruptor de rede 2 Ligação à...
- Page 91 I N F O R M A Ç Õ E S S O B R E O A P A R E L H O Legenda para figura 4, figura 5 e figura 6: Tecla “Programa” Tecla “Função” Tecla “Seleção” Tecla “Informação”...
-
Page 92: Vista Geral Do Programa, Teclas De Seleção Rápida
I N F O R M A Ç Õ E S S O B R E O A P A R E L H O _ Programa 2 [P2] – fast Vista geral do programa, teclas de ▪ Programa de sinterização rápida para zircona seleção rápida - unidades individuais. - Page 93 I N F O R M A Ç Õ E S S O B R E O A P A R E L H O _ Programa 4 [P4] – default ▪ Parâmetro livremente ocupável ▪ O programa é pré-ajustado em 1500 °C, 2 horas de tempo de parada e uma taxa de aque- cimento de 10 °C/min (não específico para o material).
-
Page 94: Instalação
I N S T A L A Ç Ã O Instalação _ A temperatura ambiente durante a operação Instalação deve estar entre 5 °C e 40 °C, grandes flutua- NOTA: ções de temperatura devem ser evitadas. _ A altitude máxima de operação NHN é de Devido ao peso de 30 kg, recomendamos que o 2000 m. -
Page 95: Colocar A Placa De Base
I N S T A L A Ç Ã O Colocar a placa de base NOTA: ▷ Colocar a placa de base. Inserir a ficha de rede antes de colocar os ele- mentos de aquecimento. ▷ Colocar o interruptor de rede na posição 0. ▷... -
Page 96: Aplicação E Comando
A P L I C A Ç Ã O E C O M A N D O Aplicação e comando PERIGO: Antes de colocar o forno em funciona- mento, este deveria se aclimatizar ao local Ar quente na abertura e saída! de instalação durante 24 horas. -
Page 97: Programar O Programa De
A P L I C A Ç Ã O E C O M A N D O ▷ Para chegar à definição de segmento: Premir a Programar o programa de sinteri- tecla zação ▷ Entrar o primeiro parâmetro do segmento (taxa Notas para a programação / comportamento do de aquecimento em °C/h) com a tecla numérica. -
Page 98: Funções
A P L I C A Ç Ã O E C O M A N D O Funções Operação Manipulação NOTA: ▷ Para selecionar uma função: Premir a tecla Danos nos elementos de aquecimento! a respectiva tecla numérica. ▷ Para o enchimento e esvaziamento do forno ▪... -
Page 99: Limpeza E Manutenção
L I M P E Z A E M A N U T E N Ç Ã O Limpeza e manutenção Limpeza Controles diários ▷ Controlar o exterior do forno quanto a danos PERIGO: visíveis. ▷ A função dos equipamentos de segurança (por Choque elétrico! ▷... -
Page 100: Avarias, Reparações E Garantia De Qualidade
A V A R I A S , R E P A R A Ç Õ E S E G A R A N T I A D E Q U A L I D A D E Avarias, reparações e materiais são excluídos se ocorrerem por uma ou garantia de qualidade mais das seguintes causas:... -
Page 101: Proteção Do Meio Ambiente
P R O T E Ç Ã O D O M E I O A M B I E N T E Proteção do meio Dados técnicos e acessó- ambiente rios/peças sobressalentes Embalagem Sob reserva de alterações. Quanto à embalagem, o fabricante está envolvido em sistemas de reciclagem específicos para cada Dados técnicos país, que garantem uma reciclagem ideal. - Page 104 Made in the European Union ISO 9001 Manufacturer | Hersteller Distribution | Vertrieb Amann Girrbach AG Herrschaftswiesen 1 6842 Koblach | Austria Fon +43 5523 62333-105 Fax +43 5523 62333-5119 austria@amanngirrbach.com www.amanngirrbach.com...