Table des Matières
Publicité
Les langues disponibles
Les langues disponibles
Liens rapides
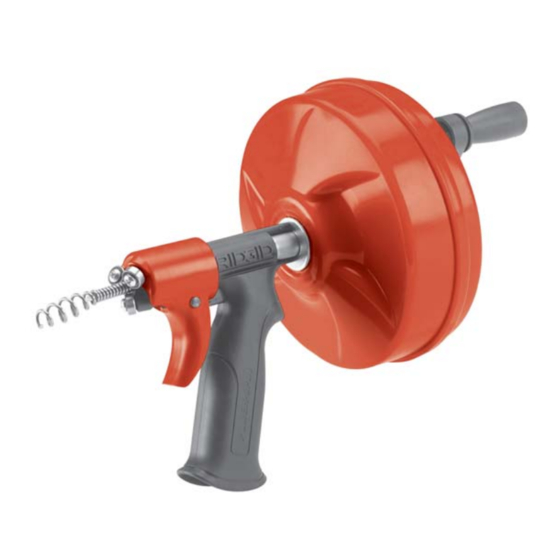
Drain Cleaner
Operator's Manual
Power-Spin
®
WARNING!
Read this Operator's Man ual
carefully before using this
tool. Failure to understand
•
Multi-Language Contacts – ii
and follow the contents of this
•
English – 4
manual may result in electri-
cal shock, fire and/or serious
•
Français – 11
person al injury.
•
Castellano – pág. 19
Publicité
Chapitres
Table des Matières
Dépannage

Manuels Connexes pour RIDGID Power-Spin 41408


Sommaire des Matières pour RIDGID Power-Spin 41408
- Page 1 Drain Cleaner Operator’s Manual Power-Spin ® WARNING! Read this Operator’s Man ual carefully before using this tool. Failure to understand • Multi-Language Contacts – ii and follow the contents of this • English – 4 manual may result in electri- cal shock, fire and/or serious •...
- Page 2 DE • Falls Sie Fragen zu diesem Produkt der anexo Marke RIDGID ® haben: – Entre em contato com o seu distribuidor – Lesen Sie die beiliegende Bedienung - RIDGID local sanleitung/An weisungen – Wenden Sie sich an Ihren örtlichen RIDGID Händler...
- Page 3 CD/DVD, som du kan ikke få adgang til, så kontakt Ridge Tool som angivet ovenfor. HR • Ako imate pitanja koja se odnose na ovaj proizvod marke RIDGID ® FI • Jos sinulla on kysyttävää tästä RIDGID ® tuotteesta: – proЛitajte priloмeni priruЛnik/upute oper- atora –...
- Page 4 (800) 519-3456. společnosti Ridge Tool. Je eli do produktu dołączono instrukcję ob- sługi w języku, któ rego nie rozumiesz lub płytę HU • Ha ké rdé se van ezzel a RIDGID ter- ® CD/DVD, do któ rej nie ma dostępu skontaktuj mé...
- Page 5 – Prečí tajte si priložený ná vod/pokyny na obsluhu. – Kontaktujte svojho miestneho predajcu výrobkov RIDGID – Na strá nkach www.RIDGID.com alebo www.RIDGID.eu si vyh adajte vá š miestny kontakt spoločnosti RIDGID – Kontaktujte oddelenie technických služieb spoločnosti RIDGID prostrední ctvom rtctechservices@emerson.com, alebo vola- jte (800) 519-3456 ak ste v USA alebo Kanade.
-
Page 6: Table Des Matières
POWER-SPIN ® Drain Cleaner Table of Contents Safety Symbols ....................4 Specific Safety Information Drain Cleaner Safety ..................5 Description and Specifications Description......................5 Specifications.....................6 Machine Inspection....................6 Machine and Work Area Set-Up ................6 Operating Instructions ..................8 Maintenance Instructions..................9 Cleaning......................9 Installing Replacement Cable ................9 To Remove Cable From Drum .................9 To Install Replacement Cable ................9 Troubleshooting ....................10... -
Page 7: Specific Safety Information
RIDGID contact point. • Position machine within 4" of the drain – Contact RIDGID Technical Services De - inlet or properly support exposed cable part ment at rtctechservices@emer - when the distance exceeds 4". Greater son.com, or in the U.S. -
Page 8: Specifications
POWER-SPIN ® Drain Cleaner Specifications • Proper assembly and completeness • Broken, worn, missing, misaligned or Drum Capacity ...25' (7,6 m) of " binding parts (6 mm) Diameter MAXCORE Cable • Smooth and free movement of the trig- ger and drum Drum Speed ....Maximum 500 RPM •... - Page 9 Catalog, on line at www.RIDGID.com or • For bathtubs, never try to go through by calling RIDGID Tech nical Services at the drain, this will damage the cable. 800-519-3456. Remove the overflow plate and any 4.
-
Page 10: Operating Instructions
POWER-SPIN ® Drain Cleaner • Control of the drain cleaner (and drill if opening. If not, the drain opening will used). need to be extended using similar size pipe and fittings so that the Power-Spin • Ability to maintain the unit 4" (100 mm) can be placed within 4"... -
Page 11: Maintenance Instructions
POWER-SPIN ® Drain Cleaner rotating. The cable can whip around and could cause serious injury. 14. Several passes through a line are rec- ommended for complete cleaning. If needed, repeat the above procedure. 15. Pull any remaining cable from the line by hand and push the cable into the drum. -
Page 12: Troubleshooting
POWER-SPIN ® Drain Cleaner Clamp Screw Figure 9 – Installing Cable End Into Holder 5. Replace drum back and retighten the 4 screws. 6. Feed cable into drum. Troubleshooting PROBLEM POSSIBLE REASONS SOLUTION Cable kinking or break- Cable is being forced. Do Not Force Cable! Let the auger do ing. - Page 13 Dégorgeoir Power-Spin ® AVERTISSEMENT Familiarisez-vous avec ce mode d’emploi avant d’utiliser l’appareil. L’incompréhension ou le non respect des consignes ci-devant augmenterait les risques de choc électriques, d’in- cendie et/ou de graves lésions cor- porelles. Table des matières Symboles de sécurité ..................12 Consignes de sécurité...
-
Page 14: Symboles De Sécurité
Tourniquet POWER-SPIN ® Symboles de sécurité Les symboles et mots clés utilisés à la fois dans ce mode d’emploi et sur l’appareil lui- même servent à signaler d’importants risques de sécurité. Ce qui suit permettra de mieux comprendre la signification de ces mots clés et symboles. Ce symbole sert à... -
Page 15: Description Et Caractéristiques Techniques
CE 890-011-320.10 accompagnera Cet appareil est prévu pour AVIS IMPORTANT le manuel. le curage des canalisations d’évacuation. Utilisé En cas de questions visant ce produit RIDGID ® de manière appropriée, il n’endommagera pas veuillez : les canalisations d’évacuation en bon état de –... -
Page 16: Inspection De L'appareil
Tourniquet POWER-SPIN ® • De nombreux ou importants plissages (de légers plissages allant jusqu’à 15º peuvent être redressés). Manivelle • Des vides entre les brins de câbles indi- Embout quant que celui-ci a été étiré, plissé ou du câble utilisé en marche arrière. •... - Page 17 Ridge Tool à elle-même, car cela endommagerait www.RIDGID.com ou en consultant les le câble. Retirez plutôt la plaque du services techniques de RIDGID en trop-plein et le mécanisme de fer- composant le 800-519-3456.
-
Page 18: Consignes D'utilisation
Tourniquet POWER-SPIN ® • La possibilité de tenir l’appareil à un maximum de 4" (100 mm) de l’entrée de canalisation. Cela permettra de mieux contrôler à la fois le câble et l’appareil. 3. Retirez une longueur de câble du tam- bour et enfoncez-la aussi loin que possi- ble dans la canalisation. -
Page 19: Consignes D'entretien
Tourniquet POWER-SPIN ® 12. Une fois le curage terminé, retirez le câble en faisant tourner le tambour en sens inverse tout en appuyant sur la gâchette. Faites particulièrement attention que le câble ne s’entrave pas dans un blocage lors de son retrait. 13. -
Page 20: Dépannage
Tourniquet POWER-SPIN ® 2. Pour faciliter son installation, déroulez le câble complètement avant de pro céder. Prenez les précautions nécessaires lors du déballage du câble, car celui-ci est comprimé et risque de fouetter. 3. Enfilez environ 12" (30 cm) de câble à travers les galets et le tube de guidage pour l’engager dans le tambour. - Page 21 Limpiadesagües Power-Spin ® ADVERTENCIA! Antes de utilizar este aparato, lea detenidamente su Manual del Operario. Pueden ocurrir descargas eléctricas, incendios y/o graves le- siones si no se comprenden y siguen las ins truc ciones de este manual. Índice Simbología de seguridad ..................20 Información de seguridad específica Seguridad del desatascador ................20 Descripción y especificaciones...
-
Page 22: Simbología De Seguridad
Desatascador POWER-SPIN ® Simbología de seguridad En este manual del operario y en las etiquetas pegadas al aparato encontrará símbolos y palabras de advertencia que comunican importante información de seguridad. Para su mejor comprensión, en esta sección se describe el significado de estos símbolos. Este es el símbolo de una alerta de seguridad. -
Page 23: Descripción Y Especificaciones
RIDGID ® mente con una cámara de video. Una mala – Contacte al distribuidor RIDGID en su lo- utilización de este desatascador podría causar - calidad. le daños al aparato y al desagüe. Es posible que este aparato no logre desatascar todas –... -
Page 24: Preparación Del Aparato Y De La Zona De Trabajo
(6 mm) Ø 4. Si empleará un taladro a pilas para impul- sar este Desatascador Power-Spin, revise • RIDGID le ofrece una línea completa el taladro de acuer do a sus propias ins - de Limpia doras de Desagües para di- trucciones de uso. -
Page 25: Instrucciones De Funcionamiento
Desatascador POWER-SPIN ® 4. Asegure que el aparato haya sido re- Tapón del visado. lavabo Tornillo 5. Cubra la zona de trabajo con protec- tores: la limpieza de tuberías es tarea sujeción sucia. Tuerca-tapa 6. Si hará funcionar el Power-Spin en forma o ciega manual, asegure que tiene su manivela y Varilla que alza... - Page 26 Desatascador POWER-SPIN ® 7. Gire el tambor en el sentido de las mane - para evitar que les entren mugre u otros objetos extraños . cillas del reloj, como indica la flecha en el tambor (Figura 2) . Si hará funcionar el de- Cuando limpie desagües que podrían con- satascador sin el taladro, emplee su tener sustancias quími cas o bacterias...
-
Page 27: Instrucciones De Mantenimiento
Desatascador POWER-SPIN ® 9. Si el cable se atranca en el atasco, no toalimentador AUTOFEED deben lavarse a siga girando el tambor. Si continúa hacién - fondo con agua para prevenir los efectos dañi- dosele girar, el cable se puede torcer o nos de sedimentos y compuestos químicos. - Page 28 Desatascador POWER-SPIN ® Tabla 1 Detección de averías PROBLEMA POSIBLES MOTIVOS SOLUCIÓN El cable se tuerce o Se está forzando el cable. ¡No fuerce el cable! Deje que la barrena rompe. en su punta haga el trabajo. El cable se está utilizando en una tu- No use el aparato en tuberías de más bería de diámetro incorrecto.
- Page 29 NOTES...
- Page 30 NOTES...
- Page 31 RIDGE TOOL COMPANY, Elyria, Ohio, or any authorized RIDGID INDEPENDENT ® payé à la RIDGE TOOL COMPANY, Elyria, Ohio, ou bien le remettre à un réparateur RIDGID ® SERVICE CENTER. Pipe wrenches and other hand tools should be returned to the place of pur- agréé.