
Manuels Connexes pour iwc DA VINCI CHRONOGRAPH


Sommaire des Matières pour iwc DA VINCI CHRONOGRAPH
- Page 1 DA VINCI CHRONOGRAPH REF. 3764 BEDIENUNGSANLEITUNG OPERATING INSTRUCTIONS MODE D’EMPLOI ISTRUZIONI PER L’USO INSTRUCCIONES DE MANEJO...
- Page 3 Bedienungsanleitung Deutsch Operating instructions English Mode d’emploi Français Istruzioni per l’uso Italiano Instrucciones de manejo Español...
- Page 5 Erfindungen technischer, materieller oder formaler Natur, selbst wenn sie im kleinsten Detail stecken, das vielleicht nicht einmal sichtbar ist. Ein schönes neues Beispiel dieser IWC-Tradition ist hiermit in Ihrem Besitz: Wir möchten Ihnen hierzu von Herzen gratulieren, verbunden mit den besten Wünschen für eine Zeit mit Ihrer Uhr, die man...
- Page 6 Das mechanische Uhrwerk mit automatischem Aufzug hat 40 Steine (synthetische Rubine) und nach dem Vollaufzug eine Gang reserve von ca. 68 Stunden. Ihre Da Vinci Chronograph ist geschützt durch ein einseitig gewölbtes Saphirglas des Härtegrades 9 nach Mohs.
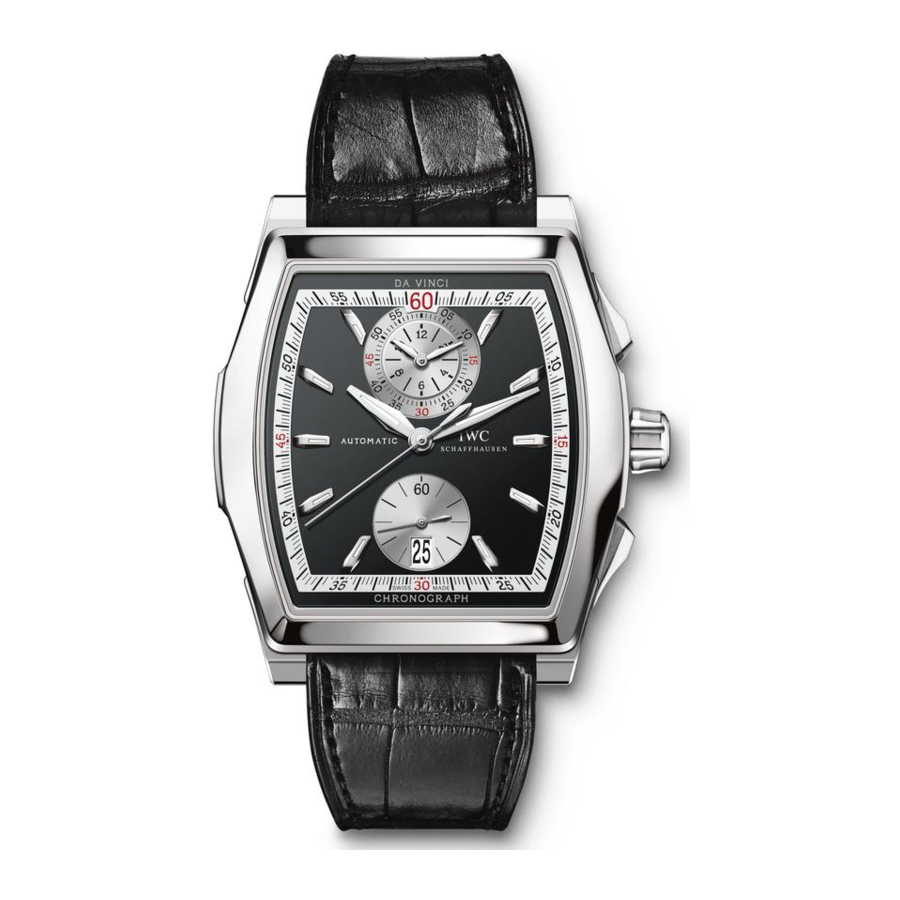
- Page 7 Die Legende zur Da Vinci Chronograph 4 | 5 1 Stundenzeiger 06 Minutenzähler 2 Minutenzeiger 7 Stundenzähler 3 kleiner Sekundenzeiger 8 verschraubte Krone 4 Datumsanzeige 09 Start-Stopp-Drücker 5 Sekundenstoppzeiger 10 Rückstell- und Flybackdrücker...
- Page 8 Die Funktionen der Krone X Normalstellung (verschraubt) 0 Aufzugsstellung 1 Datumseinstellung 2 Zeiteinstellung Die Normalstellung Diese Uhr besitzt eine verschraubte Krone. Die Verschraubung (Normal stellung, Position X) verhindert ein unbeabsichtigtes Verstellen der Uhrzeit oder des Datums, und das Uhrengehäuse ist dadurch zusätzlich gegen ein- dringendes Wasser geschützt.
- Page 9 Die Datumseinstellung 6 | 7 Hat ein Monat weniger als 31 Tage, müssen Sie das Datum von Hand auf den ersten Tag des Folgemonats einstellen. Ziehen Sie die Krone in Position 1. Durch Rechtsdrehen können Sie nun das Datum verstellen (Schnell schaltung).
- Page 10 Das richtige Einstellen Ihrer Uhr Zum richtigen Einstellen Ihrer Uhr gehen Sie wie folgt vor: • Entsichern Sie die Krone durch Linksdrehen. • Ziehen Sie das Uhrwerk bis zum Vollaufzug auf (ca. 40 Kronenumdrehungen). • Ziehen Sie die Krone in Position 1. •...
- Page 11 Das Ablesen des Chronographen 8 | 9 Sekundenstoppzeiger: Am Rand des Zifferblattes befindet sich die Ein - teilung für den zentralen Sekundenstoppzeiger. Minuten- und Stundenzähler: Auf dem Hilfszifferblatt bei 12 Uhr befindet sich die 12-Stunden- und die 60-Minuten-Einteilung mit zwei kontinuierlich laufenden Zeigern.
- Page 12 Uhr von nicht autorisierten Personen geöffnet, so lehnt IWC jegliche Garantie- oder Haftungsansprüche ab. Empfehlung: Nach jedem Öffnen und Service Ihrer IWC-Uhr muss Ihr auto - risierter IWC-Fachhändler (Official Agent) wieder eine Wasserdichtheits - prüfung durchführen.
- Page 13 Das Trennen des Bandes und das Herausnehmen 10 | 11 einzelner Bandglieder Öffnen Sie den Tastenverschluss durch Drücken der seit- lichen Taste. Legen Sie das Band mit der Oberseite nach unten auf eine feste Unterlage. Mit den beiliegenden Hilfs werkzeugen können Sie nun an der gewünschten Trennstelle den Fixierbolzen hinunterdrücken (1) und dabei den Gelenkbolzen mit dem zweiten Hilfswerkzeug seitlich etwa 3 Milli- meter hinausschieben (2).
- Page 14 Ihnen erlaubt, die Länge Ihres Bandes jederzeit gering - fügig anzupassen. Zum Verlängern des Bandes drücken Sie auf die mit «IWC» beschriftete Taste im Zentrum des Bandver- schlussdeckels und halten Sie diese gedrückt. Ziehen Sie das Band am schmaleren Ende des Bandver- schlussdeckels vorsichtig unter diesem hervor.
- Page 15 Öles durch metallischen Abrieb rechtzeitig beseitigt wird. Wir empfehlen deshalb, an Ihrer Uhr ca. alle fünf Jahre einen Unterhalts- service durchführen zu lassen. Wenden Sie sich dazu an einen autorisierten IWC-Fachhändler (Official Agent) oder direkt an den IWC-Kundendienst in Schaffhausen. Stand: Januar 2009.
- Page 17 You are now the owner of a beautiful new example of this IWC tradition. We would like to congratulate you on your choice and send you our best wi shes for the time you will spend with your watch, which perhaps cannot be described with any greater accuracy than it is here.
- Page 18 The technical refinements of the Da Vinci Chronograph Your IWC watch shows you the time in hours, minutes and seconds, together with the date. You can use the integrated flyback chronograph to measure any period in seconds, minutes and hours. Stop times can be added together.
- Page 19 Key to the Da Vinci Chronograph 16 | 17 1 Hour hand 06 Minute counter 2 Minute hand 7 Hour counter 3 Small seconds hand 8 Screw-in crown 4 Date display 09 Start/stop button 5 Chronograph 10 Reset/flyback button seconds hand...
- Page 20 Functions of the crown X Normal position (screwed in) 0 Winding position 1 Date setting 2 Time setting Normal position This watch has a screw-in crown. Screwing the crown in to its normal position (X) prevents inadvertent adjustment of the time or date and also acts as a seal against ingress of water into the case.
- Page 21 Date setting 18 | 19 If a month has fewer than 31 days, you will need to set the date manually to the first day of the following month. Pull the crown out to position 1. You can now set the date by turning the crown to the right (rapid advance). You should not use the rapid advance function between 8 pm and 2 am because the movement automatically advances the date during this period.
- Page 22 Setting your watch correctly To set your watch correctly, proceed as follows: • Release the crown by turning it to the left. • Wind the movement until it is fully wound (about 40 revolutions of the crown). • Pull the crown out to position 1. •...
- Page 23 Reading the chronograph 20 | 21 Chronograph seconds hand: The scale for the central chronograph seconds hand runs around the edge of the dial. Minute and hour counters: The subdial at 12 o’clock has two hands, which run continuously and show the elapsed time on a 12-hour and a 60-minute scale.
- Page 24 Agent will also be pleased to provide you with information. To ensure that your watch continues to function perfectly, you should have it checked by an IWC service centre at least once a year. Your watch should also be tested after exposure to unusually harsh conditions. If the tests are not carried out as stipulated, or if the watch is opened by unauthorised persons, IWC will accept no warranty or liability claims.
- Page 25 Taking the bracelet apart and removing individual links 22 | 23 Open the clasp by pressing the button on the side. Lay the bracelet with its top surface on a firm base. Using the special tools provided, you can now push down the securing pin (1) at the desired point of separation and, at the same time, displace the pivot pin laterally by about 3 millimetres (2) with the second special tool.
- Page 26 To make the bracelet longer, push the button labelled “IWC”, which is in the middle of the cover of the bracelet clasp, and continue to hold it down. Carefully pull the bracelet out from underneath the small end of the clasp cover.
- Page 27 For this reason, we recommend that you have your watch serviced approximately every five years. Please contact an authorised IWC Official Agent or send your watch directly to the IWC Customer Service Department in Schaffhausen. Effective from January 2009.
- Page 29 Vous possédez aujour - d’hui un bel exemple de cette tradition IWC. Nous tenons à vous en féliciter cordialement, tout en formant nos meilleurs vœux pour ces nombreuses heures en compagnie de votre montre qu’il est peut-être impossible de...
- Page 30 Les raffinements techniques de la Da Vinci Chronographe Votre montre IWC vous indique l’heure en heures, minutes et secondes ainsi que la date. À l’aide du chronographe flyback intégré, vous pouvez chrono- métrer des temps en secondes, en minutes et en heures. Les temps chrono- métrés peuvent être additionnés.
- Page 31 La légende de la Da Vinci Chronographe 28 | 29 1 Aiguille des heures 06 Compteur de minutes 2 Aiguille des minutes 7 Compteur d’heures 3 Petite seconde 8 Couronne vissée 4 Affichage de la date 09 Poussoir start-stop 5 Trotteuse du chronographe 10 Poussoir de remise à...
- Page 32 Les fonctions de la couronne X Position normale (couronne vissée) 0 Position de remontage 1 Réglage de la date 2 Réglage de l’heure La position normale Cette montre possède une couronne vissée. Ce dispositif (position normale, position X) empêche de dérégler involontairement l’heure ou la date et, de surcroît, il assure une protection du boîtier contre les infiltrations d’eau.
- Page 33 Le réglage de la date 30 | 31 Si le mois compte moins de 31 jours, vous devez avancer manuellement la date au premier jour du mois suivant. Tirez la couronne en position 1. En la tournant à droite, vous pouvez maintenant régler la date (correction rapide). Ne procédez jamais à...
- Page 34 Le bon réglage de votre montre Pour régler correctement votre montre, veuillez procéder comme suit: • Déverrouillez la couronne en la tournant vers la gauche. • Remontez le mouvement jusqu’au remontage complet (environ 40 tours de la couronne). • Tirez la couronne en position 1. •...
- Page 35 La lecture du chronographe 32 | 33 Trotteuse du chronographe: la graduation de la trotteuse centrale du chronographe se trouve sur le bord du cadran. Compteurs de minutes et d’heures: les graduations à 12 heures et 60 minutes, avec deux aiguilles tournant en continu, se trouvent sur le cadran auxiliaire à...
- Page 36 Pour garantir un fonctionnement parfait de votre montre, celle-ci doit être contrôlée au minimum une fois par an par un point service IWC. Un tel contrôle doit aussi être réalisé après toute sollicitation exception nel le. Si ces contrôles ne sont pas réalisés correctement ou si la montre est ouverte...
- Page 37 Séparer le bracelet et retirer des maillons 34 | 35 Ouvrez le fermoir en appuyant sur le poussoir latéral. Posez le bracelet bien à plat sur une surface rigide, à l’envers. Au moyen des instruments spéciaux fournis avec votre montre, vous pouvez maintenant enfoncer la cheville de fixation vers le bas (1) au point de division souhaité...
- Page 38 Pour allonger le bracelet, appuyez et maintenez en - foncée le poussoir comportant la mention «IWC», au centre du fermoir du bracelet. Tirez prudemment le bracelet sous celle-ci, à l’extrémité la plus mince du fermoir du bracelet.
- Page 39 à temps. Nous vous recommandons pour cette raison de prévoir une révision de votre montre tous les cinq ans environ. Pour ce faire, veuillez vous adresser à un concessionnaire IWC agréé (Official Agent) ou directe- ment au service après-vente IWC à Schaffhausen.
- Page 41 Un esempio nuovo e affascinante di questa tradizione IWC è ora in suo possesso. Le porgiamo le nostre più vive congratulazioni, unitamente all’augurio di trascorrere col suo orologio tempi segnati da momenti così...
- Page 42 Le finezze tecniche del Da Vinci Chronograph Il suo orologio IWC le indica l’ora in ore, minuti e secondi, come pure la data. Col cronografo integrato potrà misurare ogni intervallo di tempo in secondi, minuti e ore come pure tempi intermedi che possono essere addizionati.
- Page 43 Le funzioni del Da Vinci Chronograph 40 | 41 1 Lancetta delle ore 06 Lancetta dei minuti cronografici 2 Lancetta dei minuti 7 Lancetta delle ore cronografiche 3 Piccola lancetta dei secondi 8 Corona a vite 4 Datario 9 Pulsante start-stop 5 Lancetta dei secondi 10 Pulsante d’azzeramento e...
- Page 44 Le funzioni della corona X Posizione normale (avvitata) 0 Posizione di carica 1 Regolazione della data 2 Regolazione dell’ora La posizione normale Quest’orologio dispone di una corona a vite. La posizione avvitata (posi- zione normale, posizione X) evita l’accidentale spostamento dell’ora o del datario e assicura alla cassa dell’orologio un’ulteriore protezione contro le infiltrazioni d’acqua.
- Page 45 La regolazione della data 42 | 43 Per i mesi che hanno meno di 31 giorni, deve regolare manualmente la data facendola avanzare sul primo giorno del mese successivo. Estragga la corona portandola in posizione 1 e la ruoti verso destra in modo da cam - biare la data (correzione rapida).
- Page 46 La corretta regolazione dell’orologio Per una corretta regolazione del suo orologio proceda come segue: • Sblocchi la corona ruotandola verso sinistra. • Carichi completamente il movimento (circa 40 rotazioni della corona). • Estragga la corona in posizione 1. • Ruotando la corona verso destra, il datario scatta gradualmente. Imposti la data del giorno precedente.
- Page 47 La lettura del cronografo 44 | 45 Lancetta dei secondi cronografici: sul bordo del quadrante è riportata la scala di riferimento per la lancetta centrale dei secondi cronografici. Lancette dei minuti e delle ore cronografici: sul quadrante ausiliario interno, posto a ore 12, è riportata la scala di riferimento delle 12 ore crono- grafiche e dei 60 minuti cronografici, con due lancette ad avanzamento continuo.
- Page 48 L’impermeabilità I dati sull’impermeabilità degli orologi IWC sono indicati in bar e non in metri. Sebbene sia spesso utilizzata nell’industria orologiera, l’indicazione in metri può infatti non coincidere con la profondità d’immersione reale a causa dei metodi di collaudo adottati. L’indicazione in metri non offre quindi un’informazione assolutamente attendibile sulle effettive possibilità...
- Page 49 La separazione del bracciale e l’estrazione di singole maglie 46 | 47 Apra la chiusura a tasto facendo pressione sul tasto laterale. Distenda il bracciale con il lato superiore appoggiato su un supporto rigido. Utilizzando gli utensili allegati, può ora spingere in basso il perno di fissaggio nel punto di separazione desiderato (1) e col secondo utensile spingere in fuori lateralmente di circa 3 millimetri il perno di snodo (2).
- Page 50 Per allungare il bracciale, prema e tenga premuto il tasto con la scritta «IWC» che si trova al centro dell’ansa che ricopre la fibbia di chiusura. Sfili con cura il bracciale sotto la terminazione più sottile di tale ansa.
- Page 51 A tale scopo potrà rivolgersi a un rivendi- tore IWC autorizzato (Official Agent) o direttamente al servizio clienti di IWC a Sciaffusa. Situazione: gennaio 2009.
- Page 53 Un hermoso ejemplo de esta tradición de IWC es ahora suyo. Reciba nuestra más cordial enhorabuena y nuestros mejores deseos de que pase con su reloj un tiempo que quizás no se pueda describir con...
- Page 54 Los refinamientos técnicos del Da Vinci Cronógrafo Su reloj IWC le señalará las horas, los minutos, los segundos y la fecha. Con el cronógrafo flyback integrado, usted podrá medir cualquier fracción de tiempo en segundos, minutos y horas. Los tiempos cronometrados son acumulables.
- Page 55 La leyenda del Da Vinci Cronógrafo 52 | 53 1 Aguja de las horas 06 Contador de minutos 2 Minutero 7 Contador de horas 3 Pequeño segundero 8 Corona atornillada 4 Indicador de la fecha 9 Pulsador de marcha-parada 5 Aguja de parada del 10 Pulsador de puesta a cero y segundero de función flyback...
- Page 56 Las funciones de la corona X Posición normal (atornillada) 0 Posición para dar cuerda 1 Ajuste de la fecha 2 Ajuste de la hora La posición normal Este reloj está dotado de una corona atornillada. El enroscamiento (posición normal, posición X) impide un desajuste involuntario de la hora o de la fecha y la caja del reloj está...
- Page 57 El ajuste de la fecha 54 | 55 Si el mes tiene menos de 31 días, tendrá que poner a mano el primer día del mes siguiente. Saque la corona hasta la posición 1. Girándola hacia la derecha podrá cambiar la fecha (conmutación rápida). No haga ningún ajuste rápido entre las 20 h y las 2 h, ya que durante este lapso el reloj efectúa el cambio automático de la fecha.
- Page 58 El ajuste correcto de su reloj Para el ajuste correcto de su reloj, proceda de la siguiente manera: • Desenrosque la corona girándola hacia la izquierda. • Dele cuerda al movimiento hasta el tope (aproximadamente 40 vueltas de la corona). •...
- Page 59 La lectura del cronógrafo 56 | 57 Aguja de parada del segundero: en el borde de la esfera se encuentra la graduación para la aguja central de parada del segundero. Contadores de minutos y horas: en la esfera auxiliar, en las 12, se en- cuentran las marcas de 12 horas y de 60 minutos con dos agujas en continuo movimiento.
- Page 60 Agent) le informará muy amplia y gustosamente sobre este particular. Para asegurar un funcionamiento impecable de su reloj, éste tiene que ser revisado al menos una vez al año por un centro de servicio IWC. Si el reloj ha estado sometido a sobrecargas excepcionales, se deberá igualmente realizar una revisión similar.
- Page 61 La división del brazalete y la extracción de eslabones 58 | 59 Abra el cierre a presión apretando el pulsador lateral. Coloque el brazalete con su parte superior sobre una base firme. Con la herramienta adjunta, presione hacia abajo el perno de fijación en el punto de separación (1) deseado y empuje, con la segunda herramienta, el perno de articulación hasta que sobresalga unos 3 milímetros (2).
- Page 62 Para alargar el brazalete, apriete el pulsador mar- cado con «IWC» en el centro de la tapa del cierre del mismo, manteniéndolo pulsado. Estire suavemente el brazalete bajo el extremo más estrecho de la tapa del cierre.
- Page 63 Por eso le recomendamos que haga revisar su reloj aproximadamente cada cinco años. Diríjase para ello a un concesionario autorizado de IWC (Official Agent) o directamente al Servicio Posventa de IWC en Schaffhausen. Estado: enero 2009.
- Page 64 IWC Schaffhausen Branch of Richemont International SA Baumgartenstrasse 15 CH-8201 Schaffhausen Switzerland Phone +41 (0)52 635 65 65 +41 (0)52 635 65 01 info@iwc.com www.iwc.com © Copyright 2009 IWC Schaffhausen, Branch of Richemont International S.A.