Table des Matières
Publicité
Les langues disponibles
Les langues disponibles
Liens rapides
Publicité
Table des Matières

Manuels Connexes pour Blatchford Navigator NAV22LWW


Sommaire des Matières pour Blatchford Navigator NAV22LWW
- Page 1 Navigator Instructions for Use NAV22LWW–NAV30RBB NAV22LWWD–NAV30RBBD Instructions for Use Instructions D’Utilisation Gebrauchsanweisung Istruzioni per L’Uso Instrucciones de Uso Bruksanvisning Инструкция протезиста Kullanım Talimatları...
- Page 2 938247/8-1019...
- Page 3 1 Description and Purpose Application Activity Level These instructions are for the practitioner. This device is recommended for Activity Level 1–3 users. The term device is used throughout these instructions for use to refer to Navigator. As an exception to our recommendation, Activity Level 4* users may only use this device This device is an ankle-foot unit that is for use based upon the outcome of a prosthetic...
- Page 4 Activity Level 1 Has the ability or potential to use a prosthesis for transfers or ambulation on level surfaces at fixed cadence. Typical of the limited and unlimited household ambulator. Activity Level 2 Has the ability or potential for ambulation with the ability to traverse low level environmental barriers such as, curbs, stairs or uneven surfaces.
-
Page 5: Limitations On Use
Avoid exposing the device to corrosive elements such as water, acids and other liquids. Avoid abrasive environments such as those containing sand, as these may promote premature wear. Exclusively for use between -15 ˚C and 50 ˚C (5 ˚F and 122 ˚F). We recommend using Blatchford products with this device. 938247/8-1019... -
Page 6: Additional Components
6 Alignment Additional components Follow the alignment instructions that are supplied with any additional components. Static alignment Sagittal plane With the flexion accommodated, the load line should pass through the center of the socket and through the center of the pyramid. Load Line Make sure that, when the user is standing, the heel and the toe are evenly loaded and the... -
Page 7: Fitting Advice
7 Fitting Advice During dynamic alignment the user can experience gait abnormalities. Use this table to correct some common gait abnormalities. Gait Abnormality Action • Sinking at heel strike a. Confirm A–P alignment and heel height accommodation. • Foot slap b. - Page 8 4. Clean inside of the top housing with Socket Cap Screw (x4) acetone or a similar solvent. 5. Place the top housing over the ankle ball. Note: Make sure the opening of the top housing faces posteriorly. 6. Apply pressure to the top housing while maintaining pyramid alignment.
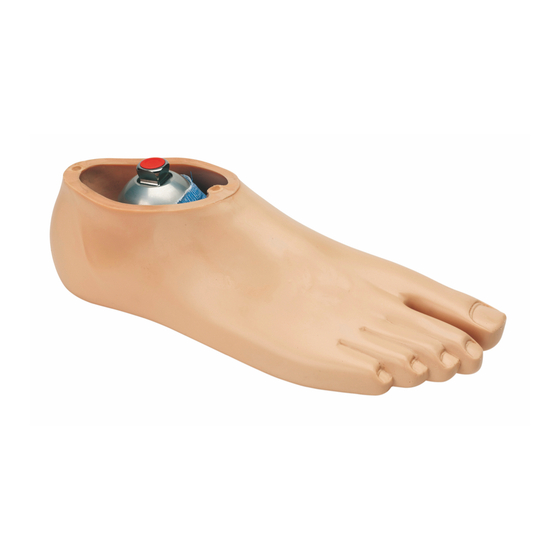
- Page 9 10 Assembling and Finishing the Foot Shell 1. Place the keel inside the glide sock and slide them both into the foot shell. Location Feature Note: Make sure that the heel of the keel is fully engaged in the location feature in the heel of the foot shell.
-
Page 10: Technical Data
(5 ˚F to122 ˚F) Component Weight (size 26): 565 g (20 oz) Activity Level: 1–3 Maximum User Weight: 125 kg (275 lb) Proximal Alignment Attachment: Male pyramid (Blatchford) Range of Adjustment ±7 ° angular Build Height: 95 mm Heel Height: 10 mm Fitting length... -
Page 11: Ordering Information
12 Ordering Information Order example This device is available in sizes 22–30. Note: For dark tone foot shells, add a D to the end of the order number. NAV25LWOD Size Ankle Snubber Optional: & Ball Dark-Tone Side Foot Shell Ankle and Keel Assemblies (USA only) Foot Shells (Add a D for dark tone) Size Type... - Page 12 Class I Product according to the classification criteria outlined in Appendix IX of the guidelines. The Declaration of Conformity was therefore created by Blatchford Products Limited with sole responsibility according to Appendix VII of the guidelines.
-
Page 13: Description Et Objectif
1 Description et objectif Application Nos recommandations peuvent ne Ces instructions sont destinées à pas convenir à tout le monde et nous l’orthoprothésiste. reconnaissons qu’il peut exister des cas particuliers. Les utilisateurs ayant un niveau Assurez-vous que l’utilisateur comprend toutes d’activité 4* peuvent utiliser ce dispositif, mais les instructions d’utilisation, en particulier cette décision doit être prise après avoir évalué... - Page 14 Niveau d’activité 1 À la capacité ou le potentiel d’utiliser une prothèse pour marcher sur des surfaces planes à une cadence fixe. Pour l’utilisateur qui se limite à la marche à l’intérieur. Niveau d’activité 2 À la capacité ou le potentiel de franchir des barrières environnementales simples comme des bordures, des escaliers ou des surfaces irrégulières.
-
Page 15: Entretien
Éviter d’exposer le dispositif à des éléments corrosifs tels que l’eau, des acides et autres liquides. Éviter les environnements abrasifs tels que ceux comportant du sable, car cela peut favoriser une usure prématurée. Utilisez exclusivement entre -15 ˚C et 50 ˚C. Nous recommandons l’utilisation des produits Blatchford avec ce dispositif. 938247/8-1019... - Page 16 6 Alignement Composants additionnels Suivez les instructions d’alignement qui sont fournies avec tous les composants supplémentaires. Alignement statique Plan sagittal Quand la flexion est ajustée, la ligne de charge Ligne de doit passer au centre du boîtier et de la charge pyramide.
-
Page 17: Conseils D'ajustement
7 Conseils d’ajustement Pendant l’alignement dynamique l’utilisateur peut observer des anomalies lors de la marche. Utilisez ce tableau pour corriger certaines anomalies de la marche. Anomalie de la marche Action • Enfoncement du pied lors de l’attaque du Ajustez l’alignement A–P et adaptez la talon au sol hauteur du talon •... -
Page 18: Changement De L'amortisseur
4. Nettoyez l’intérieur du boîtier supérieur avec Vis à tête cylindrique (x4) de l’acétone ou un solvant similaire. 5. Placez le boîtier supérieur sur la sphère de cheville. Remarque : Assurez-vous que l’ouverture du boîtier supérieur est orientée vers l’arrière. 6. Appliquer une pression sur le boîtier supérieur tout en maintenant l’alignement Boîtier supérieur de la pyramide. -
Page 19: Assemblage Et Ajustement De L'enveloppe De Pied
10 Assemblage et ajustement de l’enveloppe de pied 1. Placez l’ame dans la chaussette de protection et insérez les deux dans l’enveloppe de pied. Emplacement Remarque : Assurez-vous que le talon de l’ame pour l’ame est fermement engagé dans l’enveloppe du pied à l’emplacement prévu à... -
Page 20: Données Techniques
11 Données techniques Plage des températures de stockage et de fonctionnement : -15 ˚C à 50 ˚C Poids du composant (taille 26): 565 g Niveau d’activité : 1–3 Poids maximum de l’utilisateur : 125 kg Fixation proximale : Pyramide mâle Plage de réglage : ±7 ° angulaire Hauteur de construction : 95 mm Hauteur du talon 10 mm... -
Page 21: Information Pour La Commande
12 Information pour la commande Référence produit Ce dispositif est disponible dans les tailles 22–30 Remarque : Pour une enveloppe de pied de teinte foncée, ajoutez un D à la fin du numéro de commande NAV25LWOD Taille Amortisseur Sphère Optionnel : Enveloppe largeur cheville de pied de teinte foncée... - Page 22 Ce produit respecte les exigences des directives 93/42/CEE relatives aux produits médicaux. Il a été classé comme un produit de classe I selon les critères de classification décrits dans l’annexe IX des directives. La déclaration de conformité a donc été établie par Blatchford Products Limited sous sa seule responsabilité selon l’annexe VII des directives.
-
Page 23: Beschreibung Und Verwendungszweck
1 Beschreibung und Verwendungszweck Anwendung Mobilitätsklasse Diese Gebrauchsanweisung ist für das Diese Prothese wird für Anwender der Fachpersonal vorgesehen. Mobilitätsklassen 1–3 empfohlen. Stellen Sie sicher, dass der Anwender Es gibt Ausnahmen und wir möchten bei alle Informationen versteht, die in dieser unseren Empfehlungen die individuellen Gebrauchsanweisung aufgeführt sind, vor Umstände berücksichtigen –... - Page 24 Mobilitätsklassen 1 Der Anwender besitzt die Fähigkeit oder das Potenzial, eine Prothese für Transferzwecke oder zur Fortbewegung auf ebenen Böden mit einer festen Gehgeschwindigkeit zu nutzen. Er besitzt die eingeschränkte und uneingeschränkte Fähigkeit, sich im häuslichen Umfeld fortbewegen. Mobilitätsklassen 2 Der Anwender besitzt die Fähigkeit oder das Potenzial, mit einer Prothese niedrige Umwelthindernisse wie Bordsteine, einzelne Stufen oder unebene Böden zu überwinden.
- Page 25 Setzen Sie das Produkt keinen korrosiven Stoffen wie Wasser, Säuren und anderen Flüssigkeiten aus. Vermeiden Sie aggressive Umgebungen wie solche mit Sand, da diese zu einer vorzeitigen Abnutzung führen können. Nur zur Verwendung bei Temperaturen zwischen -15 ˚C und 50 ˚C. Wir empfehlen den Einsatz von Blatchford-Produkten mit dieser Prothese. 938247/8-1019...
-
Page 26: Zusätzliche Komponenten
6 Aufbau Zusätzliche Komponenten Befolgen Sie die Ausrichtungsanleitungen, die mit sämtlichen zusätzlichen Komponenten geliefert werden. Statischer Aufbau Sagittalebene Unter Berücksichtigung der Flexion sollte die Belastungslinie durch den Mittelpunkt Belastungslinie des Schaftes und durch den Mittelpunkt der Pyramide laufen. Achten Sie darauf, dass Ferse und Vorfuß gleichmäßig belastet sind und sich der Fuß... -
Page 27: Tipps Für Die Anpassung
7 Tipps für die Anpassung Während des dynamischen Aufbaus kann es bei dem Anwender zu Unregelmäßigkeiten im Gangbild kommen. Nutzen Sie diese Tabelle, um einige dieser häufigen Unregelmäßigkeiten zu korrigieren. Unregelmäßigkeiten beim Gehen Maßnahme • Einsinken beim Fersenauftritt Überprüfen von A–P-Ausrichtung und Absatzhöhe. - Page 28 4. Reinigen Sie das Anschlussgehäuse mit Azeton Zylinderschraube (x4) oder einem ähnlichen Reinigungsmittel. 5. Setzen Sie das Anschlussgehäuse auf den Gummiball. Hinweis: Achten Sie darauf, dass das Anschlussgehäuse posterior gerichtet ist. 6. Drücken Sie auf das Anschlussgehäuse und behalten Sie dabei die Ausrichtung Anschlussgehäuse der Pyramide bei Setzen Sie dann die Zylinderschrauben in das Gehäuse ein.
- Page 29 10 Montage und Fertigstellung der Fußkosmetik 1. Setzen Sie den Kiel in die Gleitsocke und schieben Sie beide in die Fußkosmetik. Einbaulage Hinweis: Achten Sie darauf, dass sich die Ferse des Kiels vollständig in der Einbaulage der Ferse der Fußkosmetik befindet. Hinweis: Stellen Sie nach der Montage der Prothese sicher, dass die Gleitsocke nicht unter dem Dome festhängt.
-
Page 30: Technische Daten
11 Technische Daten Betriebs- und Lagerungstemperatur: -15 ˚C bis 50 ˚C Gewicht der Komponente (bis Fußgröße 26): 565 g Mobilitätsklasse: 1–3 Maximales Körpergewicht des Anwenders: 125 kg Proximale Adaption: Pyramide Einstellbereich: ±7 ° abgewinkelt Aufbauhöhe: 95 mm Absatzhöhe: 10 mm Aufbauhöhe 95 mm 10 mm 938247/8-1019... - Page 31 12 Bestellinformationen Beispiel für die Bestellnummer Das Produkt ist in den Größen 22–30 erhältlich. Hinweis: Fügen Sie für einen dunkleren Farbton einfach ein D am Ende der Bestellnummer ein. NAV25LWOD Größe Gummiball Dämpfer Optional: Fußkosmetik Seite in dunklem Farbton Knöchel- und Kieleinheiten (nur in den USA) Fußkosmetik —...
- Page 32 Das Produkt entspricht den Anforderungen der 93/42/EWG-Richtlinien für medizinische Produkte. Dieses Produkt wurde entsprechend der Klassifikationskriterien, die in Anhang IX der Richtlinien aufgeführt werden, als Produkt der Klasse I eingestuft. Die Konformitätserklärung wurde deshalb von Blatchford Products Limited abgegeben, mit alleiniger Verantwortung gemäß Anhang VII der Richtlinien. Garantie Das Produkt besitzt eine Garantiezeit von 24 Monaten –...
-
Page 33: Descrizione E Finalità
1 Descrizione e finalità Applicazione i pazienti con livello di attività 1–3. Le presenti istruzioni sono destinate ai tecnici Esistono delle eccezioni alle nostre ortopedici. raccomandazioni e la nostra intenzione è di Accertarsi che l’utente comprenda tutte tenere conto delle singole circostanze: gli le informazioni contenute nelle presenti utenti con livello di attività... - Page 34 Livello di attività 1 Ha l’abilità o la potenzialità di utilizzare una protesi per trasferimenti o deambulazione su superfici orizzontali a un’andatura fissa. È il livello tipico di chi presenta una deambulazione limitata o una deambulazione domestica illimitata. Livello di attività 2 Ha l’abilità...
-
Page 35: Limiti Di Utilizzo
Evitare l’esposizione del dispositivo a elementi corrosivi, quali acqua, acidi e altri liquidi. Evitare ambienti abrasivi come quelli contenenti sabbia, poiché favoriscono l’usura prematura. Utilizzare esclusivamente a temperature comprese tra -15 ˚C e 50 ˚C. Si raccomanda l’utilizzo di prodotti Blatchford con questo prodotto. 938247/8-1019... - Page 36 6 Allineamento Componenti aggiuntivi Seguire le istruzioni di allineamento fornite con i componenti aggiuntivi. Allineamento statico Piano sagittale Con la flessione opportunamente adattata, la linea di carico deve passare dal centro dell'invasatura e attraverso il centro della Linea di piramide. carico Accertarsi che, durante la posizione eretta, il tallone e l’avampiede siano caricati in modo...
-
Page 37: Indicazioni Di Montaggio
7 Indicazioni di montaggio Nel corso dell’allineamento dinamico l’utente potrebbe riscontrare anomalie dell’andatura. Fare riferimento alla tabella seguente per correggerne alcune. Anomalie dell’andatura Azione • Affondo eccessivo all’appoggio del tallone Verificare l'allineamento anteriore/ posteriore e l'altezza del tallone. • Il piede "sbatte" b. - Page 38 Vite ad esagono incassato (x4) 4. Pulire l’interno dell’alloggiamento superiore con acetone o solventi simili. 5. Posizionare l’alloggiamento superiore sull'articolazione sferica. N.B.: Assicurarsi che l’apertura dell’alloggiamento superiore sia rivolta posteriormente. 6. Applicare pressione all’alloggiamento Alloggiamento superiore mantenendo l’allineamento della superiore piramide.
- Page 39 10 Installazione e finitura del rivestimento 1. Posizionare la chiglia nella calza di rivestimento Vano di posizionamento e farle scivolare entrambe nel rivestimento del piede. N.B.: Assicurarsi che il tallone della chiglia sia completamente inserito nel vano di posizionamento apposito presente sul tallone del rivestimento.
-
Page 40: Dati Tecnici
11 Dati tecnici Intervallo di temperatura operativa e di immagazzinaggio: Da -15 ˚C a 50 ˚C Peso del componente (misura 26): 565 g Livello di attività: 1–3 Peso massimo del paziente: 125 kg Collegamento prossimale: Piramide Intervallo di regolazione: Angolare ±7 ° Altezza di carico: 95 mm Altezza del tallone: 10 mm... -
Page 41: Informazioni Sulle Ordinazioni
12 Informazioni sulle ordinazioni Esempio di numero d’ordine Questo dispositivo è disponibile nelle misure 22–30. N.B.: Per i rivestimenti di colore scuro, aggiungere la lettera D al termine del numero d’ordine. NAV25LWOD Articolazione Misura Ammortizzatore Opzionale: sferica della e lato Rivestimento caviglia del piede... - Page 42 Il presente prodotto è stato classificato come prodotto di classe I in base ai criteri di classificazione delineati nell’allegato IX degli orientamenti. La dichiarazione di conformità è stata quindi prodotta da Blatchford Products Limited con la sola responsabilità conformemente all’allegato VII degli orientamenti.
-
Page 43: Descripción Y Finalidad
1 Descripción y finalidad Nivel de actividad Estas instrucciones son para el técnico Este dispositivo se recomienda para usuarios ortopédico. de nivel de actividad 1–3. Asegúrese de que el usuario entienda Hay excepciones a nuestras recomendaciones toda la información que se incluye en y deseamos dar cabida a circunstancias estas instrucciones de uso, en concreto la personales —... - Page 44 Nivel de actividad 1 Tiene la capacidad o potencial de utilizar una prótesis para transferencias o caminar sobre terrenos nivelados a una cadencia variable. Esta categoría suele corresponder a los usuarios capaces de desplazarse a pie por casa de manera limitada e ilimitada. Nivel de actividad 2 Tienen la capacidad o el potencial de superar barreras del entorno de bajo nivel como bordillos, escaleras o terrenos irregulares.
-
Page 45: Limitaciones En El Uso
Evite exponer el dispositivo a elementos corrosivos como agua, ácidos y otros líquidos. Evite los ambientes abrasivos, como los que contengan arena, puesto que podrían provocar un desgaste prematuro. Para uso exclusivo entre -15 ˚C y 50 ˚C. Recomendamos emplear productos Blatchford con este dispositivo. 938247/8-1019... -
Page 46: Componentes Adicionales
6 Alineación Componentes adicionales Siga las instrucciones de alineación proporcionadas con cualquier componente adicional. Alineación estática Plano sagital Al dar cabida a la flexión la línea de carga Línea de debería pasar por el centro del encaje y a través del centro de la pirámide. carga Asegúrese de que cuando el usuario esté... - Page 47 7 Consejos para la fijación Durante la alineación dinámica el usuario puede experimentar anormalidades en la marcha. Utilice esta tabla para corregir algunas anormalidades de la marcha. Anormalidad de la marcha Acción • Se hunde demasiado al apoyar el talón Confirme la alineación anterior posterior y la adaptación de la altura •...
- Page 48 4. Limpie el interior del alojamiento superior con Tornillo de cabeza hueca (x4) acetona un disolvente similar. 5. Coloque el alojamiento superior sobre la esfera de tobillo. Nota: Asegúrese de que la abertura del alojamiento superior quede hacia atrás. 6. Aplique presión al alojamiento superior mientras mantiene la alineación de la pirámide.
- Page 49 10 Montaje y acabado de la cubierta cosmética 1. Coloque la quilla dentro del calcetín y deslice ambos hacia dentro de la carcasa. Ubicación Nota: Asegúrese de que el talón de la quilla esté totalmente encajado en la ubicación de la quilla de la cubierta cosmética.
-
Page 50: Datos Técnicos
11 Datos técnicos Rango de temperatura de funcionamiento y almacenamiento: -15 ˚C a 50 ˚C Peso del componente (talla 26): 565 g Nivel de actividad: 1–3 Peso máximo del usuario: 125 kg Accesorio proximal: Pirámide macho Rango de ajuste: Angular de ±7 ° Altura de construcción: 95 mm Altura del talón:... -
Page 51: Información Para Pedidos
12 Información para pedidos Ejemplo de número de pedido Este dispositivo está disponible en las tallas 22–30. Nota: Para cubiertas cosméticas de tono oscuro añada una D al final del número de pedido. NAV25LWOD Talla Esfera Amortiguador Opcional: Cubierta lado tobillo cosmética de tono... - Page 52 Producto Clase I de acuerdo a los criterios de clasificación descritos en el Apéndice IX de la normativa. La Declaración de Conformidad fue, por tanto, creada por Blatchford Products Limited con exclusiva responsabilidad según el Apéndice VII de la normativa.
-
Page 53: Beskrivelse Og Formål
1 Beskrivelse og formål Anvendelse Det finnes unntak til anbefalingene våre, Disse instruksjonene er for helsepersonell. og vi ønsker å ta høyde for individuelle omstendigheter – brukere på aktivitetsnivå 4* Forsikre deg om at brukeren forstår all kan ha nytte av dette produktet, men denne informasjonen i denne bruksanvisningen, beslutningen må... - Page 54 Aktivitetsnivå 1 Kan eller har potensial til å bruke en protese for overføring eller ambulering på jevne overflater i jevn hastighet. Typisk for de som kan gå begrenset og ubegrenset i huset. Aktivitetsnivå 2 Kan eller har potensial til å gå og kunne håndtere lave miljøbarrierer som fortauskanter, trapper eller ujevne overflater.
- Page 55 Unngå å eksponere enheten for korrosive elementer slik som vann, syrer og andre væsker. Unngå friksjonsmiljøer, for eksempel miljøer med sand, da de kan føre til tidlig slitasje. Kun for bruk mellom -15 ˚C og 50 ˚C . Vi anbefaler at du bruker Blatchford-produkter med denne enheten. 938247/8-1019...
- Page 56 6 Justering Tilleggsdeler Følg justeringsinstruksjonene som følger med eventuelle tilleggsdeler. Statisk justering Sagittalt plan Med fleksjonen tatt i betraktning skal belastningslinjen passere gjennom midten av kontakten og gjennom midten av pyramiden. Belastningslinje Sikre at hælen og tåen belastes likt og at foten er i full kontakt med gulvet når brukeren står.
- Page 57 7 Råd for tilpasning Brukeren kan oppleve at gangen er annerledes ved dynamisk justering. Bruk denne tabellen til å korrigere vanlige abnormiteter i gangen. Abnormitet i gange Handling • Synker ved hælslag Bekreft A–P-justeringen og at hælhøyde er tatt i betraktning. •...
- Page 58 4. Rengjør innsiden av det øvre huset med Unbrakoskruer (x4) aceton eller lignende løsemiddel. 5. Plasser det øvre huset over ankelkulen. Merk: Sikre at åpningen på det øvre huset vender bakover. 6. Legg press på det øvre huset mens du holder pyramiden justert.
- Page 59 10 Sette sammen og ferdigstille fotdekselet 1. Plasser kjølen inni glidesokken og sett dem begge inn i fotdekselet. Hakk Merk: Sikre at hælen på kjølen sitter skikkelig i hakket i hælen på fotdekselet. Merk: Sikre at glidesokken ikke sitter fast under kuppelen etter at den har blitt satt på...
-
Page 60: Tekniske Data
11 Tekniske data Drifts- og oppbevaringstemperatur: -15 ˚C til 50 ˚C Komponentvekt (størrelse 26): 565 g Aktivitetsnivå: 1–3 Maksimal brukervekt: 125 kg Proksimal kobling: Pyramide adapter Justeringsområde: ±7 ° vinkel Bygghøyde: 95 mm Hælhøyde: 10 mm Monteringslengde 95 mm 10 mm 938247/8-1019... - Page 61 12 Bestillingsinformasjon Eksempel på bestillingsnummer Denne enheten er tilgjengelig i størrelser fra 22 til 30. Merk: Dersom du vil at fotdekselet skal være mørkt, legger du til en D etter bestillingsnummeret. NAV25LWOD Størrelse Ankelkule Demper Valgfritt: og side Mørkt fotdeksel Sammenstillinger for ankel og kjøl (kun Fotdeksler –...
- Page 62 Gå til Blatchford-nettstedet for å se hele garantierklæringen. Produsentens registrerte adresse Blatchford Products Limited, Lister Road, Basingstoke RG22 4AH, UK. Navigator og Blatchford er registrert varemerke eid av Blatchford Products Limited. 938247/8-1019...
-
Page 63: Описание И Назначение
1 Описание и Назначение Применение лей с рекомендуемым уровнем двигательной ак- Данные инструкции предназначаются только для тивности 1–3. врача/протезиста. Однако есть и исключения, поэтому при назначе- нии стопы необходимо тщательно рассматривать Убедитесь в том, что пользователь внимательно индивидуальные особенности пользователя про- ознакомился... - Page 64 Уровень двигательной активности 1 Пользователь обладает способностью или имеет достаточный потенциал для перемещения на протезе по ровной опорной поверхности с фиксированным темпом ходьбы. Данный уровень типичен для поль- зователей, которые могут перемещаются в пределах помещения. Уровень двигательной активности 2 Пользователь обладает способностью или имеет достаточный потенциал для перемещения на протезе, а...
-
Page 65: Техническое Обслуживание
ной активности и веса пользователя. 4 Техническое обслуживание Все работы по техническому обслуживанию изделия должны выполняться только сертифицированным персоналом, прошедшим обучение в Blatchford и только в условиях предприятия-изготовителя или уполномоченного им предприятия. Рекомендуется нижеследующее проведение ежегодного технического обслуживания изделия: •... -
Page 66: Дополнительные Компоненты
6 Юстировка Дополнительные компоненты Следуйте инструкциям, прилагаемым к раз- личным дополнительным компонентам. Статическая юстировка Сагиттальная плоскость Для удобства сгибания в колене, осевая ли- Осевая ния нагрузки должна проходить через центр линия протезной гильзы и центр адаптера -пира- нагрузки мидки стопы. Убедитесь... - Page 67 7 Рекомендации по сборке В процессе динамической юстировки пользователь может испытать некоторые проблемы при ходьбе. Используйте данную таблицу для их устранения. Проблема при ходьбе Действие • Снижение пяточного удара Убедитесь в корректности юстировки в плоскости A–P (вперед-назад) и настрой- • «Шлепок»...
- Page 68 4. Очистите от загрязнений внутреннюю по- Крепежный болт (x4) верхность верхнего корпуса при помощи ацетона или другого подходящего раствори- теля 5. Установите верхний корпус поверх шаровой опоры Замечание: Убедитесь в том, чтобы открытая часть верхнего корпуса находилась сзади Верхний корпус 6.
- Page 69 10 Сборка косметической калоши и финишной косметической облицовки 1. Наденьте на киль стопы скользящий носок и разместите конструкцию в косметической Специальный калоше паз Замечание: Убедитесь что киль стопы устано- вился в специальный паз в пяточной области косметической калоши. Замечание: После сборки протеза убедитесь в том, что...
- Page 70 11 Спецификация Температурный диапазон хранения и эксплуатации: от -15 ˚C до +50 ˚C Вес изделия (для размера 26см): 565 г Уровень двигательной активности: 1–3 Максимальный вес пользователя: 125 кг Проксимальное крепление: Встроенный адаптер-пирамидка Диапазон юстировки: ±7 ° юстировка наклона Высота конструкции: 95 мм Высота...
-
Page 71: Информация Для Заказа
12 Информация для заказа Пример заказа Размерный ряд стопы с 22 по 30 включительно. Замечание: при заказе стопы с косметической калошей темного цвета к шифру изделия добавляется суффикс «D» NAV25LWOD Размер и Шаровая Амортизатор Дополнительный суффикс «D» сторона опора при заказе стопы с... - Page 72 Данное изделие относится к категории изделий класса I в соответствии с критериями клас- сификации, изложенными в Приложении IX данного Стандарта. Это означает, что компания Blatchford Products Limited имеет сертификат о соответствии и исключительной ответствен- ности в соответствии с Приложением VII данного Стандарта.
- Page 73 1 Açıklama ve Amaç Uygulama Bağımsız durumlara imkan tanımak Bu talimatlar klinisyene yöneliktir. istediğimizden, tavsiyelerimizin bazı istisnaları bulunmaktadır — bu üründen Kullanıcının, özellikle bakım ve güvenlik faydalanabilecek olan, 4. Aktivite bilgileri olmak üzere bu kullanım Seviyesindeki* kullanıcılar da olabilir, ancak talimatlarındaki tüm bilgileri anladığından bu karar bir prostetik değerlendirmeye dayalı...
- Page 74 1. Aktivite Seviyesi Düz yüzeyler üzerinde sabit bir yürüyüş temposu ile transfer veya yürüme amacıyla protezi kullanma kabiliyetine veya potansiyeline sahiptir. Ev ortamında sınırlı veya sınırsız düzeyde yürüyen kişiler için tipik seçenektir. 2. Aktivite Seviyesi Kaldırım taşları, merdiven veya düz olmayan yüzeyler gibi düşük seviyeli çevresel engelleri aşma kabiliyeti ile birlikte, yürüyüş...
- Page 75 Cihazı, su, asitler ve diğer sıvılar gibi aşındırıcı bileşenlere maruz bırakmayın. Erken aşınmaya neden olabilecekleri için, örneğin kum içeren ortamlar gibi aşındırıcı ortamlardan kaçının. Yalnızca -15 ˚C ile 50 ˚C arası sıcaklıklarda kullanım içindir. Bu cihazla birlikte Blatchford ürünlerinin kullanılmasını öneririz. 938247/8-1019...
- Page 76 6 Hizalama Ek Komponentler Tüm ek komponentlerle birlikte verilen hizalama yönergelerini izleyin. Statik Hizalama Sagittal Düzlem Uygun fleksiyon pozisyonunda hazırlanmış sokette, yük hattı gösterildiği şekilde soketin orta noktasından ve piramit ekseninden Yük Hattı geçmelidir. Kullanıcı ayakta dururken, topuğun ve ayak parmağının eşit yüklendiğinden ve ayağın zemin ile tamamen temas ettiğinden emin olun.
- Page 77 7 Bağlantı Bilgileri Dinamik hizalama sırasında kullanıcı yürüme bozuklukları yaşayabilir. Yaygın görülen bazı yürüyüş anormalliklerini düzeltmek için bu tabloyu kullanın. Yürüyüş Anormalliği İşlem • Topuğu basarken batma A–P hizalamasını ve topuk yüksekliği uyumunu kontrol edin • Ayak vurması b. Daha sert bir bilek bilyesi takın. •...
- Page 78 4. Üst muhafazanın iç kısmını aseton veya benzer Soket başlı vida (x4) bir solvent ile temizleyin. 5. Üst muhafazayı bilek bilyesinin üzerine yerleştirin. Not: Üst muhafazanın açıklığının posterior tarafa baktığından emin olun. 6. Piramit hizalamasını muhafaza ederken üst muhafazaya baskı uygulayın. Daha sonra soket Üst muhafaza başlı...
- Page 79 10 Ayak Kılıfının Montajı ve Kaplanması 1. Omurgayı kaydırıcı çorap içerisine yerleştirin ve her ikisini ayak kılıfı içerisine kaydırın. Yerleştirme Not: Omurga topuğunun, ayak kılıfı topuğu yuvası içerisindeki yerleştirme yuvasına tam olarak oturduğundan emin olun. Not: Ekstremiteye taktıktan sonra, kaydırıcı çorabın kubbe altına sıkışmadığından emin olun 2.
-
Page 80: Teknik Veriler
11 Teknik Veriler Kullanma ve Saklama Sıcaklığı Aralığı: -15 ˚C ile 50 ˚C Komponent Ağırlığı (26 numara): 565 g Aktivite Seviyesi: 1–3 Maksimum Kullanıcı Ağırlığı: 125 kg Proksimal Bağlantı: Erkek piramit Ayarlama Aralığı: ±7 ° açısal Yapı Yüksekliği: 95 mm Topuk Yüksekliği: 10 mm Bağlantı... - Page 81 12 Sipariş Bilgileri Sipariş Numarası Örneği Bu cihaz 22–30 arası numaralarda mevcuttur. Not: Koyu tonlu bir ayak kılıfı için sipariş numarasının sonuna bir D ekleyin. NAV25LWOD Numara Bilek Snubber İsteğe bağlı: & taraf bilyesi Koyu tonlu ayak kılıfı Bilek ve omurga donanımları (yalnızca Ayak kılıfları...
- Page 82 CE Uygunluğu Bu ürün, tıbbi ürünler için 93/42/AET sayılı yönetmeliğin gerekliliklerini karşılamaktadır. Bu ürün, yönetmelik Ek IX’da belirtilen sınıflandırma kriterlerine göre 1. Sınıf Ürün olarak sınıflandırılmıştır. Uygunluk Beyanı, yönetmelik Ek VII uyarınca tüm sorumluluğa sahip Blatchford Products Limited tarafından hazırlanmıştır. Garanti Bu cihaz, 24 aylık garantiye tabidir —...
- Page 83 938247/8-1019...
- Page 84 Fax: +33 (0) 467 073 630 Email: post@ortopro.no Tel: +1 (0) 800 548 3534 Email: contact@blatchford.fr www.ortopro.no Fax: +1 (0) 800 929 3636 www.blatchford.fr Email: info@blatchfordus.com www.blatchfordus.com © Blatchford Products Limited 2019. All rights reserved. © Blatchford Products Limited 2019. All rights reserved. 938247/8-1019...