Publicité

Les langues disponibles

Les langues disponibles

Liens rapides

OWNERS MANUAL
MANUAL DEL USUARIO
MANUEL D'UTILISATION
Model / Modelo / Modèle :
DSR104
Booster
Arrancador
Aide au démarrage
PLEASE SAVE THIS OWNER'S MANUAL AND READ BEFORE EACH USE.
This manual will explain how to use the booster and charger safely and effectively.
Please read and follow these instructions and precautions carefully.
POR FAVOR GUARDE ESTE MANUAL DEL PROPIETARIO Y LEER ANTES DE
CADA USO. En este manual se explica cómo utilizar el arrancador y cargador con
seguridad y eficacia. Por favor, lea y siga las siguientes instrucciones y precauciones.
VEILLEZ A CONSERVER CES INSTRUCTIONS ET LES LIRE AVANT CHAQUE
UTILISATION. Ce guide vous montrera comment utiliser le booster efficacement
et en toute sécurité. Veuillez lire et suivre ces instructions et précautions.
0099001651-04

Publicité

Table des Matières
loading

Sommaire des Matières pour DSR PROBOOSTER DSR104

  • Page 1 OWNERS MANUAL MANUAL DEL USUARIO MANUEL D’UTILISATION Model / Modelo / Modèle : DSR104 Booster Arrancador Aide au démarrage PLEASE SAVE THIS OWNER’S MANUAL AND READ BEFORE EACH USE. This manual will explain how to use the booster and charger safely and effectively. Please read and follow these instructions and precautions carefully.
  • Page 2 CONTAINS SEALED NON-SPILLABLE LEAD-ACID BATTERY. MUST BE DISPOSED OF PROPERLY. CONTIENE UNA BATERÍA SELLADA DE ÁCIDO-PLOMO NO DERRAMABLE QUE DEBE DESECHARSE APROPIADAMENTE. CONTIENT UNE BATTERIE À L’ACIDE QUI DOIT ÊTRE MANIPULEE CORRECTEMENT. WARNING: Possible explosion hazard. Contact with battery acid may cause severe burns and blindness.
  • Page 3: Important Safety Instructions

    1. IMPORTANT SAFETY INSTRUCTIONS SAVE THESE INSTRUCTIONS. 1.1 SAVE THESE INSTRUCTIONS – 1.9 Do not disassemble the booster; take it to This manual contains important safety a qualified service person when service or and operating instructions. repair is required. Incorrect reassembly may result in a risk of fire or electric shock.
  • Page 4: Installation Instructions

    3. PREPARING TO USE THE BOOSTER IMPORTANT: AFTER PURCHASE, contact with your eyes, nose and mouth. CHARGE YOUR BOOSTER FOR Use baking soda and water to neutralize 24 HOURS, BEFORE USE. the battery acid and help eliminate airborne corrosion. Do not touch your WARNING! RISK OF CONTACT WITH eyes, nose or mouth.
  • Page 5: Grounding And Ac Power Cord Connections

    6.1 CHARGER CLAMPS REVERSED (red) LED Start/Stop Button flashing: The connections are Press to immediately begin charging your reversed. properly connected battery. If the button is not pressed, charging should begin CHARGING (yellow/orange) LED lit: in ten minutes. The charger is charging the battery. LED Indicators CHARGING (yellow/orange) LED flashing: The charger is in abort mode.
  • Page 6 Desulfation Mode it will go into abort mode (see Aborted Charge). This is usually caused by a Desulfation could take 8 to 10 hours. If drain on the battery or the battery could desulfation fails, charging will abort. The be bad. Make sure there are no loads on BAD BATTERY (red) LED will light, the battery.
  • Page 7 The booster is equipped with an auxiliary the battery. DC cable connection. This connection is • To allow the internal components of only to be used with DSR Auxiliary DC the battery to cool down. Cables. If you do not wait and/or the starting...
  • Page 8: Maintenance Instructions

    WARNING! A SPARK NEAR THE 9. Crank the engine. If the engine does not BATTERY MAY CAUSE A BATTERY start within 8-10 seconds, stop cranking EXPLOSION. TO REDUCE THE RISK and wait at least 3 minutes before OF A SPARK NEAR THE BATTERY: attempting to start the vehicle again.
  • Page 9: Replacement Parts

    11. SPECIFICATIONS Booster Internal battery type ............Maintenance-free AGM lead-acid Nominal voltage ..................12V/24V DC Capacity ......................2 x 50 Ah Peak amps, 12V....................10000 Peak amps, 24V...................... 5000 Cranking amps, 12V ....................1050 Cranking amps, 24V ....................850 Cold cranking amps, 12V ..................780 Cold cranking amps, 24V ..................
  • Page 10 PROBLEM REASON SOLUTION The Booster has no power. The booster’s battery is not Check the battery charge charged. status by pressing the Voltmeter button. Recharge the battery. The internal fuse has blown. Replace the fuse. The battery in the booster won’t The battery is bad (will not Replace the battery.
  • Page 11: Before Returning For Repairs

    14. BEFORE RETURNING FOR REPAIRS For more information about troubleshooting, contact customer service for assistance: services@schumacherelectric.com www.batterychargers.com or call 1-800-621-5485 For REPAIR OR RETURN, contact Customer Service at 1-800-621-5485. DO NOT SHIP UNIT until you receive a RETURN MERCHANDISE AUTHORIZATION (RMA) number from Customer Service at Schumacher Electric Corporation.
  • Page 12: Instrucciones De Seguridad Importantes

    1. INSTRUCCIONES DE SEGURIDAD IMPORTANTES GUARDE ESTAS INSTRUCCIONES. 1.1 GUARDE ESTAS INSTRUCCIONES – 1.9 No desmonte el arrancador; llévelo Este manual contiene instrucciones de a un reparador cualificado cuando funcionamiento y seguridad importantes. necesite mantenimiento o reparación. Un desmontaje inapropiado puede derivar en ADVERTENCIA: RIESGO DE peligro de descarga eléctrica o fuego.
  • Page 13: Instrucciones Para La Instalación

    ácido de la batería tenga contacto con su el área afectada con agua y jabón. En piel, ropa u ojos. caso de que ingrese ácido en un ojo, sumerja el mismo de inmediato bajo agua 2.8 Utilice protección visual y corporal potable corriente por al menos 10 minutos completa, incluyendo gafas de seguridad y obtenga atención médica en forma...
  • Page 14: Características

    6. CARACTERÍSTICAS 1. Selector de voltaje 11. Puerto de cable auxiliar de salida (en el lado; no se muestra) 2. Conectores de voltaje 12. Cargador SC3DSR de salida 13. LED de encendido 3. LED de selección 14. Botón de inicio/parada de voltaje 15.
  • Page 15 ADVERTENCIA: RIESGO DE 7.3 Modos de carga DESCARGA ELÉCTRICA O FUEGO. Modo de Carga Automática Este cargador de batería está destinado a Cuando se realiza una carga automática, un uso en un circuito con tensión nominal el cargador cambia del modo de de 120 V.
  • Page 16 8. INSTRUCCIONES DE OPERACIÓN IMPORTANTE: LEA LAS 1. Apague el vehículo antes de hacer INSTRUCCIONES ANTES DE conexiones de cables. CONECTAR EL SELECTOR DE 2. Ubique los cables de C.C. para reducir VOLTAJE DE SALIDA. el riesgo de daños a la cubierta, a la puerta y a las piezas móviles o calientes 8.1 Sistema de detección de voltaje del motor.
  • Page 17: Inversión De Polaridad

    CC • Asegúrese de que las abrazaderas auxiliar. Esta conexión solo debe utilizarse estén conectadas correctamente. con cables de CC auxiliares DSR. • No desconecte el arrancador con el IMPORTANTE: El uso del arrancador sin motor en funcionamiento cuando no una batería instalada en el vehículo puede...
  • Page 18: Instrucciones De Mantenimiento

    NOTA: Si es necesario cerrar el capó • Para permitir que el voltaje de la batería durante el proceso de arranque, del arrancador se acumule de nuevo. asegúrese de que el capó no toque • Para permitir la renovación de los los cables auxiliares de CC ni corte el gases dentro de la batería.
  • Page 19 11. ESPECIFICACIONES Arrancador Tipo Interno de la batería ...... Libre de mantenimiento AGM, de plomo-ácido Volaje nominal................... 12V / 24V CC Capacidad ......................2 x 50 Ah Amperios máximos (12V)..................10000 Amperios máximos (24V)..................5000 Amperios de arranque (12V)................... 1050 Amperios de arranque (24V)..................
  • Page 20: Localización Y Solución De Problemas

    13. LOCALIZACIÓN Y SOLUCIÓN DE PROBLEMAS Arrancador PROBLEMA CAUSA POSIBLE SOLUCIÓN Si el arrancador no Tomacorriente de C.A. fuera de Controle la posible presencia de recarga. funcionamiento. fusibles abiertos o disyuntores que suministren energía al tomacorriente de CA. Conexión eléctrica deficiente. Controle la posible périda del enchufe perteneciente a los cables de alimentación o al alargador.
  • Page 21: Antes De Devolver A Reparaciones

    PROBLEMA CAUSA POSIBLE SOLUCIÓN El LED BAD BATTERY La batería está sulfatada. El cargador está en el modo de se ilumina. desulfatación. Continuar la carga por varias horas. Si no tiene éxito, revisar la batería. Se detecta la falta de progreso La batería se puede sobrecalienta.
  • Page 22: Garantía Limitada

    15. GARANTÍA LIMITADA SCHUMACHER ELECTRIC CORPORATION, 801 BUSINESS CENTER DRIVE, MOUNT PROSPECT, IL 60056-2179, REALIZA LA PRESENTE GARANTÍA LIMITADA AL COMPRADOR MINORISTA ORIGINAL DE ESTE PRODUCTO. LA PRESENTE GARANTÍA LIMITADA NO PUEDE TRANSFERIRSE NI CEDERSE. Schumacher Electric Corporation (el “Fabricante”) otorga garantía por este arrancador y el cargador por un (1) año contados a partir de la fecha de compra, contra cualquier material defectuoso o de mano de obra de la unidad que pudieran surgir durante su uso y bajo cuidado normal.
  • Page 23: Consignes De Sécurité Importantes

    1. CONSIGNES DE SÉCURITÉ IMPORTANTES CONSERVEZ CES INSTRUCTIONS. 1.1 CONSERVEZ CES INSTRUCTIONS – tombé par terre ou a été endommagé. Ce manuel contient d’importantes Faites appel à une personne qualifiée. consignes de sécurité et d’exploitation. 1.9 Ne démontez pas le booster. Apportez-le AVERTISSEMENT! RISQUE DE CHOC à...
  • Page 24: Préparation À L'utilisation Du Booster

    2.8 Portez des lunettes et des vêtements de avec de l’eau froide coulante pendant au protection. Évitez de toucher vos yeux moins 10 minutes et consultez aussitôt un lorsque vous travaillez à proximité de la médecin. batterie. 2.10 Si l’acide de batterie est avalée 2.9 Si l’acide de batterie entre en contact accidentellement : boire du lait, du blanc avec votre peau ou vos vêtements, lavez...
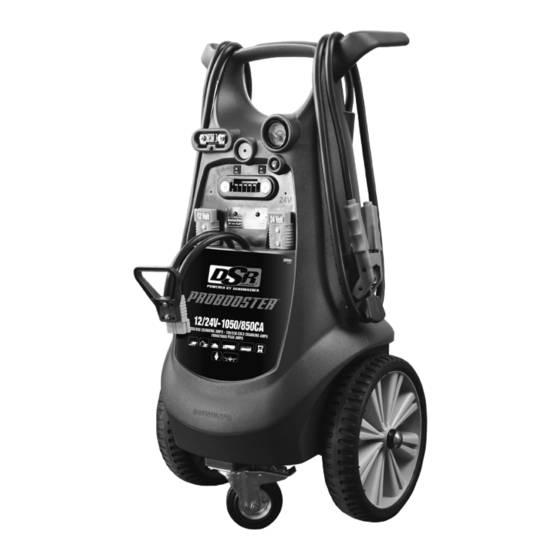
  • Page 25: Caractéristiques

    6. CARACTÉRISTIQUES 1. Sélecteur de tension 10. Pinces de la batterie de sortie 11. Port de câble 2. Connecteurs de tension (sur le côté, non montré) de sortie 12. Chargeur SC3DSR 3. Voyants LED 13. Voyant d’alimentation LED de sélection de tension 14.
  • Page 26: Chargement Du Booster

    L’utilisation d’un chargeur différent 7.3 Modes de charge pourrait causer des blessures aux Mode de charge automatique personnes ou des dommages matériels. Lorsqu’une charge automatique est AVERTISSEMENT! RISQUE DE CHOC effectuée, le chargeur reste en mode ÉLECTRIQUE OU D’INCENDIE. automatique après que la batterie soit Ce chargeur de batterie est conçu pour chargée.
  • Page 27: Consignes D'utilisation

    8. CONSIGNES D’UTILISATION IMPORTANT : LISEZ LES INSTRUCTIONS MISE EN GARDE : LA PRÉSENCE D’UNE AVANT DE BRANCHER LE SÉLECTEUR ÉTINCELLE PRÈS DE LA BATTERIE DE TENSION DE SORTIE. PEUT CAUSER SON EXPLOSION. POUR RÉDUIRE LE RISQUE 8.1 Système de détection de tension D’ÉTINCELLE PRÈS DE LA BATTERIE : Votre booster est muni d’un système de 1.
  • Page 28: Inversion De Polarité

    CC auxiliaire. Cette connexion ne • Ne connectez jamais le booster sur peut être utilisée qu’avec des câbles CC une batterie ou un démarreur en auxiliaires DSR. court-circuit. IMPORTANT : l’utilisation du booster • Assurez-vous que les pinces soient sans batterie installée dans le véhicule...
  • Page 29: Instructions D'entretien

    MISE EN GARDE : LA PRÉSENCE 9. Démarrez le moteur. Si le moteur ne D’UNE ÉTINCELLE À PROXIMITÉ démarre pas dans les 8-10 secondes, PEUT ENTRAÎNER L’EXPLOSION DE arrêter de tourner et attendre au moins LA BATTERIE. RÉDUIRE LE RISQUE 3 minutes avant de tenter de démarrer D’ÉTINCELLE PRÈS DE LA BATTERIE : le véhicule à...
  • Page 30: Instructions De Stockage Et Emplacement

    10. INSTRUCTIONS DE STOCKAGE ET EMPLACEMENT 10.1 IMPORTANT : 10.3 Les pinces doivent être entreposées sur leurs supports, afin d’éviter qu'elles • CHARGEZ L’APPAREIL IMMÉDIATEMENT n'entrent en contact avec toute surface APRÈS L’AVOIR ACHETÉ métallique. • MAINTENEZ-LE COMPLÈTEMENT 10.4 Si le booster est déplacé ou transporté CHARGÉ...
  • Page 31: Dépannage

    13. DÉPANNAGE Booster PROBLÈME CAUSE POSSIBLE SOLUTION Le booster n’arrive pas à se Il n’y a pas de courant dans la Vérifiez la présence d’un recharger. prise CA. fusible ou d’un disjoncteur ouvert dans le circuit d’alimentation de la prise CA. La connexion électrique est Vérifiez le câble de recharge faible.
  • Page 32: Avant De Retourner Pour Les Réparations

    PROBLÈME CAUSE POSSIBLE SOLUTION Le VOYANT LED DE BATTERIE La tension de la batterie est La batterie pourrait être toujours inférieure à 10 V après 2 défectueuse. Assurez-vous qu’il DÉFECTUEUSE est allumé heures de charge. n’y ait aucune source de drainage et le voyant LED clignote.
  • Page 33: Garantie Limitée

    15. GARANTIE LIMITÉE SCHUMACHER ELECTRIC CORPORATION, 801 BUSINESS CENTER DRIVE, MOUNT PROSPECT, IL 60056-2179, DONNE CETTE GARANTIE LIMITÉE POUR PREMIER ACHETEUR DE CE PRODUIT. CETTE GARANTIE LIMITÉE N’EST PAS TRANSFÉRABLES NI CESSIBLES. Schumacher Electric Corporation (le « Fabricant ») garantit ce booster et son chargeur pour un (1) an à...
  • Page 35 WARRANTY CARD / TARJETA DE GARANTÍA SAVE ON POSTAGE! ACTIVATE YOUR WARRANTY ONLINE – THE QUICK AND EASY WAY! Go to www.batterychargers.com to register your product online. 1 YEAR LIMITED WARRANTY PROGRAM REGISTRATION MODEL: _____________________ DESCRIPTION: ________________________ This is the only express limited warranty, and the manufacturer neither assumes nor authorizes anyone to assume or make any other obligation.
  • Page 36: Carte De Garantie

    CARTE DE GARANTIE PAS BESOIN DE VOIE POSTAL ! ACTIVEZ VOTRE GARANTIE SUR INTERNET – LA VOIE PLUS RAPIDE ET FACILE ! Aller sur www.batterychargers.com pour enregistrer votre produit en ligne. (Pas d’accès internet? Envoyer la carte de garantie par poste.) INSCRIPTION AU PROGRAMME DE GARANTIE LIMITÉE DE UN AN...

Table des Matières