Philips WelcomeEye Connect DES9900VDP - 531002 Notice D'utilisation

Philips WelcomeEye Connect DES9900VDP - 531002 Notice D'utilisation

Masquer les pouces Voir aussi pour WelcomeEye Connect DES9900VDP - 531002:
Table des Matières

Publicité

Les langues disponibles
  • FR

Les langues disponibles

  • FRANÇAIS, page 1
WelcomeEye Connect
DES9900VDP - 531002
WelcomeEye Touch
DES9700VDP - 531001
DES9700VDP - 531001
FR -Notice téléchargeable sur philips.com
GB - Downloadable instructions at phillips.com
D - Anleitung kann auf philips.com heruntergeladen werden
NL - De handleiding kan gedownload worden op philips.com
PL - Instrukcja do pobrania na philips.com
IT- Il manuale è disponibile anche su www.philips.com.
ES - Manual que puede descargar en philips.com
PT - Manual de instruções disponível no site philips.com
09/2017
Scan me
to fi nd out about our products
Flashez-moi
pour découvrir nos produits

Publicité

Table des Matières
loading

Sommaire des Matières pour Philips WelcomeEye Connect DES9900VDP - 531002

  • Page 1 FR -Notice téléchargeable sur philips.com GB - Downloadable instructions at phillips.com D - Anleitung kann auf philips.com heruntergeladen werden NL - De handleiding kan gedownload worden op philips.com PL - Instrukcja do pobrania na philips.com IT- Il manuale è disponibile anche su www.philips.com.
  • Page 2 Fig. 1 (Master) DES 9900 VDP Wifi 2.4GHz 550mA CFI Extel ZI de Fétan, 01600 Trévoux FRANCE DES 9900 VDP 120 m max DES 9900 VDP 1 2 3 4 DES 9900 VDP CFI Extel ZI de Fétan, 01600 Trévoux FRANCE 110mA RFID 125kHz...
  • Page 3 Fig. 2 Made in P.R.C Made in P.R.C Made in P.R.C Made in P.R.C Made in P.R.C WelcomeEye Connect / Touch / 09/17...
  • Page 4 Fig. 3 Made in P.R.C Made in P.R.C Made in P.R.C Made in P.R.C Made in P.R.C Made in P.R.C Made in P.R.C Made in P.R.C WelcomeEye Connect / Touch / 09/17...
  • Page 5: Table Des Matières

    SOMMAIRE CONSIGNES DE SÉCURITÉ .............p.2 CONTENU DU KIT ................p.2 GÉNÉRALITÉ ..................p.3 NOMENCLATURE ................p.3 INSTALLATION DU PRODUIT ............p.5 1. Câblage 2. Paramétrage de la platine 3. Installation du moniteur principal ou supplémentaire 4. Installation de la platine de rue principal ou supplémentaire 5.
  • Page 6: Consignes De Sécurité

    1. CONSIGNE DE SÉCURITÉ Important ! • Veuillez lire le manuel d’utilisation soigneusement avant d’installer ou d’utiliser ce produit. • Si vous installez ce produit pour d’autres, pensez à laisser le manuel ou une copie à l’utilisateur final. Avertissement : •...
  • Page 7: Généralité

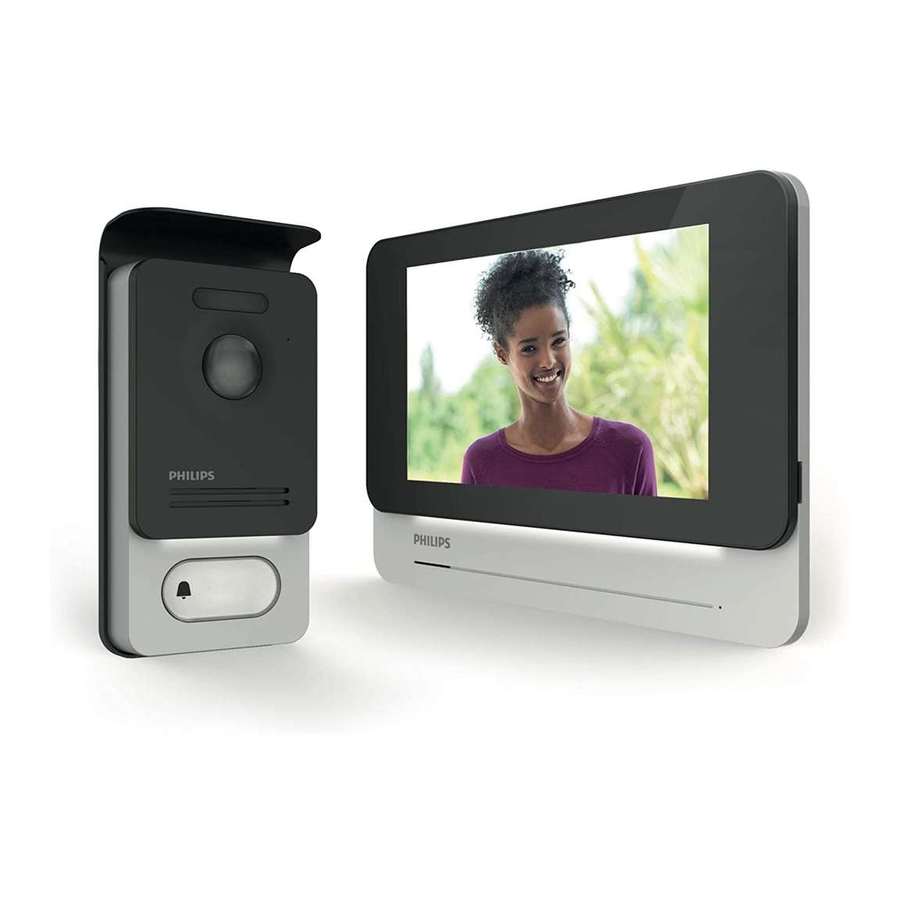
    3. GÉNÉRALITÉ Ce visiophone est composé d’un poste de réponse intérieur avec écran tactile et d’une platine extérieure avec interphone et caméra permettant de voir et communiquer avec le visiteur qui a sonné. Il est facile d’installation puisque 2 fi ls sont nécessaires pour toutes les fonctions (sonnerie, vidéo, interphone, commandes gâche et automatisme).
  • Page 8: Led Blanche (Vision De Nuit) Microphone

    Platine de rue : LED blanche (vision de nuit) Capteur crépusculaire Microphone Objectif de la caméra Haut-parleur Éclairage porte-nom Bouton d’appel, porte-nom et zone de lecture RFID DES 9900 VDP Vis antivol de fi xation 1 2 3 4 Switch de programmation Bouton reset RFID Réglage volume haut-...
  • Page 9: Installation Du Produit

    5. INSTALLATION DU PRODUIT Conseils et notes importantes : - Afin de profiter pleinement de votre platine de rue, nous vous conseillons de la paramétrer (RFID, mode 1 ou 2 familles, 1 ou 2 platines, volume du haut-parleur), avant installation définitive.
  • Page 10: Paramétrage De La Platine

    2. Paramétrage de la platine (voir fig. 1, fig. 2 ou fig. 3) a. Paramétrage du numero de la platine : Placer le switch 2 à gauche sur la platine n°1 et à droite sur la platine n°2. b. Paramétrage du nombre de famille : Placer le switch 1 à...
  • Page 11: Installation Du Moniteur Principal Ou Supplémentaire

    3. Installation du moniteur principal ou supplémentaire 1m60 DES 9900 VDP Wi 2.4GHz 550mA CFI Extel ZI de Fétan, 01600 Trévoux FRANCE DES 9900 VDP 1 - Positionner le support mural en faisant en sorte que l’écran du moniteur soit à une hauteur d’environ 1m60 du sol.
  • Page 12: Installation De La Platine De Rue Principal Ou Supplémentaire

    4. Installation de la platine de rue principale ou supplémentaire Attention : Le produit ne doit pas être relié à l’alimentation avant la fi n du câblage. 1m60 DES 9900 VDP 1 2 3 4 DES 9900 VDP CFI Extel ZI de Fétan, 01600 Trévoux FRANCE 110mA...
  • Page 13: Installation D'une Caméra (En Option)

    10 - Brancher l’alimentation 230V AC sur l’adapteur modulaire, sur une installation conforme aux normes en vigueur ( NFC 15-100 pour la France). - Vérifi er le bon fonctionnement (appel vidéo, RFID...). - Dans le cas d’une deuxième platine de rue, penser à confi gurer le(s) moniteur(s). 11 - Mettre un joint silicone* entre la visière et le mur afi n d’éviter le ruissellement de l’eau.
  • Page 14: Fonction Monitoring Et Réponse A Un Appel

    : indique que la mémoire est pleine. Les photos/vidéos les plus anciennes sont alors remplacées par les nouveaux enregistrements. A. Fonction monitoring et réponse a un appel 1 : Permet de passer à la vue de la seconde platine de rue, de la caméra ou de revenir au menu principal.
  • Page 15 1. Fonction mémoire de passage a : Enregistrement de passage par photo. b : Enregistrement de passage par vidéo (la présence d’une carte micro SD formatée sur le moniteur est nécessaire). c : Désactivation de la fonction mémoire de passage. 2.
  • Page 16 b : Permet de lire le message vocal enregistré. c : Permet de commencer puis arrêter l’enregistrement du message vocal (durée maximum du message : 15s.). 6 : Confi guration des options du système WelcomeEye a : Activation d’une seconde platine de rue (choisir On si utilisation d’une seconde platine de rue).
  • Page 17: Album Photos

    c : Accès aux informations relatives au réseau et réinitialisation du réseau WIFI. Note : L’utilisation du réseau WIFI et de l’application smartphone est détaillé dans le chapitre 8 application. 10 : Réglage de l’heure et la date a : réglage de l’heure et de la date b : réglage du format de la date (s’applique au menu principal uniquement) et de l’heure.
  • Page 18: Album Vidéo

    E. Album vidéo Menu accessible uniquement si une carte micro SD est présente. Permet d’accéder aux vidéos enregistrées. Le chiff re dans le rond rouge indique le nombre de vidéos non lues. La procédure de visualisation et suppression est identique à l’album photo. 7.
  • Page 19: Application Smartphone

    - Il suffi t d’effl eurer l’écran pour sortir du mode veille. 8. APPLICATION SMARTPHONE Connecter un moniteur au réseau Wifi 1. Téléchargez l’application Philips WelcomeEye sur votre smartphone. Depuis l’Apple store ou le Play store 2. Depuis le moniteur, allez dans...
  • Page 20 4. Depuis l’application WelcomeEye, cliquez sur + afi n d’ajouter un appareil. 5. Android : Cliquez sur nouvel appareil puis suivant L’UID de votre moniteur doit apparaitre. Cliquez dessus. WelcomeEye Connect / Touch / 09/17...
  • Page 21 Choisissez la box à laquelle vous souhaitez connecter votre moniteur, entrez son mot de passe et cliquer sur suivant. 5 Bis. IOS : Cliquez sur nouvel appareil puis suivant. Sortez de l’application et allez dans les réglages wifi du smartphone. Connectez-vous au wifi commençant par ‘UIDcg…..’. WelcomeEye Connect / Touch / 09/17...
  • Page 22 Votre visiophone est désormais connecté au réseau Wifi et votre smartphone peut recevoir les appels. Ajouter un smartphone à un visiophone connecté 1. Téléchargez l’application Philips WelcomeEye sur votre smartphone depuis l’Apple store ou le Play store Attention : retirez le mode réseau intelligent du wifi du smartphone s’il est activé.
  • Page 23 2. Depuis l’application WelcomeEye, cliquez sur + afi n d’ajouter un appareil. 3. Cliquez sur appareil connecté au réseau, puis appar.conne. Assurez-vous que le smartphone est connecté sur le même réseau wifi que le moniteur. 4. L’UID de votre moniteur doit apparaître. Cliquez dessus. WelcomeEye Connect / Touch / 09/17...
  • Page 24 5. Entrez le nom que vous désirez donner à votre appareil, le nom d’utilisateur, le mot de passe et le nombre d’ouvrant (= numéro de canal) que vous souhaitez commander. Le mot de passe vous sera demandé à chaque fois que vous voudrez ouvrir votre gâche électrique ou portail depuis l’application.
  • Page 25 Permet de réduire la qualité de la vidéo (1 barre) ou ne laisser passer que le son (0 barre) en cas de faible bande passante. Pour un fonctionnement optimal, il est nécessaire d’avoir un débit minimum de 40 kB/s. Mode plein écran Ouvrir la gâche électrique ou le portail (mot de passe par défaut : 1 2 3 4).
  • Page 26: Caractéristiques Techniques

    Activer/désactiver les alarmes sonores. Activer/désactiver le vibreur lors des alarmes. Info sur l’application. Quitter l’application. Gérer les paramètres. 9. CARACTÉRISTIQUES TECHNIQUES Moniteur : réf : 538102 (WelcomeEye Connect) réf : 538101 (WelcomeEye Touch) - 2 fi ls - Ecran 7’’ tactile - Résolution 800 x 480 - Carte micro SD classe 10 jusqu’à...
  • Page 27: Accessoires

    * Réferez vous à la notice complète WelcomeEye Comfort/Compact disponible sur le site www.philips.com pour plus d’informations. ** Réferez vous à la notice complète WelcomeEye Connect/Touch disponible sur le site www.philips.com pour plus d’informations. WelcomeEye Connect / Touch / 09/17...
  • Page 28: Faq

    11. FAQ Panne Cause Solution • Le moniteur ne • Le moniteur n’est • Vérifier que l’alimentation est s’allume pas pas alimenté correctement branchée et sous tension • Vérifier la polarité au niveau du moniteur ou à la sortie de l’alimentation •...
  • Page 29 • Image trop lumineuse • Position de la • Ne pas exposer l’objectif de la caméra caméra directement au soleil ou sur une surface réfléchissante. • Vérifier les réglages du moniteur (page 12) • Volume de la platine • Réglage •...
  • Page 30 • La carte micro SD • Dossiers non créés • A sa 1° insertion, il est obligatoire n’est pas prise en de faire un formatage par le compte «Message SD moniteur (page 13) card error» • Qualité de la carte •...
  • Page 31: Assistance Technique - Garantie

    Le ticket de caisse ou la facture fait preuve de la date d’achat. En cas de besoin, les contacts et les horaires d’ouverture de nos centres d’assistance technique sont disponible sur le site www.philips.com. WelcomeEye Connect / Touch / 09/17...
  • Page 32: Mesures De Sécurité

    Important : veuillez conserver précieusement cette carte de garantie, ainsi que votre preuve d’achat. Philips et l’emblème bouclier Philips sont des marques déposées de Koninklijke Philips N.V. et sont utilisées sous licence. Ce produit a été fabriqué par et est vendu sous la responsabilité...
  • Page 33: Avertissement Fcc/Ce

    - Lors de l’installation de ce produit, vérifiez bien que les câbles d’alimentation ne risquent pas d’être endommagés. - Ne remplacez jamais les câbles électriques endommagés vous-même ! Dans ce cas, enlevez-les et faites appel à une personne expérimentée. - La prise de courant doit se trouver à proximité de l’appareil et doit être aisément accessible.
  • Page 34 TABLE OF CONTENTS SAFETY INSTRUCTIONS ..............p.2 CONTENT OF THE KIT ..............p.2 GENERAL INFORMATION ...............p.3 NOMENCLATURE ................p.3 PRODUCT INSTALLATION ...............p.5 1. Wiring 2. Confi guring the intercom 3. Installing the main or additional monitor 4. Installing the main or additional intercom panel 5.
  • Page 35: Safety Instructions

    1. SAFETY INSTRUCTIONS Important! • Please read the user manual carefully before installing or using this product. • If you are installing this product for a third party, please remember to leave the manual or a copy of it with the end user. Warning: •...
  • Page 36: Nomenclature

    3. GENERAL This videophone consists of an indoor answering unit with a touch screen and an outdoor panel with an intercom and camera, allowing you to see and communicate with the visitor who has pressed the bell. It is easy to install as only two wires are needed for all functions: bell, video image, intercom and strike plate and automatic opener controls.
  • Page 37 Intercom panel: White LED (night vision) Twilight sensor Microphone Camera lens Loudspeaker Name holder lighting Call button, name holder and RFID scan area DES 9900 VDP Tamper-resistant retaining screw 1 2 3 4 Programming switch RFID reset button Loudspeaker volume DES 9900 VDP settings DES 9900 VDP...
  • Page 38: Product Installation

    5. PRODUCT INSTALLATION Important notes and advice: - To make the most of your intercom panel, we recommend configuring it (RFID, for 1 or 2 families, 1 or 2 intercoms, loudspeaker volume) before final installation. To do this, a table connection may be necessary to check that the settings are correct.
  • Page 39: Confi Guring The Intercom

    2. Configuring the intercom (see fig. 1, fig. 2 or fig. 3) a. Configuring the intercom number: Place switch 2 on the left on intercom no. 1 and on the right on intercom no. 2. b. Configuring the number of families: Place switch 1 on the left to be in one-family mode and on the right to be in two-family mode.
  • Page 40: Installing The Main Or Additional Monitor

    3. Installing the main or additional monitor 1m60 DES 9900 VDP Wi 2.4GHz 550mA CFI Extel ZI de Fétan, 01600 Trévoux FRANCE DES 9900 VDP 1 - Position the wall bracket so that the screen of the monitor is approximately 1.60m above the ground.
  • Page 41: Installing The Main Or Additional Intercom Panel

    4. Installing the main or additional intercom panel Warning: The product must not be connected to the power supply before wiring is complete. 1m60 DES 9900 VDP 1 2 3 4 DES 9900 VDP CFI Extel ZI de Fétan, 01600 Trévoux FRANCE 110mA RFID 125kHz...
  • Page 42: Installing A Camera (Optional)

    9 – Refi t the front cover of the intercom and tighten the tamper-resistant retaining screw. 10 - Connect the 230V AC power supply to the modular adaptor, for an installation compliant with applicable standards (NFC 15-100 in France). - Verify the smooth functioning (video call, RFID, etc.). - When there is a second intercom panel, don’t forget to confi gure the monitor(s).
  • Page 43: Monitoring Function And Response To A Call

    : indicates that the memory is full. The oldest photos/videos are replaced with the new recordings. A. Monitoring function and response to a call 1: To switch to the view of the second intercom panel or camera, or return to the main menu.
  • Page 44 1. Visit memory function a: Photo record of a visitor. b: Video recording of a visitor (there must be a formatted micro SD card in the monitor). c: Deactivation of the visit memory function. 2. Video recording confi guration (valid if video mode has been selected) Choose the video recording time (10, 20 or 30 sec) during a missed call or in monitoring mode (note:...
  • Page 45 6: Confi guration of the WelcomeEye system’s options a: Activation of a second intercom panel (choose On if a second intercom panel is used). b: Activation of the camera option (choose On if a camera is used). c: Confi guration of the monitor(s). When the system has several monitors, you must confi gure one Master monitor and Slave monitors.
  • Page 46: Photo Album

    10: Time and date settings a: time and date settings b: date (applies to the main menu only) and time format settings. Slide the image to access this menu. 11: Reset menu a: Micro SD card resetting and formatting. May be necessary when using an micro SD card for the fi rst time.
  • Page 47 7. USER MANUAL Response to a call: - Pressing the intercom panel button triggers an audible signal and the monitor turns on. You have up to 20 seconds to respond to the call. Once the visitor has been identifi ed, press the key to begin talking.
  • Page 48: Smartphone Application

    - Lightly touch the screen to exit the standby mode. 8. SMARTPHONE APPLICATION Connect a monitor to the Wi-Fi network 1. Download the Philips WelcomeEye application onto your smartphone. From the Apple store or Play store 2. From the monitor, go to...
  • Page 49 5. Android : Click on new device and then next 6. The UID of your monitor should appear. Click on it. Choose the box to which you wish to connect your monitor, enter its password and click on next. GB16 WelcomeEye Connect / Touch / 09/17...
  • Page 50 5 Bis. IOS : Click on new device and then next. Exit the application and go to the Wi-Fi settings of the smartphone. Log in to the Wi-Fi starting with ‘UIDcg…..’. Return to the application and click on next. Enter the name of your network and its password, then click on next.
  • Page 51 Your videophone is now connected to the Wi-Fi network and your smartphone can receive calls. Add a smartphone to a connected videophone 1. Download the Philips WelcomeEye application onto your smartphone from the Apple App Store or Google Play Store Warning: deactivate the smart Wi-Fi network mode on the smartphone if it is activated.
  • Page 52 4. The UID of your monitor should appear. Click on it. 5. Enter the name you wish to give your device, the user name, password and number of doors (= channel number) you wish to control. You will be asked for the password every time you wish to open your electric strike plate or gate from the application.
  • Page 53 Managing camera settings: name, password, Wi-Fi network, Number of channels and alarm. Start/stop my real-time viewing. Switch the sound on/off . Record a video. Take a photo. Reduces the quality of the video (1 bar) or only records the sound (0 bar) if band- width is limited.
  • Page 54: Technical Characteristics

    To modify the photos (delete, sort and group) Contains the saved photos. Activate/deactivate audible alarms. Activate/deactivate vibrating mode during alarms. Information on the application. Exit the application. Manage the settings. 9. TECHNICAL CHARACTERISTICS Monitor: ref.: 538102 (WelcomeEye Connect) ref.: 538101 (WelcomeEye Touch) - 2 wires - 7”...
  • Page 55 - Viewing angle H130°, V90° - Night vision (white LEDs) - Strike plate control 12V/1.1A/ 1,5 s. - Gate control: breaking capacity 12V/2A - RFID (125kHz) - IP44 - Operating temperature: -20°C / +50°C - Dimensions: 168(h) x 82(l) x 38(d) mm WelcomeEye application (for WelcomeEye Connect only): - Android v4.4 or above - iOS 7 or above...
  • Page 56: Accessories

    Refer complete WelcomeEye Comfort/Compact instructions available www.philips.com website for more information. ** Refer to the complete WelcomeEye Connect/Touch instructions available on the www.philips.com website for more information. 11. FAQ Failure Cause Solution • The monitor does not • The monitor is not •...
  • Page 57 • The intercom panel • Switch • Verify that the intercom panel is not is on but the monitor configuration of programmed in dual-family mode. does not ring the intercom panel Reminder: single-family =switch 2 set to ON, dual-family = switch 2 set to OFF.
  • Page 58 • The Dual-family • Configuration • Verify that the intercom panel is not mode is not working programmed in dual-family mode. Reminder: single-family =switch 2 set to ON, dual-family =switch 2 set to OFF. Don’t forget to turn the power off for five seconds to activate the new settings (page 6) •...
  • Page 59 • No video recording • Absence of micro • Videos can only be recorded when SD card there is a micro SD card in the monitor • Card format • Type of micro SD card or SDHC mic, unsuitable no SDXC mic •...
  • Page 60: Technical Assistance - Warranty

    Important : Please keep this warranty card with your proof of purchase. Philips and Philips’ shield emblem are registered trademarks of Koninklijke Philips N.V. and are used under licence. This product has been manufactured by and is sold under the responsibility of CFI Extel SAS, and CFI Extel SAS is the sole guarantor of this product.
  • Page 61: Fcc/Ce Warning

    maintain this status and get the most out of the product, users must adhere to the safety instructions and warnings contained in this manual. : This symbol indicates that there is a risk of electric shock or short-circuit. - You should only use this product with a voltage between: 100-240 Volts and 50-60 hertz. Never attempt to use this device with a different voltage.
  • Page 62 INHALT SICHERHEITSANWEISUNGEN ............S. 2 INHALT DES SETS ................S. 2 ALLGEMEINES ...................S. 3 NOMENKLATUR ................S. 3 INSTALLATION DES PRODUKTS ..........S. 5 1. Verkabelung 2. Parametrierung der Sprechanlage 3. Installation des Haupt- oder Zusatzmonitors 4. Installation der Haupt- oder Nebentürsprechanlage 5. Installation einer Kamera (optional) OBERFLÄCHE DES MONITORS ............S.
  • Page 63: Sicherheitsanweisungen

    1. SICHERHEITSANWEISUNGEN Wichtig! • Bitte lesen Sie diese Bedienungsanleitung vor Installation oder Verwendung des Geräts aufmerksam durch. • Wenn dieses Gerät für Dritte installieren, muss Endnutzer diese Bedienungsanleitung oder eine Kopie davon überlassen werden. Warnhinweis: • Die unterschiedlichen Elemente dürfen ausschließlich durch einen Techniker mit entsprechender Zulassung demontiert werden.
  • Page 64: Allgemeines

    3. ALLGEMEINES Diese Video-Türsprechanlage besteht aus einer Antwortstation für den Innenraum mit taktilem Bildschirm und einer Außenanlage mit Gegensprechanlage und Kamera. Sie ermöglicht es Ihnen, den Besucher an der Tür nach dem Läuten zu sehen und mit ihm zu sprechen. Sie lässt sich leicht installieren, da zwei Kabel für das Ausführen sämtlicher Funktionen nötig sind: Klingel, Video, Gegensprechanlage, Steuerung von Türöff ner und Automatik.
  • Page 65 Türsprechanlage: Weiße LED (Nachtsicht) Dämmerungssensor Mikrofon Kameraobjektiv Lautsprecher Beleuchtung des Namensfelds Ruftaste, Namensfeld und RFID Sensor DES 9900 VDP Schraube zum Diebstahlschutz 1 2 3 4 Programmierschalter Rückstelltaste für RFID Lautstärkeregler für DES 9900 VDP den Lautsprecher DES 9900 VDP 1 2 3 4 1 2 3 4 DES 9900 VDP...
  • Page 66: Installation Des Produkts

    5. INSTALLATION DES PRODUKTS Wichtige Empfehlungen und Hinweise: - Damit Sie Ihre Türsprechanlage optimal nutzen können, empfehlen wir Ihnen, sie vor der endgültigen Installation einzustellen (RFID, Familienmodus 1 oder 2, 1 oder 2 Außenanlagen, Lautsprecherlautstärke). Hierbei kann eine provisorische Testinstallation erforderlich sein, um zu prüfen, ob die Einstellungen korrekt vorgenommen worden sind.
  • Page 67: Parametrierung Der Sprechanlage

    - Die Öffnen-Funktion ist nur dann verfügbar, wenn auch das Videobild der Türsprechanlage verfügbar ist. 2. Parametrierung der Sprechanlage (siehe Abb. 1, Abb. 2 oder Abb. 3) a. Einstellung der Nummer der Sprechanlage: Schalter 2 auf Sprechanlage Nr. 1 nach links stellen und auf Sprechanlage Nr. 2 nach rechts stellen.
  • Page 68: Installation Des Haupt- Oder Zusatzmonitors

    5) Gebrauch der Tags: Zum Öff nen Ihres elektrischen Türöff ners führen Sie Ihren zuvor programmierten Benutzer- Tag (grau) schnell an dem RFID-Sensor entlang. Ein kurzer Piepton zeigt das Öff nen des elektrischen Türöff ners an. Zur Betätigung Ihres Torantriebs, halten Sie den Tag 3 Sekunden vor den RFID-Sensor. Zwei kurze Pieptöne zeigen das Öff nen des Tors an.
  • Page 69: Installation Der Haupt- Oder Nebentürsprechanlage

    8 – Wenn die gesamte Verkabelung abgeschlossen ist und je nach gewählter Konfi guration kann ein Einstellen der Schnittstelle erforderlich sein. Achtung: zu diesem Zeitpunkt nicht an die 230V AC Stromversorgung anschließen. 4. Installation der Haupt- oder Nebentürsprechanlage Achtung: Das Gerät darf nicht vor Ende der Verkabelung an die Stromversorgung angeschlossen werden.
  • Page 70: Installation Einer Kamera (Optional)

    sind für Mauern aus Vollmaterial geeignet). 7 - Schließen Sie die beiden vom Monitor kommenden Kabel und gegebenenfalls den elektrischen Türöff ner und das Tor an (siehe Abschnitt 1 Verkabelung). Die Schalter auf der Rückseite der Türsprechanlage einstellen (siehe Abschnitt 2 Einstellung der Sprechanlage).
  • Page 71: Monitoring-Funktion Und Anrufannahme

    C. Einstellungen D. Fotoalbum E. Videoalbum : zeigt an, dass die Funktion automatischer Anrufbeantworter aktiviert ist. : zeigt die Aktivierung des lautlosen Modus an : zeigt an, dass der Speicher voll ist. Die ältesten Fotos/Videos werden nun durch die neuen Aufzeichnungen ersetzt. A.
  • Page 72 1. Bewegungsspeicher-Funktion a: Besucheraufnahme per Foto. b: Besucheraufnahme per Video (eine in die Kamera eingeführte, formatierte microSD- Karte ist erforderlich). c: Deaktivierung der Bewegungsspeicher-Funktion. 2. Konfi guration Videoaufzeichnungen (verfügbar, wenn der Videomodus ausgewählt wurde). Die Länge der Videoaufzeichnung (10, 20 oder 30 Sek.) bei Anruf in Abwesenheit oder Monitoring wählen (Achtung: Funktion ohne microSD-Karte inaktiv).
  • Page 73 Diese Funktion ermöglicht es, eine Sprachnachricht aufzuzeichnen, die wiedergegeben wird, wenn niemand den Anruf entgegennimmt. Es ist erforderlich, die Videoaufzeichnung bei Anrufen einzustellen, um diese Funktion zu aktivieren. a: Ermöglicht die Aktivierung Deaktivierung der Sprachnachricht-Funktion. b: Ermöglicht den Abruf der gespeicherten Sprachnachricht. c: Ermöglicht Start und Stopp der Aufzeichnung der Sprachnachricht (maximale Dauer der Nachricht: 15 Sek.).
  • Page 74 8: Bildeinstellung Einstellung von Helligkeit, Kontrast und Farbe des Bildes. 9: WLan-Netz-Management (nur bei WelcomeEye Connect) a: Aktivierung (On) oder Deaktivierung (Off ) des WLan-Netzes. b: Konfi guration der Zeit zwischen dem Klingeln des Besuchers und des Versands der Benachrichtigung an das Smartphone. c: Zugang zu Informationen über das Netz und WLan-Netzwerk-Reset.
  • Page 75: Fotoalbum

    D. Fotoalbum Ermöglicht den Zugriff auf das Album mit den aufgezeichneten Fotos. Die Zahl im roten Kreis gibt die Anzahl der nicht wiedergegebenen Fotos an. : Datum und Uhrzeit der Fotoaufnahme. Darauf klicken, um das Foto anzuzeigen. : Ermöglicht das Löschen eines oder mehrere Bilder. Auf den Papierkorb klicken, um die zu löschenden Fotos auszuwählen, dann erneut auf den Papierkorb klicken, um sie zu löschen.
  • Page 76: Smartphone-App

    - Es genügt, den Bildschirm zu berühren, um den Standby-Modus zu verlassen. 8. SMARTPHONE-APP Einen Monitor mit dem WLan-Netz verbinden 1. Laden Sie die App Philips WelcomeEye auf Ihrem Smartphone herunter. Über den Apple store oder den Play store 2. Gehen Sie auf dem Monitor auf...
  • Page 77 3. Gehen Sie auf , folgendes Menü erscheint: Hinweis: Falls das Symbol Falls das Symbol nicht in der zweiten Zeile erscheint, setzen Sie das WLan per Klick auf zurück und warten Sie bis das Symbol erscheint (ca. 30 Sek.). 4. In der App WelcomeEye klicken Sie auf +, um ein Gerät hinzuzufügen.
  • Page 78 Die UID Ihrer Kamera muss erscheinen. Klicken Sie darauf. Wählen Sie den Router, mit dem Sie Ihren Monitor verbinden möchten, geben Sie das entsprechende Passwort ein und klicken Sie auf „suivant“ (weiter). 5b. IOS : Gerät klicken Sie auf „nouvel appareil“ (neues Gerät) und anschließend auf „suivant“...
  • Page 79 Verlassen Sie die App und öff nen Sie die WLan-Einstellungen des Smartphones. Verbinden Sie sich mit dem WLan, das mit „UIDcg…..“ beginnt. Kehren Sie in die App zurück und klicken Sie auf „suivant“ (weiter). Geben Sie den Namen Ihres Netzwerks und das entsprechende Passwort ein und klicken Sie auf „suivant“...
  • Page 80 Ein Smartphone zu einer verbundenen Video-Türsprechanlage hinzufügen 1. Laden Sie die App Philips WelcomeEye über den Apple store oder den Play store auf Ihr Smartphone herunter Achtung: Entfernen Sie den Modus intelligentes WLan-Netzwerk vom Smartphone, wenn dieser aktiviert ist. 2. In der App WelcomeEye klicken Sie auf +, um ein Gerät hinzuzufügen.
  • Page 81 4. Die UID Ihrer Kamera muss erscheinen. Klicken Sie darauf. 5. Geben Sie den Namen, den Sie Ihrem Gerät geben möchten, den Benutzernamen, das Passwort und die Anzahl der Öff ner (= Kanalnummer), die Sie bedienen möchten, ein. Das Passwort wird jedes Mal abgefragt, wenn Sie über die App Ihren elektrischer Türöff ner betätigen oder das Tor öff nen wollen.
  • Page 82 Ermöglicht die Verwaltung der Kameraeinstellungen: Name, Passwort, WLan-Netz, Anzahl der Kanäle und Alarm. Starten/stoppen der Live-Anzeige. Den Ton aktivieren/deaktivieren. Ein Video aufnehmen. Ein Foto aufnehmen. Ermöglicht die Reduktion der Qualität des Videos (ein Balken) oder die bloße Übermittlung des Tons (kein Balken) bei schwacher Bandbreite. Für einen optima- len Betrieb ist eine Bandbreite von mindestens 40 kB/s erforderlich.
  • Page 83: Technische Daten

    Ermöglicht die Bearbeitung der Fotos (löschen, sortieren und gruppieren). Gruppiert die aufgezeichneten Fotos. Akustische Warnsignale aktivieren/deaktivieren. Vibration bei Alarmen aktivieren/deaktivieren. Info zur App. App verlassen. Parameter verwalten. 9. TECHNISCHE DATEN Monitor: Ref.: 538102 (WelcomeEye Connect) Ref.: 538101 (WelcomeEye Touch) - 2 Kabel - 7“-Touchscreen - Aufl ösung 800 x 480 - Klasse 10 microSD-Karte bis 32 GB (nicht im Lieferumfang)
  • Page 84 - Blickwinkel H130°, V90° - Nachtsicht (weiße LEDs) - Türöffner 12 V/1,1 A/ 1,5 s. - Steuerung Tor: Schaltvermögen 12V/2A - RFID (125 kHz) - IP44 - Betriebstemperatur: -20 °C / +50°C - Abmessungen: 168 (H) x 82 (B) x 38 (T) mm WelcomeEye Anwendung (nur für WelcomeEye Connect): - Android v4.4 oder höher - iOS 7 oder höher...
  • Page 85: Zubehör

    WelcomeEye Power - DES 1000 DPS (Ref.: 531010)** WelcomeEye TAG - DES 1000 ACI (Ref.: 531011)** * Für weitere Informationen siehe vollständige Anleitung von WelcomeEye Comfort/Compact auf der Website www.philips.com. ** Für weitere Informationen siehe vollständige Anleitung von WelcomeEye Connect/Touch auf der Website www.philips.com.
  • Page 86 • Die Türsprechanlage • Schalter-Konfiguration • Prüfen, ob die ist eingeschaltet, der Türsprechanlage Türsprechanlage nicht auf der Monitor klingelt zwei Familien programmiert jedoch nicht. ist. Zur Erinnerung: eine Familie = Schalter 2 auf ON, zwei Familien = Schalter 2 auf OFF. Daran denken, die Stromzufuhr für 5 s zu unterbrechen, damit die neuen...
  • Page 87 • Der Zwei-Familien- • Konfiguration • Prüfen, ob die Modus funktioniert Türsprechanlage nicht auf nicht. zwei Familien programmiert ist. Zur Erinnerung: eine Familie = Schalter 2 auf ON, zwei Familien = Schalter 2 auf OFF. Daran denken, die Stromzufuhr für 5 s zu unterbrechen, damit die neuen Einstellungen...
  • Page 88 • Nach Einführung • Die microSD-Karte hat • MicroSD-Karte entfernen, der microSD-Karte Priorität und gewährt um zum internen Speicher zu ist ein Zugang zu keinen Zugriff auf den gelangen. den Fotos auf dem internen Speicher mehr. • Normaler Betrieb internen Speicher unmöglich.
  • Page 89: Technischer Kundendienst - Garantie

    • Die Steuerung von • Der Türöffner oder das Türöffner erfolgt elektrische Schloss, das Sie nicht über den bedienen möchten, muss Monitor in jedem Fall über einen mechanischen Speicher verfügen. Der Strom am Türöffner darf 1,1 Anicht überschreiten. • Direkt an die Klemmen 7 und 8 auf der Rückseite der Sprechanlage anschließen (es ist keine Polarität zu...
  • Page 90: Sicherheitsmassnahmen

    PHI/1031/ Wichtig : Bitte bewahren Sie diese Garantiekarte und Kaufbeleg. Philips und das Logo mit dem Schild sind eingetragene Warenzeichen von Koninklijke Philips N.V. und werden im Rahmen einer Lizenzvereinbarung benutzt. Dieses Produkt wurde von CFI Extel SAS gefertigt und wird unter der Verantwortlichkeit von CFI Extel SAS vertrieben und CFI Extel SAS ist der einzige Garantiepartner für dieses Produkt.
  • Page 91: Warnung Fcc/Ce

    - Elektrische Geräte dürfen niemals mit feuchten Händen angeschlossen oder getrennt werden. - Vergewissern Sie sich bei der Installation dieses Geräts, dass die Stromkabel nicht beschädigt werden können. - Tauschen Sie beschädigte Stromkabel niemals selbst aus! Ziehen Sie sie in diesem Fall aus der Steckdose und wenden Sie sich an eine Person mit entsprechender Erfahrung.
  • Page 92 INHOUDSOPGAVE VEILIGHEIDSVOORSCHRIFTEN ............p.2 INHOUD VAN DE KIT.................p.2 ALGEMEEN ...................p.3 NOMENCLATUUR ................p.3 INSTALLATIE VAN HET PRODUCT ..........p.5 1. Bedrading 2. Instelling van de straatunit 3. Installatie van het hoofdscherm of extra scherm 4. Installatie van de hoofd- of extra straatunit 5.
  • Page 93: Veiligheidsvoorschriften

    1. VEILIGHEIDSVOORSCHRIFTEN Belangrijk! • Lees de gebruiksaanwijzing zorgvuldig door voordat u dit product installeert of gebruikt. • Indien u dit product installeert voor derden, vergeet dan niet om de handleiding of een kopie hiervan achter te laten voor de eindgebruiker. Waarschuwing: •...
  • Page 94: Algemeen

    3. ALGEMEEN Deze videofoon is samengesteld uit een antwoordset binnen met aanraakscherm en een buitenunit met intercom en camera waarmee u de bezoeker die heeft gebeld kunt zien en ermee kunt praten. Het systeem kan eenvoudig geïnstalleerd worden omdat er slechts 2 draden nodig zijn voor alle functies (bel, video, intercom, bediening slot en automatische poort).
  • Page 95 Straatunit: Witte LED (nachtzicht) Schemersensor Microfoon Lens van de camera Luidspreker Verlichting naamplaatje Belknop, naamplaatje en RFID-scanzone DES 9900 VDP Antidiefstal- bevestigingsschroef 1 2 3 4 Programmaswitch RFID resetknop Volumeregeling DES 9900 VDP luidspreker DES 9900 VDP 1 2 3 4 1 2 3 4 DES 9900 VDP Connector voor de...
  • Page 96: Installatie Van Het Product

    5. INSTALLATIE VAN HET PRODUCT Advies en belangrijke opmerkingen: - Om optimaal gebruik te maken van uw straatunit raden wij u aan deze in te stellen (RFID, mode 1 of 2 families, 1 of 2 straatunits, volumeregeling van de luidspreker), alvorens het systeem definitief te installeren.
  • Page 97: Instelling Van De Straatunit

    2. Instelling van de straatunit (zie fig. 1, fig. 2 of fig. 3) a. Instelling van het nummer van de straatunit: Schuif switch 2 naar links op straatunit nr. 1 en naar rechts op straatunit nr. 2. b. Instelling van het aantal families: Zet switch 1 naar links voor een familie en naar rechts voor 2 families.
  • Page 98: Installatie Van Het Hoofdscherm Of Extra Scherm

    3. Installatie van het hoofdscherm of extra scherm 1m60 DES 9900 VDP Wi 2.4GHz 550mA CFI Extel ZI de Fétan, 01600 Trévoux FRANCE DES 9900 VDP 1 - Breng de wandhouder zodanig aan dat het scherm op een hoogte van ongeveer 1,60 m staat.
  • Page 99: Installatie Van De Hoofd-Of Extra Straatunit

    4. Installatie van de hoofd-of extra straatunit Let op: Het apparaat mag niet op de voeding aangesloten worden voordat de bekabeling voltooid is. 1m60 DES 9900 VDP 1 2 3 4 DES 9900 VDP CFI Extel ZI de Fétan, 01600 Trévoux FRANCE 110mA RFID 125kHz...
  • Page 100: Installatie Van Een Camera (Optie)

    8 – Breng de schroeven aan en plaats dan de twee doppen terug die de bevestigingsschroeven verbergen. Opmerking: schroef vast via de zwarte plaatjes die op de achterkant van de straatunit zijn geplaatst zonder ze te verwijderen. 9 – Breng het frontpaneel van de straatunit aan en draai de antidiefstalschroef weer aan. 10 - Sluit de 230V AC voeding aan op de modulaire adapter op een installatie die voldoet aan de van kracht zijnde regelgeving (voor Frankrijk NFC 15-100).
  • Page 101: Functie Bewaking En Oproep Beantwoorden

    : geeft aan dat de functie automatisch antwoordapparaat ingeschakeld is : geeft aan dat de stille modus is ingeschakeld : geeft aan dat het geheugen vol is. De oudste foto’s/video’s worden in dat geval door nieuwe opnames vervangen. A. Functie bewaking en oproep beantwoorden 1 : Om over te gaan naar het beeld van de tweede straatunit, de camera of terug te keren naar het hoofdmenu.
  • Page 102 1. Functie passagegeheugen a : Foto-opname passage b : Video-opname passage (hiervoor is een op het scherm geformatteerde micro SD-kaart vereist). c : Uitschakeling van de functie passagegeheugen 2. Confi guratie video-opnames (als de videomodus geselecteerd is) Keuze van de opnameduur van de video (10, 20 of 30 sec) wanneer gebeld wordt bij (let op: afwezigheid of voor bewaking de functie werkt niet als er geen micro SD-kaart is).
  • Page 103 Door middel van deze functie kan men een bericht inspreken dat weergegeven wordt als niemand de oproep beantwoordt. Om deze functie in te schakelen, dient men de video- opname tijdens oproepen in te stellen. a : Om de functie gesproken bericht in of uit te schakelen. b : Om het ingesproken bericht weer te geven.
  • Page 104: Fotoalbum

    8 : Instelling van het beeld Instelling van de helderheid, het contrast en de kleur van het beeld. 9 : Beheer van het WIFI-net (uitsluitend voor WelcomeEye Connect) a : Inschakeling (On) of uitschakeling (Off ) van het WIFI-net. b : instelling van de tijd tussen het moment waarop een bezoeker belt en het moment waarop het bericht naar de smartphone verzonden wordt.
  • Page 105: Videoalbum

    : datum en tijd van de foto-opname. Klik erop om de foto te bekijken. : Om een of meer foto’s te wissen. Klik op de prullenmand en selecteer vervolgens de te wissen foto’s en klik daarna nogmaals op de prullenmand om ze te wissen. E.
  • Page 106: Smartphone-Applicatie

    - Men hoeft het scherm slechts aan te raken om de slaapstand te verlaten. 8. SMARTPHONE-APPLICATIE Een scherm aansluiten op het Wifi -netwerk 1. Download de Philips WelcomeEye applicatie op uw smartphone. Vanuit de Apple store of Play store 2. Ga op het scherm naar...
  • Page 107 4. Klik in de WelcomeEye applicatie op + om een apparaat toe te voegen. 5. Android : Klik op nieuw apparaat en daarna op volgende De UID van uw scherm moet verschijnen. Klik erop. NL16 WelcomeEye Connect / Touch / 09/17...
  • Page 108 Kies de box waar u uw scherm mee wilt verbinden, voer het wachtwoord daarvan in en klik op volgende. 5 Bis. IOS : Op nieuw apparaat en daarna op volgende. Verlaat de applicatie en ga naar de wifi -instellingen van de smartphone.
  • Page 109 Uw visiofoon is voortaan verbonden met het Wifi -netwerk en uw smartphone kan de oproepen ontvangen. Een smartphone toevoegen aan een verbonden visiofoon 1. Download de Philips WelcomeEye applicatie op uw smartphone vanuit de Apple store of Play store Let op: schakel de modus intelligent Wifi -netwerk van de smartphone uit als dat ingeschakeld is.
  • Page 110 2. Klik in de WelcomeEye applicatie op + om een apparaat toe te voegen. 3. Klik op met het netwerk verbonden apparaat en vervolgens op appar.conne. Controleer of de smartphone verbonden is met hetzelfde Wifi -netwerk als het scherm. 4. De UID van uw scherm moet verschijnen. Klik erop. NL19 WelcomeEye Connect / Touch / 09/17...
  • Page 111 5. Voer de naam in die u aan uw apparaat wenst te geven, de gebruikersnaam, het wachtwoord en het aantal openingen (= kanaalnummer) dat u wenst te bedienen. Het wachtwoord wordt gevraagd telkens wanneer u uw elektrische slotplaat of poort via de applicatie wenst te openen.
  • Page 112 Om de kwaliteit van de videoweergave te verlagen (1 staaf) of om alleen geluid (0 staven) door te laten in geval van zwakke bandbreedte. Voor een optimale werking dient men minstens over een snelheid van 40 kb/s te beschikken. Weergave vol scherm Elektrische slotplaat of poort openen (standaard wachtwoord: 1 2 3 4).
  • Page 113: Technische Eigenschappen

    Geluidsalarmen inschakelen/uitschakelen. Trilstand inschakelen/uitschakelen bij alarmen. Info over de applicatie. Applicatie verlaten. Instellingen beheren. 9. TECHNISCHE EIGENSCHAPPEN Scherm: ref: 538102 (WelcomeEye Connect) ref: 538101 (WelcomeEye Touch) - 2 draden - Aanraakscherm 7” - Resolutie 800 x 480 - Micro SD-kaart klasse 10 tot 32Gb (niet meegeleverd) - Wifi 2.4 GHz IEEE 8111 b/g/n (uitsluitend WelcomeEye Connect) - Uitgezonden draadloos vermogen: Maximaal 18 dB - Stroomverbruik: 550mA (Connect), 470mA (Touch)
  • Page 114: Toebehoren

    WelcomeEye TAG - DES 1000 ACI (ref.: 531011)** * Raadpleeg voor meer informatie de complete handleiding van WelcomeEye Comfort/Compact, beschikbaar op de site www.philips.com. ** Raadpleeg voor meer informatie de complete handleiding van WelcomeEye Connect/Touch, beschikbaar op de site www.philips.com.
  • Page 115: Faq

    11. FAQ Storing Oorzaak Oplossing • Het scherm wordt • Het scherm krijgt • Controleer of de voeding goed niet ingeschakeld geen voeding is aangesloten en de spanning ingeschakeld is • Controleer de polariteit van de schermaansluiting of bij de uitgang van de voeding •...
  • Page 116 • Beeld is te licht. • Positie van de • Richt de camera niet direct naar camera de zon of een weerspiegelend oppervlak. • Controleer de instellingen van het scherm (pagina 12) • Het geluidsvolume • Instellingen • Controleer de instellingen op de van de straatunit is achterzijde van de straatunit te zwak...
  • Page 117 • De micro SD-kaart • Geen mappen • Bij de 1ste aanbrenging moet de wordt niet herkend, aangemaakt kaart verplicht geformatteerd bericht "SD card worden door het scherm (pagina error" • Kwaliteit van de • Gebruik minstens een kaart van micro SD-kaart de klasse 10 •...
  • Page 118: Technische Bijstand - Garantie

    De kassabon of de factuur is het bewijs van de datum van aankoop. De contactadressen en openingstijden van onze technische centra kunnen zo nodig geraadpleegd worden op de website www.philips.com. NL27 WelcomeEye Connect / Touch / 09/17...
  • Page 119: Veiligheidsmaatregelen

    PHI/1031/ Belangrijk : Bewaar deze garantiekaart en het aankoopbewijs. Philips en het schildembleem van Philips zijn gedeponeerde merken van Koninklijke Philips N.V. en worden onder licentie gebruikt. Dit product werd gefabriceerd door en verkocht onder de aansprakelijkheid van CFI Extel SAS, die als enige garant staat voor dit product.
  • Page 120: Fcc/Eg-Waarschuwing

    - Neem contact op met een deskundig persoon als u twijfelt over de werking of de veiligheid van de apparaten. - Elektrische apparaten nooit met natte handen aan- en uitschakelen of loskoppelen. - Bij het installeren van dit product moet u controleren of de voedingskabels van het apparaat niet beschadigd zijn.
  • Page 121 SPIS TREŚCI ZALECENIA BEZPIECZEŃSTWA ..........str. 2 ZAWARTOŚĆ ZESTAWU............... str. 2 INFORMACJE OGÓLNE ..............str. 3 TERMINOLOGIA ................str. 3 MONTAŻ URZĄDZENIA ..............str. 5 1. Okablowanie 2. Ustawienia panelu 3. Montaż monitora głównego lub dodatkowego 4. Montaż głównego lub dodatkowego panelu zewnętrznego 5.
  • Page 122: Zalecenia Bezpieczeństwa

    1. ZALECENIA BEZPIECZEŃSTWA Ważna uwaga! • Przed montażem lub użyciem produktu należy dokładnie przeczytać niniejszą instrukcję obsługi. • Jeśli produkt instalowany jest na rzecz osób trzecich, należy pamiętać o pozostawieniu użytkownikowi końcowemu niniejszej instrukcji obsługi lub jej kopii. Uwaga: • Demontaż poszczególnych elementów powinien być wykonany wyłącznie przez wykwalifikowanego technika.
  • Page 123: Informacje Ogólne

    3. INFORMACJE OGÓLNE Wideodomofon składa się z wewnętrznego odbiornika z ekranem dotykowym oraz panelu zewnętrznego z interkomem i kamerą, umożliwiającego komunikację audiowizualną z osobą odwiedzającą. Jest urządzeniem łatwym w montażu, ponieważ do korzystania ze wszystkich jego funkcji (dzwonka, rejestracji wideo, interkomu, sterowania zaczepem i sterowania automatyką) niezbędna jest jedynie instalacja 2-przewodowa.
  • Page 124 Panel zewnętrzny: Białe światło LED Czujnik (widoczność w nocy) zmierzchu Mikrofon Obiektyw kamery Głośnik Podświetlenie wizytówki Przycisk wywołania, wizy- tówka i strefa odczytu RFID DES 9900 VDP Antywłamaniowa śruba mocująca 1 2 3 4 Przełącznik programowania Przycisk resetu RFID Regulacja siły dźwięku DES 9900 VDP głośnika DES 9900 VDP...
  • Page 125: Montaż Urządzenia

    5. MONTAŻ URZĄDZENIA Ważne rady i uwagi: - Aby korzystać w pełni z funkcjonalności panelu zewnętrznego, zaleca się jego ustawienie przed ostatecznym montażem (RFID, tryb 1 lub 2 rodziny, 1 lub 2 panele, ustawienie siły dźwięku głośnika). Może zajść konieczność podłączenia urządzenia do tablicy w celu sprawdzenia poprawności ustawień.
  • Page 126 - Funkcja otwierania jest możliwa tylko wtedy, gdy wyświetla się obraz wideo z odpowiedniego panelu zewnętrznego. 2. Ustawienia parametrów panelu (zob. rys. 1, rys. 2 lub rys. 3) a. Ustawienia numeru panelu głównego: Umieścić przełącznik 2 po lewej stronie na panelu nr 1 i po prawej stronie na panelu nr 2. b.
  • Page 127: Montaż Monitora Głównego Lub Dodatkowego

    Aby otworzyć bramę, uruchamiając jej napęd, należy przyłożyć i przytrzymać brelok w strefi e odczytu RFID przez 3 sekundy. Dwa krótkie sygnały dźwiękowe potwierdzają otwarcie bramy. 3. Montaż monitora głównego lub dodatkowego 1m60 DES 9900 VDP Wi 2.4GHz 550mA CFI Extel ZI de Fétan, 01600 Trévoux FRANCE DES 9900 VDP...
  • Page 128: Montaż Głównego Lub Dodatkowego Panelu Zewnętrznego

    Uwaga: na tym etapie prac nie podłączać zasilania 230 V AC. 4. Montaż głównego lub dodatkowego panelu zewnętrznego Uwaga: Nie należy podłączać urządzenia do zasilania przed zakończeniem montażu okablowania. 1m60 DES 9900 VDP 1 2 3 4 DES 9900 VDP CFI Extel ZI de Fétan, 01600 Trévoux FRANCE...
  • Page 129: Montaż Kamery (Opcjonalnie)

    zewnętrznego (zob. część 2: Ustawienia panelu). 8 – Zamontować śruby i zamontować zaślepki maskujące śruby mocujące. Informacja: przykręcić przez czarne osłony umieszczone z tyłu panelu zewnętrznego bez zdejmowania ich. 9 – Umieścić front z przodu panelu i przykręcić antywłamaniową śrubę mocującą. 10 –...
  • Page 130: Funkcja Monitoringu I Odbieranie Domofonu

    : informuje o tym, że włączono funkcję automatycznej sekretarki : oznacza, cze włączono tryb cichy : informuje o tym, że pamięć jest pełna. Najstarsze zdjęcia/fi lmy zostaną zastąpione nowymi nagraniami. A. Funkcja monitoringu i odbieranie domofonu 1: Umożliwia wyświetlenie widoku drugiego panelu zewnętrznego, kamery lub powrót do menu głównego.
  • Page 131 1. Funkcja rejestracji gości a: Rejestracja gości — zapis do zdjęcia. b: Rejestracja gości — zapis do fi lmu (niezbędne jest włożenie do monitora sformatowanej karty microSD). c: Wyłączanie funkcji rejestracji gości. 2. Konfi guracja nagrań wideo (aktywna, jeśli wybrano tryb fi lmowy) Wybrać...
  • Page 132 nie odbierze połączenia przychodzącego. Aby włączyć tę funkcję, należy skonfi gurować zapis wideo dla połączeń. a: Umożliwia włączenie lub wyłączenie funkcji wiadomości głosowej. b: Umożliwia odsłuchanie zapisanej wiadomości głosowej. c: Umożliwia rozpoczęcie, a następnie zatrzymanie zapisu wiadomości głosowej (maksymalna długość wiadomości: 15 sekund). 6: Konfi guracja opcji systemu WelcomeEye a: Włączanie drugiego panelu zewnętrznego (wybrać...
  • Page 133: Galeria Zdjęć

    9: Zarządzanie siecią Wi-Fi (wyłącznie w przypadku WelcomeEye Connect) a: Włączanie (On) lub wyłączanie (Off ) sieci Wi-Fi. b: Ustawianie opóźnienia od momentu uruchomienia dzwonka przez osobę odwiedzającą a wysłaniem powiadomienia na smartfon. c: Dostęp do informacji dotyczących sieci oraz resetowanie sieci Wi-Fi. Uwaga: Korzystanie z sieci Wi-Fi oraz aplikacji na smartfony opisano szczegółowo w Rozdziale 8: Aplikacja.
  • Page 134: Galeria Fi Lmów

    : data i godzina wykonania zdjęcia. Kliknąć element, aby wyświetlić zdjęcie. : umożliwia usunięcie jednego zdjęcia lub większej liczby zdjęć. Kliknąć kosz, wybrać zdjęcia do usunięcia, następnie ponownie kliknąć kosz, aby usunąć wybrane zdjęcia. E. Galeria fi lmów Menu dostępne wyłącznie, jeśli do urządzenia włożono kartę microSD. Umożliwia uzyskanie dostępu do zapisanych fi lmów.
  • Page 135: Aplikacja Na Smartfony

    - Wystarczy dotknąć ekran, aby wyjść z trybu czuwania. 8. APLIKACJA NA SMARTFONY Podłączanie monitora do sieci Wi-Fi 1. Pobrać aplikację Philips WelcomeEye na smartfona. Skorzystać ze sklepu Apple lub Play 2. Z poziomu monitora wybrać , następnie i włączyć Wi-Fi: 3.
  • Page 136 4. W aplikacji WelcomeEye kliknąć znak +, aby dodać urządzenie. 5. Android : Kliknąć „nowe urządzenie”, a następnie „dalej” Powinien wyświetlić się identyfi kator UID monitora. Kliknąć ten element. PL16 WelcomeEye Connect / Touch / 09/17...
  • Page 137 Wybrać router, z którym ma łączyć się monitor, wpisać hasło i kliknąć „dalej”. 5’. iOS : Kliknąć „nowe urządzenie”, a następnie „dalej”. Wyjść z aplikacji i przejść do ustawień Wi-Fi w smartfonie. Podłączyć się do sieci Wi-Fi, której nazwa rozpoczyna się literami „UIDcg”.
  • Page 138 W tym momencie następuje połączenie wideodomofonu z siecią Wi-Fi i użytkownik może odbierać połączenia przychodzące, korzystając ze smartfona. Dodawanie smartfona do wideodomofonu połączonego z siecią 1. Pobrać aplikację Philips WelcomeEye na smartfona za pośrednictwem sklepu Apple lub Play Uwaga: wyłączyć ewentualny tryb inteligentnej sieci Wi-Fi w smartfonie.
  • Page 139 2. W aplikacji WelcomeEye kliknąć znak +, aby dodać urządzenie. 3. Kliknąć urządzenie połączone z siecią, a następnie „appar.conne.” [urządzenie połączone]. Upewnić się, że smartfon i monitor podłączono do tej samej sieci Wi-Fi. 4. Powinien wyświetlić się identyfi kator UID monitora. Kliknąć ten element.
  • Page 140 5. Wpisać nową nazwę dla urządzenia, nazwę użytkownika, hasło i liczbę elementów otwieranych (= liczbę kanałów), którymi użytkownik chce zarządzać. Za każdym razem, gdy użytkownik będzie chciał otworzyć elektrozaczep lub bramę z poziomu aplikacji, pojawi się pytanie o hasło. Uwaga: jeśli użytkownik określi 1 jako liczbę...
  • Page 141 Umożliwia zmniejszenie jakości nagrania wideo (1 kreska) lub ograniczenie reje- stracji jedynie do dźwięku (0 kresek) w razie niskiej przepustowości łącza. Opty- malne działanie uzyskuje się przy prędkości co najmniej 40 kb/s. Tryb pełnoekranowy Otwieranie elektrozaczepu lub bramy (hasło domyślne: 1 2 3 4). Uwaga: liczbę...
  • Page 142: Dane Techniczne

    Zarządzanie ustawieniami. Włączanie/wyłączanie alarmów dźwiękowych. Włączanie/wyłączanie wibracji podczas alarmów. Informacje na temat aplikacji. Zamknięcie aplikacji. 9. DANE TECHNICZNE Monitor: nr kat.: 538102 (WelcomeEye Connect) nr kat.: 538101 (WelcomeEye Touch) - 2 przewody - Ekran dotykowy 7” - Rozdzielczość 800 x 480 - Karta pamięci microSD klasy 10 o pojemności do 32 GB (poza zestawem) - Wi-Fi 2,4 GHz IEEE 8111 b/g/n (wyłącznie WelcomeEye Connect) - Moc emitowanego sygnału radiowego: do 18 dB...
  • Page 143: Dodatki

    WelcomeEye Power - DES 1000 DPS (nr kat.: 531010)** WelcomeEye TAG - DES 1000 ACI (nr kat.: 531011)** * Więcej informacji można znaleźć w kompletnej instrukcji WelcomeEye Comfort/Compact dostępnej na stronie www.philips.com. ** Więcej informacji można znaleźć w kompletnej instrukcji WelcomeEye Connect/Touch dostępnej na stronie www.philips.com.
  • Page 144: Najczęściej Zadawane Pytania

    11. Najczęściej zadawane pytania Usterka Przyczyna Rozwiązanie • Nie włącza się • Brak zasilania • Sprawdzić, czy prawidłowo monitor monitora podłączono zasilanie oraz czy instalacja jest pod napięciem. • Sprawdzić polaryzację na poziomie monitora oraz na wyjściu zasilania. • Złe podłączenie •...
  • Page 145 • Zbyt jasny obraz • Położenie kamery • Nie ustawiać obiektywu kamery bezpośrednio w kierunku słońca ani na powierzchniach odbijających światło. • Sprawdzić ustawienia monitora (strona 12). • Zbyt niska głośność • Ustawienia • Ponownie dokonać regulacji panelu zewnętrznego przełączników znajdujących się z tyłu panelu zewnętrznego.
  • Page 146 • Dodatkowy panel • Konfiguracja • Sprawdzić położenie przełącznika zewnętrzny nie działa 1 paneli zewnętrznych (strona 6); musi się różnić. Należy odłączyć zasilanie na 5 sekund, aby zapisać nowe ustawienia. • Konfiguracja menu • Sprawdzić, czy monitory są monitorów prawidłowe (jeden ORAZ drugi). •...
  • Page 147: Pomoc Techniczna - Gwarancja

    • Zła jakość obrazu lub • Problem z • Konieczna jest prędkość co dźwięku w przypadku przepustowością najmniej 40 kb/s. korzystania ze • Dokonać modyfikacji smartfona* przepustowości z poziomu ustawień aplikacji (zmienić liczbę klatek na sekundę). • Z poziomu aplikacji •...
  • Page 148: Środki Bezpieczeństwa

    Ważny : Proszę zachować tę kartę gwarancyjną i dowód zakupu. Nazwa Philips oraz emblemat tarczy Philips są objętymi licencją znakami towarowymi firmy Koninklijke Philips N.V. Ten produkt został wytworzony i jest sprzedawany na odpowiedzialność firmy CFI Extel SAS, która jest jedynym gwarantem w odniesieniu do tego produktu.
  • Page 149: Ostrzeżenia Fcc/Ce

    : Ten symbol wskazuje zagrożenie związane z możliwością porażenia prądem lub powstania zwarcia elektrycznego. - Produkt można zasilać wyłącznie napięciem o wartości: 100–240 V i częstotliwości 50– 60 Hz. Nie zasilać urządzenia napięciem o innej wartości. - Wszystkie podłączenia elektryczne systemu powinny być wykonane zgodnie z zaleceniami instrukcji użytkowania.
  • Page 150: Deklaracja Zgodności

    • Zwiększenie odległości między urządzeniem a odbiornikiem • Podłączenie urządzenia do gniazda w obwodzie innym niż ten, do którego podłączony jest odbiornik 15. DEKLARACJA ZGODNOŚCI Producent CFI-EXTEL zapewnia, iż urządzenie radioelektryczne WelcomeEye jest zgodne z dyrektywą 2014/53/UE. Pełny tekst deklaracji zgodności UE jest udostępniony pod adresem www.cfi -extel.com.
  • Page 151 INDICE ISTRUZIONI DI SICUREZZA ............p.2 CONTENUTO DEL KIT ...............p.2 INFORMAZIONI GENERALI.............p.3 NOMENCLATURA................p.3 INSTALLAZIONE DEL PRODOTTO ..........p.5 1. Cablaggio 2. Impostazione della pulsantiera 3. Installazione del monitor principale o supplementare 4. Installazione della pulsantiera esterna principale o supplementare 5. Installazione di una telecamera (opzionale) INTERFACCIA DEL MONITOR ............p.9 A.
  • Page 152: Istruzioni Di Sicurezza

    1. ISTRUZIONI DI SICUREZZA Importante! • Prima di installare o utilizzare il prodotto, leggere attentamente il manuale d’istruzioni. • Se si installa il prodotto per conto di terzi, ricordarsi di lasciare il manuale o una copia dello stesso all’utente finale. Avvertenza: •...
  • Page 153: Informazioni Generali

    3. INFORMAZIONI GENERALI Il presente videocitofono è composto da un touch screen e da una pulsantiera esterna con citofono e telecamera che consentono di vedere chi ha suonato e comunicare con l’esterno. L’installazione è particolarmente semplice, poiché bastano 2 fi li per assicurare tutte le funzioni (audio, video, citofono e comando di bocchetta e automatismo).
  • Page 154 Pulsantiera esterna: LED bianco (visione notturna) Sensore crepuscolare Microfono Obiettivo della telecamera Altoparlante Illuminazione portaetichette Pulsante di chiamata, por- taetichette e area di lettura RFID DES 9900 VDP Vite di fi ssaggio antifurto 1 2 3 4 Switch di programmazione Pulsante reset RFID Regolazione volume DES 9900 VDP...
  • Page 155: Installazione Del Prodotto

    5. INSTALLAZIONE DEL PRODOTTO Consigli e note importanti: - Per sfruttare a pieno tutte le potenzialità della pulsantiera esterna, prima di installarla nella sua posizione definitiva, si consiglia di impostarne tutti i vari parametri (RFID, modalità 1 o 2 famiglie, 1 o 2 pulsantiere, volume altoparlante). Per controllare che tutte le regolazioni siano state eseguite correttamente, è...
  • Page 156: Impostazione Della Pulsantiera

    - La funzione di apertura è possibile solo se vengono visualizzate le immagini riprese dalla pulsantiera esterna interessata. 2. Impostazione della pulsantiera (v. fig. 1, fig. 2 o fig. 3). a. Impostazione del numero della pulsantiera: Posizionare lo switch 2 a sinistra sulla pulsantiera esterna n°1 e a destra sulla pulsantiera esterna n°2 b.
  • Page 157: Installazione Del Monitor Principale O Supplementare

    Per attivare la motorizzazione di un cancello, tenere il badge per 3 secondi davanti all’area di lettura RFID. Due bip brevi indicano l’apertura del cancello. 3. Installazione del monitor principale o supplementare 1m60 DES 9900 VDP Wi 2.4GHz 550mA CFI Extel ZI de Fétan, 01600 Trévoux FRANCE DES 9900 VDP...
  • Page 158: Installazione Della Pulsantiera Esterna Principale O Supplementare

    Attenzione: in questa fase NON collegare l’apparecchiatura alla rete di alimentazione 230V AC. 4. Installazione della pulsantiera esterna principale o supplementare Attenzione: Non collegare il prodotto alla fonte di alimentazione prima di aver portato a termine il cablaggio. 1m60 DES 9900 VDP 1 2 3 4 DES 9900 VDP CFI Extel...
  • Page 159: Installazione Di Una Telecamera (Opzionale)

    elettrica e il cancello (v. sezione 1. Cablaggio). Posizionare in maniera opportuna gli switch sul retro della pulsantiera esterna (v. sezione 2. Impostazione della pulsantiera). 8 – Inserire le viti e reintrodurre i due tappi che coprono le viti di fi ssaggio. N.B.: avvitare direttamente attraverso i coperchi neri sul retro della pulsantiera esterna senza rimuoverli.
  • Page 160: Funzione Monitoring E Risposta Alle Chiamate

    E. Album video : indica che la funzione segreteria è attiva : indica che è attiva la modalità silenzioso : indica che la memoria è piena. In tal caso le foto e in video più vecchi sono sovrascritti da quelli più recenti. A.
  • Page 161 Toccare per tornare al menu precedente. 1. Funzione registrazione transito a: Registrazione transito tramite foto. b: Registrazione transito tramite video (nel monitor deve essere presente una scheda Micro SD formattata). c: Disattivazione della funzione di registrazione transito 2. Confi gurazione registrazioni video (valida solo se è stata selezionata la modalità video) Impostare la durata della registrazione (10, 20 o 30 sec) in caso di chiamata persa o quando si attiva la funzione monitoring (attenzione:...
  • Page 162 c: Ora a cui la suoneria sarà riattivata. 5. Funzione segreteria (solo per WelcomeEye Connect e solo se è stata selezionata la modalità video) Questa funzione permette di registrare un messaggio vocale che sarà riprodotto se qualcuno dovesse suonare senza ricevere risposta. Per attivare la funzione è necessario defi nire le impostazioni della registrazione video.
  • Page 163: Album Foto

    e: Regolazione del volume dell’altoparlante del monitor durante la comunicazione. 8: Impostazioni immagine Regolazione di luminosità, contrasto e colore dell’immagine. 9: Gestione rete senza fi li (solo WelcomeEye Connect) a: Attivazione (On) o disattivazione (Off ) della rete senza fi li. b: Confi gurazione dell’intervallo di tempo che trascorre dal momento in cui si suona a quello in cui la notifi ca della chiamata viene inviata allo smartphone.
  • Page 164: Album Video

    numero di fotografi e non visualizzate. : data e ora a cui è stata scattata la foto. Toccare per vedere la foto. : Permette di cancellare una o più foto. Toccare il cestino e selezionare le foto da cancellare, quindi toccare di nuovo il cestino per cancellarle. E.
  • Page 165: Applicazione Per Smartphone

    - Per uscire dalla modalità stand-by è suffi ciente sfi orare lo schermo. 8. APPLICAZIONE PER SMARTPHONE Connettere il monitor alla rete senza fi li 1. Scaricare l’applicazione Philips WelcomeEye sullo smartphone da Apple store o Play store 2. Toccare...
  • Page 166 N.B.: Se sulla seconda riga l’icona non compare, reinizializzare il Wi-Fi toccando e attendere che l’icona venga visualizzata (circa 30 sec.). 4. Aprire l’applicazione WelcomeEye e toccare + per aggiungere un dispositivo. 5. Android : Toccare “nouvel appareil” (nuovo dispositivo), quindi toccare “suivant”...
  • Page 167 Selezionare il modem/router a cui connettere il monitor, digitare la relativa password e toccare “suivant” (successivo). 5. Bis. iOS : Toccare “nouvel appareil” (nuovo dispositivo), quindi toccare “suivant” (successivo). Uscire dall’applicazione e accedere alle impostazioni Wi-Fi dello smartphone. Connettersi alla rete senza fi li il cui nome inizia per “UIDcg…..”.
  • Page 168 Il videocitofono è ora connesso alla rete senza fi li e lo smartphone può ricevere le chiamate di chi suona. Aggiungere uno smartphone a un videocitofono connesso 1. Scaricare l’applicazione Philips WelcomeEye sullo smartphone da Apple store o Play store Attenzione: se attiva, disattivare la modalità...
  • Page 169 2. Aprire l’applicazione WelcomeEye e toccare + per aggiungere un dispositivo. 3. Toccare il dispositivo connesso alla rete, quindi toccare “appar.conne.” (dispositivo connesso). Controllare che lo smartphone sia connesso alla stessa rete a cui è connesso anche il monitor. 4. Sullo schermo deve comparire l’UID del monitor. Toccare l’UID. IT19 WelcomeEye Connect / Touch / 09/17...
  • Page 170 5. Digitare il nome che si desidera dare al dispositivo, il proprio nome utente, la password e il numero di aperture (= numero di canale) che si desidera comandare. La password sarà richiesta ogni volta che si tenterà di aprire la bocchetta elettrica o il cancello a partire dall’applicazione.
  • Page 171 Riduci qualità video (1 barra) o registra solo l’audio (0 barre) in caso di banda passante insuffi ciente. Per un funzionamento ottimale occorre una velocità minima di 40 kB/s. Modalità schermo intero Apri la bocchetta elettrica o il cancello (password predefi nita: 1 2 3 4). Attenzione: per poter comandare l’apertura di un cancello, il numero di aperture deve essere impostato su 2...
  • Page 172: Caratteristiche Tecniche

    Attiva/disattiva la suoneria degli allarmi. Attiva/disattiva la vibrazione per gli allarmi. Informazioni sull’applicazione. Esci dall’applicazione. Gestisci le impostazioni. 9. CARATTERISTICHE TECNICHE Monitor: rif.: 538102 (WelcomeEye Connect) rif.: 538101 (WelcomeEye Touch) - 2 fi li - Touch screen 7” - Risoluzione 800 x 480 - Scheda micro SD classe 10 fi no a 32 GB (non inclusa) - Wi-Fi 2,4 GHz IEEE 8111 b/g/n (solo WelcomeEye Connect) - Potenza radio emessa: 18 dB max.
  • Page 173: Accessori

    WelcomeEye Power - DES 1000 DPS (rif: 531010)** WelcomeEye TAG - DES 1000 ACI (rif.: 531011)** * Per maggiori informazioni consultare il manuale completo WelcomeEye Comfort/Compact disponibile sul sito www.philips.com. ** Per maggiori informazioni consultare il manuale completo WelcomeEye Connect/Touch disponibile sul sito www.philips.com.
  • Page 174: Domande Frequenti

    11. DOMANDE FREQUENTI Problema Causa Soluzione • Il monitor non si • Il monitor non è • Controllare che l’alimentazione sia accende alimentato collegata alla rete e in tensione • Controllare la polarità a livello del monitor o dell’uscita dell’alimentazione •...
  • Page 175 • L'immagine è troppo • Posizione della • Non puntare l'obiettivo della luminosa telecamera telecamera direttamente contro la luce del sole o di fronte a una superficie riflettente. • Controllare le impostazioni del monitor (pagina 12) • Volume della • Regolazione •...
  • Page 176 • La scheda micro • File non creati • La prima volta che viene inserita, SD non viene la scheda micro SD deve essere riconosciuta: formattata dal monitor (pagina 13) messaggio “SD card • Qualità della • Usare una scheda di classe 10 error”...
  • Page 177: Assistenza Tecnica - Garanzia

    Per la data d’acquisto, fa fede lo scontrino o la fattura. In caso di necessità, i contatti e gli orari di apertura dei nostri centri di assistenza sono disponibili sul sito www.philips.com. IT27 WelcomeEye Connect / Touch / 09/17...
  • Page 178: Misure Di Sicurezza

    Importante : Si prega di conservare questa scheda di garanzia e la prova di acquisto. Philips e il simbolo dello scudo Philips sono marchi depositati da Koninklijke Philips N.V. usati con licenza. Il presente prodotto è stato costruito da CFI Extel SAS ed è venduto sotto la responsabilità...
  • Page 179: Avviso Fcc/Ce

    funzionino correttamente. - Attenersi alle istruzioni per l’uso delle altre apparecchiature collegate all’impianto. - In caso di dubbi riguardanti le modalità di funzionamento o la sicurezza delle apparecchiature, contattare una persona qualificata. - Non collegare o scollegare mai apparecchiature elettriche alla/dalla rete con le mani bagnate.
  • Page 180 ÍNDICE NORMAS DE SEGURIDAD ..............p. 2 CONTENIDO DEL KIT...............p. 2 GENERALIDADES ................p. 3 NOMENCLATURA................p. 3 INSTALACIÓN DEL PRODUCTO ...........p. 5 1. Cableado 2. Confi guración de la placa 3. Instalación del monitor principal o adicional 4. Instalación de la placa externa principal o adicional 5.
  • Page 181: Normas De Seguridad

    1. NORMAS DE SEGURIDAD ¡Importante! • Lea atentamente el manual de uso antes de la instalación o utilización de este producto. • Si instala este producto para terceros, recuerde dejar el manual o una copia del mismo al usuario fi nal. Advertencia: •...
  • Page 182: Generalidades

    3. GENERALIDADES Este videoportero se compone de un módulo para contestar desde el interior con pantalla táctil y una placa externa con interfono y cámara que permite ver y comunicarse con el visitante que ha llamado. Es sencillo de instalar ya que son necesarios 2 cables para todas las funciones (timbre, vídeo, interfono y controles del cerradero y del automatismo).
  • Page 183 Placa externa: Led blanco (visión nocturna) Sensor crepuscular Micrófono Objetivo de la cámara Altavoz Iluminación portanombre Botón de llamada, porta- nombre y zona de lectura RFID DES 9900 VDP Tornillo antirrobo de fi jación 1 2 3 4 Conmutador de programación Botón reset RFID Ajuste volumen de...
  • Page 184: Instalación Del Producto

    5. INSTALACIÓN DEL PRODUCTO Consejos y notas importantes: - Para disfrutar plenamente de su placa externa, le recomendamos configurarla (RFID, modo 1 o 2 familias, 1 o 2 placas, volumen del altavoz) antes de su instalación definitiva. Para ello puede ser necesaria una conexión previa para comprobar que los ajustes se han realizado correctamente.
  • Page 185: Confi Guración De La Placa

    2. Configuración de la placa (ver fig. 1, fig. 2 o fig. 3) a. Configuración del número de la placa: Colocar el conmutador 2 a la izquierda en la placa n.° 1 y a la derecha en la placa n.° 2. b.
  • Page 186: Instalación Del Monitor Principal O Adicional

    3. Instalación del monitor principal o adicional 1m60 DES 9900 VDP Wi 2.4GHz 550mA CFI Extel ZI de Fétan, 01600 Trévoux FRANCE DES 9900 VDP 1 - Colocar el soporte de pared procurando que la pantalla del monitor esté a una altura de aproximadamente 1,60 m del suelo.
  • Page 187: Instalación De La Placa Externa Principal O Adicional

    4. Instalación de la placa externa principal o adicional Atención: El producto no debe estar conectado a la alimentación antes de haber terminado el cableado. 1m60 DES 9900 VDP 1 2 3 4 DES 9900 VDP CFI Extel ZI de Fétan, 01600 Trévoux FRANCE 110mA RFID 125kHz...
  • Page 188: Instalación De Una Cámara (Opcional)

    Nota: atornillar a través de las tapas negras situadas al dorso de la placa externa sin retirarlas. 9 - Volver a colocar la parte delantera de la placa y el tornillo antirrobo de fi jación. 10 - Conectar la alimentación de 230 V CA al adaptador modular, en una instalación que cumpla con las normas vigentes (NFC 15-100 para Francia).
  • Page 189: Función De Monitoreo Y Respuesta A Una Llamada

    : indica que el modo silencioso está activado : indica que la memoria está llena. Las fotos/vídeos más antiguos serán sustituidos por los nuevos. A. Función de monitoreo y respuesta a una llamada 1: Permite pasar a la vista de la segunda placa externa, de la cámara o volver al menú principal.
  • Page 190 1. Función de memoria de paso a: Grabación de paso mediante foto b: Grabación de paso mediante vídeo (es necesaria la presencia de una tarjeta microSD formateada en el monitor). c: Desactivación de la función de memoria de paso. 2. Confi guración de las grabaciones de vídeo (válida si se ha seleccionado el modo vídeo) Elegir la duración de la grabación del vídeo (10, 20 o 30 s) al recibir una llamada perdida o durante el monitoreo (atención:...
  • Page 191 5. Función de contestador (únicamente en WelcomeEye Connect, válida si se ha seleccionado el modo vídeo) Esta función permite grabar un mensaje vocal que se reproducirá si nadie contesta a la llamada. Es necesario confi gurar la grabación de vídeo durante las llamadas para activar esta función.
  • Page 192: Álbum De Fotos

    8: Ajuste de imagen Ajuste de la luminosidad, del contraste y del color de la imagen. 9: Gestión de la red wifi (únicamente en WelcomeEye Connect) a: Activación (On) o desactivación (Off ) de la red wifi . b: Confi guración del tiempo entre la llamada del visitante y el envío de la notifi cación al teléfono inteligente.
  • Page 193: Álbum De Vídeo

    : fecha y hora de la toma de la foto. Hacer clic encima para visualizar la foto. : Permite eliminar una o varias fotos. Hacer clic en la papelera y seleccionar las fotos que desea eliminar. Volver a hacer clic en la papelera para eliminarlas. E.
  • Page 194: Aplicación Para Teléfono Inteligente

    - Basta con rozar la pantalla para salir del modo suspensión. 8. APLICACIÓN PARA TELÉFONO INTELIGENTE Conectar un monitor a la red wifi 1. Descargue la aplicación Philips WelcomeEye en el teléfono inteligente. Desde el Apple store o el Play store 2. Desde el monitor, vaya a , después...
  • Page 195 y espere a que aparezca el icono (aproximadamente 30 s.). 4. Desde la aplicación WelcomeEye, haga clic en + para añadir un dispositivo. 5. Android : Haga clic en nuevo dispositivo y siguiente Deberá aparecer la UID del monitor. Haga clic encima. ES16 WelcomeEye Connect / Touch / 09/17...
  • Page 196 Seleccione la box a la que desea conectar el monitor, introduzca su contraseña y hacer clic en siguiente. 5 Bis. iOS : Haga clic en nuevo dispositivo y siguiente. Salga de la aplicación y vaya a los ajustes wifi del teléfono inteligente.
  • Page 197 A partir de ahora, el videoportero estará conectado a la red wifi y el teléfono inteligente podrá recibir las llamadas. Añadir un teléfono inteligente a un videoportero conectado 1. Descargue la aplicación Philips WelcomeEye en su teléfono inteligente desde el Apple store o el Play store Atención: retire el modo red inteligente de la wifi del teléfono inteligente si está...
  • Page 198 2. Desde la aplicación WelcomeEye, haga clic en + para añadir un dispositivo. 3. Haga clic en el dispositivo conectado a la red y después en «appar.conne.» (dispositivo conectado). Asegúrese de teléfono inteligente esté conectado a la misma red WIFI que el monitor.
  • Page 199 5. Introduzca el nombre que desee dar a su dispositivo, el nombre de usuario, la contraseña y el número del elemento que se abre (= número de canal) que desea controlar. Se le pedirá la contraseña cada vez que desee abrir el cerradero eléctrico o cancela desde la aplicación.
  • Page 200 Permite reducir la calidad del vídeo (1 barra) o solo dejar pasar el sonido (0 barras) en caso de velocidad baja. Para un funcionamiento óptimo, es necesario tener una velocidad mínima de 40 kB/s. Modo de pantalla completa Abrir el cerradero eléctrico o la cancela (contraseña por defecto: 1 2 3 4). Atención: el número de elementos que se abren debe estar ajustado a 2 para poder controlar la apertura de la cancela...
  • Page 201: Características Técnicas

    Activar/desactivar las alarmas sonoras. Activar/desactivar la vibración al saltar las alarmas. Información acerca de la aplicación. Salir de la aplicación. Gestionar los parámetros. 9. CARACTERÍSTICAS TÉCNICAS Monitor: ref.: 538102 (WelcomeEye Connect) ref.: 538101 (WelcomeEye Touch) - 2 cables - Pantalla táctil de 7’’ - Resolución 800 x 480 - Tarjeta microSD de clase 10 hasta 32 Gb (no incluida) - Wifi 2,4 GHz IEEE 8111 b/g/n (solamente WelcomeEye Connect)
  • Page 202: Accesorios

    WelcomeEye TAG - DES 1000 ACI (ref.: 531011)** * Consulte el manual completo de WelcomeEye Comfort/Compact disponible en el sitio www.philips.com para más información. ** Consulte el manual completo WelcomeEye Connect/Touch disponible en el sitio www.philips.com para más información. ES23...
  • Page 203: Preguntas Frecuentes

    11. PREGUNTAS FRECUENTES Avería Causa Solución • El monitor no se • El monitor no tiene • Compruebe que la alimentación enciende corriente esté correctamente conectada y con tensión • Compruebe la polaridad en el monitor o a la salida de la alimentación •...
  • Page 204 • Imagen demasiado • Posición de la • No exponga el objetivo de la luminosa cámara cámara directamente al sol o hacia una superficie reflectante • Compruebe los ajustes del monitor (página 12) • Volumen de la placa • Ajuste •...
  • Page 205 • La tarjeta microSD no • Carpetas no • En la primera introducción, es se tiene en cuenta creadas obligatorio realizar un formateo «Message SD card desde el monitor (página 13) error» (Mensaje de • Calidad de la • Use como mínimo una tarjeta de error de la tarjeta SD) tarjeta microSD clase 10...
  • Page 206: Asistencia Técnica - Garantía

    El ticket de compra o la factura sirven para demostrar la fecha de compra. En caso de necesidad, encontrará los contactos y los horarios de apertura de nuestros centros de asistencia técnica en el sitio www.philips.com. ES27 WelcomeEye Connect / Touch / 09/17...
  • Page 207: Medidas De Seguridad

    Importante : Conserve esta tarjeta de garantía y el comprobante de compra. Philips y el emblema escudo Philips son marcas registradas de Koninklijke Philips N.V. y se usan bajo licencia. Este producto ha sido fabricado por y es vendido bajo la responsabilidad de CFI Extel SAS y CFI Extel SAS es el único garante de dicho producto.
  • Page 208: Advertencia Fcc/Ce

    - Póngase en contacto con una persona experimentada en caso de que tenga dudas sobre el modo de funcionamiento o la seguridad de los aparatos. - No conecte ni desconecte nunca los aparatos eléctricos con las manos húmedas. - Durante la instalación de este producto, compruebe que los cables de alimentación no corren peligro de sufrir daños.
  • Page 209 ÍNDICE INSTRUÇÕES DE SEGURANÇA ............p.2 CONTEÚDO DO KIT ................p.2 GENERALIDADE .................p.3 NOMENCLATURA................p.3 INSTALAÇÃO DO PRODUTO ............p.5 1. Cablagem 2. Parametrização da placa de rua 3. Instalação do monitor principal ou suplementar 4. Instalação da placa de rua principal ou suplementar 5.
  • Page 210: Instrução De Segurança

    1. INSTRUÇÃO DE SEGURANÇA Importante ! • Leia atentamente o manual de utilização antes de instalar ou utilizar este produto. • Se instalar este produto para outras pessoas, não se esqueça de transmitir o manual ou uma cópia para o utilizador final. Advertência: •...
  • Page 211: Ecrã Táctil

    3. GENERALIDADE Este videoporteiro é composto por um posto de resposta interno com ecrã táctil e uma placa externa com intercomunicador e câmara que permite ver e comunicar com o visitante que tocou a campainha. A instalação do videoporteiro é fácil com apenas 2 fi os para todas as funções (campainha, vídeo, intercomunicador e comandos do trinco e do automatismo).
  • Page 212 Placa de rua: LED branco (visão noturna) Sensor crepuscular Microfone Objetiva da câmara Altifalante Iluminação da etiqueta de identifi cação Botão de chamada, etique- ta de identifi cação e zona de leitura RFID DES 9900 VDP Parafuso de fi xação antirroubo 1 2 3 4 Switch de programação...
  • Page 213: Instalação Do Produto

    5. INSTALAÇÃO DO PRODUTO Conselhos e notas importantes: - Para desfrutar plenamente da sua placa de rua, não se esqueça de configurar o dispositivo (RFID, modo 1 ou 2 domicílios, 1 ou 2 placas, volume do altifalante), antes da instalação definitiva.
  • Page 214 2. Parametrização da placa de rua (ver fig. 1, fig. 2 ou fig. 3) a. Parametrização do número da placa: Colocar o switch 2 à esquerda na placa de rua n°1 e à direita na placa de rua n°2. b. Parametrização do número de domicílios: Colocar o switch 1 à...
  • Page 215 3. Instalação do monitor principal ou suplementar 1m60 DES 9900 VDP Wi 2.4GHz 550mA CFI Extel ZI de Fétan, 01600 Trévoux FRANCE DES 9900 VDP 1 - Posicionar o suporte de parede de modo que o ecrã do monitor fi que à uma altura de cerca de 1m60 do solo.
  • Page 216: Instalação Da Placa De Rua Principal Ou Suplementar

    4. Instalação da placa de rua principal ou suplementar Atenção: Não ligar o produto à alimentação antes de terminar a cablagem. 1m60 DES 9900 VDP 1 2 3 4 DES 9900 VDP CFI Extel ZI de Fétan, 01600 Trévoux FRANCE 110mA RFID 125kHz IP44...
  • Page 217 9 - Recolocar a fachada dianteira da placa e apertar o parafuso de fi xação antirroubo. 10 - Ligar a alimentação de 230V AC no adaptador modular, numa instalação conforme às normas em vigor (IEC 61439 em Portugal). - Verifi car o bom funcionamento (chamada vídeo, RFID…). - Se tiver uma segunda placa de rua, confi gure o(s) monitor(es).
  • Page 218: Função Intercomunicação

    : Indica que a memória está cheia. As fotos/vídeos mais antigos são então substituídos pelas novas gravações. A. Função de monitoring e atendimento de chamada 1: Permite visualizar a segunda placa de rua, a câmara ou voltar ao menu principal. 2: Permite entrar em comunicação vocal com a placa de rua e desligar.
  • Page 219 1. Função de memória de passagem a : Gravação de passagem por foto. b : Gravação de passagem por vídeo (a presença de um cartão micro SD formatado no monitor é necessária). c : Desativação da função de memória de passagem. 2.
  • Page 220 a : Permite ativar ou desativar a função de mensagem vocal. b : Permite ler a mensagem vocal gravada. c : Permite iniciar e parar a gravação da mensagem vocal (duração máxima da mensagem: 15 segundos). 6: Confi guração das opções do sistema WelcomeEye a : Ativação de uma segunda placa de rua (selecionar On em caso de utilização de uma segunda placa de rua).
  • Page 221 a : Ativação (On) ou desativação (Off ) da rede WIFI. b: confi guração do intervalo de tempo entre o momento onde o visitante toca e o momento onde a notifi cação é enviada ao smartphone. c : Acesso às informações relativas à rede e reinicialização da rede WIFI. Nota: A utilização da rede WIFI e da aplicação smartphone é...
  • Page 222 E. Álbum de vídeo Menu acessível unicamente se um cartão micro SD for inserido. Permite aceder aos vídeos gravados. O número no círculo vermelho mostra o número de vídeos não lidos. O procedimento de visualização e eliminação é idêntico ao do álbum foto. 7.
  • Page 223 - Basta tocar no ecrã para sair do modo de espera. 8. APLICAÇÃO DE SMARTPHONE Ligar um monitor à rede WiFi 1. Descarregue a aplicação Philips WelcomeEye para o seu smartphone. A partir da Apple store ou Play store 2. No monitor, aceda à...
  • Page 224 5. Android : Clique em “Nouvel appareil” (Novo dispositivo) e “Suivant” (Seguinte). O UID do seu monitor deve aparecer. Clique nele. Selecione a box para a ligação do monitor, insira a sua senha e clique em “Suivant” (Seguinte). PT16 WelcomeEye Connect / Touch / 09/17...
  • Page 225 5 Bis. IOS : Clique em “Nouvel appareil” (Novo dispositivo) e “Suivant” (Seguinte). Saia da aplicação e aceda às confi gurações WiFi do smartphone. Faça uma ligação ao WiFi que começa por “UIDcg...”. Aceda novamente à aplicação e clique em Seguinte. Insira o nome e a senha da sua rede e clique em “Suivant”...
  • Page 226 O seu videoporteiro está agora conectado à rede WiFi e o seu smartphone pode receber chamadas. Adicionar um smartphone a um videoporteiro conectado 1. Descarregue a aplicação Philips WelcomeEye para o seu smartphone a partir da Apple store ou Play store Atenção: retire o modo de rede inteligente do WiFi do smartphone se estiver ativado.
  • Page 227 4. O UID do seu monitor deve aparecer. Clique nele. 5. Insira o nome que deseja dar ao seu dispositivo, o nome de utilizador, a senha e o número do canal de abertura que deseja controlar. A senha será pedida cada vez que quiser abrir o seu trinco elétrico ou portão a partir da aplicação.
  • Page 228 Permite gerir os parâmetros da câmara: nome, senha, rede WiFi, número de canais e alarme. Iniciar/parar a minha visualização ao vivo. Ativar/desativar o som. Fazer um vídeo. Tirar uma fotografi a. Permite reduzir a qualidade do vídeo (1 barra) ou permitir que o som (sem barras) passe em caso de baixa largura de banda.
  • Page 229 Permite a edição de fotos (eliminar, classifi car e agrupar) Agrupa as fotos gravadas. Ativar/desativar os alarmes sonoros. Ativar/desativar a vibração durante o alarme. Informações sobre a aplicação. Sair da aplicação. Gerir os parâmetros. 9. CARACTERÍSTICAS TÉCNICAS Monitor: ref: 538102 (WelcomeEye Connect) ref: 538101 (WelcomeEye Touch) - 2 fi os - Ecrã...
  • Page 230 - Visão noturna (LEDs brancos) - Comando do trinco 12V/1.1A/ 1,5 s. - Comando de portão : poder de corte 12V/2A - RFID (125kHz) - IP44 - Temperatura de utilização: -20°C / +50°C - Dimensões: 168(A) x 82(L) x 38(P) Aplicação WelcomeEye (unicamente para o WelcomeEye Connect): - Android v4.4 ou superior - iOS 7 ou superior...
  • Page 231 WelcomeEye TAG - DES 1000 ACI (ref: 531011)** * Consulte o manual de instruções completo do WelcomeEye Comfort/Compact disponível no site www.philips.com para obter mais informações. ** Consulte o manual de instruções completo do WelcomeEye Connect/Touch disponível no site www.philips.com para obter mais informações.
  • Page 232 • A placa de rua está • Configuração • Verifique se a placa de rua não está ligada, mas o monitor switch da placa de programada em modo bi-domicílio. não toca Lembrete : monodomicílio = switch 2 no ON, bi-domicílio = switch 2 no OFF.
  • Page 233 • O modo bi-domicílio • Configuração • Verifique se a placa de rua não está não funciona programada em modo bi-domicílio. Lembrete : monodomicílio = switch 2 no ON, bi-domicílio = switch 2 no OFF. Corte a alimentação elétrica durante 5 segundos para que as novas configurações sejam tomadas em conta (página 6) •...
  • Page 234 • Nenhuma gravação • Ausência de cartão • A gravação de vídeo só pode ser de vídeo micro SD feita com a presença de um cartão micro SD no monitor • Formato de cartão • Tipo de cartão micro SD ou micro inadequado SDHC, mas nunca micro SDXC •...
  • Page 235: Assistência Técnica - Garantia

    Importante : Por favor, guarde este cartão de garantia e prova de compra. Philips e o logotipo Philips são marcas registadas da Koninklijke Philips N.V. e são utilizadas sob licença. Este produto foi fabricado e é vendido sob a responsabilidade da CFI Extel SAS, e a CFI Extel SAS é...
  • Page 236: Medidas De Segurança

    13. MEDIDAS DE SEGURANÇA Os danos provocados pela falta de conformidade ao manual conduzem à expiração da garantia. Não assumiremos qualquer responsabilidade pelos danos daí resultantes! Não assumiremos qualquer responsabilidade relativamente a todo o dano, em bens e pessoas, causado por uma má manipulação ou pela falta da conformidade relativamente às instruções de segurança.
  • Page 237: Advertência Fcc/Ce

    14. ADVERTÊNCIA FCC/CE Nota : Este equipamento foi testado e está em conformidade com os limites de um dispositivo de classe B, de acordo com as normas europeias em vigor. Estes limites foram concebidos para fornecer uma proteção razoável contra as interferências numa instalação residencial.
  • Page 238 WelcomeEye Connect / Touch / 09/17...
  • Page 239 WelcomeEye Connect / Touch / 09/17...
  • Page 240 GB - Alternating Current Wechselstrom Koninklijke Philips N.V. NL - Gelijkstroom I marchi Philips sono marchi registrati di proprietà di Koninklijke Philips PL - Prąd zmienny N.V. IT - Corrente alternata Las marcas registradas de Philips son marcas registradas de Koninklijke...

Ce manuel est également adapté pour:

Welcomeeye touch des9700vdp - 531001

Table des Matières