Rotel La passione PLUS Mode D'emploi

Rotel La passione PLUS Mode D'emploi

Cafetière espresso

Publicité

Les langues disponibles

Les langues disponibles

Liens rapides

Espressomaschine
Espresso coffee maker
Cafetière espresso
Macchina per caffè espresso
GEBRAUCHSANLEITUNG
INSTRUCTIONS FOR USE
MODE D'EMPLOI
ISTRUZIONI PER L'USO
U 23.31CH
1

Publicité

Table des Matières
loading

Sommaire des Matières pour Rotel La passione PLUS

  • Page 1 Espressomaschine Espresso coffee maker Cafetière espresso Macchina per caffè espresso GEBRAUCHSANLEITUNG INSTRUCTIONS FOR USE MODE D’EMPLOI ISTRUZIONI PER L’USO U 23.31CH...
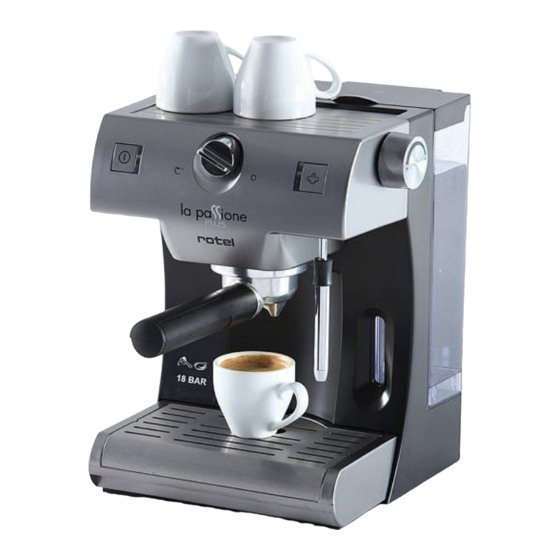
  • Page 3 1. Ein/Aus Schalter mit Leuchtanzeige 1. On/Off switch with pilot light 2. Espresso-Schalter 2. Coffee switch 3. Dampf-Schalter mit Leuchtanzeige 3. Steam switch with pilot light 4. Siebträger 4. Filter holder 5. Filtereinsatz für 1 Tasse oder 5. 1-cup filter (and for single-dose pad) Kaffeepad 6.
  • Page 5: Sicherheitshinweise

    BEDIENUNGSANLEITUNG DEUTSCH Sicherheitshinweise - Bitte lesen Sie diese Anweisungen vor Inbetriebnahme der Espressomaschine sorgfältig durch. - Vergewissern Sie sich vor dem Anschluss des Gerätes, dass die auf dem Typenschild angegebene Netzspannung mit der Spannung Ihres Haushaltes übereinstimmt. - Die Espressomaschine nicht mit leerem Wassertank einschalten. - Unter gewissen Umständen können Dampf und Wasser aus dem Espressoauslauf austreten.
  • Page 6 Betrieb Espresso: a.- Espressozubereitung 1. Füllen Sie den Wassertank mit Wasser. Dazu entnehmen Sie entweder den Wassertank (7) an der Rückseite des Gerätes oder öffnen den Deckel (14) des Wassertanks und leeren das Wasser direkt hinein. 2. Schließen Sie die Espressomaschine an das Netz an und betätigen Sie den EIN/AUS-Schalter (1).
  • Page 7: Reinigung Und Instandhaltung

    Dampf: Zum Erhitzen von Flüssigkeiten mit der Dampfdüse (9): 1. Schließen Sie die Espressomaschine an das Netz an und betätigen Sie den EIN/AUS-Schalter (1). Die Leuchtanzeige leuchtet orange auf. Sobald das Gerät bereit ist, leuchtet sie grün auf. 2. Hierauf betätigen Sie den Dampfschalter (3) und warten, bis die Leuchtanzeige aufleuchtet.
  • Page 8: Safety Instructions

    Entkalkung Um Ihre Espressomaschine in einwandfreiem Zustand zu erhalten, sollten Sie das Gerät je nach Kalkhaltigkeit des Wassers, 1-3 mal pro Jahr entkalken. Wir empfehlen Ihnen unser Entkalkungsmittel Calc Clean 2000. (1 Liter Flaschen, Art.Nr. 226.900.0006). 1. Netzstecker ziehen. 2. Brühsieb (18) wegnehmen (Schraube lösen). 3.
  • Page 9 VERY IMPORTANT! Do not get the appliance wet or submerge it in water. This appliance is only for household use. Keep out of the reach of children. Children should be supervised to ensure that they do not play with the appliance. This appliance is not intended for use by persons (including children) with reduced physical, sensory or mental capabilities, or lack of experience and knowledge, unless they have been given supervision or instructions concerning use of the...
  • Page 10: Cleaning And Maintenance

    A - Small cups B - Large cups 9. Place one or two cups under the coffee outlet holes (12). 10. When the mains pilot light (1) turns green, turn the coffee extraction selector (2) to the left until the selector mark points to the cup icon (fig.4). The coffee will start to flow out.
  • Page 11: Limescale Removal

    anticlockwise. Wipe the steamer spindle with a damp cloth and soap the cylindrical part. Make sure that the small hole at the top of the steamer is clean before refitting the part. Fit the steamer on its spindle, screwing it clockwise. Limescale removal To maintain your Espresso machine in perfect condition you should carry out this limescale removal procedure 1-3 times a year, depending on the lime content of your...
  • Page 12 goût. C’est pourquoi il est tout à fait normal qu’il se produise un léger bruit et de petites vibrations lorsque la pompe électrique se met en marche. Si le cordon d’alimentation est endommagé, il devra être remplacé par le fabricant, par un service après-vente agréé...
  • Page 13 5. Si vous souhaitez utiliser du café en dosette placez le filtre pour 1 tasse (5) dans le porte-filtres (4). Placez la dosette dans le porte-filtres. b.- Mise en marche 6. Ensuite, insérez le porte-filtres (4) dans la cafetière. 7. Assurez-vous que le porte-filtres est bien refermé en poussant fortement la commande de gauche vers la droite afin d’éviter les fuites (fig.
  • Page 14: Nettoyage Et Entretien

    Nettoyage et entretien  Débranchez la cafetière.  Nettoyez régulièrement le réservoir et le porte-filtres.  N’utilisez pas d’alcool, ni de dissolvants ou de produits abrasifs pour nettoyer la cafetière ou le plateau ; un chiffon doux et humide suffit. ...
  • Page 15: Indicazioni Inerenti Alla Sicurezza

    ISTRUZIONI PER L’USO ITALIANO Indicazioni inerenti alla sicurezza Leggere attentamente le presenti istruzioni prima di utilizzare la macchina per caffè. Non collegare la caffettiera all’alimentazione elettrica senza aver prima verificato se la tensione indicata sulla targhetta delle caratteristiche e quella dell’impianto domestico coincidono.
  • Page 16 Funzionamento Caffè : a.- Preparazione del caffè 1. Riempire d’acqua il serbatoio. Allo scopo è possibile estrarre il serbatoio (7) dalla parte posteriore della macchina oppure aprirne il coperchio (14) e versare direttamente l’acqua. 2. Collegare la macchina per caffè alla rete elettrica e accendere l’interruttore (1). La spia luminosa si accenderà...
  • Page 17: Pulizia E Manutenzione

    Vapore : Per riscaldare qualsiasi tipo di liquido utilizzando il vaporizzatore (9): 1. Collegare la macchina per caffè alla rete elettrica e accendere l’interruttore (1). La spia luminosa si accenderà in arancio, per diventare verde quando sarà pronta. 2. Quindi azionare l’interruttore di vapore (3) e attendere fino all’accensione della spia.
  • Page 18 1. Staccare la spina di alimentazione. 2. Estrarre il gruppo erogatore (18) (allentare la vite). 3. Mettere la soluzione anticalcare nel serbatoio dell’acqua (7) (seguendo le indicazioni riportate sulla confezione). 4. Mettere un contenitore sotto la testa di erogazione (18) 5.
  • Page 19: Obligation De Garantie

    L’invio deve avvenire nell’imballaggio originale. Le spese di trasporto sono a carico dell’acquirente. Non dimenticatevi p.f. di allegare all’invio il vostro indirizzo e, qualora il difetto non fosse chiaro, anche una spiegazione. Servicestation: Rotel AG Service après-vente: Parkstrasse 43 Servizio Assistenza : 5012 Schönenwerd Tel: 062 787 77 00 / e-mail: office@rotel.ch...

Ce manuel est également adapté pour:

Presto 227

Table des Matières