Table des Matières
Publicité
Les langues disponibles
Les langues disponibles
Publicité
Chapitres
Table des Matières
Dépannage

Manuels Connexes pour Mantis 401739


Sommaire des Matières pour Mantis 401739
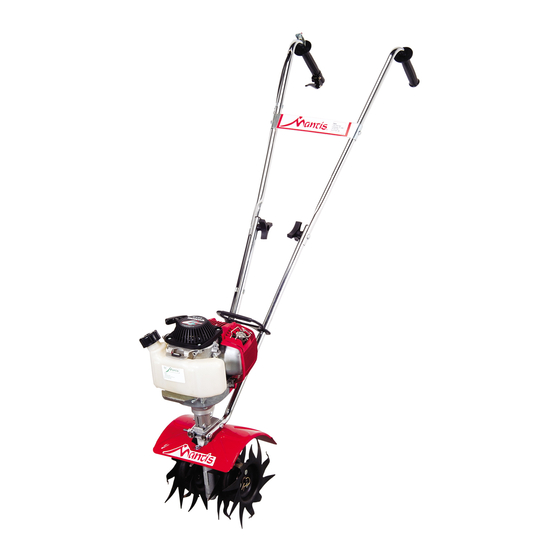
- Page 1 Tiller/Cultivator with 4 Stroke Engine OWNER’S MANUAL Original Instructions Motobêche-bineuse à moteur 4 temps MANUEL D’UTILISATION Traduction des instructions originales Gartenfräse/Hacke mit Viertaktmotor BEDIENERHANDBUCH Übersetzung der Originalanleitung...
-
Page 2: Table Des Matières
Assembly and mixing fuel ....6-10 MANTIS Tiller assembly layout ... . 17 Starting ....... . 11 Parts assemblies . -
Page 3: Safety Rules & Warnings
Safety rules & warnings You will notice throughout this owners manual safety rules and important notes. Make sure you understand and obey these warnings for your own protection. I. Special safety information WARNING • DANGER WARNING • DANGER ATTENTION: THIS SYMBOL POINTS OUT TO REDUCE THE POTENTIAL FOR ACCIDENTS, COMPLY WITH OUR IMPORTANT SAFETY INSTRUCTIONS. - Page 4 SPECIFICATION: GUARANTEED SOUND POWER LEVEL Model 7263 .61 Kw Max 7000 min 9.5 kg WARNING • DANGER IF THE TILLER IS USED IMPROPERLY OR SAFETY PRECAUTIONS ARE NOT FOLLOWED, THE USERS RISK SERIOUS INJURY TO THEMSELVES AND OTHERS. READ AND UNDERSTAND THIS MANUAL BEFORE ATTEMPTING TO OPERATE THIS TILLER. IV.
-
Page 5: Engine & Fuel Warnings
See handles, while tines are moving, before switching the engine off that only original Mantis parts are and engine is running. and making sure the tines have used. Don’t overreach. Keep a good stopped completely. - Page 6 CONTACT, YOUR LOCAL AUTHORISED MANTIS OFFICE. Quantity Description *Key No. Your MANTIS Tiller comes partially assembled. You must install only the Upper handle assembly handlebars, the carrying handle, and the Upper handle throttle side assembly tines. This will take just a few minutes if Lower handles you follow the directions.
- Page 7 Assembly (continued) HOW TO ASSEMBLE (7.62 cm) bolt. Fit the other LOWER HANDLES clamp onto this other handle’s short leg. Add a nut and tighten finger tight. (Picture 3) To identify part numbers, see 6. Locate the worm gear pages 6 and 18. housing.
- Page 8 Assembly (continued) How to assemble upper Note: If throttle handle is Line it up with the holes on the upper handles. Then insert a cap mounted on the left, it will not handles and carrying screw and a lock nut on either fold down as completely as when handle side (Picture 5)
- Page 9 IMPORTANT NOTE: 2. Slide the tines onto the axle Before starting your shafts. The “D” hole goes on the 4 Stroke/Mantis Tiller, add the outside. (Picture 1) premeasured (80ml) bottle of 3. Make sure you’ve installed the 4 stroke engine oil. See 4 Stroke tines properly for tilling.
-
Page 10: Corrective Action
Assembly (continued) Oil Overfill Warning Do not overfill! Adding too much or too little oil may cause damage to the engine and void the warranty. Overfilling may cause: 1. Hard starting or a locked piston High pull force Handle locked in place - caused by excess oil in the combustion chamber. -
Page 11: Starting
MAINTAIN PROPER IDLE maximum 10% ethyl alcohol, or SPEED ADJUSTMENT 15% MTBE, no methyl alcohol.) (2500-3100 RPM) Mantis Tiller starting 2. Pull grip slowly until you instructions feel resistance then pull briskly. Make sure the choke is in the (4 Stroke 25cc engine) open, or run, position. -
Page 12: Additional Information
Picture 2 then squeeze the throttle trigger You can easily transport your gradually to increase the engine MANTIS Tiller to a friend’s or speed and engage the tines. relative’s house. Just empty the NOTE: This step must be fuel tank. (This is crucial.) -
Page 13: Tilling & Cultivating
Unlike a tractor or big 1. Make sure your tiller is off. As a tiller, your MANTIS tiller, your MANTIS Tiller is a Tiller works the soil down to 10” precision tool. It will pulverise 2. Remove the retaining pins (25 cm) deep. - Page 14 Your Mantis Tiller weeds 15cm to Weeding position 23 cm wide. So you can run it in Tine teeth point in the opposite a tightly planted garden without direction as the rotation of the tine.
-
Page 15: Maintenance
Maintenance How to check the grease level inside the worm gear housing When we built your MANTIS Tiller, we lubricated the worm gear housing thoroughly. It is imperative that you inspect the grease level once a year. Simply remove the cover plate on the worm gear housing. -
Page 16: Storage
8. Wipe the tines with oil or spray IMPORTANT IMPORTANT It is important to store your 4 Stroke Mantis Avoid any orientation that places the top cover Tiller in an upright position. Laying the Tiller (engine head) down -this may allow oil from the... -
Page 17: Mantis Tiller Assembly Layout
Mantis Tiller assembly... - Page 18 Mantis Tiller assembly MATERIAL MATERIAL 400257 TRIGGER HANDLE TINE SHAFT ASSM. RH WORM GEAR THRUST 400255 HANDLE ASSM. LH WASHER 400224 LOWER HANDLE - WORM GEAR BEARING FOLD DOWN BEARING 400620 LABEL BEARING SEAL RETAINER HANDLE BRACE 438RA TINE ASSY - RT...
-
Page 19: Troubleshooting
– Ignition lead wire shorted, – Replace lead wire or attach to spark plug. broken or disconnected from spark plug. – Ignition inoperative – Contact your Mantis Service Department. – Diaphragm clogged – Replace diaphragm 3. Engine hard to start –... - Page 20 Please Call us First! Our tines not only work better If you ever need Mantis parts, If you are having any trouble with any Mantis product, than the rest: they’re also we’ll get them right out to please call us. Ask for the Customer Service Dept. Usually, guaranteed for life against you.
- Page 21 Name: Disassemble the machine or part, empty the petrol and wrap it in a sturdy box; send it back to us. Thank you. ©2018 Mantis, Division of Schiller Grounds Care, Inc. P/N 401739 REV B 5/30/18...
-
Page 23: Motobêche-Bineuse
Tiller/Cultivator with 4 Stroke Engine OWNER’S MANUAL Original Instructions Motobêche-bineuse à moteur 4 temps MANUEL D’UTILISATION Traduction des instructions originales Gartenfräse/Hacke mit Viertaktmotor BEDIENERHANDBUCH Übersetzung der Originalanleitung... - Page 24 Assemblage de la motobêche ... . . 6-10 MANTIS ....... 17 Mise en marche .
-
Page 25: Règles De Sécurité Et Avertissements
Règles de sécurité et avertissements Vous noterez, tout au long de ce manuel, des « Règles de sécurité » et des « Remarques importantes ». Pour votre propre sécurité, assurez-vous de bien les comprendre et veillez à respecter ces mises en garde. I. -
Page 26: Avertissements - À Faire
SPECIFICATION: NIVEAU DE PUISSANCE ACOUSTIQUE GARANTI Modèle 7263 0,61 Kw Max 7000 min 9,5 kg AVERTISSEMENT • DANGER SI LA MOTOBÊCHE EST UTILISÉE DE MANIÈRE INCORRECTE OU SI LES PRÉCAUTIONS DE SÉCURITÉ NE SONT PAS RESPECTÉES, L’UTILISATEUR RISQUE D’INFLIGER DES BLESSURES GRAVES À... -
Page 27: Avertissements Concernant Le Moteur
Confier les réparations à un technicien ou revendeur qualifié. Veiller Ne pas tenter de dégager les dents à ce que seules des pièces Mantis Ne pas conduire la motobêche d’une pendant qu’elles sont en mouvement. d’origine soient utilisées. -
Page 28: Assemblage
PAS HÉSITER À CONSULTER UN DISTRIBUTEUR AGRÉÉ MANTIS. Quantité Description *Repère La motobêche MANTIS est livrée partiellement montée. Il ne reste plus Montant supérieur de poignée qu’à installer les montants de poignée, la Montant supérieur de poignée – poignée de transport et les fraises. Il suffit côté... - Page 29 Assemblage (suite) ASSEMBLAGE du coude où le montant inférieur de poignée se courbe. DES MONTANTS (Figures 2 et 3) INFÉRIEURS DE 5. Faire maintenant glisser POIGNÉE l’autre montant inférieur de poignée sur le boulon de 76 mm (3 po). Ajuster l’autre bride sur la Pour l’identification des numéros de section courte de cet autre montant référence des pièces, se reporter aux...
-
Page 30: Transport
Assemblage (suite) Assemblage du guidon Nota. - des montants supérieurs de poignée. Si la poignée de commande Insérer ensuite une vis et un écrou de l’accélérateur est montée à et de la poignée de d’un côté et de l’autre (Figure 5). gauche, elle ne se pliera pas vers transport le bas aussi complètement que si... - Page 31 REMARQUE IMPORTANTE : méplat se place vers l’extérieur. Avant de démarrer la motobêche (Figure 1) Mantis 4 temps, vider le flacon 3. Vérifier que les fraises sont prédosé (80 ml) d’huile pour posées correctement pour le bêchage. moteur 4 temps. Voir les détails...
-
Page 32: Mesure Corrective
Assemblage (suite) Remplissage d’huile excessif Ne pas trop remplir d’huile. L’excédent et l’insuffisance d’huile peuvent endommager le moteur et annuler la garantie. L’excédent d’huile peut causer : Forte résistance au lancement Poignée bloquée 1. Démarrage difficile ou blocage de piston en raison de l’excédent d’huile dans la chambre de combustion. -
Page 33: Mise En Marche
3100 TR/MN). en marche de la 2. Tirer lentement sur la poignée du cordon du démarreur jusqu’à apparition motobêche Mantis d’une certaine résistance, puis tirer énergiquement. Veiller à ce que le (moteur 4 temps 25 cc) levier du volet de départ soit sur la position ouverte de marche normale. -
Page 34: Informations Supplémentaires
Informations supplémentaires AVERTISSEMENT • DANGER SI LE MOTEUR NE S’ARRÊTE PAS LORSQUE L’INTERRUPTEUR EST MIS SUR LA POSITION D’ARRÊT, RELACHER LA COMMANDE DE L’ACCÉLÉRATEUR ET LAISSER LE MOTEUR PASSER AU RALENTI. DEPOSER LA MOTOBÊCHE, ET POUSSER LE LEVIER DU VOLET DE DÉPART (STARTER) VERS L’AVANT, SUR LA POSITION FERMÉE DE DÉMARRAGE À... -
Page 35: Bêchage Et Binage
Contrairement à configuration de binage un tracteur ou un gros motoculteur, Dans sa configuration motobêche, la motobêche MANTIS est un la machine travaille le sol jusqu’à 1. Vérifier que le moteur est à instrument de précision. Elle permet une profondeur de 25 cm (10 po). - Page 36 Dents autres. La motobêche Mantis est un outil Arrière Avant de désherbage de précision que l’on manoeuvre facilement dans les *Avec l’accessoire charrue en option endroits resserrés.
-
Page 37: Entretien
Vérification du niveau de graisse à l’intérieur du carter de la vis sans fin Au cours de la fabrication de la motobêche MANTIS, le carter de la vis sans fin a été lubrifié soigneusement. Il est très important de vérifier le niveau de graisse une fois par an. -
Page 38: Rangement
Il est important de ranger la motobêche 4 temps supérieur (culasse du moteur) en bas - l’huile Mantis en position verticale. Si la motobêche du carter peut pénétrer dans la chambre de est couchée sur le côté, l’huile peut s’écouler du combustion et résulter en un démarrage difficile... -
Page 39: Mantis
Assemblage de la motobêche Mantis... - Page 40 Assemblage de la motobêche Mantis QTÉ RÉF. DÉSIGNATION QTÉ RÉF. DÉSIGNATION 400257 POIGNÉE DE COMMANDE ARBRE DES FRAISES CÔTÉ DROIT RONDELLE DE BUTÉE 400255 POIGNÉE CÔTÉ GAUCHE D’ENGRENAGE À VIS SANS FIN 400224 MONTANT INFÉRIEUR – PALIER D’ENGRENAGE À VIS SANS...
-
Page 41: Depannage
– Allumage hors service. – Appeler le service clientèle Mantis. 3. Le moteur est difficile à mettre en marche – Eau dans l’essence ou mélange vicié – Vidanger tout le système et refaire le de carburant. - Page 42 Contactez-nous en premier ! Si vous éprouvez de la difficulté avec tout produit Mantis, veuillez nous contacter. Nous pouvons habituellement résoudre la plupart des problèmes au téléphone. Si vous devez renvoyer un produit –...
- Page 43 Démontez la pièce qui doit être renvoyée, emballez-la dans le carton d’origine ou toute autre boîte robuste et expédiez-la en port payé. Si vous renvoyez la motobêche, videz-la de l’essence ! ©2018 Mantis, Division of Schiller Grounds Care, Inc. P/N 401739 REV B 5/30/18...
- Page 45 Tiller/Cultivator with 4 Stroke Engine OWNER’S MANUAL Original Instructions Motobêche-bineuse à moteur 4 temps MANUEL D’UTILISATION Traduction des instructions originales Gartenfräse/Hacke mit Viertaktmotor BEDIENERHANDBUCH Übersetzung der Originalanleitung...
- Page 46 Zusammenbau und Mischen des Kraftstoffs . . 6-10 MANTIS-Fräse ......17 Starten des Geräts ......11 Motorbauteil-Diagramme .
-
Page 47: Sicherheitsvorschriften Und Warnungen
Sicherheitsvorschriften und Warnungen Sie werden in diesem Handbuch zahlreiche Sicherheitsregeln und wichtige Hinweise antreffen. Sie sollten diese Warnungen für Ihren eigenen Schutz unbedingt verstehen und beachten. I. Besondere Sicherheitsinformationen ACHTUNG • GEFAHR ACHTUNG • GEFAHR ZUR REDUZIERUNG DES UNFALLRISIKOS SIND ALLE VORSICHT: MIT DIESEM SYMBOL WIRD AUF WICHTIGE SICHERHEITSHINWEISE IN DIESEM HANDBUCH ZU SICHERHEITSHINWEISE AUFMERKSAM GEMACHT. - Page 48 SPECIFICATION: GARANTIERTER SCHALLLEISTUNGSPEGEL: Modell 7263 0,61 Kw Max 7000 min 9,5 kg ACHTUNG • GEFAHR BEI UNSACHGEMÄSSEM GEBRAUCH DER GARTENFRÄSE ODER MISSACHTUNG DER SICHERHEITSVORKEHRUNGEN RISKIERT DER BENUTZER SCHWERE VERLETZUNGEN AN SICH UND ANDEREN. VOR JEDEM VERSUCHTEN BETRIEB DIESER GARTENFRÄSE DIESES HANDBUCH LESEN UND BEACHTEN.
- Page 49 Haltegriffe umschließen müssen, wenn bevor der Motor ausgeschaltet ist ausführen lassen. Darauf achten, dass nur die Hackelemente in Bewegung sind und und sichergestellt wurde, dass die Originalersatzteile von Mantis benutzt der Motor läuft. Hackelemente zum Stillstand gekommen werden. sind. Nicht zu weit nach vorne beugen.
- Page 50 GEFAHR EIN UNSACHGEMÄSSER ZUSAMMENBAU DIESER GARTENFRÄSE KANN SCHWERE VERLETZUNGEN VERURSACHEN. ALLE ANLEITUNGEN SORGFÄLTIG BEFOLGEN. BEI JEGLICHEN FRAGEN WENDEN SIE SICH AN IHREN MANTIS- KUNDENDIENST. Ihre MANTIS-Gartenfräse ist beim Anzahl Beschreibung *Kenn-Nr. Versand bereits teilweise zusammengebaut. Obere Griffbaugruppe Sie müssen nur die Haltestangen, den Obere Griffbaugruppe, Gashebelseite Tragegriff und die Hackelemente einbauen.
- Page 51 Zusammenbau (Fortsetzung) ZUSAMMENBAU 5. Schieben Sie dann die andere untere Griffstange auf die 7,62 cm DER UNTEREN lange Schraube auf. Befestigen GRIFFSTANGEN Sie die andere Klemme am kurzen Schenkel der anderen Griffstange. Bringen Sie eine Mutter an und Für die Identifizierung der ziehen Sie diese handfest an.
- Page 52 Zusammenbau (Fortsetzung) Zusammenbau der Hinweis: Wenn der Gashebelgriff oberen Griffstangen aus. Setzen Sie auf der linken Seite montiert ist, dann eine Kopfschraube und eine oberen Griffstangen lässt er sich nicht so weit einklappen Sicherungsmutter auf beiden Seiten und des Tragegriffs wie bei einer Befestigung auf ein (Bild 5).
- Page 53 2. Schieben Sie die Zinkenräder auf die Achsschäfte. Das mit „D“ markierte WICHTIGER HINWEIS: Loch muss sich an der Außenseite Vor dem Starten der Mantis- befinden. (Bild 1). Gartenfräse mit Viertaktmotor füllen 3. Stellen Sie sicher, dass die Sie diese mit der vorbemessenen Zinkenräder für das Fräsen richtig...
- Page 54 Zusammenbau (Fortsetzung) Warnung: Nicht mit Öl überfüllen Nicht überfüllen! Wenn zu viel – oder zu wenig – Öl nachgefüllt wird, kann der Motor beschädigt und die Garantie ungültig werden. Mögliche Folgen einer Überfüllung: Hohe Zugkraft Arretierter Griff 1. Schwer zu startender oder blockierter Kolben.
-
Page 55: Starten Des Geräts
Menge Benzin (bleifreies ABZUGSHEBELS BEIM Benzin). STARTEN. Motorstartanleitung BEHALTEN SIE DIE RICHTIGE LEERLAUFDREHZAHL DES für die Mantis- MOTORS BEI (2500 -3100 U/ Gartenfräse MIN). 2. Ziehen Sie den Griff langsam heraus, (25-cc-Viertaktmotor) bis Sie Widerstand verspüren, und ziehen Sie dann rasch. Der Choke muss... -
Page 56: Zusatzinformationen
(Bild 4) und betätigen Sie den Bild 2 Nehmen Sie sie im Auto mit. Abzugshebel, um die Motordrehzahl allmählich zu erhöhen und die Die Gartenfräse von MANTIS Hackelemente einzurücken. lässt sich auch problemlos auf längere Strecken transportieren. Leeren Sie HINWEIS: Dieser Schritt muss einfach den Kraftstofftank. -
Page 57: Fräsen Und Hacken
Als Hacke bearbeitet es die oder einer großen Gartenfräse Oberfläche auf schonende Weise, 3. Entfernen Sie die Hackelemente ist die MANTIS-Gartenfräse ein jedoch nur bis zu einer Tiefe von 5 von der Achse. Präzisionswerkzeug, das Ihren bis 8 cm. - Page 58 Sie den Motor ganz aus, bevor Sie versuchen, die Blockierung zu beseitigen. Mit dem als Zubehör erhältlichen engen Reihen. Ihre Mantis-Gartenfräse Reinigungshaken (Art.-Nr. 1322) Griffe jätet auf einer Breite von 22 cm. Sie ist diese Arbeit im Nu zu erledigen.
-
Page 59: Wartung
Fall ist, füllen Sie Lithiumfett Nr. 0 (Art.-Nr. M9985) auf. Dies ist die einzige Möglichkeit, dem Schneckengetriebegehäuse Schmierstoff hinzuzufügen. (Bild 1) Zum Kauf von Mantis- Schmierstoffen wenden Sie sich an Ihren Mantis-Kundendienst. Bitte nicht überfüllen. Zu viel Schmierstoff kann Druck erzeugen, der einen Ausfall von Dichtungen oder ein Schlupfen der Kupplung verursachen kann. - Page 60 Rufen Sie uns einfach an der Gartenfräse bereit sind oder diese (1-800-366-6268) und erkundigen Sie länger als 2 Wochen nicht benutzt wird, sich nach einem Mantis- oder Viertakt- sollten Sie daher den Kraftstofftank Gartenfräsen-Vertragshändler in Ihrer völlig ablassen.
- Page 61 Montage der Mantis-Gartenfräse...
- Page 62 Montage der Mantis-Gartenfräse MENGE MATERIAL MENGE MATERIAL 400257 GRIFFABZUGS- HACKELEMENTWELLE BAUGRUPPE R UNTERLAGSSCHEIBE 400255 GRIFFSTANGENBAUGRUPPE L SCHNECKENGETRIEBE 400224 UNTERE GRIFFSTANGE - SCHNECKENGETRIEBELAGER EINKLAPPBAR LAGER 400620 AUFKLEBER LAGERVERSCHLUSSBEFESTIGER GRIFFVERSTREBUNG 438RA HACKELEMENTE 910502 10-32 X 3/4 - (RECHTS) FLANSCHSCHRAUBE 438LA HACKELEMENTE (LINKS)
-
Page 63: Fehlerbehebung
– Zündkabel auswechseln oder an oder nicht angeschlossen. Zündkerze anschließen. – Zündung defekt (kein Zündfunke). – Rufen Sie den Mantis Kundendienst an. 3. Der Motor springt nur schwer an – Wasser im Benzin. Kraftstoffgemisch alt. – Kraftstoff ablassen und durch neuen ersetzen. - Page 64 Die Hackelemente besitzen Lebenslanger Service Bitte rufen Sie uns zuerst an! ei ne Falls Sie ein Mantis-Ersatzteil Falls Sie Probleme mit einem Mantis-Produkt haben sollten, Fünf-Jahres-Garantie ge gen brauchen, bemühen wir dann rufen Sie uns bitte an. Meistens können wir Ihre Bruch! uns, es Ihnen innerhalb von Probleme schon am Telefon lösen.
- Page 65 Für Reparaturen oder Rückvergütungen Bitte füllen Sie folgende Angaben aus, wenn Sie einen Reparaturservice oder eine Rückvergütung wünschen. Name: Vorname: Adresse: PLZ/Ort: Tel. (Geschäft): Tel. (Privat): E-Mail: Kundennummer: (wenn vorhanden) Produkt, das Sie an uns zurückschicken: für: ® Reparatur ® Reparaturkostenvoranschlag ®...
-
Page 68: Declaration Of Conformity
Declare that the machine described below: Make & Type ..... . . Mantis Motor Hoe (Tiller) Category ......Motor Hoe, Hand Held, Pedestrian controlled, Petrol Powered Series (model) .