Sharp LL-S242A-W Manuel D'installation

Masquer les pouces Voir aussi pour LL-S242A-W:
Table des Matières

Publicité

Les langues disponibles

Les langues disponibles

Liens rapides

LL-S242A-W
LL-P202V
LCD MONITOR
MONITEUR LCD
MONITOR LCD
SETUP MANUAL
MANUEL D'INSTALLATION
MANUAL DE INSTALACIÓN
ENGLISH ...... E1
FRANÇAIS ..... F1
ESPAÑOL .... S1

Publicité

Table des Matières
loading

Sommaire des Matières pour Sharp LL-S242A-W

  • Page 1 LL-S242A-W LL-P202V LCD MONITOR MONITEUR LCD MONITOR LCD SETUP MANUAL MANUEL D’INSTALLATION MANUAL DE INSTALACIÓN ENGLISH ..E1 FRANÇAIS ..F1 ESPAÑOL ..S1...
  • Page 2: Declaration Of Conformity

    This device complies with Part 15 of the FCC Rules. Operation is subject to the following two conditions: (1) This device may not cause harmful interference, and (2) this device must accept any interference received, including interference that may cause undesired operation. Responsible Party: SHARP ELECTRONICS CORPORATION Sharp Plaza, Mahwah, New Jersey 07430 TEL: 1-800-BE-SHARP U.S.A. ONLY...
  • Page 3: Table Des Matières

    REFER SERVICING TO QUALIFIED SERVICE PERSONNEL. DEAR SHARP CUSTOMER Thank you for your purchase of a SHARP LCD product. To ensure safety and many years of trouble-free operation of your product, please read the Safety Precautions carefully before using this product.
  • Page 4: Safety Precautions

    SAFETY PRECAUTIONS Electricity is used to perform many useful functions, but it can also cause personal injuries and property damage if improperly handled. This product has been engineered and manufactured with the highest priority on safety. However, improper use can result in electric shock and/or fire.
  • Page 5: Safety Instruction

    - Do not use your nails, touch pens or digitizer pens other Doing so may result in low-temperature burns. than the one supplied, sharp pencils, or other hard objects to - For your health, observe the following: operate the unit.
  • Page 6: Supplied Components

    CD-ROM (Utility Disc) Setup Manual (this manual) Logo sticker * SHARP Corporation holds authorship rights to the Utility Disk program. Do not reproduce it without permission. * Keep packaging for use when transporting monitor, etc. Applying the Logo Sticker You can apply the supplied logo sticker to the unit.
  • Page 7: Binding Cables

    Binding Cables Caution • When connecting cables, spread a soft cloth on a stable level surface such as a desk, and gently place the monitor on it with the screen facing down. Video cable and USB cable Secure the video cable (HDMI or DisplayPort) and USB cable using the cable clamp. 1.
  • Page 8: Connecting Peripheral Equipment

    Connecting Peripheral Equipment DisplayPort input terminal Caution • Be sure to turn off the power and disconnect the plug from the power outlet before connecting/disconnecting cables. Also, read the manual of the equipment to be connected. Commercially available DisplayPort cable •...
  • Page 9: Connecting Usb Devices

    Connecting Peripheral Equipment (Continued) Connecting USB devices Connecting the digitizer pen (LL-P202V) When using a commercially available mouse, keyboard, or other device, connect the device to the USB port. When using the supplied digitizer pen, connect the digitizer pen cable. USB cable Digitizer pen cable USB terminal...
  • Page 10: Installation

    3. Place the monitor in the standing position, and adjust the angle of the stand. following positions. Hold the display with one hand so that it does not fall over, Installation position LL-S242A-W LL-P202V hold the rear leg of the stand with your other hand, and Standing Rack stand adjust the angle of the stand.
  • Page 11 Installation (Continued) 3. Peel off the adhesive tape securing the support to the nLL-S242A-W back side. Placement on the rack stand Place the unit on the supplied rack stand. 1. Attach the back of the stand to the front. Tape Place the front and back sides together, and attach the hinge.
  • Page 12: Horizontal Position

    Installation (Continued) Installing on a table Portrait orientation (Pen writing position/Horizontal position) Remove the monitor from the stand and place face-down on a table or other level surface. Caution • Do not exert a large amount of force on the monitor from above.
  • Page 13: Turning Power On/Off

    Installation (Continued) 2. Place the monitor where you want to use it. nLL-S242A-W Horizontal position Place the monitor on a table or other level surface. 1. Simply lay the unit on the desired location. Turning Power ON/Off Turning on the power Turning off the power 1.
  • Page 14: Specifications

    * When the DisplayPort input terminal and touch panel are connected. As a part of our policy of continuous improvement, SHARP reserves the right to make design and specification changes for product improvement without prior notice. The performance specification figures indicated are nominal values of production units. There may be some deviations from...
  • Page 15: Information Importante

    PROCÉDURE D’ENTRETIEN. CHER CLIENT Nous vous remercions d’avoir acheté cet appareil SHARP à écran LCD. Afin de garantir le bon fonctionnement de ce moniteur, nous vous conseillons de lire attentivement cette brochure et de la conserver pour toute référence ultérieure.
  • Page 16: Précautions De Sécurité

    PRÉCAUTIONS DE SÉCURITÉ L’électricité remplit de nombreuses fonctions utiles, mais elle peut provoquer des blessures et des dégâts matériels si elle n’est pas utilisée correctement. Cet appareil a été conçu et fabriqué en attachant la plus grande importance à la sécurité. Cependant, une utilisation inadéquate peut entraîner une décharge électrique et/ou un incendie.
  • Page 17: Précautions De Sécurité (Suite)

    PRÉCAUTIONS DE SÉCURITÉ (Suite) Afin de satisfaire aux normes EMC, utiliser des câbles blindés pour connecter les bornes suivantes : borne d’entrée HDMI, borne d’entrée DisplayPort Un moniteur placé sur un support instable est dangereux en raison des risques de chute qu’il présente. De nombreuses blessures, touchant en particulier les enfants, peuvent être évitées en prenant quelques précautions simples : •...
  • Page 18: Composants Fournis

    CD-ROM (Utility Disk) Manuel d’Installation (ce manuel) Logo adhésif * SHARP Corporation détient les droits d’auteur du programme de l’Utility Disk. Veuillez ne pas le reproduire sans autorisation de la société. * Conservez l’emballage pour transporter le moniteur, etc. Application du logo adhésif Vous pouvez coller le logo adhésif fourni sur l’appareil.
  • Page 19: Fixation Des Câbles

    Fixation des câbles Attention • Pendant le raccordement des câbles, étalez un tissu doux sur une surface horizontale stable, telle qu’un bureau, et placez le moniteur délicatement dessus, en orientant l’écran vers le bas. Câble vidéo et câble USB Fixez le câble vidéo (HDMI ou DisplayPort) et le câble USB à l’aide du serre-câble. 1. Enlevez le serre-câble.
  • Page 20: Connexion De Périphériques

    Connexion de périphériques Borne d’entrée DisplayPort Attention • Veillez à bien mettre hors tension l’interrupteur principal puis débranchez la prise de l’alimentation secteur avant de Câble DisplayPort disponible dans connecter ou de déconnecter les câbles. Lisez également le commerce le manuel de l’équipement à connecter. •...
  • Page 21: Connexion De Périphériques (Suite)

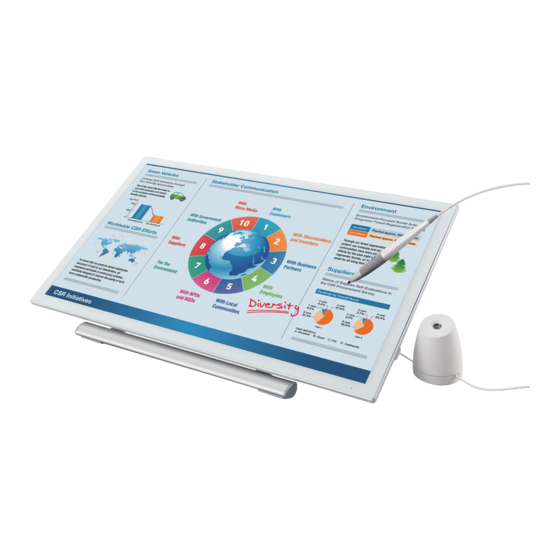
    Connexion de périphériques (Suite) Connexion de périphériques USB Connexion du stylet de numérisation (LL-P202V) Lors de l’utilisation d’une souris, d’un clavier ou d’un autre périphérique en vente dans le commerce branchez cet Lors de l’utilisation du stylet de numérisation, branchez le appareil au port USB. câble du stylet. Câble USB fourni Câble du stylet de numérisation Bornes USB Borne de raccordement du stylet...
  • Page 22: Installation

    3. Disposez le moniteur à la verticale, puis réglez l’angle du support. les positions suivantes. Tenez l’écran d’une main pour qu’il ne bascule pas, tenez Position d’installation LL-S242A-W LL-P202V le pied arrière du support avec l’autre main et ajustez l’angle Position Support fixe du support.
  • Page 23: Installation (Suite)

    Installation (Suite) 3. Enlevez le ruban adhésif fixant l’élément de maintien nLL-S242A-W sur le panneau arrière. Installation sur le support fixe Placez l’appareil sur le support fixe fourni. 1. Fixez les panneaux avant et arrière du support. Ruban adhésif Assemblez ensemble les panneaux avant et arrière, puis attachez la charnière. Arrière Partie avant de la charnière Élément de maintien 4.
  • Page 24: Installation Sur Une Table (Positionnement Pour Écriture/ Position Horizontale)

    Installation (Suite) Installation sur une table Orientation verticale (positionnement pour écriture/ position horizontale) Retirez le moniteur de son support et placez-le à plat, face écran vers le bas, sur une table ou une autre surface plane. Attention • Ne forcez pas trop sur le moniteur par en haut. Cela pourrait endommager le volet.
  • Page 25: Mise Sous / Hors Tension

    Installation (Suite) 2. Placez le moniteur là où vous souhaitez l’utiliser. nLL-S242A-W Position horizontale Placez le moniteur sur une table ou une autre surface plane. 1. Placez simplement l’appareil à l’horizontale à l’endroit souhaité. Mise sous / hors tension Mise sous tension Mise hors tension 1.
  • Page 26: Caractéristiques

    * Quand la borne d’entrée DisplayPort et l’écran tactile sont connectées. SHARP se réserve le droit d’apporter sans préavis des modifications à la présentation et aux caractéristiques des appareils afin d’amélioration. Les valeurs indiquées dans ce document sont les valeurs nominales des appareils de série mais de légères différences peuvent être constatées...
  • Page 27: Estimado Cliente De Sharp

    CUALQUIER REPARACIÓN A UN TÉCNICO DE SERVICIO CALIFICADO. ESTIMADO CLIENTE DE SHARP Gracias por adquirir un producto LCD de SHARP. Para garantizar la seguridad y muchos años de funcionamiento sin problemas, lea atentamente las Precauciones de seguridad antes de utilizar este producto.
  • Page 28: Precauciones De Seguridad

    PRECAUCIONES DE SEGURIDAD La electricidad se emplea para muchas funciones útiles pero también puede causar lesiones personales y daños en la propiedad si se manipula de forma inadecuada. Este producto se ha diseñado y fabricado poniendo el máximo énfasis en la seguridad.
  • Page 29: Instrucciones De Seguridad

    PRECAUCIONES DE SEGURIDAD (Continuación) 20. No toque las partes del producto o el adaptador CA que se calientan durante un tiempo prolongado. Podrían producirse quemaduras de baja temperatura. Para mantener la conformidad con la normativa sobre compatibilidad electromagnética (EMC), utilice cables blindados para la conexión a los siguientes terminales: terminal de entrada HDMI y DisplayPort.
  • Page 30: Componentes Suministrados

    Manual de Instalación (este manual) Adhesivo del logotipo * SHARP Corporation posee los derechos de autor del programa Disco de utilidades. No lo reproduzca sin permiso. * Conservar el embalaje para su uso durante el transporte del monitor, etc. Aplicar el adhesivo del logotipo Puede pegar el adhesivo suministrado del logotipo en la unidad.
  • Page 31: Fijación De Los Cables

    Fijación de los cables Precaución • Al conectar los cables, coloque un paño suave en una superficie nivelada y estable, como una mesa, y coloque suavemente el monitor sobre el mismo con la pantalla boca abajo. Cable de vídeo y cable USB Fije el cable de vídeo (HDMI o DisplayPort) y el cable USB mediante la abrazadera para cable. 1.
  • Page 32: Conexión De Equipos Periféricos

    Conexión de equipos periféricos Terminal de entrada DisplayPort Precaución • Asegúrese de desconectar el equipo y desenchufarlo de la toma de corriente antes de conectar o desconectar los cables. Asimismo, lea el manual del equipo que desea conectar. Cable DisplayPort de venta en comercios •...
  • Page 33: Conexión De Dispositivos Usb

    Conexión de equipos periféricos (Continuación) Conexión de dispositivos USB Conexión del lápiz digitalizador (LL-P202V) Si utiliza un ratón, teclado u otro dispositivo de venta en comercios, conecte el dispositivo al puerto USB. Si utiliza el lápiz digitalizador, conecte el cable del lápiz digitalizador. Cable USB Cable del lápiz digitalizador Terminal USB Terminal de conexión del lápiz Compruebe la orientación del conector e insértelo digitalizador...
  • Page 34: Instalación

    3. Coloque el monitor en la posición de pie y ajuste el ángulo del pedestal. siguientes posiciones. Sujete la pantalla con una mano para que no caiga, sujete Posición de instalación LL-S242A-W LL-P202V la pata posterior del pedestal con la otra mano y ajuste el Posición de Pedestal de Sí...
  • Page 35 Instalación (Continuación) 3. Retire la cinta adhesiva que fija el soporte al lado nLL-S242A-W trasero. Colocación en el pedestal de bastidor Coloque la unidad en el pedestal de bastidor suministrado. 1. Acople la parte trasera del pedestal a la parte frontal. Tapa Coloque las partes frontal y trasera juntas y acople la bisagra.
  • Page 36 Instalación (Continuación) Instalación en una mesa Orientación vertical (Estilo para escritura con lápiz/ posición horizontal) Retire el monitor del pedestal y colóquelo boca abajo sobre una mesa u otra superficie nivelada. Precaución • No ejerza demasiada fuerza sobre el monitor desde arriba, ya que hacerlo podría dañar la tapa.
  • Page 37: Encendido/Apagado

    Instalación (Continuación) 2. Coloque el monitor donde vaya a utilizarlo. nLL-S242A-W Posición horizontal Coloque el monitor sobre una mesa u otra superficie nivelada. 1. Tumbe la unidad en el lugar que prefiera. Encendido/apagado Encendido de la alimentación Apagado de la alimentación 1. Pulse el Botón POWER. 1. Apague el PC. 2.
  • Page 38: Especificaciones

    * Cuando se conectan el terminal de la entrada DisplayPort y el panel táctil. Como parte de la política de mejoras continuas, SHARP se reserva el derecho de realizar cambios en el diseño y especificaciones para la mejora del producto sin previo aviso. Las figuras indicadas que especifican el rendimiento son valores nominales de los aparatos de producción.
  • Page 40 Printed in China Imprimé en China Impreso en Chine TINSE1348MPZZ(1)

Ce manuel est également adapté pour:

Ll-p202v

Table des Matières