Table des Matières

Publicité

Les langues disponibles
  • FR

Les langues disponibles

Liens rapides

LCD Monitor
LCD Farbmonitor
Moniteur LCD
Monitor LCD
Monitor LCD
LL-T2020
OPERATION MANUAL
BEDIENUNGSANLEITUNG
MODE D'EMPLOI
MANUALE D'USO
MANUAL DE FUNCIONAMIENTO

Publicité

Table des Matières
loading

Sommaire des Matières pour Sharp LL-T2020

  • Page 1 LCD Monitor LCD Farbmonitor Moniteur LCD Monitor LCD Monitor LCD LL-T2020 OPERATION MANUAL BEDIENUNGSANLEITUNG MODE D’EMPLOI MANUALE D’USO MANUAL DE FUNCIONAMIENTO...
  • Page 2 Table of Contents / Inhaltsverzeichnis / Table des matières / Indice / Índice Notice for Users in Europe ............. 3 Notice for Users in the UK .
  • Page 3 Notice for Users in Europe This equipment complies with the requirements of Directives 89/336/EEC and 73/23/EEC as amended by 93/68/EEC. Dieses Gerät entspricht den Anforderungen der EG-Richtlinien 89/336/EWG und 73/23/EWG mit Änderung 93/68/EWG. Ce matériel répond aux exigences contenues dans les directives 89/336/CEE et 73/23/CEE modifiées par la directive 93/68/CEE.
  • Page 4: Important

    "WARNING :THIS APPARATUS MUST BE EARTHED" Notice for Users in Australia Service Inquiries Please contact your dealer for service if required or contact Sharp Corporation of Australia on 1 300 13 50 22 for referral to your nearest Sharp authorized Service Center.
  • Page 5: Fcc Statement

    Sharp Plaza, Mahwah, New Jersey 07430 TEL :1-800-BE-SHARP * As an ENERGY STAR Partner, SHARP has determined that this product meets the ENERGY STAR guidelines for energy efficiency. This product utilizes tin-lead solder, and fluorescent lamp containing a small amount of mercury.
  • Page 6 Their purpose is to prevent, or at least to delay the spread of fire. Up to 30% of the plastic in a computer casing can consist of flame LL-T2020-B LL-T2020-H retardant substances. Most flame retardants contain...
  • Page 7: Table Des Matières

    Table of Contents Tips and safety precautions ............. 8 Product description .
  • Page 8: Tips And Safety Precautions

    - Do not place the monitor on top of unstable monitor needs to be transported. objects or in unsafe places. Do not allow the - Sharp Corporation holds authorship rights to the monitor to come into contact with strong shocks Utility Disk program. Do not reproduce it without or vibrations.
  • Page 9: Product Description

    Product description 1. INPUT button ......To switch between the signal’s input terminals. 2. MENU button ....... This button is used to pop-up, select and close the OSD (On Screen Display) Menu. button ........This button is used to select menu options when the OSD Menu is displayed.
  • Page 10: Height Adjustment, Angle Adjustment, Rotation (Long Height/Width)

    Height adjustment, angle adjustment, rotation (long height/width) Rotation (long height/width) CAUTION! The display can be rotated for a long height or - Pressure from hands on the LCD panel could width to suit the displayed content. cause damage. - Before rotating, move the display to its - Be careful not to allow your fingers to be uppermost position.
  • Page 11: Connecting The Monitor And Turning The Monitor On And Off

    Connecting the monitor and turning the monitor on and off CAUTION! 3.Refit the cover. Be careful not to pinch the cable. - When connecting, ensure that both the monitor and computer are switched off. - Be careful not to overly bend the cable or add extension cords as this could lead to a malfunction.
  • Page 12 Connecting the monitor and turning the monitor on and off Analog connection Connect the analog signal cable to the analog RGB output terminal of the computer. Input terminal 1 and 2 You can connect to Input terminal 1 and 2 either side.
  • Page 13: Connecting The Monitor To A Power Source

    Connecting the monitor and turning the monitor on and off When connecting using a separately sold 2- Connecting the monitor to a power input cable source The separately sold 2-input cable (NL-C03J) enables connection between the DVI-I input terminal on the monitor and the two PCs. (One analog and one digital connection.) Power terminal 1.Connect the 2-input cable to the DVI-I input...
  • Page 14: Turning The Power On

    Connecting the monitor and turning the monitor on and off Turning the power on Changing between input terminals 1.Turn on the main power of the monitor. Use the INPUT button to switch between signal input terminals. When not using a 2-input cable Select [INPUT-1] Select [INPUT-2] Main power switch...
  • Page 15: Turning The Power Off

    Connecting the monitor and turning the monitor on and off Turning the power off 1. Turn the computer off. 2. Press the monitor's POWER button. The Power LED will disappear. Turn the computer Press power button If the monitor will not be used for a long time, turn off the main power switch of the monitor, and remove the power plug from the outlet.
  • Page 16: Adjusting The Screen Display

    Adjusting the screen display For analog signal Adjustment lock function 1.First perform an automatic adjustment. (p. 17) By disabling the control buttons (i.e. setting the 2.Perform manual adjustment where necessary. lock) any attempted changes to adjusted values will (p. 18) be voided.
  • Page 17: Adjusting The Screen Display (With Analog Connection)

    Adjusting the screen display (With analog connection) How to Adjust Automatic screen adjustment 1.Press the MENU button. Options in the ADJUSTMENT Menu can be The ADJUSTMENT Menu will be displayed. adjusted automatically (CLOCK, PHASE, H-POS, A D J U S T M E N T V-POS).
  • Page 18: Manual Screen Adjustment

    Adjusting the screen display (With analog connection) ADJUSTMENT Menu Manual screen adjustment A D J U S T M E N T Adjustments can be made using On Screen Display (OSD) Menu provided. M A N UA L AU TO C L O C K 1 2 7 P H A S E...
  • Page 19 Adjusting the screen display (With analog connection) GAIN CONTROL Menu COLOR CONTROL Menu G A I N C O N T RO L COLOR CONTROL COLOR MODE sRGB STD VIVID M A N UA L AU TO WHITE BALANCE B L AC K L E V E L GAMMA C O N T R A S T SATURATION...
  • Page 20 Adjusting the screen display (With analog connection) MODE SELECT-1 Menu COOL ..Color tone bluer than standard • ... Color tone slightly bluer than standard M O D E S E L E C T- 1 STD ..Color tone standard setting I N F O R M AT I O N •...
  • Page 21 Adjusting the screen display (With analog connection) MODE SELECT-2 Menu M O D E S E L E C T- 2 O S D L A N G UAG E S C A L I N G 4 0 0 L I N E S 6 4 0 7 2 0 I N P U T- 1...
  • Page 22: Adjusting The Screen Display (With Digital Connection)

    Adjusting the screen display (With digital connection) COLOR CONTROL Menu Adjustments can be made using On Screen Display (OSD) Menu provided. C O L O R C O N T RO L C O L O R M O D E s R G B S T D V I V I D On Screen Display for adjustment W H I T E B A L A N C E...
  • Page 23 Adjusting the screen display (With digital connection) MODE SELECT-1 Menu COOL ..Color tone bluer than standard • ... Color tone slightly bluer than standard M O D E S E L E C T- 1 STD ..Color tone standard setting I N F O R M AT I O N •...
  • Page 24 Adjusting the screen display (With digital connection) MODE SELECT-2 Menu M O D E S E L E C T- 2 O S D L A N G UAG E S C A L I N G 4 0 0 L I N E S 6 4 0 7 2 0 I N P U T- 2...
  • Page 25: Monitor Care And Repair

    LCD panel. (A soft or your nearest Sharp authorized Service cloth such as gauze or that used for lens cleaning Center. (Never attempt this replacement on is suitable.)
  • Page 26: Specifications

    Specifications Product specifications Dimensions (W x D x H) (Units: mm) With long width screen: 450 x 228 x 438 - 498 LCD display With long heightscreen: 348 x 228 x 490 - 550 51 cm measured diagonally Weight Advanced Super-V and Anti Glare Low Reflection Approx.
  • Page 27 Specifications Relevant signal timings (analog) Relevant signal timings (digital) Display mode Hsync Hsync Vsync Display mode Vsync frequency frequency 640x480 31.5kHz 60Hz 25.175MHz 640x480 31.5kHz 60Hz 25.175MHz VESA VESA 37.9kHz 72Hz 31.5MHz 37.9kHz 72Hz 31.5MHz 37.5kHz 75Hz 31.5MHz 37.5kHz 75Hz 31.5MHz 35.1kHz 56Hz...
  • Page 28: Power Management

    Specifications The DVI-I input connector pin Power management (DVI-I connector with 29 pins) The monitor is based on the VESA DPMS and the DVI DMPM standards. To activate the monitor's Power Management function, both the video card and the computer must conform to the VESA DPMS standard and the DVI DMPM standard.
  • Page 29: Installing Set-Up Information And The Icc Profile (For Windows)

    Installing set-up information and the ICC profile (For Windows) Depending on the computer or OS, it may be For Windows98 necessary to use the computer to operate the Installing monitor set-up information into Win- installation of monitor set-up information etc. If so, dows98, and setting the monitor's ICC profile as a follow the steps below to install the monitor set-up predetermined value.
  • Page 30 Installing set-up information and the ICC profile (For Windows) For Windows2000 For WindowsMe Installing monitor set-up information into Win- Installing monitor set-up information into dows2000, and setting the monitor's ICC profile as WindowsMe, and setting the monitor's ICC profile a predetermined value. as a predetermined value.
  • Page 31 Installing set-up information and the ICC profile (For Windows) Installing the ICC profile For WindowsXP Installing the monitor’s ICC profile. (If the set-up Installing monitor set-up information into information has already been installed, so too has WindowsXP, and setting the monitor's ICC profile the profile, and there is no need to install it.) as a predetermined value.
  • Page 32: Information About The Colorsync Profile (For Macos)

    Information about the ColorSync profile (For MacOS) About the ColorSync profile ColorSync is the Apple Corporation's color man- agement system and is a function that enables color resolution to be realized when used with a compatible application. A ColorSync profile de- scribes the color characteristics of the LCD moni- tor.
  • Page 33: Instructions For Attaching A Vesa Compliant Arm

    Instructions for attaching a VESA compliant arm An arm or stand based on the VESA standard Notes: (commercially available) can be attached to the - The stand is specially made for use with this monitor. monitor. Once having removed the stand, never Procurement of the arm or stand is at the custom- attempt to attach it to another device.
  • Page 34: Information About The Pivot Software (Long Height/Width Display)

    Information about the Pivot Software (Long height/width display) Switching display direction When rotating the display, change the display orientation using Pivot Software. For Windows Compatible operating systems (OS) for the Pivot 1.Click the right mouse button or click the left Software that comes with the monitor: mouse button on at the lower right of the...
  • Page 35 Inhaltsverzeichnis Tips und Sicherheitsvorkehrungen ............36 Produktbeschreibung .
  • Page 36: Tips Und Sicherheitsvorkehrungen

    - Achten Sie darauf, daß der Monitor nicht mit Wasser (Modellbezeichnung: NL-C03J) oder anderen Flüssigkeiten in Berührung kommt. - Schließen Sie am LL-T2020 nur Kabel mit einer Länge Achten Sie darauf, daß keinerlei Gegenstände, von höchstens 3 m an. beispielsweise Büroklammern oder sonstige spitze - Bewahren Sie den Karton für einen eventuellen...
  • Page 37: Produktbeschreibung

    Produktbeschreibung 1. Taste INPUT ........ Für die Umschaltung zwischen den Signaleingangsanschlüssen. 2. Taste MENU ........ Mit dieser Taste öffnen, wählen und schließen Sie das OSD (On screen Display) -Menü. 3. Taste ........Mit dieser Taste wählen Sie die Menüoptionen aus, wenn das OSD- Menü...
  • Page 38: Höheneinstellung, Winkeleinstellung, Drehung (Vertikal/Horizontal)

    Höheneinstellung, Winkeleinstellung, Drehung (Vertikal/Horizontal) Drehung (Vertikal/Horizontal) ACHTUNG: - Wenn Sie mit der Hand auf den LCD-Bildschirm Das Display kann vertikal oder horizontal gedreht drücken, kann dieser beschädigt werden. werden, um der Wiedergabe zu entsprechen. - Vorsichtig vorgehen und darauf achten, dass die - Vor dem Drehen sollte das Display in die oberste Finger nicht eingeklemmt werden.
  • Page 39: Anschließen Des Monitors Und Ein- Und Ausschalten Des Monitors

    Anschließen des Monitors und Ein- und Ausschalten des Monitors - Bevor Sie den Monitor anschließen, müssen Sie 3.Die Abdeckung wieder anbringen. den Monitor und den Computer ausschalten. Vorsichtig vorgehen, damit die Kabel nicht - Achten Sie darauf, daß Sie das Kabel nicht eingeklemmt werden.
  • Page 40 Anschließen des Monitors und Ein- und Ausschalten des Monitors Analoger Anschluß - Das mitgelieferte Digitalsignalkabel oder ein NL- C04J-Kabel (im Handel erhältlich) verwenden. Das Analogsignalkabel am analoger RGB- Wenn andere im Handel erhältliche Ausgangsanschluß des Computers anschließen. Digitalsignalkabel verwendet werden, kann eine Eingangsanschluss 1 und 2 richtige Wiedergabe eventuell nicht möglich sein.
  • Page 41: Anschließen Des Monitors An Eine Stromquelle

    Anschließen des Monitors und Ein- und Ausschalten des Monitors Beim Anschluß eines separat erhältlichen 2- Hinweise: - Bei Verwendung des 2-Eingangskabels stellen Eingangskabels Sie den verwendeten Eingangsanschluß [INPUT- Das im Handel erhältliche 2-Eingangskabel (NL- 1] oder [INPUT-2] im MODE-SELECT-1-Menü auf C03J) ermöglicht die Verbindung zwischen dem [2-LINES] ein.
  • Page 42: Anschließen Eines Usb-Geräts

    Anschließen des Monitors und Ein- und Ausschalten des Monitors Anschließen eines USB-Geräts Einschalten des Monitors Dieser Monitor ist mit einem aktiven USB-Stand- 1.Den Monitor mit dem Hauptschalter einschalten. ard-Steckanschluss (Rev. 1.1) ausgestattet. Nachgeschaltet (2 Anschlüsse) Jeder dieser Ports kann für den Anschluss an ein Hauptschalter USB-Gerät mit einem Nennstrom von 500 mA verwendet werden.
  • Page 43: Umschalten Zwischen Eingangsanschlüssen

    Anschließen des Monitors und Ein- und Ausschalten des Monitors Umschalten zwischen Ausschalten des Monitors Eingangsanschlüssen 1. Schalten Sie den Computer aus. 2.Drücken Sie den Netzschalter am Monitor. Mit der Taste INPUT schalten Sie die Die Betriebsanzeige erlischt. Signaleingangsanschlüsse um. Wenn kein 2-Eingangskabel verwendet wird Wählen Sie [INPUT-1] Wählen Sie [INPUT-2] Schalten Sie den...
  • Page 44: Einstellen Der Bildschirmanzeige

    Einstellen der Bildschirmanzeige Analogsignal Hinweis: 1.Führen Sie zunächst eine automatische - Wenn die Sperre aktiviert ist, sind alle Tasten mit Einstellung durch. (S. 45) Ausnahme des Netzschalters deaktiviert. 2. Führen Sie bei Bedarf eine manuelle Einstellung durch. (S. 46) Aufhebung der Einstellungssperre Digitalsignal 1.
  • Page 45: Einstellen Der Bildschirmanzeige (Bei Analogem Anschluss)

    Einstellen der Bildschirmanzeige (bei analogem Anschluss) Einstellen Automatische Bildschirmeinstellung 1.Drücken Sie die Taste MENU. Die Optionen im Menü ADJUSTMENT können Das Menü ADJUSTMENT wird angezeigt. automatisch eingestellt werden (CLOCK, PHASE, ADJUSTMENT H-POS, V-POS). MANUAL AUTO Hinweis: CLOCK PHASE - Wenn Sie den Monitor zum ersten Mal einrichten H-POS oder eine Komponente des bestehenden Systems V-POS...
  • Page 46: Manuelle Bildschirmeinstellung

    Einstellen der Bildschirmanzeige (bei analogem Anschluss) Menü ADJUSTMENT Manuelle Bildschirmeinstellung A D J U S T M E N T Die Einstellungen können über das OSD-Menü vorgenommen werden. M A N UA L AU TO C L O C K 1 2 7 P H A S E OSD für die Einstellung...
  • Page 47 Einstellen der Bildschirmanzeige (bei analogem Anschluss) Menü GAIN CONTROL COLOR CONTROL Menu G A I N C O N T RO L COLOR CONTROL COLOR MODE sRGB STD VIVID M A N UA L AU TO WHITE BALANCE B L AC K L E V E L GAMMA C O N T R A S T SATURATION...
  • Page 48 Einstellen der Bildschirmanzeige (bei analogem Anschluss) Menü MODE SELECT-1 - Wählen Sie [R-CONTRAST], [G-CONTRAST] und [B-CONTRAST] mit der Taste aus. M O D E S E L E C T- 1 - Nach Abschluß der Einstellung: Taste MENU I N F O R M AT I O N O F F T I M E R COOL ..
  • Page 49 Einstellen der Bildschirmanzeige (bei analogem Anschluss) INPUT-1, INPUT-2 400LINES (Auflösungsgrad) Stellen Sie [1 LINE] ein, wenn Digital- oder Sie können die horizontale Auflösung eines Analogsignalkabel am DVI-I-Eingangsanschluß des Bildschirms mit 400 Zeilen festlegen, wenn Sie US- Displays angeschlossen werden. Text usw. verwenden. (Tasten Stellen Sie [2 LINES] ein, wenn ein 2-Eingangskabel 640: 640 x 400 Punktemodus angeschlossen wird.
  • Page 50: Einstellen Der Bildschirmanzeige (Bei Digitalem Anschluss)

    Einstellen der Bildschirmanzeige (bei digitalem Anschluss) Die Einstellungen können über das OSD-Menü COLOR CONTROL Menu vorgenommen werden. C O L O R C O N T RO L C O L O R M O D E s R G B S T D V I V I D OSD für die Einstellung W H I T E B A L A N C E G A M M A...
  • Page 51 Einstellen der Bildschirmanzeige (bei digitalem Anschluss) Menü MODE SELECT-1 - Wählen Sie [R-CONTRAST], [G-CONTRAST] und [B-CONTRAST] mit der Taste aus. M O D E S E L E C T- 1 - Nach Abschluß der Einstellung: Taste MENU I N F O R M AT I O N O F F T I M E R COOL ..
  • Page 52 Einstellen der Bildschirmanzeige (bei digitalem Anschluss) INPUT-1, INPUT-2 400LINES (Auflösungsgrad) Stellen Sie [1 LINE] ein, wenn Digital- oder Sie können die horizontale Auflösung eines Analogsignalkabel am DVI-I-Eingangsanschluß des Bildschirms mit 400 Zeilen festlegen, wenn Sie US- Displays angeschlossen werden. Text usw. verwenden. (Tasten Stellen Sie [2 LINES] ein, wenn ein 2-Eingangskabel 640: 640 x 400 Punktemodus angeschlossen wird.
  • Page 53: Pflege Des Monitors Und Reparaturen

    Gehäuse und Bedienfeld dem Sie den Monitor gekauft haben, oder an Wischen Sie das Gehäuse und das Bedienfeld mit das nächste autorisierte Sharp-Kundendienst- einem weichen, trockenen Tuch vorsichtig sauber. zentrum. (Nehmen Sie diesen Austausch Falls starke Verschmutzungen auftreten, geben Sie niemals selber vor.)
  • Page 54: Technische Daten

    Technische Daten Produktspezifikationen Abmessungen (B x T x H) (Einheiten: mm) Bei vertikaler Anzeige: 450 x 228 x 438 - 498 LCD-Anzeige Bei horizontaler Anzeige: 348 x 228 x 490 - 550 51 cm diagonal gemessen Gewicht TFT LCD-Modul mit erweiterter Super-V und Ca.
  • Page 55 Technische Daten Relevante Signaltakte (analog) Relevante Signaltakte (digital) Anzeigemodus Hsync Vsync Punktfrequenz Anzeigemodus Hsync Vsync Punktfrequenz 640x480 31.5kHz 60Hz 25.175MHz 640x480 31.5kHz 60Hz 25.175MHz VESA VESA 37.9kHz 72Hz 31.5MHz 37.9kHz 72Hz 31.5MHz 37.5kHz 75Hz 31.5MHz 37.5kHz 75Hz 31.5MHz 35.1kHz 56Hz 36.0MHz 800x600 37.9kHz...
  • Page 56 Technische Daten Pinbelegung des DVI-I-Eingangsanschluß Power Management (29poliger DVI-I-Anschluß) Der Monitor basiert auf den Standards VESA DPMS und DVI DMPM. Um die Power Management-Funktion des Monitors zu aktivieren, müssen sowohl die Videokarte als auch der Computer den Standards VESA DPMS und DVI DMPM entsprechen.
  • Page 57: Installieren Der Setup-Informationen Und Des Icc-Profils (Für Windows)

    Installieren der Setup-Informationen und des ICC-Profils (Für Windows) Je nach dem verwendeten Computer oder Be- Für Windows 98 triebssystem muß die Installation der Monitor- Installieren der Monitor-Setup-Informationen unter Setup-Informationen usw. eventuell über den Windows 98 und Festlegen des Monitor-ICC-Profils Computer erfolgen. Führen Sie in diesem Fall die als vorbestimmter Wert.
  • Page 58 Installieren der Setup-Informationen und des ICC-Profils (Für Windows) Für Windows 2000 Für Windows Me Installieren der Monitor-Setup-Informationen unter Installieren der Monitor-Setup-Informationen unter Windows 2000 und Festlegen des Monitor-ICC- Windows Me und Festlegen des Monitor-ICC- Profils als vorbestimmter Wert. Die in den Profils als vorbestimmter Wert.
  • Page 59 Installieren der Setup-Informationen und des ICC-Profils (Für Windows) Installieren des ICC-Profils Für Windows XP Installieren des Monitor-ICC-Profils (Wenn die Installieren der Monitor-Setup-Informationen unter Setup-Informationen bereits installiert wurden, ist WindowsXP und Festlegen des Monitor-ICC-Profils auch das Profil bereits installiert. Es braucht dann als vorbestimmter Wert.
  • Page 60: Informationen Zum Profil Colorsync (Für Macos)

    Informationen zum Profil ColorSync (Für MacOS) Informationen zum Profil ColorSync ColorSync ist das Farbverwaltungssystem der Apple Corporation. Damit erkennt das System die Farbauflösung bei Verwendung mit einer kompatiblen Anwendung. Ein ColorSync-Profil beschreibt die Farbeigenschaften des LCD- Monitors. Hinweise: - Das ColorSync-Profil dieses Monitors kann zusammen mit MacOS8.5 oder höher eingesetzt werden.
  • Page 61: Anweisungen Zum Anbringen Eines Vesa-Kompatiblen Monitorarms

    Anweisungen zum Anbringen eines VESA- kompatiblen Monitorarms Ein Arm oder Fuß basierend auf dem VESA- Hinweise: Standard (im Handel erhältlich) kann am Monitor - Der Fuß ist nur für diesen Monitor bestimmt, angebracht werden. verwenden Sie ihn für keine anderen Geräte oder Der Arm oder Fuß...
  • Page 62: Informationen Zur Pivot-Software (Vertikale Oder Horizontale Anzeige)

    Informationen zur Pivot-Software (vertikale oder horizontale Anzeige) Beim Drehen sollte die Ausrichtung des Displays 8. Wenn die Meldung zur Beendigung der unter Verwendung der Pivot-Software geändert Installation angezeigt wird, klicken Sie [Restart] werden. Kompatible Betriebssysteme (OS) für die Pivot- Umschalten der Display-Ausrichtung Software, die mit dem Monitor mitgeliefert wird: Windows 98/2000/Me/XP Für Windows...
  • Page 63 Table des matières Astuces et mesures de sécurité ............64 Description du produit .
  • Page 64: Astuces Et Mesures De Sécurité

    (nom du modèle : QCNW-1051MPZZ) moniteur avec des objets durs. - Câble du signal numérique (1) - Il faut savoir que la société Sharp décline toute (nom du modèle : QCNW-1088MPZZ) responsabilité en cas d’erreur survenue durant - Câble USB (1) l’utilisation par le client ou une tierce personne, ainsi...
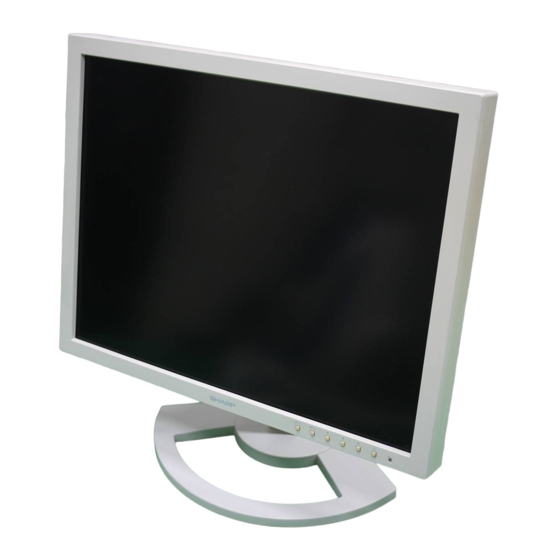
  • Page 65: Description Du Produit

    Description du produit 1. Bouton INPUT ......Pour passer d’une borne d’entrée du signal à l’autre. 2. Bouton MENU ......Ce bouton est utilisé pour faire apparaître, sélectionner et refermer le menu OSD (On Screen Display). 3. Bouton ........Ce bouton est utilisé pour sélectionné les options du menu lorsque le menu OSD est affiché...
  • Page 66: Réglage De La Hauteur, De L'inclinaison Et De L'orientation (Hauteur/Largeur Inversées)

    Réglage de la hauteur, de l’inclinaison et de l’orientation (hauteur/largeur inversées) Orientation (largeur/hauteur inversées) Attention : - Une pression des mains sur l’écran LCD peut L’écran peut être orienté dans le sens de la provoquer un endommagement. longueur ou de la largeur, selon le contenu affiché. - prendre garde de ne pas se coincer les doigts.
  • Page 67: Raccordement, Activation Et Désactivation Du Moniteur

    Raccordement, activation et désactivation du moniteur Attention : 3.Remettre le cache en place. - Lors du raccordement, s’assurer que Attention de ne pas coincer le câble. l’alimentation tant du moniteur que de l’ordinateur est désactivée. - Ne pas courber le câble de manière excessive ni y ajouter de rallonge car cela peut provoquer un dysfonctionnement.
  • Page 68 Raccordement, activation et désactivation du moniteur Connexion analogique - Utilisez le câble pour signal numérique fourni comme accessoire, ou un câble NL-C04J (vendu Reliez le câble pour signal analogique à la prise de séparément). sortie RVB de l'ordinateur. Si vous utilisez un autre câble pour signal Borne d’entrée 1 et 2 numérique disponible dans le commerce, Vous pouvez effectuer le...
  • Page 69: Raccordement Du Moniteur À Une Source D'alimentation

    Raccordement, activation et désactivation du moniteur 4.Presser le bouton d’alimentation, puis mettre le Remarques: moniteur hors tension. - Si vous utilisez un câble à 2 entrées, vous devez Cette opération clôt la configuration. régler la prise d'entrée [INPUT-1] ou [INPUT-2] sur [2LINES] grâce au menu MODE SELECT-1 (p.
  • Page 70: Activation De L'alimentation

    Raccordement, activation et désactivation du moniteur Remarques: (avec un signal analogique) Port USB : Amont - En cas de première utilisation du moniteur ou (1 port) après avoir modifié les paramètres système en cours d’utilisation, effectuer un réglage automatique d’écran. (p.73) - En cas de raccordement à...
  • Page 71: Désactivation De L'alimentation

    Raccordement, activation et désactivation du moniteur Désactivation de l’alimentation 1. Mettre l’ordinateur hors tension. 2.Presser le bouton d’alimentation du moniteur. La diode d’alimentation s'éteind. Presser le bouton Mettre l’ordinateur d’alimentation hors tension Si le moniteur devait ne pas être utilisé pendant une période de temps prolongée, arrêter l’alimentation principale du moniteur, puis débrancher la prise d’alimentation de la prise...
  • Page 72: Réglage De L'image Au Moniteur

    Réglage de l’image au moniteur Pour le signal analogique 2.Presser simultanément les boutons MENU et 1.Effectuer tout d’abord un réglage automatique. d’alimentation (c’est-à-dire allumer le moniteur). (p. 73) Continuer à presser le bouton jusqu’à ce que 2. Effectuer au besoin un réglage manuel. (p. 74) [ADJUSTMENT LOCKED] s’affiche.Le verrouillage Pour le signal numérique est activé...
  • Page 73: Réglage De L'image Du Moniteur (Avec Un Raccordement Analogique)

    Réglage de l’image du moniteur (avec un raccordement analogique) Comment procéder aux réglages Réglage automatique de l'image 1. Presser le bouton MENU. Les options CLOCK,PHASE,H-POS,V-POS du Le menu ADJUSTMENT s'affiche. menu ADJUSTMENT peuvent être ajustées ADJUSTMENT automatiquement. MANUAL AUTO Remarque : CLOCK PHASE - Lors de la toute première installation du moniteur,...
  • Page 74: Réglage Manuel De L'image

    Réglage de l’image du moniteur (avec un raccordement analogique) Menu ADJUSTMENT Réglage manuel de l’image A D J U S T M E N T Des réglages peuvent être effectués au moyen du menu du moniteur actif (OSD) proposé. M A N UA L AU TO C L O C K 1 2 7...
  • Page 75 Réglage de l’image du moniteur (avec un raccordement analogique) Menu GAIN CONTROL Menu COLOR CONTROL G A I N C O N T RO L COLOR CONTROL COLOR MODE sRGB STD VIVID M A N UA L AU TO WHITE BALANCE B L AC K L E V E L GAMMA C O N T R A S T...
  • Page 76 Réglage de l’image du moniteur (avec un raccordement analogique) - Le fait de sélectionner [USER], permettra 4.Appuyez sur le bouton MENU. d'afficher les valeurs de réglage pour [R- Le menu de sélection des couleurs est rétabli. CONTRAST], [G-CONTRAST] et [B-CONTRAST], Pour régler une autre couleur, répétez les afin de pouvoir effectuer des réglages fins.
  • Page 77 Réglage de l’image du moniteur (avec un raccordement analogique) INPUT-1, INPUT-2 SCALING (Compensation de l'extension de Choisissez [1 LINE] si vous reliez des câbles de l'écran) signaux numériques ou analogiques à la prise Donne à l'image la définition maximale quand d'entrée DVI-I de l'écran.
  • Page 78: Réglage De L'image Du Moniteur (Avec Un Raccordement Numérique)

    Réglage de l'image du moniteur (avec un raccordement numérique) Menu COLOR CONTROL Des réglages peuvent être effectués au moyen du menu interactif (OSD) proposé. C O L O R C O N T RO L C O L O R M O D E s R G B S T D V I V I D Affichage à...
  • Page 79 Réglage de l'image du moniteur (avec un raccordement numérique) - Le fait de sélectionner [USER], permettra d'afficher 4.Appuyez sur le bouton MENU. les valeurs de réglage pour [R-CONTRAST], [G- Le menu de sélection des couleurs est rétabli. CONTRAST] et [B-CONTRAST], afin de pouvoir Pour régler une autre couleur, répétez les effectuer des réglages fins.
  • Page 80 Réglage de l'image du moniteur (avec un raccordement numérique) INPUT-1, INPUT-2 SCALING (Compensation de l'extension de Choisissez [1 LINE] si vous reliez des câbles de l'écran) signaux numériques ou analogiques à la prise Donne à l'image la définition maximale quand d'entrée DVI-I de l'écran.
  • Page 81: Entretien Et Réparation Du Moniteur

    Châssis et panneau de réglage rétroéclairage. Se renseigner auprès du Utiliser un chiffon doux et sec pour éliminer les revendeur ou du mainteneur agréé Sharp le poussières du chassis et du panneau de réglage. plus proche. (Ne jamais tenter d’effectuer ce Si le chassis et le panneau de commande remplacement soi-même.)
  • Page 82: Caractéristiques Techniques

    Caractéristiques techniques Caractéristiques techniques du produit Dimensions (L x P x H) (Unités : mm) Avec l’écran dans le sens de la largeur: Moniteur LCD 450 x 228 x 438 - 498 51 cm en diagonale Avec l’écran dans le sens de la hauteur: Module TFT à...
  • Page 83: Fréquences Des Signaux (Analogique)

    Caractéristiques techniques Fréquences des signaux (numérique) Fréquences des signaux (analogique) Bande Bande Mode affichage Hsync Vsync Mode affichage Hsync Vsync passante passante 640x480 31.5kHz 60Hz 25.175MHz 640x480 31.5kHz 60Hz 25.175MHz VESA VESA 37.9kHz 72Hz 31.5MHz 37.9kHz 72Hz 31.5MHz 37.5kHz 75Hz 31.5MHz 37.5kHz 75Hz...
  • Page 84: Gestion De L'alimentation

    Caractéristiques techniques La broche du connecteur d’entrée DVI-I Gestion de l’alimentation (Connecteur DVI-I à 29 broches) Le moniteur est basé sur les normes VESA DPMS et DVI DMPM. Pour activer la fonction de gestion de l’alimentation du moniteur, la carte vidéo et l'ordinateur doivent être conformes aux normes VESA DPMS et DVI DMPM.
  • Page 85: Installation Des Fichiers Relatifs Au Paramétrage Du Moniteur Et Au Profil Icc (Pour Windows)

    Installation des fichiers relatifs au paramétrage du moniteur et au profil ICC (Pour Windows) En fonction du type d’ordinateur ou du système Pour Windows 98 d’exploitation, il peut parfois s’avérer nécessaire Installation des fichiers relatifs au paramétrage du d’utiliser l’ordinateur pour consulter les paramètres moniteur sous Windows 98, et au réglage du profil relatifs à...
  • Page 86 Installation des fichiers relatifs au paramétrage du moniteur et au profil ICC (Pour Windows) Pour Windows 2000 Pour Windows Me Installation des fichiers relatifs au paramétrage du Installation des fichiers relatifs au paramétrage du moniteur sous Windows 2000, et au réglage du moniteur sous WindowsMe, et au réglage du profil profil ICC du moniteur en tant que valeur par ICC du moniteur en tant que valeur par défaut.
  • Page 87 Installation des fichiers relatifs au paramétrage du moniteur et au profil ICC (Pour Windows) Installation du profile ICC Pour Windows XP Installation du profile ICC du moniteur (Si Installation des fichiers relatifs au paramétrage du l’information relative à l’installation a déjà été moniteur sous Windows XP, et au réglage du profil installée, alors le profile l’a été...
  • Page 88: Informations Sur Le Profil Colorsync (Pour Macos)

    Informations sur le profil ColorSync (Pour MacOS) A propos du profile ColorSync ColorSync est le système de gestion des couleurs de Apple Corporation et est une fonction qui permet de d’optimiser l’affichage des couleurs lors d’une utilisation avec une application compatible. Un profil ColorSync décrit les caractéristiques de couleur du moniteur LCD.
  • Page 89: Instructions Relatives À L'installation D'un Bras Conforme Vesa

    Instructions relatives à l’installation d’un bras conforme VESA Un bras ou un support conforme à la norme VESA Remarques : (en vente dans le commerce) peut servir de - Le support est conçu spécifiquement pour ce support au moniteur. moniteur, ne pas l'utiliser pour un autre L’acquisition du bras ou du support est laissée à...
  • Page 90: Informations Sur Le Logiciel Pivot (Écran Dans Le Sens De La Hauteur/Largeur)

    Informations sur le logiciel Pivot (écran dans le sens de la hauteur/largeur) Changer le sens de l’image En cas de rotation de l’écran, changer le sens de l’image au moyen du logiciel Pivot. Pour Windows Systèmes d’exploitation (OS) compatibles pour le 1.Cliquez le bouton droit de la souris ou cliquez le logiciel Pivot fourni avec le moniteur : bouton gauche de la souris sur...
  • Page 91 Indice Suggerimenti e precauzioni per la sicurezza ..........92 Descrizione del prodotto .
  • Page 92: Suggerimenti E Precauzioni Per La Sicurezza

    (nome del modello: NL-C03J) acqua oppure altri liquidi. Assicuratevi che nessun - Collegate solo cavi minori di 3m all’ LL-T2020. oggetto come graffette o spilli penetri nel monitor, in - Vi si suggerisce di conservare il cartone per il caso in quanto ciò...
  • Page 93: Descrizione Del Prodotto

    Descrizione del prodotto 1. Tasto INPUT ........ Per commutare tra i terminali di ingresso del segnale. 2. Tasto MENU ........ Questo tasto si usa per visualizzare, selezionare e chiudere il menu OSD (On Screen Display). 3. Tasto ........Questo tasto si usa per selezionare delle opzioni di menu, quando il menu OSD è...
  • Page 94: Regolazione Dell'altezza, Regolazione Dell'angolazione, Rotazione (Larghezza/Altezza Lunga)

    Regolazione dell’altezza, regolazione dell’angolazione, rotazione (larghezza/altezza lunga) ATTENZIONE: Rotazione (larghezza/altezza lunga) - La pressione con le mani sul pannello LCD può Lo schermo può essere ruotato per un’altezza produrre dei danni. lunga o larghezza per adattare il contenuto - Fare attenzione a non rimanere con le dita visualizzato.
  • Page 95: Collegamento Del Monitor Ed Accensione E Spegnimento Del Monitor

    Collegamento del monitor ed accensione e spegnimento del monitor ATTENZIONE: 3.Reinserire il coperchio. - Quando eseguite i collegamenti, assicuratevi che Fare attenzione a che il cavo non resti incastrato. sia il monitor che il computer siano spenti. - Fate attenzione a non piegare eccessivamente il cavo oppure nell'aggiungere dei cavi di prolunga, in quanto ciò...
  • Page 96 Collegamento del monitor ed accensione e spegnimento del monitor Collegamento analogico Terminale d’ingresso 1 e 2 Collegare il cavo del segnale analogico al La connessione è possibile terminale analogico di uscita RGB del computer. in uno qualsiasi dei due. Terminale d’ingresso 1 e 2 La connessione è...
  • Page 97: Collegamento Del Monitor Ad Una Sorgente Di Alimentazione Elettrica

    Collegamento del monitor ed accensione e spegnimento del monitor Per il collegamento usare un cavo a 2 - Il monitor collegato al cavo a 2 ingressi tramite collegamento analogico può non venire ingressi, da acquistare separatamente riconosciuto e configurato in modo automatico, in Il cavo a 2 ingressi venduto a parte (NL-C03J) base al sistema Plug &...
  • Page 98: Accensione

    Collegamento del monitor ed accensione e spegnimento del monitor Notes: (quando si usa un segnale analogico) - Se state usando il monitor per la prima volta, Upstream oppure dopo aver modificato le impostazioni del sistema durante l'uso, eseguite una regolazione automatica dello schermo (p.
  • Page 99: Spegnimento

    Collegamento del monitor ed accensione e spegnimento del monitor Note: - In assenza di segnali di ingresso compare il messaggio [NO SIGNAL] ("nessun segnale"). Spegnimento 1. Spegnete il computer. 2. Premete il tasto di alimentazione del monitor. Il LED di alimentazione si spegnerà. Premete il tasto di Spegnete il alimentazione...
  • Page 100: Regolazione Della Visualizzazione Sullo Schermo

    Regolazione della visualizzazione sullo schermo Per il segnale analogico Note 1.Prima di tutto eseguite una regolazione - Quando il blocco è attivato, tutti i tasti, ad automatica. (p. 101) eccezone del tasto di alimentazione sono 2.Eseguite la regolazione manuale, se necessario. disabilitati.
  • Page 101: Regolazione Della Visualizzazione Sullo Schermo (Con Collegamento Analogico)

    Regolazione della visualizzazione sullo schermo (con collegamento analogico) Come eseguire la regolazione Regolazione automatica dello schermo 1. Premete il tasto MENU. Le opzioni nel menu ADJUSTMENT si possono Il menu ADJUSTMENT verrà visualizzato. regolare automaticamente (CLOCK, PHASE ADJUSTMENT (FASE), H-POS, V-POS). MANUAL AUTO Note:...
  • Page 102: Regolazione Manuale Dello Schermo

    Regolazione della visualizzazione sullo schermo (con collegamento analogico) Menu ADJUSTMENT Regolazione manuale dello schermo A D J U S T M E N T Le regolazioni si possono fare mediante il menu On Screen Display (OSD) fornito. M A N UA L AU TO C L O C K 1 2 7...
  • Page 103 Regolazione della visualizzazione sullo schermo (con collegamento analogico) Menu GAIN CONTROL Menu COLOR CONTLOR G A I N C O N T RO L COLOR CONTROL COLOR MODE sRGB STD VIVID M A N UA L AU TO WHITE BALANCE B L AC K L E V E L GAMMA C O N T R A S T...
  • Page 104 Regolazione della visualizzazione sullo schermo (con collegamento analogico) - Usate il tasto per selezionare [R-CONTRAST], 5.Per tornare al menù COLOR CONTROL agire sul [G-CONTRAST] e [B-CONTRAST]. tasto MENU. - Quando la regolazione è stata completata: Tasto MENU Menu MODE SELECT-1 M O D E SE L E C T- 1 COOL ..
  • Page 105 Regolazione della visualizzazione sullo schermo (con collegamento analogico) - Se si attiva il monitor con il timer di spegnimento LANGUAGE a tempo OFF TIMER sulla posizione ON, sullo Potete cambiare la lingua usata nel menu OSD. schermo compare per alcuni secondi il tempo 1.Dopo aver selezionato [LANGUAGE], premere il predisposto per lo spegnimento (in assenza di tasto...
  • Page 106: Regolazione Della Visualizzazione Sullo Schermo (Con Collegamento Digitale)

    Regolazione della visualizzazione sullo schermo (con collegamento digitale) Menu COLOR CONTLOR Le regolazioni si possono fare mediante il menu On Screen Display (OSD) fornito. C O L O R C O N T RO L C O L O R M O D E s R G B S T D V I V I D On Screen Display per la regolazione W H I T E B A L A N C E...
  • Page 107 Regolazione della visualizzazione sullo schermo (con collegamento digitale) - Selezionando USER si visualizzano i valori delle 4.Premere il tasto MENU. impostazioni per [R-CONTRAST], [G-CONTRAST] Lo schermo ritorna al menù di selezione dei e [B-CONTRAST], allo scopo di eseguire delle colori. Per regolare altri colori, ripetere la regolazioni fini.
  • Page 108 Regolazione della visualizzazione sullo schermo (con collegamento digitale) - Per disattivare momentaneamente la funzione di spegnimento automatico, agire sul tasto di Dopo aver selezionato [OSD], premere il tasto accensione e spegnimento nell'intervallo di (Quando la regolazione è stata completata: Tasto tempo fra la visualizzazione del tempo rimanente MENU) e lo spegnimento automatico.
  • Page 109: Cura E Riparazione Del Monitor

    Centro del Servizio Tecnico Assisten- di controllo. za Clienti della Sharp più vicino a voi. (Non Se sono molto sporchi, applicate del detersivo tentate mai di eseguire la sostituzione da voi.)
  • Page 110: Specifiche

    Specifiche Specifiche del prodotto Dimensioni (L x P x A)(Unità: mm) Con schermata di larghezza lunga: Display LCD 450x228x438 - 498 51 cm misurati diagonalmente Con schermata di altezza lunga: Modulo TFT LCD Super-V ed anti abbagliamento 348x228x490 - 550 a bassa riflessione perfezionato Peso Risoluzione (max.)
  • Page 111 Specifiche Sincronizzazioni rilevanti del segnale Sincronizzazioni rilevanti del segnale (analogico) (digitale) Modalità di Modalità di Frequenza Sincronismo Sincronismo Frequenza Sincronismo Sincronismo orizzontale verticale punti visualizzazione orizzontale verticale punti visualizzazione 31.5kHz 60Hz 25.175MHz 640x480 31.5kHz 60Hz 25.175MHz 640x480 VESA VESA 37.9kHz 72Hz 31.5MHz 37.9kHz...
  • Page 112: Gestione Dell'energia

    Specifiche Pin del connettore di ingresso DVI-I Gestione dell'energia (Connettore DVI-I con 29 pin) Il monitor è basato sulle norme VESA DPMS e DVI DMPM. Per attivare la funzione della gestione dell'energia del monitor, sia la scheda video che il computer devono essere conformi alle norme VESA DPMS e DVI DMPM.
  • Page 113: Installazione Delle Informazioni Per Il Setup E Del Profilo Icc (Per Windows)

    Installazione delle informazioni per il setup e del profilo ICC (Per Windows) A seconda del computer oppure del sistema Per Windows98 operativo può essere necessario usare il computer Installazione delle informazioni di setup del monitor per eseguire l'installazione delle informazioni di in Windows98, e impostazione del profilo ICC del setup del monitor, ecc.
  • Page 114 Installazione delle informazioni per il setup e del profilo ICC (Per Windows) Per Windows2000 Per WindowsMe Installazione delle imformazioni di setup del SInstallazione delle informazioni di setup del monitor in Windows2000, e impostazione del monitor in WindowsMe, e impostazione del profilo profilo ICC del monitor come valore ICC del monitor come valore predeterminato.
  • Page 115 Installazione delle informazioni per il setup e del profilo ICC (Per Windows) Installazione del profilo ICC Per WindowsXP Installazione del profilo ICC del monitor. (Se le Installazione delle imformazioni di setup del informazioni di setup sono già installate, lo è anche monitor in WindowsXP, e impostazione del profilo il profilo e non occorre installarlo.) ICC del monitor come valore predeterminato.
  • Page 116: Informazioni Sul Profilo Colorsync (Per Macos)

    Informazioni sul profilo ColorSync (Per MacOS) Il profilo ColorSync ColorSync è il sistema di gestione del colore della Apple Corporation ed è una funzione che consente di realizzare la risoluzione del colore, quando lo si usa con un'applicazione compatibile. Un profilo ColorSync descrive le caratteristiche cromatiche del monitor LCD.
  • Page 117: Istruzioni Per Collegare Un Braccio Compatibile Vesa

    Istruzioni per collegare un braccio compatibile VESA E’ possibile collegare al monitor un braccio oppure 4. Rimuovete le quattro viti e rimuovete quindi il un supporto basati sullo standard VESA (da supporto dal monitor. acquistare in commercio). L’acquisto del braccio oppure del supporto è a discrezione del cliente.
  • Page 118: Informazioni Sul Software Pivot(Display Di Larghezza/Altezza Lunga)

    Informazioni sul Software Pivot (Display di larghezza/altezza lunga) Per cambiare la direzione di visualizzazione Quando si ruota lo schermo, cambiare l’orientamento dello schermo usando il Software Pivot. Per Windows 1.Agire sul tasto destro del mouse, o agire sul I sistemi operativi compatibili (OS) per il Software tasto sinistro del mouse in corrispondenza Pivot che viene fornito con il monitor: dell'icona...
  • Page 119 Índice Sugerencias y precauciones de seguridad ..........120 Descripción del producto .
  • Page 120: Sugerencias Y Precauciones De Seguridad

    (nombre del modelo: NL-C03J) - No coloque el monitor sobre objetos inestables o en - Sólo conectar cables de menos de 3 m. a la LL-T2020. lugares inseguros. No permita que el monitor quede - Guarde la caja de cartón por si necesita transportar el sometido a intensas sacudidas o vibraciones.
  • Page 121: Descripción Del Producto

    Descripción del producto 1. Botón INPUT ....... Para conmutar entre los bornes de entrada de la señal. 2. Botón MENU ....... Este botón se utiliza para ampliar, seleccionar y cerrar el menú OSD (On Screen Display). 3. Botón ........Este botón se utiliza para seleccionar opciones de menú cuando se visualiza el menú...
  • Page 122: Ajuste De Altura, Ajuste De Ángulo Y Rotación (Sentido Vertical/Horizontal)

    Ajuste de altura, ajuste de ángulo y rotación (sentido vertical/horizontal) Rotación (altura/anchura) Precaución: - Si presiona el panel LCD con las manos podría La pantalla puede girar para colocarla en sentido dañarlo. vertical u horizontal y ver claramente la imagen. - Tenga cuidado para que sus dedos no queden - Antes de girar la pantalla, muévala a la posición atrapados.
  • Page 123: Conexión Del Monitor Y Encendido/Apagado Del Mismo

    Conexión del monitor y encendido/ apagado del mismo Precaución: 3. Vuelva a colocar la cubierta. - Antes de realizar la conexión, asegúrese de que Tenga cuidado de no pellizcar los cables. tanto el monitor como el ordenador están apagados. - Tenga cuidado de no doblar excesivamente el cable ni utilizar cables de prolongación ya que ello podría llevar a un funcionamiento anómalo.
  • Page 124 Conexión del monitor y encendido/apagado del mismo Conexión analógica - Utilice el cable de señales digitales suministrado o un cable NL-C04J (vendido separadamente). Conecte el cable de señal analógica al terminal de Si se utilizan otros cables de señales digitales de salida RGB analógica del ordenador.
  • Page 125: Conexión Del Monitor A Una Toma De Corriente

    Conexión del monitor y encendido/apagado del mismo Cuando haga la conexión utilizando un cable Conexión del monitor a una toma de de 2 entradas vendido separadamente corriente El cable de 2 entradas vendido separadamente (NL- C03J) permite hacer la conexión entre el terminal de entrada DVI-I del monitor y los dos PCs.
  • Page 126: Encendido

    Conexión del monitor y encendido/apagado del mismo Encendido Alternar entre bornes de entrada 1.Conmute el interruptor primario del monitor. Utilizar el botón de ENTRADA (INPUT) para conmutar entre bornes de entrada de señal. Cuando no se utiliza un cable de 2 entradas Seleccione [INPUT-1] Seleccione [INPUT-2] Interruptor primario...
  • Page 127: Apagado

    Conexión del monitor y encendido/apagado del mismo Apagado 1. Apague el ordenador. 2.Pulse el botón de encendido/apagado del monitor. El LED indicador de conexión se apagará. Pulse el botón de Apague el encendido/apagado ordenador Si no se va a utilizar el monitor durante mucho tiempo, desconecte la interruptor primario del monitor y desenchufe la clavija de alimentación de la toma de corriente.
  • Page 128: Ajuste De La Pantalla

    Ajuste de la pantalla Para la señal analógica Nota: 1.En primer lugar, lleve a cabo un ajuste - Cuando la función de bloqueo se encuentra automático. (p. 129) activada, se deshabilitan todos los botones 2.En caso necesario, realice un ajuste manual. excepto el de encendido/apagado.
  • Page 129: Ajuste De La Pantalla (Con Conexión Analógica)

    Ajuste de la pantalla (con conexión analógica) Cómo realizar el ajuste Ajuste automático de la pantalla 1.Pulse el botón MENU. Las opciones del Menú ADJUSTMENT (RELOJ, Aparecerá el menú ADJUSTMENT. FASE, H-POS, V-POS) se pueden ajustar A D J U S T M E N T automáticamente.
  • Page 130: Ajuste Manual De La Pantalla

    Ajuste de la pantalla (con conexión analógica) Menú ADJUSTMENT Ajuste manual de la pantalla A D J U S T M E N T Los ajustes se pueden realizar a través del Menú M A N UA L AU TO en pantalla (OSD).
  • Page 131 Ajuste de la pantalla (con conexión analógica) Menú GAIN CONTROL Menú COLOR CONTROL COLOR CONTROL G A I N C O N T RO L COLOR MODE sRGB STD VIVID M A N UA L AU TO WHITE BALANCE GAMMA B L AC K L E V E L C O N T R A S T SATURATION...
  • Page 132 Ajuste de la pantalla (con conexión analógica) Menú MODE SELECT-1 - Utilice el botón para seleccionar [R- CONTRAST], [G-CONTRAST] y [B-CONTRAST]. M O D E S E L E C T- 1 - Una vez finalizados los ajustes: Botón MENU I N F O R M AT I O N O F F T I M E R I N P U T- 1...
  • Page 133 Ajuste de la pantalla (con conexión analógica) INPUT-1, INPUT-2 400 LINES (grado de resolución) Ponga [1 LINE] cuando conecte cables de señal Puede programar la resolución horizontal de una digital o analógica al borne de entrada DVI-I del pantalla de 400 líneas si utiliza US text, etc. monitor.
  • Page 134: Ajuste De La Pantalla (Con Conexión Digital)

    Ajuste de la pantalla (con conexión digital) Menú COLOR CONTROL Los ajustes se pueden realizar a través del menú Máscara en pantalla (OSD). C O L O R C O N T RO L C O L O R M O D E s R G B S T D V I V I D Máscara en pantalla para el ajuste W H I T E B A L A N C E...
  • Page 135 Ajuste de la pantalla (con conexión digital) Menú MODE SELECT-1 - Utilice el botón para seleccionar [R-CONTRAST], [G-CONTRAST] y [B- MODE SELECT-1 CONTRAST]. INFORMATION - Una vez finalizados los ajustes: Botón MENU OFF TIMER INPUT-1 1LINE 2LINES INPUT-2 1LINE 2LINES COOL ..
  • Page 136 Ajuste de la pantalla (con conexión digital) INPUT-1, INPUT-2 400 LINES (grado de resolución) Ponga [1 LINE] cuando conecte cables de señal Puede programar la resolución horizontal de una digital o analógica al borne de entrada DVI-I del pantalla de 400 líneas si utiliza US text, etc. monitor.
  • Page 137: Conservación Y Reparación Del Monitor

    Utilice un paño suave y seco para limpiar, sin apretar servicio autorizado de asistencia técnica de demasiado, la caja y el panel de control. Sharp más cercano. (No intente jamás hacer Si estuvieran muy sucios, eche un poco de usted mismo este cambio.) detergente neutro en un paño suave previamente...
  • Page 138: Especificaciones

    Especificaciones Especificaciones del producto Dimensiones (An. x F x Al. ) (Unidades: mm) Con pantalla en sentido horizontal: 450x228x438 - 498 Display LCD Con pantalla en sentido vertical: 348x228x490 - 550 51 cm medidos en diagonal Peso Advanced Super-V y módulo antirreververante Aprox.
  • Page 139 Especificaciones Sincronizaciones de las señales Sincronizaciones de las señales correspondientes (analógica) correspondientes (digital) Modo display Hsync Vsync Frecuencia Modo display Hsync Vsync Frecuencia 31.5kHz 60Hz 25.175MHz 640x480 31.5kHz 60Hz 25.175MHz 640x480 VESA VESA 37.9kHz 72Hz 31.5MHz 37.9kHz 72Hz 31.5MHz 37.5kHz 75Hz 31.5MHz 37.5kHz...
  • Page 140 Especificaciones Vías del conector de entrada DVI-I Gestión de energía (Conector DVI-I de 29 vías) El monitor está basado en los estándares VESA DPMS y DVI DMPM. Para activar la función Power Management del monitor, tanto la tarjeta de vídeo como el ordenador deben cumplir el estándar VESA DPMS y el estándar DVI DMPM.
  • Page 141: Instalación De La Información De Configuración Y Del Perfil Icc (Para Windows)

    Instalación de la información de configuración y del perfil ICC (Para Windows) Según sea el tipo de ordenador o de sistema Para Windows98 operativo, puede que sea necesario utilizar el Instalación de la información de configuración del ordenador para llevar a cabo la instalación de la monitor en Windows98 y configuración del perfil información de configuración del monitor, etc.
  • Page 142 Instalación de la información de configuración y del perfil ICC (Para Windows) Para Windows2000 Para WindowsMe Instalación de la información de configuración del Instalación de la información de configuración del monitor en Windows2000 y configuración del perfil monitor en WindowsMe y configuración del perfil ICC del monitor como valor predeterminado.
  • Page 143 Instalación de la información de configuración y del perfil ICC (Para Windows) Instalación del perfil ICC Para WindowsXP Instalación del perfil ICC del monitor. (Si ya ha Instalación de la información de configuración del instalado la información de configuración, se habrá monitor en WindowsXP y configuración del perfil instalado también el perfil por lo que no hace falta ICC del monitor como valor predeterminado.
  • Page 144: Información Acerca Del Perfil Colorsync (Para Macos)

    Información acerca del perfil ColorSync (Para MacOS) Acerca del perfil ColorSync ColorSync es el sistema de gestión del color de Apple Corporation y se trata de una función que permite obtener una resolución cromática cuando se utiliza con una aplicación compatible. Un perfil ColorSync describe las características cromáticas del monitor LCD.
  • Page 145: Instrucciones Para Acoplar Un Brazo De Compatibilidad Vesa

    Instrucciones para acoplar un brazo de compatibilidad VESA Puede acoplar al monitor un brazo o una base (de Notas: venta en el comercio) conforme al estándar VESA. - La base se ha diseñado específicamente para La adquisición del brazo o la base queda a este monitor, no la use con ningún otro equipo ni discreción del cliente.
  • Page 146: Información Acerca De Pivot Software (Pantalla Vertical/Horizontal)

    Información acerca de Pivot Software (Pantalla vertical/horizontal) Cambio del sentido de la pantalla Cuando gire la pantalla, cambie la orientación de la misma usando Pivot Software. Para Windows Sistemas operativos (OS) compatibles para Pivot 1.Haga clic con el botón derecho o con el botón Software entregados con el monitor: izquierdo del ratón en situado en la esquina...
  • Page 148 SHARP CORPORATION © 2002 SHARP CORPORATION DSC2 TINSM1046MPZZ (2)

Table des Matières