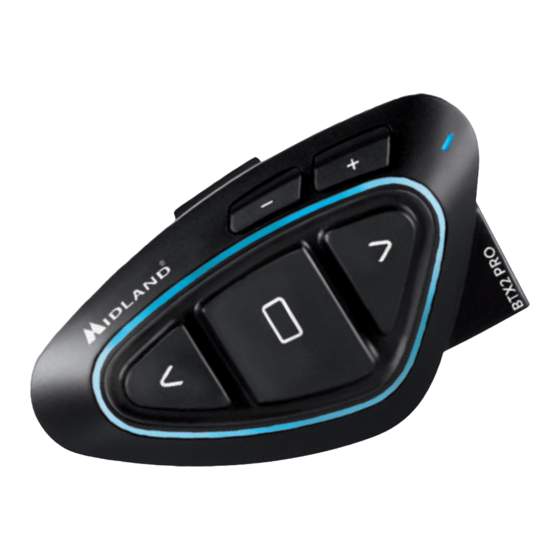
Midland BTX2 PRO Guide D'utilisation
Masquer les pouces Voir aussi pour BTX2 PRO:
Table des Matières

Publicité

Les langues disponibles
  • FR

Les langues disponibles

  • FRANÇAIS, page 68

Liens rapides

› MANUALE D'USO
› INSTRUCTION GUIDE
› BEDIENUNGSANLEITUNG
› MANUAL DE INSTRUCCIONES
› GUIDE D'UTILISATION
› HANDLEIDING
› ΟΔΗΓΊΕΣ ΧΡΉΣΗΣ
› マニュアル

Publicité

Table des Matières
loading

Sommaire des Matières pour Midland BTX2 PRO

  • Page 1 › MANUALE D’USO › INSTRUCTION GUIDE › BEDIENUNGSANLEITUNG › MANUAL DE INSTRUCCIONES › GUIDE D’UTILISATION › HANDLEIDING › ΟΔΗΓΊΕΣ ΧΡΉΣΗΣ › マニュアル...
  • Page 2: Table Des Matières

    Accensione e spegnimento del Midland BTX2 PRO ........................................5 Modalità operative ....................................................5 Come abbinare un altro dispositivo Midland BTX2 PRO .........................................6 Come abbinare più di due dispositivi ad un Midland BTX2 PRO ....................................7 Conference ......................................................8 Compatibilità con i BT Midland ................................................9 Funzione Background ..................................................10...
  • Page 3: Midland Btx2 Pro

    Bluetooth, quali Telefonino/MP3 player, Navigatore GPS e, se abbinato ad un altro BTX2 PRO Twin Midland BTX2 PRO, anche come sistema intercom senza fili fino a 4 persone (di cui 1 di › 2 dispositivi BTX2 PRO altre marche) e conference fino a 4 persone ad una distanza massima di 1Km. Grazie al suo ›...
  • Page 4: Ricarica Delle Batterie

    Connessioni a filo: › Per sorgente audio stereo (iPod/MP3 player) Attenzione: Midland BTX2 PRO è stato progettato per essere resistente alla pioggia. Verificate sem- pre che il gommino di protezione della presa di ricarica sia ben chiuso in caso di pioggia.
  • Page 5 è importante mantenere l’attenzione in mezzo al traffico e durante i Il Midland BTX1 PRO è fornito con due sistemi di fissaggio al casco, uno tramite base con vostri spostamenti in moto. Il microfono può essere fissato al casco in due modi: biadesivo e l’altro con aggancio a morsetto.
  • Page 6: Accensione E Spegnimento Del Midland Btx2 Pro

    Midland BTX2 PRO ha tre modalità di funzionamento distinte: Intercom, Telefono e Radio FM. In base alla modalità attiva in un dato momento, le funzioni del Midland BTX2 PRO cam- Base gommata biano e di conseguenza anche i tre pulsanti centrali assumono funzionalità diverse.
  • Page 7: Come Abbinare Un Altro Dispositivo Midland Btx2 Pro

    Abbinamento di un altro dispositivo Midland BTX2 PRO ficiente parlare nuovamente. Quando l’Intercom è attivato tramite VOX è possibile co- 1. Attivate la modalità “Setup” su entrambi i dispositivi (Spegnete il Midland BTX2 PRO munque disattivarlo senza aspettare il tempo predeterminato, semplicemente premen- Tenere premuto il pulsante “Centrale”...
  • Page 8: Come Abbinare Più Di Due Dispositivi Ad Un Midland Btx2 Pro

    › Fare un doppio click sul pulsante “Centrale” . La luce Rossa si spegne e al suo posto sitivi per un totale di 4 (uno dei quali può essere un Universal Intercom). Il Midland BTX2 lampeggia la luce Blu. Ora potete utilizzare il Midland BTX2 PRO PRO ha tre pulsanti disponibili: Avanti, Centrale oppure Indietro.
  • Page 9: Conference

    (un Il vostro BTX2 PRO può funzionare sia in modalità classica, con la comunicazione “uno ad tono audio vi avvisa dell’apertura). Se nessuno parla, dopo 40 secondi l’intercom viene uno”, oppure in modalità...
  • Page 10: Compatibilità Con I Bt Midland

    • Attivazione: in modalità Intercom e senza audio attivi, tenere premuto il pulsante “AVANTI” per 7 secondi. L’avviso vocale “Conference” indicherà l’attivazione. Grazie alla funzione “Talk2 All - Universal Intercom” è possibile abbinare al BTX2 PRO un • Disattivazione: in modalità Intercom e senza audio attivi, tenere premuto il pulsante dispositivo intercom di un‘altra marca.
  • Page 11: Funzione Background

    › Radio PMR446 telefonino). 2. Attivate la modalità “Setup: spegnete il Midland BTX2 PRO e tenete premuto il pul- sante “Centrale” fino a che la luce non rimane di colore rosso fisso. 3. Premere il pulsante “Volume+” o “Volume -” fino a quando la luce lampeggia Rosso e Blu.
  • Page 12 Rispondere ad una chiamata Chiamata vocale: Quando sentite il telefonino squillare, potete rispondere utilizzando due modalità: Telefono collegato al pulsante “Vol+”: premete brevemente il pulsante “Avanti”, se il vo- Risposta vocale: stro telefonino supporta la chiamata vocale, vi verrà chiesto di pronunciare il nome del E’...
  • Page 13: Condividere La Musica

    › Avanti di una canzone: premere il pulsante “Avanti” › Indietro di una canzone: premere il pulsante “Indietro” BTX2 PRO supporta gli annunci vocali stereo (A2DP) provenienti da navigatori GPS o Applicazione su smartphone quando abbinati al tasto “Vol +”.
  • Page 14: Utilizzo Della Funzionalita' Radio Fm

    Abbinamento ad un Navigatore GPS In generale è possibile abbinare qualunque navigatore GPS per moto che accetti un au- Il Midland BTX2 PRO è dotato di un ricevitore radio FM integrato. Per utilizzarlo è suffi- ricolare Bluetooth. ciente passare alla modalità “FM Radio”.
  • Page 15: Ingresso Audio In Background

    Utilizzo dell’ingresso audio a filo Segnalatore di frenata d’emergenza BTX2 PRO ha un ingresso audio per collegare una sorgente audio a filo, per esempio un Sul retro del kit di montaggio del BTX2 PRO è posizionata una luce di iPod o un qualsiasi MP3 player.
  • Page 16: Configurazione E Aggiornamento Firmware

    5. Premete brevemente il pulsante “Indietro”, la luce Blu lampeggerà diverse volte in Da questo momento il BTX2 PRO non avrà più nessun dispositivo Bluetooth in memo- ria, quindi non esistono più le modalità “Phone” e “Intercom”. Potrete procedere ad una base alla configurazione della sensibilità...
  • Page 17: Garanzia

    Attenzione: Non collegate il dispositivo al computer prima di aver scaricato ed installato il software Uso e avvertimenti specifici L’uso assiduo di questi dispositivi può diminuire la vostra capacità di udire suoni esterni e chi vi sta intorno. L’uso di questo dispositivo mentre si sta guidando può diventare un pericolo per voi e per chi vi sta intorno e in alcuni paesi, l’utilizzo del dispositivo potrebbe non essere consentito.
  • Page 18 How to pair two Midland BTX2 PRO units .............................................22 Set up of the AGC system ................................................22 How to pair the Midland BTX2 PRO to more than two units .......................................22 Talk 2 All - Universal Intercom with different brand unit.......................................25 Compatibility with Midland BT line units ............................................25...
  • Page 19: Main Features

    › 2 Slide-in mounting kit with two stereo speakers operate thanks to the three big buttons placed on the front of the unit. Midland BTX2 PRO › 2 microphones with boom and 2 wired microphones is fixed on the helmet using the adhesive plate or the screw mounting clamp.
  • Page 20: Charging Batteries

    BTX2 PRO description Fixing the stereo speakers The BTX2 PRO has five buttons on the front; the main three big buttons are multi fun- The two stereo speakers have a Velcro/adhesive strip that aids their fixing into your hel- ctions buttons: the Forward (on the left), the middle button and the Backward (on the met.
  • Page 21 Description of the Slide-in mounting kit The Midland BTX1 PRO can be fixed onto the helmet, installing the slide-in mounting kit in two different ways: By either using the plate with bi-adhesive strip, or the screw plate. These methods allow you to safely “fix” the BTX1 PRO unit onto your helmet and to remove it at any time in order to recharge or store it.
  • Page 22: Switching On And Off Your Midland Btx2 Pro

    (6 memories are available). The BTX2 PRO can be easily fitted onto the helmet by sliding it downwards on the sliding mounting kit. BTX2 PRO is maintained in position thanks to the fixing clip located on the You can switch (toggle) from one mode to the other simply pressing the Middle button upper section (A).
  • Page 23: Maximum Distance

    If there is no conversation the intercom will be The two units supplied in the same Midland BTX2 PRO box, are already paired and ready closed after 40 seconds. If needed you can close the intercom manually without waiting to use, which mean you don’t need to perform this procedure.
  • Page 24 The Midland BTX2 PRO has three main buttons (Forward, Middle and Rear). It is up to How to use the Intercom with more than two units you which button use to pair and activate the “Intercom”, you are totally free to choose To use the intercom feature, be sure that all the units are turned on and correctly paired the button you like more.
  • Page 25 The conference mode can be disabled in every moment, just pressing the FWD button Midland BTX2 PRO unit can work as usually, with “one to one” communication up to 4 for 7 sec. You will hear the voice announcement “Intercom” and from that moment your people (“classic”...
  • Page 26: Talk 2 All - Universal Intercom With Different Brand Unit

    Attention: In order to use the the “Talk2All-Universal Intercom” feature the pairing on the other unit must be done as a phone. The other intercom (not Midland brand) will be able to be paired to a phone only if two phones are supported.
  • Page 27 How to use a Phone Background feature After pairing your phone to the Midland BTX2 PRO unit you must switch to the “Phone” It is possible to keep always in background the audio connection of the device paired mode in order to use it. Press the middle button until you hear “Phone” from the voice an- on “Vol-”...
  • Page 28 MP3 player. You smartphone “BT SET-APP” application can even use the buttons on the Midland BTX2 PRO unit to control the following play options: Play, Pause, Forward and Backward the songs.
  • Page 29 (but cannot control the music). The driver can stop the music sharing just pressing again the “Backward” button long. With music share active you can not keep open the In general it is possible to pair the Midland BTX2 PRO to all the GPS for motorbike that Intercom communication.
  • Page 30: How To Listen To The Fm Radio

    To save the station you are listening to, press the Forward and Backward buttons together Your Midland BTX2 PRO can be connected to a wired audio source, like an iPod (or any for 3 sec. You will hear a beep tone for confirmation.
  • Page 31: Emergency Stop Light

    LED emergency stop light. Every time you make a full brake, the stop › Double click on the “Middle” button to exit the “Setup” mode and use the Midland BTX2 light will turn ON to give an extra alert to the drivers behind you. In case...
  • Page 32: Setup And Firmware Update

    EU countries. Users are not permitted to make any changes or modifications › Double click on the “Middle” button to exit the “Setup” mode and use the BTX2 PRO to the device. Modifications which are not expressly approved by the producer invalidate Enabling: the warranty card.
  • Page 33: Fcc Compliance Information

    FCC Compliance Information This device complies with Part 15 of the FCC Rules. Operation is subject to the following two conditions: (1) this device may not cause harmful interference, and (2) this device must accept any interference received, including interference that may cause undesired operation.
  • Page 34 Max. Reichweite ....................................................38 Konferenz ......................................................40 Talk 2 All - Universelles Gegensprechen mit einem Gerät einer anderen Marke................................. 41 Koppeln von Bluetooth Geräten mit dem BTX2 PRO ........................................42 ”Hintergrund“-Funktion ................................................... 42 Music Share (Musik weiterleiten) ..............................................44 Kopplung mit einem GPS Navigator ............................................... 44 Verwenden eines PMR 446 Funkgeräts mit integriertem Bluetooth ..................................
  • Page 35: Gegensprechanlage Für Mehrere Motorradfahrer

    Alle wichtigen Funktionen sind dank der drei großen Tasten auf der Vorderseite des Gerätes einfach zu bedienen. BTX2 PRO Twin- Intercom Set Das BTX2 PRO wird mit einer Befestigungsplatte und Klebeband oder einer angeschrau- › 2 BTX2 PRO Geräte Sets bten Klemmhalterung am Helm fixiert. Dank seines Audiokits mit ultraflachen Lautspre- ›...
  • Page 36: Aufladen Des Akkus

    Mikrofone, eine Klapphelmversion und eine Integralhelmversion. Mit Beschreibung des Geräts und Montagehalterung dem Mini-Stecker am Mikrofon können Sie für jeden Helmtyp das passende Mikrofon Das BTX2 PRO hat fünf Tasten auf der Vorderseite, wobei die drei großen Tasten auswählen. www.midlandeurope.com...
  • Page 37 Ihre Blinker hören können. Slide-In Halterungssatz Das Midland BTX2 PRO kann am Helm befestigt werden, indem man die Slide-In Hal- terung auf zwei verschiedene Weisen anbaut: entweder mittels des Klebestreifens oder mittels der Schraubenplatte. Mit beiden Verfahren können Sie das BTX2 PRO sicher an Ihrem Helm befestigen und es jederzeit wieder abnehmen, um es aufzuladen oder zu lagern.
  • Page 38: Ein-/Ausschalten Des Midland Btx2 Pro

    Gummierte Grundplatte Das Midland BTX2 PRO anbauen und abbauen Das BTX2 PRO kann problemlos am Helm befestigt werden, indem es nach unten auf Schritt 2. Befestigen Sie die Schraubenplatte mit den zwei mitgelieferten Schrauben an die Slide-In Halterung geschoben wird. Das BTX2 PRO wird durch den Befestigungsclip der Slide-In Halterungdoppelseitigem Klebeband auf der Oberseite (A) in Position gehalten.
  • Page 39: Betriebsarten

    › Im Intercom - Modus können Sie mit den Tasten die Sprechverbindung mit bis zu 6 Um ein BTX2 PRO mit einem anderen BTX2 PRO zu koppeln, müssen Sie zunächst den Teilnehmern steuern, indem jeweils einer mit einem der anderen spricht. Drücken Sie Setup-Modus aufrufen: einfach auf eine der drei Tasten, um das Intercom zu aktivieren.
  • Page 40 Achtung: Die Lautstärke kann nur während einer gerade bestehenden Audioverbindung Kopplung des Midland BTX2 PRO mit einem anderen Midland BTX2 PRO angepasst werden. Um zwei Midland BTX2 PRO miteinander zu koppeln, müssen diese zuerst in den Das AGC-System einrichten Setupmodus gebracht werden: 1.
  • Page 41: Konferenz

    Der Konferenz Modus gestattet es, sich mit 4 Personen gleichzeitig zu unterhalten. chverbindung aktiv ist, fangen Sie einfach an zu reden. Die Sprechverbindung wird Das Midland BTX2 PRO funktioniert entweder als Eins-zu-Eins Intercom mit bis zu 4 automatisch durch das Sprechen eingeschaltet und bleibt bestehen, solange Sie reden.
  • Page 42: Talk 2 All - Universelles Gegensprechen Mit Einem Gerät Einer Anderen Marke

    In “Intercom Modus” und ohne Audio, halten Sie den Vorwärts Knopf für 7sek. gedrückt. Gegensprechanlagen von Fremdherstellern zu koppeln. Wenn Sie sich im Intercom Modus befinden, zeigt die Sprachansage “Conference” die Sie können bis zu 2 nicht-Midland Geräte verbinden: eines auf der „Vorwärts“- und eines Aktivierung an. auf der „Zurück“-Taste.
  • Page 43: Koppeln Von Bluetooth Geräten Mit Dem Btx2 Pro

    Kompatibilität mit Geräten der Midland BT-Produktlinie Hintergrund laufen lassen. Dadurch wird die Intercom Verbindung z.B. nicht mehr Das BTX2 PRO ist mit BTX1 PRO, BTNext PRO, BT Next Conference, BTX1 FM und durch Navigationsansagen unterbrochen. Um die „Hintergrund“-Funktion zu aktivieren, BTX2 FM kompatibel.
  • Page 44 Tasten das Telefon (siehe die Tabelle B). Das BTX2 PRO mit einem Mobiltelefon koppeln Einen Anruf beantworten Um das BTX2 PRO mit einem Mobiltelefon zu koppeln, müssen Sie zunächst den Se- Wenn Sie das Telefon klingeln hören, können Sie auf zwei Arten antworten: tup-Modus aufrufen: Sprachgesteuert: ›...
  • Page 45: Music Share (Musik Weiterleiten)

    Schnellwahl Taste gekoppelt ist (maximale Distanz 10 m), müssen Sie während der Musikwiedergabe 3 Sie können eine Telefonnummer im BTX2 PRO speichern und bei Bedarf anrufen. Sie Sekunden lang die „Zurück“-Taste drücken. Das Gerät des Beifahrers muss sich entweder müssen die Nummer zuerst über die PC-Software „BT UPDATER“ oder die Smartpho- im „Handy-“...
  • Page 46 Sie Ihr Mobiltelefon direkt mit dem GPS-Navigationsgerät koppeln und munikation (Intercom, UKW-Radio und Musikwiedergabe). anschließend das GPS-Gerät mit dem BTX2 PRO koppeln. In diesem Fall wird die Be- Wenn das GPS-Gerät mit dem „Lautstärke + “ Knopf gekoppelt wurde, ist der Tele- dienung des Mobiltelefons vom GPS-Navibildschirm (Touch Screen) übernommen.
  • Page 47: Verwenden Eines Pmr 446 Funkgeräts Mit Integriertem Bluetooth

    UKW-Radio (siehe die Tabelle C): Kabelgebundener Audioeingang Drücken Sie die „Vorwärts“ – oder „Zurück“-Taste kurz, um nach neuen Radiostationen Sie können Ihr Midland BTX2 PRO mit einer kabelgebundenen Tonquelle wie zum zu suchen. Beispiel einem iPod oder einem anderen MP3-Player verbinden.
  • Page 48: Setup Und Spezielle Konfiguration

    Manchmal kann es notwendig sein, zu den Werkseinstellungen zurückzukehren, um Bremslicht alle Änderungen oder Setupeinstellungen zurückzusetzen und ein „sauberes“ Gerät zu Auf der Rückseite des Montagesatzes Ihres BTX2 PRO befindet sich ein erhalten. extrem helles LED-Bremslicht. Wenn Sie eine Vollbremsung ausführen,...
  • Page 49: Setup Und Firmware-Aktualisierung

    1x Aufblinken = VOX deaktiviert Setup und Firmware-Aktualisierung 2x Aufblinken = niedrige Empfindlichkeit Die Firmware Ihres BTX2 PRO kann mittels einer USB-Verbindung mit Ihrem PC 3x Aufblinken= mittlere Empfindlichkeit konfiguriert und aktualisiert werden. Auf der Website von Midland 4x Aufblinken= hohe Empfindlichkeit (Standard) www.midlandeurope.com oder unter www.btupdater.de finden Sie auf der BTX2...
  • Page 50: Gewährleistung

    Das Benutzen eines Headsets mit extremer Lautstärkeeinstellung kann bleibende Gehörschäden hervorrufen. Sollten Sie Klingeln in Ihren Ohren oder andere Hörprobleme feststellen, so verringern Sie sofort die Lautstärke oder schalten Sie das Gerät aus. Bei ständigem Gebrauch mit hohen Lautstärken kann sich Ihr Gehör and den erhöhten Lautstärkepegel so gewöhnen, dass die Folge eine permanente Hörschädigung sein kann.
  • Page 51 www.midlandeurope.com...
  • Page 52 Descripción del dispositivo y del sistema de montaje ........................................53 Modos Operativos ....................................................55 Distancia......................................................55 Emparejar el Midland BTX2 PRO con otro Midland BTX2 PRO ....................................57 Talk 2 All - Universal Intercom: sincronización con Intercomunicadores de otras marcas ............................58 Sincronizar BTX2 PRO a dispositivos Bluetooth..........................................59 Función “Background”...
  • Page 53: Características Principales

    › 2 sistemas de fijación al casco con biadhesivo el frontal del dispositivo. Midland BTX2 PRO se fija al casco mediante la lámina con biadhesivo › 2 sistemas de fijación al casco mediante mordaza o mediante mordaza.
  • Page 54: Carga De La Batería

    Atención: Midland BTX2 PRO se ha diseñado para resistir la lluvia. Verifique siempre que las Descripción de las conexiones por cable gomas de protección estén bien cerradas. Debajo de la unidad puede encontrar la Toma de Carga, que permite cargar el dispositivo mediante una conexión microUSB estándar.
  • Page 55 Descripción del sistema de montaje en el casco El Midland BTX2 Pro puede fijarse al casco de dos formas: usando la lámina con biadhesi- vo o la lámina con mordaza. Estos métodos permiten tanto fijar de forma segura el BTX2 PRO al casco como retirarlo en cualquier momento para cargarlo o guardarlo.
  • Page 56: Modos Operativos

    Puede cambiar de un modo a otro pulsando durante 3 segundos la tecla “Central”. Un hasta que encaje en la ranura. El BTX2 PRO se mantiene en posición gracias al clip de mensaje vocal le dirá en que modo se encuentra. La secuencia del cambio de modo es fijación de la parte superior del soporte (A).
  • Page 57 Cómo emparejar el Midland BTX2 PRO a más de dos unidades Activación manual: Un Midland BTX2 PRO puede ser emparejado a un máximo de tres otras unidades de BT, es decir, cuatro en total. El Midland BTX2 PRO dispone de tres botones principales (Adelante, Con las unidades encendidas, pulse la tecla central en una de las dos unidades.
  • Page 58: Emparejar El Midland Btx2 Pro Con Otro Midland Btx2 Pro

    Si es necesario, también se puede desactivar la función VOX pul- Para emparejar el Midland BTX2 PRO con otro Midland BTX2 PRO debe entrar primero sando durante 7 segundos la tecla “Atrás”. Un anuncio vocal avisará de la desactivación.
  • Page 59: Talk 2 All - Universal Intercom: Sincronización Con Intercomunicadores De Otras Marcas

    Cuando la función “Conference” está activa, sólo habrá disponibles dos modos: Confe- Su BTX2 PRO puede funcionar en modo “clásico”, comunicación uno a uno hasta 4 rence (que sustituye “intercom”) y Radio FM personas, o en modo “Conference”...
  • Page 60: Sincronizar Btx2 Pro A Dispositivos Bluetooth

    El BTX2 PRO permite mantener siempre de fondo la conexión de audio del dispositivo línea de Midland BT (BT Next, BTX2 y BTX1) si ésta se actualiza a la versión de firmware sincronizado all botón “Vol -”. De esta manera, la comunicación Intercom no se inter- de 2014 o posterior.
  • Page 61 Cómo sincronizar el teléfono Realizar una llamada Hay varias maneras de realizar una llamada: Para sincronizar el BTX2 PRO al teléfono, sólo es necesario entrar en modo “Setup” : Desde el teclado del teléfono (nunca en marcha): › Apague la unidad Marque el número con el teclado y pulse la tecla de llamada del teléfono.
  • Page 62: Marcación Rápida

    A2DP y AVRCP, los cuales permiten escuchar música estéreo y gestionar las funciones Tecla Vol + (soporta audio estéreo A2DP) principales de reproductor MP3. De hecho es posible utilizar las teclas del BTX2 PRO Si el audio de las indicaciones del navegador es estéreo (lo mismo cuando usa un navega- para las siguientes funciones: Play, Stop/Pause, Adelante y Atrás.
  • Page 63: Uso De La Función Radio Fm

    Si desea utilizar también las funciones de reproductor estéreo del Navegador GPS, de- El BTX2 PRO integra un receptor de Radio FM con RDS. Para utilizarlo,sólo tiene que berá sincronizar el GPS a la tecla “Vol+”. En esta configuración, el GPS tendrá la prio- entrar en modo “Radio FM”.
  • Page 64: Cómo Usar La Entrada De Audio Por Cable

    “Adelante” durante tres segundos. Escuchará un tono de confirmación al activarla y dos Entrada de audio por cable tonos al desactivarla. El Midland BTX2 PRO puede conectarse a una fuente de audio por cable, como un iPod Audio por cable en segundo plano (o cualquier otro reproductor MP3).
  • Page 65: Configuraciones Especiales

    Consejo: Un correcto ajuste de la sensibilidad le permitirá aprovechar al máximo las posibili- › Haga doble click en la tecla “Central” para salir del modo “Setup” y usar el BTX2 PRO dades del dispositivo. Contra más ruido genere el binomio moto-casco, más baja ha de ser la Atención: este proceso no elimina las referencias a los equipos acoplados...
  • Page 66: Setup Y Actualización De Firmware

    › Doble click en la tecla “Central” para salir del modo “Setup” y usar el BTX2 PRO Esta garantía sólo es válida en el país donde se ha adquirido el producto.
  • Page 67: Certificaciones Europeas Ce

    Las modificaciones que no están aprobadas por el fabricante invalidan la garantía. © MIDLAND IBERIA. Queda prohibida la reproducción total o parcial sin el permiso por escrito del titular. Para más información, visite nuestra web: www.midland.es...
  • Page 68 “Mode” de fonctionnement ................................................71 Distance maximale .....................................................72 Comment coupler deux modules BTX2 PRO ..........................................72 Comment coupler le BTX2 PRO a plus de deux modules ......................................73 Conférence ......................................................74 Talk2All – Couplage avec un interphone d’une autre marque......................................75 Compatibilité avec modules de la gamme Midland BT ........................................75 Couplage du BTX2 PRO aux appareils Bluetooth ...........................................75...
  • Page 69: Caractéristiques Principales

    à utiliser grâce aux trois gros boutons placés sur le devant de l’appareil. Midland › 2 Modules BTX2 PRO BTX2 PRO est fixé sur le casque en utilisant une plaque adhésive ou une bride de fixation à › 2 Kit de montage glissière avec deux oreillettes stéréo vis.
  • Page 70: Rechargement Des Batteries

    USB. Ce même connecteur micro USB sur Attention: Le Midland BTX2 PRO a été conçu pour résister à la pluie et à l’eau. Cependant, s’il le module peut être utiliser pour connecter une source audio tel que un lecteur stéréo pleut vérifiez que les capuchons en caoutchouc des connecteurs sont bien en place.
  • Page 71 Step 2. Vissé à l’aide des deux vis fournit la plaque de serrage au kit de montage à glissière. Description du kit de montage à glissière Le Midland BTX2 PRO peut être fixé sur votre casque en utilisant le kit de montage à glissière de deux façon différentes, soit en utilisant la plaque avec adhésif double face ou alors la plaque avec vis.
  • Page 72: Allumer Et Eteindre Votre Midland Btx2 Pro

    Mise en place et retrait de votre Midland BTX2 PRO ble). Le BTX2 PRO peut être facilement mise en place sur le casque en le faisant glisser vers le Vous pouvez basculer d’un mode à l’autre simplement en appuyant longtemps sur la tou- bas sur le kit de montage à...
  • Page 73: Distance Maximale

    Comment coupler deux modules BTX2 PRO Activation vocale (VOX) Les deux modules fournis dans la même boîte BTX2 PRO, sont déjà liés et prêts à utiliser, Il suffit de commencer à parler, après quelques secondes la communication sera ouvert et ce qui signifie que vous n’avez pas besoin d’effectuer cette procédure.
  • Page 74: Comment Coupler Le Btx2 Pro A Plus De Deux Modules

    (lumière rouge toujours). Un Midland BTX2 PRO peut être jumelé à trois autres unités BT maximale, cela veut 5. Maintenant, la procédure de couplage est terminée, vous pouvez aller sur l’appa- dire quatre au total.
  • Page 75: Conférence

    Attention: lorsque le mode « conférence » est active, la fonction « Talk2All- Universal Inter- Pour utiliser le mode conférence, vous devez coupler toutes les unités dans une confi- com » (pour parler avec un interphone n’etant pas de la marque Midland) n’est pas disponible. guration de « chaîne ».
  • Page 76: Talk2All - Couplage Avec Un Interphone D'une Autre Marque

    Talk2All et l’autre module utilise le couplage avec la procédure “Téléphone”). Vous pouvez coupler un interphone qui n’est pas Midland sur la touche “Avant” . › Sur le BTX2 PRO entrez dans le mode configuration : (avec le module éteint, mainte- Compatibilité avec modules de la gamme Midland BT nez la touche centrale enfoncée pendant 7 secondes environ jusqu’à...
  • Page 77 Lorsqu’un appareil est couplé aux boutons « Vol + » ou « Vol - » le mode « Téléphone » Pour coupler le BTX2 PRO avec un téléphone , il faut d’abord entrez dans le mode de est activé.
  • Page 78 à distance votre lecteur. Vous Tél. couplé à ‘Vol-’: Appuyez brièvement sur la touche “Arrière”. Si votre téléphone sup- pouvez même utiliser les touches de votre BTX2 PRO pour controler les actions suivan- porte la reconaissance tes : Lecture, Pause, Avancer et Reculer.
  • Page 79: Partage De Musique

    (mais ne peut pas En général il est possible de connecter le BTX2 PRO à tous les GPS pour moto qui suppor- contrôler la musique). Le conducteur peut arrêter le partage de musique simplement te le protocole Bluetooth “headset”.
  • Page 80: Comment Ecouter La Radio Fm

    Pour enregistrer la station que vous écoutez, appuyez sur la touche avant et ar- Votre Midland BTX2 PRO peut être connecté à une source audio filaire, comme un iPod rière en même temps pendant 3 secondes. Vous entendez un bip de confirmation.
  • Page 81: Installation Et Configuration Speciale

    Feu stop d’urgence Écouter de la musique Sur le dos de votre kit de montage BTX2 PRO vous avez une LED Hau- Pour écouter de la musique à partir de l’entrée filaire, branchez la source audio en utilisant le te luminosité d’arrêt d’urgence. Chaque fois que vous faites un freinage câble AUX en option.
  • Page 82 2 fois = Sensibilité basse 3 fois= Sensibilité moyenne Il est possible de configurer et de mettre à jour le logiciel embarqué du BTX2 PRO en 4 fois= Sensibilité haute (Réglage par défaut) utilisant la connexion USB vers votre PC. Sur le site web Midland www.midlandeurope.
  • Page 83: Garantie

    FCC Compliance Information com à la page BTX2 PRO vous pouvez trouver le logiciel Pc et le firmware pour la mise à jour. This device complies with Part 15 of the FCC Rules. Operation is subject to the following Attention: NE PAS CONNECTER LE MODULE AU PC AVANT D’AVOIR TELECHAR-...
  • Page 84 fiind usor de folosit datorita celor 3 butoane mari plasate in partea din fata a dispozitivului. BTX2 PRO se fixeaza pe casca cu ajutorul benzii adezive sau a clamei de fixare cu surub. Datorita kit-ului audio cu casti ultra subtiri va puteti bucura de muzica de inalta calitate in timpul condusului.
  • Page 85 Conexiuni prin cablu ›› Pentru dispozitive audio precum iPod/MP3 player (cablu optional) Atentie: Midland BTX2 PRO este conceput sa fie rezistent la stropiri cu apa si ploaie. Totusi, daca ploua, asigurati-va intotdeauna ca aveti bine fixate capacelele protectoare din cauciuc.
  • Page 86 Descrierea produsului si a modalitatilor de prindere Descriere dispozitiv BTX2 PRO BTX2 PRO are 5 butoane in partea din fata; butoanele principale sunt multifunctionale: butonul Inainte (in partea stanga), butonul din mijloc si butonul Inapoi (in partea dreapta). Cele doua butoane dreptunghiulare sunt pentru "Volum +" (cresterea volumului) si "Volum-"...
  • Page 87 Descrierea modalitatilor de montare Midland BTX2 PRO se poate fixa pe casca in doua moduri: fie prin folosirea placii dublu adezive fie prin clama de fixare cu surub. Aceste metode va permit sa fixati in siguranta dispozitivul BTX2 PRO pe casca si sa il demontati oricand pentru a-l incarca sau depozita.
  • Page 88 fixa clama in partea stanga a castii. Montarea si demontarea dispozitivului Midland BTX2 PRO BTX2 PRO poate fi montat foarte usor pe casca prin indreptarea lui in jos astfel incat sa se potriveasca in slot –ul mecanismului de fixare ales (placa dublu adeziva sau clama cu surub).
  • Page 89 LED-ul rosu clipeste de 3 ori, diminuand astfel sansele de a-l stinge din greseala (mai ales daca purtati manusi). Mod de functionare BTX2 PRO poate functiona in trei moduri: intercom, telefon si radio FM. Cele trei butoane multifunctionale pot indeplini functii diferite conditionate de modul de functionare ales.
  • Page 90 Imperecherea unui dispozitiv BTX2 PRO la un alt dispozitiv BTX2 PRO Pentru a le imperechea, trebuie sa accesati modul de configurare: 1. Inchideti dispozitivul 2.Tineti apasat butonul din mijloc timp de 7 secunde pana cand LED-ul rosu se aprinde 3. Apoi apasati butonul din mijloc timp de 3 secunde. LED-ul va clipi albastru si rosu 4.
  • Page 91 Puteti dezactiva sistemul AGC apasand simultan butoanele „Volume+“ si Volume-“ timp de 3 secunde. Imperecherea mai multor dispozitive BTX2 PRO O unitate BTX2 PRO poate fi imperecheat cu maxim alte 3 unitati identice. BTX2 PRO are 3 butoane principale prin care puteti imperechea cele 3 unitati. Pilot1...
  • Page 92 Modul Conferinta Acest mod va permite comunicarea cu mai multe persoana odata. BTX2 PRO ofera comunicatie unu la unu a pana la 4 persoane (mod clasic intercom) sau mod conferinta cu pana la 4 persoane.
  • Page 93 Datorita functiei Talk2All acum este posibila interconectarea dispozitivului Midland BTX2 PRO cu alte dispozitive de acest tip de pe piata. Intrati in modul de configurare de pe BTX2 PRO: cand dispozitivul este oprit apasati Ÿ butonul din mijloc si mentineti timp de 7 secunde, pana cand LED-ul rosu ramane aprins.
  • Page 94 Cand sunt imperecheate 2 dispozitive diferite, distanta maxima de comunicare este data de cea cu distanta cea mai mica. Atentie: BTX2 PRO este compatibil cu gama anterioara Midland BT (BT Next, BTX2 si BTX1) doar daca au actualizare cu firmware versiunea 2014 sau mai noua.
  • Page 95 Activati cautarea dispozitivelor prin bluetooth de pe telefonul mobil Ÿ Dupa cateva secunde, pe ecranul telefonului mobil va fi afisat Midland BTX2 PRO. Ÿ Urmati procedura de imperechere conform telefonului. Daca vi se cere un pin introduceti "0000" (patru de zero)
  • Page 96 SET-APP“. Apoi cand sunteti in modul telefon apasati butonul inainte pentru 7 sec. Redare muzica de pe telefon Puteti reda muzica de pe un telefon mobil cand acesta este conectat prin butonul "Volum+". Puteti utiliza butoanele de pe dispozitivul BTX2 PRO ca functii pentru redarea muzicii: redare/pauza/inainte/inapoi. Inapoi...
  • Page 97 "Volum -" a fost deja folosit) pierdeti posibilitatea de a imperechea telefonul la dispozitivul BTX2 PRO. Puteti depasi aceasta limita prin imperecherea telefonului la GPS si GPS-ul la BTX2 PRO. Astfel toate functiile telefonului vor fi controlate de GPS. Imperecherea cu o statie radio PMR446 cu Bluetooth integrat sau extern Statia radio poate fi...
  • Page 98 Intercom trebuie sa schimbati modul de functionare. Conexiune audio cablata (AUX) Dispozitivul Midland BTX2 PRO este dotat cu o conexiune audio AUX ce poate fi utilizata pentru a conecta o sursa audio, cum ar fi un iPod sau MP3 player.
  • Page 99 Lumina de Setari si configuratii speciale urgenta Resetarea tuturor dispozitivelor imperecheate Uneori veti dori stergerea tuturor dispozitivelor imperecheate la BTX2 PRO. Pentru a efectua acest lucru, trebuie sa accesati modul de configurare (setup): Inchideti dispozitivul Ÿ Apasati butonul din mijloc timp de 7 secunde pana cand se aprinde LED-ul rosu Ÿ...
  • Page 100 Pentru rezultate optime, este posibil sa alegeti unul dintre cele 4 nivele de sensibilitate pentru microfon: ridicat, mediu, scazut si foarte scazut. Configurarea standard a dispozitivului BTX2 PRO este pe nivel de sensibilitate mediu. Este de asemenea posibil sa dezactivati functia VOX pentru a activa optiunea intercom si pentru a prelua apelurile telefonice numai manual.
  • Page 101 Apasati de doua ori pe butonul din mijloc pentru a iesi din modul de configurare si Ÿ puteti folosi BTX2 PRO. Configurare si actualizare firmware Puteti configura si actualiza dispozitivul dvs. BTX2 PRO folosind conexinea USB la calculatorul dvs. Pe website-ul www.midlandradio.com , la pagina produsului BTX2 PRO, puteti gasi toate actualizarile disponibile.

Table des Matières