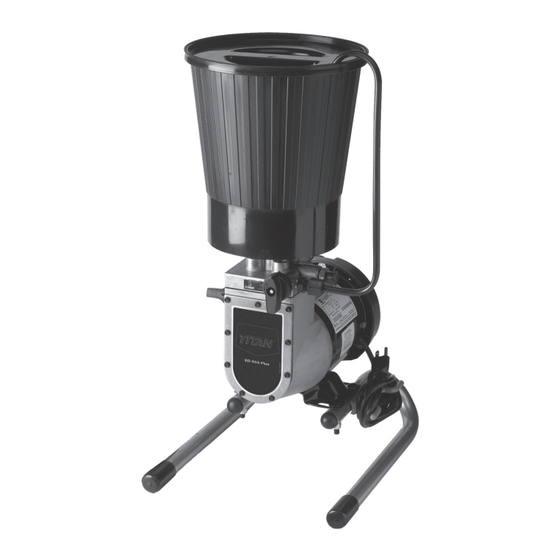
Titan ED655 Mode D'emploi
Groupe de projection à haute pression
Masquer les pouces
Voir aussi pour ED655:
- Notice d'utilisation (10 pages) ,
- Mode d'emploi (132 pages) ,
- Mode d'emploi (44 pages)

Manuels Connexes pour Titan ED655


Sommaire des Matières pour Titan ED655
- Page 1 OPERATING MANUAL - EN - OPERATING MANUAL - F - MODE D’EMPLOI ED655 ™ - ES - INSTRUCCIONES DE USO AIRLESS, HIGH-PRESSURE SPRAYING UNIT GROUPE DE PROJECTION À HAUTE PRESSION AIRLESS EQUIPO DE ALTA PRESIÓN PARA PULVERIZAR • Form No. 0528937L...
-
Page 12: Consignes De Sécurité
à la terre pour protéger contre les décharges PRIME pour libérer la pression. Consultez la PROCÉDURE DE d’électricité statique et les étincelles. N’utilisez que des DÉCOMPRESSION décrite dans le manuel de la pompe. Français © Titan Tool Inc. Tous droits réservés. - Page 13 à haute pression d‘origine de TITAN. fonctionnement. • Ce système peut produire une pression de 2 800 PSI / 193 •...
-
Page 14: Description Générale
à bille de sortie bouge sans de pression problème. Robinet Bouton du clapet de poussée PRIME/SPRAY (en option) Cordon d'alimentation Français © Titan Tool Inc. Tous droits réservés. -
Page 15: Assemblage Du Flexible De Peinture
8. Placez l’interrupteur ON/OFF du moteur sur OFF. vaporisation ou débouché. Engagez toujours le verrouillage de la gâchette du pistolet avant de démonter, de remplacer ou de nettoyer l’embout. Français English © Titan Tool Inc. Tous droits réservés. -
Page 16: Assemblage De La Trémie De Peinture
5. Placez l’extrémité en forme de crochet du tube de retour dans le trou du couvercle de la trémie de peinture. Tube de retour Couvercle de la trémie Français © Titan Tool Inc. Tous droits réservés. -
Page 17: Pulvérisation
Si la pression est trop élevée, la pulvérisation sera trop fine. Si la pression est trop basse, des traînées apparaîtront ou alors la peinture s’étalera en faisant des taches au lieu d’une fine pulvérisation. Français English © Titan Tool Inc. Tous droits réservés. -
Page 18: Nettoyage
5. Une fois le pulvérisateur amorcé, tournez le robinet de PRIME/ SPRAY sur SPRAY et tournez progressivement le bouton de commande de pression dans le sens des aiguilles d’une montre pour faire monter la pression. Français © Titan Tool Inc. Tous droits réservés. -
Page 19: Nettoyage Du Pistolet
20. Essuyez toute l’unité, le tuyau et le pistolet avec un chiffon montre jusqu’à la moitié de la pression. Continuez à actionner humide pour enlever les dépôts de peinture. le pistolet pendant environ 30 secondes. Français English © Titan Tool Inc. Tous droits réservés. -
Page 20: Maintenance
2. Retirez et nettoyez la butée de la bille et le petit ressort à l’intérieur du robinet en vous servant d’un crochet métallique ou d’une pince. Remplacez le ressort s’il est cassé ou usé. Français © Titan Tool Inc. Tous droits réservés. -
Page 21: Dépannage
Des corps étrangers ou de la peinture se sont Remplacez le robinet de PRIME/SPRAY ou emmenez le accumulés entre la robinet de PRIME/SPRAY. pulvérisateur à un Centre technique agréé Titan. Le pistolet de pulvérisation fuit. Des pièces internes du pistolet sont usées ou Emmenez le pulvérisateur à... -
Page 33: Product Registration
Enregistrement du produit Enregistrer votre appareil en ligne à www.titantool.com. Registro del producto Registre su producto en línea en www.titantool.com. Serial Number Location • Emplacement du numéro de série • Ubicación del número de serie © Titan Tool Inc. All rights reserved. - Page 35 Not pictured / Non illustré / Sin imagen: 0270462 Fan (not shown) Ventilateur (non illustré) Ventilador (no se muestra) 0270612 Fan cover (not shown) Couvercle du ventilateur (non illustré) Cubierta del ventilador (no se muestra) © Titan Tool Inc. All rights reserved.
-
Page 39: Garantie Limitée
RECLAMOS EN CASO DE INCUMPLIMIENTO DE ESTAS GARANTÍAS. Las Hojas de Datos de Seguridad (Material Safety Data Sheets - MSDS) se encuentran disponibles en el sitio web de Titan o llamando al Servicio al Cliente. © Titan Tool Inc. All rights reserved.