Sony MEX-1HD Installation/Connexions
Les langues disponibles
Les langues disponibles
Liens rapides
Audio Library
System
Installation/Connections
Installation/Connexions
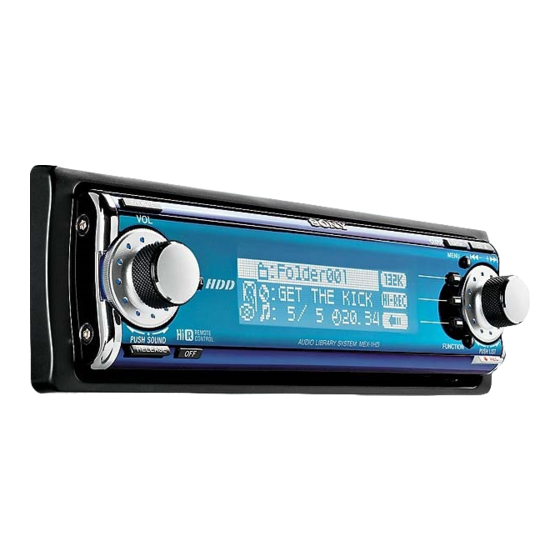
MEX-1HD
Sony Corporation © 2002
121 (4
7
/
)
1
8
18.5 (
3
19 (
3
/
)
4
60 (2
3
/
)
8
Unit: mm (in.)
Unité : mm (po.)
Dimensions include unit size, front panel and disc tray open, etc.
Les dimensions comprennent l'appareil lui-même, la façade et le plateau de disque lorsqu'ils
sont ouverts, etc.
2
1
5
4
Screw
Vis
7
Note
If there is alternator noise (a whining sound
when raising engine speed), ground the
master unit by connecting it to a metal
surface of the car with the supplied chassis
ground lead 7.
3-242-072-12 (1)
Printed in Japan
142.5 (5
5
/
)
8
/
)
4
170 (6
3
/
)
4
2
3
× 2
6
7
× 4
To a metal surface of the car
Vers une surface métallique de la
carrosserie du véhicule
Remarque
Si l'alternateur génère un bruit anormal (son aigu
lorsque le régime moteur augmente), reliez
l'appareil principal à la masse en le raccordant à
une surface métallique de la carrosserie du véhicule
au moyen du fil de masse pour châssis 7 fourni.
Equipment used in illustrations (not supplied)
Appareils utilisés dans les illustrations (non fournis)
3
SUB OUT (MONO)
Cautions
• This unit is designed for negative ground 12 V
DC operation only.
• Do not get the wires under a screw, or caught
in moving parts (e.g. seat railing).
• Before making connections, turn the car
ignition off to avoid short circuits.
• Connect the yellow and red power input leads
only after all other leads have been connected.
• Run all ground wires to a common ground
point.
• Be sure to insulate any loose unconnected
wires with electrical tape for safety.
• The use of optical instruments with this
product will increase eye hazard.
Notes on the power supply cord (yellow)
• When connecting this unit in combination with
other stereo components, the connected car
circuit's rating must be higher than the sum of
each component's fuse.
• When no car circuits are rated high enough,
connect the unit directly to the battery.
× 2
Before installation (1)
Do not install the unit where its operation
interferes with driving.
Example:
— Opening and closing of the front panel or
disc tray interfere with operation of the gear
shift.
— With the front panel open, operation of
hazard lamps, switches etc., is impaired.
Parts Iist (2)
The numbers in the list are keyed to those in the
instructions.
Caution
Handle the bracket 1 carefully to avoid injuring
your fingers.
Front speaker
Haut-parleur avant
Rear speaker
Haut-parleur arrière
AUDIO OUT
FRONT
AUDIO OUT
REAR
Connection example (3)
Note
Be sure to connect the ground cord before
connecting the amplifier.
Connection diagram (4)
1
To a metal surface of the car
• First connect the black ground lead, then
connect the yellow and red power input leads.
• Be sure to ground to the chassis of the car
securely.
2
To the power antenna control lead or power
supply lead of antenna booster amplifier
Notes
• It is not necessary to connect this lead if there
is no power antenna or antenna booster, or
with a manually-operated telescopic antenna.
• When your car has a built-in FM/AM antenna in
the rear/side glass, see "Notes on the control
and power supply leads."
3
To AMP REMOTE IN of an optional power
amplifier
This connection is only for amplifiers. Connecting
any other system may damage the unit.
4
To the interface cable of a car telephone
5
To a car's illumination signal
Be sure to connect the black ground lead to it
first.
6
To the +12 V power terminal which is energized
in the accessory position of the ignition key
switch
Notes
• If there is no accessory position, connect to the
+12 V power (battery) terminal which is
energised at all times.
Be sure to connect the black ground lead to it
first.
• When your car has a built-in FM/AM antenna in
the rear/side glass, see "Notes on the control
and power supply leads."
7
To the +12 V power terminal which is energised
at all times
Be sure to connect the black ground lead to it
first.
Active subwoofer
Caisson de graves actif
Power amplifier
Amplificateur de puissance

Manuels Connexes pour Sony MEX-1HD


Sommaire des Matières pour Sony MEX-1HD
- Page 2 from car antenna à partir de l’antenne de la voiture AUX IN (AUDIO) AUDIO OUT FRONT XM tuner Récepter XM DRN-XM01C RCA pin cord (not supplied) Fuse (10 A) AUDIO OUT REAR FRONT Fusible (10 A) Cordon à broche RCA (non fourni) SUB OUT (MONO) RK-G129 (Stereo mini plug to Phono plug) (not AUDIO OUT...
- Page 3 •Avoid installing the unit in areas subject to • Evitez d’installer l’appareil dans un endroit your Sony dealer. cas, votre revendeur Sony. dust, dirt, excessive vibration, or high exposé à la poussière, à la saleté, à des temperatures, such as in direct sunlight or near vibrations excessives ou à...
- Page 4 TOYOTA NISSAN max. size max. size 5 × 6 mm 5 × 6 mm × × in.) in.) to dashboard/center console to dashboard/center console Dimension Dimension au tableau de bord/console centrale max. 5 × 6 mm max. 5 × 6 mm au tableau de bord/console centrale ×...