Sharp SWA3052DS Manuel D'utilisation
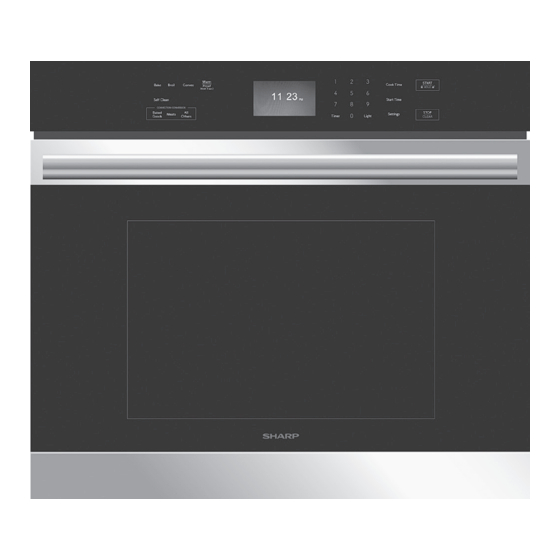
Four mural à convection simple de 30 po
Table des Matières
Les langues disponibles
Les langues disponibles
Liens rapides
30" SINGLE CONVECTION WALL OVEN
US CUSTOMER ASSISTANCE ........................................ 2
CANADA CUSTOMER ASSISTANCE ................................. 3
US CONSUMER LIMITED WARRANTY ............................. 4
CANADA LIMITED WARRANTY ...................................... 5
OVEN SAFETY ......................................................... 6
WARNINGS FOR ELECTRIC INSTALLATION ........................... 6
IMPORTANT SAFETY INSTRUCTIONS .............................. 7
PARTS AND FEATURES ............................................. 9
CONTROL PANEL. ................................................... 10
OVEN MODE CONTROLS .................................................... 10
DISPLAY .............................................................................. 10
START/CONTROL LOCKOUT ................................................. 10
STOP/CLEAR ......................................................................... 10
LIGHT .................................................................................... 10
TIMER ................................................................................... 10
COOK TIME ......................................................................... 10
START TIME ........................................................................ 11
SETTINGS ........................................................................... 11
SELF-CLEAN ........................................................................ 12
BRIGHTNESS ...................................................................... 12
DEMO MODE ........................................................................ 12
Carefully read the important information regarding installation, safety and maintenance.
TINSK B261MR R5
MODELS : SWA3052DS, SWA3062GS
IMPORTANT SAFETY INSTRUCTIONS
Keep these instructions for future reference.
OPERATION MANUAL
OVEN USE ............................................................ 13
BEFORE USING THE OVEN .................................................. 13
GENERAL .............................................................................. 13
OVEN TEMPERATURE CONTROL ......................................... 14
OVEN MODES ..................................................................... 14
CONVECTION ...................................................................... 16
BAKE TIPS .......................................................................... 17
CONVECTION BAKE TIPS ..................................................... 18
CONVECTION ROAST TIPS ................................................... 19
CONVECTION BROIL TIPS .................................................... 20
DEHYDRATE TIPS ................................................................. 21
BROIL TIPS .......................................................................... 22
OVEN CARE ...........................................................23
GENERAL CLEANING ........................................................... 23
AUTOMATIC SELF-CLEANING .............................................. 24
OVEN DOOR REMOVAL ........................................................ 25
REPLACING AN OVEN LIGHT ................................................ 26
TROUBLESHOOTING ................................................27
BAKING AND ROASTING ....................................................... 27
OPERATION ......................................................................... 27
E - JUN 30, 2022
Chapitres
Table des Matières
Dépannage

Manuels Connexes pour Sharp SWA3052DS


Sommaire des Matières pour Sharp SWA3052DS
- Page 29 MANUEL D'UTILISATION FOUR MURAL À CONVECTION SIMPLE DE 30 PO MODÈLES : SWA3052DS, SWA3062GS ........2 GÉNÉRAL ................11 ASSISTANCE À LA CLIENTÈLE COMMANDE DE LA TEMPÉRATURE DU FOUR ..... 13 ..3 GARANTIE LIMITÉE DU CONSOMMATEUR AU CANADA MODES DU FOUR ..............13 ..........
-
Page 30: Assistance À La Clientèle
CONTACTEZ-NOUS Si, à tout moment, vous avez des questions ou commentaires concernant votre produit SHARP, veuillez contacter le Centre d’assistance à la clientèle SHARP. Nous pouvons vous fournir de l’assistance par divers moyens de communication, pour mieux vous servir :... -
Page 31: Garantie Limitée Du Consommateur Au Canada
émanant de ou en rapport avec l’utilisation ou la performance d’un produit ou la défaillance d’un produit, même si Sharp est au courant ou a été informé de la possibilité de tels dommages;... -
Page 32: Sécurité Du Four
SÉCURITÉ DE DE FOUR Votre sécurité et celle des autres est très importante. Nous fournissons de nombreux messages de sécurité importants dans ce manuel et sur votre appareil ménager. Assurez-vous de toujours lire tous les messages de sécurité et de vous y conformer. Voici le symbole d’alerte de sécurité. -
Page 33: Importantes Instructions De Sécurité
IMPORTANTES INSTRUCTIONS DE SÉCURITÉ LISEZ TOUTES LES INSTRUCTIONS AVANT UTILISATION Ne pas faire cuire les aliments excessivement. Surveiller Afin de réduire le risque d’incendie, de choc AVERTISSEMENT attentivement le four si du papier, du plastique ou électrique, de blessures corporelles ou de dommage lors de d’autres matériaux combustibles sont placés à... -
Page 34: Sécurité Du Four En Mode D'autonettoyage
IMPORTANTES INSTRUCTIONS DE SÉCURITÉ L’encadrement supérieur et latéral de la porte du four Confirmer que la porte se verrouille et ne s’ouvrira peut devenir suffisamment chaud pour provoquer des pas une fois que les deux sélecteurs sont en position brûlures. CLEAN (nettoyage) et que l’icône de verrouillage de la porte s’affiche. -
Page 35: Caractéristiques De Votre Four
CARACTÉRISTIQUES DE VOTRE FOUR A Évent du four J Arrière de la grille du four (2 grilles standard, 1 grille coulissante) B Elément de gril K Devant de la grille du four C Panneau de contrôle L Grilles de plat du gril D Ampoule halogène M Grilles de plat du gril E Ventilateur à... -
Page 36: Tableau De Commande
TABLEAU DE COMMANDE A Commandes d’activation des modes du four F Annulation B Affichage G Réglages C Durée de cuisson H Lampe D Heure de démarrage Minuterie E Mise en marche/verrouillage des commandes J Commandes du mode Conversion à la convection (appuyer pendant 3 secondes) K Autonettoyage COMMANDES D’ACTIVATION DES... -
Page 37: Cook Time (Durée De Cuisson)
TABLEAU DE COMMANDE 7 Appuyer sur START (mise en marche). La fonction Heure COOK TIME (DURÉE DE CUISSON) de démarrage effectuera un compte à rebours jusqu’à ce que La fonction Cook Time (durée de cuisson) permet d’allumer l’heure programmée soit atteinte. le four à... -
Page 38: Signaux Sonores
TABLEAU DE COMMANDE 2 Appuyer sur 2 sur le clavier numérique. “TEMP UNIT” (unité SIGNAUX SONORES de température) et “FAHRENHEIT” s’affichent. Les signaux sonores avertissent l’utilisateur de divers événe- ments : 3 Appuyer sur 1 sur le clavier numérique. “DEGREE F/C” (degrés F/C) s’affiche. -
Page 39: Self-Clean (Autonettoyage)
TABLEAU DE COMMANDE SELF-CLEAN (AUTONETTOYAGE) LE MODE DE DÉMONSTRATION Active la fonction d’autonettoyage. Voir la section “Entretien 1 Appuyer sur SETTINGS et appuyer sur START pour aller du four” à la page 23. à la page suivante. 2 Appuyer sur 0 sur le clavier numérique. “DEMO MODE" et LUMINOSITÉ... - Page 40 UTILISATION DU FOUR de cuisson directement sur la porte du four ou le fond du four. UTILISATION DE LA SONDE THERMIQUE : 1 Insérer la sonde dans l’aliment. • Les grilles de four peuvent être positionnées à n’importe laquelle des six hauteurs du four. REMARQUE : Pour les viandes, la pointe de la sonde doit être insérée au coeur de la partie la plus épaisse de la viande.
-
Page 41: Commande De La Température Du Four
UTILISATION DU FOUR • Votre nouveau four comprend un capteur de température REMARQUE : L’élément inférieur est dissimulé sous le fond électronique aidant à maintenir soigneusement une tem- du four. pérature précise. Votre four antérieur avait peut-être un thermostat mécanique qui passit graduellement à une plus BAKE (CUISSON AU FOUR) haute température. - Page 42 UTILISATION DU FOUR lèchefrite peut être recouvert de papier d’aluminium pour en faciliter le nettoyage. • Enlever l’excès de graisse pour réduire les éclaboussures. Entailler le gras résiduel sur les côtés pour éviter que la viande ne se recroqueville. • Sélectionner la cuisson au gril HI/550 °F (288 °C) pour la plupart des cuissons au gril.
-
Page 43: Convection
UTILISATION DU FOUR 2 Appuyer sur WARM/PROOF (maintien au chaud/levée) homogène, ils sont plus dorés et plus croustillants. pendant 3 secondes. “Proof” (levée) et “Set temp or Press • Les aliments soufflés tels que les choux à la crème, les soufflés START”... -
Page 44: Rôtissage Par Convection
UTILISATION DU FOUR lorsqu'on utilise la fonction de cuisson au gril par convection. temp. ou appuyer sur mise en marche) et 325 °F (163 °C) s’affichent. Il n’est pas nécessaire de préchauffer le four pour la cuisson au gril par convection. 4 Appuyer sur START (mise en marche) si un rôtissage par convection à... -
Page 45: Produits De Boulangerie Et Tous Les Autres
UTILISATION DU FOUR • Vérifier la cuisson au temps minimum. PRODUITS DE BOULANGERIE ET TOUS LES AUTRES (SEULEMENT) • Utiliser des plats en métal (avec une finition antiadhésive ou 1 Le préchauffage démarre. Une fois le four préchauffé à la non), en verre résistant à... -
Page 46: Aliments Recommandés Pour Le Mode Convection Européenne
UTILISATION DU FOUR 1, 2, 3, 4 et 5. Les six grilles peuvent être utilisées pour des • Convertir vos propres recettes peut être facile. Choisissez une gâteaux, des biscuits et des biscuits apéritifs. recette qui marche bien en convection. - 2 grilles de cuisson : Utiliser positions 1 et 3. -
Page 47: Conseils De Cuisson Àconvection
UTILISATION DU FOUR • Utiliser la sonde ou le thermomètre pour déterminer la cuisson CONSEILS DE CUISSON À intérieure sur la température “END” (fin) (voir le tableau de CONVECTION cuisson). • Ne pas préchauffer le rôtissage à convection. • Vérifier de nouveau la température de la viande/volaille en •... -
Page 48: Conseils Et Techniques Pour Le Gril À Convection
UTILISATION DU FOUR • Ne pas préchauffer pour le four. CONSEILS ET TECHNIQUES POUR LE GRIL À CONVECTION • Utiliser le plat de rôtissage à 2 pièces. • Placer le gril dans la position appropriée avant d’allumer • Tourner les viandes une fois à mi-cuisson du temps de cuisson votre four. -
Page 49: Conseils De Gril
UTILISATION DU FOUR TEMPS DE SÉCHAGE ALIMENT PRÉPARATION VÉRIFIER LA CUISSON APPROX.* (HEURES) • Tranches Séchées à la serviette En conserve : 9-13 Souples et pliables d’ananas Frais : 8-12 • Fraises Lavées et sechées à la serviette. Tranches " 12-17 Sèches et cassantes d’épaisseur, dessus sur la grille... -
Page 50: Guide De Température De Service De La Fsis (Service D'inspection Et Sécurité Des Aliments Usda)
UTILISATION DU FOUR POSITION DE RÉGLAGE ITEMP. INTERNE TEMPS CÔTÉ 1 TEMPS CÔTÉ 2 ALIMENTS ET ÉPAISSEUR GRILLE DU GRIL °F (°C) (MIN.)* (MIN.)* Agneau • Côtelettes (1") - Médium saignant 145 (63) - Médium 160 (71) - Bien cuit 170 (77) Pain •... -
Page 51: Entretien Du Four
ENTRETIEN DU FOUR NETTOYAGE GÉNÉRAL MÉTHODE DE PIÈCE IMPORTANT : Avant le nettoyage, s’assurer que toutes les NETTOYAGE commandes sont désactivées et que le four est froid. Toujours 8 Devant de la porte C & G suivre les instructions indiquées sur l’étiquette des produits 9 Capuchons d’extrémités nettoyants. -
Page 52: Autonettoyage Automatique
ENTRETIEN DU FOUR Ce four est doté d’une fonction d’autonettoyage qui élimine le PIÈCE MÉTHODE DE NETTOYAGE besoin de récurer manuellement la cavité du four. Durant le Nettoyez avec une eau savonneuse ou programme d’autonettoyage, le four utilise des températures très appliquez du Fantastik ou du Formula 409 élevées, brûlant les saletés pour les réduire en cendres. -
Page 53: Programme D'autonettoyage
ENTRETIEN DU FOUR suffisamment durant le programme de nettoyage pour brûler RETRAIT DE LA PORTE DU FOUR la saleté, et doivent être nettoyées à la main AVANT le début Il n’est pas nécessaire d’enlever la porte du four dans le cadre du programme. -
Page 54: Remplacement D'une Ampoule Du Four
ENTRETIEN DU FOUR 2 Ouvrir la porte du four. 3 Sortir l’ampoule de la douille. REMARQUE : Vous devriez entendre un déclic lorsque la porte est correctement remise en place. 3 Remettre les loquets des charnières à la position verrouillée (de chaque côté). -
Page 55: Dépannage
DÉPANNAGE Essayer d’abord les solutions suggérées ici pour éviter le coût dessous qui répond à la plupart des problèmes communs. Étant d’un appel de service. donné que la taille, la forme et le matériel de cuisson affectent les résultats de la cuisson, la meilleure solution est de remplacer les vieux plats qui sont devenus sombres et qui se sont voilés CUISSON ET RÔTISSAGE avec le temps et leur utilisation. -
Page 56: Fonctionnement
DÉPANNAGE FONCTIONNEMENT PROBLÈME CAUSE POSSIBLE SOLUTION Un code d’erreur F03 ou Un problème s’est Déconnecter la source de courant électrique principale (fusible ou boîtier F04 apparaît sur la fenêtre produit avec le de disjoncteurs), attendre quelques secondes et remettre en marche. d’affichage. - Page 57 DÉPANNAGE PROBLÈME CAUSE POSSIBLE SOLUTION Le four ne s’autonettoie pas Le four était encore Laisser le four refroidir avant de démarrer l’autonettoyage. correctement. chaud lorsque le mode de nettoyage a été sélectionné. Le four est très sale. Toujours essuyer pour décoller les saletés ou les gros renversements avant de démarrer l’autonettoyage.
- Page 60 Sharp Électronique du Canada Ltée • 335, rue Britannia Est • Mississauga, Ontario • L4Z 1W9 • Canada...