Beurer HK 72 Akku Mode D'emploi
Masquer les pouces
Voir aussi pour HK 72 Akku:
- Mode d'emploi (76 pages) ,
- Mode d'emploi (10 pages) ,
- Mode d'emploi (100 pages)
Table des Matières
Publicité
Les langues disponibles
Les langues disponibles
Liens rapides
D Mobiler Wärmegürtel
Gebrauchsanweisung ............ 2 – 8
G Mobile heat belt
Instructions for use ...............9 – 15
F Ceinture chauffante sans fil
Mode d'emploi .................... 16 – 22
E Cinturón de calor portátil
Instrucciones de uso .......... 23 – 29
I Cintura riscaldante da viaggio
Istruzioni per l'uso .............. 30 – 36
All manuals and user guides at all-guides.com
T Taşınabilir ısıtıcı kemer
r Электрогрелка-пояс
Q Przenośny pas rozgrzewający z
HK 72 Akku
Kullanma Talimatı ................37 – 43
Инструкция по
применению ........................ 44 – 51
akumulatorem
Instrukcja obsługi ............... 52 – 58
Publicité
Chapitres
Table des Matières

Manuels Connexes pour Beurer HK 72 Akku


Sommaire des Matières pour Beurer HK 72 Akku
- Page 1 All manuals and user guides at all-guides.com HK 72 Akku D Mobiler Wärmegürtel T Taşınabilir ısıtıcı kemer Gebrauchsanweisung .... 2 – 8 Kullanma Talimatı ....37 – 43 G Mobile heat belt r Электрогрелка-пояс Instructions for use ....9 – 15 Инструкция по ...
-
Page 2: Table Des Matières
All manuals and user guides at all-guides.com DEUTSCH Inhalt 1. Lieferumfang ............3 4.6 Temperatur einstellen ......... 6 1.1 Gerätebeschreibung ........3 4.7 Ausschalten ..........6 2. Wichtige Anweisungen 4.8 Automatische Abschaltzeit ......6 Für den späteren Gebrauch aufbewahren ..3 5. -
Page 3: Lieferumfang
All manuals and user guides at all-guides.com 1. Lieferumfang 1 Heizkissen 1 Akku 1 Ladegerät 1 Gebrauchsanweisung 1.1 Gerätebeschreibung 1. Ladegerät 2. Akkupack 3. Anschlussbuchse des Akkupacks 4. Anschlussstecker des Ladegeräts 5. Anschlussstecker der Verbindungsleitung 6. LED-Anzeige der Temperaturstufen (blau) 7. - Page 4 All manuals and user guides at all-guides.com mentalen Fähigkeiten oder Mangel an Erfahrung und Wissen benutzt werden, wenn sie beaufsichtigt werden und bezüglich des sicheren Gebrauchs des Heizkissens unterwiesen wurden und die daraus resultierenden Gefahren verstehen. • Kinder dürfen nicht mit dem Heizkissen spielen. •...
-
Page 5: Bestimmungsgemäße Verwendung
All manuals and user guides at all-guides.com 3. Bestimmungsgemäße Verwendung ACHTUNG Dieses Heizkissen ist nur zur Erwärmung des menschlichen Körpers bestimmt. 4. Bedienung 4.1 Sicherheit ACHTUNG Das Heizkissen ist mit einer SICHERHEITS-ABSCHALTUNG ausgestattet. Ein Sensor verhindert eine Überhitzung des Heizkissens durch automatische Abschaltung im Fehlerfall. Wenn die SICHERHEITS-ABSCHALTUNG erfolgt ist, wird die blaue LED-Anzeige der Temperaturstufen (6) im eingeschalteten Zustand nicht mehr beleuchtet. -
Page 6: Einschalten
All manuals and user guides at all-guides.com ACHTUNG Stellen Sie sicher, dass sich das Heizkissen im Gebrauch nicht zusammenschiebt oder Falten bildet. 4.5 Einschalten Schalten Sie das Heizkissen ein, indem sie auf die Taste für EIN/AUS und Temperaturstufen (8) drücken. Die blaue LED-Anzeige der Temperaturstufe 1 leuchtet auf. -
Page 7: Reinigung Und Pflege
All manuals and user guides at all-guides.com 5. Reinigung und Pflege ACHTUNG • Trennen Sie vor der Reinigung immer zuerst den Akkupack (2) vom Heizkissen und entfernen Sie ihn aus der Tasche des Heizkissens. Andernfalls besteht die Gefahr der Beschädigung. ACHTUNG •... -
Page 8: Was Tun Bei Problemen
Die gesetzlichen Gewährleistungen des Kunden bleiben durch die Garantie unberührt. Für Geltendmachung eines Garantiefalles innerhalb der Garantiezeit ist durch den Kunden der Nachweis des Kaufes zu führen. Die Garantie ist innerhalb eines Zeitraumes von 3 Jahren ab Kaufdatum gegenüber der Beurer GmbH, 89077 Ulm (Germany) geltend zu machen. -
Page 9: Explanation Of Symbols
All manuals and user guides at all-guides.com ENGLISH Contents 1. Included in delivery .......... 10 4.5 Switching on ..........13 1.1 Device description ........10 4.6 Setting the temperature ......13 2. Important instructions 4.7 Switching off ..........13 Retain for future use ......... 10 4.8 Automatic switch-off time ...... -
Page 10: Included In Delivery
All manuals and user guides at all-guides.com 1. Included in delivery 1 Heating pad 1 Battery 1 Charger 1 Instructions for use 1.1 Device description 1. Charger 2. Battery pack 3. Connection socket for the battery pack 4. Connector plug for the charger 5. -
Page 11: Intended Use
All manuals and user guides at all-guides.com • Children must not play with the heating pad. • Cleaning and user maintenance must not be performed by children unless supervised. • This heating pad is not designed for use in hospitals. •... -
Page 12: Operation
All manuals and user guides at all-guides.com 4. Operation 4.1 Safety IMPORTANT The heating pad is fitted with a SAFETY SWITCH-OFF. A sensor prevents the heating pad from overheating by means of automatic switch-off in the event of an error. Once the SAFETY SWITCH- OFF has taken place, the blue LED display for the temperature settings (6) that is shown when switched on is no longer lit up. -
Page 13: Switching On
All manuals and user guides at all-guides.com IMPORTANT Ensure that the heating pad will not bunch up or become folded during use. 4.5 Switching on Switch on the heating pad by pressing the button for controlling ON/OFF and temperature settings (8). The blue LED display for temperature setting 1 lights up. -
Page 14: Cleaning And Maintenance
All manuals and user guides at all-guides.com 5. Cleaning and maintenance IMPORTANT • Prior to cleaning, you must always disconnect the battery pack (2) from the heating pad and remove it from the heating pad pouch, otherwise there is a risk of damage. IMPORTANT •... -
Page 15: What If There Are Problems
All manuals and user guides at all-guides.com 8. What if there are problems? Problem Cause Solution The blue LED display for the temperature The battery pack has been fully run Charge the battery pack. settings (6) does not light up when: down. -
Page 16: Explication Des Symboles
All manuals and user guides at all-guides.com FRANÇAIS Sommaire 1. Contenu ............17 4.5 Mise sous tension ........20 1.1 Description de l’appareil ......17 4.6 Réglage de la température ....... 20 2. Instructions importantes 4.7 Mise hors tension ........20 À... -
Page 17: Description De L'appareil
All manuals and user guides at all-guides.com 1. Contenu 1 Coussin chauffant 1 batterie 1 chargeur 1 mode d‘emploi 1.1 Description de l’appareil 1. Chargeur 2. Bloc de batterie 3. Prise femelle du bloc de batterie 4. Prise mâle du bloc de batterie 5. - Page 18 All manuals and user guides at all-guides.com condition qu‘ils soient surveillés ou sachent comment l‘utiliser en toute sécurité et en comprennent les risques. • Les enfants ne doivent pas jouer avec le coussin chauffant. • Le nettoyage et l‘entretien ne doivent pas être effectués par des enfants sans surveillance.
-
Page 19: Utilisation Conforme Aux Recommandations
All manuals and user guides at all-guides.com 3. Utilisation conforme aux recommandations ATTENTION Ce coussin chauffant est exclusivement conçu pour réchauffer le corps humain. 4. Utilisation 4.1 Sécurité ATTENTION Le coussin chauffant est équipé d‘un système d‘ARRÊT AUTOMATIQUE DE SÉCURITÉ. Un capteur permet d‘éviter la surchauffe du coussin chauffant grâce à... -
Page 20: Mise Sous Tension
All manuals and user guides at all-guides.com ATTENTION Lorsque vous l‘utilisez, assurez-vous que le coussin chauffant n‘est pas froissé et qu‘aucun pli ne s‘est formé. 4.5 Mise sous tension Allumez le coussin chauffant en appuyant sur la touche Marche/Arrêt et niveaux de température (8). Le voyant LED bleu du niveau de température 1 s‘allume. -
Page 21: Nettoyage Et Entretien
All manuals and user guides at all-guides.com 5. Nettoyage et entretien ATTENTION • Avant de nettoyer l‘appareil, débranchez toujours le bloc de batterie (2) et retirez-le de la poche du coussin chauffant. Sinon, vous risquez d‘endommager l‘appareil. ATTENTION • Le bloc de batterie (2) ne doit jamais entrer en contact avec de l‘eau ni d‘autres liquides. Il pourrait être endommagé. -
Page 22: Que Faire En Cas De Problèmes
All manuals and user guides at all-guides.com 8. Que faire en cas de problèmes ? Problème Cause Solution Le voyant LED bleu des niveaux de tem- Le bloc de batterie est complète- Charger le bloc de batterie. pérature (6) ne s‘allume pas lorsque : ment déchargé. -
Page 23: Explicación De Los Símbolos
All manuals and user guides at all-guides.com ESPAÑOL Índice 1. Artículos suministrados ........24 4.5 Encendido ..........27 1.1 Descripción del aparato ......24 4.6 Ajuste de la temperatura ......27 2. Indicaciones importantes 4.7 Apagado ........... 27 Consérvelas para futuras consultas ....24 4.8 Tiempo de desconexión automática .. -
Page 24: Artículos Suministrados
All manuals and user guides at all-guides.com 1. Artículos suministrados 1 almohadilla eléctrica 1 batería 1 cargador 1 instrucciones de uso 1.1 Descripción del aparato 1. Cargador 2. Batería 3. Conector hembra de la batería 4. Clavija del cargador 5. Clavija del interconector 6. - Page 25 All manuals and user guides at all-guides.com • Esta almohadilla eléctrica puede ser utilizada por niños mayores de 8 años, así como por personas con facultades físicas, sensoria- les o mentales limitadas, o con poca experiencia o conocimientos, siempre que estén vigilados o se les indique cómo usarla de forma segura y entiendan los peligros que conlleva.
-
Page 26: Uso Correcto
All manuals and user guides at all-guides.com 3. Uso correcto ATENCIÓN Esta almohadilla eléctrica solo está destinada a calentar el cuerpo humano. 4. Manejo 4.1 Seguridad ATENCIÓN La almohadilla eléctrica dispone de un SISTEMA DE DESCONEXIÓN DE SEGURIDAD. Un sen- sor impide el sobrecalentamiento de la almohadilla, que se apaga automáticamente en caso de fallo. -
Page 27: Encendido
All manuals and user guides at all-guides.com ATENCIÓN Asegúrese de que la almohadilla no se doble ni se puedan formar arrugas durante el uso. 4.5 Encendido Encienda la almohadilla eléctrica pulsando la tecla de encendido/apagado y de selección de niveles de temperatura (8). -
Page 28: Limpieza Y Cuidado
All manuals and user guides at all-guides.com 5. Limpieza y cuidado ATENCIÓN • Antes de proceder a la limpieza, retire siempre primero la batería (2) de la almohadilla eléctrica y sáquela del compartimento de esta. De lo contrario podrían producirse daños. ATENCIÓN •... -
Page 29: Solución De Problemas
All manuals and user guides at all-guides.com 8. Solución de problemas Problema Causa Solución El indicador LED azul de los niveles de La batería está completamente Carga de la batería. temperatura (6) no se ilumina cuando: descargada. – la batería está conectada a la almoha- Se ha producido una DESCO- Deje enfriar la almohadilla dilla eléctrica y... -
Page 30: Spiegazione Dei Simboli
All manuals and user guides at all-guides.com ITALIANO Indice 1. Fornitura ............31 4.5 Accensione ..........34 1.1 Descrizione dell’apparecchio ..... 31 4.6 Impostazione della temperatura ....34 2. Istruzioni importanti 4.7 Spegnimento ..........34 Conservare per utilizzo futuro ......31 4.8 Tempo di spegnimento automatico .. -
Page 31: Fornitura
All manuals and user guides at all-guides.com 1. Fornitura 1 Termoforo 1 Batteria ricaricabile 1 Caricabatteria 1 Manuale di istruzioni 1.1 Descrizione dell’apparecchio 1. Caricabatterie 2. Batteria ricaricabile 3. Connettore per batteria ricaricabile 4. Connettore per caricabatterie 5. Connettore per cavo di collegamento 6. - Page 32 All manuals and user guides at all-guides.com o non in possesso della necessaria esperienza e conoscenza, esclu- sivamente sotto supervisione oppure se sono stati istruiti in merito alle misure di sicurezza e comprendono i rischi ad esse correlati. • I bambini non devono giocare con il termoforo. •...
-
Page 33: Uso Conforme
All manuals and user guides at all-guides.com 3. Uso conforme ATTENZIONE Questo termoforo è destinato esclusivamente al riscaldamento del corpo umano. 4. Funzionamento 4.1 Sicurezza ATTENZIONE Il termoforo è dotato di uno SPEGNIMENTO AUTOMATICO DI SICUREZZA. Un sensore impedisce il surriscaldamento del termoforo grazie allo spegnimento automatico in caso di anomalia. In caso di SPEGNIMENTO AUTOMATICO DI SICUREZZA, l’indicatore LED blu dei livelli di tempe- ratura (6) si spegne quando l’apparecchio è... -
Page 34: Accensione
All manuals and user guides at all-guides.com ATTENZIONE Accertarsi che durante l’uso del termoforo non si formino arricciature o pieghe. 4.5 Accensione Accendere il termoforo premendo il pulsante ON/OFF e dei livelli di temperatura (8). L’indicatore LED blu del livello di temperatura 1 si accende. Premendo ripetutamente il pulsante si aumenta il livello di temperatura. -
Page 35: Pulizia E Cura
All manuals and user guides at all-guides.com 5. Pulizia e cura ATTENZIONE • Prima di procedere alla pulizia, scollegare la batteria ricaricabile (2) e rimuoverla della tasca del termoforo. In caso contrario sussiste il pericolo di danneggiamento. ATTENZIONE • La batteria ricaricabile (2) non deve mai entrare in contatto con acqua o altri liquidi. Potrebbe subire danni. -
Page 36: Che Cosa Fare In Caso Di Problemi
All manuals and user guides at all-guides.com 8. Che cosa fare in caso di problemi? Problema Causa Soluzione L‘indicatore LED blu dei livelli di tempe- La batteria ricaricabile è completa- Caricamento della batteria ratura (6) si accende quando: mente scarica. ricaricabile. -
Page 37: Şekillerin Anlamı
All manuals and user guides at all-guides.com TÜRKÇE İçerik 1. Teslimat kapsamı ..........38 4.5 Açma ............40 1.1 Cihaz açıklaması ......... 38 4.6 Sıcaklığı ayarlama ........41 2. Önemli uyarılar 4.7 Kapatma ........... 41 Daha sonra kullanmak üzere muhafaza edin ..38 4.8 Otomatik kapanma zamanı... -
Page 38: Teslimat Kapsamı
All manuals and user guides at all-guides.com 1. Teslimat kapsamı 1 Isı yastığı 1 Batarya 1 Şarj cihazı 1 Kullanma talimatı 1.1 Cihaz açıklaması 1. Şarj cihazı 2. Batarya 3. Bataryanın bağlantı yuvası 4. Şarj cihazının bağlantı fişi 5. Bağlantı kablosunun bağlantı fişi 6. -
Page 39: Amaca Uygun Kullanım
All manuals and user guides at all-guides.com • Çocuklar ısı yastığıyla oynamamalıdır. • Temizlik ve kullanıcı bakımı, gözetim altında olmadıkları sürece ço- cuklar tarafından yapılmamalıdır. • Bu ısı yastığı hastanelerde kullanım için tasarlanmamıştır. • İğne batırmayın. • Katlanmamış veya buruşturulmamış halde kullanın. •... -
Page 40: Kullanım
All manuals and user guides at all-guides.com 4. Kullanım 4.1 Güvenlik DİKKAT Isı yastığı bir GÜVENLİ KAPATMA SİSTEMİ ile donatılmıştır. Bir sensör hata durumunda otomatik olarak kapatarak ısı yastığının aşırı ısınmasını önler. GÜVENLİK KAPATMASI gerçekleştiğinde sıcaklık kademelerinin mavi renkli LED göstergesi (6) cihaz açık olduğu halde yanmaz. Isı yastığı oda sıcaklığına kadar soğuduktan sonra yeniden açılabilir. -
Page 41: Sıcaklığı Ayarlama
All manuals and user guides at all-guides.com BİLGİ/NOT Isı yastığını en hızlı şekilde ısıtmak için önce en yüksek sıcaklık kademesini ayarlamalısınız. BİLGİ/NOT Bu ısı yastığı, ilk 10 dakika içinde hızlı ısınma sağlayan bir hızlı ısıtma sistemine sahiptir. UYARI Eğer ısı yastığı birkaç saat boyunca kullanılacaksa, ısıtılan vücut kısmının aşırı... -
Page 42: Saklama
All manuals and user guides at all-guides.com Bu ısı yastığı makinede yıkanabilir. Bunun için ısı yastığının cırt cırt bandını kapatın ve bir yastık kılıfı içine koyun. Çamaşır makinesini 30 °C’de özel narin yıkama moduna ayarlayın. Ekolojik nedenlerle ısı yastığını yalnız başka tekstillerle birlikte yıkayın. Bir yumuşak deterjanı... -
Page 43: Teknik Veriler
All manuals and user guides at all-guides.com 9. Teknik veriler Isı yastığındaki, bataryadaki ve şarj cihazındaki tip etiketlerine bakın. 10. Yedek parçalar Aşağıdaki yedek parçaları doğrudan müşteri hizmetlerinden tedarik edebilirsiniz: • Batarya (Ürün No. 108.303) • Şarj cihazı (Ürün No. 546.007) •... -
Page 44: Пояснение Символов
All manuals and user guides at all-guides.com РУССКИЙ Оглавление 1. Комплект поставки ......... 45 4.6 Установка температуры ......48 1.1 Описание прибора ........45 4.7 Выключение ..........49 2. Важные указания 4.8 Автоматическое выключение ....49 Сохраните для последующего 5. Очистка и уход ..........49 использования! .......... -
Page 45: Комплект Поставки
All manuals and user guides at all-guides.com 1. Комплект поставки 1 Электрогрелка 1 Аккумулятор 1 Зарядное устройство 1 Инструкция по эксплуатации 1.1 Описание прибора 1. Зарядное устройство 2. Аккумулятор 3. Гнездо для подключения аккумулятора 4. Штекер зарядного устройства 5. Штекер соединительного провода 6. - Page 46 All manuals and user guides at all-guides.com • Допускается использование электрогрелки детьми старше 8 лет, а также лицами с ограниченными физическими, сенсорными или умственными способностями, если они находятся под присмо- тром или обучены безопасному применению электрогрелки и предупреждены о возможных опасностях. •...
-
Page 47: Использование По Назначению
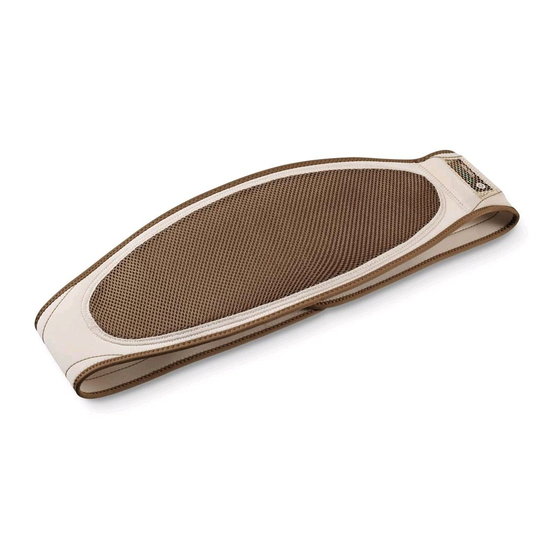
• Во время подзарядки не накрывайте аккумулятор одеялами, по- душками или другими предметами. • Обязательно следуйте указаниям по применению (глава 4), очистке и уходу (глава 5) и хранению (глава 6). • С дополнительными вопросами по применению приборов Beurer обращайтесь в нашу сервисную службу. 3. Использование по назначению ВНИМАНИЕ Эта электрогрелка предназначена только для обогревания человеческого тела. - Page 48 All manuals and user guides at all-guides.com 4.4 Использование электрогрелки • Установите заряженный аккумулятор (2) округлой стороной вперед во встроенный отсек электро- грелки. Вставьте штекер соединительного провода (5) электрогрелки в гнездо для подключения аккумулятора (3). Электрогрелка готова к работе. • Приложите электрогрелку-пояс светлым овалом к телу в области живота или спины. Затем оберните вокруг...
-
Page 49: Автоматическое Выключение
All manuals and user guides at all-guides.com 4.7 Выключение Нажмите кнопку включения/выключения и переключения температурных режимов (8), чтобы выключить электрогрелку. Режим переключения: 1 - 2 - 3 - 4 - ВЫКЛ. … Когда электрогрелка выключится, синий светодиодный индикатор температурного режима (6) погаснет. УКАЗАНИЕ... - Page 50 All manuals and user guides at all-guides.com ВНИМАНИЕ • Не используйте прищепки и аналогичные приспособления для закрепления электрогрелки на стойке для сушки белья. В противном случае возможны повреждения электрогрелки. • Подсоединяйте электрогрелку к аккумулятору (2) только тогда, когда электрогрелка и ште- кер...
-
Page 51: Технические Характеристики
All manuals and user guides at all-guides.com 9. Технические характеристики См. заводскую этикетку на электрогрелке, аккумуляторе и зарядном устройстве. 10. Запасные детали В сервисной службе Вы можете заказать следующие запасные детали: • Аккумулятор (арт. № 108.303) • Зарядное устройство (арт. № 546.007) •... - Page 52 All manuals and user guides at all-guides.com POLSKI Spis treści 1. Zawartość opakowania ........53 4.5 Włączanie ..........56 1.1 Opis urządzenia .......... 53 4.6 Ustawianie temperatury ......56 2. Ważne wskazówki 4.7 Wyłączanie ..........56 Zachować do późniejszego użytku ....53 4.8 Czas automatycznego wyłączenia ...
-
Page 53: Zawartość Opakowania
All manuals and user guides at all-guides.com 1. Zawartość opakowania 1 Poduszka rozgrzewająca 1 Akumulator 1 Ładowarka 1 Instrukcja obsługi 1.1 Opis urządzenia 1. Ładowarka 2. Pakiet akumulatorów 3. Gniazdo przyłączeniowe pakietu akumu- latorów 4. Wtyczka ładowarki 5. Wtyczka przewodu łączącego 6. - Page 54 All manuals and user guides at all-guides.com • Poduszka rozgrzewająca może być używana przez dzieci od 8 roku życia oraz osoby z ograniczoną sprawnością fizyczną, sensoryczną i umysłową lub brakiem doświadczenia i wiedzy tylko wtedy, gdy znaj- dują się one pod nadzorem lub otrzymały instrukcje, w jaki sposób bezpiecznie korzystać...
-
Page 55: Użytkowanie Zgodne Z Przeznaczeniem
All manuals and user guides at all-guides.com • Należy bezwzględnie przestrzegać wskazówek dotyczących obsługi (Rozdział 4), czyszczenia i konserwacji (Rozdział 5) oraz przechowy- wania (Rozdział 6) urządzenia. • W razie pytań dotyczących użytkowania naszych urządzeń należy zwrócić się do działu obsługi klienta. 3. -
Page 56: Obsługa Poduszki Rozgrzewającej
All manuals and user guides at all-guides.com 4.4 Obsługa poduszki rozgrzewającej • Włóż naładowany pakiet akumulatorów (2) zaokrąglonym bokiem do zintegrowanej kieszeni poduszki rozgrzewającej. Następnie włóż wtyczkę przewodu łączącego (5) poduszki rozgrzewającej do gniazda przyłączeniowego pakietu akumulatorów (3). Poduszka rozgrzewająca jest gotowa go użytku. •... -
Page 57: Czas Automatycznego Wyłączenia
All manuals and user guides at all-guides.com WSKAZÓWKA Należy pamiętać o tym, że pakiet akumulatorów powinien być chroniony przed ekstremalnym zimnem (w razie potrzeby pod ubraniem), aby zachować jego pełną wydajność. 4.8 Czas automatycznego wyłączenia Poduszka jest wyposażona w funkcję automatycznego wyłączania. Poduszka wstrzyma emisję ciepła po ok. 90 minutach od uruchomienia. -
Page 58: Utylizacja
All manuals and user guides at all-guides.com UWAGA Najpierw należy odczekać, aż poduszka ostygnie. W przeciwnym razie może dojść do uszkodzenia poduszki rozgrzewającej. Podczas przechowywania poduszki rozgrzewającej nie należy umieszczać na niej żadnych przedmio- tów, ponieważ mogłoby to spowodować jej zagięcie. UWAGA W celu zachowania odpowiedniej pojemności pakietu akumulatorów należy go ładować... - Page 59 All manuals and user guides at all-guides.com...
- Page 60 All manuals and user guides at all-guides.com Beurer GmbH • Söflinger Str. 218 • D-89077 Ulm, Germany www.beurer.com...