Publicité
Les langues disponibles
Les langues disponibles
Liens rapides
96901KFE-N
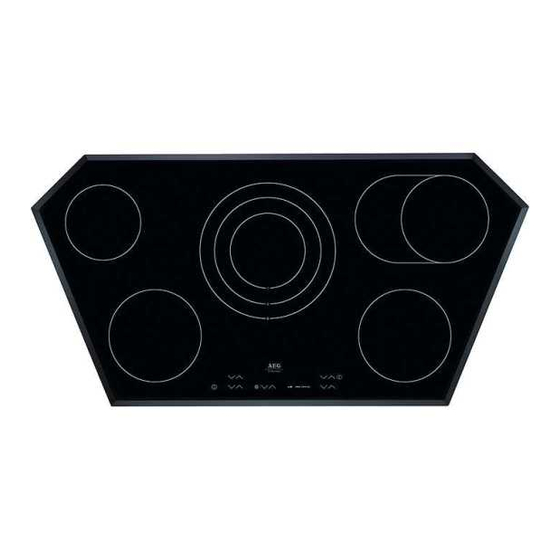
Ceramic glass hob
Table de cuisson vitrocéramique
Glaskeramische kookplaat
Operating and installation instructions
Notice d'utilisation et instructions d'installation
Gebruiksaanwijzing en montage-instructie
Publicité

Manuels Connexes pour AEG 96901KFE-N


Sommaire des Matières pour AEG 96901KFE-N
- Page 1 96901KFE-N Ceramic glass hob Table de cuisson vitrocéramique Glaskeramische kookplaat Operating and installation instructions Notice d’utilisation et instructions d’installation Gebruiksaanwijzing en montage-instructie...
- Page 2 Dear customer Please read these operating instructions carefully. Pay particular attention to the „Safety Instructions” section on the first pages. Please retain these operating instructions for later reference. Pass them on to any potential new owners of the appliance. The following symbols are used in the text: Safety information Warning! Information which serves your personal safety.
- Page 3 Contents Operating instructions................5 Safety instructions ........................5 Intended usage ............................5 Appliance operation ..........................5 Appliance implementation ......................... 5 Appliance cleaning ..........................6 Avoid damage to the appliance ......................6 Environmental awareness ........................6 Appliance description ....................... 7 Your appliance components ......................7 Ceramic glass hob ..........................
- Page 4 Cleaning and care ........................29 Rectifying faults ........................30 Installation instructions ................34 Technical data .......................... 34 Appliance dimensions ........................34 Cut-out dimensions ..........................34 Safety instructions ........................34 Appliance assembly ........................ 34 Electrical connection ......................35 Service......................36 Hob mounting ..........................114...
- Page 5 Operating instructions Safety instructions The safety aspects of this appliance comply with the accepted technical standards and the German Appliance Safety Law. However, as the manufacturer we also believe it is our responsibility to familiarise you with the following safety instructions. Please observe these instructions otherwise guarantee claims on the manufacturer will be nullified.
- Page 6 Switch off the cooking zones after use. The residual heat from hot pots or pans heats the ceramic glass hob although the residual heat display does not indicate this. Appliance cleaning Always switch off the appliance before cleaning. The cooking zones must have cooled down to the extent that they may be touched without risk of burning.
- Page 7 Disposing of the packaging material The plastic materials are identified as follows: Symbol Plastic Polyethylene Outer wrapping, bags Polystyrene (CFC free) Cushioning parts Appliance disposal The appliance may only be disconnected from the power supply by trained and authorised specialised personnel. The specialised person must put the appliance out of commission electrically (removal of connection cable).
- Page 8 Ceramic glass hob...
- Page 9 Control panel elements Sensor fields: Your appliance is operated using Touch-Control-sensor fields. Sensor field Function Switching the appliance on and off (separate On/Off main switch). Switching centre heating ring on and off. Triple ring cooking zone Switching outer heating rings on and off. Casserole cooking zone Switching outer heating ring on and off.
- Page 10 Display Description The appliance is switched on. Heat setting Set cooking zone heat setting. Decimal point Set cooking zone intermediate heat setting. Keep warm function Keep warm function is set. Automatic warm-up Automatic warm-up function is activated. function Error display A malfunction has occurred.
- Page 11 Power management system: If the front left, rear and front right cooking zones are operated simultaneously the distribution of the maximum possible heat settings is established and is automatically monitored. Cooking zone 1 Cooking zone 2 Cooking zone 3 Control panel safety switch-off: Moisture (e.g. a wet cloth) or liquids boiling over on the control panel immediately switch off all cooking zones.
- Page 12 Operating the hob Before using for the first time IMPORTANT! Damage to the ceramic glass surface. Aggressive, scouring cleaning agents may damage the ceramic glass surface. Use only water and washing-up liquid. 1. Wash down the ceramic glass hob with hot water and washing-up liquid and rub dry (with a tea towel).
- Page 13 Touch the „ON/OFF“ sensor field for approx. two seconds. is illuminated in the digital display. If the cooking zone is not set within ten seconds the appliance is switched off automatically. Switching off the appliance To switch off the appliance completely, touch the „ON/OFF“ sensor field Touch the „ON/OFF“...
- Page 14 Setting the keep warm function Heat setting is used as a keep warm function for all cooking zones. Touch the „heat setting selection“ sensor fields The keep warm function lights up in the digital display Switching off the cooking zone WARNING! Risk of burning due to residual heat.
- Page 15 In the event a power failure existing residual heat will no longer be indicated in the digital displays. Residual heat may be used to melt or keep food hot. Switching the casserole cooking zone on and off Depending on the size of the pot or pan, the “casserole cooking zone“ sensor field can be used to switch between the two sizes of the casserole cooking zone.
- Page 16 Switch off the outer heating ring Touch the „casserole cooking zone” sensor field The outer heating ring is switched off. The control lamp “casserole cooking zone” extinguishes. Switching the triple ring cooking zone on and off Depending on the size of the pot or pan, the “triple ring cooking zone” sensor field can be used to switch between the three sizes of the zone.
- Page 17 3. Touch the „triple ring cooking zone” sensor field The outer heating ring is switched on. The „top triple ring cooking zone“ control lamp lights up. Switch off the outer heating ring Touch the „triple ring cooking zone” sensor field The outer and middle heating ring, respectively, is switched off.
- Page 18 Using the automatic warm-up function Switching on the automatic warm-up function The duration of the warm-up phase depends on the heat setting selected. Set the required heat setting ( ) via the “heat setting selection” sensor field The set power level lights up in the digital display. lights up in the digital display after approx.
- Page 19 The cooking zone is used without the automatic warm-up function if the required heat level is set via the „heat setting selection“ sensor field. Using the child safety feature With the child safety feature, the hob can be protected against undesirable use. Switching on the child safety feature The appliance is switched on and all the cooking zones are switched off.
- Page 20 1. Switch on the appliance. is illuminated in the digital display. 2. Touch the „heat setting selection“ sensor fields for approx. one second simultaneously. An acoustic signal is sounded. is illuminated in the digital display. The child lock is switched off until the appliance is switched off. Switching off the child safety feature 1.
- Page 21 Using the lock function At any random time during cooking, the control panel can be locked with the exception of the sensor field „ON/OFF“ in order to prevent a changing of the settings caused by, for example, the wiping with a cloth. Locking the control panel Touch the „locking“...
- Page 22 Cooking zone selection 1. Touch the „timer“ sensor field. appears in the timer display. The cooking zone „timer function“ control lamps light up. The „timer function“ control lamp of the adjustable cooking zone flashes. 2. Touch the „timer“ sensor field. The „timer function“...
- Page 23 2. Set the required time via the „heat setting selection“ sensor fields. The set time is indicated in the timer display. For a faster adjustment, touch the “heat setting selection” sensor fields such time until the required value is obtained. The time for the selected cooking zone is activated after approx.
- Page 24 Switching off the timer 1. Select the required cooking zone. The remaining time is indicated in the timer display. The „timer function“ control lamp of the adjustable cooking zone flashes. 2. Set the time via the „heat setting selection“ sensor field to zero. appears in the timer display.
- Page 25 General information • The base should always be clean and dry. • In order to avoid scratches on the ceramic glass cooking surface, do not slide pots and pans around but lift them up instead when changing positions. • Severe scratches may weaken the glass. •...
- Page 26 Cooking with and without the automatic warm-up function The automatic warm-up function is suitable for: • Dishes that start off cold, are heated up at high power and do not need to be continually watched when cooking on the lower heat setting. •...
- Page 27 Duration of the warm-up phase The duration of the warm-up phase depends on the heat setting selected. Heat setting Duration of the warm-up phase [min] 10,2 12,3...
- Page 28 Typical heat settings for cooking The details shown in the following table are guidelines. The heat setting required for cooking depends on the quality of the pans and on the type and quantity of food. Heat Warm-up Slow cooking Examples for use setting time of the procedure...
- Page 29 Cleaning and care Important! Cleaning agents must not come into contact with the hot ceramic glass surface! All cleaning agents must be removed with plenty of clean water after cleaning because they have a caustic effect when the zones are heated up again. Never use any aggressive cleaners such as grill or oven sprays, coarse scourers or abrasive pot cleaners.
- Page 30 Problem soiling 1. Carefully remove burnt-on sugar, melted plastic, aluminium foil or other materials which melt immediately while they are still hot, using a suitable cleaning scraper. Important! You risk burning yourself when using the cleaning scraper on the hot cooking zone! 2.
- Page 31 Malfunction Cause Remedy The error display flashes. The overheat protection Allow the cooking zone to cool feature has switched off down. the double ring cooking zone and inhibited its functions. Liquid or a damp cloth on 1. Disconnect the appliance the touch control sensor from the mains power fields.
- Page 32 Malfunction Cause Remedy The cooking zones cannot The child safety feature is Switch off the child safety be switched on. switched on. feature (see „child safety feature“ section). Since switching on the Switch the appliance back on. appliance more than 10 seconds have elapsed.
- Page 33 Malfunction Cause Remedy The automatic warm-up The cooking zone still Allow the cooking zone to cool function cannot features residual heat. down. switched on. The heat setting is set via 1. Switch off the cooking the „heat setting selection“ zone. 2.
- Page 34 Installation instructions Technical data Appliance dimensions Width 1029 mm Depth 519 mm Height 47 mm Cut-out dimensions Width 995 mm Depth 490 mm Corner radius Safety instructions The appliance may only be mounted and electrically connected by trained and authorised specialised personnel.
- Page 35 The appliance must not be mounted directly adjacent to doors or under windows. Windows opening or bursting open may knock hot cooking utensils off the hob. Drawers should not be fitted underneath the hob. Installation must be such as to ensure protection against shock. The kitchen unit in which the appliance is fitted must satisfy the stability requirements of DIN 68930.
- Page 36 Service In the "Rectifying faults" section a number of malfunctions are listed that you can rectify yourself Look there first if a fault occurs. Is it a technical fault? If so, please contact your customer service centre. (You will find ad-dresses and telephone numbers in the section "Customer Service Centres".) Always prepare in advance for the discussion.
- Page 37 Chère cliente, cher client, Veuillez lire attentivement cette notice d’utilisation. Respectez en particulier le chapitre « Indications de sécurité » qui se trouve aux premières pages. Conserver cette notice d’utilisation pour la consulter ultérieurement. Remettez-la à un éventuel acheteur de cet appareil. Les symboles suivants sont utilisés dans le texte : Indications de sécurité...
- Page 38 Sommaire Notice d’utilisation .................40 Indications de sécurité ......................40 Utilisation conforme .......................... 40 Fonctionnement de l'appareil ......................40 Utilisation de l'appareil ........................40 Nettoyage de l'appareil ........................41 Eviter d'endommager l'appareil ...................... 41 Agir écologiquement .......................... 42 Description de l'appareil ......................43 Les éléments de votre appareil .......................
- Page 39 Nettoyage et entretien ......................66 Aide en cas de panne ......................68 Instructions d’installation..............72 Caractéristiques techniques ....................72 Dimensions de l’appareil ........................72 Dimensions de découpe ........................72 Indications de sécurité ......................72 Encastrement de l'appareil ....................72 Branchement électrique de l'appareil ................74 Service après-vente ................75 Montage de la table de cuisson...................114...
- Page 40 Notice d’utilisation Indications de sécurité La sécurité de cet appareil correspond aux règlements reconnus en matière de technique et de sécurité des appareils. En tant que constructeur, nous nous voyons néanmoins obligés de vous familiariser avec les indications de sécurité suivantes. Respecter ces indications, sans quoi le droit de garantie cesse.
- Page 41 Prudence lors du branchement d'appareils électriques aux prises de courant à proximité de l'appareil. Les conduites d'alimentation ne doivent pas toucher les foyers brûlants. Les graisses et les huiles surchauffées s'enflamment rapidement. Ne pas laisser sans surveillance les cuissons à la graisse ou à l'huile (p.ex. : pommes frites). Eteindre les zones de cuisson après usage.
- Page 42 Agir écologiquement Toutes les matières utilisées peuvent être réutilisées sans limite. Les matières utilisées ne doivent pas être jetées dans les ordures ménagères. Respecter les règlements nationaux et régionaux de recyclage conforme des matériaux d'emballage et de l'appareil. Eliminer les matériaux d'emballage Les matières plastiques sont identifiées comme suit : Symbole Matières plastiques...
- Page 43 Description de l'appareil Les éléments de votre appareil Les éléments de votre table de cuisson Surface de cuisson vitrocéramique : L'appareil dispose d'une surface de cuisson vitrocéramique avec cinq zones de cuisson à incandescence rapide. La surface de cuisson est exempte de porosité et insensible aux écarts brusques de température.
- Page 44 La table de cuisson vitrocéramique...
- Page 45 Les éléments du bandeau de commande Touches sensitives : La commande de votre appareil est effectuée par des touches sensitives « Touch-Control ». Touches sensitives Fonction Allumer/arrêter l'appareil (interrupteur Marche/Arrêt principal séparé). Allumer/éteindre le circuit intermédiaire. Zone de cuisson à triple circuit Allumer/éteindre le circuit extérieur.
- Page 46 Affichage Description L'appareil est allumé. Puissance de chauffe Puissance de chauffe de la zone de cuisson réglée. Puissance de chauffe intermédiaire de la zone de Virgule décimale cuisson réglée. Maintien au chaud Le degré de maintien de la chaleur est réglé. Cuisson automatique La cuisson automatique est activée.
- Page 47 Commande de puissance : Si les zones de cuisson avant gauche, arrière et avant droit sont utilisées simultanément, la répartition des puissances de chauffe maximales possibles est établie et automatiquement contrôlée. Zone de cuisson 1 Zone de cuisson 2 Zone de cuisson 3 Arrêt de sécurité...
- Page 48 Maintien au chaud : Cette fonction (puissance de chauffe ) permet de maintenir les aliments au chaud. Verrouillage : Le bandeau de commande peut être verrouillé à tout moment, à l'exception de la touche sensitive « Marche/Arrêt », pour empêcher une modification des réglages. Commande de la table de cuisson Avant la première utilisation ATTENTION !
- Page 49 Allumer l'appareil L'appareil complet s'allume au moyen de la touche sensitive « Marche/Arrêt » Appuyer sur la touche sensitive « Marche/Arrêt » pendant environ deux secondes. Le symbole s'allume sur l'affichage numérique. L'appareil s'éteint automatiquement si vous ne réglez pas la puissance de chauffe dans un délai de dix secondes.
- Page 50 Appuyer sur la touche sensitive « Sélection puissance de chauffe » La puissance de chauffe sélectionnée est indiquée sur l'affichage numérique. Réduire la puissance de chauffe Appuyer sur la touche sensitive « Sélection puissance de chauffe » La puissance de chauffe sélectionnée est indiquée sur l'affichage numérique. Régler le maintien au chaud La puissance de chauffe sert de maintien au chaud pour toutes les zones de cuisson.
- Page 51 L'appareil s'éteint automatiquement après dix secondes lorsque toutes les zones de cuisson sont éteintes. La chaleur résiduelle présente est indiquée sur l'affichage numérique des zones de cuisson. Après une panne de courant, la chaleur résiduelle présente n'est plus indiquée sur l'affichage numérique.
- Page 52 2. Appuyer sur la touche sensitive « Zone poissonnière » Le circuit extérieur est allumé. Le voyant « Zone poissonnière » s'allume. Eteindre le circuit extérieur Appuyer sur la touche sensitive « Zone poissonnière » Le circuit extérieur est éteint. Le voyant «...
- Page 53 3. Appuyer sur la touche sensitive « Zone de cuisson à triple circuit » Le circuit extérieur est allumé. Le voyant « Zone de cuisson à triple circuit haut » s'allume. Eteindre le circuit extérieur Appuyer sur la touche sensitive « Zone de cuisson à triple circuit » Le circuit extérieur ou intermédiaire est éteint.
- Page 54 Commuter sur le maintien de la chaleur Appuyer sur la touche sensitive « STOP&GO ». L’affichage numérique indique les puissances de chauffe réglées. Utiliser la cuisson automatique Allumer la cuisson automatique La durée de la reprise de la cuisson automatique dépend de la puissance de chauffe sélectionnée.
- Page 55 Ne pas utiliser la cuisson automatique La zone de cuisson est utilisée sans cuisson automatique quand la puissance de chauffe désirée est réglée avec la touche sensitive « Sélection puissance de chauffe » Utiliser la sécurité enfants La sécurité enfants permet de verrouiller la table de cuisson contre son usage non désiré. Activer la sécurité...
- Page 56 2. Appuyer sur la touche sensitive « Sélection puissance de chauffe » quelconque. Le symbole s’allume sur l'affichage numérique. La sécurité enfants est activée. L'appareil s'éteint automatiquement après quelques secondes. Eviter la sécurité enfants La sécurité enfants peut être évitée par l'utilisation unique de l'appareil (jusqu'à son prochain arrêt).
- Page 57 2. Appuyer sur la touche sensitive « Verrouillage » pour environ trois secondes. Un signal sonore retentit. 3. Appuyer sur une touche sensitive« Sélection puissance de chauffe » quelconque. Le symbole s'allume sur l'affichage numérique. La sécurité enfants est désactivée. L'appareil s'éteint automatiquement après quelques secondes.
- Page 58 Déverrouiller le bandeau de commande Appuyer sur la touche sensitive « Verrouillage » pendant environ 2 secondes. Le bandeau de commande est utilisable. Le verrouillage est automatiquement désactivé à l'arrêt de l'appareil. Utiliser le minuteur Vous pouvez utiliser le minuteur de deux manières : •...
- Page 59 Régler le temps 1. Sélectionner la zone de cuisson. Le voyant « Fonction minuteur » de la zone de cuisson réglable clignote. 2. Régler le temps à l’aide des touches sensitives « Sélection puissance de chauffe » L'affichage minuteur indique le temps réglé. Pour un réglage plus rapide, appuyer sur les touches sensitives «...
- Page 60 Afficher le temps restant 1. Sélectionner la zone de cuisson désirée. L'affichage minuteur indique le temps restant. Le voyant « Fonction minuteur » de la zone de cuisson concernée clignote. Modifier le temps 1. Sélectionner la zone de cuisson désirée. L'affichage minuteur indique le temps restant.
- Page 61 Conseils d'utilisation de la table de cuisson Batterie de cuisine Plus la casserole est de bonne qualité, meilleur est le résultat. • Une bonne casserole se reconnaît à son fond. Il doit être aussi épais et plat que possible. • Lors de l'achat de nouvelles casseroles et de poêles, tenez compte du diamètre du fond. Les fabricants indiquent souvent le diamètre supérieur de l'ustensile.
- Page 62 Economiser l'énergie Vous économiserez l'énergie en respectant les points suivants : • Placer les casseroles et les poêles sur la zone de cuisson avant de l'allumer. • Les zones de cuisson et les fonds de casserole sales augmentent la consommation d'énergie.
- Page 63 Cuire avec et sans cuisson automatique La cuisson automatique convient aux plats suivants : • les aliments posés froid qui sont chauffés à forte puissance et dont le degré de la poursuite de la cuisson ne doit pas être contrôlé en permanence, •...
- Page 64 Durée de la reprise de cuisson automatique La durée de la reprise de cuisson automatique est fonction de la puissance de chauffe sélectionnée. Puissance de chauffe Durée de la reprise de cuisson [min] 10,2 12,3...
- Page 65 Valeurs de repère pour cuisson avec l'appareil Les valeurs indiquées dans les tableaux suivants sont indicatives. La position du commutateur pour la cuisson dépend de la qualité des casseroles ainsi que du type et de la quantité d'aliments. Position Temps de Cuisson Exemples d'utilisation reprise de la...
- Page 66 Nettoyage et entretien Table de cuisson Attention ! Les nettoyants ne doivent pas être mis en contact avec la surface vitrocéramique ! Tous les nettoyants doivent être enlevés avec suffisamment d'eau claire après le nettoyage, car ils peuvent avoir un effet corrosif lors du réchauffement ! Ne pas utiliser de nettoyants agressifs, comme les sprays de nettoyage pour barbecues ou fours, les produits de récurage à...
- Page 67 Vous trouverez les grattoirs et les nettoyants pour vitrocéramique dans les magasins spécialisés. Salissures spécifiques 1. Eliminer immédiatement le sucre brûlé, le plastique fondu, les feuilles d'aluminium et les autres matières fusibles avec un grattoir lorsqu'ils sont encore chauds. Attention ! Danger de brûlure en manipulant le grattoir sur une surface de cuisson brûlante ! 2.
- Page 68 Aide en cas de panne Il est probable que la panne ne provient que d'un petit défaut auquel vous pouvez vous- même remédier à l'aide des instructions suivantes. Si vous ne réussissez pas à éliminer la panne à l'aide des informations suivantes, veuillez vous adresser à...
- Page 69 Panne Cause Remède L'indication erreurs protection anti- Laisser refroidir la zone de clignote. surchauffe a éteint la zone cuisson. de cuisson à double circuit verrouillé leurs fonctions. Liquide ou un chiffon 1. Débrancher l'appareil du humide sur les touches secteur (ôter le fusible). sensitives.
- Page 70 Panne Cause Remède Il est impossible d'allumer La sécurité enfants est Désactiver la sécurité enfants les zones de cuisson. activée. (voir chapitre « Sécurité enfants »). Plus de 10 secondes se sont Allumer de nouveau l'appareil. écoulées depuis l'allumage de l'appareil. Plus de 10 secondes se sont Sélectionner de nouveau la écoulées depuis la sélection...
- Page 71 Panne Cause Remède La cuisson automatique ne zone cuisson Laisser refroidir la zone de peut pas être allumée. présente encore cuisson. chaleur résiduelle. La puissance de chauffe a 1. Eteindre la zone de cuisson. été réglée avec le panneau 2. Régler la puissance de sensitif «...
- Page 72 Instructions d’installation Caractéristiques techniques Dimensions de l’appareil Largeur 1029 mm Profondeur 519 mm Hauteur 47 mm Dimensions de découpe Largeur 995 mm Profondeur 490 mm Rayon d'angle Indications de sécurité L’installation et le branchement électrique de l’appareil ne doivent être effectués que par des spécialistes formés et autorisés.
- Page 73 L'appareil ne doit pas être monté directement à côté de portes et sous les fenêtres. Les fenêtres qui se relèvent ou s'ouvrent brusquement peuvent faire tomber les ustensiles brûlants de la table de cuisson. Ne pas monter de tiroirs sous la table de cuisson. La protection contre tout contact doit être garantie par l’encastrement.
- Page 74 Branchement électrique de l'appareil DANGER ! Danger de mort par décharge électrique. La borne de branchement au secteur peut être sous tension. 1. Respecter les règles de sécurité en électrotechnique. 2. Mettre la borne de branchement au secteur sans tension. ATTENTION ! Dommage dû...
- Page 75 Service après-vente Vous trouverez dans le paragraphe « Aide en cas de panne » quelques pannes que vous pourrez vous-même éliminer. En cas de panne, consultez ce paragraphe. S'agit-il d'une défaillance technique ? Veuillez alors vous adresser à notre service après-vente ou à un des nos partenaires. Toujours bien se préparer à...
- Page 76 Geachte klant, Lees deze gebruiksaanwijzing aandachtig door. Schenk vooral de nodige aandacht aan het hoofdstuk „Veiligheidsinstructies“ op de eerste pagina’s. Bewaar deze gebruiksaanwijzing zodat u hem later nog eens kunt gebruiken. Geef ze eventueel door aan de volgende eigenaar van het apparaat. In de tekst worden de volgende symbolen gebruikt: Veiligheidsinstructies Waarschuwing! Instructies, bedoeld voor uw persoonlijke veiligheid.
- Page 77 Inhoudsopgave Gebruiksaanwijzing ................79 Veiligheidsinstructies ......................79 Doelmatig gebruik ..........................79 Het apparaat gebruiken ........................79 Het apparaat bedienen ........................79 Het apparaat schoonmaken ......................80 Beschadigingen aan het apparaat voorkomen ................80 Handel milieubewust ......................... 81 Beschrijving van het apparaat ..................... 82 De onderdelen van uw apparaat ....................
- Page 78 Reiniging en onderhoud ..................... 104 Hulp bij storingen ........................ 105 Montage-instructie ................110 Technische gegevens ......................110 Afmetingen van het apparaat ....................... 110 Uitsnijmaten ............................110 Veiligheidsinstructies ......................110 Het apparaat monteren ...................... 110 Het apparaat elektrisch aansluiten .................. 112 Service.....................
- Page 79 Gebruiksaanwijzing Veiligheidsinstructies De veiligheid van dit apparaat voldoet aan de erkende regels der techniek en de (Duitse) Wet op de veiligheid van apparatuur.. Houdt u zich a.u.b. aan deze instructies, want anders verliezen uw garantie- aanspraken jegens de fabrikant hun geldigheid. Doelmatig gebruik Dit apparaat mag uitsluitend gebruikt worden voor het huishoudelijk koken en braden van spijzen.
- Page 80 Oververhit vet en olie kan snel in brand vliegen. Blijf in de buurt als u kookt met vet of olie (bijv. als u frituurt). Schakel de kookzones na gebruik uit. De restwarmte van hete potten of pannen verwarmt de glaskeramische kookplaat zonder dat de restwarmte-indicatie dit aangeeft.
- Page 81 Handel milieubewust Alle gebruikte materialen kunnen onbeperkt hergebruikt worden. Gooi de gebruikte materialen niet bij het normale huisvuil. U dient zich te houden aan de nationale en regionale voorschriften die aangeven hoe de verpakkingsmaterialen en het apparaat gerecycleerd moeten worden. Het verpakkingsmateriaal opruimen De kunststoffen zijn als volgt gemarkeerd: Symbool...
- Page 82 Beschrijving van het apparaat De onderdelen van uw apparaat De onderdelen van de kookplaat Glaskeramisch kookvlak: Het apparaat heeft een kookvlak van glaskeramiek met vijf kookzones voor snelle opwarming. Het kook vlak is porievrij en bovendien ongevoelig voor snelle temperatuurschommelingen. Daarom kunt u pannen gewoon van een hete op een koude zone zetten.
- Page 83 De glaskeramische kookplaat...
- Page 84 De onderdelen van het bedieningsveld Tiptoetsen: U bedient uw apparaat met touch-control-tiptoetsen. Tiptoets Functie Apparaat in-/uitschakelen (aparte Aan/Uit hoofdschakelaar). Middelste verwarmingscirkel in-/uitschakelen. Kookzone met drie cirkels Buitenste verwarmingscirkels in-/uitschakelen. Braadpanzone Buitenste verwarmingscirkel in-/uitschakelen. Kookstand-keuze Kookstand / timer verhogen. Kookstand-keuze Kookstand / timer verlagen. STOP&GO STOP&GO Warmhoudstand in-/uitschakelen.
- Page 85 Indicatie Beschrijving Apparaat is ingeschakeld. Kookstand Ingestelde kookstand van de kookzone. Decimaalpunt Ingestelde tussenkookstand van de kookzone. Warmhoud-stand Warmhoudstand is ingesteld. Aankook-automaat Aankookautomaat is geactiveerd. Foutindicatie Er is een storing opgetreden. Restwarmte-indicatie De kookzone is uitgeschakeld, maar nog heet. Kinder-beveiliging Kinderbeveiliging is geactiveerd.
- Page 86 Powermanagement: Als u de kookzones links voren, achteren en rechts voren tegelijkertijd gebruikt, is de verdeling van de maximaal mogelijke kookstanden vastgelegd en wordt ze automatisch bewaakt. Kookzone 1 Kookzone 2 Kookzone 3 Veiligheidsuitschakeling bedieningsveld: Als er vocht (bijv. een natte doek) of overkokende vloeistof op het bedieningsveld terecht komt, worden alle kookzones onmiddellijk uitgeschakeld.
- Page 87 De kookplaat bedienen Vóór het eerste gebruik Let op! Schade aan het glaskeramische oppervlak. Scherpe en schurende reinigingsmiddelen kunnen het glaskeramische oppervlak beschadigen. Gebruik uitsluitend water en afwasmiddel. 1. Was de glaskeramische kookplaat schoon met warm water en afwasmiddel en wrijf ze droog (met een vaatdoek).
- Page 88 Apparaat inschakelen Het hele apparaat wordt ingeschakeld met de tiptoets „Aan/Uit“ Houd uw vinger gedurende ca. twee seconden op de tiptoets „Aan/Uit“ Op de digitale indicatie brandt Als u niet binnen de tien seconden een kookstand instelt, schakelt het apparaat zichzelf automatisch uit.
- Page 89 Raak de tiptoets „Kookstandkeuze“ aan. Op de digitale indicatie is de gewenste kookstand zichtbaar. Kookstand lager zetten Raak de tiptoets „Kookstandkeuze“ aan. Op de digitale indicatie is de gewenste kookstand zichtbaar. De warmhoudstand instellen De kookstand doet bij alle kookzones ook dienst als warmhoudstand. Raak de tiptoets „Kookstandkeuze“...
- Page 90 De digitale indicatie van de kookzones geeft aan dat er restwarmte is. Na een stroomuitval wordt de beschikbare restwarmte niet meer op de digitale indicatie aangegeven. De restwarmte kan gebruikt worden om spijzen te smelten en warm te houden. De braadpanzone in- en uitschakelen Al naar gelang de grootte van de poten en pannen kunt u bij de braadpanzone met de tiptoets „Braadpanzone“...
- Page 91 De buitenste verwarmingscirkel uitschakelen Raak de tiptoets „Braadpanzone“ De buitenste verwarmingscirkel wordt uitgeschakeld. Het verklikkerlampje „Braadpanzone“ gaat uit. De kookzone met drie cirkels in- en uitschakelen Al naar gelang de grootte van de poten en pannen kunt u bij de kookzone met drie cirkels met de tiptoets „Kookzone met drie cirkels“...
- Page 92 3. Raak de tiptoets „Kookzone met drie cirkels“ aan. De buitenste verwarmingscirkel wordt ingeschakeld. Het verklikkerlampje „Kookzone met drie cirkels achteren“ brandt. De buitenste verwarmingscirkel uitschakelen Raak de tiptoets „Kookzone met drie cirkels“ aan. De buitenste resp. de middelste verwarmingscirkel wordt uitgeschakeld. Het bijbehorende verklikkerlampje „Kookzone met drie cirkels“...
- Page 93 Stel met de tiptoets „Kookstandkeuze“ de gewenste kookstand ( ) in. Op de digitale indicatie is de ingestelde kookstand zichtbaar. Op de digitale indicatie licht na ca. vijf seconden op. De aankookautomaat is geactiveerd. Als er restwarmte beschikbaar is, wordt de aankookautomaat voor deze kookzone niet in werking gesteld.
- Page 94 De kinderbeveiliging gebruiken Met de kinderbeveiliging kunt u het kookveld beveiligen tegen ongewenst gebruik. De kinderbeveiliging inschakelen Het apparaat is ingeschakeld en alle kookzones zijn uitgeschakeld. 1. Raak de tiptoets „Vergrendeling“ gedurende ca. drie seconden aan. Er weerklinkt een signaal. 2.
- Page 95 2. Raak de tiptoetsen „Kookstandkeuze“ tegelijkertijd gedurende één seconde aan. Er weerklinkt een signaal. Op de digitale indicatie brandt De kinderbeveiliging is uitgeschakeld totdat het apparaat wordt uitgeschakeld. De kinderbeveiliging uitschakelen 1. Het apparaat inschakelen. Op de digitale indicatie brandt 2.
- Page 96 Het bedieningsveld vergrendelen Raak de tiptoets „Vergrendeling“ gedurende ca. twee seconden aan. Op de digitale indicatie licht gedurende vijf seconden op. Het bedieningsveld is vergrendeld. Als u een tiptoets aanraakt, brandt op de digitale weergav Het bedieningsveld ontgrendelen Raak de tiptoets „Vergrendeling“ gedurende ca.
- Page 97 De tijd instellen 1. Kies een kookzone. Het verklikkerlampje „Timerfunctie“ van de instelbare kookzone knippert.
- Page 98 2. Stel de gewenste tijd in met de tiptoetsen „Kookstandkeuze“ Op de timerindicatie verschijnt de ingestelde tijd. Voor een snellere instelling kunt u de tiptoetsen „Kookstandkeuze“ aanraken totdat de gewenste waarde bereikt is. De tijd voor de gekozen kookzone is na ca. vijf seconden geactiveerd. Als u een tijd voor meerdere kookzones hebt ingesteld, geeft de timerindicatie altijd de kortste gaarkookduur aan en knippert het controlelampje „Timerfunctie“...
- Page 99 2. Stel de tijd met de tiptoets „Kookstandkeuze“ in op nul. Op de timerindicatie verschijnt De timer is uitgeschakeld. Tips voor het gebruik van de kookplaat Kookpannen Hoe beter de pan, des te beter is het kookresultaat. • Goede kookpannen herkent u aan de bodem van de pan. De bodem moet zo dik en zo vlak mogelijk zijn.
- Page 100 Algemene instructies • De bodem moet altijd schoon en droog zijn. • Om lelijke krassen op het glaskeramische kookoppervlak te voorkomen, mag u de potten en pannen bij het verplaatsen niet schuiven, maar moet u ze optillen. • Krassen kunnen ook ontstaan als gevolg van zandkorrels (bijv. van de zojuist schoongemaakte groente) die samen met de pan over het kookoppervlak getrokken worden.
- Page 101 De aankookautomaat is niet geschikt voor: • hachee, rollades en andere stoofgerechten, die totdat ze goed bruin zijn tijdens het braden vaak omgedraaid, overgoten en klaargestoofd moeten worden, • knoedels, pastagerechten met veel vloeistof, • het gaarkoken met snelkookpannen, • zeer grote hoeveelheden soep/eenpansgerechten met meer dan 2 liter vocht. Algemene instructies: •...
- Page 102 Duur van de aankookkracht De duur van de automatische aankookkracht is afhankelijk van de gekozen kookstand. Kookstand Duur van de aankookkracht [min] 10,2 12,3...
- Page 103 Richtwaarden voor het koken met het fornuis De gegevens in de volgende tabellen zijn richtwaarden. Welke schakelaarstand voor kookprocessen nodig is, hangt af van de kwaliteit van de pannen en van de levensmiddelen (soort en hoeveelheid) die u gebruikt. Schakelaar- Aankooktijd Gaarkookfase Voorbeelden van de toepassing...
- Page 104 Reiniging en onderhoud Kookplaat Let op! U mag niet met reinigingsmiddelen aan een heet glaskeramisch oppervlak komen! Alle reinigingsmiddelen moeten na het reinigen met veel schoon water verwijderd worden, omdat zij etsend kunnen gaan werken als ze opnieuw verhit worden! Gebruik geen bijtende reinigingsmiddelen zoals gril- of ovensprays, grove schuurmiddelen of krassende pannenreinigsmiddelen.
- Page 105 Reinigingsschrapers en glaskeramische reinigers krijgt u bij de vakhandel. Speciale verontreinigingen 1. Ingebrande suiker, gesmolten kunststof, aluminiumfolie of andere smeltbare materialen moet u onmiddellijk, terwijl ze nog heet zijn met een reinigingsschraper verwijderen. Let op! Als u met een reinigingsschraper op een hete kookzone werkt, loopt u kans op verbrandingen! 2.
- Page 106 Storing Oorzaak Oplossing De digitale indicatie is De stroom is uitgevallen. 1. Wacht totdat de uitgevallen. stroomuitval voorbij is. 2. Apparaat inschakelen. zekering Nieuwe zekering inzetten. huisinstallatie De zekering slaat opnieuw doorgeslagen. door: 1. Apparaat uitschakelen 2. Waarschuw een elektricien. beveiliging tegen Laat de kookzones afkoelen.
- Page 107 Storing Oorzaak Oplossing glaskeramische Er zijn harde resp. spitse 1. Apparaat uitschakelen. oppervlak heeft scheuren, voorwerpen 2. Koppel het apparaat van barsten of breuken. glaskeramische oppervlak het elektriciteitsnet af gevallen. (zekering verwijderen). 3. Waarschuw de klantenservice. De kookzones werken niet. apparaat niet Apparaat inschakelen.
- Page 108 Storing Oorzaak Oplossing De restwarmte-indicatie is stroom even 1. Wacht totdat de uitgevallen. uitgevallen. stroomuitval voorbij is. Apparaat inschakelen. De beschikbare restwarmte wordt niet meer aangegeven. De elektronica is defect. 1. Apparaat uitschakelen. 2. Koppel het apparaat van het elektriciteitsnet af (zekering verwijderen).
- Page 109 Storing Oorzaak Oplossing De programmaklok van de automatische Automatische uitschakeling timer kan niet ingesteld uitschakeling uitschakelen. worden. kookzone is ingesteld. bedieningsveld Bedieningsveld ontgrendelen. vergrendeld. De programmaklok van de bedieningsveld Bedieningsveld ontgrendelen. timer niet vergrendeld. uitgeschakeld worden. Het apparaat reageert niet Apparaat is uitgeschakeld.
- Page 110 Montage-instructie Technische gegevens Afmetingen van het apparaat Breedte 1029 mm Diepte 519 mm Hoogte 47 mm Uitsnijmaten Breedte 995 mm Diepte 490 mm Hoekradius Veiligheidsinstructies Het apparaat mag uitsluitend gemonteerd en elektrisch aangesloten worden door hiervoor opgeleide en bevoegde vakmensen. Houdt u zich a.u.b.
- Page 111 U dient zich te houden aan de vereiste minimumafstanden ten opzichte van andere apparatuur in uw keuken (kijk in de technische specificaties van die apparatuur). Het apparaat mag niet meteen naast deuren of onder vensters gemonteerd worden. Opengaande en openspringende vensters kunnen de hete kookpannen van de kookplaat slaan.
- Page 112 Het apparaat elektrisch aansluiten GEVAAR! Levensgevaarlijk door elektrische stroom. Op de netaansluitklem kan spanning staan. 1. Houdt u zich aan de veiligheidsregels van de elektrotechniek. 2. Maak de netaansluitklem spanningsvrij. Let op! Schade door elektrische stroom. Loszittende onvakkundig gemaakte klemverbindingen veroorzaken spanningsoverslagen.
- Page 113 Service In de paragraaf „Hulp bij storingen“ staan enkele storingen vermeld die u zelf kunt verhelpen. Lees in geval van een storing eerst die paragraaf. Is het een technische storing? Neem dan contact op met onze klantenservice of met één van onze servicepartners. Bereid het gesprek in elk geval goed voor.
- Page 114 Hob mounting / Montage de la table de cuisson / De kookplaat monteren The electrical connection should be performed by a qualified electrician according to the information in the „Electrical connection“ section on page 35. Le branchement électrique doit être effectué par un électricien spécialisé conformément aux informations du chapitre «...
- Page 115 Step / Etape / Stap 3 Step / Etape / Stap 4...
- Page 116 Step / Etape / Stap 5 Step / Etape / Stap 6...
- Page 120 Hier Typenschild aufkleben (nur für Werk) AEG Hausgeräte Postfach 1036 D-90327 Nürnberg http://www.aeg.hausgeraete.de Copyright by AEG Subject to modification without notice © Sous réserve de modifications 822 924 341-C-240204 Wijzigingen voorbehouden...