Table des Matières
Publicité
Les langues disponibles
Les langues disponibles
Liens rapides
DE
Pumpendatenblatt
EN
Data sheet
FR
Fiche technique pompe
NL
Pompgegevens
IT
Documentazione pompa
ES
Ficha técnica de la bomba
BADU
BADU
beantragt | approval pending |
demandé | aangevraagd | richiesto |
solicitado
03/2014
VG 766.2100.071 1' AHIR/BA
®
90 Eco VS /
®
Bronze Eco VS
Hauptstraße 1-3
91233 Neunkirchen a. Sand
Germany
Tel. +49 9123-949-0
Fax +49 9123-949-260
info@speck-pumps.com
www.speck-pumps.com
Publicité
Chapitres
Table des Matières

Manuels Connexes pour Speck pumpen BADU SD Eco VS


Sommaire des Matières pour Speck pumpen BADU SD Eco VS
- Page 1 Pumpendatenblatt Data sheet Fiche technique pompe Pompgegevens Documentazione pompa Ficha técnica de la bomba ® BADU 90 Eco VS / BADU ® Bronze Eco VS beantragt | approval pending | demandé | aangevraagd | richiesto | Hauptstraße 1-3 solicitado 91233 Neunkirchen a. Sand Germany Tel.
- Page 2 ® BADU 90 Eco VS ~100 D90.04.029 50Hz / 60Hz n=3000 min n=2500 min n=2000 min n=1500 min n=1000 min Q (m³/h) KL90.04.015 VG 766.2100.071 03/2014...
- Page 3 ® TD 50 Hz BADU 90 Eco VS 90 Eco VS min. max. 1000 min 3000 Sa/Rp Da/Rp 1½ d-Saug/mm d-Druck/mm L/mm 1~ 230 V 0,08 1,40 0,03 1,10 0,60 6,10 Lpa (1 m)/dB(A) 38,6 64,2 Lwa/dB(A) ● ● ○ ○...
- Page 4 ® BADU Bronze Eco VS ~100 D92.05.014 50Hz / 60Hz n=3000 min n=2500 min n=2000 min n=1500 min n=1000 min Q (m³/h) KL90.04.015 VG 766.2100.071 03/2014...
- Page 5 ® TD 50 Hz BADU Bronze VS Bronze VS min. max. 1000 min 3000min Sa/Rp Da/Rp d-Saug/mm d-Druck/mm L/mm 1~ 230 V 0,08 1,40 0,03 1,10 0,60 6,10 Lpa (1 m)/dB(A) 36,7 64,5 Lwa/dB(A) ● ● ○ ○ m/kg 25,5 2,00 18,0 max.
- Page 6 Bei Sonderspannung und/oder 60 Hz-Ausführung sind die Leistungsdaten vom Pumpentypenschild zu entnehmen. Bei manchen Sondertypen oder -motoren ist das GS-Zeichen nicht vorhanden – ggf. GS-Zeichen am Pumpentypenschild. | At special voltage and/or 60 Hz version the performance data can be taken from the pump name plate.
- Page 7 Glossar | Glossary | Glossaire | Woordenlijst | Glossario | Glosario Technische Daten | Technical data | Données techniques | Technische gegevens | Dati tecnici | Datos técnicos Sauganschluss | Inlet connection | Raccordement aspiration | Zuigaansluiting | Raccordo aspirazione | Conexión por aspración Druckanschluss | Outlet connection | Raccordement refoulement | Persaansluiting | Raccordo mandata |...
- Page 8 Glossar | Glossary | Glossaire | Woordenlijst | Glossario | Glosario Gewicht | Weight | Poids | Gewicht | Peso | Peso Wicklungsschutzkontakt oder Motorschutzschalter | Built-in or external overlaod switch | Disjoncteur thermique intégré dans le bobinage ou disjoncteur protecteur du moteur | Wikkelingsbeschermingscontact of motorbeveiligingsschakelaar | Contatto di terra dell’avvolgimento oppure salvamotore | Protector térmico...
- Page 9 Glossar | Glossary | Glossaire | Woordenlijst | Glossario | Glosario P-GHI 2,5 bar maximaler Gehäuseinnendruck/maximaler System- druck | 2,5 bar max. casing pressure/system pressure | 2,5 bar de pression maximale à l‘intérieur du carter/pression maximale de l’équipement | 2,5 bar maximale huisdruk/ maximale systeemdruk | 2,5 bar massima pressione interna corpo/massima pressione sistema | Presión máxima del sistema...
- Page 10 Glossar | Glossary | Glossaire | Woordenlijst | Glossario | Glosario 1~/3~ Geeignet für Dauerbetrieb bei | Suitable for continuous operation at | Adaptée à un fonctionnement ininterrompu à | Geschikt voor continu gebruik bij | Adatta per funzionamento continuo a | Apropiado para un servicio continuo a 1~ 220 - 240 V ±...
- Page 23 La pompe possède un moteur à entraînement électro magnétique avec protection contre la surcharge. Raccordement de contacts de commutation externes Pour la commande externe, la pompe possède un câble à 5 fils aux extrémités libres. L'affectation des fils du câble aux différentes vitesses de rotation est la suivante: Brun = n 1 Vert...
- Page 24 Préréglage: Vitesse: 1 = 2000 min 2 = 2400 min 3 = 2850 min Vitesse d'aspiration: = 2850 min Temps d'aspiration: = 5 minutes Vitesses réglables: 1000 - 3000 min (par pas de 10 min Temps d'aspiration réglable: oFF, 1 - 10 min (par pas de 1 min) Commande externe Comportement de commutation entrée "0"...
- Page 25 Commande Appuyer sur la touche "1", "2" ou "3" pour POWER sélectionner la vitesse de rotation prédéfinie. Speed adjustable Lorsque la pompe démarre à partir de l'arrêt, elle démarre en mode d'aspiration (pour autant que celui-ci soit activé) et ensuite avec la vitesse de rotation fixe sélectionnée.
- Page 26 Réglage des paramètres En appuyant sur la touche "Setup" pendant POWER 3 secondes, on passe au menu Setup. On Speed adjustable peut y feuilleter le menu avec la touche "Info". Le premier caractère de l'écran indique le point de menu actuel et les quatre autres le paramètre à...
- Page 27 Comportement de commutation "0" (arrêt) Sous le point "0", le comportement de POWER commutation de l'entrée numérique "0" peut Speed adjustable être modifié (inversé). "cL" signifie que l'entraînement est arrêté lorsque le contact est fermé. "oP" signifie que l'entraînement est arrêté INFO lorsque le contact est ouvert.
- Page 28 En cas de défaut, l'installation doit être isolée de l'alimentation en tension. Voir chapitre 2.2 de la notice d’utilisation originale pour "pompes non auto-amorçantes ou auto-amorçantes avec/sans lanterne plastique (exécution AK)". Défaut n° Description Err 1 Sous-tension du circuit intermédiaire Err 2 Surtension du circuit intermédiaire Err 3...
- Page 47 03/2014 VG 766.2100.071 ES 47...
- Page 48 Geschäftsführer | Managing Director | Directeur technique | Technisch directeur | Gérant | Bedrijfsleider | Amministratore | Direttotore tecnico | Director técnico Gerente 91233 Neunkirchen a. Sand, 01.03.2014 Speck Pumpen Verkaufsgesellschaft GmbH Hauptstraße 1-3, 91233 Neunkirchen a. Sand VG 766.2100.071 03/2014...
- Page 49 DE Normal- und selbstansaugende Pumpen mit/ohne Kunststofflaternen-Ausführung (AK) EN Non self-priming and self-priming pumps with/without plastic lantern construction (AK) FR Pompes non auto-amorçantes ou auto-amorçantes avec/sans lanterne plastique (exécution AK) NL Normaal en zelfaanzuigende pompen met/zonder uitvoering met kunststof lantaarn Pompe aspirazione normale e autoadescanti con/senza campana in plastica (AK) ES Bombas normales y auto-aspirantescon/sin linternas...
- Page 115 Instruction d'utilisation originale Pompes non auto-amorçantes ou auto- amorçantes avec/sans lanterne plastique (exécution AK) ü P o s : / T e c h n i s c h e D o k u m e n t a t i o n / A l l g e m e i n e M o d u l e / C E - Z e i c h e n 2 \ m o d _ 1 4 3 4 5 4 2 1 7 5 8 0 9...
- Page 116 Le contenu ne doit pas être distribué, copié, modifié ou encore cédé à un tiers sans l'accord écrit de la société SPECK Pumpen Verkaufsgesellschaft GmbH. Ce document ainsi que tous les documents en annexe ne sont aucunement soumis à une obligation de mise à...
- Page 117 Sommaire Pos : 10 /T echnisc he Dokumentation/Allgemei ne Module/Inhalts verzeic hnis @ 2\mod_1435582896243_371.doc x @ 33765 @ @ 1 Sommaire === Ende der Liste für T extmar ke Ihvz === A propos de ce document ............. 5 Utilisation de ce manuel .............. 5 Documents applicables ...............
- Page 118 Sommaire Installation ..................17 Lieu de montage ............... 17 5.1.1 Installation en plein air ............17 5.1.2 La mise en place d'une bonde d'évacuation de l'eau est obligatoire ..................17 5.1.3 Aération et ventilation ............17 5.1.4 Vibrations structurelles et aériennes ........17 5.1.5 Espace disponible ..............
-
Page 119: Propos De Ce Document
A propos de ce document Pos : 13.1 /T echnisc he Dokumentation/Betriebsanlei tung/Z u dies em D okument/Z u di esem Dokument @ 0\mod_1427210330941_371.doc x @ 26357 @ 1 @ 1 A propos de ce document Pos : 13.2 /T echnisc he Dokumentation/Betriebsanlei tung/Z u dies em D okument/U mg ang mit di es er Anleitung @ 0\mod_1427286785560_371.doc x @ 26454 @ 2 @ 1 Utilisation de ce manuel Ce mode d'emploi est inclus dans le colis de la pompe/l'installation. - Page 120 A propos de ce document A T T E N T IO N Dangers pour les personnes. Le non-respect peut entraîner des blessures légères à moyennes. A V IS Recommandations permettant d'éviter les dégâts matériels, d'améliorer la compréhension et d'optimiser les phases de travail. Afin que l´utilisation correcte du produit soit claire, les informations importantes ainsi que les conseils techniques sont présentés de façon spécifique.
-
Page 121: Sécurité
Sécurité Pos : 15 /T echnisc he Dokumentation/Betriebsanl eitung/Sic herheit/Sic her heit @ 0\mod_1427704077019_371.doc x @ 26503 @ 1 @ 1 Sécurité Pos : 16 /T echnisc he Dokumentation/Betriebsanl eitung/Sic herheit/Besti mmungsgemäße Ver wendung/Besti mmungsg emäß e Ver wendung @ 0\mod_1427705810414_371.doc x @ 26533 @ 2 @ 1 Utilisation conforme aux dispositions La pompe est destinée à... -
Page 122: Consignes De Sécurité
Sécurité – Pour les travaux sur la partie mécanique, comme le changement des roulements à bille ou de la garniture mécanique : mécanicien qualifié. – Pour les travaux sur le système électrique : électricien qualifié. Assurez-vous que les conditions préalables suivantes sont remplies: –... -
Page 123: Changements Structurels Et Pièces De Rechange
Sécurité Changements structurels et pièces de rechange Les transformations ou modifications peuvent nuire à la sécurité d'exploitation. Transformer ou modifier pompe/l'installation uniquement en concertation avec le fabricant. Utiliser uniquement des pièces de rechange ou accessoires d'origine qui sont autorisés par le fabricant. Pos : 22 /T echnisc he Dokumentation/Betriebsanl eitung/Sic herheit/Sc hilder/Sc hilder @ 0\mod_1427722464221_371.doc x @ 26625 @ 2 @ 1 Plaques signalétiques ... -
Page 124: Énergie Électrique
Sécurité – Ne pas porter de vêtements amples. – Porter un filet de protection sur les cheveux. – Ne pas porter de bijoux. Pos : 28 /T echnisc he Dokumentation/Betriebsanl eitung/Sic herheit/R estrisi ken/El ektrisc he Energie @ 0\mod_1427779167394_371.doc x @ 26693 @ 3 @ 1 2.7.3 Énergie électrique L´environnement humide entraîne un risque élevé... -
Page 125: Dérangements
Sécurité Pos : 33 /T echnisc he Dokumentation/Betriebsanl eitung/Sic herheit/Störungen/Störungen @ 0\mod_1427783778053_371.doc x @ 26753 @ 2 @ 1 Dérangements En cas d'anomalies constatées, couper et débrancher immédiatement l'installation. Remédier immédiatement à toute sorte d’anomalie. Pos : 34 /T echnisc he Dokumentation/Betriebsanl eitung/Sic herheit/Störungen/F estsi tzende Pumpe @ 0\mod_1427784418208_371.doc x @ 26768 @ @ 1 Pompe bloquée Lorsqu’une pompe bloquée est démarrée plusieurs fois de suite, cela peut endommager le moteur. -
Page 126: Fonctionnement Sans Eau
Sécurité Pos : 39 /T echnisc he Dokumentation/Betriebsanl eitung/Sic herheit/Ver meidung von Sc häden/Troc kenlauf @ 0\mod_1427789053644_371.doc x @ 26813 @ 3 @ 1 2.9.2 Fonctionnement sans eau En cas de fonctionnement de la pompe sans alimentation en eau, la garniture mécanique et les pièces en matière plastique peuvent être détruites en l'espace de quelques secondes. -
Page 127: Coups De Bélier
Sécurité Pos : 45 /T echnisc he Dokumentation/Betriebsanl eitung/Sic herheit/Ver meidung von Sc häden/Druc ks töß e @ 0\mod_1427792241712_371.doc x @ 26863 @ 3 @ 1 2.9.5 Coups de bélier La fermeture brusque de la robinetterie peut provoquer des coups de bélier, entraînant un dépassement de la pression maximale autorisée à... -
Page 128: Description
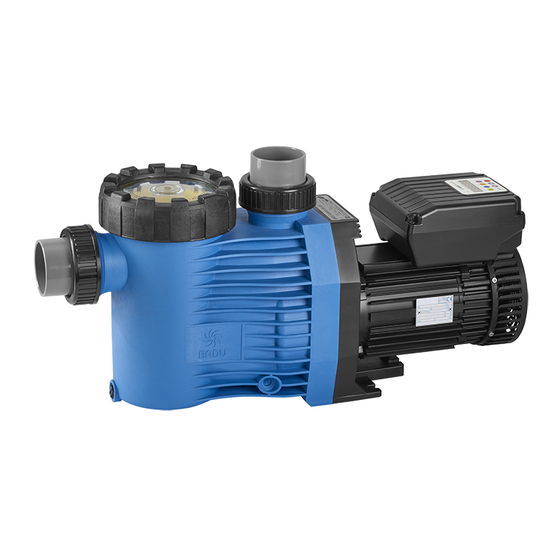
Description Pos : 53 /T echnisc he Dokumentation/Betriebsanl eitung/Besc hrei bung/Beschr eibung @ 0\mod_1427795115728_371.doc x @ 26938 @ 1 @ 1 Description Pos : 54 /T echnisc he Dokumentation/Betriebsanl eitung/Besc hrei bung/W90.04.086- 1-P @ 2\mod_1436517304672_0.doc x @ 34463 @ @ 1 Pos : 55 /T echnisc he Dokumentation/Allgemei ne Module/Abbil dung @ 1\mod_1430211005604_371.doc x @ 29222 @ @ 1 Fig. -
Page 129: Transport Et Stockage Intermédiaire
Transport et stockage intermédiaire Pos : 59 /T echnisc he Dokumentation/Betriebsanl eitung/Trans por t und Z wisc henl agerung/Tr ans port und Z wis chenl ager ung @ 0\mod_1427801635560_371.doc x @ 27003 @ 1 @ 1 Transport et stockage intermédiaire A V IS Corrosion due à... - Page 130 Transport et stockage intermédiaire Pos : 62 /T echnisc he Dokumentation/Allgemei ne Module/Abbil dung @ 1\mod_1430211005604_371.doc x @ 29222 @ @ 1 Fig. 2 Pos : 63 /T echnisc he Dokumentation/Allgemei ne Module/#### Sei tenumbruch #### @ 0\mod_1426069111812_0.doc x @ 892 @ @ 1 16 FR 10|2015...
-
Page 131: Installation
Installation Pos : 64 /T echnisc he Dokumentation/Betriebsanl eitung/Installation/Ins tallation @ 0\mod_1427869040467_371.doc x @ 27033 @ 1 @ 1 Installation Pos : 65 /T echnisc he Dokumentation/Betriebsanl eitung/Installation/Einbauort/Einbauort @ 0\mod_1427869486488_371.doc x @ 27048 @ 2 @ 1 Lieu de montage Pos : 66 /T echnisc he Dokumentation/Betriebsanl eitung/Installation/Einbauort/Aufstellen i m Fr eien @ 0\mod_1427869735350_371.doc x @ 27063 @ 3 @ 1 5.1.1 Installation en plein air... -
Page 132: Espace Disponible
Installation 5.1.5 Espace disponible Définir l'espace nécessaire de telle manière à permettre le démontage de l'unité moteur du côté du ventilateur et l'extraction du panier filtrant par le haut. Voir schéma avec dimensions dans la fiche technique de pompe. Pos : 72 /T echnisc he Dokumentation/Betriebsanl eitung/Installation/Einbauort/Befes tigungs elemente @ 0\mod_1427877318034_371.doc x @ 27138 @ 3 @ 1 5.1.6 Éléments de fixation... - Page 133 Installation amorçantes). Ainsi, la conduite d'aspiration ne peut pas se vider lorsque la pompe est à l'arrêt et le temps d'aspiration, par exemple après le nettoyage du filtre, reste bref. Lorsque le système est obstrué, par exemple avec de la paille ou de l'herbe, ce qui n'est pas à...
-
Page 134: Mise En Place
Installation Pos : 75 /T echnisc he Dokumentation/Betriebsanl eitung/Installation/Aufstellung/allgemeine Anl eitung Aufstellung @ 2\mod_1432017628128_371.doc x @ 31943 @ 2 @ 1 Mise en place Pos : 76 /T echnisc he Dokumentation/Betriebsanl eitung/Installation/Aufstellung/allgemeine Anl eitung Pumpe aufs tell en - Was ser ni veau @ 2\mod_1432022562944_371.doc x @ 32003 @ @ 1 La pompe peut être installée soit en dessous du niveau d'eau en fonctionnement d'alimentation ou en dessous du niveau d'eau en fonctionnement d'aspiration. -
Page 135: Installer La Pompe Et La Raccorder Aux Tuyauteries
Installation Pos : 82 /T echnisc he Dokumentation/Betriebsanl eitung/Installation/Aufstellung/Pumpe aufstellen und an die Rohrleitung ansc hließ en @ 0\mod_1427897347705_371.doc x @ 27259 @ 3 @ 1 5.3.1 Installer la pompe et la raccorder aux tuyauteries Installer la pompe horizontalement et au sec. Respecter pour cela les distances maximales par rapport au niveau d’eau ainsi que la hauteur géodésique. -
Page 136: Branchement Électrique
Installation A V E R T IS S E ME N T Fluides à pomper dangereux pour la santé! Respecter les dispositions légales en matière d'élimination de fluides dangereux pour la santé. Pos : 84 /T echnisc he Dokumentation/Betriebsanl eitung/Installation/Elektrischer Ansc hl uss/allgemei ne Anl eitungEl ektrisc her Ansc hluss @ 2\mod_1435143493499_371.doc x @ 33593 @ 2 @ 1 Branchement électrique A V E R T IS S E ME N T Risque de décharge électrique résultant d’un branchement... - Page 137 Installation Dans l'éventualité de la survenance de situations dangereuses, installer un interrupteur d'arrêt d'urgence conformément à la norme DIN EN 809. Le constructeur/l'exploitant doit en décider conformément à cette norme. Raccordement au niveau du bâtiment: – Protection 1 ~ 230 V/3 ~ 400 V fusible 16 A lent ou disjoncteur automatique type K 16 A.
-
Page 138: Mise En Service
Mise en service Pos : 86 /T echnisc he Dokumentation/Betriebsanl eitung/Inbetri ebnahme/Inbetriebnahme @ 0\mod_1427956937430_371.doc x @ 27299 @ 1 @ 1 Mise en service A V IS Endommagement de la pompe/l'installation suite à un fonctionnement sans eau! Assurez-vous que la pompe/l'installation est remplie d'eau. Cette recommandation s’applique également au contrôle du sens de rotation. -
Page 139: Démarrer La Pompe
Mise en service Pos : 90 /T echnisc he Dokumentation/Betriebsanl eitung/Inbetri ebnahme/Pumpe ei nsc halten @ 0\mod_1427962694084_371.doc x @ 27344 @ 2 @ 1 Démarrer la pompe Conditions préalables: • Le panier filtrant est à sa place dans le préfiltre au cas où la pompe en est pourvue. - Page 140 Anomalies Pos : 92 /T echnisc he Dokumentation/Betriebsanl eitung/Stör ung/Störungen @ 0\mod_1427964696943_371.doc x @ 27359 @ 1 @ 1 Anomalies A V IS Il est normal que, de temps en temps, des gouttelettes d'eau suintent de la garniture mécanique. Cela est particulièrement vrai lorsque la pompe est en fonctionnement.
-
Page 141: Anomalies
Anomalies Pos : 94 /T echnisc he Dokumentation/Betriebsanl eitung/Stör ung/Ü bersicht @ 1\mod_1427966108756_371.doc x @ 27374 @ 2 @ 1 Aperçu Anomalie Causes Résolution possibles La pompe est mise Surcharge Vérifier la hors service par le pompe. Voir disjoncteur chapitre 7.1.1, thermique du page 27. -
Page 142: Listes De Pièces De Rechange
Anomalies Contacter le service après-vente/votre installateur et faire tester la pompe. Bon fonctionnement de l'arbre moteur: Enlever le tournevis. Ouvrir à moitié la vanne du côté du refoulement. Rétablir la tension d'alimentation. A V IS Si la pompe est bloquée, le moteur peut être endommagé par des redémarrages successifs. -
Page 143: Entretien/Maintenance
Entretien/Maintenance Pos : 100 /Tec hnisc he D okumentati on/Betri ebs anleitung/Wartung/Ins tandhaltung/allgemeine Anl eitung Wartung/Instandhaltung @ 1\mod_1428480782431_371.doc x @ 27444 @ 1 @ 1 Entretien/Maintenance A V IS Fermer tous les clapets anti-retour et vider les tuyauteries avant tous travaux de maintenance. Applicable à... -
Page 144: Nettoyer Le Panier Filtrant
Entretien/Maintenance Pos : 103 /Tec hnisc he D okumentati on/Betri ebs anleitung/Wartung/Ins tandhaltung/allgemeine Anl eitungSaugsieb rei nigen @ 1\mod_1428483476842_371.doc x @ 27474 @ 2 @ 1 Nettoyer le panier filtrant Éteindre la pompe. Fermer le clapet anti-retour. Enlever le couvercle. Sortir le panier filtrant. -
Page 145: Retirer Les Cristaux De Sel D'une Pompe Avec Lanterne Plastique
Entretien/Maintenance Pos : 105 /Tec hnisc he D okumentati on/Betri ebs anleitung/Wartung/Ins tandhaltung/allgemeine Anl eitungSalz kristalle bei Kunsts tofflater nen-Aus führung (AK) entfer nen - Ü berschrift @ 1\mod_1428484943782_371.doc x @ 27506 @ 2 @ 1 Retirer les cristaux de sel d'une pompe avec lanterne plastique (-AK) Pos : 106 /Tec hnisc he D okumentati on/Betri ebs anleitung/Wartung/Ins tandhaltung/allgemeine Anl eitung W90.80.018-P @ 2\mod_1436517922324_0.doc x @ 34524 @ @ 1 Pos : 107 /Tec hnisc he D okumentati on/Allgemeine M odul e/Abbildung @ 1\mod_1430211005604_371.doc x @ 29222 @ @ 1... -
Page 146: Garantie
Entretien/Maintenance Garantie La garantie s'étend aux appareils fournis avec toutes leurs pièces. En sont cependant exclues la dégradation/usure naturelle (DIN 3151/DIN-EN 13306) de toutes les pièces rotatives ou à sollicitation dynamique, y compris les composants électroniques sous tension. Le non-respect des consignes de sécurité peut conduire à la perte de toutes les revendications en dommage et intérêts Pos : 112 /Tec hnisc he D okumentati on/Allgemeine M odul e/#### Seitenumbruc h #### @ 0\mod_1426069111812_0.doc x @ 892 @ @ 1 32 FR... -
Page 147: Elimination
Elimination Pos : 113 /Tec hnisc he D okumentati on/Betri ebs anleitung/Ents orgung/Ents orgung @ 1\mod_1428486567397_371.doc x @ 27537 @ 1 @ 1 Elimination Recueillir et éliminer les fluides à pomper nocifs conformément aux prescriptions La pompe/installation et les composants individuels doivent être éliminés dans les règles de l'art à... -
Page 148: Index
Index Pos : 115 /Tec hnisc he D okumentati on/Allgemeine M odul e/Index @ 2\mod_1435751775796_371.doc x @ 33851 @ 1 @ 1 Index === Ende der Liste für T extmar ke Index === Anomalies 26 garniture mécanique 26 Aperçu 27 Mise en place 20 Branchement électrique 22 Mise en service 24...