Klarstein Iceberg Pure Mode D'emploi
Enfriador de aire

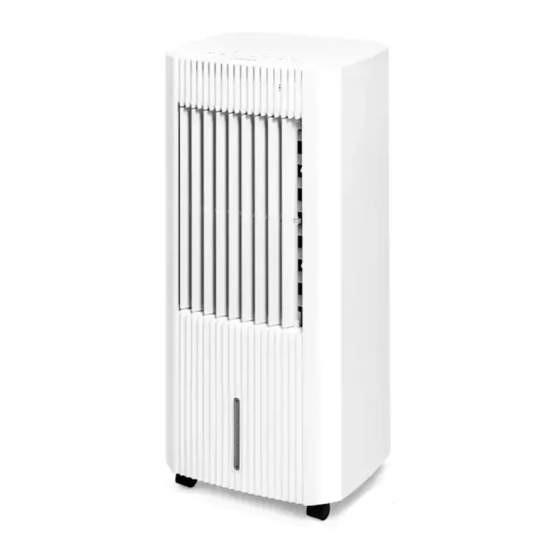
Manuels Connexes pour Klarstein Iceberg Pure


Sommaire des Matières pour Klarstein Iceberg Pure
- Page 1 Iceberg Pure Luftkühler Air Cooler Enfriador de aire Rafraîchisseur d’air Raffreddatore d’aria 10035856...
-
Page 35: Fiche Technique
Chère cliente, cher client, Toutes nos félicitations pour l’acquisition de ce nouvel appareil. Veuillez lire attentivement et respecter les instructions de ce mode d’emploi afin d’éviter d’éventuels dommages. Nous ne saurions être tenus pour responsables des dommages dus au non-respect des consignes et à... -
Page 36: Consignes De Sécurité
CONSIGNES DE SÉCURITÉ • Avant d‘utiliser l‘appareil, vérifiez sa tension sur la plaque signalétique. Ne branchez l‘appareil que sur des prises dont la tension correspond à ce le de l‘appareil. • Tenez le câble à l‘écart des surfaces chaudes et des objets aux angles pointus. •... - Page 37 • Changez l‘eau du réservoir au plus tard tous les 3 jours. MISE EN GARDE Risque de choc électrique ! Les travaux sur les composants électriques ne peuvent être effectués que par une entreprise spécialisée autorisée ! Remarques sur le rayonnement UV-C •...
-
Page 38: Aperçu De L'appareil
APERÇU DE L‘APPAREIL Panneau de commande Filtre anti poussière Volets de ventilation verticaux Filtre nid d'abeille Grille de protection Réservoir d'eau Volets de ventilation horizontaux Commutateur de réservoir d'eau Cache avant Roulettes Indicateur de niveau d'eau Télécommande Cache arrière Packs réfrigérants Boîtier de filtre nid d'abeille MISE EN GARDE Risque de blessure ! N‘utilisez que des accessoires et des pièces de... -
Page 39: Panneau De Commande Et Fonctions Des Touches
PANNEAU DE COMMANDE ET FONCTIONS DES TOUCHES Mode humidificateur Vitesse (rapide, moyenne, lente) Stériliser (lumière UV / ioniseur) Mode oscillation Minuterie Marche/arrêt Mode (vent normal, vent naturel, mode nuit) -
Page 40: Télécommande
TÉLÉCOMMANDE Remarques sur l‘utilisation de la télécommande 1. La télécommande doit être dirigée vers le récepteur. 2. Lorsque la télécommande est dirigée vers le récepteur de l‘appareil, la portée est de 5 mètres maximum. Si la télécommande n‘est pas pointée vers le récepteur, la portée de la télécommande sera réduite. -
Page 41: Utilisation
UTILISATION Remarque : N‘utilisez pas l‘appareil sans le filtre à air inséré ! Sans le filtre à air, l‘intérieur de l‘appareil se salira vite. Cela pourrait réduire les performances et endommager l‘appareil. Conduite à tenir en cas d‘urgence 1. Éteignez l‘appareil. 2. - Page 42 Vitesse Si l‘appareil est allumé ou si une minuterie a été réglée, vous pouvez régler la vitesse du vent souhaitée en appuyant plusieurs fois sur la touche de vitesse [ • En mode de vent normal la vitesse du vent se règle dans l‘ordre suivant : lente >...
- Page 43 Mode vent naturel avec vitesse moyenne moyenne (50 s) – lente (50 s) – rapide (25 s) – moyenne (75 s) – lente (50 s) – rapide(50 s) – moyenne (75 s) – lente (50 s) – moyenne (75 s) – lente (50 s) – rapide (25 s) –...
-
Page 44: Remplissage Du Réservoir D'eau
• Appuyez sur le bouton Stériliser [ ] pour sélectionner l‘un ou les deux • Réglez les fonctions de stérilisation. Appuyez plusieurs fois sur le bouton de stérilisation pour régler les fonctions dans l‘ordre suivant : UV > Anions > UV + Anions >... -
Page 45: Transport Et Stockage
MISE EN GARDE Risque de blessure ! Le liquide contenu dans les blocs de glace peut être nocif pour votre santé ! Si vous avalez ce liquide, consultez immédiatement un médecin. Si le liquide est entré en contact avec vos yeux, rincez-les avec de l‘eau et consultez immédiatement un ophtalmologiste. -
Page 46: Nettoyage Et Entretien
Stockage Avant de ranger l‘appareil, appliquez les consignes suivantes : • Videz et nettoyez le réservoir d‘eau. • Laissez sécher le filtre en nid d‘abeille avant de le ranger. Sinon, l‘appareil peut dégager une odeur de moisi au redémarrage. Lorsque vous n‘utilisez pas l‘appareil, respectez les conditions de stockage suivantes : •... - Page 47 Lorsque le verrou Ouvrez le verrou en le Le réservoir d'eau peut se tournant est fermé, les tournant pour libérer les retirer séparément. composants de la pompe composants de la pompe à eau sont sécurisés. à eau et les retirer. Nettoyage du filtre en nid d‘abeille Remarque : Si le filtre n‘est pas nettoyé...
-
Page 48: Résolution Des Problèmes
RÉSOLUTION DES PROBLÈMES MISE EN GARDE Risque de choc électrique ! Les réparations de l‘appareil et les interventions sur les composants électriques ne doivent être effectuées que par une entreprise spécialisée ! N‘essayez pas de réparer l‘appareil vous-même. L‘appareil a été vérifié plusieurs fois pendant la production et devrait fonctionner parfaitement. - Page 49 Fuite d'eau. Vérifiez que l'appareil ne fuit pas. Vérifiez que le réservoir d'eau est bien installé. Impossible d'installer le Vérifiez que le mécanisme d'abaissement de la pompe réservoir d'eau. s'est déclenché. Si la pompe est visible dans la zone inférieure, le réservoir d'eau est bloqué. Faites glisser la pompe vers le haut jusqu'à...
-
Page 50: Informations Sur Le Recyclage
INFORMATIONS SUR LE RECYCLAGE Vous trouverez sur le produit l’image ci-contre (une poubelle sur roues, barrée d‘une croix), ce qui indique que le produit se trouve soumis à la directive européenne 2012/19/ UE. Renseignez-vous sur les dispositions en vigueur dans votre région concernant la collecte séparée des appareils électriques et électroniques.