Ryobi RGBV3100 Manuel De L'utilisateur

Ryobi RGBV3100 Manuel De L'utilisateur

Souffleuse/aspirateur/déchiqueteuse 2-temps
Masquer les pouces Voir aussi pour RGBV3100:
Table des Matières

Publicité

Les langues disponibles

Les langues disponibles

Liens rapides

RGBV3100
2-Cycle Mulching Blower Vacuum
OPERATOR'S MANUAL
FOR QUESTIONS, CALL 1-800-345-8746 in U.S. or
1-800-668-1238 in CANADA
www.RyobiOutdoor.com
IMPORTANT MANUAL
DO NOT THROW AWAY

Publicité

Table des Matières
loading

Sommaire des Matières pour Ryobi RGBV3100

  • Page 1 RGBV3100 2-Cycle Mulching Blower Vacuum OPERATOR’S MANUAL FOR QUESTIONS, CALL 1-800-345-8746 in U.S. or 1-800-668-1238 in CANADA www.RyobiOutdoor.com IMPORTANT MANUAL DO NOT THROW AWAY...
  • Page 2: Table Des Matières

    This unit includes the following: Make sure you carefully read and understand this manual before starting or operating this equipment. • Model RGBV3100 Mulching Blower Vacuum • Blower/Vacuum Tube THIS PRODUCT IS COVERED BY ONE OR MORE US PATENTS, OTHER PATENTS PENDING.
  • Page 3: Rules For Safe Operation

    CALIFORNIA PROPOSITION 65 WARNING WARNING THE ENGINE EXHAUST FROM THIS PRODUCT CONTAINS CHEMICALS KNOWN TO THE STATE OF CALIFORNIA TO CAUSE CANCER, BIRTH DEFECTS OR OTHER REPRODUCTIVE HARM. SPARK ARRESTOR NOTE: For users on U.S. Forest Land and in the states of California, Maine, Oregon and Washington. All U.S. Forest Land and the state of California (Public Resources Codes 4442 and 4443), Oregon and Washington require, by law that certain internal combustion engines operated on forest brush and/or grass-covered areas be equipped with a spark arrestor, maintained in effective working order, or the engine be constructed, equipped and maintained for the...
  • Page 4 RULES FOR SAFE OPERATION • IMPORTANT SAFETY INFORMATION • READ ALL INSTRUCTIONS WHILE OPERATING BEFORE OPERATING • Never start or run the unit inside a closed room or building. Breathing exhaust fumes can kill. Operate this WARNING : When using the unit, you must unit only in a well-ventilated outdoor area.
  • Page 5 RULES FOR SAFE OPERATION • Do not touch the engine or muffler. These parts get • The unit is designed to pickup dry material such as extremely hot from operation. When turned off they leaves, grass, small twigs, and bits of paper. Do not remain hot for a short time.
  • Page 6: Safety And International Symbols

    RULES FOR SAFE OPERATION SAFETY AND INTERNATIONAL SYMBOLS This operator's manual describes safety and international symbols and pictographs that may appear on this product. Read the operator's manual for complete safety, assembly, operating and maintenance and repair information. SYMBOL MEANING SYMBOL MEANING •...
  • Page 7: Know Your Unit

    RULES FOR SAFE OPERATION KNOW YOUR UNIT Throttle Control APPLICATION As a blower: • Cleaning yards, garages, driveways, porches, patios, around walls, fences and more As a vacuum: • Picking up leaves and other light debris Fuel Cap Starter Rope Grip On/Off Stop Control Blower/Vacuum Tube...
  • Page 8: Assembly Instructions

    ASSEMBLY INSTRUCTIONS ATTACHING AND REMOVING THE Removing BLOWER/VACUUM TUBE NOTE: It may be necessary to remove the Blower/Vacuum Tube to clear a blocked tube WARNING: To avoid serious personal injury, or impeller. the blower/vacuum tube and vacuum bag must be used when operating this unit. WARNING: To prevent serious personal injury, stop the engine and allow the impeller Attaching...
  • Page 9: Attaching And Removing The Vacuum Bag

    ASSEMBLY INSTRUCTIONS ATTACHING AND REMOVING THE VACUUM BAG INSTALLING THE SHOULDER HARNESS (Optional) Attaching WARNING: To avoid serious personal injury, never attempt to start the unit when 1. Attach the vacuum bag to the vacuum bag hook on standing, when the unit is clipped to the the blower/vacuum tube (Fig.
  • Page 10: Oil And Fuel Information

    OIL AND FUEL INFORMATION OIL AND FUEL MIXING INSTRUCTIONS Thoroughly mix the proper ratio of 2-cycle engine oil with unleaded gasoline in a separate fuel can. Use a 40:1 Old and/or improperly mixed fuel are the main reasons fuel/oil ratio. Do not mix them directly in the engine fuel for the unit not running properly.
  • Page 11: Starting/Stopping Instructions

    STARTING/STOPPING INSTRUCTIONS Throttle Control STARTING INSTRUCTIONS Idle Fast WARNING: Operate this unit only in a well- ventilated outdoor area. Carbon monoxide exhaust fumes can be lethal in a confined area. WARNING: Avoid accidental starting. Make sure you are in the starting position when pulling the starter rope (Fig.
  • Page 12: Operating Instructions

    OPERATING INSTRUCTIONS • To reduce noise levels, limit the number of pieces of HOLDING THE BLOWER/VACUUM equipment used at any one time. Before operating the unit, stand in the operating position. (Fig. 12). Check for the following: • To reduce noise levels, operate power blowers at the •...
  • Page 13: Operating As A Vacuum

    OPERATING INSTRUCTIONS OPERATING AS A VACUUM Blower Operating Procedures Hold the blower as shown in Figures 14, 15, and 16. Converting to Vacuum Sweep from side to side with the nozzle several inches 1. Start engine. See Starting/Stopping Instructions. above the ground or floor. Slowly advance the unit, keeping the accumulated pile of debris in front of you.
  • Page 14: Clearing A Blocked Tube/Impeller

    OPERATING INSTRUCTIONS 2. Disconnect the spark plug wire to prevent the unit from starting. 3. Remove the blower/vacuum tube and the vacuum bag. 4. Carefully remove material blocking the tube or impeller. Inspect the blades to assure no damage has occurred.
  • Page 15: Maintenance And Repair Instructions

    MAINTENANCE AND REPAIR INSTRUCTIONS MAINTENANCE SCHEDULE NOTE: Maintenance, replacement, or repair of the emission control devices and system may be Perform these required maintenance procedures at the performed by any non-road engine repair frequency stated in the table. These procedures should establishment, individual or authorized service also be a part of any seasonal tune-up.
  • Page 16: Spark Arrestor Maintenance

    MAINTENANCE AND REPAIR INSTRUCTIONS 7. Place the exhaust gasket against muffler's back side. Align the gasket bolt holes with the bolt holes in the muffler. While holding exhaust gasket in place, insert the bolts into the muffler's front side (Fig. 25). 8.
  • Page 17: Carburetor Adjustment

    MAINTENANCE AND REPAIR INSTRUCTIONS CARBURETOR ADJUSTMENT Idle Speed Screw The idle speed of the engine is adjustable through the air filter/muffler cover (Fig. 27). NOTE: Careless adjustments can seriously damage your unit. An authorized service dealer should make carburetor adjustments. Check Fuel Mixture Old and/or improperly mixed fuel is usually the reason for improper unit performance.
  • Page 18: Accessories/Replacement Parts

    MAINTENANCE AND REPAIR INSTRUCTIONS CLEANING THE UNIT 2. Start the engine and allow it to run until it stalls. This ensures that all fuel has been drained from the WARNING: To avoid serious personal injury, carburetor. always turn your unit off and allow it to cool 3.
  • Page 19 TROUBLESHOOTING ENGINE WILL NOT START C A U S E A C T I O N Choke is in the incorrect position Refer to the Starting/Stopping instructions Empty fuel tank Fill fuel tank with properly mixed fuel Primer bulb wasn't pressed enough Press primer bulb fully and slowly 10 times Engine flooded Use starting procedure WITHOUT USING the CHOKE...
  • Page 20: Specifications

    SPECIFICATIONS ENGINE Engine Type............................Air-Cooled, 2-Cycle Displacement............................. 31 cc (1.9 cu. in) Operating RPM............................6,600-8,000 rpm Idle Speed RPM ............................3,800-4,200 rpm Ignition Type................................Electronic On/Off Stop Control............................Rocker Switch Spark Plug Gap ............................ 0.020 inch (0.5 mm) Lubrication ..............................Fuel/Oil Mixture Fuel/Oil Ratio.................................
  • Page 21 • As the small off-road engine owner, you are responsible for the performance of the required maintenance listed in your operator’s manual. Ryobi recommends that you retain all receipts covering maintenance on your small off-road engine, but Ryobi cannot deny warranty solely for the lack of receipts or for your failure to ensure the performance of all scheduled maintenance.
  • Page 22: Warranty

    P.O. Box 361131 MTD reserves the right to change or improve the design of Cleveland, OH 44136-0019 any RYOBI Product without assuming any obligation to modify any product previously manufactured. SAVE THESE INSTRUCTIONS FOR FUTURE REFERENCE. FOR QUESTIONS CALL 1-800-345-8746 IN U.S.
  • Page 23 RGBV3100 Souffleuse/aspirateur/déchiqueteuse 2-temps MANUEL DE L'UTILISATEUR SI VOUS AVEZ DES QUESTIONS, APPELEZ LE 1-800-345-8746 aux ÉTATS-UNIS, ou le 1-800-668-1238 au CANADA www.RyobiOutdoor.com MANUEL IMPORTANT À NE PAS JETER...
  • Page 24 CONTENU DE L'EMBALLAGE QUI VOUS L'AVEZ ACHETÉ. Cet appareil comprend les éléments suivants : REMARQUE: TOUT SERVICE SOUS GARANTIE NÉCESSITE • Souffleuse/aspirateur/déchiqueteuse, modèle RGBV3100 UNE PREUVE D'ACHAT • Tube de souffleuse/aspirateur Prenez soin de lire et de bien comprendre ce manuel •...
  • Page 25: Consignes De Sécurité

    PROPOSITION 65 DE CALIFORNIE AVERTISSEMENT LES GAZ D'ÉCHAPPEMENT DU MOTEUR DE CET APPAREIL CONTIENNENT DES PRODUITS CHIMIQUES CONSIDÉRÉS PAR L'ÉTAT DE CALIFORNIE COMME POUVANT CAUSER LE CANCER, DES MALFORMATIONS CONGÉNITALES OU D'AUTRES EFFETS NOCIFS SUR L'APPAREIL DE REPRODUCTION PARE-ÉTINCELLES NOTE : À l'intention des utilisateurs opérant dans les terres forestières des États-Unis et dans les états de Californie, du Maine, de l'Orégon et de Washington.
  • Page 26: Importantes Consignes De Sécurité

    CONSIGNES DE SÉCURITÉ • IMPORTANTES CONSIGNES DE SÉCURITÉ • • Éloigner l’outil d’au moins 9 m (30 pi) du point LIRE TOUTES LES INSTRUCTIONS d’approvisionnement en carburant avant de démarrer le moteur. Ne pas fumer et éloigner toute source AVANT UTILISATION d’étincelles ou de flammes vives du point •...
  • Page 27 CONSIGNES DE SÉCURITÉ • Ne pas essayer de travailler hors de portée ou en se LORS DE L’UTILISATION EN ASPIRATEUR tenant sur une surface instable, telle qu’une échelle, un • Éviter les situations où le sac d’aspirateur pourrait arbre, un toit, une pente abrupte, un toit, etc. Toujours s’enflammer.
  • Page 28: Symboles De Sécurité Et Internationaux

    CONSIGNES DE SÉCURITÉ SYMBOLES DE SÉCURITÉ ET INTERNATIONAUX Ce manuel de l'utilisateur décrit les symboles et pictogrammes de sécurité et internationaux pouvant apparaître sur ce produit. Consultez le manuel de l'utilisateur pour les informations concernant la sécurité, le montage, le fonctionnement, l'entretien et les réparations.
  • Page 29: Familiarisez-Vous Avec Votre Appareil

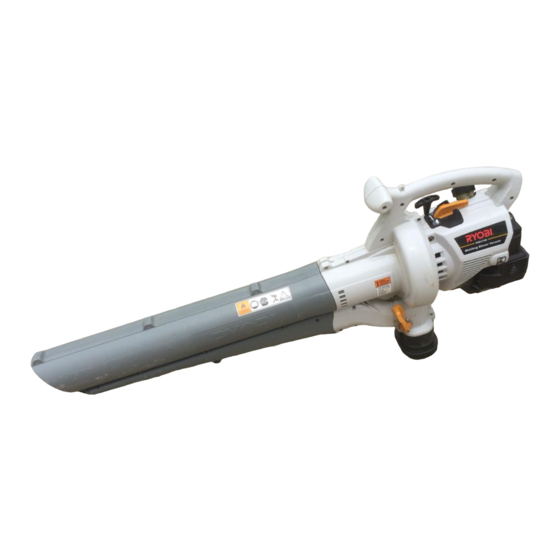
    CONSIGNES DE SÉCURITÉ FAMILIARISEZ-VOUS AVEC L’APPAREIL Manette des gaz USAGE Comme souffleuse : • Nettoyage de cours, garages, chemins, porches, terrasses, autour des murs, clôtures, etc. Comme aspirateur : • Ramassage de feuilles, de débris légers, etc. Bouchon du carburant Poignée de la corde de démarrage...
  • Page 30: Instructions De Montage

    INSTRUCTIONS DE MONTAGE FIXATION ET RETRAIT DU TUBE DE Retrait SOUFFLEUSE/ASPIRATEUR REMARQUE : Il peut s'avérer nécessaire de retirer le tube de souffleuse/aspirateur pour le dégager ou AVERTISSEMENT : Pour éviter des dégager l’hélice. blessures graves, veillez à ce que le tube et le sac soient installés sur l’appareil lors de AVERTISSEMENT : Pour éviter des son utilisation.
  • Page 31: Fixation Et Retrait Du Sac D'aspirateur

    INSTRUCTIONS DE MONTAGE INSTALLATION DU HARNAIS (en option) FIXATION ET RETRAIT DU SAC D'ASPIRATEUR Fixation AVERTISSEMENT: portez toujours le harnais 1. 1. Fixez le sac d’aspirateur à son crochet, sur le tube d'épaule lorsque vous utilisez la lame de de souffleuse/aspirateur (Fig. 3). coupe afin d'éviter des blessures graves.
  • Page 32 INSTRUCTIONS DE MONTAGE MÉLANGE D'HUILE ET DE CARBURANT Mélangez soigneusement l'huile moteur 2-temps avec de l'essence sans plomb dans un bidon séparé. Utilisez En général, si l'appareil ne fonctionne pas correctement, un rapport 40:1 d'essence/huile. Ne les mélangez pas c'est que le carburant est vieux ou mal mélangé. Prenez directement dans le réservoir de carburant.
  • Page 33: Instructions De Démarrage Et D'arrêt

    INSTRUCTIONS DE DÉMARRAGE ET ARRÊT Manette des gaz DÉMARRAGE Ralenti Haute vitesse AVERTISSEMENT : n’utiliser l’outil qu’à l’extérieur, dans un endroit bien aéré. Les émanations d’oxyde de carbone dans un endroit confiné peuvent être mortelles. AVERTISSEMENT : éviter le démarrage accidentel. Se tenir en position de démarrage pour lancer le moteur (Fig.
  • Page 34: Mode D'emploi

    MODE D'EMPLOI TENUE DE LA SOUFFLEUSE/ASPIRATEUR • Pour réduire le niveau sonore, utiliser le moins possible d’outils motorisés en même temps. Avant d’utiliser l’outil, se tenir en position de travail (Fig. 12) et effectuer les vérifications suivantes : • Pour réduire le niveau sonore utiliser la souffleuse au régime minimum permettant de s’acquitter de la tâche.
  • Page 35 MODE D'EMPLOI UTILISATION COMME ASPIRATEUR Utilisation Comme Souffleuse Tenez la souffleuse tel qu’illustré sur les Figures 14, 15 et Convertir en Aspirateur 16. Balayez d'un côté vers l'autre, en tenant la buse à 1. Démarrez le moteur Voir Instructions de démarrage plusieurs centimètres du sol.
  • Page 36: Dégagement D'un(E) Tube/Hélice Bloqué(E)

    MODE D'EMPLOI 1. Appuyez sur la commande Marche/Arrêt Stop et maintenez-la en position ARRÊT (O) jusqu'à ce que le moteur s’arrête complètement (Fig. 9). 2. Déconnectez le câble de bougie pour empêcher l'appareil de démarrer. 3. Retirez le tube de la soufflante/aspirateur et le sac de l'aspirateur.
  • Page 37: Entretien Et Réparations

    ENTRETIEN ET RÉPARATIONS REMARQUE : certaines procédures d'entretien REMARQUE: l'entretien, le remplacement ou la nécessitent des compétences ou des outils réparation des dispositifs et systèmes particuliers. Si vous n'êtes pas sûr de pouvoir les antipollution peuvent être effectués par tout entreprendre, emmenez votre appareil dans un atelier, technicien ou concessionnaire agréé...
  • Page 38: Entretien Du Pare-Étincelles

    ENTRETIEN ET RÉPARATIONS 6. Replacez le pare-étincelles en l'enfonçant dans son trou à l'arrière du silencieux. Assurez-vous qu'il est bien fixé contre le silencieux et qu'il n'est pas soulevé. 7. Placez le joint d'échappement contre l'arrière du silencieux. Alignez les trous de boulon du joint d'échappement avec les trous de boulon du silencieux.
  • Page 39: Réglage Du Carburateur

    ENTRETIEN ET RÉPARATIONS Vis de réglage RÉGLAGE DU CARBURATEUR de ralenti Le régime ralenti du moteur est réglable par le couvercle du filtre à air/silencieux (Fig. 27). REMARQUE : des réglages non soigneux peuvent endommager sérieusement l'appareil. Les réglages de carburateur doivent être faits par un concessionnaire agréé.
  • Page 40: Accessoires/Pièces De Rechange

    ENTRETIEN ET RÉPARATIONS NETTOYAGE REMSISAGE À LONG TERME Si l’outil doit être remisé pour une période prolongée, AVERTISSEMENT: pour éviter des procéder comme suit : blessures graves, éteignez toujours 1. Vider tout le carburant du réservoir dans un récipient l'appareil et laissez-le refroidir avant tout contenant le même mélange 2-temps.
  • Page 41 DÉPANNAGE LE MOTEUR NE DÉMARRE PAS C A U S E S O L U T I O N Étrangleur en position incorrecte Voir les instructions de démarrage/arrêt Réservoir de carburant vide Le remplir de carburant bien mélangé La poire d’amorçage n’a pas été enfonçée un nombre de Le remplir de carburant bien mélangé.
  • Page 42: Caractéristiques

    CARACTÉRISTIQUES MOTEUR Type de moteur..........................Refroidi par air, 2-temps Cylindrée ................................ 31 cc (1,9 po Régime de fonctionnement ........................6.600-8.000 tr/min Régime ralenti ............................3.800-4.200 tr/min Type d'allumage..............................Électronique Commande Marche/Arrêt Stop......................Interrupteur berceau Écartement de la bougie......................... 0,5 mm (0,020 po) Lubrification ...........................
  • Page 43 REMARQUES...
  • Page 44 REMARQUES...
  • Page 45 • Il vous incombe de présenter votre petit moteur à usage tout-terrain à un centre de service agréé Ryobi dès que le problème fait son apparition. Les réparations sous garantie doivent être achevées dans une durée de temps raisonnable ne dépassant en aucun cas 30 jours.
  • Page 46: Garantie

    MTD LLC canaux agréés de distribution à l’exportation. MTD se réserve la droit de modifier ou d’améliorer la P.O. Box 361131 ® RYOBI conception de tout produit sans assumer l’obligation de modifier tout produit d’une fabrication plus Cleveland, OH 44136-0019 ancienne.
  • Page 47 RGBV3100 Aspirador / soplador triturador de 2 ciclos MANUAL DEL OPERADOR SI TIENE PREGUNTAS, LLAME AL 1-800-345-8746 en EE.UU. o al 1-800-668-1238 en CANADA www.RyobiOutdoor.com ESTE MANUAL ES IMPORTANTE NO LO DESECHE...
  • Page 48 CONTENIDO DE LA CAJA Esta unidad debe consistir en lo siguiente: Antes de arrancar u operar este equipo, asegúrese de • Soplador aspirador triturador Modelo RGBV3100 leer y comprender bien este manual. • Tubo del soplador / aspirador ESTE PRODUCTO ESTA CUBIERTO POR UNA O MAS PATENTES DE EE.UU., OTRAS PATENTES EN...
  • Page 49: Normas Para Una Operación Segura

    ADVERTENCIA DE LA PROPOSICIÓN 65 DE CALIFORNIA ADVERTENCIA LAS EMISIONES DEL MOTOR DE ESTE PRODUCTO CONTIENEN SUBSTANCIAS QUIMICAS QUE EL ESTADO DE CALIFORNIA CONOCE COMO CAUSANTES DE CANCER, DEFECTOS DE NACIMIENTO U OTROS DAÑOS REPRODUCTIVOS. AMORTIGUADOR DE CHISPAS NOTA: Para los usuarios en tierras forestales de los EE.UU. y en los estados de California, Maine, Oregon y Washington.
  • Page 50 NORMAS PARA UNA OPERACIÓN SEGURA • INFORMACIÓN IMPORTANTE DE SEGURIDAD • LEA TODAS LAS INSTRUCCIONES DURANTE LA OPERACIÓN ANTES DE LA OPERACIÓN • No arranque ni opere la unidad en un cuarto o edificio cerrado. Los gases de escape de monóxido de •...
  • Page 51 NORMAS PARA UNA OPERACIÓN SEGURA • Sostenga siempre la unidad con ambas manos MIENTRAS OPERA COMO ASPIRADORA mientras esté en funcionamiento. • Evite situaciones que puedan prenderle fuego a la • Mantenga las manos, la cara y los pies lejos de todas bolsa de recolección.
  • Page 52: Símbolos De Seguridad E Internacionales

    NORMAS PARA UNA OPERACIÓN SEGURA SIMBOLOS DE SEGURIDAD E INTERNACIONALES Este manual del operador describe los símbolos y figuras de seguridad e internacionales que pueden aparecer en este producto. Lea el manual del operador para obtener información completa acerca de la seguridad, ensamble, operación y mantenimiento y reparación.
  • Page 53: Conozca Su Unidad

    NORMAS PARA UNA OPERACIÓN SEGURA CONOZCA SU UNIDAD APLICACIÓN Control del regulador Como soplador: • Limpieza de jardines, cocheras, entradas de automóviles, pórticos, patios, alrededor de paredes, cercos, etc. Como aspirador: • Recoger hojas, escombros livianos, etc. Tapa del combustible Mango de la cuerda de arranque...
  • Page 54: Instrucciones De Ensamble

    INSTRUCCIONES DE ENSAMBLAJE CONEXIÓN Y REMOCIÓN DEL TUBO DEL Remoción SOPLADOR / ASPIRADOR NOTA: s posible que deba retirar el tubo del soplador / aspirador para desbrozar un tubo o propulsor ADVERTENCIA: Para evitar graves lesiones que estén obstruidos. personales, debe usar el tubo del soplador / aspirador y la bolsa del aspirador cuando ADVERTENCIA: Para evitar graves lesiones opere esta unidad.
  • Page 55: Conexión Y Remoción De La Bolsa Del Aspirador

    INSTRUCCIONES DE ENSAMBLAJE CONEXIÓN Y REMOCIÓN DE LA BOLSA INSTALACION DEL ARNES (Opcional) DEL ASPIRADOR ADVERTENCIA: Para evitar graves lesiones Conexión personales, use siempre el arnés del hombro cuando utilice la cuchilla de corte. 1. Conecte la bolsa del aspirador al gancho de la bolsa del aspirador del tubo del soplador / aspirador (Fig.
  • Page 56: Información Del Aceite Y Del Combustible

    INFORMACION DEL ACEITE Y DEL COMBUSTIBLE INSTRUCCIONES PARA MEZCLAR EL Mezcle bien la proporción correcta de aceite para motor de 2 ciclos y gasolina sin plomo en una lata de ACEITE Y EL COMBUSTIBLE combustible por separado. Use una proporción de 40:1 El combustible viejo o mal mezclado son los motivos de combustible y aceite.
  • Page 57: Instrucciones De Arranque Y Apagado

    INSTRUCCIONES DE ARRANQUE Y APAGADO Control del regulador INSTRUCCIONES DE ARRANQUE Rápida Mínima ADVERTENCIA: Use esta unidad sólo en un área exterior bien ventilada. Los gases de escape de monóxido de carbono pueden ser letales en un área cerrada. ADVERTENCIA: Evite los arranques accidentales.
  • Page 58: Instrucciones De Operación

    INSTRUCCIONES DE OPERACIÓN SOSTENIMIENTO DE LA SOPLADORA/ • Limite el número de equipos que se usen simultáneamente, para reducir los niveles de ruido. ASPIRADORA • Opere las sopladoras motorizadas a la menor velocidad Antes de operar esta unidad, párese en la posición de posible, para hacer el trabajo y reducir los niveles de ruido.
  • Page 59: Operación De La Unidad Como Aspirador

    INSTRUCCIONES DE OPERACIÓN OPERACIÓN DE LA UNIDAD COMO ASPIRADOR Procedimiento de Operación Para la Sopladora El Convertir a un Aspirador Sostenga el soplador según se ilustra en las Figs.14, 15 y 16. Barra de lado a lado con la boquilla a varias pulgadas 1.
  • Page 60: Vaciado De La Bolsa Del Aspirador

    INSTRUCCIONES DE OPERACIÓN 1. Oprima y sostenga el control de apagado On/Off en la posición de apagado (STOP) (O) hasta que el motor se apague por completo (Fig. 9). 2. Desconecte el cable de la bujía de encendido para evitar que la unidad arranque. 3.
  • Page 61: Instrucciones De Mantenimiento Y Reparación

    INSTRUCCIONES DE MANTENIMIENTO Y REPARACIÓN NOTA: El mantenimiento, la sustitución o arreglo de NOTA: Algunos procedimientos de mantenimiento dispositivos para el control de emisiones y pueden requerir el uso de herramientas o habilidades especiales. Si no está seguro acerca sistemas pueden ser hechos por cualquier establecimiento de reparación, persona o de estos procedimientos, lleve su unidad a un establecimiento de reparación, persona o...
  • Page 62 INSTRUCCIONES DE MANTENIMIENTO Y REPARACIÓN 7. Ponga la junta del silenciador contra el lado posterior del mismo. Alinees los orificios de los pernos de la junta del silenciador en el silenciador. Mientras sostiene la junta en su lugar, ponga los pernos en el lado frontal del silenciador (Fig.
  • Page 63: Ajuste Del Carburador

    INSTRUCCIONES DE MANTENIMIENTO Y REPARACIÓN Tornillo de AJUSTE DEL CARBURADOR marcha en vacío La velocidad lenta del motor puede ser ajustada por la cubierta del silenciador / filtro de aire (Fig. 27). NOTA: Los ajustes realizados sin cuidado pueden dañar seriamente su unidad.
  • Page 64: Accesorios Y Piezas De Repuesto

    INSTRUCCIONES DE MANTENIMIENTO Y REPARACIÓN LIMPIEZA ALMACENAMIENTO PROLONGADO Si planea guardar la unidad durante un largo período de ADVERTENCIA: Para evitar graves tiempo, siga el siguiente procedimiento para su lesiones personales, apague siempre su almacenamiento. unidad y espere que se enfríe antes de 1.
  • Page 65 RESOLUCIÓN DE PROBLEMAS EL MOTOR NO ARRANCA C A U S A A C C I Ó N El obturador está en la posición incorrecta Consulte las instrucciones de Arranque / Apagado El tanque de combustible está vacío Llene el tanque con combustible bien mezclado La bombilla de cebado no fue oprimida lo suficiente Oprima la bombilla de cebado total y lentamente de 10 veces hasta que el combustible se vea en la perilla...
  • Page 66: Especificaciones

    ESPECIFICACIONES MOTOR Tipo de motor......................... Enfriado por aire, de 2 ciclos Desplazamiento................................31 cc R.P.M. de operación ........................... 6.600 - 8.000 r.p.m. R.P.M. de velocidad mínima ........................ 3.800 - 4.200 r.p.m. Tipo de encendido .............................. Electrónico Control de apagado On/Off ........................Interruptor oscilante Separación de la bujía de encendido....................
  • Page 67 NOTAS...
  • Page 68 NOTAS...
  • Page 69 Ryobi tiene que garantizar el sistema de control de emisiones de su pequeño motor para uso fuera de la carretera durante los períodos de tiempo que aparecen a continuación siempre que no haya habido abuso, negligencia o mantenimiento indebido de su motor para uso fuera de la carretera.
  • Page 70 PARTS LIST ENGINE PARTS - MODEL RGBV3100 2-CYCLE GAS MULCHING BLOWER VACUUM PPN- 41ESGBVG034 Item Part No. Description Item Part No. Description 791-182059 Air Cleaner/Muffler Cover Assembly 791-611061 Rope Guide (includes 2 & 32) 791-180930 Pulley Retainer Assembly 791-180350B Air Cleaner Filter...
  • Page 71 PARTS LIST HOUSING PARTS - MODEL RGBV3100 2-CYCLE GAS MULCHING BLOWER VACUUM PPN- 41ESGBVG034 18 19 Item Part No. Description Item Part No. Description 753-04138 Engine Cover Assembly (includes 2, 9 & 10) 791-147353 Impeller Blade 791-181345 Cover Screw 791-182412...
  • Page 72: Garantía

    MTD. MTD LLC MTD se reserva el derecho a cambiar o mejorar el diseño ® RYOBI de cualquier Producto sin asumir cualquier P.O. Box 361131 obligación en cuanto a modificar cualquier producto previamente fabricado.

Table des Matières