Table des Matières

Publicité

Les langues disponibles

Les langues disponibles

Liens rapides

Printed on recycled paper.
Sony Corporation
Printed in Japan
Data Projector
VPL-GH10
© 2009 Sony Corporation
4-139-070-03 (1)
Operating Instructions
GB
Mode d'emploi
FR

Publicité

Chapitres

Table des Matières

Dépannage

loading

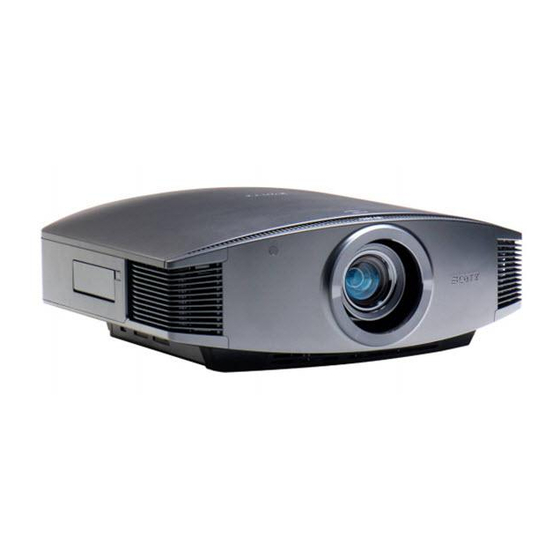
Sommaire des Matières pour Sony VPL-GH10

  • Page 1 4-139-070-03 (1) Data Projector Operating Instructions Mode d’emploi VPL-GH10 Printed on recycled paper. Sony Corporation Printed in Japan © 2009 Sony Corporation...
  • Page 2 For the customers in Europe radio communications. Operation of this The manufacturer of this product is Sony equipment in a residential area is likely to Corporation, 1-7-1 Konan, Minato-ku, cause harmful interference in which case the Tokyo, 108-0075 Japan.
  • Page 3 For the customers in Europe, do corpo afetado com água abundante. Australia and New Zealand Ocorrendo irritação, procure auxílio médico. Não remova o invólucro da pilha. WARNING Mantenha fora do alcance das crianças. Em This is a Class A product. In a domestic caso de ingestão procure auxílio médico environment, this product may cause radio imediatamente.
  • Page 4 Für Kunden in Europa WARNUNG Der Hersteller dieses Produkts ist Sony Corporation, 1-7-1 Konan, Minato-ku, Tokyo, 108-0075 Japan. Um die Gefahr von Bränden oder Der autorisierte Repräsentant für EMV und elektrischen Schlägen zu verringern, darf Produktsicherheit ist Sony Deutschland dieses Gerät nicht Regen oder Feuchtigkeit GmbH, Hedelfinger Strasse 61, 70327 ausgesetzt werden.
  • Page 5: Table Des Matières

    Table of Contents Precautions .........7 Adjusting the Picture Using Real Color Processing ........33 Location of Controls Using the Supplied Software to Adjust the Picture Quality Front/Right Side .........8 (ImageDirector3) ......34 Rear/Bottom ........9 Remote Control ........10 Using the Menus Operation through the Menus ..
  • Page 6 Cleaning the Air Filter ..... 64 Cleaning and the Screen of the Projector ........... 64 Specifications ........66 Preset Signals ......67 Input Signals and Adjustable/ Setting Items ....... 69 Index ..........71...
  • Page 7: Precautions

    Precautions On safety • Check that the operating voltage of your unit is identical with the voltage of your local power supply. • Should any liquid or solid object fall into the cabinet, unplug the unit and have it checked by qualified personnel before operating it further.
  • Page 8: Location Of Controls

    Location of Controls Front/Right Side You can use the buttons on the control panel with the same names as those on the remote control to operate the projector. Press the button and Control panel open the cover. LAMP/ LENS button COVER Open M/m/</, (arrow)/...
  • Page 9: Rear/Bottom

    Rear/Bottom Remote control detector (1 page 19) Ventilation holes (intake) (1 page 13) Ventilation holes (intake) (1 page 13) Ventilation holes (intake) (1 page 13) Ventilation holes (intake) (1 page 13) Lamp cover (1 page 62) Adjusters (1 page 23) Filter holder (1 page 63) Ventilation holes (intake) (1 page 13)
  • Page 10: Remote Control

    Remote Control Infrared transmitter (ON/STANDBY) switch (1 page 20) LIGHT button Illuminates the buttons on COLOR TEMP button the remote control. (1 page 31) INPUT button BLACK LEVEL button Does not function with this (1 page 31) unit. COLOR SPACE button (1 page 31) LENS button (1 page 20)
  • Page 11: Connections And Preparations

    Connections and Preparations This section describes how to install the projector and screen, how to connect the equipment from which you project the picture. Unpacking Check the carton to make sure it contains the following items: • Remote control (1) and Size AA (R6) manganese batteries (2) •...
  • Page 12: Step 1: Installing The Projector

    Step 1: Installing the Projector The projector displays pictures output from Installing the projector in such a location a computer or other device. may cause a malfunction of the unit due to The lens shift allows you to have broader moisture condensation or rise in options for placing the projector and temperature.
  • Page 13 Improper use Do not do any of the following while using the projector. Blocking the ventilation holes (intake 15° or more or exhaust) Avoid using the projector tilted at an angle Ventilation holes of more than 15 degrees. (intake) Do not install the projector anywhere other than on a level surface or on the ceiling.
  • Page 14: Positioning The Projector And A Screen

    Positioning the Projector and a Screen The installation distance between the projector and a screen varies depending on the size of the screen or whether or not you use the lens shift features. Determine the installation position of the projector and screen. You can obtain a good quality picture if you position the projector so that the center of the lens is within the area indicated in gray in the illustration.
  • Page 15 When using the 16:9 aspect ratio screen size Screen Size SS (inches) (mm) 1016 1524 2032 2540 3048 3810 5080 6350 7620 minimum 1201 1825 2448 3072 3695 4631 6189 7748 9307 (121) (145 ) (182 ) (243 ) (305 ) (366 maximum 1840...
  • Page 16 When using the 4:3 aspect ratio screen size Screen Size SS (inches) (mm) 1016 1524 2032 2540 3048 3810 5080 6350 7620 minimum 1480 2243 3006 3770 4533 5677 7585 9493 11401 (118 ) (148 ) (178 ) (223 ) (298 ) (373 ) (448 maximum...
  • Page 17 Position the projector so that the lens is parallel to the screen. Top view Screen Project an image on the screen and adjust the picture so that it fits the screen. (1 page 19) To project an image, connect a computer or other equipment to the projector. (1 page Note When using a screen with an uneven surface, stripes pattern may rarely appear on the screen depending on the distance between the screen and the projector or the zooming magnifications.
  • Page 18: Step 2: Connecting The Projector

    Step 2: Connecting the Projector When making a connection, be sure to do the following: • Turn off the projector and a computer before making a connection. • Use the proper connecting cable. • Insert the cable plugs properly; poor connection at the plugs may cause a malfunction or poor picture quality.
  • Page 19: Step 3: Adjusting The Picture Position

    Step 3: Adjusting the Picture Position Project an image on the screen and then adjust the picture position. ON/STANDBY indicator 4, 5, 6 Remote control detector Lens button (On/ standby) switch (ON/STANDBY), LENS, MENU, and M/m/</,/ (joystick) buttons on the side panel of the projector function the same as those on the remote control.
  • Page 20 Press the (ON/STANDBY) switch to turn on the projector. The ON/STANDBY indicator flashes in green, and then lights in green. Flashes in green for When the ON/STANDBY indicator a while (tens of flashes, “Starting...” appears on the seconds) and then screen.
  • Page 21 1 screen width Top view : Picture position when moving the picture to the left at maximum : Picture position when moving the picture to the right at maximum To adjust the vertical position Press M/m. The picture projected on the screen moves up or down by a maximum of 65% of the screen height from the center of the lens.
  • Page 22 Range of movement of the projected picture Projected Picture H: Width of the projected picture V: Height of the projected picture Adjust the picture size. Press the LENS button repeatedly until the Lens Zoom adjustment window (test pattern) appears. Then adjust the size of the picture by pressing the M/m/</, buttons.
  • Page 23 Adjust the focus. Press the LENS button repeatedly until the Lens Focus adjustment window (test pattern) appears. Then adjust the focus of the picture by pressing the M/m/</, buttons. Note Be sure to adjust the picture size and the focus by using buttons on the remote control or the control panel of the projector.
  • Page 24: Step 4: Selecting The Menu Language

    Step 4: Selecting the Menu Language You can select one of 16 languages for displaying the menu and other on-screen displays. The factory default setting is English. To change the current menu language, set the desired language with the menu screen. 2,3,4 M/m/</, (arrow)/...
  • Page 25 Press M/m to select the Setup menu, and press , or The setting items of the selected menu appears. Setup Status Language English Menu Position Bottom Left Cooling Setting Standard Cooling Setting 2 Standby Mode Standard 2 Power Saving Lamp Setting Press M/m to select “Language,”...
  • Page 26: Projecting

    Projecting This section describes how to operate the projector to view the picture from the equipment connected to the projector. It also describes how to adjust the quality of the picture to suit your taste. Projecting the Picture on the Screen Power on both the projector and the equipment connected to the projector.
  • Page 27: Turning Off The Power

    Turning Off the Power Press the (ON/STANDBY) switch. A message “POWER OFF?” appears on the screen. Press the (ON/STANDBY) switch again before the message disappears. The ON/STANDBY indicator flashes in green and the fan continues to run to reduce the internal heat.
  • Page 28: Selecting The Wide Screen Mode

    Selecting the Wide Screen Mode You can enjoy various wide screen modes according to the video signal received. Press WIDE MODE. Each time you press the button, you can select the “Wide Mode” setting. You can also select it using the menu. (1 page 44) WIDE MODE button...
  • Page 29 Letterbox picture with side panels Zoom A 16:9 aspect ratio picture is enlarged vertically and horizontally in the same ratio to fill the screen. Use this mode to Letterbox picture view a letterbox picture or a letterbox picture with side panels. If the subtitle of a movie, etc.
  • Page 30: Selecting The Picture Viewing Mode

    Selecting the Picture Viewing Mode You can select the picture viewing mode that best suits the type of program or room conditions. Press one of the PICTURE MODE buttons (DYNAMIC, STANDARD, CINEMA and USER 1, USER 2 and USER 3). DYNAMIC Vivid picture quality that enhances the sharpness and contrast of the picture.
  • Page 31: Adjusting The Picture Quality

    Adjusting the Picture Quality You can easily adjust the picture quality that suits your taste by selecting the adjustment items with the remote control. The adjusted data can be stored in each picture mode. Selecting to Directly Adjust the Desired Menu Item The following menu items can be adjusted by using the buttons on the remote control.
  • Page 32: Selecting Desired Adjust Menu Items In Sequence

    Selecting Desired Adjust Menu Items in Sequence Press ADJ PIC. Each time you press the button, the following adjustment windows are displayed in sequence. “Advanced Iris”, “Lamp Control”, “Film Projection”, “Motion Enhancer”, “Contrast”, “Brightness”, “Color”, “Hue”, “Color Temp.”, “Sharpness”, “NR”, “MPEG NR”, “Film Mode”, “Black Level Adj.”, “Gamma Correction”, “Color Space”...
  • Page 33: Adjusting The Picture Using Real Color

    Adjusting the Picture Using Real Color Processing The Real Color Processing (RCP) feature allows you to adjust the color and hue of each target of the projected picture you specify independently. You can thus obtain a picture more suitable to your taste. Freeze the scene of the video source when you are adjusting the picture using Real Color Processing.
  • Page 34: Using The Supplied Software To Adjust The Picture Quality (Imagedirector3)

    2 Press to select “Position” or “Range,” and specify it more delicate color position and color range you want to adjust using < Adjust the color of the specified portions. Press to select “RCP Color” or “RCP Hue,” then adjust the color or hue of the portions selected in step 3 to suit your taste using <...
  • Page 35: Using The Menus

    Using the Menus This section describes how to make various adjustments and settings using the menus. Operation through the Menus The projector is equipped with an on-screen menu for making various adjustments and settings. Some of the adjustable/setting items are displayed in a pop-up menu, in a setting menu or adjustment menu with no main menu, or in the next menu window.
  • Page 36 Press MENU. The menu window appears. Press M/m to select a menu item, and press , or The items that can be set or adjusted with the selected menu appear. The item presently selected is shown in yellow. Setup Status Language English Menu Position...
  • Page 37 Press M/m to select an item you want to set or adjust and press , or The setting items are displayed in a pop-up menu, in a setting menu, in an adjustment menu or in the next menu window. Pop-up menu Setting items Setup Status...
  • Page 38 Make the setting or adjustment To reset the items that have of an item. been adjusted Select an item in the Menu screen, and When changing the adjustment display the pop-up menu, the setting level To increase the value, press M/,. menu, and the adjustment menu.
  • Page 39: Picture Menu

    Picture Menu The Picture menu is used for adjusting the picture. Picture Mode Note Some items may not be available, depending on the type of input signal. For details, see “Input Signals and Adjustable/Setting Items.” (1 page 69) Picture Mode You can select the picture viewing mode that best suits the type of picture or the environment.
  • Page 40 Cinema Black Pro Advanced Iris Switches the iris function during projection. Auto 1: Automatically switches to an optimum iris according to a projected scene. The contrast of the scene is emphasized most. Auto 2: An optimum iris becomes smaller than that when set to “Auto 1.”...
  • Page 41 Brightness Adjusts the brightness of the picture. The higher the setting, the brighter the picture. The lower the setting, the darker the picture. You can make adjustments by pressing the BRIGHTNESS+/– on the remote control. Color Adjusts the intensity of the color density. The higher the setting, the greater the intensity.
  • Page 42 Expert Setting Gamma Correction Adjusts the response characteristics of the tone of the picture. Select a favorite tone from 6 options. Gamma 1: Makes the scene much brighter overall. Gamma 2: Makes the scene brighter overall. Gamma 3: Makes the scene slightly brighter overall. Gamma 4: Makes the scene darker overall.
  • Page 43: Advanced Picture Menu

    Advanced Picture Menu The Advanced Picture is used for adjusting the picture more. RCP (Real Color You can adjust the color and hue of each selected portion of the Processing) picture independently. User 1, User 2, User 3: You can adjust the picture using Real Color Processing and store the settings.
  • Page 44: Screen Menu

    Screen Menu The Screen menu is used to adjust the input signal. You can adjust the size of the picture, and select wide screen mode, etc. Note These items may not be available, depending on the type of input signal. For details, see “Input Signals and Adjustable/Setting Items.”...
  • Page 45 Over Scan Hides the outline of the picture. On: Hides the outline of the input picture. Select this setting when noise appears along the edge of the picture. Off: Projects the whole of the input picture. To display the displayable region within the four directions of the screen, refer to “Blanking”...
  • Page 46: Setup Menu

    Setup Menu The Setup menu is used to change the factory preset settings, etc. Setup Status Language English Menu Position Bottom Left Cooling Setting Standard Cooling Setting 2 Standby Mode Standard 2 Power Saving Lamp Setting Status Sets whether or not the on-screen display is to be displayed. Set to “Off”...
  • Page 47 Standby Mode Lowers the power consumption in standby. Standard 1: Sets power consumption to normal. Standard 2: Sets the network function ineffective and power consumption lower than “Standard 1.” Low: Sets power consumption lower than “Standard 2.” Note When this item is set to “Low” or “Standard 2,” the network function will not operate in standby.
  • Page 48: Function Menu

    Function Menu The Function menu is used for changing the settings of the functions of the projector. Function Test Pattern Background Blue Test Pattern Displays the test pattern. When set to “On,” a test pattern appears on the screen to be used when adjusting the lens with “Lens Focus,”...
  • Page 49: Installation Menu

    Installation Menu The Installation menu is used for changing the installation settings. Image Flip Flips the picture on the screen horizontally and/or vertically. HV: Flips the picture horizontally and vertically. H: Flips the picture horizontally. V: Flips the picture vertically. Off: The picture does not flip.
  • Page 50 Panel Alignment This feature allows you to adjust the gaps in the color of characters or the picture. When set to “On,” “Adjust Color” and “Pattern Color” can be assigned and adjusted. Adjust Item: Selects how to make adjustments from below. Shift: Shifts the whole picture and makes adjustments.
  • Page 51 Network Setting You can configure the network settings such as IP address, Subnet Mask, Default Gateway, and DNS Server when accessing the projector from a computer or using the supplied application “ImageDirector3.” IP Address Setup Select either “Auto (DHCP)” or “Manual.” When you select “Manual,”...
  • Page 52: Information Menu

    Memory No. 1080/60p Lamp Timer 1234 H Signal type Model name Displays the model name (VPL-GH10). Serial No. Displays the serial number. Memory No. Displays the preset memory number of the input signal. Signal type Displays the type of the input signal.
  • Page 53: Operating The Projector From A Computer

    Operating the Projector from a Computer Accessing the Checking the Status Projector from a of the Projector Computer Click “Information.” You can check the information and present status of the You can check the present status of the projector on a computer display. You can projector on a computer display and control check the information and status in the the projector from a computer.
  • Page 54: Operating The Projector

    Operating the Setting the Projector Information Click “Control.” You can perform various Click “Setup.” The Password Properties adjustments and settings of the projector on dialog box appears. The name of the “User” a computer display. account is preset without a password to The functions of the buttons in the windows “root”...
  • Page 55 Detailed information on Advertisement button and PJ Talk button are indicated by the PROTOCOL manual. For details on each function of “Advanced setting”, consult with your local dealer or qualified Sony personnel. To reset the setting Click the Reset button displayed in “Advanced setting.”...
  • Page 56: Others

    This section describes how to solve the problems, how to replace the lamp and air filter, etc. Troubleshooting If the projector appears to be operating erratically, try to diagnose and correct the problem using the following instructions. If the problem persists, consult with qualified Sony personnel. Power Symptom Cause and Remedy The power is not turned on.
  • Page 57 The display mode of the projector may be set at the time of The model name does not disappear from the screen. purchase. Consult with your local dealer or qualified Sony Or else, the demo mode is personnel. displayed continuously.
  • Page 58: Warning Indicators

    ON/STANDBY flashes in c The fan is broken. Consult with qualified Sony personnel. red. (A repetition rate of 4 flashes) c The internal temperature is unusually high. Check to ensure that ON/STANDBY flashes in red.
  • Page 59: Message Lists

    Message Lists Note If “Status” is set to “All Off” in the Setup menu, the warning/caution messages are not displayed except for the message marked with an asterisk (*). (1 page 46) Warning messages Message Cause and Remedy High temp.! Lamp off in 1 c Turn off the power.
  • Page 60 Caution messages Message Cause and Remedy c No signal is input in the selected input. Check connections. (1 page 18) Not applicable! c Press the appropriate button. c The operation to be activated by the button is currently prohibited. c The INPUT button on the remote control has been pressed. This Feature not available on this model.
  • Page 61: Replacing The Lamp And The Air Filter And Cleaning The Ventilation Holes (Intake)

    • When you remove the air filter, be careful Replacing the Lamp not to let any dust fall into the projector. • Replacing the air filter is crucial to maintain and the Air Filter and the good performance of the projector or to prevent malfunction to it.
  • Page 62 Loosen the screw on the lamp cover with a Phillips screwdriver, and then open the lamp cover. Note Loosen the 3 screws on the Be careful not to touch the optical block lamp with the Phillips inside the unit. screwdriver. Hold up the handle, then pull the lamp straight out.
  • Page 63 Remove the filter holder. Ventilation holes (intake) Place the projector back on its Remove the air filter. original position. Turn on the projector, then select “Lamp Setting” on the Setup menu. The menu screen below will appear. Claws Select “Yes.” Attach the new air filter so that it fits into the each claws (10 positions) on the filter holder.
  • Page 64: Cleaning The Air Filter

    • Be sure to turn off the projector and unplug Cleaning the Air the power cord before replacing the lamp, then check the ON/STANDBY lamp has Filter already been turned off. • The projector will not turn on unless the lamp is securely installed in place.
  • Page 65 Black points and bright points (red, blue, or green) on the screen The projector is manufactured using high- precision technology. You may, however, see tiny black points and/or bright points (red, blue, or green) that continuously appear on the projector. This is a normal result of the manufacturing process and does not indicate a malfunction.
  • Page 66: Specifications

    Note 7,620 mm) (measured diagonally) Always verify that the unit is operating Acceptable video signals properly before use. SONY WILL NOT BE 480/60i, 576/50i, 480/60p, 576/50p, LIABLE FOR DAMAGES OF ANY KIND 720/60p, 720/50p, 1080/60i, 1080/50i, INCLUDING, BUT NOT LIMITED TO,...
  • Page 67: Preset Signals

    Warning on power connection Use a proper power cord for your local power supply. The United States, Continental UK, Ireland, Japan Canada Europe Australia, New Zealand Plug type YP-3 YP-12A YP-359 Female end YC-13 YC-13D VM0303B YC-13 Cord type H05VV-F CEE (13) 53 rd VCTF (OC)
  • Page 68 Memory No. Preset signal (resolution) (kHz) (Hz) 1024 × 768 VESA 60 48.363 60.004 1280 × 960 VESA 60 60.000 60.000 1280 × 1024 VESA 60 63.974 60.013 1400 × 1050 SXGA + 65.317 59.978 1280 × 768 1280 × 768/60 47.776 59.870...
  • Page 69: Input Signals And Adjustable/Setting Items

    Input Signals and Adjustable/Setting Items The items in the menus available to adjust differ depending on the input signal. The following tables indicate them. The items that cannot be adjusted are not displayed in the menu. Picture menu Item Preset memory numbers 3, 4, 5, 6, 7, 8, 10, 11, 12, 13, 14 26, 32, 36, 37, 45, 47, 50, 55 Advanced Iris Lamp Control...
  • Page 70 Screen menu Item Preset memory numbers 3, 4, 5, 6, 7, 8, 10, 11, 12, 13, 14 26, 32, 36, 37, 45, 47, 50, 55 Wide Mode Over Scan – Screen Area * – (preset memory numbers 7, 8, 12, 13, 14 only) V Center * Vertical Size *...
  • Page 71: Index

    Index Lamp Control .......... 40 Lamp Timer ..........52 Language ..........46 Lens Control ........... 49 Adjust Signal Location of Controls Shift .............45 Front/Right side ........8 Adjuster ...........23 Rear/Bottom .......... 9 Adjusting picture position ........19 picture quality ........31 Menu Advanced Iris ..........40 Advanced Picture ........
  • Page 72 RCP ............43 Remote control inserting the batteries ......11 location of controls ......10 Reset resettable items ........38 resetting the items ....... 38 Screen Area ..........45 Selecting the menu language ....24 Sharpness ..........41 Specifications .......... 66 Standby Mode .........
  • Page 74 Pour les clients en Europe Le fabricant de ce produit est Sony Corporation, 1-7-1 Konan, Minato-ku, Tokyo, 108-0075 Japon. Le représentant autorisé pour EMC et la sécurité des produits est Sony Deutschland GmbH, Hedelfinger Strasse 61, 70327 Stuttgart, Allemagne.
  • Page 75 Table des matières Précautions .........5 Utilisation du logiciel fourni pour régler la qualité d’image (ImageDirector3) ......34 Emplacement des commandes Utilisation des menus Face avant/droite ........6 Commande par les menus ....35 Face arrière/inférieure ......7 Menu Image ........39 Télécommande ........8 Menu Image avancée .......
  • Page 76 Le nettoyage et l’écran du projecteur ......... 65 Spécifications ........66 Signaux préprogrammés ..... 67 Signaux d’entrée et options réglables/paramétrables ....69 Index ..........71...
  • Page 77: Précautions

    Remballage Précautions Conserver le carton d’emballage original et le matériel d’emballage ; ils seront très utiles si l’on doit un jour expédier l’appareil. Pour Sécurité assurer une protection maximale, remballer • S’assurer que la tension de service de votre l’appareil tel qu’il avait été emballé en usine. projecteur est identique à...
  • Page 78: Emplacement Des Commandes

    Emplacement des commandes Face avant/droite Pour commander le projecteur, on peut utiliser les boutons du panneau de commande qui portent le même nom que ceux de la télécommande. Appuyer sur le bouton et Panneau de commande ouvrir le couvercle. Indicateur Bouton LENS LAMP/COVER Bouton...
  • Page 79: Face Arrière/Inférieure

    Face arrière/inférieure Capteur de télécommande (1 page 18) Orifices de ventilation (prise d’air) (1 page 11) Orifices de ventilation (prise d’air) (1 page 11) Orifices de ventilation (prise d’air) (1 page 11) Orifices de ventilation (prise d’air) (1 page 11) Couvercle de la lampe (1 page 62) Supports réglables...
  • Page 80: Télécommande

    Télécommande Émetteur infrarouge Interrupteur (Marche/ Veille) (1 page 19) Bouton LIGHT Éclaire les boutons sur la Bouton COLOR TEMP télécommande. (1 page 31) Bouton INPUT Ne fonctionne pas sur cet Bouton BLACK LEVEL appareil. (1 page 31) Bouton COLOR SPACE (1 page 31) Bouton LENS (1 page 19)
  • Page 81: Connexions Et Préparatifs

    Connexions et préparatifs Cette section décrit comment installer le projecteur et l’écran, comment connecter l’appareil à partir duquel projeter l’image. Déballage Vérifier l’emballage pour s’assurer qu’il contient les éléments suivants : • Télécommande (1) et piles de format AA (R6) manganèse (2) •...
  • Page 82: Étape 1 : Installation Du Projecteur

    Étape 1 : Installation du projecteur Endroits directement exposés au Le projecteur affiche la sortie des images à partir d’un ordinateur ou d’un autre appareil. souffle froid ou chaud d’un Le déplacement d’objectif vous permet climatiseur d’avoir accès à de plus grandes options pour positionner le projecteur et visualiser les images plus facilement.
  • Page 83 Inclinaison vers l’avant/arrière et vers Installer dans un endroit loin des la gauche/droite murs Afin de maintenir les performances et la fiabilité du projecteur, laisser au moins 30 cm (11 pouces) entre le 15° ou plus projecteur et les murs. 30 cm pouces) 30 cm...
  • Page 84 Lors de l’installation de l’appareil en haute altitude Lorsque vous utilisez le projecteur à une altitude de 1 500 m ou plus, réglez le « Régl. refroidssmnt » dans le menu Réglage « Haut ». (1 page 46) Si vous n’activez pas ce mode lors d’une utilisation à...
  • Page 85: Positionnement Du Projecteur Et D'un Écran

    Positionnement du projecteur et d’un écran La distance qui doit séparer le projecteur de l’écran lors de l’installation varie suivant la taille de l’écran ou selon que vous utilisez ou non les fonctions de déplacement de l’objectif. Déterminer la position d’installation du projecteur et de l’écran. Vous pouvez obtenir une bonne qualité...
  • Page 86 Lors de l’utilisation d’un écran à rapport de format 16:9 Taille d’écran SS (pouces) (mm) 1016 1524 2032 2540 3048 3810 5080 6350 7620 minimum 1201 1825 2448 3072 3695 4631 6189 7748 9307 (121) (145 ) (182 ) (243 ) (305 ) (366 maximum...
  • Page 87 Lors de l’utilisation d’un écran à rapport de format 4:3 Taille d’écran SS (pouces) (mm) 1016 1524 2032 2540 3048 3810 5080 6350 7620 minimum 1480 2243 3006 3770 4533 5677 7585 9493 11401 (118 ) (148 ) (178 ) (223 ) (298 ) (373 ) (448...
  • Page 88 Placer le projecteur de sorte que l’objectif soit parallèle à l’écran. Vue du haut Écran Projeter une image sur l’écran et régler l’image de sorte qu’elle s’adapte à la taille de l’écran. (1 page 18) Pour projeter une image, connecter un ordinateur ou un autre appareil au projecteur. (1 page 17) Remarque Lorsqu’un écran à...
  • Page 89: Étape 2 : Raccordement Du Projecteur

    Étape 2 : Raccordement du projecteur Lors de l’exécution des raccordements, il faut procéder comme suit : • Mettre le projecteur et l’ordinateur hors tension avant tout raccordement. • Utiliser les câbles de raccordement appropriés. • Insérer correctement les fiches de câble ; la mauvaise connexion des fiches peut entraîner un dysfonctionnement ou une piètre qualité...
  • Page 90: Étape 3 : Réglage De La Position De L'image

    Étape 3 : Réglage de la position de l’image Projeter une image sur l’écran puis régler la position de l’image. Indicateur ON/STANDBY 4, 5, 6 Capteur de télécommande Bouton d’objectif Interrupteur (marche/ veille) Conseil Les boutons (marche/veille), LENS, MENU, et M/m/</,/ (manche à...
  • Page 91 Appuyer sur l’interrupteur (marche/veille) pour mettre le projecteur sous tension. L’indicateur ON/STANDBY clignote Clignote en vert pendant un moment en vert, puis demeure allumé en vert. (quelques dizaines Lorsque l’indicateur lumineux de secondes) puis ON/STANDBY clignote, s’allume en vert. Démarrage... s’affiche sur l’écran.
  • Page 92 Pour régler la position horizontale Appuyer sur </,. L’image projetée sur l’écran se décale vers la droite ou la gauche sur 25 % maximum de la largeur d’écran en partant du centre de l’objectif. 1 largeur d’écran 25% Vue du haut : Position de l’image une fois celle-ci décalée au maximum sur la gauche : Position de l’image une fois celle-ci décalée au...
  • Page 93 Plage de déplacement de l’image projetée Image projetée H : Largeur de l’image projetée V : Hauteur de l’image projetée Régler la taille de l’image. Appuyer sur le bouton LENS plusieurs fois, jusqu’à ce que la fenêtre de réglage (mire d’essai) Zoom d’objectif apparaisse.
  • Page 94 Conseil Lorsque « Cde objectif » est réglé sur « Off » dans le menu Installation , il n’est pas possible de régler la taille de l’image et la mise au point. (1 page 49) Lorsque « Mire d’essai » est réglé sur « Off » dans le menu Fonction , la mire d’essai ne s’affiche pas.
  • Page 95: Étape 4 : Sélection De La Langue De Menu

    Étape 4 : Sélection de la langue de menu Vous pouvez sélectionner l’une des 16 langues d’affichage du menu et d’autres affichages à l’écran. Le réglage en usine par défaut est l’anglais. Pour changer la langue actuelle du menu, choisissez la langue désirée grâce à l’écran de menu. 2,3,4 Boutons M/m/</, (flèche)/...
  • Page 96 Appuyer sur M/m pour sélectionner le menu Setup puis appuyer sur , ou Les options de réglage du menu sélectionné apparaissent. Setup Status Language English Menu Position Bottom Left Cooling Setting Standard Cooling Setting 2 Standby Mode Standard 2 Power Saving Lamp Setting Appuyer sur M/m pour sélectionner «...
  • Page 97: Projection

    Projection Cette section décrit comment utiliser le projecteur pour afficher l’image depuis l’appareil raccordé au projecteur. Elle décrit aussi comment régler la qualité de l’image suivant vos préférences. Projection de l’image sur l’écran Mettre sous tension le projecteur et l’appareil qui y est raccordé. L’indication DVI est affichée et l’image est projetée sur l’écran.
  • Page 98 Appuyez une nouvelle fois sur l’interrupteur (marche/veille) avant que le message ne disparaisse. L’indicateur ON/STANDBY clignote en vert et le ventilateur continue à tourner pour abaisser la température interne. D’abord, l’indicateur ON/STANDBY clignote rapidement et à ce moment il n’est pas possible d’allumer l’indicateur ON/STANDBY avec l’interrupteur (marche/veille).
  • Page 99: Sélection Du Mode D'écran Large

    Sélection du mode d’écran large Divers modes d’écran large sont disponibles, suivant le type de signal vidéo reçu. Appuyer sur WIDE MODE. À chaque pression sur le bouton, vous pouvez sélectionner le réglage « Mode large ». Vous pouvez aussi les sélectionner au moyen du menu.
  • Page 100 Zoom Image en format panoramique avec panneaux latéraux. Une image à rapport de format 16:9 est agrandie avec le même rapport à la verticale et à l’horizontale pour remplir l’écran. Utilisez ce mode pour afficher une image en format panoramique ou une Image en format panoramique image en format panoramique avec panneaux latéraux.
  • Page 101 • Noter qu’en cas d’utilisation du projecteur à des fins lucratives ou pour une projection publique, la modification de l’image originale par la sélection d’un mode large peut porter atteinte aux droits des auteurs ou producteurs qui sont protégés légalement.
  • Page 102: Sélection Du Mode D'affichage De L'image

    Sélection du mode d’affichage de l’image Vous pouvez sélectionner le mode d’affichage de l’image qui convient le mieux au type de programme ou aux conditions de la pièce. Appuyer sur l’un des boutons PICTURE MODE (DYNAMIC, STANDARD, CINEMA et USER 1, USER 2 et USER 3). DYNAMIC Qualité...
  • Page 103: Réglage De La Qualité D'image

    Réglage de la qualité d’image Vous pouvez régler facilement la qualité d’image en fonction de vos préférences en sélectionnant les options de réglage avec la télécommande. Les données réglées peuvent être mises en mémoire dans chacun des modes d’image. Sélection pour régler directement l’option de menu désirée Les options de menu suivantes peuvent être réglées en utilisant les Bouton COLOR...
  • Page 104: Sélection Des Options De Menu De Réglage Désirées Dans L'ordre

    Sélection des options de menu de réglage désirées dans l’ordre Appuyez sur ADJ PIC. À chaque pression sur le bouton, les fenêtres de réglage suivantes s’affichent dans l’ordre. « Diaphrag. avancé », « Commande lampe », « Projection », « Meilleur mvt », «...
  • Page 105: Réglage De L'image Avec La Fonction

    Réglage de l’image avec la fonction Real Color Processing La fonction Real Color Processing (RCP) permet de régler la couleur et la teinte pour chacune des cibles de l’image projetée, spécifiées séparément. Cela vous permet d’obtenir une image plus adaptée à vos préférences. Conseil Geler l’image de la source vidéo lorsque l’on règle l’image avec la fonction Real Color Processing.
  • Page 106: Utilisation Du Logiciel Fourni Pour Régler La Qualité D'image (Imagedirector3)

    2 Appuyer sur pour sélectionner « Position » ou « Plage » et spécifier de façon plus précise la position de couleur et la plage de couleur que vous désirez régler au moyen de < Régler la couleur des parties spécifiées.
  • Page 107: Utilisation Des Menus

    Utilisation des menus Cette section décrit comment effectuer les divers réglages et paramétrages au moyen des menus. Commande par les menus Le projecteur est doté d’un menu sur écran permettant d’effectuer divers réglages et paramétrages. Certaines des options réglables/paramétrables s’affichent sur un menu local, un menu de paramétrage ou un menu de réglage sans menu principal, ou sur la fenêtre de menu suivante.
  • Page 108 Appuyer sur MENU. La fenêtre de menu apparaît. Appuyer sur M/m pour sélectionner une option de menu, puis appuyer sur , ou Les options qui peuvent être paramétrées ou réglées au moyen du menu sélectionné apparaissent. État L’option actuellement sélectionnée est Langage Français Position de menu...
  • Page 109 Appuyer sur M/m pour sélectionner l’option à configurer ou régler, puis appuyer sur , ou Les paramètres s’affichent sur un menu local, un menu de paramétrage, un menu de réglage ou sur la fenêtre Menu local de menu suivante. Paramètres État Langage Français...
  • Page 110 Régler le paramètre ou « Réglages expert » sur le menu Image sélectionner une option. Pour changer la valeur d’un Pour réinitialiser les paramètre paramètres modifiés Pour augmenter la valeur, appuyer sur Sélectionnez un paramètre sur l’écran M/,. Pour réduire la valeur, appuyer sur m/ Menu, et affichez le menu local, le menu <.
  • Page 111: Menu Image

    Menu Image Le menu Image sert à régler l’image. Remarque Suivant les types de signal d’entrée, il est possible que certaines options ne soient pas disponibles. Pour plus de détails, voir « Signaux d’entrée et options réglables/paramétrables » ( 1 page 69). Mode d’image Vous pouvez sélectionner le mode de visualisation de l’image qui convient le mieux au type d’image ou d’environnement.
  • Page 112 Noir Ciné Pro Diaphrag. avancé Change la fonction du diaphragme pendant la projection. Auto 1: Passe automatiquement à un diaphragme optimum en fonction d’une scène projetée. C’est le contraste de la scène qui est le plus mis en valeur. ’ Auto 2 : Un iris optimal devient plus petit que lorsqu il est réglé...
  • Page 113 Contraste Règle la zone blanche des images (niveau de blanc). Plus la valeur est élevée, plus le contraste est grand. Plus la valeur est basse, plus le contraste est petit. Vous pouvez effectuer des ajustements en appuyant sur la touche CONTRAST+/–...
  • Page 114 Réglages expert Mode Film D’après la source film que vous avez sélectionnée, crée un paramètre de lecture. Auto 1 : Approprié pour reproduire un mouvement d’image proche du mouvement d’image d’origine de la source film. Régler normalement ce paramètre sur « Auto 1 ». Auto 2 : Reproduit un signal vidéo de format 2-3 ou 2-2 Pull-Down, tel que celui des sources de film, avec un mouvement d’image fluide.
  • Page 115: Menu Image Avancée

    Menu Image avancée Le menu Image avancée est utilisé pour régler davantage l’image. RCP (Real Color Vous pouvez régler la couleur et la teinte séparément pour chaque Processing) partie sélectionnée de l’image. Utilisateur 1, Utilisateur 2, Utilisateur 3: Vous pouvez régler l’image au moyen de la fonction Real Color Processing et enregistrer les paramètres en mémoire.
  • Page 116: Menu Écran

    Menu Écran Le menu Écran permet de régler le signal d’entrée. Vous pouvez régler la taille de l’image, sélectionner le mode d’écran large, etc. Remarque Suivant les types de signal d’entrée, il se peut que cette option ne soit pas disponible. Pour plus de détails, voir «...
  • Page 117 Surscannage Cache les contours de l’image. On : Cache les contours de l’image reçue. Sélectionner ce réglage si des parasites apparaissent sur les bords de l’image. Off : Projette toute l’image reçue. Conseil Pour afficher la zone affichable dans les quatre directions de l’écran, se reporter à...
  • Page 118: Menu Réglage

    Menu Réglage Le menu Réglage sert à modifier les réglages d’usine, etc. État Langage Français Position de menu Bas gauche Régl. refroidssmnt Standard Régl. refroidssmnt 2 Mode de veille Standard 2 Mode économique Réglage de la lampe État Spécifie l’activation ou non de l’affichage sur écran. Régler cette option sur «...
  • Page 119 Mode de veille Spécifie la réduction de la consommation d’énergie en veille. Standard 1 : Spécifie la consommation d’énergie normale. Standard 2 : Désactive la fonction réseau et réduit la consommation d’énergie par rapport à celle de « Standard 1 ». Bas : Réduit la consommation d’énergie par rapport à...
  • Page 120: Menu Fonction

    Menu Fonction Le menu Fonction sert à changer les paramètres des diverses fonctions du projecteur. Mire d’essai Arrière-plan Bleu Mire d’essai Affiche la mire d’essai. Lorsque cette option est réglée sur « On », une mire d’essai apparaît sur l’écran, à utiliser lors du réglage de l’objectif avec « Focus d’objectif », «...
  • Page 121: Menu Installation

    Menu Installation Le menu Installation sert à changer les paramètres d’installation. Symétrie Fait pivoter horizontalement et/ou verticalement l’image sur l’écran. HV : Fait pivoter l’image horizontalement et verticalement. H : Fait pivoter l’image horizontalement. V : Fait pivoter l’image verticalement. Off : L’image ne pivote pas.
  • Page 122 Alig. panneau Permet de sélectionner les écarts de couleur des caractères ou de l’image. Lorsque « On » est réglé, il est possible de définir et de régler les paramètres « Couleur cible » et « Couleur écran ». Mode de régl. : Permet de sélectionner comment effectuer les réglages.
  • Page 123 Réinitialiser : Ramène aux réglages d’usine. Remarque Selon les réglages effectués ci-dessus, il est possible que les couleurs deviennent irrégulières ou que la résolution change. Param. réseau Vous pouvez configurer les paramètres réseau tels que l’adresse IP, le masque de sous-réseau, la passerelle par défaut et le serveur DNS lors de l’accès au projecteur depuis un ordinateur ou au moyen de l’application «...
  • Page 124: Menu Informations

    1080/60p Durée de lampe 1234 H Type de signal Nom du modèle Affiche le nom du modèle (VPL-GH10). N° de Série Affiche le numéro de série. N° de mémoire Affiche le numéro de mémoire préréglé du signal d’entrée. Type de signal Affiche le type de signal d’entrée.
  • Page 125: Utilisation Du Projecteur À Partir D'un Ordinateur

    Utilisation du projecteur à partir d’un ordinateur Conseil Accès au projecteur Lorsque « Mode de veille » est réglé sur « Standard 1 » dans le paramètre Réglage à partir d’un , vous pouvez accéder au projecteur depuis un ordinateur même si le projecteur ordinateur est en mode de veille.
  • Page 126: Utilisation Du Projecteur

    Utilisation du Paramétrage des projecteur informations Cliquer sur « Control ». Vous pouvez Cliquer sur « Setup ». La boîte de dialogue effectuer divers réglages et paramètrages du « Password Properties » apparaît. Le nom du projecteur à partir du moniteur de compte «...
  • Page 127 Advertisement et le bouton PJ Talk sont indiqués dans le manuel PROTOCOL. Pour plus d’informations sur les fonctions de « Advanced setting », consulter le distributeur local ou un personnel Sony qualifié. Pour réinitialiser les réglages Cliquer sur le bouton Reset affiché dans «...
  • Page 128: Dépannage

    Cette section décrit comment régler les problèmes, remplacer la lampe et le filtre à air, etc. Dépannage Si le projecteur ne fonctionne pas correctement, essayer d’en déterminer la cause et remédier au problème comme il est indiqué ci-dessous. Si le problème persiste, consulter le service après-vente Sony. Alimentation Symptôme Cause et remède c Il se peut que l’appareil ne s’allume pas si vous l’éteignez avec...
  • Page 129 Le mode d’affichage du projecteur peut être défini au moment Le nom du modèle ne disparaît pas de l’écran. Ou de l’achat. Informez-vous auprès de votre revendeur local ou du le mode de démonstration personnel agréé de Sony. s’affiche continuellement. Télécommande Symptôme Cause et remède La télécommande ne...
  • Page 130: Indicateurs D'avertissement

    Consultez le service après-vente Sony. Remarque Lorsqu’un indicateur d’avertissement autre que celui ci-dessus commence à clignoter et que le symptôme persiste même après avoir effectué les opérations ci-dessus, consulter un personnel Sony qualifié.
  • Page 131: Listes De Messages

    Listes de messages Remarque Si « État » est réglé sur « Tout Off » dans le menu Réglage , les messages d’avertissement/de mise en garde ne sont pas affichés à l’exception du message indiqué par un astérisque (*). (1 page 46).
  • Page 132 Messages de mise en garde Message Cause et remède c Aucun signal n’est reçu dans l’entrée sélectionnée. Vérifier les connexions. (1 page 17) c Appuyer sur le bon bouton. Non applicable! c Le fonctionnement normalement activé par le bouton est actuellement interdit.
  • Page 133: Remplacement De La Lampe Et Du Filtre À

    • Prêter une attention spéciale au Remplacement de la remplacement de la lampe lorsque le projecteur est installé au plafond. lampe et du filtre à air • Lorsque vous retirez la lampe, assurez-vous qu’elle reste en position horizontale, puis et nettoyage des soulevez-la directement vers le haut.
  • Page 134 Desserrez la vis du couvercle de lampe avec un tournevis cruciforme, puis ouvriez le couvercle de lampe. Dévissez les 3 vis de la lampe à l’aide du tournevis cruciforme. Remarques Maintenez la poignée vers le haut, • Lorsque la lampe se casse, des morceaux et retirez la lampe.
  • Page 135 Tenir la poignée de la nouvelle Retirez le support à filtre. lampe avec la main, puis pousser celle-ci à l’intérieur entièrement avant de resserrer les 3 vis. Retirez le filtre à air. Remarque Prendre garde de toucher le bloc optique à l’intérieur du projecteur.
  • Page 136 Mise en garde Ne pas introduire les doigts dans la fente de remplacement de la lampe et veiller à ce qu’aucun liquide ou objet ne tombe à l’intérieur de la fente pour éviter tout risque d’électrocution ou d’incendie. Remarques • Il faut utiliser une lampe pour projecteur LMP-H201 pour le remplacement.
  • Page 137: Nettoyage Du Filtre À Air

    Nettoyage du filtre à Le nettoyage et l’écran du projecteur Le filtre à air doit être nettoyé toutes les 1 000 Nettoyage du boîtier heures. Cette fréquence dépend de • Pour retirer la poussière qui recouvre le l’environnement et de la manière dont le boîtier, l’essuyer délicatement avec un projecteur est utilisé.
  • Page 138: Spécifications

    480/60i, 576/50i, 480/60p, 576/ Remarque 50p, 720/60p, 720/50p, 1080/60i, Vérifiez toujours que l’appareil fonctionne 1080/50i, 1080/60p, 1080/50p, correctement avant l’utilisation. Sony n’assumera 1080/24p pas de responsabilité pour les dommages de Signaux d’ordinateur compatibles quelque sorte qu’ils soient, incluant mais ne se fH : 19 kHz à...
  • Page 139: Signaux Préprogrammés

    Avertissement pour le raccordement secteur Utiliser un cordon d’alimentation adapté à la source d’alimentation locale. États-Unis, Europe Royaume-Uni, Japon Canada continentale Irlande, Australie, Nouvelle Zélande Type de fiche YP-3 YP-12A YP-359 Extrémité YC-13 YC-13D VM0303B YC-13 femelle Type de cordon H05VV-F CEE (13) 53 rd (OC) VCTF...
  • Page 140 N° de mémoire Signal préprogrammé fH (kHz) fV (Hz) (résolution) 832 × 624 Mac 16 49,724 74,550 1024 × 768 VESA 60 48,363 60,004 1280 × 960 VESA 60 60,000 60,000 1280 × 1024 VESA 60 63,974 60,013 1400 × 1050 SXGA + 65,317 59,978...
  • Page 141: Signaux D'entrée Et Options Réglables/Paramétrables

    Signaux d’entrée et options réglables/paramétrables Les options des menus qu’il est possible de régler diffèrent suivant le signal d’entrée. Elles sont indiquées dans les tableaux suivants. Les options non réglables n’apparaissent pas dans le menu. Menu Image Option Numéros de mémoire préréglée 3, 4, 5, 6, 7, 8, 10, 11, 12, 13, 14 26, 32, 36, 37, 45, 47, 50, 55 Diaphrag.
  • Page 142 Menu Ecran Option Signal d’entrée 3, 4, 5, 6, 7, 8, 10, 11, 12, 13, 14 26, 32, 36, 37, 45, 47, 50, 55 Mode large Surscannage – Zone d’écran * – (numéros de mémoire préréglée 7, 8, 12, 13, 14 uniquement) Centrer V * Taille verticale * –...
  • Page 143: Index

    Messages Index Avertissement ........59 Mise en garde ........60 Mire d’essai ..........48 Mode d’image CINEMA ..........30 Accessoires fournis ........9 Cinéma ..........39 Alignement panneau ........50 DYNAMIC ......... 30 Arrière-plan ..........48 Dynamique .......... 39 STANDARD ........30 Standard ..........39 Blanc ............49 USER ..........
  • Page 144 paramètres pouvant être réinitialisés ........38 réinitialisation des options ....38 Sélection de la langue de menu ....23 Signaux préprogrammé ......67 Spécifications .......... 66 Supports réglables ........22 Surscannage ..........45 Symétrie ..........49 Teinte ............41 Télécommande emplacement des commandes ....
  • Page 146 警告表示の意味 安全のために 取扱説明書および製品で は、 次のような表示をして います。 表示の内容をよく ソニー製品は安全に充分配慮して設計されています。 しか 理解してから本文をお読 し、 電気製品は、 まちがった使いかたをすると、 火災や感電な みください。 どにより死亡や大けがなど人身事故につながることがあり、 危険です。 事故を防ぐために次のことを必ずお守りください。 この表示の注意事項を守 安全のための注意事項を守る らないと、 火災や感電など により死亡や大けがなど 3 〜 9 ページの注意事項をよくお読みください。 人身事故につながること があります。 定期点検をする 5 年に 1 度は、 内部の点検を、 ソニーの相談窓口にご相談くだ さい (有料) 。 この表示の注意事項を守 らないと、...
  • Page 147 警告 火災 感電 下記の注意を守らないと、 や により 死亡 大けが や につながることがあります。 火災 感電 電源コードを傷つけない 光源用ランプ交換は光源用ランプが 充分に冷えてから行う 電源コードを傷つけると、 火 災や感電の原因となること 電源を切った直後は光源用 があります。 ランプが高温になっており、 ・ 設置時に、 製品と壁やラッ さわるとやけどの原因とな ク (棚) などの間に、 はさみ ることがあります。 光源用ラ 込んだりしない。 ンプ交換の際は、 電源を切っ ・ 電源コードを加工したり、 てから 1 時間以上たって、 充 傷つけたりしない。...
  • Page 148 お手入れの際は、電源を切って電源 床置き、または天井つり金具を使っ プラグを抜く た天井つり以外の設置をしない 電源を接続したままお手入 それ以外の設置をすると火 れをすると、 感電の原因とな 災や大けがの原因となるこ ることがあります。 とがあります。 天井への取り付け、移動は絶対に自 プロジェクターの上に水が入ったも 分でやらない のを置かない 天井への取り付け、 移動は必 内部に水が入ると火災や感 ずソニーの相談窓口にご相 電の原因となります。 談ください (有料) 。 天井の強度不足、 取り付け方 法が不充分のときは落下し 大けがの原因となります。 電源コードのアース端子からはずし た絶縁キャップなどの小さな部品は、 長時間の外出、旅行のときは、電源 幼児が飲み込む恐れがあるので、手 プラグを抜く の届かないところに保管する 安全のため、 必ず電源プラグ 万一誤って飲みこんだとき をコンセントから抜いてく は、 窒息する恐れがあります ださい。 のでただちに医師にご相談...
  • Page 149 注意 けが 物品 下記の注意を守らないと、 をしたり周辺の に 損害 を与えることがあります 不安定な場所に設置しない 湿気やほこり、油煙、湯気の多い場 所や虫の入りやすい場所、直射日光 ぐらついた台や棚の上、 ある が当たる場所、熱器具の近くに置か いは傾いたところに設置す ない ると、 倒れたり落ちたりして けがの原因となることがあ 火災や感電の原因となるこ ります。 また、 設置 ・ 取り付け とがあります。 場所の強度を充分にお確か めください。 ぬれた手で電源プラグにさわらない スプレー缶などの発火物や燃えやす ぬれた手で電源プラグの抜 いものを排気口やレンズの前に置か き差しをすると、 感電の原因 ない となることがあります。 火災の原因となることがあ ります。 雷が鳴り出したら、電源プラグに触 水のある場所に置かない れない...
  • Page 150 レンズをのぞかない レンズは定期的にクリーニングする 投影中にプロジェクターの レンズのよごれにより画質 レンズをのぞくと光が目に に悪影響をおよぼす可能性 入り、 悪影響を与えることが があります。 あります。 定期的に内部の掃除を依頼する 光源用ランプについ 長い間掃除をしないと内部 ての安全上のご注意 にほこりがたまり、 火災や感 電の原因となることがあり ます。 1 年に 1 度は、 内部の プロジェクターの光源には、 内部圧力の 掃除をソニーの相談窓口に 高い水銀ランプを使用しています。 高圧 ご相談ください (有料) 。 水銀ランプには、 次のような特性があり 特に、 湿気の多くなる梅雨の ます。 前に掃除をすると、 より効果 的です。 ・ 衝撃や、 使用時間の経過による劣化な どにより大きな音をともなって破裂...
  • Page 151 破裂 高温 破裂 下記の注意事項を守らないと、 下記の注意事項を守らないと、破 けが 物品 損 死亡 をしたり周辺の に 裂・発熱・液漏れにより、 害 大けが を与えることがあります。 や などの人身事故になる ことがあります。 光源用ランプが破裂したときはすぐ 光源用ランプ交換は光源用ランプが に交換を依頼する 充分に冷えてから行う 光源用ランプが破裂した際 電源を切った直後は光源用 には、 プロジェクター内部や ランプが高温になっており、 ランプハウス内に破片が飛 さわるとやけどの原因とな 散している可能性がありま ることがあります。 光源用ラ す。  ソニーの相談窓口に光 ンプ交換の際は、 電源を切っ 源用ランプの交換と内部の てから 1 時間以上たって、 充 点検を依頼してください。...
  • Page 152 電池についての安全 上のご注意 破裂 高温 下記の注意事項を守らないと、破 死亡 ここでは、本機での使用が可能なソ 裂・発熱・液漏れにより、 大けが ニー製乾電池についての注意事項を記 や などの人身事故になる ことがあります。 載しています。 ・ 乾電池は充電しない。 万一、異常が起きたら ・ 火の中に入れない。 ショートさせたり、 分解、 加熱しない。 ・ 指定された種類の電池を使用する。 ・ 電池の液が目に入ったら すぐにきれいな水で洗い、 ただちに医師の治 療を受ける。 破裂 下記の注意事項を守らないと、破 ・ 煙が出たら けが 裂・液漏れにより、 をした 物品 損害 り周辺の に を与えた...
  • Page 153 その他の安全上のご この装置は、 クラス A 情報技術装置です。 こ の装置を家庭環境で使用すると電波妨害を 注意 引き起こすことがあります。 この場合には 使用者が適切な対策を講ずるよう要求され ることがあります。 注意 VCCI-A 指定以外の電池に交換すると、 破裂する危険 があります。 本機は 「高調波電流規格 JIS C 61000-3- 必ず指定の電池に交換してください。 2 適合品」 です。 使用済みの電池は、 国または地域の法令に 従って処理してください。 警告 設置の際には、 容易にアクセスできる固定配 線内に専用遮断装置を設けるか、 使用中に、 容易に抜き差しできる、 機器に近いコンセン トに電源プラグを接続してください。 万一、 異常が起きた際には、 専用遮断装置を 切るか、 電源プラグを抜いてください。 設置時には、...

Table des Matières