Sony VPL-VW995ES Guide De Référence Rapide

Masquer les pouces Voir aussi pour VPL-VW995ES:

Publicité

Les langues disponibles

Les langues disponibles

Liens rapides

Printed in China
Video Projector
VPL-VW995ES
© 2018 Sony Corporation
4-745-122-11 (1)
Quick Reference Manual ___
US
Guide de reference rapide _
FR

Publicité

Table des Matières
loading

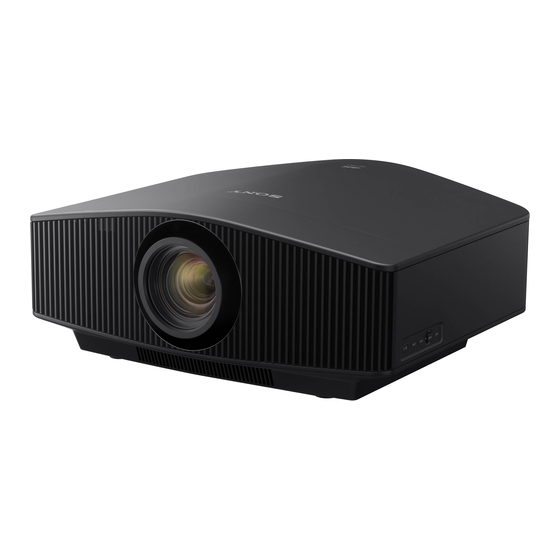
Sommaire des Matières pour Sony VPL-VW995ES

  • Page 1 4-745-122-11 (1) Video Projector Quick Reference Manual ___ Guide de reference rapide _ VPL-VW995ES Printed in China © 2018 Sony Corporation...
  • Page 2 Note If you have lost or damaged the CD-ROM, you can purchase a new one from your Sony dealer or Sony service counter. Adobe and Adobe Reader are trademarks of Adobe Systems Incorporated in the United States and/or other countries.
  • Page 3: Checking The Supplied Accessories

    Preparing Step 1 Checking the Supplied Accessories Check the carton to make sure it contains the following items: • Remote control RM-PJ24 (1) • Size AA (R6) manganese batteries (2) • AC power cord (1) • Quick Reference Manual (this manual) (1) •...
  • Page 4: Installing The Unit

    Installing the Unit Step 2 Position the unit so that the lens is parallel to the Project an image on the screen, then adjust the focus, screen. size, and position. After connecting the AC power cord to the unit, plug the AC power cord into a wall outlet.
  • Page 5 Lens adjustment window (test pattern) 1.78:1 (16:9) 1.33:1 (4:3) 2.35:1 1.85:1 The dashed lines show the screen sizes of each aspect ratio. For more information, refer to “Connections and Preparations” in the Operating Instructions contained in the supplied CD-ROM. Installing the Unit...
  • Page 6: Connecting The Unit

    Connecting the Unit Step 3 When making connections, be sure to do the following: • Turn off all equipment before making any connections. • Use the proper cables for each connection. • Insert the cable plugs properly; poor connection at the plugs may cause a malfunction or poor picture quality. When pulling out a cable, be sure to pull it out from the plug, not the cable itself.
  • Page 7: Projecting The Picture

    Projecting Step 4 Projecting the Picture Selecting the Picture Viewing Mode Press one of the CALIBRATED PRESET buttons. Turn on both the unit and the equipment connected to the unit. Press INPUT to display the input palette on the screen. Select the equipment from which you want to display CALIBRATED PRESET buttons images.
  • Page 8: Error Handling

    Note If the symptom persists even after carrying out the above methods, consult with qualified Sony personnel. If the indicator starts flashing in a way of other than the above, turn off, and then turn on the power with the ?/1 (On/Standby) button on the remote control or control panel of the unit.
  • Page 10 Si vous avez perdu ou endommagé le CD-ROM, vous pouvez acheter un CD-ROM de remplacement auprès de votre représentant Sony ou du service clientèle Sony. Adobe et Adobe Reader sont des marques d’Adobe Systems Incorporated aux États-Unis et/ou dans d’autres pays.
  • Page 11: Préparation

    Préparation Etape 1 Vérification des accessoires fournis Vérifiez si le carton renferme bien tous les éléments suivants : • Télécommande RM-PJ24 (1) • Piles au manganèse AA (R6) (2) • Cordon d’alimentation secteur (1) • Guide de référence rapide (ce manuel) (1) •...
  • Page 12: Installation De L'appareil

    Installation de l’appareil Etape 2 Positionnez l’appareil de façon à ce que l’objectif soit Projetez une image sur l’écran, puis réglez la mise au parallèle à l’écran. point, la taille et la position. Après avoir branché le cordon d’alimentation à l’appareil, branchez le cordon d’alimentation secteur à...
  • Page 13 Fenêtre de réglage de l’objectif (mire d’essai) 1,78:1 (16:9) 1,33:1 (4:3) 2,35:1 1,85:1 Les lignes pointillées indiquent les tailles d’écran de chaque rapport de format. Pour plus d’informations reportez-vous à « Raccordements et préparatifs » dans le Mode d’emploi que vous trouverez sur le CD-ROM fourni.
  • Page 14: Raccordement De L'appareil

    Raccordement de l’appareil Etape 3 Lors de l’exécution des raccordements, vous devez procéder comme suit : • Mettez tous les appareils hors tension avant tout raccordement. • Utilisez les câbles appropriés pour chaque raccordement. • Insérez correctement les fiches de câble ; le mauvais raccordement des fiches peut entraîner un dysfonctionnement ou une piètre qualité...
  • Page 15: Projection

    Projection Etape 4 Projection de l’image Sélection du mode d’affichage de l’image Mettez sous tension cet appareil et l’appareil qui y est raccordé. Appuyez sur un des boutons CALIBRATED PRESET. Appuyez sur INPUT pour afficher la palette d’entrée sur l’écran. Sélectionnez le périphérique à...
  • Page 16: Gestion Des Erreurs

    Remarque Si le symptôme persiste même après avoir suivi les méthodes décrites ci-dessus, consultez le service après-vente Sony. Si l’indicateur se met à clignoter d’une manière qui n’est pas décrite ci-dessus, éteignez et rallumez l’appareil en appuyant sur le bouton [/1 (Marche/Veille) de la télécommande ou du panneau de commande de l’appareil.

Table des Matières