HP Stitch S500 64in Instructions D'assemblage
Liens rapides
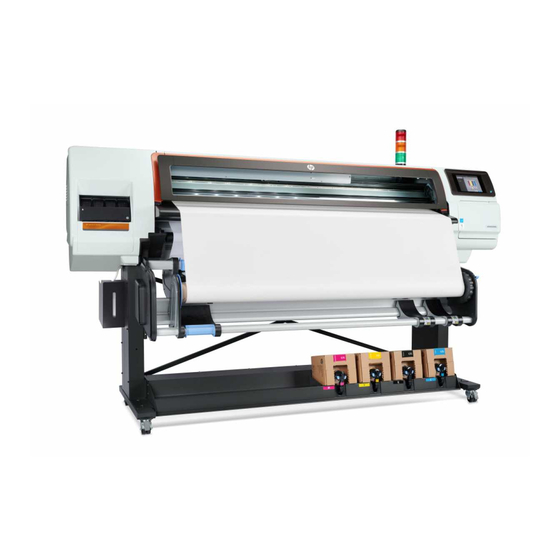
HP Stitch S500 64in.
Printer
Printer assembly instructions
EN
Instructions d'assemblage
FR
de l'imprimante
Anleitung zur Druckermontage
DE
Istruzioni per l'installazione della
IT
stampante
Instrucciones de montaje de la
ES
impresora
Instruções de montagem da
PT
impressora
تعليمات تجميع الطابعة
AR
© Copyright 2019 HP Development Company, L.P.
Large Format Division
Camí de Can Graells 1-21 · 08174
Sant Cugat del Vallès
Barcelona · Spain
All rights reserved
Contenu de l'emballage
EN
Box Contents
FR
1. EE cables
1. Câbles EE
2. Guides de support
2. Edge holders
3. User maintenance kit
3. Kit de maintenance utilisateur
4. Printheads
4. 4 têtes d'impression
5. Cartouche de maintenance
5. Maintenance cartridge
6. Loading accessory and
6. Accessoire de chargement et
crochets
hooks
7. Ink collector
7. Collecteur d'encre
8. Accessoire de balise
8. Beacon accessory
9. Spanner set
9. Jeu de clés
10. 3 empty intermediate tanks
10. 3 réservoirs intermédiaires vides
11. Kit d'adaptateur 2 pouces
11. 2-inch adaptor kit
12. Hubs
12. Moyeux
13. Bouteille de résidus et capuchons
13. Waste bottle and waste
bottle caps
de la bouteille de résidus
LAN cable, roll of substrate, and
Le câble LAN, le rouleau de support, et
les cartouches ne sont pas inclus.
cartridges are not included.
Tools required: Electrical
Outils nécessaires : Taille de serre-
écrou électrique (17/Découpeur/
nutdriver size 17 / Cutter /
Forklift / Flat screwdriver)
Elévateur/Tournevis plat)
Remarque : L'assemblage peut être
Note: Assembly can be done
with manual tools only, but
effectué avec des outils manuels
installation will take longer.
uniquement, mais l'installation sera
plus longue.
Note: The printer body cannot
be disassembled from the legs.
Remarque : L'ensemble de
l'imprimante ne peut pas être démonté
Correct printer functionality
cannot be assured.
à partir des supports inférieurs.
Un fonctionnement correct de
l'imprimante ne peut pas être assuré.
Please read these instructions carefully. These assembly instructions explain how to assemble the printer. Because spare screws are supplied, some screws will remain unused after assembly of the printer.
EN
Veuillez lire attentivement ces instructions. Ces instructions d'assemblage expliquent comment assembler l'imprimante. Des vis de rechange étant fournies, certaines vis pourront rester inutilisées après
FR
l'assemblage de l'imprimante.
Lesen Sie diese Anleitungen sorgfältig durch. Dieses Dokument enthält Anleitungen für den Zusammenbau des Druckers. Zum Lieferumfang gehören Ersatzschrauben, sodass nach dem Zusammenbau
DE
einige Schrauben übrig bleiben.
Leggere attentamente queste istruzioni. Queste istruzioni descrivono la procedura d'installazione della stampante. Poiché vengono fornite viti di riserva, alcune potrebbero risultare inutilizzate dopo
IT
l'installazione della stampante.
Lea atentamente estas instrucciones. Estas instrucciones de montaje explican cómo se monta la impresora. Como también se incluyen tornillos de repuesto, después de montar la impresora quedarán
ES
algunos sin utilizar.
Leia as instruções com atenção. Estas instruções de montagem explicam como montar a impressora. Como são fornecidos parafusos sobressalentes, alguns permanecerão sem uso depois da montagem da
PT
impressora.
يرجى ق ر اءة هذه اإلر شادات بعناية. تشرح هذه التعليمات المجمعة كيفية تجميع الطابعة. نظر ً ا لتوفير ب ر اغي احتياطية، ستظل بعض الب ر اغي غير مستخدمة بعد تجميع الطابعة
AR
DE
Verpackungsinhalt
ES
1. EE-Kabel
1. Cables EE
2. Randhalter
2. Sujetapapeles
3. Benutzerwartungskit
3. Kit de mantenimiento para el usuario
4. Druckköpfe
4. Cabezales de impresión
5. Wartungspatrone
5. Cartucho de mantenimiento
6. Ladezubehör und Haken
6. Accesorio y ganchos de carga
7. Tintenkollektor
7. Recogedor de tinta
8. Statussignal-Zubehör
8. Accesorio de baliza
9. Satz Schraubenschlüssel
9. Juego de llaves
10. 3 leere Zwischentanks
10. Tres depósitos intermedios vacíos
11. 2-Zoll-Adapter-Kit
11. Kit de adaptador de 2 pulgadas
12. Anschläge
12. Bujes
13. Abfallflasche und Abfallflaschendeckel
13. Botella de residuos y tapas de botellas de
LAN-Kabel, Druckmaterialrolle und Patronen
sind nicht enthalten.
El cable LAN, el rollo de sustrato y los cartuchos
Erforderliches Werkzeug: Elektrischer
no están incluidos.
Nussschraubendreher Größe (17/
Herramientas requeridas: Tamaño del
Schneideplotter/Gabelstapler/flacher
destornillador eléctrico (17/cortador/carretilla
Schraubendreher)
elevadora/destornillador plano)
Hinweis: Die Installation kann ausschließlich
Nota: El montaje se puede hacer con
mit manuellen Werkzeugen durchgeführt
herramientas manuales solamente, pero la
werden, dauert in diesem Fall aber länger.
instalación tardará más tiempo.
Hinweis: Das Untergestell des Druckers
Nota: El cuerpo de la impresora no se puede
kann nicht demontiert werden. Ein
separar de las patas. No se puede asegurar un
ordnungsgemäßes Druckergebnis kann nicht
funcionamiento correcto de la impresora.
gewährleistet werden.
PT
Contenuto della confezione
1. Cabos EE
IT
1. Cavi EE
2. Suportes de borda
2. Supporti bordi
3. Kit de manutenção do usuário
3. Kit manutenzione utente
4. Cabeçotes de impressão
4. Testine di stampa
5. Cartucho de manutenção
5. Cartuccia di manutenzione
6. Acessório de carregamento e ganchos
6. Accessorio di caricamento e ganci
7. Coletor de tinta
7. Raccoglitore di inchiostro
8. Acessório sinalizador
8. Accessorio segnale luminoso
9. Conjunto da chave de boca
9. Set di chiavi
10. 3 tanques intermediários vazios
10. 3 serbatoi intermedi vuoti
11. Kit adaptador de 2 pol.
11. Kit adattatore da 2 pollici
12. Hubs
12. Mozzi
13. Frasco residual e tampas do frasco residual
13. Contenitore di scarto e relativi tappi
Cabo de LAN, rolo de substrato e cartuchos não
il cavo LAN, il rotolo del supporto di stampa e le
incluídos.
cartucce non sono inclusi.
Ferramentas necessárias: Tamanho da chave
Strumenti necessari: chiave elettrica (17/
de porca elétrica (17 / cortador / empilhadeira /
taglierina/carrello elevatore a forca/cacciavite
chave de fenda plana)
piatto)
Nota: A montagem pode ser feita apenas com
Nota: l'assemblaggio può essere eseguito solo
ferramentas manuais, mas a instalação demorará
con gli strumenti manuali, ma l'installazione
mais.
richiederà più tempo.
Nota: O corpo da impressora não pode ser
Nota: il corpo della stampante non può
desmontado a partir das pernas. A funcionalidade
essere disassemblato dai piedi stabilizzatori;
correta da impressora não pode ser garantida.
la corretta funzionalità della stampante non
potrebbe essere garantita.
1
Contenido de la caja
3. مجموعة الصيانة بواسطة المستخدم
11. مجموعة مهايئات مقاس 2 بوصة
31. زجاجة النفايات وأغطية زجاجة
residuos
(شبكةLAN ال يشمل الصندوق على اكبل
االتصال المحلية) وأسطوانة الركيزة
األدوات المطلوبة: مفك كهربائي حجم
(71 / آلة قطع / ر افعة شوكية / مفك ب ر اغي
مالحظة: يمكن إج ر اء عملية التجميع
باستخدام أدوات يدوية فقط، ولكن سوف
مالحظة: ال يمكن فك هيلك الطابعة من
األرجل. ال يمكن ضمان تشغيل الطابعة
Conteúdo da caixa
محتويات الصندوق
AR
EE 1. اكبالت
2. حامالت الحواف
4. رؤوس الطباعة
5. خرطوشة الصيانة
6. ملحقات التحميل والخطافات
7. مجمع الحبر
8. ملحقات اإلشارة الضوئية
9. مجموعة مفاتيح الربط
01. 3 حاويات متوسطة فارغة
21. محاور
النفايات
.والخ ر اطيش
)بحافة مستوية
.يستغرق التركيب وقت ً ا أطول
".بطريقة صحيحة

Manuels Connexes pour HP Stitch S500 64in


Sommaire des Matières pour HP Stitch S500 64in
- Page 1 Schrauben übrig bleiben. Leggere attentamente queste istruzioni. Queste istruzioni descrivono la procedura d’installazione della stampante. Poiché vengono fornite viti di riserva, alcune potrebbero risultare inutilizzate dopo © Copyright 2019 HP Development Company, L.P. Large Format Division l’installazione della stampante.
- Page 2 The space required for assembly is 1.5 m (5 ft) front, rear and Remove the packaging side, and 7.7 m (25,3 ft) from end to the other side Retrait de l’emballage L’espace requis pour l’assemblage est de 1,5 m (5 pi) à l’avant et Entfernen der Verpackung à...
- Page 3 Remove printer from packaging Retrait de l’imprimante de son emballage Nehmen Sie den Drucker aus der Verpackung Rimozione della stampante dalla confezione Extracción de la impresora del embalaje Remova a impressora da embalagem إ ز الة الطابعة من العبوة Remove 2 screws from each support using the spanner Remove 3 screws from each of the 4 columns and remove Remove the protective plastic bag.
- Page 4 Remove the box. Remove the desiccant bags on each side and the 2 on the Remove the loading accessory. Remove the 2 screws, protection, and metal bracket from cover, cut the tapes and remove the ink collector box. each side. The spanner is required to hold the nut in place on the back side.
- Page 5 Remove 5 screws on each side. Keep the screws for later use. Take the M10x160 bolt and spanner from next to the bag that these assembly instructions were in. At one end of the printer (not Remove the wooden/foam block. important which), insert and tighten the bolt with the electrical nutdriver to raise the printer until the screw touches the pallet, then continue raising it with the spanner until the wooden/foam block can be removed.
- Page 6 Untighten the screw to lower the printer until it is back on the Remove the plastic, unlock the wheels, roll the printer out of Place the ramps in postition on the pallet. Insert 2 screws on each side to hold the ramps in place. platform (it may shake/tremble).
- Page 7 Take the beacon from the box and connect the cable. Lower the cover. Tighten the 4 (T-25) screws. Open the cover. Important: Keep the screws attached. Sortez la balise du carton et connectez le câble. Abaissez le capot. Serrez les 4 vis (T25). Ouvrez le capot.
- Page 8 Unpack more components Déballage des autres composants Auspacken weiterer Komponenten Disimballaggio di altri componenti Desembalaje de otros componentes Retire mais componentes da embalagem أخرج من العبوة مزيد ً ا من المكونات Remove the side protection and all the tapes from the Remove the tie from media input and media output sides.
- Page 9 Open the window. Detach the two orange tapes, and pull them from the carton Open the maintenance cartidge door and remove the Remove the tape. piece and tape together. There are two carton pieces inside packaging from inside of the printer. Once removed, close the the printer.
- Page 10 Close the window. Remove the platen. Slide the edge holders onto the platen and replace it Attach the waste bottle platform to the stand. reversing the previous step. Refermez le capot. Retirez la platine. Faites glisser les guides de support sur la platine et replacez- Fixez la plate-forme de la bouteille de résidus au support.
- Page 11 Setup the Printer Configuration de l’imprimante Einrichten des Druckers Configurazione della stampante Instalación de la impresora Configure a impressora ق ٌ م بإعداد الطابعة Place the waste bottle onto the platform and insert the Move the printer to its final location. Connect LAN and power cord cables to the printer.
- Page 12 Siga as instruções do painel frontal. Agite os cartuchos de e instalar novos perfis de mídia e imprimir a partir do software RIP. Use o Guia Rápido para o treinamento de tópicos (www.hp.com/ tinta 3 litros conforme mostrado em suas embalagens.
- Page 13 The 3L accessory attempts autopurge, if it fails, the above message appears, tap OK to retry. If the problem persists, follow the front Install the cartridges and connect them. Press OK on the front panel. panel instructions. If the message doesn’t appear, the autopurge process has fully completed. Go to step 41. Installez les cartouches et procédez à...
- Page 14 If the assisted purge is successful, the startup continues normally. If not, a System Error occurs: Remove the label. Gently shake the intermediate tanks. - You can repeat the process by restarting the printer. -If unresolved, the pump may need to be purged manually with a syringe or replaced by a service engineer. Si la purge assistée est réussie, le démarrage continue normalement.
- Page 15 Install the intermediate tanks and click OK on the front Place the lockouts onto the intermediate tanks’ drawers, and Open the window. Open the printhead cover and check the setup purgers panel. stick the intermediate tank label into place. contain ink. Do not remove them yet. Close the printhead cover and the window.
- Page 16 Insert the maintenance cartridge, and push it in as far as Open the window and printhead cover. When prompted; Open the window. Make sure the ink funnel is correctly Remove the orange packaging from the printhead. positioned, if not, insert it as shown above. possible.
- Page 17 Load the substrate Chargement du substrat Laden des Druckmaterials Caricamento del supporto di stampa Carga del sustrato Carregue o substrato قم بتحميل الر كيز ة The printer will start the printhead alignment. Wait until the Install printheads from 5 to 8 (right side), close the When the printer prompts, install printheads 1 to 4.
- Page 18 Rest the roll of substrate that you want to load on the loading table. Insert the lead-edge of the substrate into the printer where Wait until the substrate emerges from the printer as shown. Note: make sure that the roll is placed correctly as shown above. shown.
- Page 19 On the front panel, select the family of the substrate roll you The printer automatically performs substrate advance If the network requires a web proxy to access the Internet, ensure you have the proxy port and proxy address information. loaded into the printer, and then press the OK button. calibration and printhead alignment.
- Page 20 If during the wizard process, you get an error on proxy test, Follow connectivity wizard to: • Enable online substrate preset searches: search and install latest presets available in the web directly from printer’s front panel press details- modify- enable proxy: use the proxy server •...
- Page 21 ) (اإلشارة الضوئيةBeacon> ) (إعدادSetup> ) (إعداداتSettings المشغ ّ ل، واستخدم الدليل السريع لموضوعات التدريب، ودعها ) إلكمال المرحلة األخيرة من التثبيتHP PrintOs Service Center( .) (تشغيلOn > ثم حدد .مثب ّ تة على جهاز الكمبيوتر للرجوع إليها مرة ً أخر...
- Page 24 النصوص الواضحة للضمان المحدود التي تصحب مثل هذه المنتجات والخدمات. ويجب عدم اعتبار أي مما ورد هنا على أنه عبارة عن ضمان مسؤولة ً عن األخطاء أو حاالت السهو الفنية أوHP إضافي. لن تكون .التحريرية المتضم ّ نة في هذه الوثيقة...