Graco TMax 506 Fonctionnement, Pièces
Table des Matières
Operation - Repair - Parts
Fonctionnement - Réparation - Pièces
Instrucciones - Reparación - Piezas
Bediening - Reparatie - Onderdelen
Betrieb - Reparatur - Teile
™
T-Max
506/657 Texture Sprayer
T-Max 506/657 Pulvérisateur à produit texturé
Pulverizador de texturas T-Max 506/657
T-Max 506/657 spuitapparaat voor structuurmateriaal
Texture-Spritzgerät T-Max 506/657
Malaysian Patent No. 08-01180-0101
Korean Patent No. 30-549220
US Patent 8,061,889
- For Water-Based Materials Only - / - Pour produits à base aqueuse uniquement - /
- Sólo para materiales de base agua - / - Alleen voor materialen op waterbasis - /
Read all warnings and instructions in this manual. Save these instructions.
Lire tous les avertissements et les instructions de ce manuel. Conservez ces instructions
Lea todas las advertencias e instrucciones de este manual. Guarde estas instrucciones
Lees alle waarschuwingen en instructies in deze handleiding. Bewaar deze instructies.
Alle Warnhinweise und Anweisungen in dieser Anleitung aufmerksam lesen. Diese Anleitung zum
späteren Nachschlagenaufbewahren.
Maximum Working Pressure / Pression maximum de service / Presión máxima de funcionamiento / Maximum werkdruk /
Zulässiger Betriebsüberdruck:
T-Max 506: 50 bar (5 MPa, 730 psi)
T-Max 657: 65 bar (6,5 MPa, 940 psi)
Models / Modèles / Modelos / Modellen / Modelle: T-Max 506/657
240V
TMax 506
255794
TMax 506
255796
TMax 506
TMax 657
255795
TMax 657
255797
TMax 657
China Patent No. ZL200830210321.X
Indian Patent No. 219464
- Nur für Materialien auf Wasserbasis -
120V
255798
255799
312891K
EN FR ES NL DE
.
ti11484a
Table des Matières
Dépannage

Manuels Connexes pour Graco TMax 506


Sommaire des Matières pour Graco TMax 506
- Page 1 Zulässiger Betriebsüberdruck: T-Max 506: 50 bar (5 MPa, 730 psi) T-Max 657: 65 bar (6,5 MPa, 940 psi) Models / Modèles / Modelos / Modellen / Modelle: T-Max 506/657 240V 120V TMax 506 255794 TMax 506 255796 TMax 506 255798...
- Page 2 Inhoudsopgave Contents Waarschuwingen ....... . 6 Warnings ........3 De onderdelen .
- Page 3 Check equipment daily. Repair or replace worn or damaged parts immediately. • Do not alter or modify equipment. • Use equipment only for its intended purpose. Call your Graco distributor for information. • Route hoses and cables away from traffic areas, sharp edges, moving parts, and hot surfaces. •...
-
Page 4: Danger Des Équipements Sous Pression
Ne pas modifier cet équipement. • N’utiliser ce matériel que pour l’usage auquel il est destiné. Pour plus de renseignements appelez votre distributeur Graco. • Écarter les flexibles et câbles électriques des zones de circulation, des bords coupants, des pièces en mouvement et des surfaces chaudes. -
Page 5: Equipo De Protección Personal
• Utilice el equipo únicamente para el fin para el que ha sido destinado. Si desea información, póngase en contacto con su distribuidor Graco. • Desvíe las mangueras de zonas de tráfico intenso, de curvas pronunciadas, de piezas movibles y superficies calientes. - Page 6 Geen veranderingen of wijzigingen in de apparatuur aanbrengen. • De apparatuur alleen voor het beoogde doel gebruiken. Neem contact op met uw Graco-leverancier voor meer informatie. • Houd slangen en kabels uit de buurt van plaatsen waar gereden wordt, scherpe randen, bewegende onderdelen en hete oppervlakken.
- Page 7 • Das Gerät nicht verändern oder modifizieren. • Das Gerät nur für den vorgesehenen Zweck verwenden. Bei Fragen dazu den Graco-Händler kontaktieren. • Die Schläuche und Kabel nicht in der Nähe von belebten Bereichen, scharfen Kanten, beweglichen Teilen oder heißen Flächen verlegen.
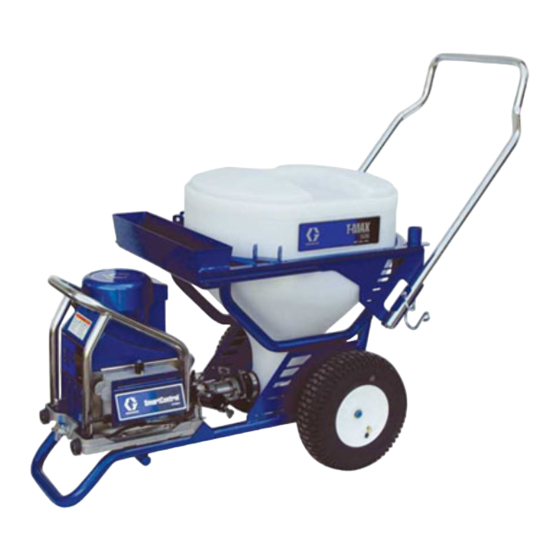
- Page 8 Component Identification / Identification des composants / Identificación de los componentes / De onderdelen / Komponenten Component Identification / Identification des composants / Identificación de los componentes / De onderdelen / Komponenten ti11690a English Français Español Nederlands Deutsch Pump module Module de pompage Módulo de la bomba Pompmodule...
- Page 9 Component Identification / Identification des composants / Identificación de los componentes / De onderdelen / Komponenten ti11817a English Français Español Nederlands Deutsch Applicator Applicateur Aplicador Spuitdeel Applikator Air nozzle, 4 mm Buse à air, 4 mm Boquilla de aire, 4 mm Luchtopening, 4 mm Luftdüse, 4 mm Applicator filter (2)
- Page 10 Operation / Fonctionnement / Funcionamiento / Bediening / Bedienung Operation / Fonctionnement / Funcionamiento / Bediening / Bedienung Setup / Réglage / Configuración / Opstellen / Systemvorbereitung ti11679a ti2707a ti11678a ti4118a ti11671a ti11730a ti11673a English Mix dry texture material Connect pump module Turn ON/OFF to OFF.
- Page 11 Startup / Mise en service / Puesta en marcha / Opstarten / Inbetriebnahme Startup / Mise en service / Puesta en marcha / Opstarten / Inbetriebnahme ti11670a ti11620a ti11676a ti11797a Spray without Air English - Fill material hopper with Add approximately10% water Prime pump.
- Page 12 Startup / Mise en service / Puesta en marcha / Opstarten / Inbetriebnahme ti2707a ti11789a ti11930a ti11697a Spray without Air English - Install filter and tip extension. Turn pump control up 1/4. Run pump until a steady Turn pump off (0). stream of material flows from material hose.
- Page 13 Startup / Mise en service / Puesta en marcha / Opstarten / Inbetriebnahme ti11788a ti11793a ti8794a ti11833a ti11790a English - Spray without Air Connect applicator Insert metal seat and Turn pump control clockwise Spray test pattern. Aim OneSeal. Insert SwitchTip. until desired material applicator at floor.
- Page 14 Startup / Mise en service / Puesta en marcha / Opstarten / Inbetriebnahme ti11714a ti11715a ti11794a ti11793a English - Spray without Air - Clear Clog Rotate SwitchTip to Clear Rotate SwitchTip to Spray position. Aim applicator at position. Turn applicator ON. floor and turn applicator ON.
- Page 15 Startup / Mise en service / Puesta en marcha / Opstarten / Inbetriebnahme ti11568a ti8793a ti11792a English - Spray without Air Clear Plugged Hose Pressure Relief Pressure Relief Fluid from pressure relief valve Do Pressure Relief. Lossen nut on bottom of pump can splash in eyes or skin and Turn pump control off.
- Page 16 Startup / Mise en service / Puesta en marcha / Opstarten / Inbetriebnahme ti4650a ti8793a ti11670a ti11676a English - Spray with Air Fill material hopper with Prime pump. mixed texture material. Place material hose Turn pump control up 1/4. in hopper. Français - Pulvérisation avec air Remplir la trémie de Amorçage de la pompe.
- Page 17 Startup / Mise en service / Puesta en marcha / Opstarten / Inbetriebnahme ti11799a ti11697a ti11800a ti11833a ti2707a English - Spray with Air Turn air valve OFF. Connect Turn applicator valve OFF. applicator to material hose and Install air nozzle. air hose.
- Page 18 Startup / Mise en service / Puesta en marcha / Opstarten / Inbetriebnahme ti11807a ti11808a ti11805a ti8794a English - Spray with Air Hold applicator over material Turn pump control clockwise Turn applicator OFF. Spray test pattern. Aim hopper and turn applicator until desired material delivery applicator at floor.
- Page 19 ti4138a Startup / Mise en service / Puesta en marcha / Opstarten / Inbetriebnahme 4 mm 6 mm 8 mm 10 mm ti11798a English - Spray with Air Adjust air valve and/or select alternative nozzle size (4 - 10 mm) for desired finish.
- Page 20 Cleanup / Nettoyage / Limpieza / Reinigen / Reinigung Cleanup / Nettoyage / Limpieza / Reinigen / Reinigung ti11732a ti11802a ti11803a ti11731a English - Storage Less than 24 HRS Do Pressure Relief, Remove applicator. Remove hose and couple Clean hopper sides to page 15.
- Page 21 Cleanup / Nettoyage / Limpieza / Reinigen / Reinigung ti11675a ti11674a ti11712a ti11850a ti11711a ti11677a English - Storage Less than 24 HRS Separate pump from Install hopper plug. Install cap on pump Install pump plug on hopper. inlet. pump outlet. Français - Entreposage durant moins de 24 heures Séparer la pompe Mettre le bouchon...
- Page 22 Cleanup / Nettoyage / Limpieza / Reinigen / Reinigung ti8794a ti11788a ti11760a ti11801a English - Storage More than 24 HRS Do Pressure Relief, Shut OFF air if spraying Turn pump control Scrape material remaining page 15. with air. Remove applicator clockwise and pump in hopper into pump to be from material hose.
- Page 23 Cleanup / Nettoyage / Limpieza / Reinigen / Reinigung ti11733a ti11672a ti8793a ti11671a ti11670a English - Storage More than 24 HRS Rotate pump control Disconnect material Insert wet cleaning ball Fill material hopper with to shut pump off. hose from pump outlet. into pump.
- Page 24 ti11788a ti4551b ti8794a ti8793a ti11833a English - Storage More than 24 HRS Rotate pump control 10 Run pump until cleaning 11 Rotate pump control 12 Connect applicator clockwise to start pump. ball exits material hose. to shut pump off. to material hose. Save cleaning ball.
- Page 25 ti8794a ti11805a ti11804a ti11670a English - Storage More than 24 HRS 13 Turn pump control 14 Run pump until clean 15 Add additional water and 16 Remove drain plug from clockwise to start pump. water flows from repeat steps 13 - 14, hopper.
- Page 26 ti8793a ti11847a ti11810a ti11811a English - Storage More than 24 HRS Caution 17 Rotate pump control 18 Clean applicator, spray 19 Clean hardened material Do not use air nozzle cleaner to shut pump off. tips and guard with from applicator nozzles to clean applicator check brush.
- Page 27 Do not use a compressor with Air Hose: 15 m of 9.5mm ID an output pressure greater than 250 psi (1.7 MPa, 17 bar). • Attach Graco 25 mm ID hose to pump outlet. Français Un compresseur pneumatique La mise en surpression de l’appareil peut L’appareil est fourni avec les flexibles suivants :...
- Page 28 Materialschlauch: 10 m mit 25 mm Innendurchmesser und Keinen Kompressor mit einem 3 m mit 19 mm Innendurchmesser Abgabedruck über 1,7 MPa (17 bar) Luftschlauch: 15 m mit 9,5 mm Innendurchmesser verwenden. • Den Graco-Schlauch mit 25 mm Innendurchmesser am Pumpenauslass anbringen. 312891K...
- Page 29 Repair / Réparation / Reparación / Repareren / Reparatur General Repair Information / Informations générales sur les réparations / Información general sobre reparación / Algemene informatie over reparaties / Allgemeine Reparaturhinweise ti11671a English • • Hose Usage: Use shortest fluid hose length Maximum fluid hose lengths: Always attach 25 mm ID hose to required for the spray application...
- Page 30 Repair / Réparation / Reparación / Repareren / Reparatur General Repair Information / Informations générales sur les réparations / Información general sobre reparación / Algemene informatie over reparaties / Allgemeine Reparaturhinweise English The system has thermal overload protection that shuts down the Quick-set materials can harden, plug passage ways and cause system if it overheats.
- Page 31 Repair / Réparation / Reparación / Repareren / Reparatur Troubleshooting Motor Won’t Operate PROBLEM CAUSE SOLUTION Basic Fluid Pressure Problems Pressure control knob setting. Motor will not run Slowly increase pressure setting to see if if at minimum setting (fully counterclockwise). motor starts.
- Page 32 Repair / Réparation / Reparación / Repareren / Reparatur Troubleshooting Low or Fluctuating Output PROBLEM CAUSE SOLUTION Low Output Worn spray tip. Follow Pressure Relief Procedure Warning, then replace tip. See your separate gun or tip manual. Verify pump does not continue to stroke when Service pump.
- Page 33 Repair / Réparation / Reparación / Repareren / Reparatur Troubleshooting Low or Fluctuating Output PROBLEM CAUSE SOLUTION Motor runs and pump strokes Material supply. Refill hopper and reprime pump. Loose fittings. Tighten; use thread sealant or sealing tape on threads if necessary. Intake valve ball and piston ball are seating Remove intake and piston valves and properly.
-
Page 34: Guide De Dépannage
Repair / Réparation / Reparación / Repareren / Reparatur Guide de dépannage Le moteur ne fonctionne pas PROBLÈME CAUSE SOLUTION Problèmes de base de pression produit Réglage du bouton de régulation de pression. Augmenter progressivement le réglage Le moteur ne fonctionnera pas si le réglage est au de la pression pour vérifier le démarrage minimum (à... -
Page 35: Dépannage
Repair / Réparation / Reparación / Repareren / Reparatur Dépannage Débit faible ou fluctuant PROBLÈME CAUSE SOLUTION Débit faible Buse usée. Toujours respecter la Mise en garde de la procédure de décompression, remplacer ensuite la buse. Se reporter au manuel traitant du pistolet ou de la buse. - Page 36 Repair / Réparation / Reparación / Repareren / Reparatur Guide de dépannage Débit faible ou fluctuant PROBLÈME CAUSE SOLUTION Le moteur et la pompe fonctionnent Alimentation en produit. Remplir la trémie et réamorcer la pompe. Raccords desserrés. Serrer ; utiliser un mastic pour filetage ou un ruban d’étanchéité...
-
Page 37: Localización De Averías
Repair / Réparation / Reparación / Repareren / Reparatur Localización de averías El motor no funciona PROBLEMA CAUSA SOLUCIÓN Problemas generales con la presión Ajuste del botón del dispositivo de control de la Aumente lentamente el valor de la presión del fluido presión. -
Page 38: Detección De Problemas
Repair / Réparation / Reparación / Repareren / Reparatur Detección de problemas Flujo bajo o fluctuante PROBLEMA CAUSA SOLUCIÓN Bajo flujo de salida La boquilla de pulverización está desgastada. Siga las indicaciones de la advertencia Procedimiento de descompresión y cambie la boquilla. - Page 39 Repair / Réparation / Reparación / Repareren / Reparatur Localización de averías Flujo bajo o fluctuante PROBLEMA CAUSA SOLUCIÓN El motor funciona y la bomba realiza Suministro de producto. Llene la tolva y cebe la bomba. un recorrido Racores flojos. Apriete;...
-
Page 40: Storingen Opsporen En Verhelpen
Repair / Réparation / Reparación / Repareren / Reparatur Storingen opsporen en verhelpen De motor werkt niet PROBLEEM OORZAAK OPLOSSING Problemen met de vloeistofdruk Controleer de instelknop van de druk. De motor Stel geleidelijk een hogere druk in om werkt niet als de knop in de minimumstand staat te zien of de motor dan start. - Page 41 Repair / Réparation / Reparación / Repareren / Reparatur Storingen opsporen en verhelpen Weinig of onregelmatige opbrengst PROBLEEM OORZAAK OPLOSSING Geringe opbrengst Versleten spuittip. Volg de Drukontlastingsprocedure en vervang dan de tip. Zie de afzonderlijke handleiding voor de tip of het pistool. Ga na dat de pomp niet blijft doorwerken Geef de pomp een servicebeurt.
- Page 42 Repair / Réparation / Reparación / Repareren / Reparatur Storingen opsporen en verhelpen Weinig of onregelmatige opbrengst PROBLEEM OORZAAK OPLOSSING De motor draait en de pomp pompt Materiaaltoevoer. De trechter bijvullen en de pomp weer inspuiten. Losse fittingen. Aandraaien; zo nodig dichtmiddel of afdichttape gebruiken op het schroefdraad.
-
Page 43: Motor Läuft Nicht
Repair / Réparation / Reparación / Repareren / Reparatur Fehlersuche Motor läuft nicht PROBLEM URSACHE LÖSUNG Allgemeine Probleme mit Druckkontrolle-Einstellung. Motor läuft nicht, Die Druckeinstellung langsam erhöhen, Flüssigkeitsdruck wenn die Druckkontrolle auf Min. gestellt ist um festzustellen, ob der Motor startet. (bis zum Anschlag gegen den Uhrzeigersinn). - Page 44 Repair / Réparation / Reparación / Repareren / Reparatur Fehlersuche Geringer oder unregelmäßiger Materialausstoß PROBLEM URSACHE LÖSUNG Geringer Materialausstoß Spritzdüse verschlissen. Warnhinweise unter "Druckentlastung" befolgen, dann die Düse auswechseln. Im Handbuch der Spritzpistole oder der Düse nachlesen. Sicherstellen, dass die Pumpe nicht weiterarbeitet, Pumpe warten.
- Page 45 Repair / Réparation / Reparación / Repareren / Reparatur Fehlersuche Geringer oder unregelmäßiger Materialausstoß PROBLEM URSACHE LÖSUNG Motor läuft und Pumpe arbeitet Materialzufuhr. Trichter auffüllen und Pumpe erneut entlüften. Fittings sind locker. Festziehen; bei Bedarf Gewindeabdichtung oder Dichtungsband an Gewinden verwenden.
- Page 46 Repair / Réparation / Reparación / Repareren / Reparatur Motor / Moteur / Motor / Motor / Motor ti11675a ti11674a ti11734a ti11737a ti11677a English Removal Separate pump from Remove four screws (240 ) Remove two screws (215) hopper. and motor cover (221). and base (201).
- Page 47 Repair / Réparation / Reparación / Repareren / Reparatur Motor / Moteur / Motor / Motor / Motor ti11736a ti11735a ti11738a English Remove four screws (219), Caution: Do not drop gear Remove three screws (216) Remove screw (245) and washers (220) and bearing cluster (217) when removing and drive housing (205).
- Page 48 Repair / Réparation / Reparación / Repareren / Reparatur Motor / Moteur / Motor / Motor / Motor ti11738a ti11737a ti11736a English Installation Caution: When installing motor, Install drive housing (205) Install bearing housing carefully align gears to avoid with three screws (216). (209) with four screws (219) Install fan (213) with screw damaging mating parts.
- Page 49 Repair / Réparation / Reparación / Repareren / Reparatur Motor / Moteur / Motor / Motor / Motor ti11679a ti11673a ti11734a ti11737a ti11678a English Install base (201) with Install motor cover (221) Connect pump module two screws (215). with four screws (240 ). to hopper and cart.
- Page 50 Repair / Réparation / Reparación / Repareren / Reparatur Control Board Diagnostics / Diagnostic de la carte de commande / Diagnóstico de la tarjeta de control / Besturingskaartdiagnose / Steuerkarten-Diagnose English Relieve pressure before Do not allow sprayer to Observe Display messages Observe LED operation performing any repairs, develop fluid pressure...
- Page 51 Repair / Réparation / Reparación / Repareren / Reparatur English DISPLAY LED BLINKS SPRAYER OPERATION INDICATES WHAT TO DO No Display Never blinks Sprayer stops. Power is not applied. Loss of power. Check power source. Relieve pressure before Sprayer must be pressurized. repair or disassembly.
- Page 52 Repair / Réparation / Reparación / Repareren / Reparatur Español FUNCIONAMIENTO DEL PANTALLA PARPADEA PULVERIZADOR INDICA QUÉ HACER No hay Nunca Pulverizador parado. No se ha Pérdida de energía. Revise la fuente de alimentación. Libere la visualización parpadea suministrado energía. El presión antes de reparar o desmontar el equipo.
- Page 53 Repair / Réparation / Reparación / Repareren / Reparatur Deutsch DISPLAY LED BLINKT SPRITZGERÄTEFUNKTION ZEIGT FOLGENDES MASSNAHME Keine Blinkt nie Spritzgerät stoppt. Kein Strom. Leistungsverlust. Spannungsquelle prüfen. Vor dem Anzeige am Spritzgerät muss druckbeaufschlagt Auseinanderbauen oder vor Reparaturarbeiten Display sein. den Druck entlasten.
- Page 54 Repair / Réparation / Reparación / Repareren / Reparatur Control Board / Carte de commande / Tarjeta de circuito impreso de control / Besturingskaart / Steuerkarte ti11737a ti11854a ti11853a English Removal Remove four screws (240) Remove four screws (237) Reference Wiring Diagram, Relieve pressure, page 15.
- Page 55 Repair / Réparation / Reparación / Repareren / Reparatur Control Board / Carte de commande / Tarjeta de control / Besturingskaart / Steuerkarte ti11855a ti11856a ti11857a ti11861a English Remove power cord (C) Remove switch board Remove ON/OFF switch Disconnect black lead from from control box (401).
- Page 56 Repair / Réparation / Reparación / Repareren / Reparatur Control Board / Carte de commande / Tarjeta de circuito impreso de control / Besturingskaart / Steuerkarte ti11865a ti11864a ti11862a ti11863a English Remove filter board (405) 10. Remove screw (409) from 11.
- Page 57 Repair / Réparation / Reparación / Repareren / Reparatur Control Board / Carte de commande / Tarjeta de control / Besturingskaart / Steuerkarte ti11863a ti11864a ti11865a ti11862a English INSTALLATION Connect motor (A), Install screw (409) through Install filter board (405) Install control board (407) thermister (B), bottom of control box.
- Page 58 Repair / Réparation / Reparación / Repareren / Reparatur Control Board / Carte de commande / Tarjeta de control / Besturingskaart / Steuerkarte ti11857a ti11857a ti11856a ti11855a English Connect black lead from Install ON/OFF switch Install switch board screw Install power cord (C) capacitor board to switch toggle boot (406).
- Page 59 Repair / Réparation / Reparación / Repareren / Reparatur Control Board / Carte de commande / Tarjeta de control / Besturingskaart / Steuerkarte ti11853a ti11854a ti11737a English Reference Wiring Diagram, 10. Connect display to control 11. Install motor cover (221) page 76.
- Page 60 Repair / Réparation / Reparación / Repareren / Reparatur Pump / Pompe / Bomba / Pomp / Pumpe ti11675a ti11674a ti11737a ti11677a English Removal Perform Storage More Separate pump from Remove four screws (240) Relieve pressure, page 15. Than 24 Hours procedure, hopper.
- Page 61 Repair / Réparation / Reparación / Repareren / Reparatur Pump / Pompe / Bomba / Pomp / Pumpe ti11867a ti11674a ti11854a ti11747a English Remove four screws (237) Disconnect transducer Slowly rotate fan blade on Pry retaining spring (249) and control cover (234). (239) from control board motor until connecting rod up on connecting rod (207).
- Page 62 Repair / Réparation / Reparación / Repareren / Reparatur Pump / Pompe / Bomba / Pomp / Pumpe ti11742a ti11674a English Loosen retaining nut (222). 10. Unscrew pump (218) from bearing housing (209). Français Desserrer l’écrou de 10. Dévisser la pompe (218) fixation (222).
- Page 63 Repair / Réparation / Reparación / Repareren / Reparatur Pump / Pompe / Bomba / Pomp / Pumpe ti11879a ti11809a ti11753a ti11742a English Installation Screw retaining nut (222) onto Tighten retaining nut (222) If pin works loose, parts could break Push piston rod (311) out pump until it stops.
- Page 64 Repair / Réparation / Reparación / Repareren / Reparatur Pump / Pompe / Bomba / Pomp / Pumpe ti11747a ti11748a ti11854a English Push retaining spring (249) Push retaining spring (249) Install transducer and strain Install control cover (234) up with a screwdriver. down over pump pin.
- Page 65 Repair / Réparation / Reparación / Repareren / Reparatur Pump / Pompe / Bomba / Pomp / Pumpe ti11679a ti11673a ti11737a ti11678a English Install motor cover (221) Connect pump module (2) with four screws (240). Français Monter le couvercle (221) Brancher le module (2) du moteur avec les de la pompe.
- Page 66 Repair / Réparation / Reparación / Repareren / Reparatur Pump Repair / Réparation de la pompe / Reparación de la bomba / De pomp repareren / Pumpenreparatur ti11740a English Note: It may be easier to leave Disassembly See Pump, Removal on Remove clamp (305) and the pump connected to the page 60 to remove pump.
- Page 67 Repair / Réparation / Reparación / Repareren / Reparatur Pump Repair / Réparation de la pompe / Reparación de la bomba / De pomp repareren / Pumpenreparatur ti11741a ti11746a ti11744a English Remove clamp (305) and Remove packing nut (312). Place end of piston rod in Inspect all parts for nicks and pump cylinder (306).
- Page 68 Repair / Réparation / Reparación / Repareren / Reparatur Pump Repair / Réparation de la pompe / Reparación de la bomba / De pomp repareren / Pumpenreparatur ti11749a ti11754a ti11755a English Assembly Install packing nut (312). Hand tighten and then tap with screw driver.
- Page 69 Repair / Réparation / Reparación / Repareren / Reparatur Pump Repair / Réparation de la pompe / Reparación de la bomba / De pomp repareren / Pumpenreparatur ti11751a ti11752a English Install clamp (305) on pump Install clamp (305) on See Pump, Installation on cylinder (306).
- Page 70 Parts / Pièces / Piezas / Onderdelen / Teile Parts / Pièces / Piezas / Onderdelen / Teile Frame / Bâti / Bastidor / Frame / Rahmen ti11717b 312891K...
- Page 71 289959 HOSE, fluid, 19 mm x 3 m coupled MODULE, power 289960 HOSE, fluid, 25 mm x 5 m coupled, 289933 TMax 506, Europe (Schuko 230V) includes 24, 25, 60 289934 TMax 506, Italy, Denmark, 289961 HOSE, fluid, 25 mm x 10m coupled,...
- Page 72 Parts / Pièces / Piezas / Onderdelen / Teile Power Module / Module d’alimentation électrique / Módulo de potencia / Voedingsmodule / Leistungsmodul ti11716a 312891K...
-
Page 73: Display Lcd
289655 120V 15U037 LABEL, TMax warning/control 277657 GUIDE, base LABEL, brand, TMax shroud HOUSING, drive 15U016 TMax 506 287294 TMax 506 15U018 TMax 657 287295 TMax 657 15B469 CORD SET, UK 100023 WASHER, flat 287720 ROD, connecting (5900) Replacement warning labels, tags and cards are ... - Page 74 Parts / Pièces / Piezas / Onderdelen / Teile Pump / Pompe / Bomba / Pomp / Pumpe Parts List / Liste des pièces / Part Description 107098 PACKING, o-ring Lista de piezas / Onderdelenlijst / 15R620 ROD, pump 248529 KIT, repair, throat seal Teileliste 501095...
-
Page 75: Part Description
Parts / Pièces / Piezas / Onderdelen / Teile Control Box / Boîtier de commande / Caja de control / Besturingskast / Steuereinheit ti7381b Part Description Part Description 289656 CONTROL, board, 240V 277228 BOX, control 289657 CONTROL, board, 120V 15G562 BUSHING, control box 120405 SCREW, mach, hex washer hd 236352 POTENTIOMETER 120165 SCREW, mach, phillips... -
Page 76: Technical Data
Wiring Diagram / Plan de câblage / Cableado / Bedradingsschema / Schaltplan Wiring Diagram / Plan de câblage / Cableado / Bedradingsschema / Schaltplan ti11841a Technical Data Parameter T-Max 506 T-Max 657 Power requirements 100 - 120 Vac, 50/60 Hz, 13A 100 - 120 Vac, 50/60 Hz, 13A 220 - 240 Vac, 50/60 Hz, 8A 220 - 240 Vac, 50/60 Hz, 8A... -
Page 77: Caractéristiques Techniques
Caractéristiques techniques Caractéristiques techniques Paramètre T-Max 506 T-Max 657 Spécification électrique 100 - 120 V CA, 50/60 Hz, 13A 100 - 120 V CA, 50/60 Hz, 13A 220 - 240 V CA, 50/60 Hz, 8A 220 - 240 V CA, 50/60 Hz, 8A HP De Moteur (W) 1.2 (900) 1.2 (900) -
Page 78: Technische Gegevens
Technische gegevens Technische gegevens Parameter T-Max 506 T-Max 657 Voedingvereisten 100 - 120 V AC, 50/60 Hz, 13A 100 - 120 V AC, 50/60 Hz, 13A 220 - 240 V AC, 50/60 Hz, 8A 220 - 240 V AC, 50/60 Hz, 8A Motor PK (W) 1.2 (900) 1.2 (900) -
Page 79: Additional Warranty Coverage
With the exception of any special, extended, or limited warranty published by Graco, Graco will, for a period of twelve months from the date of sale, repair or replace any part of the equipment determined by Graco to be defective. - Page 80 TO PLACE AN ORDER, contact your Graco distributor or call 1-800-690-2894 to identify the nearest distributor. For the latest information about Graco products, visit www.graco.com. All written and visual data contained in this document reflects the latest product information available at the time of publication.