Table des Matières

Publicité

Les langues disponibles

Les langues disponibles

Liens rapides

DIRECTIONS FOR USE
GEBRAUCHSANWEISUNG
MODE D'EMPLOI

INSTRUCCIONES DE USO

1

Publicité

Table des Matières
loading

Sommaire des Matières pour VOCO Celalux 3

  • Page 1: Instrucciones De Uso

    DIRECTIONS FOR USE GEBRAUCHSANWEISUNG MODE D’EMPLOI INSTRUCCIONES DE USO...
  • Page 2 CONTENT DIRECTIONS FOR USE ..........3 GEBRAUCHSANWEISUNG .........11 MODE D’EMPLOI ............19 INSTRUCCIONES DE USO........27...
  • Page 3 Celalux 3 Curing Light • Components Light guide Handpiece Battery pack...
  • Page 4 Celalux 3 Curing Light • Components Celalux 3 Curing Light • Quick Set-up Guide: Rubber shield Handpiece: a Light guide screw-on b Battery insertion; “Rotate while inserting” Recharging station Radiometer indicator Charging indicator Radiometer window Recharging Station: a Power cable insertion to RC Station b Power cable to wall socket Radiometer: •...
  • Page 5 Celalux 3 Curing Light • Operation at a Glance Celalux 3 Curing Light • Operation at a Glance Handpiece: Activation of Celalux 3: switch on handpiece • Adjusting light angle • Position light guide tip close to material for optimal results • Check light guide attachment, •...
  • Page 6: Table Des Matières

    Directions for Use English 2. Safety Notices The Celalux 3 is only intended for use as described in this manual. Any and all other uses constitute improper use and are the sole responsibility of the user and owner. Curing Light Safety alert symbol In this manual, this symbol alerts you to information regarding possible safety and/or personal injury hazards.
  • Page 7: Operation Instructions

    The owner is fully responsible to assure that the Celalux 3 unit is in a safe working condi- guide and use protective, light filtering eyewear (ex. glasses). tion at all times. If in doubt, do not use the unit and contact VOCO. 2. Do not stare at operating curing light. May be harmful to the eyes.
  • Page 8: General Care & Maintenance

    This warranty becomes void if repairs are undertaken by unauthorized persons. 3. Contact your dealer for further technical assistance. This warranty extends to every country where this device is supplied by VOCO or by au- The instrument communicates with several vibration signals to inform about normal or thorized representatives of VOCO products and where no import restrictions or legal regu- special operating modes.
  • Page 9: Explanation Of Symbols

    14. Contact Information power supply as the device re- input lines IEC mains in safety; no • In case of problems, please contact or e-mail VOCO. 61000-4-11 malfunctions have been detected and can be restored to Annex 1 pre-test status with the intervention of Guidance and manufacturer’s declaration –...
  • Page 11 Celalux 3 Polymerisationslampe • Komponenten Lichtleiter Handstück 2 Akkus...
  • Page 12 Celalux 3 Polymerisationslampe • Komponenten Celalux 3 Polymerisationslampe • Kurzanleitung: Blendschutz Handstück: a Lichtleiter aufschrauben b Akku einlegen; beim Einsetzen drehen Ladestation Radiometer-Anzeige Ladeanzeige Radiometer-Fenster Ladestation: a Stromkabel in Ladestation stecken b Stromkabel in Steckdose stecken Radiometer: • Grün .= OK • Rot = geringe Leistung Stromkabel...
  • Page 13 Celalux 3 Polymerisationslampe • Bedienung auf einen Blick Celalux 3 Polymerisationslampe • Bedienung auf einen Blick Handstück: Aktivierung von Celalux 3: Handstück einschalten • Lichtwinkel einstellen • Spitze des Lichtleiters nahe am Material positionieren, um ein optimales Ergebnis zu erzielen • Befestigung des Lichtleiters prüfen •...
  • Page 14: Sicherheitshinweise

    Gebrauchsanweisung Deutsch 2. Sicherheitshinweise Die Celalux 3 darf nur wie in diesem Handbuch beschrieben eingesetzt werden. Jedwede andere Nutzung gilt als unsachgemäß und liegt in der alleinigen Verantwortung des An- wenders und Eigentümers. Polymerisationslampe Symbol für Sicherheitswarnungen Dieses Symbol weist Sie auf Informationen zu möglichen Sicherheits- und/ oder Verletzungsgefahren hin.
  • Page 15: Bedienungsanleitung

    Gerät Celalux 3 jederzeit in einwandfreiem Betriebszustand befindet. Verwenden Sie die Hinweise hierzu finden Sie im Abschnitt „Fehlerbehebung“. Sobald Sie die Aus- Einheit im Zweifelsfall nicht, und wenden Sie sich an VOCO. wertung haben, können Sie den Zyklus anhalten. Das Radiometer funktioniert nur, wenn die Ladestation an die Netzversorgung angeschlossen ist VOCO empfiehlt, dieses Handbuch und dazugehörige Dokumente zusammen aufzube-...
  • Page 16: Allgemeine Pflege Und Wartung

    Gültigkeit, sobald das Gerät ohne vorherige Genehmigung durch VOCO verändert wird. 5. Die Akkus und das Handstück dürfen nicht autoklaviert werden!! Hiermit bestätigt VOCO, dass das Gerät Celalux 3 der Richtlinie 93/42 EG und den Nor- 6. Allgemeine Pflege und Wartung men IEC 60601-1 und IEC 60601 entspricht.
  • Page 17: Informationen Zur Nachbestellung

    Die Celalux 3 ist für den Betrieb in der unten angegebenen elektromagnetischen Umgebung bestimmt. Der Kunde oder Anwender von der Celalux 3 sollte sicherstellen, dass das Gerät Diese Garantie gilt für jedes Land, in dem das Gerät von VOCO oder einem autorisierten in einer solchen Umgebung betrieben wird.
  • Page 18 Maßnahmen erforderlich sein, wie z. B. eine ver- änderte Ausrichtung oder ein anderer Standort von der Celalux 3. Empfohlene Schutzabstände zwischen tragbaren und mobilen HF-Telekommunikationsgerä- ten und der Celalux 3 Dieses Produkt ist für eine Verwendung in einer elektromagnetischen Umgebung bestimmt, in der die gestrahlten HF-Störungen kontrolliert sind.
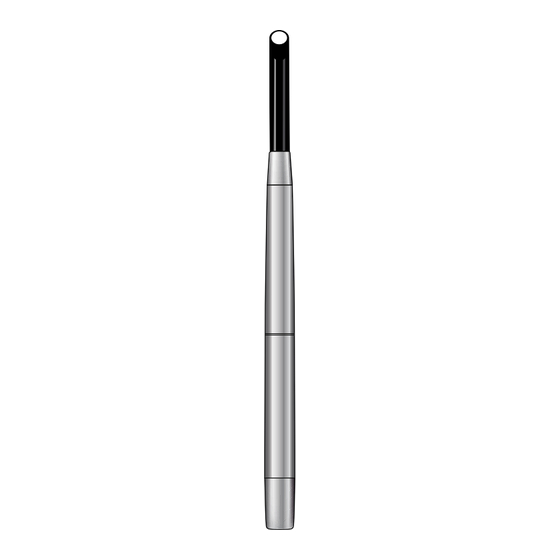
  • Page 19 Lampe de photopolymérisation Celalux 3 • Composants Guide de lumière Pièce à main 2 piles rechargeables...
  • Page 20 Lampe de photopolymérisation Celalux 3 • Composants Lampe de photopolymérisation Celalux 3 • Mode d’emploi ré- sumé : Capuchon antiéblouissant en caoutchouc Pièce à main : a Vissage du guide de lumière b Insertion de la pile rechargeable : « insérer en tournant »...
  • Page 21 Lampe de photopolymérisation Celalux 3 • Fonctionnement en Lampe de photopolymérisation Celalux 3 • Fonctionnement en bref bref Pièce à main : Pour activer Celalux 3 : mettre en marche la pièce à main • Régler l’angle de répartition lumineuse • Pour un meilleur résultat, po- sitionner la pointe du guide de lumière près du matériau •...
  • Page 22: Lampe De Photopolymérisation

    Mode d‘emploi Français 2. Consignes de sécurité La lampe Celalux 3 est destinée uniquement à l’usage décrit dans le présent mode d’em- ploi. Tout autre emploi, quel qu’il soit, est considéré non conforme et engage l’entière res- ponsabilité de l’utilisateur et du propriétaire Lampe de photopolymérisation Symbole d'avertissement Dans le présent mode d'emploi, ce symbole d'avertissement fournit des...
  • Page 23: Mode D'emploi

    Il incombe au propriétaire d’assurer que l’appareil Celalux 3 est utilisé à tout moment dans ». Arrêter le cycle une fois la mesure obtenue. Le radiomètre ne fonctionne que si le des conditions de sécurité. Au moindre doute ne pas utiliser l’appareil et contacter VOCO. chargeur est connecté à l’alimentation électrique.
  • Page 24: Entretien Et Maintenance D'ordre Général

    Vérifier régulièrement l’absence de dommages sur la lampe Celalux 3 et, si nécessaire, 8.1. Déclaration de conformité l’envoyer au service de réparation. Par la présente, VOCO déclare que le design, la structure et la version lancés sur le marché • Utiliser le radiomètre intégré pour contrôler le rendement.
  • Page 25: Informations Relatives Aux Commandes Ultérieures

    à moins que notre responsabilité ne soit automatiquement enga- gée conformément à la loi. Sauf dans les pays où la loi l’interdit, VOCO déclinera toute res- La lampe Celalux 3 est destinée à servir dans un environnement électromagnétique ponsabilité...
  • Page 26 Remarque : (P) représente la puissance nominale maximale de l’émetteur en watts (W) indiquée par le fabricant de l’émetteur, (d) correspond à l’écart de sécurité conseillé en mètres (m). Les intensités de champs émises par les émetteurs RF fixes, telles que déterminées par une étude électromagnétique du site, devraient être moins élevées que le niveau d’équivalence dans chaque plage de fréquence (b).
  • Page 27 Lámpara de polimerización Celalux 3 • Componentes Conductor óptico Pieza manual Batería...
  • Page 28 Lámpara de polimerización Celalux 3 • Componentes Lámpara de polimerización Celalux 3 • Guía de montaje rápido: Pantalla de goma Pieza manual: a Enroscar el conductor óptico b Insertar la batería; “Girar mientras se inserta” Base de carga Indicador del radiómetro Indicador de carga Ventana del radiómetro...
  • Page 29 Lámpara de polimerización Celalux 3 • Guía rápida de funcionamiento Lámpara de polimerización Celalux 3 • Guía rápida de funcionamiento Pieza manual: Activación de la Celalux 3: conectar la pieza manual • Ajustar el ángulo de la luz • Colocar el extremo del conduc- tor óptico cerca del material...
  • Page 30: Indicaciones De Seguridad

    Instrucciones de uso Español 2. Indicaciones de seguridad La Celalux 3 está destinada únicamente al uso descrito en este manual. Cualquier otro uso se considerará uso indebido y será responsabilidad exclusiva del usuario y propi- Lámpara de polimerización Símbolo de aviso de seguridad En el presente manual, este símbolo llama su atención sobre información referida a posibles peligros para la seguridad o riesgos de lesiones.
  • Page 31: Obligaciones Del Propietario

    «off» o retirarla del instrumento para cargarla. Esto es importante para la vida de la batería.for battery life. VOCO le recomienda que guarde este manual junto con los documentos asociados a él. 1. Antes de usar la Celalux 3, fijar el protector ocular al conductor óptico y 3.2.
  • Page 32: Cuidados Generales Y Mantenimiento

    • Inspeccionar periódicamente la Celalux 3 en busca de daños, y enviar al servicio de VOCO declara que el diseño, la estructura y la versión introducidos en el mercado dental reparaciones si es necesario. para la unidad descrita en el presente manual satisfacen los requisitos relevantes de se- •...
  • Page 33: Información Para Pedidos

    Queda excluida cualquier otra reclamación, incluidas aquellas por daños derivados de esta como el indicado. garantía, a menos que seamos responsables por ley. Salvo en los casos prohibidos por la ley, VOCO no será responsable por ninguna pérdida o daño que se deriven de este Ensayo de Nivel del ensayo Conformidad Orientación sobre el entorno...
  • Page 34 Celalux 3. Distancias de separación recomendadas entre los equipos de comunicación de RF portátiles y móviles y la Celalux 3 Este producto está destinado al uso en un ambiente electromagnético donde las perturba- ciones de RF estén controladas. El cliente o usuario de la Celalux 3 puede ayudar a prevenir las interferencias electromagnéticas manteniendo una distancia mínima entre la Celalux 3 y los...
  • Page 36 CAUTION • The light emitted may be harmful to the eyes • Do not stare at the light source Risk group 2 LED product VOCO GmbH Anton-Flettner-Straße 1-3 27472 Cuxhaven Germany Tel.: +49 (0)4721-719-0 Fax: +49 (0)4721-719-140 info@voco.com www.voco.com EAR 25533584...

Table des Matières