Sony UP-DP10 Mode D'emploi

Manuels Connexes pour Sony UP-DP10


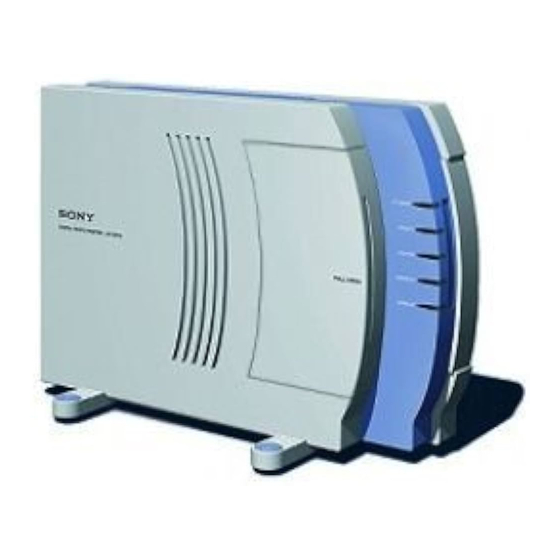
Sommaire des Matières pour Sony UP-DP10
- Page 37 AVERTISSEMENT CET APPAREIL DOIT ÈTRE RELIÉ À LA TERRE. AVERTISSEMENT Afin d’éviter tout risque d’incendie ou d’électrocution, ne pas exposer cet appareil à la pluie ou à l’humidité. Afin d’écarter tout risque d’électrocution, garder le coffret fermé. Ne confier l’entretien de l’appareil qu’à...
- Page 38 Table des matières Introduction ................39 Caractéristiques d’une imprimante photo numérique ... 39 Vérification du contenu de l’emballage ....... 39 Conditions requises .............. 40 Nomenclature ................ 41 Installation et connexion ............42 Fixation des supports à l’imprimante ........42 Branchement de l’imprimante à l’ordinateur ....... 42 Branchement de l’alimentation ..........
-
Page 39: Introduction
Introduction Caractéristiques d’une Les bourrages de papier peuvent facilement être dégagés imprimante photo numérique Si le papier est coincé, il peut facilement être dégagé en ouvrant simplement le couvercle. Impression photo de grande qualité Le processus d’impression par sublimation utilisé par cette imprimante permet d’imprimer des Vérification du contenu de images avec une bonne qualité... -
Page 40: Conditions Requises
• Au moins 30 MB d’espace disque dur Les conditions suivantes sont nécessaires pour *La connexion nécessite un câble USB avec un pouvoir utiliser le UP-DP10. connecteur mâle de type A et un connecteur mâle de type B. (Se reporter à l’illustration ci- dessous). -
Page 41: Nomenclature
Nomenclature <Vue de face> <Vue arrière> Interrupteur d’alimentation Couvercle du socle Couvercle de la cartouche ruban Port USB Témoins Port parallèle Témoin POWER Témoin PRINT Prise d’alimentation CA Témoin PAPER Témoin RIBBON Fentes de ventilation Témoin ALARM Les témoins indiquent l’état de l’imprimante en s’allumant ou en clignotant. -
Page 42: Installation Et Connexion
Installation et connexion Fixation des supports à Branchement de l’imprimante l’imprimante à l’ordinateur Remarques Les supports peuvent être fixés par des vis. Le • Avant de raccorder l’imprimante à l’ordinateur, montage des supports dépend de la position s’assurer de mettre tout d’abord hors tension d’utilisation de l’imprimante verticale ou l’imprimante, l’ordinateur, le moniteur, etc. -
Page 43: Branchement De L'alimentation
Lors de la connexion à un port Mise sous/hors tension d’imprimante Appuyer sur l’interrupteur d’alimentation pour allumer le témoin POWER. Pour éteindre, Câble d’imprimante appuyer de nouveau sur l’interrupteur. (acheté séparément) Au port d’imprimante Ordinateur avec Windows 95/98 Au port parallèle (connecteur Amphénol à... -
Page 44: Installation Du Pilote D'imprimante
Installer le pilote d’imprimante contenu dans le La fenêtre change comme ci-dessous. CD-ROM fourni avec l’imprimante. Le “pilote d’imprimante” est le logiciel qui permet d’imprimer avec la UP-DP10, utilisant la fonction d’impression d’un logiciel d’application typique. Avant d’installer le pilote d’imprimante, mettre l’ordinateur et l’imprimante hors tension et... - Page 45 Cliquer sur [Terminer]. Sélectionner l’option [Définir un La fenêtre change comme ci-dessous. emplacement], cliquer sur [Parcourir], spécifier le dossier [Win98\French] dans le CD-ROM, puis cliquer sur [Suivant]. La fenêtre change comme ci-dessous. Cliquer sur [Suivant]. La fenêtre change comme ci-dessous. Cliquer sur [Suivant].
- Page 46 Installation du pilote d’imprimante Sélectionner [Rechercher le meilleur pilote Lorsque l’imprimante est raccordée pour votre périphérique.(Recommandé).] et via un câble d’imprimante cliquer sur [Suivant]. La fenêtre change comme ci-dessous. Mettre tout d’abord l’imprimante sous tension, puis l’ordinateur. Une fois Windows 98 lancé, la fenêtre “Assistant Ajout de nouveau matériel”...
-
Page 47: Avec Windows 95
La fenêtre change comme ci-dessous. Installer le pilote d’imprimante contenu dans le CD-ROM fourni avec l’imprimante. Le “pilote d’imprimante” est le logiciel qui permet d’imprimer avec la UP-DP10, utilisant la fonction d’impression d’un logiciel d’application typique. Avant d’installer le pilote d’imprimante, mettre l’ordinateur et l’imprimante hors tension et... -
Page 48: Avec Macintosh Os
Installer le pilote d’imprimante contenu dans le La fenêtre change comme ci-dessous. CD-ROM fourni avec l’imprimante. Placer le CD-ROM “PRINTER SOFTWARE UP-DP10” dans le lecteur CD-ROM du Macintosh. L’icône “PRINTER SOFTWARE” apparaît dans le bureau. Faire un double clic sur l’icône “Driver”... -
Page 49: Préparation À L'impression
Préparation d’un pack d’impression Pour pouvoir imprimer, il est nécessaire de préparer un pack d’impression Sony (le papier d’impression et la cartouche ruban d’encre, vendus en set). Le pack d’impression Sony doit être acheté séparément. Le tableau suivant liste les types de packs d’impression Sony disponibles. -
Page 50: Remarques Sur Le Rangement Des Cartouches Ruban D'encre Et Du Papier
Préparation à l’impression • Si des photos prises avec un appareil photo numérique d’un ratio d’aspect de 2:3 (V:H) sont imprimées sur le papier du pack UPC-10P34, l’image risque de déborder sur les perforations à gauche et à droite ou bien un bord blanc risque d’apparaître en haut et en bas du papier. -
Page 51: Chargement De La Cartouche Ruban D'encre Et Du Papier D'impression
Chargement de la cartouche ruban d’encre et du papier d’impression Chargement de la cartouche ruban d’encre Remarque Ne pas toucher le ruban d’encre. Les traces de doigts sur le ruban d’encre risquent de détériorer la qualité de l’image. Retendre le mou dans le ruban d’encre en tournant dans la direction indiquée par la flèche. -
Page 52: Chargement Du Papier D'impression
Préparation à l’impression Fermer le couvercle de la cartouche ruban et s’assurer que le témoin RIBBON est éteint. Chargement du papier d’impression Remarque Ne pas toucher le ruban d’encre. Les traces de doigts sur le ruban d’encre risquent de détériorer la qualité de l’image. Ventiler la rame de papier. - Page 53 Remarques • Ne pas mettre plus de 25 feuilles à la fois sur le plateau. • Lors du chargement du papier d’alimentation dans le plateau, vérifier que tout le papier se trouve entièrement dans le plateau. • Ne pas utiliser de papier très gondolé. •...
-
Page 54: Retrait De La Cartouche Ruban D'encre Et Du Papier D'impression
Préparation à l’impression Retrait de la cartouche ruban d’encre et du papier d’impression Retrait de la cartouche ruban d’encre Ouvrir le couvercle de la cartouche ruban d’encre. Tenir la languette et tirer la cartouche vers l’extérieur. Retrait du papier d’impression Tirer le plateau d’alimentation/éjection du papier hors de l’imprimante. -
Page 55: Réglages D'imprimante À Partir De L'ordinateur
La boîte de dialogue “SONY UP-DP10 : Propriétés” possède des onglets standard pour OS et d’autres spécifiques pour UP-D10. La section suivante explique les onglets spécifiques à la UP-DP10 : [Paper] et [Graphics]. - Page 56 Réglages d’imprimante à partir de l’ordinateur < [Orientation] Sélectionner l’orientation portrait ou paysage pour l’impression entre [Portrait] et [Landscape]. < [Copies] Le nombre de copies peut être choisi dans une plage de “1” à “25”. < [Scaling] Spécifier le taux d’agrandissement/réduction. Il est possible de régler toute valeur entre 10% et 400%.
-
Page 57: Réglages De L'onglet [Graphics]
Réglages de l’onglet [Graphics] Cet onglet est utilisé pour effectuer des réglages relatifs à l’image, tel que la couleur d’impression et la clarté. Effectuer ces réglages si l’impression finale n’est pas satisfaisante ou pour des réglages avancées. Sélectionner [Digital Camera Correction], [Color Balance], [Tone Curve] ou [Sharpness] dans la liste de [Color Correction]. - Page 58 Réglages d’imprimante à partir de l’ordinateur < [Color Balance] Utiliser cet écran pour régler l’équilibrage des couleurs de l’imprimante, soit en glissant les réglettes à gauche et à droite, soit en cliquant sur [ v ] ou [ V ] ou en entrant directement une valeur par le clavier. <...
- Page 59 < [Sharpness] Utiliser cet écran pour régler l’accentuation du contour de l’image, soit en glissant les réglettes à gauche et à droite, soit en cliquant sur [ v ] ou [ V ] ou en entrant directement une valeur par le clavier. Plus la valeur du réglage augmente, plus le contour de l’image est accentué.
-
Page 60: Avec Macintosh
Avec Macintosh Sélection de UP-DP10 avec Sélecteur Cette opération avec le Sélecteur doit être effectuée à la première utilisation de la UP-DP10 et chaque fois qu’une autre imprimante a été utilisée avant la UP-DP10. Sélectionner Sélecteur dans le menu Apple. -
Page 61: Réglage De Page
Réglage de page La boîte de dialogue “Page Setup” est utilisée pour effectuer les réglages d’impression de base tel que le type de papier, la qualité d’impression, etc. S’assurer que ces réglages ont été effectués avant d’imprimer quoi que ce soit. - Page 62 Réglages d’imprimante à partir de l’ordinateur Réglages d’impression La boîte de dialogue “Print” apparaît si “Imprimer” est sélectionné dans le menu “Fichier”. Sélectionner “General” ou “Color Correction” dans le menu déroulant à côté du haut de la boîte de dialogue pour régler divers articles. Réglages “General”...
- Page 63 < “Digital Camera Correction” Sélectionner cet écran pour imprimer une image d’un appareil photo numérique pour corriger l’intensité et la saturation. • Si la case “Use Digital Camera Correction” est cochée, le traitement de correction d’image approprié à l’appareil photo numérique est appliqué à...
- Page 64 Réglages d’imprimante à partir de l’ordinateur < “Tone Curve” Il est possible de régler les valeurs de sortie par l’imprimante en fonction des valeurs d’entrée en choisissant un réglage de courbe de tonalité entre “Hard” et “Soft”. < “Sharpness” Utiliser la barre de défilement pour régler l’accentuation du contour de l’image.
- Page 65 Les articles suivants peuvent être réglés si l’option “ColorSync” est activée : • Dans le menu déroulant “Profile”, spécifier le profil de UP-DP10. • Dans le menu déroulant “Intent”, sélectionner l’un des articles suivants pour le mappage de la reproduction couleur :...
-
Page 66: Divers
Si elle ne fonctionne la section “Avertissement” (page 37). toujours pas correctement, s’adresser au magasin d’achat de l’imprimante ou au service après- vente Sony. Remarques sur l’utilisation Symptôme Cause/Remède • Si l’imprimante n’est pas utilisée pendant une longue période, retirer le plateau d’alimentation/... - Page 67 Indications d’état Symptôme Cause/Remède Bourrage • Vérifier si plus de 25 feuilles ont été L’état de l’imprimante est indiqué par les témoins de papier chargées dans le plateau POWER, PRINT, PAPER, RIBBON et ALARM d’alimentation/éjection du papier. qui s’allument ou qui clignotent. S’il y a un t Ne charger pas plus de 25 feuilles de papier dans le problème dans l’imprimante, agir en fonction de...
-
Page 68: En Cas De Bourrage De Papier
• Un problème nécessitant Tous ruban d’encre, contacter le revendeur ou le une réparation par un personnel qualifié s’est témoins service après-vente Sony le plus proche. produit. t Contacter le Retirer le papier coincé. revendeur ou le service après-vente Sony le plus proche. -
Page 69: En Cas De Rupture Du Ruban D'encre
Bande cellophane Remarques • S’il n’est pas possible de retirer le papier coincé, contacter le revendeur ou le service après-vente Sony le plus proche. • Ne pas essayer d’imprimer de nouveau alors que le papier coincé n’est pas encore dégagé. -
Page 70: Spécifications Principales
Divers Méthode d’éjection du papier Spécifications principales Ejection frontale Les feuilles sont éjectées dans l’ordre Alimentation électrique au dessus du plateau d’alimentation 100 à 120 V CA (50 Hz/60Hz) du papier Consommation électrique Cartouche ruban 1.0 A max. à 120 V CA Peut imprimer 25 feuilles Température de fonctionnement Entrées... -
Page 71: Attribution Des Broches Du Connecteur D'interface Parallèle
Attribution des broches du Interface USB connecteur d’interface parallèle Méthode de transfert de données Conforme à la révision 1.0 des Signal No. Broche spécifications de bus série universel Mode d’interface Compatible Nibble nStrobe HostClk HostClk Attribution des broches du connecteur d’interface USB Data1 (LSB) Data2 E/S Signal...