Medion LIFE E66567 Notice D'utilisation

Medion LIFE E66567 Notice D'utilisation

Radio stéréo encastrable avec bluetooth
Table des Matières

Publicité

Les langues disponibles
  • FR

Les langues disponibles

  • FRANÇAIS, page 78

Liens rapides

Stereo-Bluetooth
reo-Bluetooth
Under cabinet stereo Bluetooth
Radio stéréo encastrable avec Bluetooth
Stereo Bluetooth
Radio de cocina estéreo con Bluetooth
Radio stereo Bluetooth
sottopensile
MEDION
®
Manual de instrucciones
®
®
®
LIFE
®
E66567 (MD 43567)
Bedienungsanleitung
Notice d'utilisation
Istruzioni per l'u
Istruzioni per l'uso
-Unterbaura
-Unterbauradio
-onderbouwradio
per installazione
®
User Manual
Handleiding
radio
®
®
®

Publicité

Table des Matières
loading

Sommaire des Matières pour Medion LIFE E66567

  • Page 1 -Unterbaura ® ® Under cabinet stereo Bluetooth radio ® Radio stéréo encastrable avec Bluetooth ® Stereo Bluetooth -onderbouwradio ® Radio de cocina estéreo con Bluetooth ® Radio stereo Bluetooth per installazione ® sottopensile MEDION LIFE ® ® E66567 (MD 43567)
  • Page 2: Table Des Matières

    Inhaltsverzeichnis Informationen zu dieser Bedienungsanleitung ........3 1.1. Zeichenerklärung ....................3 Bestimmungsgemäßer Gebrauch .............. 5 Sicherheitshinweise ..................6 3.1. Eingeschränkter Personenkreis ................ 6 3.2. Betriebssicherheit ....................6 3.3. Stromversorgung ....................7 3.4. Aufstellungsort / Umgebung ................8 3.5. Reparatur ........................10 3.6.
  • Page 3 14.2. Individuelle Timer-Zeit einstellen und starten .........31 14.3. Timer-Signaltöne abschalten ................31 Reinigung ....................32 Fehlersuche ....................33 Lagerung bei Nichtbenutzung ..............34 EU Konformitätsinformation ..............34 Entsorgung ....................35 Technische Daten ..................36 Serviceinformationen ................37 Datenschutzerklärung ................40 Impressum ....................40...
  • Page 4: Informationen Zu Dieser Bedienungsanleitung

    1. Informationen zu dieser Bedienungsanleitung Vielen Dank, dass Sie sich für unser Produkt entschieden haben. Wir wünschen Ihnen viel Freude mit dem Gerät. Lesen Sie vor Inbetriebnahme die Sicherheitshinweise und die gesamte Anleitung aufmerksam durch. Beachten Sie die Warnungen auf dem Ge- rät und in der Bedienungsanleitung.
  • Page 5 Geprüfte Sicherheit BUREAU VERITAS Mit diesem Symbol gekennzeichnete Produkte erfüllen die Anforde- rungen des Produktsicherheitsgesetzes. Symbol für Gleichstrom Symbol für Wechselstrom Schutzklasse II Elektrogeräte der Schutzklasse II sind Elektrogeräte die durchge- hend doppelte und/oder verstärkte Isolierung besitzen und keine Anschlussmöglichkeiten für einen Schutzleiter haben. Das Gehäu- se eines isolierstoffumschlossenen Elektrogerätes der Schutzklasse II kann teilweise oder vollständig die zusätzliche oder verstärkte Iso- lierung bilden.
  • Page 6: Bestimmungsgemäßer Gebrauch

    2. Bestimmungsgemäßer Gebrauch Dies ist ein Gerät der Unterhaltungselektronik. Das Gerät dient der Wiedergabe von Audiomaterial, welches via Bluetooth zuge- spielt werden kann, sowie zum FM-Radioempfang. Externe Wie- dergabegeräte (z. B. MP3-Player) können über den AUX-An- schluss an das Gerät angeschlossen werden . Das Gerät verfügt zudem über eine Timerfunktion.
  • Page 7: Sicherheitshinweise

    – extrem hohe oder tiefe Temperaturen, – direkte Sonneneinstrahlung, – offenes Feuer. 3. Sicherheitshinweise 3.1. Eingeschränkter Personenkreis  Das Gerät ist nicht dafür bestimmt, durch Personen (ein- schließlich Kinder) mit eingeschränkten physischen, senso- rischen oder geistigen Fähigkeiten oder mangels Erfahrung und/oder mangels Wissen benutzt zu werden, es sei denn, sie werden durch eine für ihre Sicherheit zuständige Person be- aufsichtigt oder erhielten von ihr Anweisungen, wie das Gerät...
  • Page 8: Stromversorgung

    GEFAHR! Stromschlaggefahr! Verletzungsgefahr durch Stromschlag durch stromfüh- rende Teile. Bei diesen besteht durch unabsichtlichen Kurzschluss die Gefahr eines elektrischen Schlages oder eines Brandes.  Stellen Sie keine mit Flüssigkeit gefüllten Gefäße, wie z.B. Va- sen, auf das Gerät oder in die nähere Umgebung und schüt- zen Sie alle Teile vor Tropf- und Spritzwasser.
  • Page 9: Aufstellungsort / Umgebung

    – Um die Stromversorgung zu Ihrem Gerät zu unterbrechen, oder es gänzlich von Spannung freizuschalten, ziehen Sie den Netzadapter aus der Steckdose. – Ziehen Sie das Anschlusskabel stets am Netzadapter aus der Steckdose, ziehen Sie nicht am Kabel.  Entfernen Sie das Anschlusskabel und/oder die Batterien in einer Notsituation wie z.
  • Page 10 HINWEIS! Gefahr von Geräteschaden! Ungünstige Umgebungsbedingungen können zur Be- schädigung des Gerätes führen.  Verwenden Sie das Gerät nur in trockenen Innenräumen.  Stellen und betreiben Sie alle Komponenten auf einer stabi- len, ebenen und vibrationsfreien Unterlage, um Stürze des Gerätes zu vermeiden.
  • Page 11: Reparatur

    3.4.1. Montage Das Gerät kann unterhalb einer horizontalen Montageplatte z. B. unter einem Hängeschrank angebracht werden. WARNUNG! Brandgefahr/Kurzschlussgefahr! Durch aufsteigenden Dampf oder Hitze kann ein Kurz- schluss die Gefahr eines elektrischen Schlages oder ei- nes Brandes auslösen.  Montieren Sie das Gerät niemals oberhalb von Herdplatten oder anderen Hitze- oder Dampfquellen (wie etwa Wasserko- cher etc.).
  • Page 12 Beachten Sie hierzu folgende Hinweise:  Halten Sie neue und gebrauchte Batterien von Kindern fern. Batterien nicht verschlucken, es besteht die Gefahr einer che- mischen Verätzung. WARNUNG! Verätzungsgefahr! Die mitgelieferte Fernbedienung beinhaltet eine Knopfzellen-Batterie. Wird diese Batterie verschluckt, kann sie innerhalb von 2 Stunden ernsthafte innere Ver- ätzungen verursachen, die zum Tode führen können.
  • Page 13: Lieferumfang

     Schließen Sie Batterien nicht kurz, nehmen Sie sie nicht ausei- nander.  Werfen Sie Batterien nicht in Feuer. Es besteht Explosionsge- fahr!  Nehmen Sie ausgelaufene Batterien sofort aus der Fernbedie- nung. Reinigen Sie die Kontakte, bevor Sie neue Batterien ein- legen.
  • Page 14: Geräteübersicht

    5. Geräteübersicht 5.1. Vorderseite Call FUNC | User MO/ST | Pairing SET | MEM./AMS Vol + Timer Pre + / Alarm AOT | EQ Gerät einschalten / in den Standby-Modus schalten Im Radiobetrieb: Zwischen Mono und Stereo umschalten Im Bluetooth-Betrieb: MO/ST/Pairing Aktuelle Bluetooth-Verbindung trennen und das Unter- bauradio in den Bluetooth-Kopplungsmodus versetzen;...
  • Page 15 Drehen: Lautstärke verringern/Lautstärke erhöhen, Wert während einer Auswahl ändern - Vol + Drücken: Eine Auswahl bestätigen Im Bluetooth-Betrieb kurz drücken: Wiedergabe starten/anhalten Im Radiobetrieb gedrückt halten: Manuelle Frequenzab- stimmung Im Radio-/AUX-Betrieb: Kurz drücken: Gerät stummschalten Erneut drücken während der Stummschaltung -> Stumm- schaltung aufheben Bei einem eingehenden Anruf: Kurz drücken: Gespräch annehmen, Gespräch beenden...
  • Page 16: Rückseite

    Radio-/Bluetooth-/AUX-Betriebsmodus auswählen FUNC/User Im Radiobetrieb gedrückt halten: Benutzerauswahl (Wechsel zwischen den Senderspeichergruppen A und B) 5.2. Rückseite ANTENNA FM-Wurfantenne Anschluss Netzadapter 5.3. Fernbedienung LED-Lichtleiste ein-/ ausschalten Einstellungsmenü auf- rufen (Einstellungen: Time Set (Uhrzeit einstellen), Date Set (Datum ein- stellen), CT Update (Au- tomatische Uhrzeitsyn- chronisation an/aus), DT (Dimmer-Timer-...
  • Page 17 Eine Auswahl bestätigen Im Bluetooth-Betrieb: Wiedergabe starten/anhalten Im Radiobetrieb gedrückt halten: Manuelle Frequenzab- stimmung Im Radio-/AUX-Betrieb: Gerät stummschalten Erneut drücken während der Stummschaltung -> Stumm- schalten aufheben Bei einem eingehenden Anruf: Kurz drücken: Gespräch annehmen, Gespräch beenden Gedrückt halten: Gespräch abweisen Im Bluetooth-Betrieb: Kurz drücken: Nächsten Titel abspielen;...
  • Page 18: Montage (Hängend)

    Im Bluetooth-Betrieb: Kurz drücken: Zum Anfang des aktuellen Titels springen; 2x drücken: Vorigen Titel abspielen; Gedrückt halten: Schneller Rücklauf innerhalb eines Titels Im Radiobetrieb: Kurz drücken: Senderspeicherplatz zurück, vorige Frequenz, Gedrückt halten: Sendersuchlauf rückwärts Vol - Lautstärke verringern; absteigenden Wert während einer Auswahl wählen Gerät einschalten / in den Standby-Modus schalten 6.
  • Page 19  Setzen Sie ggf. die Abstandhalter zwischen Montagefläche und Halte- rung.  Ziehen Sie die 4 Schrauben an.  Setzen Sie das Gerät auf die Halte- zapfen der Halterung und schieben Sie das Gerät vorsichtig nach hinten, bis es einrastet. WARNUNG! Brandgefahr/Kurzschlussgefahr! Durch aufsteigenden Dampf oder Hitze kann ein Kurz-...
  • Page 20: Aufstellung (Stehend)

    6.1. Aufstellung (stehend) Sie können das Gerät alternativ zur Montage an einer Hängeschrankunterseite oder einem Regalbrett auch auf einen Tisch oder Schrank stellen, ohne es dauerhaft be- festigen zu müssen. Für diesen Zweck verfügt das Gerät über Standfüße. HINWEIS! Beschädigungsgefahr! Geräteschaden durch unsachgemäßen Umgang mit dem Gerät.
  • Page 21: Vorbereitungen Zur Inbetriebnahme

    7. Vorbereitungen zur Inbetriebnahme 7.1. Batterie in die Fernbedienung einlegen In der Fernbedienung ist eine Lithium Batterie CR2025 3V eingesetzt. Wenn Sie die Fernbedienung zum ersten Mal in Betrieb nehmen, ziehen Sie die transparente Folie mit der Beschriftung „Vor Gebrauch entfernen“ heraus, ohne das Batteriefach zu öffnen.
  • Page 22: Inbetriebnahme

    8. Inbetriebnahme  Um das Gerät in Betrieb zu nehmen, schließen Sie den mitgelieferten Netzadap- ter an der Anschlussbuchse auf der Rückseite des Gerätes an. HINWEIS! Mögliche Sachschäden Durch die Verwendung eines nicht kompatiblen Netz- adapters können Geräteschäden entstehen.  Verwenden Sie nur den mitgelieferten Netzadapter. ...
  • Page 23: Bedienung

    9. Bedienung 9.1. Gerät ein-/ausschalten  Drücken Sie die Taste , um das Gerät einzuschalten.  Drücken Sie die Taste erneut, um das Gerät in den Standby-Modus zu schal- ten. Auch in ausgeschaltetem Zustand verbraucht das Gerät eine geringe Menge Strom. Trennen Sie zum vollständigen Abschalten des Gerätes den Netzadapter vom Stromnetz.
  • Page 24: Equalizer

    9.5. Equalizer Das Radio verfügt über vorinstallierte Equalizer-Einstellungen (NORMAL, FLAT, ROCK, POP, JAZZ, CLASSIC, BASS). Die Auswahl einer Equalizer-Einstellung ist in jedem Betriebsmodus möglich.  Halten Sie die Taste A O T / E Q gedrückt oder drücken Sie die Taste E Q auf der Fernbedienung, um das Equalizer-Einstellungsmenü...
  • Page 25: Geräte Über Bluetooth Verbinden

    9.6.2. Automatischer Sendersuchlauf Das Gerät ist eingeschaltet und befindet sich im Radiobetrieb.  Halten Sie die Taste S E T / M E M . / A M S oder die Taste A M S auf der Fernbe- dienung gedrückt, um einen automatischen Sendersuchlauf zu starten. Das Radio wird automatisch nach empfangbaren Sendern (max.
  • Page 26 Informationen über die Bluetooth-Funktion Ihres Audioausgabegerätes entnehmen Sie ggf. der dazugehörigen Bedienungsanleitung. Die Kopplung der beiden Geräte ist abgeschlossen, wenn die Pairing-LED konstant blau leuchtet und das Unterbauradio einen Signalton ausgibt.  Drücken Sie die Taste M O / S T / PA I R I N G oder die Taste PA I R I N G auf der Fernbedienung, um die aktuelle Bluetooth-Verbindung zu trennen und das Unterbauradio wieder in den Bluetooth-Kopplungsmodus zu versetzen.
  • Page 27: Geräte Über Aux Anschließen

    10.1. Geräte über AUX anschließen Für den Anschluss eines externen Wiedergabegerätes (z. B. MP3-Player) benötigen Sie ein Audiokabel mit einem 3,5 mm Klinkenstecker (nicht im Lieferumfang enthal- ten).  Stellen Sie bei dem Wiedergabegerät eine mittlere Lautstärke ein und schalten Sie es anschließend aus.
  • Page 28: Datum Manuell Einstellen

     Stellen Sie mithilfe des Reglers oder der Tasten V O L + /V O L  auf der Fernbe- dienung die aktuellen Minuten ein.  Drücken Sie auf den Regler oder die Taste auf der Fernbedienung, um Ihre Einstellungen zu speichern. 11.2.
  • Page 29: Uhrzeitformat Einstellen

     Drehen Sie den Regler oder drücken Sie eine der Tasten V O L + / V O L  auf der Fernbedienung, um die gewünschte Einstellung auszuwählen: ON = Funktion aktiviert / OFF = Funktion deaktiviert.  Drücken Sie abschließend auf den Regler oder die Taste auf der Fern- bedienung, um Ihre Einstellung zu speichern.
  • Page 30  Drehen Sie den Regler oder drücken Sie eine der Tasten V O L + / V O L  auf der Fernbedienung, bis ON im Display angezeigt wird und drücken Sie erneut auf den Regler oder die Taste auf der Fernbedienung, um die Alarmzeit einzustellen.
  • Page 31: Koch-Timer-Funktion

     Drücken Sie während eines aktiven Alarms auf den Regler, um das Wecksignal nach 9 Minuten zu wiederholen (SNOOZE). 13.1.2. Alarm ausschalten  Schalten Sie das Radio in den Standby-Modus.  Drücken Sie die Taste A L A R M . Im Display wird ALARM 1 angezeigt. ...
  • Page 32: Individuelle Timer-Zeit Einstellen Und Starten

    14.2. Individuelle Timer-Zeit einstellen und starten Sie können die voreingestellten Timer-Zeiten auf allen 6 Speicherplätzen bei Bedarf beliebig verändern und neu abspeichern. Gehen Sie dazu wie folgt vor:  Drücken Sie die Taste T I M E R einmal oder mehrmals, um zwischen den vorin- stallierten Timer-Speicherplätzen (T1-T6) zu wechseln.
  • Page 33: Reinigung

    15. Reinigung GEFAHR! Stromschlaggefahr! Verletzungsgefahr durch Stromschlag durch stromfüh- rende Teile.  Ziehen Sie vor der Reinigung des Gerätes den Netz- adapter aus der Steckdose. HINWEIS! Beschädigungsgefahr! Gefahr von Geräteschaden durch unsachgemäßen Um- gang mit dem Gerät.  Verwenden Sie für die Reinigung nur ein trockenes, weiches Tuch.
  • Page 34: Fehlersuche

    16. Fehlersuche Sollte das Gerät Funktionsstörungen zeigen, kann es sein, dass eine elektrostatische Entladung stattgefunden hat.  Ziehen Sie in diesem Fall den Netzadapter aus der Steckdose.  Schließen Sie das Gerät wieder ans Stromnetz an. Das Gerät wird auf diese Wei- se zurückgesetzt.
  • Page 35: Lagerung Bei Nichtbenutzung

     Entnehmen Sie bei längerem Nichtgebrauch die Batterie aus der Fernbedienung und entfernen Sie den Netzadapter vom Gerät. 18. EU Konformitätsinformation Hiermit erklärt die MEDION AG, dass sich dieses Gerät in Übereinstim- mung mit den grundlegenden Anforderungen und den übrigen ein- schlägigen Bestimmungen befindet: •...
  • Page 36: Entsorgung

    19. Entsorgung VERPACKUNG Ihr Gerät befindet sich zum Schutz vor Transportschäden in einer Verpa- ckung. Verpackungen sind aus Materialien hergestellt, die umweltscho- nend entsorgt und einem fachgerechten Recycling zugeführt werden können. GERÄT Alle mit dem nebenstehenden Symbol gekennzeichneten Altgeräte dür- fen nicht im normalen Hausmüll entsorgt werden.
  • Page 37: Technische Daten

    Umgebungstemperatur (Lagerung): feuchtigkeit (nicht kondensierend) von max. 85% Ausgangsleistung: 2 x 5W RMS Netzadapter Hung Kay Industrial Co. Ltd. Importeur: MEDION AG Hersteller: Am Zehnthof 77 45307 Essen Deutschland HR-Nummer: HRB 13274 Modellbezeichnung: HKP15 - 0751600dV Eingangsspannung / Strom / Ein-...
  • Page 38: Serviceinformationen

    Ihre Erfahrungen austauschen und Ihr Wissen weiter- geben. Sie finden unsere Service-Community unter community.medion.com. • Gerne können Sie auch unser Kontaktformular unter www.medion.com/contact nutzen. • Selbstverständlich steht Ihnen unser Serviceteam auch über unsere Hotline oder postalisch zur Verfügung.
  • Page 39 Deutschland Österreich Öffnungszeiten Rufnummer Mo. - Fr.: 08:00 - 20:00  01 9287661 Sa.: 10:00 - 18:00 Serviceadresse MEDION Service Center Franz-Fritsch-Str. 11 4600 Wels Österreich Schweiz Öffnungszeiten Rufnummer  Mo. - Fr.: 09:00 - 19:00 0848 - 33 33 32...
  • Page 40 Luxemburg Öffnungszeiten Rufnummer  Mo. - Fr.: 09:00 - 19:00 34-20 808 664 Serviceadresse MEDION B.V. John F.Kennedylaan 16a 5981 XC Panningen Nederland Diese und viele weitere Bedienungsanleitungen stehen Ihnen über das Serviceportal www.medionservice.com zum Download zur Verfügung. Dort finden Sie auch Treiber und andere Software zu diversen Geräten.
  • Page 41: Datenschutzerklärung

    22. Datenschutzerklärung Sehr geehrter Kunde! Wir teilen Ihnen mit, dass wir, die MEDION AG, Am Zehnthof 77, D-45307 Essen als Verantwortliche Ihre personenbezogenen Daten verarbeiten. In datenschutzrechtlichen Angelegenheiten werden wir durch unseren betrieb- lichen Datenschutzbeauftragten, erreichbar unter MEDION AG, Datenschutz, Am Zehnthof 77, D-45307 Essen;...
  • Page 42 Table of Contents Information about this user manual ............43 1.1. Explanation of symbols ..................43 Proper use ....................45 Safety instructions ..................46 3.1. Restricted group of people ................46 3.2. Operating safety ....................46 3.3. Power supply ......................47 3.4. Installation location/surroundings ...............48 3.5.
  • Page 43 14.2. Setting and starting an individual timer time ..........69 14.3. Switching off the timer acoustic signals .............69 Cleaning ..................... 70 Troubleshooting ..................70 Storing the device when not in use ............71 EU Declaration of Conformity ..............71 Disposal ...................... 72 Technical specifications ................
  • Page 44: Information About This User Manual

    1. Information about this user manual Thank you for choosing our product. We hope you enjoy using this device. Please read the safety instructions and the user manual carefully before using the device for the first time. Note the warnings on the device and in the user manual.
  • Page 45 Tested safety BUREAU VERITAS Products that feature this symbol meet the requirements of the German Product Safety Act. Symbol for direct current (DC) Symbol for alternating current (AC) Protection class II Electrical devices in protection class II are devices that have double and/or reinforced insulation throughout and do not have the option of connecting a protective earth.
  • Page 46: Proper Use

    2. Proper use This is a home entertainment device. The device is used to play back audio material that can be played via Bluetooth, as well as for FM radio reception. External playback devices (e.g. MP3 players) can be connected to the device via the AUX port. The device also has a timer function.
  • Page 47: Safety Instructions

    3. Safety instructions 3.1. Restricted group of people  This device is not intended for use by people (including children) with reduced physical, sensory or mental abilities or by those without experience and/or knowledge, unless they are supervised by a person responsible for their safety or they have been instructed in its use by that person.
  • Page 48: Power Supply

     Do not place containers filled with liquid, e.g. vases, on or near the product, and protect all the parts from drips or splashes. Such containers may tip over and the liquid may impair the electrical safety of the device. ...
  • Page 49: Installation Location/Surroundings

     The mains adapter must always be easily accessible, so the device can be unplugged in an emergency. For this reason, it is important that the power socket is always easily accessible.  The device uses a small amount of electricity, even when it is switched off.
  • Page 50  When setting up the device: – Leave a sufficient gap in relation to other objects, and check that the ventilation slots are not covered in order to ensure that there is always sufficient ventilation. – Do not expose the device and mains adapter to direct sources of heat (e.g.
  • Page 51: Repairs

    3.5. Repairs DANGER! Risk of electric shock! There is a risk of electric shock due to live parts.  Check the device and the connection cable for damage before using the device for the first time, and after each use. ...
  • Page 52  Before inserting the battery, check that the contacts in the device and on the battery are clean and, if necessary, clean them.  Always use new batteries of the same type. Never use old and new batteries together.  Pay attention to the polarity (+/–) when inserting the battery. ...
  • Page 53: Package Contents

    4. Package contents DANGER! Risk of choking and suffocation! There is a risk of choking and suffocation if plastic film or small parts are breathed in or swallowed.  Keep packaging away from children.  Do not allow children to play with the packaging material.
  • Page 54: Device Overview

    5. Device overview 5.1. Front Call FUNC | User MO/ST | Pairing SET | MEM./AMS Vol + Timer Pre + / Alarm AOT | EQ Switch device on/switch to standby mode In radio mode: Switch between mono and stereo In Bluetooth mode: MO/ST/Pairing Disconnect the current Bluetooth connection and set the under cabinet radio to Bluetooth pairing mode;...
  • Page 55 Turn: decrease volume/increase volume, change value during a selection - Vol + Press: confirm selection Short press in Bluetooth mode: start/pause playback Press and hold in radio mode: Manual frequency tuning In radio/AUX mode: Short press: mute the device Press again during mute -> unmute When there is an incoming call: Short press: accept call, end call Press and hold: reject call...
  • Page 56: Rear

    Select radio/Bluetooth/AUX operating mode FUNC/User Press and hold in radio mode: user selection (switch between station memory groups A and B) 5.2. Rear ANTENNA FM wire antenna Mains adapter connection 5.3. Remote control Switch LED light strip on/off Call up settings menu (Settings: Time Set (set time), Date Set (set date), CT Update...
  • Page 57 confirm selection In Bluetooth mode: start/pause playback Press and hold in radio mode: Manual frequency tuning In radio/AUX mode: mute the device Press again during mute -> unmute When there is an incoming call: Short press: accept call, end call Press and hold: reject call In Bluetooth mode: Short press: play next track;...
  • Page 58: Hanging The Device

    Switch device on/switch to standby mode 6. Hanging the device The under cabinet radio is designed to be mounted on the underside of a wall cupboard or shelf unit. You will need 4 screws to mount the device. The size and length of the screws must match the mounting plate and bracket.
  • Page 59: Free-Standing Installation

     Place the device onto the mounting bracket retaining pins and carefully push the device back until it clicks into place. WARNING! Risk of fire/short circuit! Rising steam or heat can pose a risk of electric shock or fire if a short circuit occurs. ...
  • Page 60: Preparing For First Use

    7. Preparing for fi rst use 7.1. Inserting the battery in the remote control The remote control contains a CR2025 3 V lithium battery. When you use the remote control for the first time, pull out the transparent strip marked “Remove before use” without opening the battery compartment.
  • Page 61: Getting Started

    8. Getting started  To start up the device, connect the supplied mains adapter to the connection socket at the back of the device. NOTICE! Possible material damage Using a non-compatible mains adapter may damage the device.  Use only the mains adapter supplied. ...
  • Page 62: Switch Led Light Strip On/Off

    9.3. Switch LED light strip on/off There is an LED light strip on the underside of the radio.  Press the button to switch the light strip on or off. The LED light strip switches off automatically after a period of 120 minutes.
  • Page 63 9.6.1. Manual station search  Press and hold the button to change the frequency upwards.  Press and hold the button to change the frequency downwards.  To save the set radio frequency, press the SET/MEM./AMS button once or the MEM button on the remote control.
  • Page 64: Connecting Devices Via Bluetooth

    9.6.4. Preset station selector  Use the buttons to switch between the stored radio stations. If necessary, adjust the wire antenna for optimum reception. 10. Connecting devices via Bluetooth®  Press the button to switch on the under cabinet radio. ...
  • Page 65: Connecting Devices Using The Aux Connection

    10.6.3. Telephone calls When a call is received, the call LED flashes green.  Press the controller or the button on the remote control to accept an incoming call. The call LED lights up green and the call is accepted. During the call, music playback is muted.
  • Page 66: Setting The Time Manually

    11.1. Setting the time manually  In the settings menu, select the TIME SET subitem and confirm your selection by pressing the controller or the button on the remote control. The hour indicator flashes on the display.  Use the controller or the VOL+ / VOL buttons on the remote control to set the current hour.
  • Page 67: Dimmer Timer Function

    11.4. Dimmer timer function When the dimmer timer function is activated, the display lighting of your radio is automatically dimmed between 11 pm and 6 am. Proceed as follows to switch the dimmer timer function on or off:  In the settings menu, select the DT subitem and confirm your selection by pressing the controller or the button on the remote control.
  • Page 68: Setting The Alarm Time

    13.1. Setting the alarm time  Switch the radio to standby mode.  Press the ALARM button. ALARM 1 is shown on the display.  Turn the controller or press one of the VOL+ / VOL buttons on the remote control to switch between ALARM 1 and ALARM 2, then press the controller or the button on the remote control to select the respective alarm.
  • Page 69: Cooking Timer Function

    13.1.1. Interrupting/ending an active alarm When the set alarm time is reached, the radio switches on or acoustic signals sound, depending on the selected option.  During an active alarm, press any button on the left side of the display or any button on the remote control to stop the alarm until the next programmed time.
  • Page 70: Setting And Starting An Individual Timer Time

     Press the TIMER button during an active timer to display the remaining timer time. 14.2. Setting and starting an individual timer time You can change the preset timer times on all 6 memory slots as required and save them again. To do so, proceed as follows: ...
  • Page 71: Cleaning

    15. Cleaning DANGER! Risk of electric shock! Risk of injury from electric shock due to live parts.  Unplug the mains adapter from the socket before you start cleaning the device. NOTICE! Risk of damage! Risk of damage to the device due to improper use of the device.
  • Page 72: Storing The Device When Not In Use

     If the device is not to be used for a long period, remove the battery from the remote control, and disconnect the mains adapter from the device. 18. EU Declaration of Conformity MEDION AG hereby declares that this device complies with the fundamental requirements and the other relevant provisions of: •...
  • Page 73: Disposal

    19. Disposal PACKAGING Your device has been packaged to protect it from damage in transit. The packaging is made of materials that can be recycled in an environmentally friendly manner. DEVICE Old devices that carry the symbol illustrated may not be disposed of in ordinary household waste.
  • Page 74 Mains adapter Hung Kay Industrial Co. Ltd. Importer: MEDION AG Manufacturer: Am Zehnthof 77 45307 Essen Germany HR number: HRB 13274 Model name: HKP15 - 0751600dV Input voltage/current/input AC 100–240 V ~ 50/60 Hz, 0.4 A max frequency: Output voltage/current: 7.5 V...
  • Page 75: Service Information

    In our Service-Community, you can meet other users, as well as our staff, and you can exchange your experiences and pass on your knowledge there. You will find our Service-Community at community.medion.com. • Alternatively, use our contact form at www.medion.com/contact.
  • Page 76: Privacy Statement

    22. Privacy statement Dear customer, We wish to inform you that we, MEDION AG, Am Zehnthof 77, D-45307 Essen, Germany process your personal data as a data controller. For matters regarding data protection, we are supported by our company data protection officer who can be contacted at MEDION AG, Datenschutz, Am Zehnthof 77, D-45307 Essen;...
  • Page 77: Legal Notice

    These operating instructions are protected by copyright. Mechanical, electronic and any other forms of reproduction are prohibited without the written permission of the manufacturer. Copyright is owned by the company: MEDION AG Am Zehnthof 77 45307 Essen Germany Please note that you cannot use the address above for returns. Please always...
  • Page 78 Sommaire Informations concernant la présente notice d’utilisation ...... 79 1.1. Explication des symboles .................79 Utilisation conforme .................. 81 Consignes de sécurité................82 3.1. Catégorie de personnes restreinte ...............82 3.2. Sécurité de fonctionnement ................83 3.3. Alimentation électrique ..................83 3.4. Lieu d’installation/environnement ...............85 3.5.
  • Page 79 14.1. Affichage et démarrage des temps de minuterie pré-installés ..107 14.2. Réglage et démarrage d’un temps de minuterie individuel .... 107 14.3. Désactivation des signaux sonores de la minuterie ......108 Nettoyage ....................108 Recherche d’erreurs ................. 109 Stockage en cas de non-utilisation ............110 Information relative à...
  • Page 80: Informations Concernant La Présente Notice D'utilisation

    1. Informations concernant la présente notice d’utilisation Merci d’avoir choisi notre produit. Nous vous souhaitons une bonne uti- lisation. Veuillez lire attentivement les consignes de sécurité et la notice d’uti- lisation dans son intégralité avant la mise en service du produit. Tenez compte des avertissements figurant sur l’appareil et dans la notice d’utilisation.
  • Page 81 Sécurité contrôlée BUREAU VERITAS Les produits portant ce symbole répondent aux exigences de la loi sur la sécurité des produits. Symbole de courant continu Symbole de courant alternatif Classe de protection II Les appareils électriques de la classe de protection II sont des appa- reils électriques qui possèdent une isolation double continue et/ou renforcée et qui ne présentent pas de possibilité...
  • Page 82: Utilisation Conforme

    2. Utilisation conforme Ce produit est un appareil électronique grand public. L’appa- reil sert à la lecture de matériel audio qui peut être transmis via Bluetooth et à la réception radio FM. Les périphériques de lec- ture externes (p. ex. lecteurs MP3) peuvent être connectés à l’ap- pareil via la prise AUX.
  • Page 83: Consignes De Sécurité

     N’exposez pas l’appareil à des conditions extrêmes. À éviter : – humidité de l’air élevée ou exposition à l’eau, – températures extrêmement hautes ou basses, – ensoleillement direct, – flamme nue. 3. Consignes de sécurité 3.1. Catégorie de personnes restreinte ...
  • Page 84: Sécurité De Fonctionnement

    3.2. Sécurité de fonctionnement  Avant chaque utilisation, vérifiez que l’appareil et le bloc d’ali- mentation ne sont pas endommagés. N’utilisez pas une radio ou un bloc d’alimentation défectueux ou endommagé. DANGER ! Risque d’électrocution ! Risque de blessure par électrocution par des pièces sous tension.
  • Page 85  Laissez impérativement la prise de courant libre d’accès à tout moment afin de pouvoir débrancher librement la fiche d’ali- mentation. Certaines pièces de l’appareil restent sous tension, même lorsque l’appareil est éteint. – Pour couper votre appareil de l’alimentation électrique et le mettre complément hors tension, débranchez l’adapta- teur secteur de la prise de courant.
  • Page 86: Lieu D'installation/Environnement

    3.4. Lieu d’installation/environnement DANGER ! Risque d’électrocution ! En cas de fortes variations de température ou d’humi- dité, il est possible que de l’humidité par condensa- tion se forme dans l’appareil, ce qui peut provoquer un court-circuit électrique.  Après le transport de l’appareil, attendez que celui-ci soit à température ambiante avant de le mettre en service.
  • Page 87: Réparation

    – ne pas plier ni tendre trop fortement le cordon d’alimenta- tion. 3.4.1. Montage L’appareil peut être monté sous une plaque de montage hori- zontale, p. ex. sous une armoire murale. AVERTISSEMENT ! Risque d’incendie/de court-circuit ! La vapeur ou la chaleur s’échappant d’un appareil peut provoquer un court-circuit et donc entraîner un risque de choc électrique ou d’incendie.
  • Page 88: Manipulation Des Piles

    3.6. Manipulation des piles La télécommande de cet appareil fonctionne avec une pile. Veuillez respecter les consignes suivantes :  Conservez les piles neuves et usagées hors de portée des en- fants. N’avalez en aucun cas les piles, vous vous exposeriez à un risque de brûlure chimique.
  • Page 89: Contenu De La Livraison

     Stockez les piles dans un endroit frais et sec. Les piles sou- mises à une forte source de chaleur directe peuvent être endommagées. N’exposez donc pas l’appareil à de fortes sources de chaleur.  Ne court-circuitez pas les piles et ne les démontez pas. ...
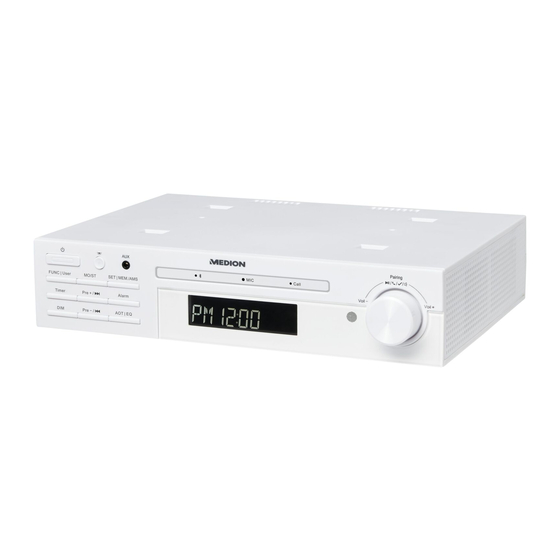
  • Page 90: Vue D'ensemble De L'appareil

    5. Vue d’ensemble de l’appareil 5.1. Face avant Call FUNC | User MO/ST | Pairing SET | MEM./AMS Vol + Timer Pre + / Alarm AOT | EQ Mise en marche/en mode veille de l’appareil En mode radio : basculer entre mono et stéréo En mode Bluetooth : MO/ST/Pairing désactiver la connexion Bluetooth actuelle et mettre...
  • Page 91 Support Tourner : diminuer/augmenter le volume, changer la valeur pendant une sélection - Vol + Appuyer : confirmer une sélection Appui bref en mode Bluetooth : démarrer/arrêter la lecture Appui long en mode radio : Réglage manuel de la fré- quence En mode radio/AUX : Appui bref : mettre l’appareil en sourdine Appui pendant la mise en sourdine ->...
  • Page 92: Face Arrière

    Allumer/éteindre le rétro-éclairage de l’écran Sélectionner l’emplacement mémoire de la minuterie de Timer cuisine (T1-T6) Sélectionner le mode radio/Bluetooth/AUX FUNC/User Appui long en mode radio : sélectionner l’utilisateur (bas- cule entre les groupes de mémoire des stations A et B) 5.2. Face arrière ANTENNA Antenne FM filaire Prise pour adaptateur secteur...
  • Page 93: Télécommande

    5.3. Télécommande Activation/désactiva- tion de la barre d’éclai- rage LED Afficher le menu de configuration (réglages : Time Set (ré- glage de l’heure), Date Set (réglage de la date), CT Update (activation/ désactivation de la syn- chronisation automa- tique de l’heure), DT (activation/désactiva- tion de la variation pro- grammée de la lumino-...
  • Page 94 Appui longen mode radio : effectuer une recherche auto- matique des stations En mode Bluetooth : désactiver la connexion Bluetooth actuelle et mettre Pairing la radio à suspendre en mode de couplage ; rétablir la connexion du périphérique de sortie audio connecté en dernier via Bluetooth programmer la minuterie de veille (AOT - minuterie d’arrêt automatique)
  • Page 95: Montage (Suspendu)

    6. Montage (suspendu) La radio à suspendre est conçue pour être fixée sur le dessous d’un élément haut ou d’une étagère. Pour la fixer, vous avez besoin de 4 vis. La taille et la longueur des vis doivent correspondre à la plaque de montage et au support. Si les portes de votre élément haut ne sont pas dans l’alignement de l’élément, vous aurez également besoin des écarteurs fournis pour le montage, afin de pouvoir ou- vrir la porte de votre élément sans problème.
  • Page 96: Pose (À La Verticale)

    AVERTISSEMENT ! Risque d’incendie/de court-circuit ! La vapeur ou la chaleur s’échappant d’un appareil peut provoquer un court-circuit et donc entraîner un risque de choc électrique ou d’incendie.  Ne montez jamais l’appareil au-dessus de plaques de cuisson ou d’autres sources de chaleur ou de vapeur (comme une bouilloire électrique, etc.).
  • Page 97: Préparations Pour La Mise En Service

    7. Préparations pour la mise en service 7.1. Insertion de la pile dans la télécommande Une pile lithium CR2025 de 3 V est déjà insérée dans la télécommande. Lorsque vous utilisez la télécommande pour la première fois, enlevez le film transparent portant l’inscription « À retirer avant utilisation » sans ouvrir le compartiment à...
  • Page 98: Mise En Marche

    8. Mise en marche  Pour mettre l’appareil en marche, branchez l’adaptateur secteur fourni sur la prise à l’arrière de l’appareil. AVIS ! Dommages matériels possibles L’utilisation d’un adaptateur secteur non compatible peut entraîner l’endommagement de l’appareil.  Utilisez uniquement l’adaptateur secteur fourni. ...
  • Page 99: Utilisation

    9. Utilisation 9.1. Mise en marche/arrêt de l’appareil  Appuyez sur la touche pour allumer l’appareil.  Appuyez à nouveau sur la touche pour mettre l’appareil en mode veille. L’appareil consomme une faible quantité de courant même lorsqu’il est éteint. Pour éteindre complètement l’appareil, débranchez l’adaptateur secteur de la prise.
  • Page 100: Fonctionnement De La Radio

     Maintenez la touche AOT/EQ enfoncée ou appuyez sur la touche EQ de la té- lécommande pour ouvrir le menu de configuration de l’égaliseur.  Tournez le bouton de réglage ou appuyez plusieurs fois sur la touche EQ de la télécommande pour sélectionner un réglage de l’égaliseur.
  • Page 101: Connexion De Périphériques Via Bluetooth

    La radio recherche automatiquement les stations disponibles (32 stations maxi- mum) et les enregistre dans le groupe de mémoire A. Les emplacements mémoire précédemment attribués manuellement sont écrasés. 9.6.3. Réglage manuel de la fréquence Outre la recherche automatique de stations (AMS) et la recherche manuelle de stations, il est possible de régler manuellement la fréquence d’une station radio.
  • Page 102 Vous trouverez le cas échéant dans la notice d’utilisation correspon- dante des informations sur la fonction Bluetooth de votre périphérique de sortie audio. Le couplage des deux appareils est terminé lorsque la LED de couplage reste allu- mée en bleu et que la radio à suspendre émet un signal sonore. ...
  • Page 103: Raccordement De Périphériques Via Aux

    10.1. Raccordement de périphériques via AUX Pour connecter un périphérique de lecture externe (p. ex. lecteur MP3), vous avez besoin d’un câble audio avec une prise jack de 3,5 mm (non compris dans la livrai- son).  Réglez le périphérique de lecture à un volume moyen, puis éteignez-le. ...
  • Page 104: Réglage Manuel De La Date

     Réglez les minutes actuelles à l’aide du bouton de réglage ou des touches VOL+/VOL de la télécommande.  Appuyez sur le bouton de réglage ou sur la touche de la télécom- mande pour enregistrer vos réglages. 11.2. Réglage manuel de la date ...
  • Page 105: Fonction De Variation Programmée De La Luminosité

    11.4. Fonction de variation programmée de la luminosité Si la fonction de variation programmée de la luminosité est activée, l’éclairage de l’écran de votre radio est automatiquement réduit entre 23 heures et 6 heures du matin. Pour activer ou désactiver la variation programmée de la luminosité, procédez comme suit : ...
  • Page 106: Fonction D'alarme

    13. Fonction d’alarme Vous avez la possibilité de programmer deux heures d’alarme (AL1 et AL2) pro- grammées indépendamment l’une de l’autre. 13.1. Réglage de l’heure de l’alarme  Mettez la radio en mode veille.  Appuyez sur la touche ALARM. Sur l’écran, ALARM 1 s’affiche. ...
  • Page 107: Fonction Minuterie De Cuisine

    L’alarme programmée est maintenant active et est indiquée par AL1 / AL2 sur l’écran. Le type de réveil radio a une durée d’alarme de 60 minutes, les signaux sonores retentissent pendant 10 minutes. 13.1.1. Interruption/arrêt d’une alarme active Lorsque l’heure d’alarme programmée est atteinte, la radio s’allume ou des signaux sonores retentissent selon l’option sélectionnée.
  • Page 108: Affichage Et Démarrage Des Temps De Minuterie Pré-Installés

    14.1. Affi chage et démarrage des temps de minuterie pré-installés  Appuyez une ou plusieurs fois sur la touche TIMER pour basculer entre les temps de minuterie pré-installés suivants (T1-T6) : T1 = 5 minutes • T2 = 10 minutes • T3 = 15 minutes •...
  • Page 109: Désactivation Des Signaux Sonores De La Minuterie

     Appuyez sur la touche TIMER, lorsque la minuterie est active, pour afficher le temps restant de la minuterie. 14.3. Désactivation des signaux sonores de la minuterie  Appuyez sur le bouton de réglage ou sur la touche TIMER pour désactiver les si- gnaux sonores de la minuterie active.
  • Page 110: Recherche D'erreurs

    16. Recherche d’erreurs Si l’appareil présente des dysfonctionnements, il se peut qu’une décharge électros- tatique se soit produite.  Débranchez pour ce faire l’adaptateur secteur de la prise de courant.  Puis rebranchez l’appareil sur le secteur. L’appareil est ainsi réinitialisé. PROBLÈME CAUSE POSSIBLE SOLUTION...
  • Page 111: Stockage En Cas De Non-Utilisation

     Si vous n’utilisez pas l’appareil pendant une période prolongée, retirez les piles de la télécommande et débranchez l’adaptateur secteur de l’appareil. 18. Information relative à la conformité UE Par la présente, MEDION AG déclare que cet appareil est conforme aux exigences essentielles et aux autres réglementations pertinentes : •...
  • Page 112: Caractéristiques Techniques

    0 °C à +40 °C pour une humidité relative Température ambiante (stockage) : de 85 % max. (sans condensation) Puissance de sortie : 2 x 5 W RMS Adaptateur secteur Hung Kay Industrial Co. Ltd. Importateur : MEDION AG Fabricant : Am Zehnthof 77 45307 Essen Allemagne Numéro HR : HRB 13274 Modèle : HKP15 - 0751600dV Tension/courant d’entrée/fréquence...
  • Page 113 Adaptateur secteur Puissance de sortie : 12,0 W Efficacité moyenne en fonctionne- 83,18 % ment : Efficacité à charge faible (10 %) : 77,80 % Consommation à charge nulle : 0,06 W Type de protection : Classe de protection II BUREAU VERITAS Radio Bande FM : 87,5 – 108 MHz Nombre d’emplacements mémoire 64 (2 x 32) pour les stations : Antenne FM : Antenne filaire intégrée à...
  • Page 114: Informations Relatives Au Service Après-Vente

    Au sein de notre Service-Community, vous pouvez discuter avec d’autres utili- sateurs ainsi qu’avec nos collaborateurs pour partager vos expériences et vos connaissances. Vous pouvez accéder à notre Service-Community ici : community.medion.com. • Vous pouvez également utiliser notre formulaire de contact disponible ici : www.medion.com/contact.
  • Page 115 Belgique Horaires d’ouverture Hotline SAV  Lun - Ven : 9h00 à 19h00 02 - 200 61 98 Adresse du service après-vente MEDION B.V. John F.Kennedylaan 16a 5981 XC Panningen Nederland Luxembourg Horaires d’ouverture Hotline SAV  Lun - Ven : 9h00 à 19h00 34 - 20 808 664 Adresse du service après-vente...
  • Page 116: Déclaration De Confidentialité

    à la loi fédérale alle- mande sur la protection des données (BDSG)). En cas de recours auprès de MEDION AG, adressez-vous au responsable de la protection des données et de la liberté d’in- formation de Rhénanie-du-Nord-Westphalie, Postfach 200444, 40212 Düsseldorf,...
  • Page 117: Mentions Légales

    La présente notice d’utilisation est protégé par les droits d’auteur. Toute reproduction sous forme mécanique, électronique ou sous toute autre forme que ce soit est interdite sans l’autorisation préalable écrite du fabricant. L’entreprise suivante possède les droits d’auteur : MEDION AG Am Zehnthof 77 45307 Essen Allemagne Veuillez noter que l’adresse ci-dessus n’est pas celle du service des retours.
  • Page 118 Inhoudsopgave Informatie over deze gebruiksaanwijzing ..........119 1.1. Betekenis van de symbolen ................119 Gebruiksdoel .................... 121 Veiligheidsvoorschriften ................ 122 3.1. Personen die het apparaat niet mogen gebruiken ......122 3.2. Veilig gebruik ..................... 123 3.3. Stroomvoorziening ..................123 3.4. Plaats van opstelling / omgeving ...............
  • Page 119 14.2. Individuele timertijd instellen en starten ..........146 14.3. Timergeluidssignalen uitschakelen ............147 Reiniging ....................147 Problemen oplossen ................148 Opslag bij niet-gebruik ................149 EU-conformiteitsinformatie ..............149 Afvalverwerking ..................149 Technische gegevens ................150 Service-informatie ................... 152 Privacy statement ..................153 Colofon .....................
  • Page 120: Informatie Over Deze Gebruiksaanwijzing

    1. Informatie over deze gebruiksaanwijzing Hartelijk dank dat u voor ons product hebt gekozen. Wij wensen u veel plezier met het apparaat. Lees de veiligheidsvoorschriften en de volledige gebruiksaanwijzing aandachtig door voordat u het apparaat in gebruik neemt. Neem de waarschuwingen op het apparaat en in de gebruiksaanwijzing in acht.
  • Page 121 Geteste veiligheid BUREAU VERITAS Producten die zijn gemarkeerd met dit symbool, voldoen aan de eisen van de Duitse wet op de productveiligheid. Symbool voor gelijkstroom Symbool voor wisselstroom Veiligheidsklasse II Elektrische apparaten van veiligheidsklasse II zijn elektrische apparaten die zijn voorzien van een dubbele en/of extra sterke isolatie en geen aansluitmogelijkheden hebben voor een aardleiding.
  • Page 122: Gebruiksdoel

    2. Gebruiksdoel Dit apparaat behoort tot de consumentenelektronica. Het apparaat dient voor het afspelen van audiomateriaal via bluetooth en voor het ontvangen van FM-radio. Externe afspeelapparaten (bijvoorbeeld mp3-spelers) kunnen via de AUX-aansluiting op het apparaat worden aangesloten. Het apparaat beschikt verder over een timerfunctie. Het apparaat is uitsluitend bedoeld voor particulier gebruik en niet voor industrieel/commercieel gebruik.
  • Page 123: Veiligheidsvoorschriften

     Gebruik het apparaat niet in de openlucht.  Stel het apparaat niet bloot aan extreme omstandigheden. Vermijd: – hoge luchtvochtigheid of vocht; – extreem hoge en lage temperaturen; – direct zonlicht; – open vuur. 3. Veiligheidsvoorschriften 3.1. Personen die het apparaat niet mogen gebruiken ...
  • Page 124: Veilig Gebruik

    3.2. Veilig gebruik  Controleer het apparaat en de netadapter vóór gebruik op beschadigingen. Een defecte of beschadigde radio of netadapter mag niet worden gebruikt. GEVAAR! Gevaar voor een elektrische schok! Gevaar voor letsel als gevolg van een elektrische schok door stroomvoerende onderdelen.
  • Page 125  Zorg ervoor dat het stopcontact altijd vrij toegankelijk is, zodat de stekker moeiteloos uit het stopcontact kan worden getrokken. Ook als het apparaat is uitgeschakeld, staan onderdelen ervan onder spanning. – Onderbreek de stroomvoorziening van het apparaat of schakel alle spanning uit door de netadapter uit het stopcontact te trekken.
  • Page 126: Plaats Van Opstelling / Omgeving

    3.4. Plaats van opstelling / omgeving GEVAAR! Gevaar voor een elektrische schok! Bij grote schommelingen in temperatuur of luchtvochtigheid kan er door condensatie vocht in het apparaat terechtkomen, waardoor er kortsluiting kan ontstaan.  Neem het apparaat nadat het is vervoerd pas weer in gebruik als het de omgevingstemperatuur heeft aangenomen.
  • Page 127: Reparatie

    – het netsnoer niet onder trekspanning staat en niet is geknikt. 3.4.1. Montage Het apparaat kan worden gemonteerd onder een horizontale montageplaat, bijvoorbeeld onder een hangkast. WAARSCHUWING! Brandgevaar / gevaar voor kortsluiting! Door opstijgende damp of hitte bestaat gevaar voor een elektrische schok of brand door kortsluiting.
  • Page 128: Omgaan Met Batterijen

    3.6. Omgaan met batterijen De afstandsbediening van dit apparaat werkt op een batterij. Neem de volgende aanwijzingen in acht:  Houd nieuwe en gebruikte batterijen uit de buurt van kinderen. Slik batterijen niet in, er bestaat gevaar voor chemische verbranding. WAARSCHUWING! Gevaar voor brandwonden! De meegeleverde afstandsbediening is voorzien...
  • Page 129  Bewaar batterijen op een koele, droge plaats. Door de directe invloed van hevige warmte kunnen de batterijen beschadigd raken. Stel het apparaat daarom niet bloot aan sterke warmtebronnen.  Voorkom dat de batterijen kortsluiting maken en haal ze niet uit elkaar.
  • Page 130: Omvang Van De Levering

    4. Omvang van de levering GEVAAR! Verstikkingsgevaar! Er bestaat verstikkingsgevaar door het inademen of inslikken van folie of kleine onderdelen.  Houd verpakkingen buiten het bereik van kinderen.  Laat kinderen niet met het verpakkingsmateriaal spelen.  Verpakkingsmateriaal is geen speelgoed! ...
  • Page 131: Overzicht Van Het Apparaat

    5. Overzicht van het apparaat 5.1. Voorkant Call FUNC | User MO/ST | Pairing SET | MEM./AMS Vol + Timer Alarm Pre + / AOT | EQ Apparaat inschakelen / in stand-bymodus zetten In radiomodus: Omschakelen tussen mono en stereo In bluetoothmodus: MO/ST/Pairing Huidige bluetoothverbinding verbreken en...
  • Page 132 Draaien: volume verlagen /volume verhogen, waarde veranderen tijdens selectie - Vol + Indrukken: een keuze bevestigen In bluetoothmodus kort indrukken: Afspelen starten/onderbreken In radiomodus ingedrukt houden: handmatige afstemming van de frequentie In radio-/AUX-modus: Kort indrukken: apparaat dempen Opnieuw indrukken tijdens dempen -> dempen opheffen Bij een inkomende oproep: Kort indrukken: gesprek aannemen, gesprek beëindigen Ingedrukt houden: oproep weigeren...
  • Page 133: Achterkant

    Timer Geheugenplaats kooktimer (T1-T6) selecteren Radio-/bluetooth-/AUX-modus selecteren FUNC/User In radiomodus ingedrukt houden: gebruiker selecteren (schakelen tussen geheugenplaatsgroep A en B) 5.2. Achterkant ANTENNA FM-draadantenne Aansluiting netadapter 5.3. Afstandsbediening Ledlichtstrip in-/ uitschakelen Instellingen openen (instellingen: Time Set (tijd instellen), Date Set (datum instellen), CT Update (automatische tijdsynchronisatie...
  • Page 134 Een keuze bevestigen In bluetoothmodus: afspelen starten/onderbreken In radiomodus ingedrukt houden: handmatige afstemming van de frequentie In radio-/AUX-modus: apparaat dempen Opnieuw indrukken tijdens dempen -> dempen opheffen Bij een inkomende oproep: Kort indrukken: gesprek aannemen, gesprek beëindigen Ingedrukt houden: oproep weigeren In bluetoothmodus: Kort indrukken: volgend nummer afspelen Ingedrukt houden: snel vooruitspoelen binnen een...
  • Page 135: Montage (Hangend)

    In bluetoothmodus: Kort indrukken: naar begin van huidige nummer gaan 2x indrukken: vorig nummer afspelen Ingedrukt houden: snel terugspoelen binnen een nummer In radiomodus: Kort indrukken: geheugenplaats terug, vorige frequentie Ingedrukt houden: zenders zoeken achteruit Vol - Volume verlagen Oplopende waarde tijdens selectie kiezen Apparaat inschakelen / in stand-bymodus zetten 6.
  • Page 136  Plaats de afstandshouders eventueel tussen het montagevlak en de houder.  Draai de vier schroeven vast.  Plaats het apparaat met de bevestigingspennen in de houder en schuif het apparaat voorzichtig naar achteren tot u het hoort vastklikken. WAARSCHUWING! Brandgevaar / gevaar voor kortsluiting! Door opstijgende damp of hitte bestaat gevaar voor elektrische schokken of brand door kortsluiting.
  • Page 137: Neerzetten (Staand)

    6.1. Neerzetten (staand) U kunt het apparaat niet alleen onder een hangkast of plank bevestigen, maar ook op een tafel of kast neerzetten. In dat geval hoeft u het niet te bevestigen. Daarvoor is het apparaat voorzien van pootjes. LET OP! Gevaar voor beschadiging! Het apparaat kan door onjuist gebruik beschadigd raken.
  • Page 138: Ingebruikname

    WAARSCHUWING! Explosiegevaar! Explosiegevaar bij het onjuist vervangen van de batterij.  Vervang de batterij alleen door een batterij van hetzelfde of een gelijkwaardig type.  Druk de vergrendeling (A) in en trek de batterijhouder met de batterij (B) uit de afstandsbediening, zoals op de afstandsbediening hiernaast.
  • Page 139: Bediening

    9. Bediening 9.1. Apparaat in-/uitschakelen  Druk op de toets om het apparaat in te schakelen.  Druk opnieuw op de toets om het apparaat in de stand-bymodus te zetten. Ook als het apparaat is uitgeschakeld, verbruikt het een kleine hoeveelheid stroom.
  • Page 140: Radiomodus

     Draai aan de draaiknop of druk herhaaldelijk op de toets EQ op de afstandsbediening om een equalizerinstelling te kiezen. Uw equalizerinstelling wordt automatisch voor alle bedrijfsmodi overgenomen. De radio sluit na enkele seconden de equalizerinstellingen en keert terug naar de vorige displayweergave.
  • Page 141: Verbinding Maken Met Apparaten Via Bluetooth

    9.6.3. Handmatige afstemming van de frequentie Naast het automatisch naar zenders zoeken (AMS) en het handmatig naar zenders zoeken is ook het mogelijk om de frequentie van een radiozender handmatig af te stemmen. Ga hiervoor als volgt te werk:  Houd bij een op het display weergegeven frequentie, bijv. 99.2 MHz, de regelaar of de toets op de afstandsbediening ingedrukt tot de frequentie- indicatie knippert.
  • Page 142: Apparaten Via Aux Aansluiten

     Druk op de toets MO/ST/PAIRING of op de toets PAIRING op de afstandsbediening om de huidige bluetoothverbinding te verbreken en de onderbouwradio weer in de bluetoothkoppelmodus te zetten. U kunt nu een ander audio-uitvoerapparaat met de onderbouwradio verbinden.  In plaats hiervan kunt u ook op de toets MO/ST/PAIRING of de toets PAIRING op de afstandsbediening drukken om de verbinding met het audio-uitvoerapparaat te herstellen waarmee het het laatst via bluetooth was verbonden.
  • Page 143: Basisinstellingen

     Druk meerdere keren op de toets FUNC/USER of op de toets FUNC op de tot op het display AUX wordt weergegeven. afstandsbediening  Schakel het weergaveapparaat in en start daar met het afspelen. 11. Basisinstellingen Om deze instellingen uit te voeren, moet de radio zich in de stand-bymodus bevinden.
  • Page 144: Automatische Tijdsynchronisatie

     Druk op de draaiknop of op de toets op de afstandsbediening om uw invoer te bevestigen. De maandaanduiding knippert op het display.  Ga zoals eerder beschreven te werk om de actuele maand en dag in te stellen.  Druk daarna op de draaiknop of op de toets op de afstandsbediening om uw instellingen op te slaan.
  • Page 145: Sleeptimerfunctie

    12. Sleeptimerfunctie Met de sleeptimer (AOT - automatische OFF-timer) wordt de radio voor een bepaalde tijd (tussen 5 en maximaal 120 minuten) ingeschakeld. Na het verstrijken van de ingestelde tijd wordt het apparaat automatisch in de stand-bymodus gezet.  Druk op de toets AOT/EQ of de toets AOT op de afstandsbediening.
  • Page 146  Druk op de draaiknop of op de toets op de afstandsbediening om uw instelling op te slaan.  Draai aan de draaiknop of druk op een van de toetsen VOL+/ VOL op de afstandsbediening om het gewenste wektype te kiezen. U kunt kiezen uit de volgende mogelijkheden: TUNER: laatst ingestelde radiofrequentie •...
  • Page 147: Kooktimerfunctie

    14. Kooktimerfunctie Het apparaat beschikt over een kooktimerfunctie. Kort vóór en na een ingestelde timertijd (maximaal 23 uur, 59 minuten) zijn geluidssignalen te horen. Hier kunt u een van de zes vooraf ingestelde timertijden kiezen of de opgeslagen timertijden individueel aan uw behoeften aanpassen. 14.1.
  • Page 148: Timergeluidssignalen Uitschakelen

     Druk op de draaiknop of op de toets op de afstandsbediening om uw invoer te bevestigen en de timer te starten. Op het display wordt de actuele modus (radiofrequentie/BT/AUX) en het symbool voor de actieve timer weergegeven.  Druk terwijl een timer actief is op de toets TIMER om de resterende timertijd te laten weergeven.
  • Page 149: Problemen Oplossen

    16. Problemen oplossen Als het apparaat niet goed werkt, is het mogelijk dat er een elektrostatische ontlading heeft plaatsgevonden.  Trek in dat geval de netadapter uit het stopcontact.  Steek de stekker weer in het stopcontact. Het apparaat wordt op deze manier gereset.
  • Page 150: Opslag Bij Niet-Gebruik

     Haal als u het apparaat langere tijd niet gebruikt de batterij uit de afstandsbediening en trek de netadapter uit het stopcontact. 18. EU-conformiteitsinformatie Hierbij verklaart MEDION AG dat dit apparaat in overeenstemming is met de fundamentele eisen en de overige toepasselijke voorschriften: •...
  • Page 151: Technische Gegevens

    Omgevingstemperatuur (bij luchtvochtigheid (niet condenserend) van opslag): max. 85 % Uitgangsvermogen: 2 x 5 W RMS Netadapter Hung Kay Industrial Co. Ltd. Importeur: MEDION AG Fabrikant: Am Zehnthof 77 45307 Essen Duitsland HR-nummer: HRB 13274 Modelaanduiding: HKP15 - 0751600dV Ingangsspanning/-frequentie/...
  • Page 152 Netadapter Uitgangsvermogen: 12,0 W Gemiddelde efficiëntie tijdens 83,18 % gebruik: Efficiëntie bij lage belasting (10 %): 77,80 % Opgenomen vermogen bij nullast: 0,06 W Beschermingsklasse: Veiligheidsklasse II BUREAU VERITAS Radio FM-band: 87,5-108 MHz Aantal geheugenplaatsen voor 64 (2 x 32) zenders: FM-antenne: vast geïnstalleerde draadantenne Aansluitingen...
  • Page 153: Service-Informatie

    • In onze Service-Community vindt u andere gebruikers en onze medewerkers en daar kunt u uw ervaringen uitwisselen en uw kennis delen. U vindt onze Service-Community onder community.medion.com. • U kunt natuurlijk ook ons contactformulier gebruiken onder www.medion.com/contact.
  • Page 154: Privacy Statement

    22. Privacy statement Beste klant! Wij delen u mee dat wij, MEDION AG, Am Zehnthof 77, D-45307 Essen, als verwerkingsverantwoordelijke uw persoonsgegevens verwerken. In aangelegenheden die te maken hebben met het recht op gegevensbescherming, worden wij bijgestaan door de functionaris voor gegevensbescherming van onze onderneming, die bereikbaar is onder MEDION AG, Datenschutz, Am Zehnthof 77, D-45307 Essen;...
  • Page 155: Colofon

    Deze gebruiksaanwijzing is auteursrechtelijk beschermd. Verveelvoudiging in mechanische, elektronische of welke andere vorm dan ook zonder schriftelijke toestemming van de fabrikant is verboden. Het copyright berust bij de firma: MEDION AG Am Zehnthof 77 45307 Essen Duitsland Houd er rekening mee dat het bovenstaande adres geen retouradres is. Neem eerst...
  • Page 156 Contenuto Informazioni relative a queste istruzioni per l’uso ....... 157 1.1. Spiegazione dei simboli ................. 157 Utilizzo conforme ..................159 Indicazioni di sicurezza ................160 3.1. Limitazione d’uso ..................... 160 3.2. Utilizzo sicuro ....................161 3.3. Alimentazione elettrica .................. 161 3.4.
  • Page 157 14.2. Impostazione e avvio di un timer personalizzato ........ 185 14.3. Spegnimento dei segnali acustici del timer ........... 185 Pulizia ....................... 186 Ricerca dei guasti ..................186 Come conservare il dispositivo se non utilizzato ........187 Informazioni sulla conformità UE ............188 Smaltimento.....................
  • Page 158: Informazioni Relative A Queste Istruzioni Per L'uso

    1. Informazioni relative a queste istruzioni per l’uso Grazie per aver scelto il nostro prodotto. Ci auguriamo che ne sia soddi- sfatto. Prima di utilizzare il prodotto, leggere attentamente le indicazioni di si- curezza e queste istruzioni. Osservare le avvertenze riportate sul disposi- tivo e nelle istruzioni per l’uso.
  • Page 159 Sicurezza verificata BUREAU VERITAS I prodotti contrassegnati da questo simbolo soddisfano i requisiti della legge tedesca sulla sicurezza dei prodotti. Simbolo della corrente continua Simbolo della corrente alternata Classe di protezione II Gli apparecchi elettrici della classe di protezione II possiedono un isolamento permanente doppio e/o rinforzato e non hanno possibi- lità...
  • Page 160: Utilizzo Conforme

    2. Utilizzo conforme Questo è un dispositivo dell’elettronica di consumo. Esso è de- stinato alla riproduzione di materiale audio (che può essere tra- smesso via Bluetooth) e alla ricezione radio FM.. Tramite la presa AUX è possibile collegare al dispositivo altri dispositivi di ripro- duzione esterni (ad es.
  • Page 161: Indicazioni Di Sicurezza

     Non esporre il dispositivo a condizioni estreme. Occorre evitare: – elevata umidità dell’aria o presenza di liquidi, – temperature estremamente alte o basse, – raggi solari diretti, – fiamme libere. 3. Indicazioni di sicurezza 3.1. Limitazione d’uso  Questo dispositivo non è destinato a essere utilizzato da per- sone (inclusi i bambini) con capacità...
  • Page 162: Utilizzo Sicuro

    3.2. Utilizzo sicuro  Prima di utilizzare il dispositivo e l’alimentatore, controllare che non siano danneggiati. Una radio o un alimentatore difet- tosi o danneggiati non devono essere utilizzati. PERICOLO! Pericolo di scossa elettrica! Pericolo di lesioni da scossa elettrica per la presenza di parti sotto tensione.
  • Page 163: Luogo Di Installazione/Ambiente

     La presa deve essere sempre facilmente accessibile, cosicché la spina possa essere estratta senza difficoltà. Alcuni componenti del dispositivo sono sotto tensione anche quando il dispositivo è spento. – Per interrompere l’alimentazione elettrica del dispositivo o per metterlo totalmente fuori tensione, staccare l’alimenta- tore dalla presa elettrica.
  • Page 164  Dopo avere trasportato il dispositivo, aspettare che abbia rag- giunto la temperatura ambiente prima di metterlo in funzio- AVVISO! Pericolo di danni al dispositivo! Condizioni ambientali sfavorevoli possono danneggia- re il dispositivo.  Utilizzare il dispositivo solo in ambienti interni asciutti. ...
  • Page 165: Riparazione

    3.4.1. Montaggio Il dispositivo può essere montato al di sotto di una piastra di montaggio orizzontale, per es. sotto un pensile. AVVERTENZA! Pericolo d’incendio / di cortocircuito! Salendo verso l’alto, il vapore o il calore può causare un cortocircuito con conseguente pericolo di scossa elet- trica o incendio.
  • Page 166 AVVERTENZA! Pericolo di ustione chimica! Il telecomando fornito contiene una batteria a botto- ne. Se ingerita, nel giro di 2 ore la batteria può provoca- re gravi ustioni chimiche interne che possono risultare letali.  Se si pensa che le batterie possano essere state ingerite o tro- varsi in una qualsiasi parte del corpo, rivolgersi immediata- mente a un medico.
  • Page 167: Contenuto Della Confezione

     In caso di fuoriuscita di liquido dalle batterie, rimuoverle im- mediatamente dal telecomando. Pulire i contatti prima di in- serire nuove batterie. Pericolo di ustioni chimiche causate dall’acido delle batterie! In caso di contatto con l’acido delle batterie, pulire subito le parti interessate con abbondante ac- qua pulita e rivolgersi immediatamente a un medico.
  • Page 168: Panoramica Del Dispositivo

    5. Panoramica del dispositivo 5.1. Lato anteriore Call FUNC | User MO/ST | Pairing SET | MEM./AMS Vol + Timer Pre + / Alarm AOT | EQ Accensione del dispositivo/passaggio alla modalità stan- In modalità radio: commutazione tra ricezione mono e stereo In modalità...
  • Page 169 Microfono Call LED di chiamata Supporto Rotazione: riduzione del volume/aumento del volume, modifica del valore durante la selezione - Vol + Pressione: conferma del valore selezionato Pressione breve in modalità Bluetooth: avvio/arresto della riproduzione Pressione prolungata in modalità radio: sintonizzazione manuale della frequenza In modalità...
  • Page 170: Lato Posteriore

    In modalità Bluetooth: Pressione breve: riproduzione della traccia successiva; Pressione prolungata: scorrimento rapido in avanti all’in- terno della traccia In modalità radio: Pressione breve: stazione memorizzata successiva, fre- quenza successiva Pressione prolungata: ricerca stazioni in avanti Attivazione/disattivazione retroilluminazione del display Timer Selezione di uno dei timer di cottura memorizzati (T1-T6) Selezione della modalità...
  • Page 171: Telecomando

    5.3. Telecomando Accensione/spegni- mento della striscia lu- minosa a LED Richiamo del menu delle impostazioni (impostazioni: Time Set (impostazione dell’ora), Date Set (impostazione della data), CT Update (sincronizzazione auto- matica dell’ora on/off ), DT (timer di riduzio- ne della luminosità on/ ), 12H/24H (formato dell’ora))
  • Page 172 In modalità radio: commutazione tra ricezione mono e ste- Mo/ST Pressione prolungata in modalità radio: avvio della ricerca automatica delle stazioni radio In modalità Bluetooth: interruzione della connessione Bluetooth attuale e imposta- zione della modalità di associazione Bluetooth della radio Pairing per il montaggio sottopensile;...
  • Page 173: Montaggio (Sospeso)

    6. Montaggio (sospeso) Questa radio per montaggio sottopensile è destinata al montaggio sul lato inferiore di un pensile o di un ripiano. Per il fissaggio sono necessarie 4 viti. La grandezza e la lunghezza delle viti devono essere adatte alla piastra di montaggio e al supporto. Se le ante del pensile non terminano a filo del corpo del mobile, per il montaggio è...
  • Page 174: Posizionamento (In Verticale)

     Collocare il dispositivo sui perni di fis- saggio del supporto, quindi spinge- re indietro il dispositivo con cautela sino a quando non si blocca in posi- zione con un clic. AVVERTENZA! Pericolo d’incendio / di cortocircuito! Salendo verso l’alto, il vapore o il calore può causare un cortocircuito con conseguente pericolo di scossa elet- trica o incendio.
  • Page 175: Preparazione Della Messa In Funzione

     Mantenere una distanza di almeno un metro da fon- ti di disturbo magnetiche e ad alta frequenza (tele- visori, altri diffusori acustici, cellulari ecc.) per evitare malfunzionamenti. 7. Preparazione della messa in funzione 7.1. Inserire la batteria nel telecomando Nel telecomando è...
  • Page 176: Messa In Funzione

     Premere la levetta di arresto (A), quindi estrarre il supporto e la batteria (B) dal telecomando come il- lustrato nella figura sottostante.  Smaltire la batteria usata nel rispetto delle norme di legge.  Inserire una batteria nuova di tipo CR2025 da 3 V nel relativo supporto con il polo positivo rivolto verso l’alto.
  • Page 177: Uso

    9. Uso 9.1. Accensione/spegnimento del dispositivo  Premere il tasto per accendere il dispositivo.  Premere nuovamente il tasto per portare il dispositivo in modalità standby. Il dispositivo consuma una piccola quantità di corrente anche quando è spento. Per spegnere completamente il dispositivo staccare l’alimenta- tore dalla rete.
  • Page 178: Equalizzatore

    9.5. Equalizzatore La radio dispone di impostazioni dell’equalizzatore preinstallate (NORMAL, FLAT, ROCK, POP, JAZZ, CLASSIC, BASS). La scelta di un’impostazione dell’equalizza- tore è possibile in tutte le modalità di funzionamento.  Tenere premuto il tasto AOT/EQ oppure premere il tasto EQ sul telecomando per aprire il menu delle impostazioni dell’equalizzatore.
  • Page 179: Connessione Di Dispositivi Via Bluetooth

    9.6.2. Ricerca automatica delle stazioni radio Il dispositivo è acceso e si trova in modalità radio.  Tenere premuto il tasto SET/MEM./AMS oppure il tasto AMS sul telecoman- do per avviare una ricerca automatica delle stazioni. La radio cerca automaticamente le stazioni ricevibili (max. 32 stazioni) e le memoriz- za nel gruppo di memoria A.
  • Page 180 Per informazioni sulla funzione Bluetooth del dispositivo di riproduzione audio, consultare le relative istruzioni per l’uso. L’associazione dei dispositivi è conclusa quando il LED di associazione rimane acce- so con luce blu fissa e la radio per il montaggio sottopensile emette un segnale acu- stico.
  • Page 181: Collegamento Di Un Dispositivo Tramite La Presa Aux

    10.1. Collegamento di un dispositivo tramite la presa Per collegare un dispositivo di riproduzione esterno (ad es. un lettore MP3) è neces- sario un cavo audio con uno spinotto da 3,5 mm (non in dotazione).  Impostare un volume medio sul dispositivo di riproduzione, quindi spegnerlo. ...
  • Page 182: Impostazione Manuale Della Data

     Impostare i minuti attuali con l’ausilio della manopola di regolazione o con i tasti VOL+/VOL sul telecomando.  Premere la manopola di regolazione o il tasto sul telecomando per salvare le impostazioni. 11.2. Impostazione manuale della data  Nel menu delle impostazioni selezionare l’opzione DATE SET , quindi confer- mare la selezione premendo la manopola di regolazione o il tasto telecomando.
  • Page 183: Timer Di Riduzione Della Luminosità

    11.4. Timer di riduzione della luminosità Se il timer di riduzione della luminosità è attivato, l’illuminazione del display della radio viene smorzata automaticamente tra le ore 23.00 e le ore 6.00. Per attivare o disattivare il timer di riduzione della luminosità, procedere come indi- cato di seguito.
  • Page 184: Funzione Sveglia

    13. Funzione sveglia È possibile programmare due sveglie (AL1 e AL2) impostabili indipendentemente l’una dall’altra. 13.1. Impostazione dell’orario della sveglia  Portare la radio in modalità standby.  Premere il tasto ALARM. Sul display viene visualizzata l’indicazione ALARM 1.  Ruotare la manopola di regolazione o premere uno dei tasti VOL+ / VOL sul te- lecomando per commutare tra le sveglie ALARM 1 e ALARM 2, quindi pre- mere la manopola di regolazione o il tasto sul telecomando per sele-...
  • Page 185: Timer Del Tempo Di Cottura

    La sveglia programmata è attiva e sul display viene visualizzata l’indicazione AL1 oppure AL2. La modalità di attivazione della sveglia Radio ha una durata di 60 minuti, mentre i segnali acustici vengono riprodotti per 10 minuti. 13.1.1. Interruzione/spegnimento della sveglia Se è stato raggiunto l’orario impostato, in base all’opzione selezionata la radio si ac- cende oppure vengono emessi segnali acustici.
  • Page 186: Selezione E Avvio Di Un Timer Preinstallato

    14.1. Selezione e avvio di un timer preinstallato  Premere una o più volte il tasto TIMER per scorrere i timer preinstallati (T1-T6): T1 = 5 minuti • T2 = 10 minuti • T3 = 15 minuti • T4 = 30 minuti •...
  • Page 187: Pulizia

    15. Pulizia PERICOLO! Pericolo di scossa elettrica! Pericolo di lesioni da scossa elettrica per la presenza di parti sotto tensione.  Prima della pulizia del dispositivo, staccare l’alimen- tatore dalla presa. AVVISO! Pericolo di danni! Pericolo di danni al dispositivo in caso di utilizzo impro- prio.
  • Page 188: Come Conservare Il Dispositivo Se Non Utilizzato

    PROBLEMA POSSIBILE CAUSA SOLUZIONE  Eventualmente impostare l’ora/la La ricezione ra- stazione manualmente. dio e la memo- I segnali delle stazio-  Eventualmente collocare la radio rizzazione auto- ni radio sono troppo matica dell’ora/ in un luogo diverso o modifica- deboli.
  • Page 189: Informazioni Sulla Conformità Ue

    18. Informazioni sulla conformità UE MEDION AG dichiara che il dispositivo è conforme ai requisiti fondamen- tali e alle altre disposizioni vigenti in materia: • Direttiva RED 2014/53/UE • Direttiva sulla progettazione ecocompatibile 2009/125/CE (e regolamento sulla progettazione ecocompatibile 2019/1782) •...
  • Page 190: Dati Tecnici

    Temperatura ambiente va dell’aria massima (senza formazione di (conservazione): condensa) dell’85%. Potenza di uscita: 2 x 5 W RMS Hung Kay Industrial Co. Ltd. Importatore: MEDION AG Am Zehnthof 77 Produttore: 45307 Essen Germania Numero di registro delle imprese: HRB 13274 Nome del modello: HKP15 - 0751600dV...
  • Page 191: Informazioni Relative Al Servizio Di Assistenza

    Il nostro team di assistenza è raggiungibile anche via telefonicamente. Italia Orari di apertura Assistenza Post-Vendita  Lun.-ven.: 9.00-17.00 02 - 360 003 40 Indirizzo del servizio di assistenza G2-DUAL S.a.S. MEDION Service Center Via Brigata Reggio, 47/AB 42124 Reggio Emilia Italia...
  • Page 192: Informativa Sulla Protezione Dei Dati Personali

    22. Informativa sulla protezione dei dati personali Egregio cliente! La informiamo che noi, MEDION AG, Am Zehnthof 77, D-45307 Essen, Germania, sia- mo responsabili del trattamento dei suoi dati personali. In materia di protezione dei dati siamo supportati dal nostro incaricato azienda- le, che può...
  • Page 193: Note Legali

    (art. 77 GDPR in combinato disposto con l’articolo 19 secondo le speciali disposizioni legali tedesche in materia di protezione dei dati in conformi- tà con la BDSG). Per MEDION AG, si tratta dell’incaricato regionale per la protezione dei dati e la libertà d’informazione della Renania Settentrionale-Vestfalia, casella po- stale 200444, 40212 Düsseldorf, www.ldi.nrw.de.
  • Page 194 Índice Información acerca de este manual de instrucciones ......195 1.1. Explicación de los símbolos ................195 Uso conforme a lo previsto ..............197 Indicaciones de seguridad ..............198 3.1. Grupo de personas limitado ................ 198 3.2. Seguridad operativa ..................199 3.3.
  • Page 195 Función de temporizador de cocina ............222 14.1. Abrir e iniciar la cuenta atrás de los tiempos preajustados para el temporizador ..................223 14.2. Ajustar e iniciar la cuenta atrás de un tiempo de temporizador personalizado................ 223 14.3. Apagado de los pitidos del temporizador ..........224 Limpieza ....................
  • Page 196: Información Acerca De Este Manual De Instrucciones

    1. Información acerca de este manual de instrucciones Muchas gracias por haber elegido nuestro producto. Le deseamos que disfrute con este aparato. Antes de la puesta en servicio, lea atentamente las indicaciones de segu- ridad y todo el manual. Tenga en cuenta las advertencias que aparecen en el propio aparato y en el manual de instrucciones.
  • Page 197 Seguridad probada BUREAU VERITAS Los productos identificados con este símbolo cumplen los requisitos de la legislación alemana sobre la seguridad de productos. Símbolo de corriente continua. Símbolo de corriente alterna. Clase de protección II Los aparatos eléctricos de la clase de protección II son aparatos que disponen de un aislamiento doble o reforzado continuo y que no tienen posibilidad de conexión de un conductor de puesta a tierra.
  • Page 198: Uso Conforme A Lo Previsto

    2. Uso conforme a lo previsto Este es un aparato de la electrónica de consumo. El aparato sirve para escuchar material de audio, que puede reproducirse a tra- vés de Bluetooth, así como para la recepción de radio FM. A tra- vés de la conexión AUX pueden conectarse dispositivos de re- producción externos (como reproductores de MP3) al aparato.
  • Page 199: Indicaciones De Seguridad

     No exponga el aparato a condiciones extremas. Se debe evitar lo siguiente: – una alta humedad del aire o humedad en general, – temperaturas extremadamente altas o bajas, – radiación solar directa, – llamas abiertas. 3. Indicaciones de seguridad 3.1.
  • Page 200: Seguridad Operativa

    3.2. Seguridad operativa  Antes de utilizarlos, inspeccione el aparato y la fuente de ali- mentación para asegurarse de que no presentan daños. Una radio o fuente de alimentación defectuosa o dañada no debe utilizarse. ¡PELIGRO! ¡Peligro de descarga eléctrica! Peligro de sufrir lesiones por descarga eléctrica debi- do a piezas conductoras de corriente.
  • Page 201: Alimentación Eléctrica

    3.3. Alimentación eléctrica ¡PELIGRO! ¡Peligro de descarga eléctrica! Peligro de sufrir lesiones por descarga eléctrica debido a piezas conductoras de corriente.  Conecte el adaptador de alimentación únicamente a una toma de corriente con puesta a tierra (100-240 V ~ 50/60 Hz) fácilmente accesible y debidamente instalada cerca del lugar de emplazamiento.
  • Page 202: Lugar De Instalación/Entorno

     Si la carcasa del adaptador de alimentación o el cable de co- nexión están dañados, debe eliminarse el adaptador de ali- mentación y sustituirse por uno nuevo del mismo tipo.  El adaptador de alimentación solo puede usarse en interiores secos.
  • Page 203: Reparación

    – se evite el contacto con humedad, gotas de agua o agua pulverizada y que no se coloquen objetos llenos de líquido, como jarrones, sobre o cerca del aparato; – el aparato no se halle junto a campos magnéticos (p. ej., te- levisores u otros altavoces);...
  • Page 204: Manipulación De Las Pilas

     Si detecta algún daño o problemas técnicos, encargue la re- paración de su aparato únicamente a personal técnico cualifi- cado.  En caso de que sea necesario realizar una reparación, diríjase exclusivamente a nuestro servicio de asistencia. 3.6. Manipulación de las pilas El mando a distancia de este aparato funciona con una pila.
  • Page 205  Nunca intente recargar las pilas. ¡Existe peligro de explosión!  Nunca exponga las pilas a un calor excesivo (como luz solar, fuego o similares).  Almacene las pilas en un lugar fresco y seco. El calor intenso directo puede dañar las pilas. Por ello, no exponga el aparato a fuentes de calor intensas.
  • Page 206: Volumen De Suministro

    4. Volumen de suministro ¡PELIGRO! ¡Peligro de asfixia! Peligro de asfixia por inhalación o ingestión de láminas de plástico o piezas pequeñas.  Mantenga los embalajes alejados de los niños.  No permita que los niños jueguen con el material de embalaje.
  • Page 207: Vista General Del Aparato

    5. Vista general del aparato 5.1. Parte delantera Call FUNC | User MO/ST | Pairing SET | MEM./AMS Vol + Timer Alarm Pre + / AOT | EQ Encender el aparato/cambiar al modo Standby En el modo de radio: Cambiar entre mono y estéreo En el modo Bluetooth: MO/ST/Pairing Interrumpir la conexión Bluetooth actual y poner la radio...
  • Page 208 Girar: bajar el volumen/subir el volumen, modificar el valor durante una selección - Vol + Pulsación: confirmar una selección Pulsación breve en el modo Bluetooth: iniciar/parar la reproducción Pulsación prolongada en el modo de radio: ajuste manual de la frecuencia En el modo radio/AUX: Pulsación breve: silenciar el aparato Volver a pulsar durante el modo silencioso ->...
  • Page 209: Parte Trasera

    En el modo Bluetooth: Pulsación breve: reproducir la pista siguiente Pulsación prolongada: avance rápido dentro de una pista En el modo de radio: Pulsación breve: posición de memoria de emisora hacia delante, frecuencia siguiente Pulsación prolongada: búsqueda de emisoras hacia de- lante Encender/apagar la iluminación de fondo de la pantalla Seleccionar posición de memoria del temporizador de co-...
  • Page 210: Mando A Distancia

    5.3. Mando a distancia Encender/apagar la moldura luminosa de Abrir el menú de confi- guración (Ajustes: Time Set (ajus- te de hora), Date Set (ajuste de fecha), CT Update (sincronización automática de la hora ON/OFF), DT (función de temporizador de atenuación ON/OFF), 12H/24H...
  • Page 211 En el modo Bluetooth: Interrumpir la conexión Bluetooth actual y poner la radio de Pairing cocina en el modo de emparejamiento Bluetooth; restable- cer la conexión con el último aparato emisor de audio co- nectado a través de Bluetooth programar el sleeptimer o temporizador de apagado auto- mático (AOT) (ALARM 1 / ALARM Abrir el menú...
  • Page 212: Montaje (Suspendido)

    6. Montaje (suspendido) La radio de cocina se ha previsto para fijarse en la parte inferior de un armario sus- pendido o estantería. Para la fijación necesita 4 tornillos. El tamaño y la longitud de los tornillos deben corresponderse con la placa de montaje y el soporte. Si las puertas de su armario suspendido no cierran al ras del cuerpo del armario, para el montaje necesitará...
  • Page 213: Colocación (Independiente)

     Coloque la radio en las espigas de su- jeción del soporte y empújela con cuidado hacia atrás hasta que encaje. ¡ADVERTENCIA! ¡Peligro de incendio/peligro de cortocircuito! Debido al vapor o al calor ascendente, un cortocircui- to puede suponer un peligro de descarga eléctrica o in- cendio.
  • Page 214: Preparativos Para La Puesta En Servicio

    7. Preparativos para la puesta en servicio 7.1. Colocación de la pila en el mando a distancia El mando a distancia lleva una pila de litio CR2025 3V. Al usar por primera vez el mando a distancia, quite la lámina transparen- te con la inscripción tirando de ella, sin abrir el compartimento de la pila.
  • Page 215: Puesta En Servicio

    8. Puesta en servicio  Para poner en servicio el aparato, conecte el adaptador de alimentación suminis- trado a la toma de conexión en la parte trasera del aparato. ¡AVISO! Posibles daños materiales Si se utiliza un adaptador de alimentación no compati- ble, se pueden producir daños en el aparato.
  • Page 216: Encendido/Apagado De La Moldura Luminosa De Led

    9.3. Encendido/apagado de la moldura luminosa de En la parte inferior de la radio hay una moldura luminosa de led.  Pulse la tecla para encender o apagar la moldura luminosa de led. Cuando la luz lleva encendida 120 minutos, la moldura luminosa de led se apaga automáticamente.
  • Page 217  Para cambiar entre la reproducción mono y estéreo en el modo de radio, pulse la tecla MO/ST. 9.6.1. Búsqueda manual de emisoras  Mantenga pulsada la tecla para cambiar la frecuencia hacia arriba.  Mantenga pulsada la tecla para cambiar la frecuencia hacia abajo. ...
  • Page 218: Conexión De Aparatos Mediante Bluetooth

     Para guardar la frecuencia en un número de posición de memoria, proceda como se indica en el capítulo «9.6.1. Búsqueda manual de emisoras» en la pági- na 216. 9.6.4. Abrir emisoras guardadas  Con las teclas puede cambiar entre las emisoras de ra- dio guardadas.
  • Page 219: Conexión De Dispositivos Mediante Aux

    10.6.2. Selección de pistas, avance/retroceso rápidos  Durante la reproducción, pulse dos veces la tecla para reproducir la pista an- terior.  Pulse una vez la tecla para saltar al inicio de la pista.  Pulse la tecla para reproducir la pista siguiente. ...
  • Page 220: Ajuste Manual De La Hora

    • DT (función de temporizador de atenuación ON/OFF) • 12 H/24 H (formato de hora) Si en el menú de configuración no se pulsa ninguna tecla durante 10 se- gundos, el menú se cerrará automáticamente. Los ajustes realizados hasta ese momento se guardarán. Para llevar a cabo otros ajustes, debe- rá...
  • Page 221: Función De Temporizador De Atenuación

     En el menú de configuración, seleccione la opción CT UPDATE y confirme la selección pulsando el regulador o la tecla del mando a distancia.  Gire el regulador o pulse una de las teclas VOL+ / VOL del mando a distancia para seleccionar el ajuste deseado: ON = función activada / OFF = función desactivada.
  • Page 222: Función De Alarma

    El temporizador de apagado activado se muestra en la pantalla mediante la indica- ción AOT.  Con el temporizador de apagado activado, pulse la tecla AOT/EQ o la tecla AOT del mando a distancia para que se muestre el tiempo restante hasta la des- conexión.
  • Page 223: Función De Temporizador De Cocina

    BUZZ: pitido •  Pulse el regulador o la tecla del mando a distancia para guardar el tipo de despertador.  Seleccione ahora con la ayuda del regulador o de las teclas VOL+ / VOL del mando a distancia el volumen (V03-V30) que debe tener la alarma y confirme su selección pulsando a continuación el regulador o la tecla del man- do a distancia.
  • Page 224: Abrir E Iniciar La Cuenta Atrás De Los Tiempos Preajustados Para El Temporizador

    14.1. Abrir e iniciar la cuenta atrás de los tiempos preajustados para el temporizador  Pulse la tecla TIMER una o varias veces para cambiar entre los siguientes tiem- pos preajustados para el temporizador (T1-T6): T1 = 5 minutos • T2 = 10 minutos •...
  • Page 225: Apagado De Los Pitidos Del Temporizador

     Mientras el temporizador está activo, pulse la tecla TIMER para que se muestre el tiempo restante. 14.3. Apagado de los pitidos del temporizador  Pulse el regulador o la tecla TIMER para apagar los pitidos del temporizador ac- tivo. 15.
  • Page 226: Localización De Fallos

    16. Localización de fallos En caso de que el aparato muestre fallos de funcionamiento, es posible que se haya producido una descarga electrostática.  En este caso, desenchufe el adaptador de alimentación de la toma de corriente.  Vuelva a enchufar el aparato en la toma de corriente. De este modo, se restable- cerá...
  • Page 227: Almacenamiento En Caso De No Utilizarse

     En caso de no utilizarse durante un largo periodo, retire la pila del mando a dis- tancia y desenchufe el adaptador de alimentación del aparato. 18. Información de conformidad UE Por la presente, MEDION AG declara que este aparato cumple los requi- sitos básicos y el resto de disposiciones pertinentes: •...
  • Page 228: Datos Técnicos

    (sin condensación) de máx. miento): 85 % Potencia de salida: 2 × 5 W RMS Adaptador de alimentación Hung Kay Industrial Co. Ltd. Importador: MEDION AG Fabricante: Am Zehnthof 77 45307 Essen Alemania N.º de registro mercantil: HRB 13274 Nombre del modelo: HKP15 - 0751600dV Tensión/corriente de entrada / fre-...
  • Page 229 Adaptador de alimentación Tensión/corriente de salida: 7,5 V 1,6 A Potencia de salida: 12,0 W Eficiencia media durante el funcio- 83,18 % namiento: Eficiencia con carga baja (10 %): 77,80 % Consumo de potencia en vacío: 0,06 W Grado de protección: Clase de protección II BUREAU VERITAS Radio...
  • Page 230: Informaciones De Asistencia Técnica

    22. Declaración de privacidad Apreciado cliente: Por el presente le comunicamos que nosotros, MEDION AG, Am Zehnthof 77, D-45307 Essen, procesamos sus datos personales en calidad de responsables. En el caso de las cuestiones legales relacionadas con la protección de datos, es- tamos a su disposición a través de nuestro responsable de la protección de datos...
  • Page 231: Aviso Legal

    (art. 77 del RGPD en combinación con § 19 BDSG). Para MEDION AG es el responsable federal de protección de datos y libertad de información de Renania del Norte-Westfalia, ap. correos 200444, 40212 Düssel- dorf, www.ldi.nrw.de.

Ce manuel est également adapté pour:

Md 43567

Table des Matières