Table des Matières

Publicité

Les langues disponibles
  • FR

Les langues disponibles

  • FRANÇAIS, page 37

Liens rapides

TOWER FAN HEATER STHL 2000 A1
TURM-HEIZLÜFTER STHL 2000 A1
RADIATEUR SOUFFLANT TOUR STHL 2000 A1
GB
IE
NI
CY
TOWER FAN HEATER
Operating and Safety Instructions
This product is only suitable for well
insulated spaces or occasional use.
FR
BE
CH
RADIATEUR SOUFFLANT TOUR
Instructions d'utilisation et consignes de sécurité
Ce produit ne peut être utilisé que dans des locaux
bien isolés ou de manière occasionnelle.
CZ
VĚŽOVÝ OHŘÍVAČ S VENTILÁTOREM
Pokyny pro obsluhu a bezpečnostní pokyny
Tento výrobek je vhodný pouze pro dobře
izolované prostory nebo občasné používání.
SK
VEŽOVÝ TEPLOVZDUŠNÝ VENTILÁTOR
Návod na obsluhu a bezpečnostné pokyny
Tento výrobok je určený iba do dobre izolovaných
priestorov alebo na príležitostné použitie.
DK
VARME-VENTILATORTÅRN
Betjenings- og sikkerhedsinstruktioner
Dette produkt er kun egnet til godt isolerede
rum eller lejlighedsvis brug.
IAN 367685_2101
MT
DE
AT
CH
TURM-HEIZLÜFTER
Bedienungs- und Sicherheitshinweise
Dieses Produkt ist nur für gut isolierte Räume oder
für den gelegentlichen Gebrauch geeignet.
NL
BE
TOREN-VENTILATORKACHEL
Bedienings- en veiligheidsinstructies
Dit product is uitsluitend geschikt voor goed
geïsoleerde plaatsen of voor incidenteel gebruik.
PL
TERMOWENTYLATOR WIEŻA
Wskazówki użytkowania i bezpieczeństwa
Ten produkt jest odpowiedni tylko do
sporadycznego użytku lub do stosowania w
dobrze izolowanych pomieszczeniach.
ES
CALEFACTOR DE TORRE
Instrucciones de utilización y de seguridad
Este producto está indicado únicamente en
lugares abrigados o para una utilización puntual.
OS

Publicité

Table des Matières
loading

Sommaire des Matières pour SilverCrest STHL 2000 A1

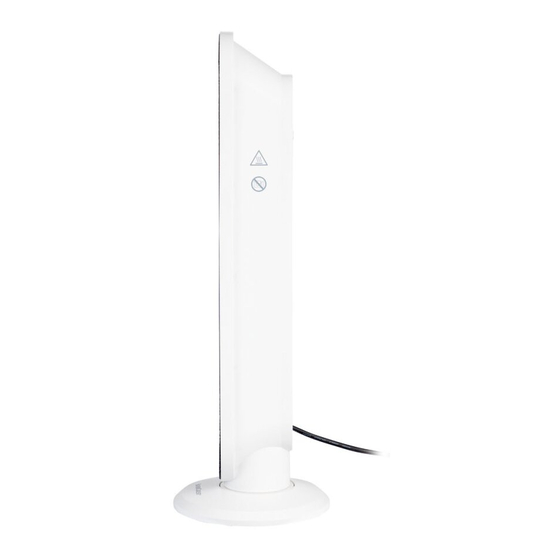
  • Page 1 TOWER FAN HEATER STHL 2000 A1 TURM-HEIZLÜFTER STHL 2000 A1 RADIATEUR SOUFFLANT TOUR STHL 2000 A1 TOWER FAN HEATER TURM-HEIZLÜFTER Operating and Safety Instructions Bedienungs- und Sicherheitshinweise This product is only suitable for well Dieses Produkt ist nur für gut isolierte Räume oder insulated spaces or occasional use.
  • Page 2 Before reading, fold out the page with the images and familiarise yourself with all the features of the device. Klappen Sie vor dem Lesen die Seite mit den Abbildungen aus und machen Sie sich anschließend mit allen Funktionen des Gerätes vertraut. Avant de lire le mode d‘emploi, ouvrez la page contenant les illustrations et familiarisez-vous ensuite avec toutes les fonctions de l‘appareil.
  • Page 5: Table Des Matières

    1. Introduction  ........................Page 7 1.1 Intended use  ........................Page 7 1.2 Scope of delivery  ........................ Page 7 1.3 Features  ..........................Page 7 1.4 Technical data  ........................Page 7 2. Safety indications  ......................Page 9 2.1 General safety indications Safety of electrical appliances for home use  ..............Page 9 2.2 Specific safety indications Special requirements for room heating appliances ...
  • Page 6 6. Commissioning (Tower fan heater with remote control)  ....... Page 16 6.1 Standby mode  ........................Page 16 6.2 Fan mode  ..........................Page 16 6.3 Heating level setting (heating mode)  ................Page 16 6.4 Switching the appliance off  ....................Page 16 6.5 Oscillation function ...
  • Page 7: Introduction

    (alternating current) 1.2 Scope of delivery Mains frequency: 50-60 Hz Rated power: 2000 W 1 Tower fan heater STHL 2000 A1 Heating level 1: 1200 W 1 Remote control (including coin cell) Heating level 2: 2000 W 1 Set of operating instructions Protection rating: Temperature selection range: 15 ºC - 40 ºC...
  • Page 8 Information requirements for electric local Type of heat output/room temperature space heaters control (select one) single stage heat output and no room Model identifier(s): STHL 2000 A1 temperature control [no] Item Symbol Value Unit Two or more manual stages, no room...
  • Page 9: Safety Indications

    2. Safety indications Read all the safety indications and instructions. Failure to adhere to the safety indications and instructions may cause serious injuries and/or property damages. Please keep all the safety indications and instructions for fu- ture use. 2.1 General safety indications Safety of electrical appliances for home use This appliance can be used by children of 8 years and more as well as by persons with reduced physical, sensory or mental abil-...
  • Page 10: Specific Safety Indications Special Requirements For Room Heating Appliances

    2.2 Specific safety indications Special requirements for room heating appliances WARNING! Do not cover! To avoid the heater overheating, it must not be covered. The heater may not be placed directly beneath a wall mains socket. Do not use this heater in the direct vicinity of a bathtub, a shower or a swimming pool.
  • Page 11: Additional Safety Indications

    Warning against hot surfaces! ATTENTION: Some parts of the product may become extremely hot and cause burns. Special care is required if children and vul- nerable persons are present. 2.3 Additional safety indications The appliance is only suitable for indoor operation. Danger to life due to electrical current! Danger to life in case of contact with live cables or components! Before connecting the appliance, compare the connection data on...
  • Page 12: Information About Batteries

    Never wind the supply cable around the appliance. Ensure that the supply cable does not come into contact with hot surfaces. Lay the supply cable so that it is not possible to stumble over it. 2.4 Information about batteries Keep out of the reach of children. If swallowed, they may cause injuries and lead to the perforation of soft tissue and ensuing death.
  • Page 13 Remove the batteries from the appliance if you do not wish to use it for a longer period or wish to store it. Insert the batteries using the correct polarity. Do not allow children to replace the batteries without adult super- vision.
  • Page 14: Before Commissioning (Tower Fan Heater Without Remote Control)

    3. Before commissioning (Tower fan 4.2 Fan mode heater without remote control) Press the on/off key 5 once in standby mode. Remove all packaging material and transport The appliance is then in fan mode. safety devices from the appliance. Check whether the packing contents are complete and 4.3 Heating level setting (heating mode) undamaged.
  • Page 15: Oscillation Function

    4.5 Oscillation function Repeated pressing of the timer key 3 sets the timer to an hourly step: To switch the oscillation of the appliance on or off, press the oscillation key 4   . If successfully activated, the oscillation key icon 4 is lit.
  • Page 16: Commissioning (Tower Fan Heater With Remote Control)

    6.3 Heating level setting (heating mode) Press the lock on the remote controller bat- tery compartment to the centre. Then, pull the battery compartment out (see Image 2). Press the heating level key once in fan mode. The appliance is then in heating level 1.
  • Page 17: Temperature Setting

    6.6 Temperature setting The timer can be set to an hourly step: Press the temperature key 8 to enter temperature setting mode. Press the plus key 9 repeatedly to increase the temperature you desire. If timer setting has been successful, the timer key Press the minus key repeatedly to icon 3 is lit.
  • Page 18: Maintenance, Cleaning And Storage

    8. Maintenance, cleaning and storage ensure that batteries/rechargeable bat- teries can be directed to environmentally Always unplug the mains cable when the friendly disposal. Only return batteries/ appliance is not in use, prior to each cleaning rechargeable batteries which are not or in case of operational faults! charged Batteries must be removed from Only clean the appliance when switched off...
  • Page 19 If the fault is covered by our guarantee, you will re- You can find the article number on the name ceive the repaired product or a new product back. plate on the product, the front page of your No new guarantee period begins with the repair or instructions (on the bottom left-hand side) or replacement of the product.
  • Page 20: Service

    12. Service Should you incur any problems when operating your ROWI Germany product, please do the following: Making contact You can reach the ROWI Germany service team under: ROWI Germany GmbH Werner-von-Siemens-Str. 27 D-76694 Forst GERMANY lidl-services@rowi-group.com Service hotline: +49 800 7694 7694 (free from landlines) IAN 367685_2101 Most problems can already be resolved by compe-...
  • Page 21 1. Einleitung ..........................Seite 23 1.1 Bestimmungsgemäße Verwendung ..................Seite 23 1.2 Lieferumfang ......................... Seite 23 1.3 Ausstattung ........................... Seite 23 1.4 Technische Daten ........................ Seite 23 2. Sicherheitshinweise ......................Seite 25 2.1 Allgemeine Sicherheitshinweise Sicherheit elektrischer Geräte für den Hausgebrauch ............Seite 25 2.2 Spezifische Sicherheitshinweise Besondere Anforderungen für Raumheizgeräte ..............
  • Page 22 6. Inbetriebnahme (Turm-Heizlüfter mit Fernbedienung) ......Seite 32 6.1 Standby-Modus ........................Seite 32 6.2 Ventilator-Modus ......................... Seite 32 6.3 Heizstufen-Einstellung (Heiz-Modus) .................. Seite 32 6.4 Gerät ausschalten ....................... Seite 32 6.5 Oszillation-Funktion ......................Seite 32 6.6 Temperatur-Einstellung ......................Seite 33 6.7 Timer-Einstellung ........................
  • Page 23: Einleitung

    50-60 Hz Bemessungsaufnahme: 2000 W Heizstufe 1: 1200 W 1.2 Lieferumfang Heizstufe 2: 2000 W Schutzklasse: 1 Turm-Heizlüfter STHL 2000 A1 Temperaturwahlbereich: 15 ºC - 40 ºC 1 Fernbedienung (inkl. Knopfzelle) Timer: 24 Stunden 1 Bedienungsanleitung Netzkabellänge: 1,8 m Fernbedienung (nur zur Verwendung mit dem Turm-Heizlüfter STHL 2000 A1)
  • Page 24 Erforderliche Angaben zu elektrischen Art der Wärmeleistung/ Einzelraumheizgeräten Raumtemperaturkontrolle (bitte eine Möglichkeit auswählen) Modellkennung: STHL 2000 A1 einstufige Wärmeleistung, keine Angabe Symbol Wert Einheit Raumtempera turkontrolle [nein] Wärmeleistung zwei oder mehr manuell einstellbare Stufen, keine Raumtemperaturkontrolle [nein] Nennwärmeleis tung Raumtemperaturkontrolle mit Mindestwärme-...
  • Page 25: Sicherheitshinweise

    2. Sicherheitshinweise Lesen Sie alle Sicherheitshinweise und Anweisungen. Versäumnisse bei der Einhaltung der Sicherheitshinweise und Anweisungen können schwere Verletzungen und/oder Sach- schäden verursachen. Bewahren Sie alle Sicherheitshinweise und Anweisungen für die Zukunft auf! 2.1 Allgemeine Sicherheitshinweise Sicherheit elektrischer Geräte für den Hausgebrauch Dieses Gerät kann von Kindern ab 8 Jahren und darüber sowie von Personen mit verringerten physischen, sensorischen oder mentalen Fähigkeiten oder Mangel an Erfahrung und Wissen be-...
  • Page 26: Spezifische Sicherheitshinweise Besondere Anforderungen Für Raumheizgeräte

    2.2 Spezifische Sicherheitshinweise Besondere Anforderungen für Raumheizgeräte WARNUNG! Nicht abdecken! Um eine Überhitzung des Heizgerätes zu vermeiden, darf das Heizgerät nicht abgedeckt werden. Das Heizgerät darf nicht unmittelbar unterhalb einer Wandsteck- dose aufgestellt werden. Dieses Heizgerät nicht in unmittelbarer Nähe einer Badewanne, einer Dusche oder eines Schwimmbeckens benutzen.
  • Page 27: Ergänzende Sicherheitshinweise

    Warnung vor heißen Oberflächen! VORSICHT: Einige Teile des Produktes können sehr heiß werden und Verbrennungen verursachen. Besondere Vorsicht ist geboten, wenn Kinder und schutzbedürftige Personen anwesend sind. 2.3 Ergänzende Sicherheitshinweise Das Gerät ist nur für den Betrieb im Innenbereich geeignet. Lebensgefahr durch elektrischen Strom! Beim Kontakt mit unter Spannung stehenden Leitungen oder Bauteilen besteht Lebensgefahr!
  • Page 28: Hinweise Zu Batterien

    Betreiben Sie das Gerät nur mit vollständig ausgerollter Netzan- schlussleitung. Wickeln Sie die Netzanschlussleitung niemals um das Gerät. Ach- ten Sie darauf, dass die Netzanschlussleitung nicht in Berührung mit heißen Oberflächen gerät. Verlegen Sie die Netzanschlussleitung so, dass man nicht über die Netzanschlussleitung stolpern kann.
  • Page 29 Chemikalien, die aus einer Batterie austreten, können zu Haut- reizungen führen. Bei Hautkontakt mit viel Wasser abspülen. Wenn die Chemikalien in die Augen gelangt sind, grundsätzlich mit Wasser ausspülen, nicht reiben und sofort einen Arzt aufsuchen. Unterschiedliche Batterie- bzw. Akkutypen sowie neue und alte Batterien dürfen nicht gemischt eingesetzt werden.
  • Page 30: Vor Der Inbetriebnahme (Turm-Heizlüfter Ohne Fernbedienung)

    3. Vor der Inbetriebnahme (Turm- 4.2 Ventilator-Modus Heizlüfter ohne Fernbedienung) Im Standby-Modus drücken Sie einmalig die Entfernen Sie sämtliches Verpackungsmate- Ein-/Aus-Taste 5   . Das Gerät befindet sich nun rial und alle Transportsicherungen vom Gerät. im Ventilator-Modus. Überprüfen Sie, ob der Packungsinhalt vollstän- dig und unbeschädigt ist.
  • Page 31: Oszillation-Funktion

    4.5 Oszillation-Funktion Das wiederholte Drücken der Timer-Taste 3 stellt den Timer in 1-Stunden-Schritten: Um die Oszillation des Gerätes ein- oder auszuschalten, drücken Sie die Oszilla- tions-Taste 4   . Bei erfolgreicher Aktivierung leuchtet das Sym- Nach erfolgreicher Timer-Einstellung leuchtet bol der Oszillation-Taste 4   . das Symbol der Timer-Taste 3  ...
  • Page 32: Inbetriebnahme (Turm-Heizlüfter Mit Fernbedienung)

    6.3 Heizstufen-Einstellung (Heiz-Modus) Drücken Sie die Lasche am Batteriefach der Fernbedienung hin zur Mitte. Ziehen Sie nun das Batteriefach heraus (siehe Bild 2). Im Ventilator-Modus drücken Sie einmalig die Heizstufen-Taste   . Das Gerät befin- det sich nun in der Heizstufe 1. Der Turm- Heizlüfter erbringt eine Heizleistung von 1200 W.
  • Page 33: Temperatur-Einstellung

    6.6 Temperatur-Einstellung Der Timer kann in 1-Stunden-Schritten eingestellt werden: Drücken Sie die Temperatur-Taste 8 , um in den Temperatur-Einstellmodus zu gelangen. Drücken Sie wiederholt die Plus-Taste 9 um die von Ihnen gewünschte Temperatur Nach erfolgreicher Timer-Einstellung leuchtet zu erhöhen. Drücken Sie wiederholt das Symbol der Timer-Taste 3  ...
  • Page 34: Wartung, Reinigung Und Lagerung

    aus. Das Gerät funktioniert ausschließlich in Batterien müssen gemäß Richtlinie aufrechter Position. 2006/66/EC recycelt und dürfen nicht im Hausmüll entsorgt werden. Jeder Ver- braucher ist gesetzlich verpflichtet, alle 8. Wartung, Reinigung und Lagerung Batterien/Akkus bei einer Sammelstelle seiner Gemeinde/seines Stadtteils oder Ziehen Sie immer den Netzstecker, wenn das im Handel abzugeben.
  • Page 35 Tritt innerhalb von drei Jahren ab dem Kauf- handlung, Gewaltanwendung und bei Eingriffen, datum dieses Produkts ein Material- oder Fabrika- die nicht von unserer autorisierten Service- tionsfehler auf, wird das Produkt von uns – nach Niederlassung vorgenommen wurden, erlischt die unserer Wahl –...
  • Page 36: Service

    12. Service Sollten beim Betrieb Ihres ROWI Germany- Produktes Probleme auftreten, gehen Sie bitte wie folgt vor: Kontaktaufnahme Das ROWI Germany Service-Team erreichen Sie unter: ROWI Germany GmbH Werner-von-Siemens-Str. 27 76694 Forst DEUTSCHLAND lidl-services@rowi-group.com Service-Hotline: +800 7694 7694 (kostenlos aus dem Festnetz) IAN 367685_2101 Die meisten Probleme können bereits im Rahmen der kompetenten, technischen Beratung unseres Service-...
  • Page 37 1. Introduction  ........................Page 39 1.1 Utilisation conforme  ......................Page 39 1.2 Contenu d’emballage  ......................Page 39 1.3 Équipement  .......................... Page 39 1.4 Données techniques  ......................Page 39 2. Consignes de sécurité  ....................Page 41 2.1 Consignes de sécurité générales Sécurité...
  • Page 38 6. Mise en service (Radiateur soufflant tour avec télécommande)  ....................Page 48 6.1 Mode de veille  ........................Page 48 6.2 Mode ventilateur  ......................... Page 48 6.3 Réglage des niveaux de chauffage (mode chauffage)  ............ Page 48 6.4 Mise à l’arrêt de l’appareil  ....................Page 48 6.5 Fonction d’oscillation ...
  • Page 39: Radiateur Soufflant Tour Sthl 2000 A1

    15 ºC - 40 ºC 1 Notice d’utilisation Minuteur : 24 heures Longueur du cordon d’alimentation : 1,8 m Télécommande (uniquement pour l’utilisation avec le radiateur soufflant tour STHL 2000 A1) Alimentation par pile : 3 V (courant continu) CR2025 Pile au lithium FR/BE/CH...
  • Page 40 (sélectionner électriques un seul type) contrôle de la puissance thermique à un Référence(s) du modèle : STHL 2000 A1 palier, pas de contrôle de la température Caractéristique Symbole Valeur Unité de la pièce...
  • Page 41: Consignes De Sécurité

    2. Consignes de sécurité Lisez toutes les consignes de sécurité et instructions. Le non-respect des consignes de sécurité et des instructions peut entraîner de graves blessures et/ou dommages matériels. Conservez toutes les consignes de sécurité et les instructions pour l’avenir ! 2.1 Consignes de sécurité...
  • Page 42: Consignes De Sécurité Spécifiques Exigences Particulières Pour Les Appareils De Chauffage Des Locaux

    2.2 Consignes de sécurité spécifiques Exigences particulières pour les appareils de chauffage des locaux AVERTISSEMENT ! Ne pas recouvrir ! Ne recouvrez pas l’appareil afin d’éviter la surchauffe de l’appareil de chauffage. N’installez pas l’appareil de chauffage juste au-dessous d’une prise murale. N’utilisez pas cet appareil de chauffage à...
  • Page 43: Consignes De Sécurité Complémentaires

    Avertissement contre les surfaces chaudes ! PRUDENCE : Certaines pièces du produit peuvent devenir très chaudes et causer des brûlures. Une prudence particulière est de mise en présence des enfants et des personnes vulnérables. 2.3 Consignes de sécurité complémentaires L’appareil convient uniquement pour l’usage à l’intérieur.
  • Page 44: Instructions Concernant Les Piles

    Utilisez l’appareil uniquement avec le cordon d’alimentation entiè- rement déroulé. N’enroulez jamais le cordon d’alimentation autour de l’appareil. Veillez à ce que le cordon d’alimentation n’entre pas en contact avec des surfaces chaudes. Posez le cordon d’alimentation de manière à éviter le risque de trébuchement.
  • Page 45 Rincer abondamment à l’eau en cas de contact avec la peau. Si les produits chimiques entrent en contact avec les yeux, rincer à l’eau, ne pas frotter et consulter immédiatement un médecin. Ne pas mélanger différents types de pile ou de batterie, de même que les piles neuves et anciennes.
  • Page 46: Avant La Mise En Service (Radiateur Soufflant Tour Sans Télécommande)

    3. Avant la mise en service 4.2 Mode ventilateur (Radiateur soufflant tour sans télé- commande) En mode de veille, appuyez une fois sur la touche marche/arrêt 5 . L’appareil est passé Retirez tout le matériel d’emballage et toutes les en mode ventilateur. fixations de transport de l’appareil.
  • Page 47: Fonction D'oscillation

    4.5 Fonction d’oscillation nombre souhaité d’heures. L’actionnement réitéré de la touche de minuteur 3 Pour activer ou désactiver l’oscillation de règle le minuteur par pas de 1 heure : l’appareil, appuyez sur la touche d’oscil- lation 4 . Si l’activation a réussi, le symbole de la touche d’oscillation 4  ...
  • Page 48: Mise En Service (Radiateur Soufflant Tour Avec Télécommande)

    6.3 Réglage des niveaux de chauffage 3  volts neuve. Ce faisant, faites attention au (mode chauffage) type de la pile bouton au lithium (CR2025). Appuyez sur la languette sur le comparti- ment à pile de la télécommande vers le mi- En mode ventilateur, appuyez une fois sur lieu.
  • Page 49: Réglage De La Température

    6.6 Réglage de la température Le minuteur peut être réglé par pas de 1 heure : Appuyez sur la touche de température 8 pour accéder au mode de réglage de la température. Appuyez encore une fois sur la touche Après le réglage du minuteur, le symbole de la plus 9 pour augmenter la température touche de minuteur 3  ...
  • Page 50: Maintenance, Nettoyage Et Entreposage

    8. Maintenance, nettoyage et tenus par la loi de remettre toutes les entreposage piles / batteries auprès d’un point de col- lecte de leur commune / quartier ou Débranchez toujours la fiche secteur lorsque dans le commerce. Le but de cette obli- vous ne l’utilisez pas et avant chaque nettoyage gation est de pouvoir remettre les piles / ou en cas de dysfonctionnements !
  • Page 51 Déroulement en cas de réclamation de de présenter sous ce délai de trois ans l’appareil garantie défectueux et la preuve d’achat (facture) ainsi qu’une brève description écrite du défaut et du moment de son Pour assurer un traitement rapide de votre demande , apparition.
  • Page 52: Service

    12. Service En cas de problèmes survenant lors de l’utilisation de votre produit de ROWI Germany, veuillez procé- der de la manière suivante : Prise de contact Vous pouvez joindre l’équipe de service de ROWI Germany sur : ROWI Germany GmbH Werner-von-Siemens-Str. 27 76694 Forst ALLEMAGNE lidl-services@rowi-group.com...
  • Page 53 1. Inleiding  ........................... Pagina 55 1.1 Beoogd gebruik  ......................Pagina 55 1.2 Leveringsomvang  ......................Pagina 55 1.3 Uitrusting  ......................... Pagina 55 1.4 Technische gegevens  ...................... Pagina 55 2. Veiligheidsinstructies  ....................Pagina 57 2.1 Algemene veiligheidsinstructies Veiligheid elektrische toestellen voor huishoudelijk gebruik  ........Pagina 57 2.2 Specifieke veiligheidsinstructies Speciale vereisten voor ruimteverwarmingstoestellen ...
  • Page 54 6. Inbedrijfstelling (Toren-ventilatorkachel met afstandsbediening)  ....................Pagina 64 6.1 Standby-Modus  ......................Pagina 64 6.2 Ventilatormodus  ......................Pagina 64 6.3 Instelling verwarmingsniveaus (verwarmingsmodus)  ........... Pagina 64 6.4 Toestel uitschakelen  ......................Pagina 64 6.5 Oscillatiefunctie  ......................Pagina 64 6.6 Temperatuurinstelling  ..................... Pagina 65 6.7 Timerinstelling ...
  • Page 55: Inleiding

    50-60 Hz Nominale opname: 2000 W Verwarmingsniveau 1: 1200 W 1.2 Leveringsomvang Verwarmingsniveau 2: 2000 W Beschermingsklasse: 1 Toren-ventilatorkachel STHL 2000 A1 Temperatuurselectiebereik: 15 ºC - 40 ºC 1 Afstandsbediening (incl. knoopcel) Timer: 24 uur 1 Bedieningshandleiding Netsnoerlengte: 1,8 m Afstandsbediening (alleen voor gebruik met...
  • Page 56 Informatie-eisen voor elektrische toestellen Type warmteafgifte/sturing voor lokale ruimteverwarming kamertemperatuur (selecteer één) Eentrapswarmteafgifte, geen sturing van de Typeaanduiding(en): STHL 2000 A1 kamertemperatuur [neen] Item Symbol Waarde Eenheid Twee of meer handmatig in te stellen Warmteafgifte trappen, geen sturing van de kamer-tem-...
  • Page 57: Veiligheidsinstructies

    2. Veiligheidsinstructies Lees alle veiligheidsinstructies en aanwijzingen. Veronachtzaming bij het naleven van veiligheidsinstructies en aanwijzingen kan ernstige verwondingen en/of materiële schade veroorzaken. Bewaar alle veiligheidsinstructies en aanwijzingen voor de toekomst! 2.1 Algemene veiligheidsinstructies Veiligheid elektrische toestellen voor huishoudelijk ge- bruik Dit toestel kan worden gebruikt door kinderen vanaf 8 jaar en personen met verminderde lichamelijke, zintuiglijke of geestelijke vermogens of met gebrek aan ervaring en kennis, indien zij on-...
  • Page 58: Specifieke Veiligheidsinstructies Speciale Vereisten Voor Ruimteverwarmingstoestellen

    2.2 Specifieke veiligheidsinstructies Speciale vereisten voor ruimteverwarmingstoestellen WAARSCHUWING! Niet afdekken! Om oververhitting ervan te voorkomen, mag het verwarmings- toestel niet worden afgedekt. Het verwarmingstoestel mag niet direct onder een wandcontact- doos worden opgesteld. Gebruik dit verwarmingstoestel niet in de onmiddellijke omgeving van een badkuip, douche of zwembad.
  • Page 59: Aanvullende Veiligheidsinstructies

    Waarschuwing voor hete oppervlakken! VOORZICHTIG: sommige delen van het product kunnen zeer heet worden en brandwonden uitlokken. Er is bijzondere voor- zichtigheid geboden wanneer er kinderen en kwetsbare perso- nen aanwezig zijn. 2.3 Aanvullende veiligheidsinstructies Het toestel is uitsluitend geschikt voor gebruik binnenshuis. Levensgevaar door elektrische stroom! Bij contact met onder spanning staande leidingen of onderdelen bestaat levensgevaar!
  • Page 60: Instructies Over Batterijen

    Gebruik het toestel uitsluitend met volledig afgerold netsnoer. Wikkel het netsnoer nooit om het toestel heen. Let erop dat het netsnoer niet in contact komt met hete oppervlakken. Leg het snoer derwijze dat men niet over het snoer kan struikelen. 2.4 Instructies over batterijen Buiten het bereik van kinderen houden.
  • Page 61 ogen komen, grondig met water spoelen, niet wrijven en onmiddel- lijk een arts raadplegen. Verschillende types batterijen of accu's, alsmede nieuwe en oude batterijen mogen niet samen worden gebruikt. Plaats de batterijen altijd met de juiste polariteit, anders bestaat het risico dat ze barsten. Verwijder de batterijen uit het toestel als u het lange tijd niet gaat gebruiken of als u het wilt opbergen.
  • Page 62: Voor De Inbedrijfstelling (Toren-Ventilatorkachel Zonder Afstandsbediening)

    3. Voor de inbedrijfstelling 4.2 Ventilatormodus (Toren-ventilatorkachel zonder afstandsbediening) Druk in de standby-modus eenmaal op de aan-/ uitknop 5   . Het toestel bevindt zich nu in de Verwijder alle verpakkingsmateriaal en alle ventilatormodus. transportvoorzieningen van het toestel. Contro- leer of de verpakkingsinhoud volledig en onbe- 4.3 Instelling verwarmingsniveaus schadigd is.
  • Page 63: Oscillatiefunctie

    4.5 Oscillatiefunctie Het herhaaldelijk drukken op de timerknop 3 stelt de timer in stappen van 1 uur in: Om de oscillatie van het toestel in of uit te schakelen, drukt u op de oscillatieknop 4   . Bij succesvolle activering licht het symbool van de oscillatieknop op 4  ...
  • Page 64: Inbedrijfstelling (Toren-Ventilatorkachel Met Afstandsbediening)

    6.3 Instelling verwarmingsniveaus Druk het lipje aan het batterijvak van de (verwarmingsmodus) afstandsbediening naar het midden. Trek nu het batterijvak eruit (zie afbeelding 2). Druk in de ventilatormodus eenmaal op de knop Verwarmingsniveaus   . Het toestel bevindt zich nu op verwarming- sniveau 1.
  • Page 65: Temperatuurinstelling

    6.6 Temperatuurinstelling De timer kan worden ingesteld in stappen van 1 uur: Druk op de temperatuurknop 8 om de temperatuurinstelmodus te openen. Druk herhaaldelijk op de plusknop 9 om de door u gewenste temperatuur Nadat de timer met succes is ingesteld, licht het te verhogen.
  • Page 66: Onderhoud, Reiniging En Opslag

    8. Onderhoud, reiniging en opslag in te leveren bij een inzamelpunt in zijn gemeente/stad of bij een detailhande- Trek de stekker altijd uit wanneer het toestel laar. Deze verplichting dient om ervoor te niet in gebruik is en vóór iedere reiniging of bij zorgen dat batterijen/accu's op milieu- bedrijfsstoringen! vriendelijke wijze kunnen worden wegge-...
  • Page 67 Procedure in geval van garantie strekking vereist dat binnen de termijn van drie jaar het defecte toestel en het aankoopbewijs (kassa- Om uw verzoek snel te kunnen af handelen, volgt u bon) worden bezorgd en dat kort schriftelijk wordt de volgende instructies: beschreven waarin het gebrek bestaat en wanneer dit is opgetreden.
  • Page 68: Service

    12. Service Indien er problemen optreden met de werking van uw ROWI Germany-product, gaat u als volgt te werk: Contactopname U bereikt het serviceteam van ROWI Germany op: ROWI Germany GmbH Werner-von-Siemens-Str. 27 76694 Forst DUITSLAND lidl-services@rowi-group.com Servicehotline: +800 7694 7694 (gratis vanuit het vaste net) IAN 367685_2101 De meeste problemen kunnen reeds in het kader van...
  • Page 69 1. Úvod  ............................ Strana 71 1.1 Použití v souladu s určeným účelem  ................Strana 71 1.2 Rozsah dodávky  ......................Strana 71 1.3 Vybavení  .......................... Strana 71 1.4 Technické údaje  ....................... Strana 71 2. Bezpečnostní upozornění  ..................Strana 73 2.1 Všeobecná bezpečnostní upozornění Bezpečnost elektrických spotřebičů...
  • Page 70 6. Uvedení do provozu (Věžový ohřívač s ventilátorem s dálkovým ovládáním)  ..................Strana 80 6.1 Pohotovostní režim  ......................Strana 80 6.2 Režim ventilátoru  ......................Strana 80 6.3 Nastavení topných stupňů (režim topení)  ..............Strana 80 6.4 Vypnutí zařízení  ....................... Strana 80 6.5 Funkce oscilace ...
  • Page 71: Úvod

    50-60 Hz 1.2 Rozsah dodávky Jmenovitý příkon: 2000 W Topný stupeň 1: 1200 W 1 Věžový ohřívač s ventilátorem STHL 2000 A1 Topný stupeň 2: 2000 W 1 Dálkový ovladač (včetně knoflíkové baterie) Třída ochrany: 1 Návod k obsluze Rozsah volby teploty: 15 ºC - 40 ºC...
  • Page 72 Požadavky na informace týkající se elek- Typ výdeje tepla/regulace teploty v místnosti trických lokálních topidel Identifikační značka (vyberte jeden) jeden stupeň tepelného výkonu, Identifikační značka modelu: STHL 2000 A1 bez regulace teploty v místnosti [ne] Údaj Značka Hodnota Jednotka dva nebo více ručních stupňů, Tepelný...
  • Page 73: Bezpečnostní Upozornění

    2. Bezpečnostní upozornění Přečtěte si všechna bezpečnostní upozornění a pokyny. Opomenutí při dodržování bezpečnostních upozornění a pokynů může způsobit vážná zranění nebo materiální škody. Uschovejte si všechna bezpečnostní upozornění a pokyny pro budoucí použití! 2.1 Všeobecná bezpečnostní upozornění Bezpečnost elektrických spotřebičů pro domácnost Toto zařízení...
  • Page 74: Zvláštní Bezpečnostní Upozornění Zvláštní Požadavky Na Pokojová Topidla

    2.2 Zvláštní bezpečnostní upozornění Zvláštní požadavky na pokojová topidla VÝSTRAHA! Nezakrývejte! Zařízení se nesmí ničím zakrývat, aby nedošlo k jeho přehřátí. Topidlo se nesmí instalovat bezprostředně pod elektrickou zásuvku na stěně. Topidlo nepoužívejte v bezprostřední blízkosti koupací vany, sprchy nebo plaveckého bazénu. Zařízení, které...
  • Page 75: Další Bezpečnostní Upozornění

    Výstraha před horkými povrchy! VAROVÁNÍ: Některé části výrobku se mohou velmi zahřát a způsobit popáleniny. Zvláštní pozornost je třeba věnovat přítom- nosti dětí a zranitelných osob. 2.3 Další bezpečnostní upozornění Zařízení je určeno pouze pro použití v interiéru. Nebezpečí ohrožení života elektrickým proudem! Nebezpečí...
  • Page 76: Poznámky K Bateriím

    2.4 Poznámky k bateriím Uchovávejte mimo dosah dětí. Jejich spolknutí může způsobit poranění, perforaci měkkých tkání a smrt. Do 2 hodin po spolknutí může dojít k těžkým popáleninám. Okamžitě vyhledejte lékařskou pomoc. Nesprávná manipulace s bateriemi může vést k požáru, výbuchu, úniku nebezpečných látek nebo jiným nebezpečným situacím! Baterie nevhazujte do ohně...
  • Page 77 Před instalací baterie očistěte kontakty baterie a také kontakty za- řízení. Vybité baterie okamžitě vyjměte a zlikvidujte je způsobem šetrným k životnímu prostředí. Baterie nerozebírejte. Pokud se kryt baterií nedá bezpečně zavřít, přestaňte dálkový ovla- dač používat a chraňte jej před dětmi. Vyhněte se extrémním podmínkám a teplotám, které...
  • Page 78: Před Uvedením Do Provozu (Věžový Ohřívač S Ventilátorem Bez Dálkového Ovládání)

    3. Před uvedením do provozu 4.2 Režim ventilátoru (Věžový ohřívač s ventilátorem bez dálkového ovládání) V pohotovostním režimu stiskněte jednou tlačítko ZAP/VYP 5   . Zařízení se nyní nachází v režimu Ze zařízení odstraňte veškerý obalový materiál ventilátoru. a všechny přepravní pojistky. Zkontrolujte, zda je obsah balení...
  • Page 79: Funkce Oscilace

    4.5 Funkce oscilace Opakované tisknutí tlačítka časovače 3 nastaví ča- sovač v krocích po 1 hodině: Chcete-li zapnout nebo vypnout oscilaci zařízení, stiskněte tlačítko oscilace 4   . Po úspěšné aktivaci se rozsvítí symbol tlačítka oscilace 4   . Po úspěšném nastavení časovače se rozsvítí Funkce oscilace způsobuje, že se vypouštěný...
  • Page 80: Uvedení Do Provozu (Věžový Ohřívač S Ventilátorem S Dálkovým Ovládáním)

    6.3 Nastavení topných stupňů (režim topení) Jazýček na přihrádce na baterie dálkové- ho ovládání přitlačte směrem ke středu. Nyní vy- táhněte přihrádku na baterie ven (viz obr. 2). V režimu ventilátoru stiskněte jednou tla- čítko topných stupňů   . Zařízení se nyní nachází...
  • Page 81: Nastavení Teploty

    6.6 Nastavení teploty Časovač lze nastavit v hodinových krocích: Pro vstup do režimu nastavení teploty stiskněte tlačítko teploty 8 . Opakovaně tiskněte tlačítko plus 9 pro zvýšení požadované teploty. Opakovaně Po úspěšném nastavení časovače se rozsvítí tiskněte tlačítko minus pro snížení symbol tlačítka časovače 3  ...
  • Page 82: Údržba, Čištění A Skladování

    8. Údržba, čištění a skladování aby baterie/dobíjecí baterie mohly být lik- vidovány způsobem šetrným k životnímu Pokud zařízení nepoužíváte a také před prostředí. Baterie/dobíjecí baterie předá- každým čištěním nebo v případě poruchy vždy vejte k likvidaci pouze vybité. Baterie je vytáhněte zařízení...
  • Page 83 Záruční lhůta a zákonné Výrobek, který bude zaevidován jako vadný, nároky z odpovědnosti za vady budete poté moci zaslat poštou zdarma na ad- Záruční lhůta se neprodlužuje poskytnutím záruč- resu servisu, která vám byla oznámena. K výrob- ního plnění. Toto platí i pro vyměněné a opravené ku přiložte doklad o koupi (účtenka) a uveďte součástky.
  • Page 84 12. Servis Pokud při provozu vašeho výrobku od společnosti ROWI Germany nastanou problémy, postupujte ná- sledovně: Kontakt Servisní tým společnosti ROWI Germany můžete kontaktovat na adrese: ROWI Germany GmbH Werner-von-Siemens-Str. 27 76694 Forst NĚMECKO lidl-services@rowi-group.com Servisní linka: +800 7694 7694 (z pevné...
  • Page 85 1. Wstęp  ..........................Strona 87 1.1 Zastosowanie zgodne z przeznaczeniem  ..............Strona 87 1.2 Zakres dostawy  ......................Strona 87 1.3 Wyposażenie  ......................... Strona 87 1.4 Dane techniczne  ......................Strona 87 2. Zasady bezpieczeństwa  ..................Strona 89 2.1 Ogólne zasady bezpieczeństwa Bezpieczeństwo domowych urządzeń elektrycznych  ..........Strona 89 2.2 Szczególne zasady bezpieczeństwa Szczególne wymagania dla grzejników pokojowych ...
  • Page 86 6. Uruchomienie (Termowentylator wieża z pilotem)  ......Strona 96 6.1 Tryb czuwania  ........................ Strona 96 6.2 Tryb wentylatora  ......................Strona 96 6.3 Ustawienie poziomu grzewczego (tryb ogrzewania)  ..........Strona 96 6.4 Wyłączanie urządzenia  ....................Strona 96 6.5 Funkcja oscylacji  ......................Strona 96 6.6 Ustawienie temperatury ...
  • Page 87: Wstęp

    1.2 Zakres dostawy Zakres temperatury: 15 ºC - 40 ºC Zegar: 24 godziny 1 Termowentylator wieża STHL 2000 A1 Długość przewodu zasilania: 1,8 m 1 Pilot (wraz z baterią guzikową) Pilot (tylko do zastosowania z termowentyla- 1 Instrukcja obsługi tor wieża STHL 2000 A1) Zasilanie z baterii:...
  • Page 88 Wymogi w zakresie informacji dotyczące Rodzaj mocy cieplnej/regulacja temperatury elektrycznych miejscowych ogrzewaczy w pomieszczeniu pomieszczeń (należy wybrać jedną opcję) jednostopniowa moc cieplna bez regulacji Identyfikator(-y) modelu: STHL 2000 A1 temperatury w pomieszczeniu [nie] Ozna- Jed- co najmniej dwa ręczne stopnie bez Parametr Wartość...
  • Page 89: Zasady Bezpieczeństwa

    2. Zasady bezpieczeństwa Przeczytać wszystkie zasady bezpieczeństwa i instrukcje. Zignorowanie zasad bezpieczeństwa lub instrukcji może spowodować poważne urazy lub szkody materialne. Przechować wszystkie zasady bezpieczeństwa i instrukcje na przyszłość! 2.1 Ogólne zasady bezpieczeństwa Bezpieczeństwo domowych urządzeń elektrycznych Urządzenie może być użytkowane przez dzieci od 8 lat oraz oso- by o ...
  • Page 90: Szczególne Zasady Bezpieczeństwa Szczególne Wymagania Dla Grzejników Pokojowych

    2.2 Szczególne zasady bezpieczeństwa Szczególne wymagania dla grzejników pokojowych OSTRZEŻENIE! Nie zakrywać! Aby uniknąć przegrzania grzejnika, nie wolno go przykrywać. Grzejnika nie wolno ustawiać bezpośrednio pod gniazdkiem. Nie używać grzejnika bezpośrednio w pobliżu wanny, prysznica lub basenu. Nie uruchamiać urządzenia po upadku. Nie stosować, jeśli grzejnik wykazuje widoczne oznaki uszkodzenia.
  • Page 91: Uzupełniające Zasady Bezpieczeństwa

    Ostrzeżenie przed gorącymi powierzchniami! OSTROŻNIE: Niektóre części produktu mogą się znacznie rozgrzewać i  powodować poparzenia. Jeżeli w  pobliżu są dzieci i osoby wymagające opieki, wymagane jest zachowanie szczególnej ostrożności. 2.3 Uzupełniające zasady bezpieczeństwa Urządzenie przeznaczone jest wyłącznie do pracy wewnątrz pomieszczeń! Śmiertelne zagrożenie w wyniku porażenia prądem! Kontakt z przewodami lub elementami pod napięciem wiąże się...
  • Page 92: Informacje Dotyczące Baterii

    Nie używać urządzenia w pobliżu otwartego ognia. Urządzenie używać wyłącznie z całkowicie rozwiniętym przewo- dem zasilania. Nigdy nie owijać przewodu zasilania wokół urządzenia. Zwrócić uwagę na to, by przewód zasilania nie miał kontaktu z gorącymi powierzchniami. Układać przewód zasilania w taki sposób, aby nie można się było o niego potknąć.
  • Page 93 Zagrożenie poparzeniem chemicznym! Nosić rękawice ochronne. Substancje chemiczne wyciekające z baterii mogą spowodować podrażnienia skóry. W przypadku kontaktu ze skórą spłukać dużą ilością wody. Kiedy substancje chemiczne dostaną się do oczu, generalnie przepłukać wodą, nie trzeć i natychmiast skontaktować się z lekarzem. Nie wolno stosować razem różnych typów baterii lub akumulato- rów, a także nowych i starych baterii.
  • Page 94: Przed Pierwszym Uruchomieniem (Termowentylator Wieża Bez Pilota)

    3. Przed pierwszym uruchomieniem 4.2 Tryb wentylatora (Termowentylator wieża bez pilota) W trybie czuwania nacisnąć raz przycisk wł./ wył. 5 . Urządzenie jest w trybie wentylatora. Usunąć całość opakowania i  wszystkie zabez- pieczenia transportowe z  urządzenia. Spraw- 4.3 Ustawienie poziomu grzewczego dzić, czy zawartość...
  • Page 95: Funkcja Oscylacji

    4.5 Funkcja oscylacji Wielokrotne naciśnięcie przycisku zegara 3 umoż- liwia ustawienie go w krokach co 1 godzinę: Aby włączyć lub wyłączyć oscylację urzą- dzenia, nacisnąć przycisk oscylacji 4 . Po udanej aktywacji świeci się symbol przycisku oscylacji 4 . Po prawidłowym ustawieniu zegara symbol Funkcja oscylacji służy do rozprowadzania wy- przycisku zegara 3 zapala się.
  • Page 96: Uruchomienie (Termowentylator Wieża Z Pilotem)

    6.3 Ustawienie poziomu grzewczego (tryb ogrzewania) W trybie wentylatora nacisnąć raz przy- cisk poziomu grzewczego . Urządze- nie ustawione jest na poziom grzewczy 1. Termowentylator kolumnowy generuje moc grzewczą 1200  W. Przycisk wł./ wył 5 świeci się na niebiesko. Naciśnięcie przycisku poziomu grzewczego przestawia urządzenie na poziom ogrzewania Wyjąć...
  • Page 97: Ustawienie Temperatury

    6.6 Ustawienie temperatury Zegar można ustawić w krokach co 1 godzinę: Nacisnąć przycisk temperatury 8 , aby przejść do trybu ustawień temperatury. Nacisnąć klika razy przycisk plus 9 , aby zwiększyć wybraną temperaturę. Po prawidłowym ustawieniu zegara symbol Nacisnąć klika razy przycisk minus przycisku zegara zapala się...
  • Page 98: Konserwacja, Czyszczenie I Przechowywanie

    albo wystawione jest na duże nachylenie, wyłącza zacji zużytego urządzenia można uzyskać się automatycznie. Urządzenie działa wyłącznie w urzędzie gminy lub miasta. w pozycji pionowej. Baterie muszą być oddane do recyklingu zgodnie z dyrektywą 2006/66/WE i nie 8. Konserwacja, czyszczenie i prze- wolno ich wyrzucać do odpadów komu- chowywanie nalnych.
  • Page 99 Jeżeli w ciągu trzech lat od daty zakupu produktu przed których realizacją i wykonywaniem instrukcja ujawni się wada materiałowa bądź produkcyjna, owa przestrzega. wówczas – według naszego uznania – dokonamy Produkt przeznaczony jest użytku bezpłatnej naprawy lub wymiany produktu. Wyżej celach prywatnych i nie jest przeznaczony do wymienione świadczenie gwarancyjne obowiązuje wykorzystania w przemyśle.
  • Page 100 Na stronie www.lidl-service.com można pobrać tę i wiele innych instrukcji, a także filmy o produktach i oprogramowanie instalacyjne. Korzystając z tego kodu QR można przejść bezpośrednio na stronę serwisową Lidla (www.lidl-service.com) gdzie wpro- wadzając numer artykułu (IAN 367685_2101) można otworzyć swoją instrukcję obsługi. 12. Serwis W przypadku wystąpienia problemów z produktem ROWI Germany, należy postępować...
  • Page 101 1. Úvod  ..........................Strana 103 1.1 Použitie zodpovedajúce určeniu  ................... Strana 103 1.2 Rozsah dodávky  ......................Strana 103 1.3 Výbava  ........................... Strana 103 1.4 Technické údaje  ......................Strana 103 2. Bezpečnostné pokyny  ................... Strana 105 2.1 Všeobecné bezpečnostné pokyny Bezpečnosť elektrických zariadení na domáce použitie  ..........Strana 105 2.2 Špecifické...
  • Page 102 6. Uvedenie do prevádzky (vežový teplovzdušný ventilátor s diaľkovým ovládaním)  ..................Strana 112 6.1 Pohotovostný režim  ....................... Strana 112 6.2 Režim ventilátora  ......................Strana 112 6.3 Nastavenie stupňov ohrevu (vykurovací režim)  ............Strana 112 6.4 Vypnutie prístroja  ......................Strana 112 6.5 Funkcia oscilácie ...
  • Page 103: Úvod

    Stupeň ohrevu 2: 2000 W 1.2 Rozsah dodávky Trieda ochrany: Rozsah voľby teploty: 15 ºC – 40 ºC 1 Vežový teplovzdušný ventilátor STHL 2000 A1 Časovač: 24 hodín 1 Diaľkové ovládanie (vrát. gombíkovej batérie) Dĺžka sieťového kábla: 1,8 m 1 Návod na obsluhu Diaľkové...
  • Page 104 Požiadavky na informácie pre elektrické Druh ovládania tepelného výkonu/ izbovej lokálne ohrievače priestoru teploty (vyberte jeden) jednoúrovňový tepelný výkon bez Identifikačný (-é) kód (-y) modelu: STHL 2000 A1 ovládania izbovej teploty [nie] Položka Symbol Hodnota Jednotka dve alebo viac manuálnych úrovní...
  • Page 105: Bezpečnostné Pokyny

    2. Bezpečnostné pokyny Prečítajte si všetky bezpečnostné pokyny a predpisy. Zanedbanie dodržiavania bezpečnostných pokynov a predpi- sov môže spôsobiť závažné zranenia a/alebo vecné škody. Všetky bezpečnostné pokyny a predpisy si odložte pre budú- ce použitie! 2.1 Všeobecné bezpečnostné pokyny Bezpečnosť elektrických zariadení na domáce použitie Tento prístroj môžu používať...
  • Page 106: Špecifické Bezpečnostné Pokyny Osobitné Požiadavky Na Izbové Ohrievače

    2.2 Špecifické bezpečnostné pokyny Osobitné požiadavky na izbové ohrievače VAROVANIE! Nezakrývajte! Aby sa zabránilo prehriatiu ohrievača, nesmie sa ohrievač za- krývať. Ohrievač nesmie byť inštalovaný bezprostredne pod zásuvkou v stene. Tento ohrievač nikdy nepoužívajte v bezprostrednej blízkosti vane, sprchy alebo bazéna. Prístroj, ktorý spadol, neuvádzajte do prevádzky. Ohrievač...
  • Page 107: Doplňujúce Bezpečnostné Pokyny

    Varovanie pred horúcimi povrchmi! POZOR: Niektoré časti výrobku sa môžu veľmi zahriať a spôso- biť popáleniny. Osobitná pozornosť sa vyžaduje, keď sú prítom- né deti a osoby, ktoré vyžadujú ochranu. 2.3 Doplňujúce bezpečnostné pokyny Prístroj je vhodný len na prevádzku v interiéri. Nebezpečenstvo ohrozenia života elektrickým prúdom! Pri kontakte s vedeniami alebo konštrukčnými prvkami, ktoré...
  • Page 108: Pokyny Týkajúce Sa Batérií

    Sieťový kábel nikdy neovíjajte okolo prístroja. Dbajte na to, aby sa sieťový kábel nedostal do kontaktu s horúcim povrchom. Sieťový kábel veďte tak, aby oň nebolo možné zakopnúť. 2.4 Pokyny týkajúce sa batérií Držte ich mimo dosahu detí. Prehltnutie môže spôsobiť poranenia, perforáciu mäkkého tkaniva a smrť.
  • Page 109 Ak prístroj dlhší čas nebudete používať alebo ho chcete uskladniť, vyberte z neho batérie. Batérie vložte so správnou polaritou. Nedovoľte deťom, aby vymieňali batérie bez dohľadu dospelej osoby. Zvoľte vždy správnu veľkosť a správny typ batérie pre zamýšľané použitie. Informácie pre pomoc pri správnom výbere batérie, doda- né...
  • Page 110: Pred Uvedením Do Prevádzky (Vežový Teplovzdušný Ventilátor Bez Diaľkového Ovládania)

    3. Pred uvedením do prevádzky 4.2 Režim ventilátora (vežový teplovzdušný ventilátor bez diaľkového ovládania) V pohotovostnom režime stlačte raz tlačidlo ZAP/VYP 5   . Prístroj sa teraz nachádza v re- Z  prístroja odstráňte všetok obalový materiál žime ventilátora. a prepravné poistky. Skontrolujte, či je obsah balenia úplný...
  • Page 111: Funkcia Oscilácie

    4.5 Funkcia oscilácie Opakované stláčanie tlačidla časovača 3 nastavu- je časovač v 1-hodinových krokoch: Na zapnutie alebo vypnutie oscilácie prí- stroja stlačte tlačidlo oscilácie 4   . Pri úspešnej aktivácii svieti symbol tlačidla osci- lácie 4   . Po úspešnom nastavení časovača svieti symbol Funkcia oscilácie spôsobí, že vyfukovaný...
  • Page 112: Uvedenie Do Prevádzky (Vežový Teplovzdušný Ventilátor S Diaľkovým Ovládaním)

    6.3 Nastavenie stupňov ohrevu Zatlačte jazýček na priehradke pre batériu (vykurovací režim) diaľkového ovládania smerom do stredu. Teraz vytiahnite priehradku pre batériu (pozri obrázok 2). V režime ventilátora stlačte raz tlačidlo stupňov ohrevu   . Prístroj sa teraz na- chádza v stupni ohrevu 1. Vežový tep- lovzdušný...
  • Page 113: Nastavenie Teploty

    6.6 Nastavenie teploty Časovač sa môže nastaviť v 1-hodinových krokoch: Stlačte tlačidlo teploty 8 , aby ste sa dostali do režimu nastavenia teploty. Stlačte opakovane tlačidlo Plus 9 , aby ste zvýšili na vami požadovanú teplotu. Po úspešnom nastavení časovača svieti symbol Stlačte opakovane tlačidlo Mínus tlačidla časovača 3  ...
  • Page 114: Údržba, Čistenie A Skladovanie

    8. Údržba, čistenie a skladovanie aby sa batérie/akumulátory mohli odo- vzdávať na ekologické zneškodnenie. Ba- Ak prístroj nepoužívate, resp. pred každým térie/akumulátory odovzdajte späť iba vo čistením alebo v  prípade poruchy vždy vybitom stave. Batérie sa musia pred vytiahnite sieťovú zástrčku! zneškodnením odstrániť...
  • Page 115 alebo výmenou výrobku nezačína plynúť nová zá- V  prípade výskytu funkčných chýb alebo iných nedostatkov kontaktujte najprv telefonicky ale- ručná doba. bo e-mailom nižšie uvedené servisné oddelenie. Záručná doba a nároky z chýb Výrobok, ktorý bude zaevidovaný ako chyb- Záručná doba sa nepredlžuje plnením záruky. ný, môžete následne zaslať...
  • Page 116 12. Servis V prípade, ak sa pri prevádzkovaní vášho výrobku od spoločnosti ROWI Germany vyskytnú problémy, postupujte nasledovne: Kontaktujte nás Kontakty na servisný tím spoločnosti ROWI Germany: ROWI Germany GmbH Werner-von-Siemens-Str. 27 76694 Forst NEMECKO lidl-services@rowi-group.com Telefonická linka servisu: +800 7694 7694 (bezplatne z pevnej siete) IAN 367685_2101 Väčšinu problémov je možné...
  • Page 117 1. Introducción  ........................Página 119 1.1 Uso previsto  ........................Página 119 1.2 Volumen de suministro ....................Página 119 1.3 Equipamiento  ......................... Página 119 1.4 Datos técnicos  ....................... Página 119 2. Instrucciones de seguridad  ................. Página 121 2.1 Instrucciones generales de seguridad Seguridad de los aparatos eléctricos de uso doméstico ...
  • Page 118 6. Puesta en marcha (Calefactor de torre con mando a distancia)  ..................Página 128 6.1 Modo de espera  ......................Página 128 6.2 Modo de ventilador  ...................... Página 128 6.3 Ajuste de los niveles de calentamiento (modo de calentamiento)  ......Página 128 6.4 Desconexión del aparato ...
  • Page 119: Introducción

    Potencia nominal de entrada: 2000 W 1.2 Volumen de suministro Nivel de calefacción 1: 1200 W Nivel de calefacción 2: 2000 W 1 Calefactor de torre STHL 2000 A1 Clase de protección: 1 Mando a distancia (incl. pilas redondas) Rango de selección de 1 Manual de instrucciones temperatura: 15 ºC a 40 ºC...
  • Page 120 Requisitos de información que deben cumplir Tipo de control de potencia calorífica/de los aparatos de calefacción local eléctricos temperatura interior (seleccione uno) potencia calorífica de un solo nivel, Identificador(es) del modelo: STHL 2000 A1 sin control de temperatura interior [no] Partida Símbolo Valor Unidad Dos o más niveles manuales,...
  • Page 121: Instrucciones De Seguridad

    2. Instrucciones de seguridad Lea todas las instrucciones de seguridad e indicaciones de uso. No cumplir las indicaciones de seguridad e instrucciones puede causar lesiones graves y/o daños materiales. Conserve todas las instrucciones de seguridad e indicaciones de uso para el futuro. 2.1 Instrucciones generales de seguridad Seguridad de los aparatos eléctricos de uso doméstico Este aparato lo pueden utilizar los niños a partir de 8 años y las...
  • Page 122: Instrucciones Específicas De Seguridad Requisitos Específicos De Los Radiadores Para Habitaciones

    2.2 Instrucciones específicas de seguridad Requisitos específicos de los radiadores para habitaciones ADVERTENCIA No cubra. No cubra el radiador para evitarque se sobrecaliente. El radiador no debe colocarse directamente debajo de una toma de corriente mural. No utilice nunca este radiador en las proximidades de una bañera, una ducha o una piscina.
  • Page 123: Instrucciones Complementarias De Seguridad

    Advertencia de superficies calientes. PRECAUCIÓN: Algunas partes del producto pueden calen- tarse mucho y causar quemaduras. Hay que tener especial cuidado cuando haya niños y personas vulnerables. 2.3 Instrucciones complementarias de seguridad El aparato solo es apto para su uso en interiores. Peligro de muerte por corriente eléctrica.
  • Page 124: Instrucciones Para Las Pilas

    No coloque el aparato cerca de llamas abiertas. Utilice el aparato solo con el cable de alimentación totalmente desenrollado. Nunca enrolle el cable de alimentación alrededor del aparato. Asegúrese de que el cable de alimentación no entre en contacto con superficies calientes. Coloque el cable de alimentación de manera que no pueda haber tropiezos.
  • Page 125 En caso de contacto con la piel, aclare con abundante agua. Si los productos químicos entran en contacto con los ojos, aclare siempre con agua, no se frote, y acuda inmediatamente al médico. No se deben utilizar de manera conjunta diferentes tipos de pilas o acumuladores, ni tampoco como pilas nuevas y viejas.
  • Page 126: Antes De La Puesta En Marcha (Calefactor De Torre Sin Mando A Distancia)

    3. Antes de la puesta en marcha 4.2 Modo de ventilador (Calefactor de torre sin mando a distancia) En el modo de espera, pulse la tecla de en- cendido/apagado una vez 5   . La unidad está Retire todo el material de embalaje y los dispo- ahora en el modo de ventilador.
  • Page 127: Función De Oscilación

    4.5 Función de oscilación Al pulsar repetidamente la tecla del temporizador 3 este último se ajusta en incrementos de 1 hora: Para activar o desactivar la oscilación del aparato, pulse la tecla de oscilación 4   . Cuando la activación tiene éxito, se ilumina el símbolo de la tecla de oscilación 4  ...
  • Page 128: Puesta En Marcha (Calefactor De Torre Con Mando A Distancia)

    6.3 Ajuste de los niveles de calentamiento botón de litio (CR2025). (modo de calentamiento) Presione la tapa en el compartimiento de pilas del mando a distancia hasta el centro. Saque el compartimento de las pilas (véase En modo de ventilador, pulse la tecla de figura 2).
  • Page 129: Ajuste De La Temperatura

    6.6 Ajuste de la temperatura El temporizador se puede ajustar en incrementos de 1 hora: Pulse la tecla de temperatura 8 para entrar en el modo de ajuste de la temperatura. Pulse repetidamente la tecla Más 9 para aumentar a la temperatura que desee. Cuando el ajuste de la temperatura tiene Pulse repetidamente la tecla Menos éxito, se ilumina el símbolo de la tecla del...
  • Page 130: Protección Antiinclinación

    7.2 Protección antiinclinación cogida municipales para el reciclaje de materiales. Puede informarse de Cada aparato se encuentra equipado con cómo elimina el aparato inservible po- una protección antiinclinación Si el aparato se niéndose en contacto con el ayuntamiento golpea accidentalmente o está sometido a una o la administración municipal.
  • Page 131 pra. Conserve el recibo original en un lugar seguro. El producto no está diseñado para el uso privado Se requiere como comprobante de compra. y no para el uso comercial. La garantía queda Si se produce un defecto de material o de fabrica- anulada en caso de uso indebido o de manipula- ción en un plazo de tres años a partir de la fecha ción incorrecta, de uso de la fuerza y de interven-...
  • Page 132: Servicio

    12. Servicio Si se producen problemas durante el funcionamien- to de su producto de ROWI Germany, proceda de la siguiente manera: Contacto Puede contactar con el equipo de servicio de ROWI Germany en: ROWI Germany GmbH Werner-von-Siemens-Str. 27 76694 Forst ALEMANIA lidl-services@rowi-group.com Línea de atención telefónica: +800 7694 7694...
  • Page 133 1. Introduktion  ........................Side 135 1.1 Tilsigtet anvendelse  ......................Side 135 1.2 Leveringsomfang  ......................Side 135 1.3 Udstyr  ..........................Side 135 1.4 Tekniske data  ........................Side 135 2. Sikkerhedsanvisninger  .................... Side 137 2.1 Generelle sikkerhedsanvisninger Sikkerhed i forhold til elektriske apparater til husholdningsbrug  ........Side 137 2.2 Specifikke sikkerhedsanvisninger Særlige krav til apparater til rumopvarmning ...
  • Page 134 6. Ibrugtagning (Varme-ventilatortårn med fjernbetjening)  ....Side 144 6.1 Standby-tilstand  ....................... Side 144 6.2 Ventilator-tilstand  ......................Side 144 6.3 Indstilling af varmeniveau (varmetilstand)  ..............Side 144 6.4 Apparat slukkes  ....................... Side 144 6.5 Oscilleringsfunktion  ......................Side 144 6.6 Indstilling af temperatur  ....................Side 145 6.7 Indstilling af timer ...
  • Page 135: Introduktion

    1.4 Tekniske data og er udelukkende beregnet til privat brug. Varme-ventilatortårn STHL 2000 A1 1.2 Leveringsomfang Indgangsspænding: 220-240 V ~ (vekselstrøm) 1 Varme-ventilatortårn STHL 2000 A1 Netfrekvens: 50-60 Hz 1 Fjernbetjening (inkl. knapcellebatteri) Dimensionering: 2000 W 1 Brugsanvisning Varmetrin 1:...
  • Page 136 Informationskrav for elektriske produkter til Type varmeydelse/rumtemperaturstyring lokal rumopvarmning (vælg en type) Ét-trinsvarmeydelse uden [nej] Modelidentifikation(er): STHL 2000 A1 rumtemperaturstyring Element Symbol Værdi Enhed To eller flere manuelle trin uden [nej] Varmeydelse rumtemperaturstyring Nominel varmeydelse Med mekanisk rumtemperaturstyring [nej] Mindste varmeydelse...
  • Page 137: Sikkerhedsanvisninger

    2. Sikkerhedsanvisninger Læs alle sikkerhedsanvisninger og vejledninger. Manglende overholdelse af sikkerhedsanvisningerne og vejledningerne kan føre til alvorlige kvæstelser og/eller mate- rielle skader. Gem alle sikkerhedsanvisninger og vejledninger til fremtidig brug! 2.1 Generelle sikkerhedsanvisninger Sikkerhed i forhold til elektriske apparater til hushold- ningsbrug Dette apparat kan bruges af børn over 8 år og personer med nedsatte fysiske, sensoriske eller mentale evner eller personer, som...
  • Page 138: Specifikke Sikkerhedsanvisninger Særlige Krav Til Apparater Til Rumopvarmning

    2.2 Specifikke sikkerhedsanvisninger Særlige krav til apparater til rumopvarmning ADVARSEL! Må ikke tildækkes! For at undgå en overophedning af varmeapparatet må varme- apparatet ikke tildækkes. Varmeapparatet må ikke placeres umiddelbart under en stikkon- takt i væggen. Dette varmeapparat må ikke anvendes i umiddelbar nærhed af et badekar, en bruser eller et svømmebassin.
  • Page 139: Supplerende Sikkerhedsanvisninger

    Advarsel om varme overflader! FORSIGTIG: Nogle af produktets dele kan blive meget varme og forårsage forbrændinger. Der skal udvises særlig forsigtig- hed, når der er børn og sårbare personer til stede. 2.3 Supplerende sikkerhedsanvisninger Apparatet er kun beregnet til indendørsbrug! Livsfare på...
  • Page 140: Batterianvisninger

    2.4 Batterianvisninger Hold uden for børns rækkevidde. Indtagelse kan medføre personskade, perforering af blødt væv og død. Alvorlige forbrændinger kan forekomme inden for 2 timer efter indtagelse, Søg straks lægehjælp. Forkert håndtering af batterier kan medføre brand, eksplosion, lækage af farlige stoffer eller andre faresituationer! Kast ikke batterierne ind i ild og udsæt dem ikke for høje temperaturer.
  • Page 141 Isæt batterierne i forhold til polariteten. Lad ikke børn udskifte batterier uden voksenopsyn. Vælg altid den rigtige størrelse og den rigtige batteritype til den tilsigtede anvendelse. De oplysninger, der leveres sammen med ap- paratet for at hjælpe med det rigtige batterivalg, skal opbevares som reference.
  • Page 142: Inden Ibrugtagning (Varme-Ventilatortårn Uden Fjernbetjening)

    3. Inden ibrugtagning (Varme-venti- 4.2 Ventilator-tilstand latortårn uden fjernbetjening) Tryk en gang på tænd- / sluk-knappen 5 i Fjern al emballage og alle transportsikringer standby-tilstand  . Apparatet er nu i ventilator-til- fra apparatet. Kontroller, at pakkens indhold er stand. komplet og ubeskadiget. 3.1 Opsætning af enheden 4.3 Indstilling af varmeniveau (varmetilstand) Til sikker og fejlfri drift ag apparatet skal opstil-...
  • Page 143: Oscilleringsfunktion

    4.5 Oscilleringsfunktion Ved gentagne tryk på timer-knappen 3 indstilles timeren i trin på en time: Tryk på oscilleringsknappen for at tænde eller slukke for apparatets oscillering 4   . Ved vellykket aktivering lyser symbolet for oscil- leringsknappen 4   . Når temperaturen er indstillet lyser symbolet for Oscilleringsfunktionen bevirker, at den blæste luft timer-knappen 3  ...
  • Page 144: Ibrugtagning (Varme-Ventilatortårn Med Fjernbetjening)

    6.3 Indstilling af varmeniveau (varmetilstand) Tryk på skinnen på batterirummet på fjernbetjeningen mod midten. Træk nu batteri- rummet ud (se figur 2). Tryk én gang på varmetrins-knappen i ventilator-tilstand  . Apparatet er nu på varmetrin 1. Tårnvarmeblæseren har en varmeeffekt på 1200 W. Tænd- / sluk-knappen 5 lyser blåt.
  • Page 145: Indstilling Af Temperatur

    6.6 Indstilling af temperatur Timeren kan indstilles i trin på en time: Tryk på temperaturknappen 8 for at komme til tilstanden for temperatur- indstilling. Tryk gentagne gange på plus-knappen Når temperaturen er indstillet, lyser symbolet for forhøje ønskede timer-knappen 3   . temperatur.
  • Page 146: Vedligeholdelse, Rengøring Og Opbevaring

    8. Vedligeholdelse, rengøring og batterier / genopladelige batterier bort- opbevaring skaffes på en miljøvenlig måde. Returner kun batterier / genopladelige batterier, når Tag altid stikket ud af stikkontakten, når de er afladet. Batterier skal inden afskaffelse apparatet ikke er i brug, samt før hver rengøring være fjernet fra apparatet.
  • Page 147 Garantiperiode og lovmæssige Mangelkrav viset (kassebon) og detaljer om, hvad manglen Garantien forlænger ikke garantiservicen. Dette består i, og hvornår den opstod, på den gælder også for udskiftede og reparerede dele. serviceadresse, du har fået oplyst. Eventuelle skader og mangler, der allerede findes ved købet, skal rapporteres umiddelbart efter udpakning.
  • Page 150 ROWI Germany GmbH Werner-von-Siemens-Str. 27 DE-76694 Forst GERMANY Last Information Update · Stand der Informationen · Version des informations · Stand van de informatie · Stav informací · Stan informacji · Stav informácií · Versión de la información · Statsoplysninger: 07/2021 ID No.: STHL2000A1-072021-LB08-04 IAN 367685_2101...

Table des Matières