Table des Matières
Publicité
Les langues disponibles
Les langues disponibles
Liens rapides
Installation and operating instructions
Notice de montage et de mise en service
Instrucciones de montaje y uso
EA-Nr.:
FAR-Best.-Nr.:
EA-Nr.:
FAR-Best.-Nr.:
7612982181726
2000103769
AQCT0005
7612982181733
2000103775
AQCT0006
Istruzioni per il montaggio e l'uso
Montage- en bedrijfsinstructies
Montaż i instrukcja obsługi
DE
EN
FR
ES
IT
NL
PL
Publicité
Chapitres
Table des Matières
Dépannage

Manuels Connexes pour Franke AQCT0005


Sommaire des Matières pour Franke AQCT0005
- Page 1 Installation and operating instructions Istruzioni per il montaggio e l’uso Notice de montage et de mise en service Montage- en bedrijfsinstructies Instrucciones de montaje y uso Montaż i instrukcja obsługi EA-Nr.: 7612982181726 FAR-Best.-Nr.: 2000103769 AQCT0005 EA-Nr.: 7612982181733 FAR-Best.-Nr.: 2000103775 AQCT0006...
- Page 2 ..................3 Please refer to the graphics in the German Installation and Operating Instructions..................14 Les graphiques sont disponibles dans la notice de montage et de mise en service allemande..................25 Por favor, consulte los gráficos en las instrucciones alemanas de montaje y uso.
-
Page 3: Table Des Matières
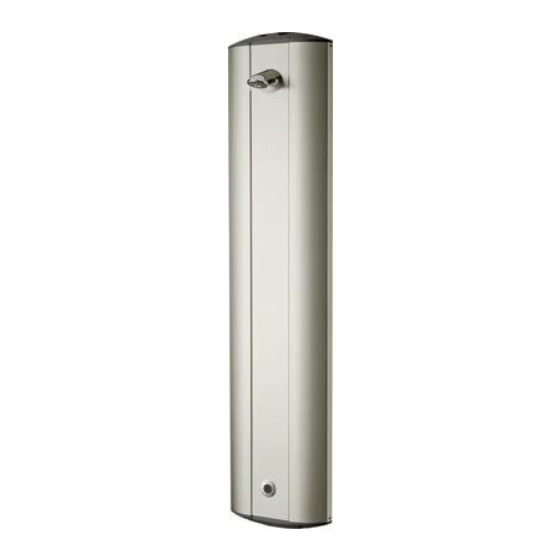
0English AQUACONTACT - stainless steel shower panel, 6 V DC AQCT0005 AQCT0006 ....with integrated tray for shower gel Please refer to the graphics in the German installation and operating instructions. Table of contents Abbreviations and units ....... . 4 Key . -
Page 4: Abbreviations And Units
SELV Safety extra low voltage EA-Nr. European article number FAR-Best.-Nr. Franke Aquarotter order number Conversion 1 mm = 0.03937 inches 1 inch = 25.4 mm All length specifications in the graphics are in mm. Warning! Failure to observe can result in bodily injury or even death. -
Page 5: Important Notes
Important Notes • Installation, commissioning and maintenance are to be performed only by a qualified expert in accordance with the provided instructions, legal requirements, and the recognised engineering standards. • All technical connection regulations specified by the local water and electricity supply companies must be observed. -
Page 6: Scope Of Delivery
Scope of delivery Quantity Name Stainless steel housing with: AQUAJET Slimline shower head, AQUACONTACT sensor, lockable water flow regulator with filter, solenoid valve and connecting hose Screw, dowel Suspension rail Connection bracket 0.15 l/s flow rate regulator Installation and operating instructions Dimensions Installation example 10. - Page 7 11.1 Only for water connection from the rear: Install the connection bracket (a) leak-tight. 11.2 Screw in the water volume regulator (b) leak-tight. 11.3 Align the water volume regulator so that the locking screw and operating element are freely accessible. 11.4 For a shower head height of 2.10 m to 2.30 m, mark drill holes for installation at a height (c) of 2.14 m to 2.34 m from the upper edge of the finished floor.
-
Page 8: Function
12. Function ☞ You can switch between time control and body reflection using the remote control (not in the scope of delivery; see Accessories, Chapter 23). Time control Triggering the flow of water 12.1 Hold your hand near the sensor. •... -
Page 9: Hygiene Flush
15. Hygiene flush ☞ At the factory, the hygiene flush function is set so that water flows for 10 seconds 24 hours after the flush was last activated. You can adjust the hygiene flush parameters using the remote control (not part of the scope of delivery;... -
Page 10: Thermal Disinfection
16. Thermal disinfection This fitting offers thermal disinfection to reduce the risk of a legionella infection! Warning! Personal protective measures (scald protection) must be implemented for the duration of the thermal disinfection. This might include cordoning off the shower facilities. Failure to observe this instruction can result in injuries due to scalding. -
Page 11: Maintenance And Care
18. Maintenance and care The fitting must be checked and maintained at regular intervals in accordance with the water quality, local conditions, and rules and regulations applicable at the site. Maintain the following components: • Shower head (see Chapter 19.) •... -
Page 12: Cleaning The Shower Head Base
19. Cleaning the shower head base 19.1 Undo the screw using a hexagonal wrench. 19.2 With a screwdriver, carefully lever out the jet base. 19.3 Clean the shower head base. 19.4 Reassemble in reverse order. 20. Replacing a filter Water volume regulator filter 20.1 Remove the shower panel (see Chapter 18.). -
Page 13: Troubleshooting
22. Troubleshooting Fault Cause Remedy ➯ Open it Water does not flow – Shut-off valve closed ➯ Restore/replace it – Voltage supply interrupted/battery flat ➯ Restore it – Water supply interrupted ➯ Replace it – Sensor defective ➯ Replace it –... - Page 14 0Français AQUACONTACT - Panneau de douche en acier inoxydable, 6 V DC AQCT0005 AQCT0006 ....avec support pour gel de douche intégré Les graphiques figurent dans la notice de montage et de mise en service allemande. Table des matières Abréviations et unités ........15 Pictogrammes.
-
Page 15: Abréviations Et Unités
Safety Extra Low Voltage, très basse tension de sécurité EA-Nr. Numéro d’article européen FAR-Best.-Nr. Numéro de commande Franke Aquarotter Conversion 1 mm = 0,03937 pouce 1 pouce = 25,4 mm Sur les graphiques, toutes les longueurs sont exprimées en mm. -
Page 16: Remarques Importantes
Remarques importantes • Seul un spécialiste est habilité à effectuer le montage, la mise en service et l’entretien de l’installation, ces opérations étant effectuées conformément aux instructions fournies, aux prescriptions légales et aux règles techniques en usage. • Il convient de respecter les conditions techniques de raccordement des entre- prises locales de distribution d’eau et d’énergie. -
Page 17: Contenu De La Livraison
Contenu de la livraison Pièce Désignation Boîtier en acier inoxydable avec : pommeau de douche AQUAJET-Slimline, capteur AQUACONTACT, régulation du débit d’eau verrouillable avec filtre, électrovanne et tuyau de raccordement Vis, cheville Barre de suspension Équerre d’assemblage Régulateur de débit 0,15 l/s Notice de montage et de mise en service Dimensions Exemple d’installation... - Page 18 11.1 Uniquement dans le cas d’un raccordement à l’alimentation en eau par l’arrière : monter l’équerre d’assemblage (a) de manière étanche. 11.2 Visser hermétiquement la régulation du débit d’eau (b). 11.3 Installer la régulation du débit d’eau de façon à ce que la vis de fermeture et l’élément de commande soient accessibles.
-
Page 19: Fonctionnement
12. Fonctionnement ☞ Il est possible de basculer du mode commande temporisée au mode réflexion à l’aide de la télécommande (non fournie, voir Accessoires Chapitre Commande temporisée Déclencher l’écoulement d’eau 12.1 Approcher la main du capteur. • L’eau coule. • L'écoulement de l'eau s'arrête automatiquement –... -
Page 20: Rinçage Hygiénique
15. Rinçage hygiénique ☞ Par défaut, le rinçage hygiénique est réglé de façon à ce que l'eau coule pendant 10 secondes 24 h après la dernière utilisation.. Il est possible de régler les paramètres du rinçage hygiénique à l’aide de la télécom- mande (non fournie, voir Accessoires Chapitre 23). -
Page 21: Désinfection Thermique
16. Désinfection thermique Ce type de robinetterie permet d’effectuer une désinfection thermique afin de réduire le risque d’infection causée par les légionelles ! Avertissement ! Pendant la durée de la désinfection thermique, il convient de prendre des mesures de protection personnelle (protection contre les brûlures), par exemple barrer l’accès aux sanitaires. -
Page 22: Maintenance Et Entretien
18. Maintenance et entretien En fonction de la qualité de l’eau, ainsi que des conditions et des dispositions locales, il convient de contrôler et d’entretenir la robinetterie à intervalles réguliers. L’entretien doit porter sur les composants suivants : • pommeau de douche (voir Chapitre 19.) •... -
Page 23: Remplacer Le Filtre
20. Remplacer le filtre Filtre de la régulation du débit d’eau 20.1 Retirer le panneau de douche (voir Chapitre 18.). 20.2 Installer les vis de fermeture (a) sur les régulateurs de débit d’eau. 20.3 Remplacer les filtres (b). ☞ Important ! Veiller à... -
Page 24: Dépannage
22. Dépannage Dysfonctionnement Cause Solution ➯ Ouvrir L’eau ne coule pas – Dispositif d’arrêt fermé ➯ Rétablir / – Alimentation électrique interrompue / Pile déchargée Remplacer ➯ Rétablir – Alimentation en eau interrompue ➯ Remplacer – Capteur défectueux ➯ Remplacer –... - Page 25 0Español AQUACONTACT - Panel de ducha de acero inoxidable, 6 V CC AQCT0005 AQCT0006 ....con compartimento integrado para gel Puede consultar los gráficos en las instrucciones de instalación y funcionamiento alemanas. Índice Abreviaturas y unidades ....... . 26 Aclaración de símbolos .
-
Page 26: Abreviaturas Y Unidades
Safety Extra Low Voltage, baja tensión de protección EA-Nr. Número de artículo europeo FAR-Best.-Nr. Número de pedido de Franke Aquarotter Conversión 1 mm = 0,03937 pulgadas 1 pulgada = 25,4 mm Todos los datos de longitudes de los gráficos se indican en mm. -
Page 27: Indicaciones Importantes
Indicaciones importantes • La instalación, la puesta en servicio y el mantenimiento deben ser efectuados únicamente por personal especializado y según las instrucciones suministradas, de conformidad con la normativa local vigente y las buenas prácticas de ingeniería. • Cumplir las condiciones de conexión de la empresa de suministro de agua y energía local. -
Page 28: Volumen De Suministro
Volumen de suministro Unidades Denominación Carcasa de acero inoxidable con: Cabezal de ducha AQUAJET-Slimline, sensor AQUACONTACT, regulador del flujo de agua bloqueable con filtro, válvula electromagnética y tubo de conexión Tornillos, tacos Listón de sujeción Codo de conexión Regulador de caudal 0,15 l/s Instrucciones de instalación y funcionamiento Dimensiones Ejemplo de instalación... - Page 29 11.1 Solo con toma de agua desde atrás: Montar el codo de conexión (a) de tal forma que quede estanco. 11.2 Atornillar el regulador del flujo de agua (b) de tal forma que quede estanco. 11.3 Disponer el regulador del flujo de agua de modo que el tornillo de cierre y el elemento de mando estén accesibles.
-
Page 30: Funcionamiento
12. Funcionamiento ☞ El modo mando temporizado/reflexión corporal puede cambiarse a través del mando a distancia (no incluido en el volumen de suministro, véase Accesorios capítulo 23). Activar el flujo de agua por mando temporizado 12.1 Acercar la mano al sensor. •... -
Page 31: Enjuague Higiénico
15. Enjuague higiénico ☞ El enjuague higiénico está ajustado de fábrica de modo que fluye agua durante 10 s una vez transcurridas 24 h tras la última utilización. Los parámetros del enjuague higiénico pueden ajustarse a través del mando a distancia (no incluido en el volumen de suministro, véase Accesorios capítulo 23). -
Page 32: Ajuste De La Desconexión De Limpieza
☞ La desinfección térmica está ajustada de fábrica de modo que, tras 5 minutos de actuación, la grifería se enfría durante 1 minuto. ☞ La desinfección térmica solamente puede ser activada a través del mando a distancia. Los parámetros de la desinfección térmica pueden ajustarse a través del mando a distancia (no incluido en el volumen de suministro, véase Accesorios capítulo 23). -
Page 33: Mantenimiento Y Cuidados
18. Mantenimiento y cuidados En función de la calidad del agua, las condiciones locales y la legislación vigente, realizar las inspecciones y el mantenimiento de la grifería a intervalos regulares. Realizar el mantenimiento de los siguientes componentes: • Cabezal de ducha (véase el capítulo 19.) •... -
Page 34: Cambio De Filtro
20. Cambio de filtro Filtro del regulador del flujo de agua 20.1 Retirar el panel de ducha (véase el capítulo 18.). 20.2 Enroscar los tornillos de cierre (a) de los reguladores del flujo de agua. 20.3 Cambiar los filtros (b). ☞... -
Page 35: Subsanación De Averías
22. Subsanación de averías Avería Causa Subsanación ➯ Abrir El agua no fluye – Dispositivo de bloqueo cerrado ➯ Restablecer/ – Interrupción de la alimentación de tensión/batería vacía cambiar ➯ Restablecer – Interrupción del suministro de agua ➯ Cambiar – Sensor defectuoso ➯... - Page 36 0Italiano AQUACONTACT - pannello doccia in acciaio inox, 6 V CC AQCT0005 AQCT0006 ....con ripiano integrato Per le figure consultare le istruzioni di montaggio e uso in tedesco. Indice Abbreviazioni e unità ........37 Spiegazione dei simboli .
-
Page 37: Abbreviazioni E Unità
Safety Extra Low Voltage, bassissima tensione di sicurezza EA-Nr. Codice articolo europeo FAR-Best.-Nr. Codice di ordinazione Franke Aquarotter Conversione 1 mm = 0,03937 pollici 1 pollice = 25,4 mm Tutte le indicazioni di lunghezza nelle figure sono in mm. Spiegazione dei simboli Avvertenza! La mancata osservanza può... -
Page 38: Indicazioni Importanti
Indicazioni importanti • Incaricare del montaggio, della messa in servizio e della manutenzione solo un tecnico specializzato, nel rispetto delle istruzioni fornite, delle norme di legge e delle norme tecniche riconosciute. • Attenersi alle disposizioni tecniche di allacciamento degli enti erogatori di acqua ed energia locali. -
Page 39: Dotazione Della Fornitura
Dotazione della fornitura Unità Denominazione Alloggiamento in acciaio inox con: doccetta AQUAJET-Slimline, sensore AQUACONTACT, regolazione intercettabile della quantità d'acqua con filtro, valvola elettromagnetica e flessibile di collegamento Vite, tassello Fascia di aggancio Gomito Regolatore di portata 0,15 l/s Istruzioni di montaggio e uso Misure Esempio di installazione 10. - Page 40 11.1 Solo in caso di attacco dell'acqua da dietro: montare il gomito (a) a tenuta. 11.2 Avvitare il regolatore della quantità d'acqua (b) a tenuta. 11.3 Orientare il regolatore della quantità d'acqua in modo da poter accedere al tappo a vite e all'elemento di comando.
-
Page 41: Funzionamento
12. Funzionamento ☞ È possibile commutare tra le modalità Temporizzazione/Riflesso corpo con il teleco- mando (non compreso nella fornitura, vedere Accessori Capitolo Temporizzazione Attivazione del flusso d'acqua 12.1 Avvicinare la mano al sensore. • L'acqua scorre. • Il flusso d'acqua si arresta automaticamente –... -
Page 42: Lavaggio Igienico
15. Lavaggio igienico ☞ Di fabbrica, il lavaggio igienico è impostato in modo tale che, 24 ore dopo l'ultimo utilizzo, l'acqua scorra per 10 sec. È possibile impostare i parametri del lavaggio igienico con il telecomando (non compreso nella fornitura, vedere Accessori Capitolo 23). -
Page 43: Impostazione Dello Spegnimento Per Pulizia
☞ Di fabbrica, la disinfezione termica è impostata in modo tale che, dopo un tempo di azione di 5 min, l'apparecchio si raffreddi per 1 min. ☞ La disinfezione termica può essere attivata solo con il telecomando. È possibile impostare i parametri della disinfezione termica con il telecomando (non compreso nella fornitura, vedere Accessori Capitolo 23). -
Page 44: Manutenzione E Cura
18. Manutenzione e cura Controllare e sottoporre a manutenzione l'apparecchio ad intervalli regolari, in funzione della qualità dell'acqua, delle caratteristiche locali e delle vigenti disposi- zioni locali. Sottoporre a manutenzione i seguenti componenti: • doccetta (vedere capitolo 19.) • filtri (vedere capitolo 20.) Utilizzare in modo adeguato detergenti adatti che non aggrediscano l'apparecchio e,... -
Page 45: Sostituzione Del Filtro
20. Sostituzione del filtro Filtro del regolatore della quantità d'acqua 20.1 Togliere il pannello doccia (vedere capitolo 18.). 20.2 Svitare le viti di chiusura (a) dei regolatori della quantità d'acqua. 20.3 Sostituire i filtri (b). ☞ Importante! Prestare attenzione alla posizione di montaggio dei filtri. 20.4 Il montaggio avviene in sequenza inversa. -
Page 46: Eliminazione Delle Anomalie
22. Eliminazione delle anomalie Anomalia Causa Rimedio ➯ Aprire L'acqua non scorre – Rubinetto d'intercettazione chiuso ➯ Ristabilire l'alimen- – Alimentazione di tensione inter- rotta/batteria scarica tazione/sostituire la batteria ➯ Ristabilire – Alimentazione d'acqua interrotta ➯ Sostituire – Sensore guasto ➯... - Page 47 0Nederlands AQUACONTACT - douchepaneel van roestvrij staal, 6 V DC AQCT0005 AQCT0006 ....met geïntegreerde douchegelhouder De tekeningen kunt u vinden in de Duitstalige montage- en gebruikshandleiding. Inhoudsopgave Afkortingen en eenheden ....... 48 Verklaring van de symbolen .
-
Page 48: Afkortingen En Eenheden
SELV Safety Extra Low Voltage, zeer lage veiligheids- spanning EA-Nr. Europees artikelnummer FAR-Best.-Nr. Franke Aquarotter-bestelnummer Omrekening 1 mm = 0,03937 inch 1 inch = 25,4 mm Alle lengtegegevens in tekeningen zijn in mm aangegeven. Verklaring van de symbolen Waarschuwing! Veronachtzaming van de instructie kan levensgevaar of lichamelijk letsel veroorzaken. -
Page 49: Belangrijke Aanwijzingen
Belangrijke aanwijzingen • Montage, inbedrijfstelling en onderhoud mogen alleen door een vakman volgens de meegeleverde instructies en volgens de wettelijke voorschriften en erkende regels van de techniek worden uitgevoerd. • De technische voorwaarden voor aansluiting van de plaatselijke water- en energiemaatschappijen moeten in acht worden genomen. -
Page 50: Omvang Van De Levering
Omvang van de levering Aantal Omschrijving Behuizing van roestvrij staal met: Douchekop AQUAJET-Slimline, sensor AQUACONTACT, afsluitbare waterhoeveelheidreguleringen met zeef, magnee- tklep en aansluitslang Schroef, plug Inhaaklijst Haaks aansluitstuk Debietregelaar 0,15 l/s Montage- en gebruikshandleiding Afmetingen Installatievoorbeeld 10. Straalbeeld 11. Montage Waarschuwing! Armatuur alleen gebruiken met de ervoor beoogde zeven. - Page 51 11.1 Alleen bij wateraansluiting aan de achterkant: haakse aansluitstukken (a) afdichtend monteren. 11.2 Waterhoeveelheidreguleringen (b) afdichtend erin schroeven. 11.3 Waterhoeveelheidreguleringen zo plaatsen dat afsluitbout en bedieningselement vrij toegankelijk zijn. 11.4 Voor een hoogte van de douchekop van 2,10 m tot 2,30 m moeten de boringen voor de bevestiging op een hoogte (c) van 2,14 m tot 2,34 m vanaf bovenkant afgewerkte vloer worden gemarkeerd.
-
Page 52: Werking
12. Werking ☞ De modus tijdsturing/lichaamsreflectie kan worden omgezet met de afstandsbe- diening (niet meegeleverd, zie Toebehoren Hoofdstuk Tijdsturing waterstroom activeren 12.1 Met uw hand de sensor naderen. • Het water stroomt. • De waterstroom stopt automatisch – na de ingestelde stromingstijd –... -
Page 53: Hygiënische Spoeling
15. Hygiënische spoeling ☞ De hygiënische spoeling is af fabriek zo ingesteld dat er na 24 uur zonder gebruik gedurende 10 s water stroomt. De parameters van de hygiënische spoeling kunnen worden ingesteld met de afstandsbediening (niet meegeleverd, zie Toebehoren Hoofdstuk 23). -
Page 54: Thermische Desinfectie
16. Thermische desinfectie Bij deze armatuur kan met de thermische desinfectie het risico op legionella-infectie worden verminderd! Waarschuwing! Tijdens de thermische desinfectie moeten persoonlijke veiligheidsmaatregelen (bescherming tegen brandwonden) worden getroffen, bijv. blokkeren van de sanitaire ruimte. Veronachtzaming kan lichamelijk letsel door brandwonden veroorzaken. Voor de uitvoering, bewaking en protocollering (ruimte, aftappunt, datum, tijdstip, temperatuur, duur) is de exploitant verantwoordelijk. -
Page 55: Onderhoud En Verzorging
18. Onderhoud en verzorging Afhankelijk van de waterkwaliteit, de plaatselijke omstandigheden en de plaatselijke voorschriften de armatuur regelmatig controleren en onderhouden. Onderhoud aan de volgende onderdelen: • douchekop (zie hoofdstuk 19.) • zeven (zie hoofdstuk 20.) Er dienen reinigingsmiddelen te worden gebruikt die geschikt zijn voor de armatuur en deze niet aantasten. -
Page 56: Straalbodem Reinigen
19. Straalbodem reinigen 19.1 Schroef met een inbussleutel losdraaien. 19.2 Straalbodem er voorzichtig met een schroevendraaier uittillen. 19.3 Straalbodem reinigen. 19.4 De montage gebeurt in omgekeerde volgorde. 20. Zeven vervangen Zeven waterhoeveelheidreguleringen 20.1 Douchepaneel weghalen (zie hoofdstuk 18.). 20.2 Afsluitbouten (a) van de waterhoeveelheidreguleringen losschroeven. 20.3 Zeven (b) vervangen. -
Page 57: Verhelpen Van Storingen
22. Verhelpen van storingen Storing Oorzaak Remedie ➯ Openen Water stroomt niet – Afsluitvoorziening gesloten ➯ Herstellen/ – Voedingsspanning onderbroken/ batterij leeg vervangen ➯ Herstellen – Watertoevoer onderbroken ➯ Vervangen – Sensor defect ➯ Vervangen – Magneetklep defect ➯ Reinigen Water stroomt –... - Page 58 0Polski AQUACONTACT – panel natryskowy ze stali nierdzewnej, 6 V DC AQCT0005 AQCT0006 ....z wbudowaną półką na kosmetyki pod prysznic Grafiki znajdują się w niemieckojęzycznej instrukcji montażu i użytkowania. Spis treści Skróty i jednostki ........59 Objaśnienie symboli .
-
Page 59: Skróty I Jednostki
SELV Safety Extra Low Voltage, bardzo niskie napięcie- bezpieczne EA-Nr. Europejski numer artykułu FAR-Best.-Nr. Numer zamówienia Franke Aquarotter Przeliczanie jednostek 1 mm = 0,03937 cala 1 cal = 25,4 mm Wszystkie długości na rysunkach podano w mm. Objaśnienie symboli Ostrzeżenie! Nieprzestrzeganie może spowodować... -
Page 60: Ważne Uwagi
Ważne uwagi • Montaż, uruchamianie i konserwacja muszą być przeprowadzane przez specja- listę zgodnie z dostarczoną instrukcją, regulacjami prawnymi i ogólnie przyjętymi normami technicznymi. • Należy przestrzegać technicznych warunków podłączenia lokalnych zakładów wodociągowych i energetycznych. • Komorę na baterię wraz z baterią lub zasilacz z przedłużaczem należy zamawiać oddzielnie (zobacz akcesoria, rozdział... -
Page 61: Zakres Dostawy
Zakres dostawy Liczba Opis sztuk obudowa ze stali nierdzewnej zawierająca następujące elementy: głowica natryskowa AQUAJET-Slimline, czujnik AQUACONTACT, zawór regulacji przepływu wody / odcinający z sitkiem, zawór elektromagnetyczny i wąż przyłąc- zeniowy wkręt, kołek listwa nośna kolano przyłączowe regulator przepływu 0,15 l/s instrukcja montażu i obsługi Wymiary Przykład instalacji... - Page 62 ☞ W razie konieczności użyć specjalistycznych kołków do różnych rodzajów ścian. Ilustr. A: Przyłącze wody od góry Ilustr. B: Przyłącze wody od tyłu 11.1 Tylko przy przyłączu wody od tyłu: Szczelnie zamontować kolano przyłączowe (a). 11.2 Szczelnie dokręcić regulator przepływu (b). 11.3 Regulator przepływu ustawić...
-
Page 63: Działanie
12. Działanie ☞ Tryb Sterowanie czasowe/Sterowanie zbliżeniowe można przełączać za pomocą zdalnego sterowania (nie znajduje się w zakresie dostawy, zobacz akcesoria rozdział Sterowanie czasowe Włączenie poboru wody 12.1 Przybliżyć rękę do czujnika. • Woda wypływa. • Wypływ wody wyłącza się automatycznie –... -
Page 64: Spłukiwanie Higieniczne
15. Spłukiwanie higieniczne ☞ Spłukiwanie higieniczne zostało ustawione fabrycznie w taki sposób, że po upływie 24 godzin od ostatniego użycia na 10 s otwierany jest strumień wody. Parametry spłukiwania higienicznego można ustawiać za pomocą zdalnego stero- wania (nie znajduje się w zakresie dostawy, zobacz akcesoria rozdział... -
Page 65: Dezynfekcja Termiczna
16. Dezynfekcja termiczna Armatura posiada możliwość przeprowadzenia dezynfekcji termicznej, dzięki której zmniejsza się ryzyko skażenia mikrobiologicznego! Ostrzeżenie! Na czas trwania dezynfekcji termicznej należy zastosować odpowiednie środki ochrony osób (ochrona przed poparzeniem), np. zamknięcie dostępu do pomies- zczeń sanitarnych. Nieprzestrzeganie tego ostrzeżenia może doprowadzić obrażeń ciała z powodu poparzenia. -
Page 66: Konserwacja I Czyszczenie
18. Konserwacja i czyszczenie W zależności od jakości wody, warunków lokalnych i obowiązujących przepisów armaturę należy poddawać regularnej kontroli i konserwacji. Konserwacji podlegają następujące elementy: • Głowica natryskowa (zobacz rozdział 19.) • Sitka (zobacz rozdział 20.) Używać odpowiednich środków czyszczących, nie działających niszcząco na armaturę, a następnie po użyciu spłukać... -
Page 67: Wymiana Sitka
20. Wymiana sitka Sitko regulatora przepływu wody 20.1 Zdjąć panel natryskowy (zobacz rozdział 18.). 20.2 Odkręcić korki gwintowane (a) na regulatorach przepływu wody. 20.3 Wymienić sitka (b). ☞ Ważne! Pamiętać o prawidłowym położeniu montażowym sitek. 20.4 Montaż następuje w odwrotnej kolejności. 21. -
Page 68: Usuwanie Usterek
22. Usuwanie usterek Usterka Przyczyna Środek zaradczy ➯ Otworzyć Woda nie wypływa – Zamknięty dopływ wody ➯ Przywrócić/ – Przerwane zasilanie elektryczne/ rozładowana bateria naładować ➯ Przywrócić – Odcięty dopływ wody ➯ Wymienić – Uszkodzony czujnik ➯ Wymienić – Uszkodzony zawór elektromagnetyczny ➯... - Page 69 Notes / Notes / Notas / Annotazioni / Notities / Uwagi - 69 -...
- Page 70 Notes / Notes / Notas / Annotazioni / Notities / Uwagi - 70 -...
- Page 71 Notes / Notes / Notas / Annotazioni / Notities / Uwagi - 71 -...
- Page 72 Phone +49 3378 818 0 Phone +41 62 787 3131 Italy Turkey Franke Water Systems AG Franke Mutfak ve Banyo Sistemleri 4663 Aarburg, Switzerland Sanayi ve Ticaret A.S. 41400 Gebze Kocaeli Numero Verde 800 789 233 Phone +90 262 644 6595...