Table des Matières

Publicité

Les langues disponibles

Les langues disponibles

Liens rapides

HORLOGE MERE & PROGRAMMATEUR
MODE D'EMPLOI - PAGE 3
MASTER CLOCK & PROGRAMMER
USER GUIDE - PAGE 65
RELOJ PATRÓN Y PROGRAMADOR
MODO DE EMPLEO - PÁGINA 129
HAUPTUHR & SCHALTUHR
BEDIENUNGSANLEITUNG - SEITE 193
RADIO
TIMING
CP09
®
MDE-RTCP09-3060V2.2

Publicité

Table des Matières
loading

Sommaire des Matières pour Gorgy Timing RADIO TIMING CP09

  • Page 1 HORLOGE MERE & PROGRAMMATEUR MODE D’EMPLOI - PAGE 3 MASTER CLOCK & PROGRAMMER USER GUIDE - PAGE 65 RELOJ PATRÓN Y PROGRAMADOR MODO DE EMPLEO - PÁGINA 129 HAUPTUHR & SCHALTUHR BEDIENUNGSANLEITUNG - SEITE 193 RADIO TIMING CP09 ® MDE-RTCP09-3060V2.2...
  • Page 2 (Enceintes, antennes, matériel hautes fréquences, sonneries électromécaniques...). Gorgy Timing décline toute responsabilité en cas d’accidents ou de dommages provoqués par une mauvaise utilisation du RTCP09. Les produits GORGY TIMING sont conformes aux normes : CE, EN 60950, EN 55022, EN 50024. MDE-RTCP09-3060V2.2...
  • Page 3: Table Des Matières

    SOMMAIRE INTRODUCTION ......................5 1.1. Fonction Horloge mère ......................6 1.2. Fonction programmateur ....................7 1.3. Paramétrage ......................... 7 INSTALLATION ET CONNEXIONS ................8 2.1. Installation matériel ....................... 8 2.1.1. Fixation (version boîtier mural) ................. 8 2.1.2. Encombrement et description ................... 9 2.2.
  • Page 4 INTERFACE WEB ......................33 5.1. Accès à l'interface Web ...................... 33 5.2. Page principale ........................34 5.3. Affichage LCD en façade ....................34 5.4. Paramètres calendrier et des relais ..................35 5.5. Paramètres réseau ......................36 5.6. Entrées / Sorties horaires......................37 5.6.1.
  • Page 5: Introduction

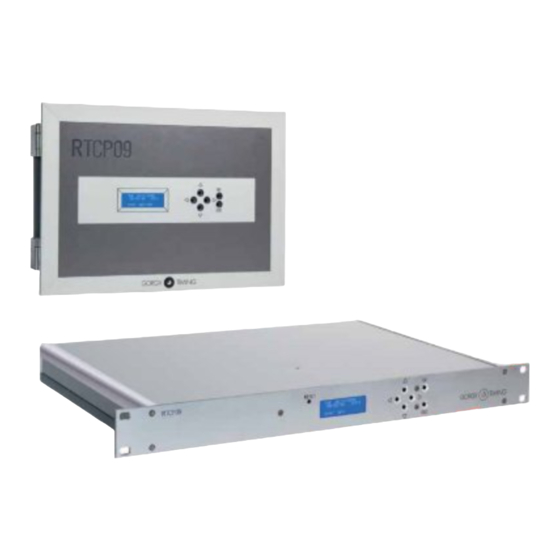
    INTRODUCTION RTCP09 a 2 fonctions principales : ► Horloge mère ► Programmateur Il existe 2 types de RTCP09 ► Boîtier mural ► Rack 1U COMPOSITION DES KITS (VISSERIE NON FOURNIE) A N T E N N E S ( e n o p t i o n ) A N T E N N E S ( e n o p t i o n ) TDF, DCF, GPS TDF, DCF, GPS...
  • Page 6: Fonction Horloge Mère

    1.1. FONCTION HORLOGE MÈRE RTCP09 est une Horloge mère capable de se synchroniser sur une source extérieure, et à son tour de redistribuer une information horaire. Il peut se synchroniser (Se mettre à l’heure exacte) avec différents types de sources en fonction des options (Exemple : DCF / TDF, GPS, AFNOR, NTP, ...).
  • Page 7: Fonction Programmateur

    1.2. FONCTION PROGRAMMATEUR Si l’option est disponible, il peut programmer l’activation de sorties sur relais, de manière à piloter d’autres appareils. (Pouvoir de coupure : 250 VAC, 10A) 1.3. PARAMÉTRAGE Les réglages de base peuvent être effectués grâce à l’interface LCD. Ecran LCD et touches ►...
  • Page 8: Installation Et Connexions

    INSTALLATION ET CONNEXIONS 2.1. INSTALLATION MATÉRIEL ☛ Obligatoire à la mise en service du produit. 2.1.1. Fixation (version boîtier mural) Utiliser le support mural comme gabarit de perçage. Fixer le support mural muni des charnières sur le mur à l'aide de vis Ø 5 mm (non fournies).
  • Page 9: Encombrement Et Description

    2.1.2. Encombrement et description ► Nomenclature boîtier RTCP09 Face avant RTCP09 Face arrière Câble d’alimentation Connecteur entrée de synchronisation (TDF, DCF, AFNOR, ASCII, …) et options Connecteur Ethernet (réseau) Afficheur LCD + boutons Sortie impulsion 230V;50-60Hz;0,1A FUSE 1A Fusible impulsion 1 A Sortie AFNOR RESET IMPULS.
  • Page 10 ► Nomenclature rack RTCP09 Câble d’alimentation Connecteur entrée de synchronisation (TDF, DCF, AFNOR, ASCII, …) et options Connecteur Ethernet (réseau) Afficheur LCD + boutons Sortie impulsion Fusible impulsion 1 A Sortie AFNOR Connecteur antenne (Sortie radio DHW) sortie relais : ABCD ère 10.
  • Page 11: Connexions

    2.2. CONNEXIONS Connexion de l'entrée de synchronisation Version boîtier face arrière Version rack face arrière FUSE 1A ETHERNET IMPULS Connecteur ASCII CODE IMPULS Le connecteur entrée de synchronisation per- met de raccorder les entrées suivantes : • IRIG B / AFNOR NFS 87500 •...
  • Page 12: B/ Gps

    NOTE Dans le cas de non clignotement de la LED (allumée ou éteinte en perma- nence), vérifier la bonne orientation de l'antenne ou le raccordement de celle-ci. B/ GPS ► Le clignotement vert indique une bonne réception du signal GPS, le clignotement rouge indique la transmission de l'information horaire au RTCP09.
  • Page 13: Option Ntp

    2.2.5. Option NTP Connexion du RTCP09 au réseau Le RTCP09, en fonction des options, doit être connecté au réseau dans les cas suivant : • Pour accéder à l'interface web. • Pour la programmation des sorties relais (si disponibles). • Pour le bon fonctionnement du serveur ou client NTP (si disponible). RTCP09 est relié...
  • Page 14: Branchements Electriques

    AFNOR 2.4.2. Installation du gestionnaire de calendriers (Mozilla Sunbird) ► Installer le logiciel "Mozilla Sunbird" fourni sur le CD-ROM Gorgy Timing dans l’on- glet "Logiciels Communs". ► Installer le logiciel "GT Scheduler" fourni sur le CD-ROM Gorgy Timing dans l’onglet "Logiciels GT".
  • Page 15: Paramétrage De L'adresse Ip

    NOTE Pour les utilisateurs de Windows Vista ou Windows 7, il est recommandé d’exécuter le programme en tant qu’administrateur. Pour cela, faire un clic droit sur le raccourci, puis sélectionner "exécuter en tant qu’administrateur". Si le programme n’est pas exécuté en tant qu’administrateur, la configuration automatique peut échouer.
  • Page 16: Configuration Automatique

    ► Pour utiliser le RTCP09, cliquer sur "Exécuter Mozilla Sunbird avec le RTCP09". 2.5.1. Configuration automatique ► Le logiciel de paramétrage automatique détecte le ou les RTCP09 présent(s) sur le réseau. ► Choisir le RTCP09 à utiliser. Dans le cas où...
  • Page 17 ► Le logiciel configure Mozilla Sunbird en l'appairant au RTCP09 précédemment sélectionné. ► Mozilla Sunbird peut désormais être utilisé pour planifier et programmer le déclenchement des sorties relais du RTCP09. ► Lancer Mozilla Sunbird pour commen- cer à configurer les calendriers. NOTE Il est conseillé...
  • Page 18: Configuration Sans Détection Réseau

    2.5.2. Configuration sans détection réseau Il est aussi possible d’effectuer une configuration du RTCP09 sans détection réseau. Cela peut être utile dans le cas où les paramètres du réseau sont trop restrictifs, et bloquent la communication entre le logiciel et le RTCP09. ►...
  • Page 19: Configuration Manuelle

    2.5.3. Configuration manuelle L'utilisateur peut paramétrer manuellement Mozilla Sunbird bien qu'il soit recommandé d’utiliser le paramétrage automatique, lorsque cela est possible. ► Pour effectuer un paramétrage manuel, il faut tout d’abord installer Mozilla Sun- bird puis créer un à un les calendriers correspondants à...
  • Page 20: Configuration Du Rtcp09

    2.6. CONFIGURATION DU RTCP09 RTCP09 est livré avec des réglages par défaut permettant son fonctionnement immé- diat dans la majorité des situations. L’intégralité des réglages du RTCP09 s’effectue dans son interface web, accessible par navigateur Internet (Internet Explorer, Firefox, Chrome,…), en saisissant l’adresse IP du RTCP09 dans la barre d’adresse (sous réserve que le RTCP09...
  • Page 21: Interface Lcd

    INTERFACE LCD 3.1. DESCRIPTION GÉNÉRALE L’écran LCD en face avant du RTCP09 et les 6 boutons constituent une interface permet- tant de configurer certains paramètres du RTCP09. Touche de validation Flèches Touche directionnelles d'annulation Lors du raccordement du produit au secteur, un écran titre indique l’initialisation de l’appareil. Botón de validación NOTE...
  • Page 22 ► L’utilisateur peut verrouiller l’écran LCD en appuyant 5 secondes sur le bouton "ESC". Le déverrouillage se fait de la même manière. Lorsque l’écran LCD du RTCP09 est verrouillé, un petit cadenas s’affiche en bas à droite de l’écran. ► Lorsque le RTCP09 calcule les prochains évènements, les caractères "/", "-"...
  • Page 23 Synoptique de navigation OK / ESC Redémarrage OK / ESC Activation du démarrage rapide (Voir section 4 DEMARRAGE RAPIDE) MDE-RTCP09-3060V2.2...
  • Page 24: Menu Principal

    3.2. MENU PRINCIPAL ► Dans le menu principal, plusieurs choix sont disponibles. Il est possible de navi- guer en utilisant les touches "▲" et "▼". ► Lorsque l’utilisateur appuie sur le bou- ton "OK", il accède à l’écran désigné. En règle générale, une page se compose de textes et de champs réglables.
  • Page 25: Affecter Une Adresse Ip

    ► Exemple : Pour la France, si l’on rentre l’heure locale, il faut renseigner les deux derniers champs de la façon suivante : ► UTC : + 01H00 ► DST : Europe Il est très important de configurer correctement les champs de fu- seau horaire et de changement d’heure.
  • Page 26: Sortie Impulsionnelle (Si Disponible)

    3.7. SORTIE IMPULSIONNELLE (SI DISPONIBLE) Si le RTCP09 possède une sortie impulsionnelle, cet écran permet d’effectuer des tâches simples de synchronisation des horloges. En entrant une heure, qui correspond à l’heure affichée sur les horloges à synchroniser, RTCP09 va automatiquement envoyer le bon nombre d’impulsions pour synchroniser à nouveau le réseau d’horloges.
  • Page 27: Alarme Sur L'ecran Lcd

    3.9. ALARME SUR L’ECRAN LCD RTCP09 peut indiquer plusieurs alarmes : ► MAINTENANCE ► RATTRAPAGE IMPULSION ► ATTENTE IMPULSION ► ERREUR: IMPULSE CC ► ERREUR: IMPULSE CO ► Maintenance : Pour connaître la procédure à suivre, contacter notre service technique (Coordonnées au dos du document).
  • Page 28: Démarrage Rapide

    DÉMARRAGE RAPIDE Le démarrage rapide permet de configurer rapidement le RTCP09. Les différentes étapes sont les suivantes : ► Activation du démarrage rapide ► Choix de la langue ► Réglage de la date et de l’heure ► Réglage de l’adresse IP ►...
  • Page 29 Synoptique de fonctionnement OUI + OK NON + OK NON + OK OUI + OK OK + Sortie impulsion OK + Pas de sortie impulsion 10 s MDE-RTCP09-3060V2.2...
  • Page 30: Activation Du Demarrage Rapide

    4.1. ACTIVATION DU DEMARRAGE RAPIDE Après l’écran d’initialisation, un écran per- met de choisir si l’on souhaite lancer le dé- marrage rapide. 4.2. CHOIX DE LA LANGUE Cet écran permet de choisir la langue de l’interface (ANGLAIS, FRANÇAIS, ESPA- GNOL, ALLEMAND). 4.3.
  • Page 31: Reglage De L'adresse Ip

    4.4. REGLAGE DE L’ADRESSE IP Le premier écran demande si l'utilisateur souhaite régler l’adresse IP du RTCP09 manuellement. Si l’utilisateur souhaite régler l’adresse IP du RTCP09, l’écran de réglage s’affiche. La première ligne permet de renseigner l’adresse IP, la seconde le masque de sous réseau et la dernière la passerelle par dé- faut.
  • Page 32: Validation Des Reglages

    4.6. VALIDATION DES REGLAGES Lorsque tous les réglages sont terminés, l’écran de validation des réglages s’affiche. Lorsque cette page est validée, l’écran de sauvegarde ci-contre s’affiche. Une fois la sauvegarde terminée, le RTCP09 redémarre. Si l’écran LCD du RTCP09 reste bloqué sur l’écran de redémarrage pendant plus de 10 secondes, il faut alors faire un redémarrage manuel (Voir section 8 REDEMARRAGE...
  • Page 33: Interface Web

    INTERFACE WEB 5.1. ACCÈS À L'INTERFACE WEB L’interface Web présente plusieurs pages dédiées à la configuration du RTCP09. Pour accéder à cette interface, il faut ouvrir un navigateur internet, puis entrer l’adresse IP RTCP09 dans la barre d’adresse. L’adresse IP du RTCP09 est soit attribuée automatiquement, soit définie par l’utilisateur.
  • Page 34: Page Principale

    5.2. PAGE PRINCIPALE La page principale fournit des informations sur l’état du RTCP09. On peut y lire l’heure de l’horloge interne, le statut de synchronisation externe,… La navigation dans les différentes pages s'effectue à l'aide du menu se trouvant sur la gauche de l’interface.
  • Page 35: Paramètres Calendrier Et Des Relais

    5.4. PARAMÈTRES CALENDRIER ET DES RELAIS Cette page permet de configurer les paramètres du calendrier. Plusieurs réglages sont disponibles : ► Le nom de la sortie (exemple : sonnerie, chauffage, …). Ce nom sera utilisé dans Mozilla Sunbird dès la prochaine exécution du logiciel de paramétrage automatique. ►...
  • Page 36: Paramètres Réseau

    En cas de coupure d’alimentation secteur, les relais s’ouvrent quels que soient les réglages de cette page. Des informations sur l’état actuel des relais sont aussi disponibles sur cette page : ► Son état d’activation, qui indique si un événement associé au relais est en cours. ►...
  • Page 37: Entrées / Sorties Horaires

    5.6. ENTRÉES / SORTIES HORAIRES Cette page permet de modifier les réglages de tous les modules horaires du RTCP09. Par défaut, un RTCP09 ne comporte qu’une horloge interne. En fonctions des options, celui-ci peut contenir en plus une source de synchronisation externe (exemple : AFNOR, GPS,…) et une ou plusieurs sorties horaires, permettant de redistribuer l’information horaire à...
  • Page 38 ► Dans la partie (voir figure précédente) se trouve la source de synchronisation, la réfé- rence pour le RTCP09. Cette source peut être l’horloge interne ou une source externe (AFNOR, DCF, GPS,...). Si une source de synchronisation externe est présente, les réglages suivants sont dis- ponibles : •...
  • Page 39: Descriptif Détaillé Des Entrées Horaires

    5.6.1. Descriptif détaillé des entrées horaires A. Version Autonome Il n’y a pas de réglage spécifique pour cette version. ► Le réglage de l’heure s’effectue dans la partie de la page "ENTREES / SORTIES HORAIRES". B. Entrée NTP Un lien donne accès à la page spécifique de configuration de l’entrée NTP. Cette page est détaillée dans la partie "5.7.
  • Page 40: Entrée Dcf / Tdf

    C. Entrée DCF / TDF Il n’y a pas de réglage spécifique pour cette entrée. D. Entrée ASCII Paramétrer ici la liaison série en entrée du RTCP09. Il convient de choisir un protocole, la vitesse de communication et les options de contrôle. E.
  • Page 41: Entrée Gps

    F. Entrée GPS Il n’y a pas de réglage spécifique pour cette entrée. 5.6.2. Descriptif détaillé des sorties horaires A. Sortie AFNOR L’utilisateur peut sélectionner s’il souhaite que la sortie fournisse un code de type IRIG B ou AFNOR NFS 87500. B.
  • Page 42 ► Ajustement automatique : L’utilisateur coche la case, puis indique dans les champs l’heure affichée actuellement sur les horloges. Le RTCP09 détermine alors automa- tiquement en fonction des fuseaux horaires, type de changement d’heure et heure actuelle, le nombre d’impulsions à envoyer. ►...
  • Page 43: Sortie Ascii

    C. Sortie ASCII L’utilisateur paramètre ici la liaison série en sortie du RTCP09. Il convient de choisir le protocole, la vitesse de communication et les options de contrôle. D. Sortie NTP Un lien donne accès à la page spécifique de configuration de la sortie NTP. Cette page est détaillée dans la partie "5.7.
  • Page 44: Paramètres Ntp

    5.7. PARAMÈTRES NTP Cette page donne accès aux réglages des options NTP du RTCP09. (Option Serveur NTP et/ou Option Client NTP) ► La première partie concerne le paramétrage du client NTP, c'est à dire lorsque le RTCP09 obtient l’information horaire à partir d’un serveur distant. Cette partie n’est visible que si le RTCP09 est équipé...
  • Page 45: Paramétrage Snmp

    Les clefs MD5 utilisées par les options client ou serveur NTP peuvent être renseignées dans la dernière partie de la page. 5.8. PARAMÉTRAGE SNMP Les informations spécifiques au protocole SNMP ainsi que les adresses où seront envoyées les alarmes (traps) pour la supervision du RTCP09 peuvent être renseignées sur cette page .
  • Page 46 ► La page "Mise à jour du micrologiciel" de l’interface web du RTCP09 a double utilité. Elle donne les différentes versions des modules intégrés dans le RTCP09 et permet en plus de mettre à jour le firmware du RTCP09. ► Pour mettre à...
  • Page 47: Redémarrage

    ► Après la mise à jour, le RTCP09 redémarre automatiquement. Si l’écran LCD du RTCP09 reste bloqué sur l’écran suivant pendant plus d’une minute, il faut alors faire un redémarrage manuel (Voir section 8 REDEMARRAGE DU RTCP09). 5.10. REDÉMARRAGE ► Pour redémarrer le RTCP09, cliquez sur le bouton "Redémarrage".
  • Page 48: Utilisation Générale Du Calendrier

    UTILISATION GÉNÉRALE DU CALENDRIER (MOZILLA SUNBIRD) 6.1. GLOSSAIRE : Agenda / Calendrier : un agenda est un calendrier qui correspond à une sortie relais. ► Il y a autant d’agendas que de sorties relais. Pour piloter un relais, on ira créer des événements dans l’agenda qui correspond.
  • Page 49: Planification D'un Événement

    6.2. PLANIFICATION D’UN ÉVÉNEMENT Dans Mozilla Sunbird, choisir un calendrier dans la partie gauche de l’écran, en cliquant sur son nom. ► Exemple : l’agenda D, qui correspond à la 4 sortie relais. ème ► Il est possible de créer un nouvel évé- nement en double cliquant sur une journée.
  • Page 50 Pour des événements dont la durée est in- férieure à 1 minute, utiliser le champ "Des- cription" pour saisir la durée de l’événe- ment en secondes. Exemple : pour déclencher le relais n°4 ► le 29 mars 2010, à 12h00 et pendant 10 secondes, la fenêtre de création doit être identique à...
  • Page 51 ► Si un problème de communication se produit entre l’ordinateur exécutant Mo- zilla Sunbird et le RTCP09, il est pos- sible que les calendriers se verrouillent (passage en mode "lecture seule"). Si cela se produit, un petit sigle apparaît prés du nom du calendrier. ►...
  • Page 52: Planification D'un Événement Récurrent

    6.3. PLANIFICATION D’UN ÉVÉNEMENT RÉCURRENT ► Reprendre la procédure d’ajout d’évé- nement puis dans la fenêtre de création d’un nouvel événement, cliquer sur la liste déroulante "Répétition". ► Plusieurs choix s’offrent alors à l’utili- sateur pour la récurrence à associer à cet événement.
  • Page 53: Exceptions Aux Règles De Récurrence

    6.4. EXCEPTIONS AUX RÈGLES DE RÉCURRENCE 6.4.1. Exceptions ponctuelles ► Il est possible de définir des excep- ► Le 5 avril étant férié, on ne souhaite pas tions aux règles de récurrence. Dans allumer l’éclairage ce jour là. Pour ajou- cet exemple, l’éclairage extérieur d’un ter une exception à...
  • Page 54 ► En choisissant "Supprimer seulement cette occurrence", l’occurrence du 5 avril est supprimée, mais les autres sont toujours présentes. On a ainsi créé une règle d’exception pour la récurrence associée à cet événement. Vue mensuelle REMARQUE En cliquant sur "Supprimer toutes les occurrences", on choisit tout simplement d’effacer l’événement et toutes ses occurrences.
  • Page 55: Plages D'exceptions

    6.4.2. Plages d'exceptions ► Il est possible de programmer des pé- riodes pendant lesquelles la program- mation des relais va être ignorée par le RTCP09. Cela peut être utile pour désactiver le déclenchement des relais par exemple pendant les périodes de vacances.
  • Page 56 ► 10 plages d’exceptions maximum sont configurables pour un RTCP09. En choisir une, et cliquer sur "Éditer". ☛ Une fenêtre s’ouvre alors, permettant de paramétrer l’exception : ► Il est possible de préciser un nom pour la plage d’exceptions (ex : vacances de Noël), de définir les dates de début et de fin, et de choisir quels relais seront désactivés pendant cette période.
  • Page 57: Exemples D'événements Possibles

    NOTE Afin de suspendre les commutations des relais pendant une certaine période, il est aussi possible de forcer les relais dans leur état désactivé, en utilisant l’interface LCD (Voir section 3 INTERFACE LCD) ou l’interface Web (Voir section 5 INTERFACE WEB). Attention ! En cas de remise à...
  • Page 58: Sauvegarde Des Calendriers

    6.6. SAUVEGARDE DES CALENDRIERS ► Lancer le logiciel Sunbird en utilisant l’application RTCP09. Faire un clic droit sur l’agenda à sauvegarder et cli- quer sur le menu "Exporter l’agenda". Enregistrez-le sur votre ordinateur sous forme de fichier .ics. Renouvelez l’opé- ration pour chacune de vos sorties.
  • Page 59: Guide De Dépannage

    GUIDE DE DÉPANNAGE SYMPTÔMES CAUSES POSSIBLES SOLUTIONS RTCP09 Le câble d’alimentation est Brancher le câble d’alimentation au s’allume pas. débranché. secteur. Le câble réseau n’est pas Vérifier le branchement du câble réseau correctement branché au au RTCP09. RTCP09. Impossible d’accéder Le RTCP09 n’a pas obtenu Utiliser les menus des interfaces de à...
  • Page 60 SYMPTÔMES CAUSES POSSIBLES SOLUTIONS Corriger le défaut sur la source de synchronisation, ou forcer l’utilisation de La source externe de l’horloge interne via la page "Entrées / synchronisation est Sorties horaires " de l’interface web, déréglée. case : "Forcer l'horloge interne ". Entrer alors l’heure exacte via cette RTCP09 fournit...
  • Page 61: Redemarrage Du Rtcp09

    REDEMARRAGE DU RTCP09 Si le RTCP09 vient à ne plus répondre aux commandes, ou que l’écran reste figé, il est possible de redémarrer ce dernier. RESET (Redémarrage) ► Cliquer sur "RESET" situé à l’arrière du RTCP09, près du connecteur réseau RJ-45. Cette opération conserve tous les paramètres du RTCP09.
  • Page 62 MDE-RTCP09-3060V2.2...
  • Page 63 NOTES MDE-RTCP09-3060V2.2...
  • Page 64: Support Technique

    DEPUIS LA FRANCE SUR UN POSTE FIXE : support@gorgy-timing.fr RADIO TIMING , LEDI , LEDICA , HANDI sont des marques déposées GORGY TIMING. ® ® ® ® Numéro de déclaration d’activité de prestataire de formation : 82 38 04877 38...
  • Page 65 MASTER CLOCK & PROGRAMMER RADIO TIMING CP09 ® USER GUIDE MDE-RTCP09-3060V2.2...
  • Page 66 (speakers, antennas, high frequency equip- ment, electromechanical rings ...). Gorgy Timing declines any liability in the event of accidents or damages caused by an impro- per use of RTCP09. GORGY TIMING products comply with the following standards: CE, EN 60950, EN 55022, EN 50024.
  • Page 67 TABLE OF CONTENTS INTRODUCTION ......................69 1.1. Master clock function ......................70 1.2. Programmer function ......................71 1.3. Settings ..........................71 INSTALLATION AND CONNECTIONS ............... 72 2.1. Hardware installation ......................72 2.1.1. Attachment (wall mount version) ................72 2.1.2. Dimensions and description ................... 73 2.2.
  • Page 68 WEB INTERFACE ......................97 5.1. Accessing the Web interface ....................97 5.2. Main page ........................... 98 5.3.Front LCD display ........................ 98 5.4. Calendar settings ........................ 99 5.5. “Network” settings ......................100 5.6. “Time inputs / outputs” ...................... 101 5.6.1. Detailed description of time inputs ................ 103 A.
  • Page 69: Introduction

    INTRODUCTION The RTCP09 has two main functions: ► Master clock ► Programmer There are two types of RTCP09: ► Wall mount ► 1U rack COMPOSITION OF THE KITS (screws not supplied) A N T E N N E S ( o p t i o n a l ) A N T E N N E S ( o p t i o n a l ) TDF, DCF, GPS TDF, DCF, GPS...
  • Page 70: Master Clock Function

    1.1. MASTER CLOCK FUNCTION RTCP09 is a Master clock that can synchronize with an external source, and in turn redis- tribute time information. It can synchronize (set itself to the exact time) with different types of sources, depending on the options (Example: NTP server, radio signal, etc.). See the schematic diagram below.
  • Page 71: Programmer Function

    INTRODUCTION 1.2. PROGRAMMER FUNCTION If this option is available, it can program the activation of relay outputs, so as to control other devices (Breaking capacity: 250 VAC, 10A) 1.3. SETTINGS Basic settings can be defined using the LCD interface. LCD screen and buttons ►...
  • Page 72: Installation And Connections

    INSTALLATION AND CONNECTIONS 2.1. HARDWARE INSTALLATION ☛ Required for the initial start-up of the product 2.1.1. Attachment (wall mount version) ► Use the wall support as drilling template. ► Attach the wall support fitted with hinges on the wall using 5 mm Ø screws (not supplied).
  • Page 73: Dimensions And Description

    2.1.2. Dimensions and description ► RTCP09 unit parts list Face avant Front panel RTCP09 Face arrière Rear panel Supply cable Synchronization input connector and options Ethernet connector (network) LCD display + button 230V;50-60Hz;0,1A FUSE 1A Pulse output 1 A pulse fuse RESET IMPULS.
  • Page 74 ► RTCP09 unit parts list Supply cable Synchronization input connector and options Ethernet connector (network) LCD display + button Pulse output 1 A pulse fuse AFNOR output Antenna connector (DHW radio output) relay output: ABCD 10. 2 relay output: EFGH relay output: IJKL 12.
  • Page 75: Connections

    2.2. CONNECTIONS Connection of the synchronisation input Unit version rear panel Rack version rear panel FUSE 1A ETHERNET IMPULS Connector ASCII CODE The synchronization input connector is used IMPULS to connect the following inputs: • IRIG B / AFNOR NFS 87500 •...
  • Page 76: B/ Gps

    Note If the LED does not flash (it is permanently on or off), check whether the antenna is correctly oriented or whether it is connected properly. B/ GPS ► If the LED flashes green, it means that there is a good reception of the GPS signal. If it flashes red, it means that the time information is being transmitted to RTCP09.
  • Page 77: Ntp Option

    2.2.5. NTP option Connecting the RTCP09 to the network RTCP09 should be connected to the network in 3 cases: • To access the web interface. • To program relay outputs (if available). • Constantly, for the NTP server or client to function properly, depending on the avai- lable options.
  • Page 78: Electrical Connections

    230V;50-60Hz;0,1A 230V;50-60Hz;0,1A FUSE 1A FUSE 1A RESET RESET IMPULS. OUT IMPULS. OUT 2.3. ELECTRICAL CONNECTIONS AFNOR OUT AFNOR OUT AFNOR ► The first image shows how the wiring must not be done. In this assembly, the relay output is directly connected to the RTCP09 power supply.
  • Page 79: Setting The Ip Address

    NOTE For Windows Vista or Windows 7 users, it is recommended to run the pro- gram as administrator. To do so, right-click the shortcut, and select “Run as administrator”. If the program is not run as administrator, the automatic setup can fail.
  • Page 80: Automatic Setup

    ► To use the RTCP09, click “Execute Mo- zilla Sunbird with the RTCP09”. 2.5.1. Automatic setup ► The automatic setup software detects the RTCP09(s) present on the network. ► Choose the RTCP09 you want to use. If RTCP09 does not appear on the list, check whether its IP address is confi- gured correctly (refer to the concerned sections in this manual).
  • Page 81 ► The software configures Mozilla Sunbird by pairing it with the RTCP09 selected beforehand. ► Mozilla Sunbird can now be used to plan and schedule the triggering of RTCP09’s relay outputs. ► Launch Mozilla Sunbird to start configu- ring the calendars. NOTE We recommend the use of the automatic setup software to use Mozilla Sun- bird with the RTCP09.
  • Page 82: Configuration Without Network Detection

    2.5.2. Configuration without network detection It is also possible to configure the RTCP09 without network detection. This can be useful in case the network settings are too restrictive and block the communication between the software and RTCP09. ► On the previous screen, click “Manual configuration”.
  • Page 83: Manual Configuration

    2.5.3. Manual configuration You can configure Mozilla Sunbird manually even though it is recommended to use auto- matic setup whenever possible. ► For a manual setup, first install Mozilla Sunbird and then create one by one the calendars corresponding to each output. To do this, choose the File menu and then “New calendar”.
  • Page 84: Configuring The Rtcp09

    2.6. CONFIGURING THE RTCP09 RTCP09 is supplied with default settings such that it can function immediately in most situations. All the RTCP09 settings are defined in its web interface, accessible via an Internet browser (Internet Explorer, Firefox, Chrome, etc.), by entering the RTCP09’s IP address in the ad- dress bar (provided the RTCP09 is correctly connected to the network).
  • Page 85: Lcd Interface

    LCD INTERFACE 3.1. GENERAL DESCRIPTION The LCD screen on the RTCP09 front panel and the 6 buttons form an interface allowing you to configure some of the RTCP09’s settings. OK button Touche de validation Touche Cancel Flèches Directional rectionnelles d'annulation arrows button When you connect the device to the power supply, a title screen shows that the device is...
  • Page 86 ► The user can lock the LCD by pressing the button “ESC” 5 seconds. Unlocking is done in the same way. When the LCD RTCP09 is locked, a small padlock appears in the bottom right of the screen. ► When the RTCP09 calculates the upcoming events, characters "/", "-"...
  • Page 87 Navigation diagram OK / ESC Rebooting OK / ESC Activating quick start (See section 4 QUICK START) MDE-RTCP09-3060V2.2...
  • Page 88: Main Menu

    3.2. MAIN MENU ► There are several choices in the main menu. You can navigate using the “▲”and “▼” keys. ► You can access the required screen by pressing the “OK” button. As a general rule, a page contains edi- table texts and fields.
  • Page 89: Configure Ip Address

    ► Example: For France, the fields with take the value “+1” and “Europe” (which is UTC time + 1 with European DST change). It is highly important to configure the time zone and daylight saving time (DST) change fields correctly. If these fields are not set cor- rectly, there will be errors in the time outputs, or the relay switching times will be shifted.
  • Page 90: Pulse Output (If Available)

    3.7. PULSE OUTPUT (IF AVAILABLE) If the RTCP09 has a pulse output, you can use this screen to carry out simple clock syn- chronization tasks. By entering a time, which is the time displayed on the clocks to be synchronized, the RTCP09 will automatically send the correct number of pulses to synchronize the clock network once again.
  • Page 91: Alarm On The Lcd Screen

    3.9. ALARM ON THE LCD SCREEN The RTCP09 can indicate several alarms: ► MAINTENANCE ► CATCHING UP PULSES ► WAITING FOR PULSES ► ERROR: PULSE SC ► ERROR: PULSE OC ► Maintenance : For the procedure to follow, please contact our technical department (contact details on the back of this document).
  • Page 92: Quick Start

    QUICK START Quick start allows you to configure the RTCP09 quickly. The various steps are as follows: ► Activating quick start ► Choosing the language ► Setting the date and time ► Setting the IP address ► Activating the outputs ►...
  • Page 93 Navigation diagram YES + OK NO + OK NO + OK YES + OK OK + Pulse output OK + No pulse output 10 s MDE-RTCP09-3060V2.2...
  • Page 94: Activating Quick Start

    4.1. ACTIVATING QUICK START After the initialization screen, a screen ap- pears allowing you to choose whether you want to launch quick start. 4.2. CHOOSING THE LANGUAGE On this screen, you can choose the inter- face language (ENGLISH, FRENCH, SPA- NISH, GERMAN).
  • Page 95: Setting The Ip Address

    4.4. SETTING THE IP ADDRESS The first screen asks you whether you want to set the RTCP09’s IP address manually. If you want to set the RTCP09’s IP address, the setting screen is displayed. The first line is used to enter the IP address, the second the subnet mask and the last the default gateway 4.5.
  • Page 96: Confirming The Settings

    4.6. CONFIRMING THE SETTINGS When all the settings are completed, a screen is displayed to confirm the settings. When this page is confirmed, the save screen shown here is displayed Once the settings are saved, the RTCP09 reboots. If the RTCP09’s LCD screen hangs while displaying the rebooting screen for more than 10 seconds, reboot it manually (see Section 8 REBOOTING THE RTCP09).
  • Page 97: Web Interface

    WEB INTERFACE 5.1. ACCESSING THE WEB INTERFACE The Web interface contains several pages dedicated to RTCP09 setup. To access this interface, you must open an internet browser and enter the RTCP09‘s IP address in the address bar. The RTCP09’s IP address is either assigned automatically or defined by the user. To find out the current IP address of the RTCP09, you can use the LCD interface (see Section 3.5 ASSIGN AN IP ADDRESS) or use the "GT Network Manager"...
  • Page 98: Main Page

    5.2. MAIN PAGE The main page gives information on the status of the RTCP09. It shows the internal clock time, the external synchronization status, etc. You can navigate between the different pages using the menu on the left of the interface. 5.3.FRONT LCD DISPLAY This page allows you to configure the time displayed on the RTCP09’s LCD screen.
  • Page 99: Calendar Settings

    5.4. CALENDAR SETTINGS This page allows you to configure the calendar settings. Depending on the number of out- puts available, the corresponding lines will be displayed. Several settings are available: ► Output name (example: ringing, heating, etc.). This name will be used in Mozilla Sun- bird the next time the automatic setup software is run.
  • Page 100: Network" Settings

    In the event of a power failure, the relays will open regardless of the settings on this page. Information on the current state of the relay is also available on this page: ► Its activation state, which shows whether an event associated with the relay is in progress ►...
  • Page 101: Time Inputs / Outputs

    5.6. “TIME INPUTS / OUTPUTS” This page allows you to modify the settings of all the time modules in RTCP09. By default, an RTCP contains only one internal clock. Depending on the options, it can additionally contain an external synchronization source (example: radio, GPS, etc.) and one or more time outputs, so that the time information can be redistributed to other devices.
  • Page 102 ► Part (see figure above) shows the synchronization source, the reference for the RTCP09. This source can be the internal clock or an optional module (radio, IRIG, etc.). If an external synchronization source is present, the following settings are available: •...
  • Page 103: Detailed Description Of Time Inputs

    5.6.1. Detailed description of time inputs A. Standalone version There is no specific setting for this version. B. NTP input A link gives you access to a specific page for configuring the NTP input. This page is described in detail in “5.7. NTP parameters”. MDE-RTCP09-3060V2.2...
  • Page 104: Dcf / Tdf Input

    C. DCF / TDF input There is no specific setting for this input. D. ASCII input Here, you can configure the serial input link of the RTCP09. You need to choose a pro- tocol, the communication speed and the control options. E.
  • Page 105: Gps Input

    F. GPS input There is no specific setting for this input. 5.6.2. Detailed description of time outputs A. AFNOR output You can specify that you want the output to supply an IRIG/B or AFNOR NFS 87500 code. B. Pulse output You can set the frequency of output pulses: ►...
  • Page 106 ► Auto-Adjust clocks: You can check this box and then indicate the time displayed currently on the clocks in the fields. Depending on the time zones, the RTCP09 will then automatically determine the time change type and the current time as well as the number of pulses to send.
  • Page 107: Ascii Output

    C. ASCII output Here, you can configure the serial output link of the RTCP09. You should choose the protocol, the communication speed and the control options. D. NTP output A link gives you access to the specific NTP output setup page. This page is descri- bed in detail in “5.7.
  • Page 108: Ntp Parameters

    5.7. NTP PARAMETERS This page allows you to set the NTP options for the RTCP09. (NTP Server Option and/or NTP Client Option) ► The first part relates to NTP client configuration, i.e. when the RTCP09 obtains time information from a remote server. This part is visible only if the RTCP09 is equipped with the corresponding option.
  • Page 109: Snmp Parameters

    You can enter the MD5 keys used by the NTP client or server modules in the lower part of the page. 5.8. SNMP PARAMETERS Here you can enter information specific to the SNMP protocol for monitoring the RTCP09 as well as the addresses to which the alarms (traps) will be sent. 5.9.
  • Page 110 ► The "Update firmware" page in the RTCP09’s web interface has a dual purpose. It gives the different versions of the modules integrated into the RTCP09 and allows you to update the RTCP09’s firmware. ► To update the RTCP09, click the "Browse..." button and select the "image.bin" file supplied to you by the Customer service department.
  • Page 111: Rebooting

    ► After the update, the RTCP09 will reboot automatically. If the RTCP09’s LCD screen hangs while displaying the following screen for more than one minute, reboot it manual- ly (see Section 8 REBOOTING THE RTCP09). 5.10. REBOOTING ► Click the "Reboot" button to restart the RTCP09. The RTCP09 will then display the following window.
  • Page 112: Glossary

    GENERAL USE OF CALENDAR (MOZILLA SUNBIRD) 6.1. GLOSSARY ► Calendar: a calendar corresponds to a relay output. There are as many calendars as relay outputs. To control a relay, events will be created in the corresponding calendar. ► Event: an event is the triggering of a relay. It is characterised by a start date (Year, Month, Day, Time, Minute) and an end date.
  • Page 113: Scheduling An Event

    6.2. SCHEDULING AN EVENT In Mozilla Sunbird, choose a calendar in the left side of the screen, by clicking its name. ► Example: Calendar D, which corres- ponds to the 4 relay output ► You can create a new event by double- clicking a day.
  • Page 114 For events whose length is less than 1 mi- nute, use the “Description” field to enter the event length in seconds. Example: To trigger relay no. 4 on ► March 26, 2010, at 12:00 hrs and for 15 seconds, the New Event window should be the same as the one on the right: NOTE When an event length...
  • Page 115 ► If a communication problem occurs between the computer running Mozilla Sunbird and the RTCP09, the calen- dars may become locked (switchover to “read only” mode). If this happens, a small sign appears next to the calendar name. ► Once the disturbances are over, you must change the calendar from read only mode.
  • Page 116: Scheduling A Repeating Event

    6.3. SCHEDULING A REPEATING EVENT ► Repeat the procedure for adding an event and then in the New event window, click the “Repeat” drop-down menu. ► Or have several options to define the recurrence to be associated with this event. ☛...
  • Page 117: Exceptions To Recurrence Rules

    6.4. EXCEPTIONS TO RECURRENCE RULES 6.4.1. Occasional exceptions ► You can define exceptions to the recur- ► As April 5 is a holiday, we do not want to rence rules. In this example, the outdoor turn on the lighting on this day. To add lighting of a building has been sche- an exception to the recurrence rule, just duled so that those present can make...
  • Page 118 ► If you select “Delete just this occurrence”, the occurrence on April 5 will be deleted, but the others will still be present. You have thus created an exception rule for the recur- rence pattern associated with this event. NOTE If you click “Delete all occurrences”, you will simply delete the event and all its occurrences.
  • Page 119: Exception Ranges

    6.4.2. Exception ranges ► You can schedule periods during which the programming of relays will be ignored by the RTCP09. This can be useful to deactivate the triggering of re- lays for instance during holiday periods. ► Exception ranges are defined in the software used for the automatic setup of Mozilla Sunbird.
  • Page 120 ► You can configure a maximum of 10 ex- ception ranges for a RTCP09. Choose one and click “Edit”. ☛ A window will then open for you to configure the exception: friday, january 1 , 2010 friday, january 1 , 2010 Relay A Relay B Relay C...
  • Page 121: Examples Of Possible Events For A School

    NOTE To suspend the switching of relays for a defined period, you can also force the relays to their deactivated state using the front interface or the Web interface. Warning! In case of a factory reset, the calendars of the relays are stored, but the exception ranges will be lost.
  • Page 122: Backing Up Calendars

    6.6. BACKING UP CALENDARS Launch Mozilla Sunbird using the RTCP09 application. Right-click the ca- lendar you want to back up and select the “Export calendar” menu. Save it on your computer in .ics file format. Repeat this operation for each of your outputs.
  • Page 123: Troubleshooting Guide

    TROUBLESHOOTING GUIDE SYMPTOMS POSSIBLE CLAUSES SOLUTIONS RTCP09 does not The power cable is Connect the power cable to the mains switch on. disconnected. supply. The network cable is not Check whether network cable is correctly connected to the connected properly with the RTCP09. RTCP09.
  • Page 124 SYMPTOMS POSSIBLE CLAUSES SOLUTIONS Correct the fault in the synchronization source, The external or force the use of the internal clock via the synchronization source is «Time base» page in the web interface: faulty. «Force RTC» box. RTCP09 Then enter the exact time on the same page. gives an incorrect time.
  • Page 125: Resetting The Rtcp09

    RESETTING THE RTCP09 If the RTCP09 does not respond to your commands, or if the screen hangs, you can reset it. RESET (restarting) ► Click “RESET” located at the back of the RTCP09, near the RJ-45 network connector. All the RTCP09 settings will be stored when you do so.
  • Page 126 MDE-RTCP09-3060V2.2...
  • Page 127 NOTES MDE-RTCP09-3060V2.2...
  • Page 128: Technical Support

    +33 476 30 48 20 support@gorgy-timing.fr RADIO TIMING®, LEDI®, LEDICA®, HANDI® are trademarks by GORGY TIMING. Number of statement for training provider activity : 82 38 04877 38 Gorgy Timing RC74B38 - Any technical, aesthetic, color modifications can be made without notice. MDE-RTCP09-3060V2.2...
  • Page 129 RELOJ PATRÓN Y PROGRAMADOR RADIO TIMING CP09 ® MANUAL DE UTILIZACIÓN MDE-RTCP09-3060V2.2...
  • Page 130 (Rejas, antenas, material de alta frecuencia, alarmas electromecánicas...). Gorgy Timing declina cualquier responsabilidad en caso de accidentes o de daños provoca- dos por una mala utilización del RTCP09. Los productos GORGY TIMING cumplen con las normas: CE, EN 60950, EN 55022, EN 50024.
  • Page 131 CONTENIDO INTRODUCCIÓN ......................133 1.1. Función Reloj patrón ....................... 134 1.2. Función programador ....................... 135 1.3. Parametrización ........................ 135 INSTALACIÓN Y CONEXIONES ................136 2.1. Instalación del equipo ....................... 136 2.1.1. Fijación (versión caja mural) ................. 136 2.1.2. Dimensiones y descripción ................... 137 2.2.
  • Page 132 INTERFAZ WEB ......................161 5.1. Acceso a la interfaz web ....................161 5.2. Página principal ........................ 162 5.3. Visualización LCD frontal ....................162 5.4. Parámetros del calendario ....................163 5.5. Parámetros de red ......................164 5.6. «Entradas / Salidas horarias» ..................165 5.6.1.
  • Page 133: Introducción

    INTRODUCCIÓN RTCP09 tiene dos funciones principales: ► Reloj patrón ► Programador RTCP09 se suministra en dos tipos de caja: ► Caja mural ► Rack 1U Composición de los kits (tornillería no suministrada) A N T E N A S ( O P C I O N A L E S ) A N T E N A S ( O P C I O N A L E S ) TDF, DCF, GPS TDF, DCF, GPS...
  • Page 134: Función Reloj Patrón

    1.1. FUNCIÓN RELOJ PATRÓN RTCP09 es un reloj patrón capaz de sincronizarse con una fuente exterior y a su vez redistribuir una información horaria. Puede sincronizarse (ponerse a la hora exacta) con diferentes tipos de entradas, en función de las opciones (ejemplo: Servidor NTP, señal de radio...) Ver esquema de principio a continuación.
  • Page 135: Función Programador

    1.2. FUNCIÓN PROGRAMADOR Si la opción está disponible, puede programarse la activación de salidas por relés para poder controlar otros aparatos. (Capacidad de ruptura: 250 VAC, 10A) 1.3. PARAMETRIZACIÓN Los ajustes básicos se pueden realizar a través de la interfaz LCD. Pantalla LCD y botones ►...
  • Page 136: Instalación Y Conexiones

    INSTALACIÓN Y CONEXIONES 2.1. INSTALACIÓN DEL EQUIPO ☛ Obligatoria en la puesta en funcionamiento del producto. 2.1.1. Fijación (versión caja mural) Utilizar el soporte mural como plantilla para taladrar. Fijar el soporte mural provisto de bisagras a la pared, con ayuda de tornillos de Ø 5 mm (no suministrados).
  • Page 137: Dimensiones Y Descripción

    2.1.2. Dimensiones y descripción ► Nomenclatura de la caja mural RTCP09 Face avant Vista delantera RTCP09 Face arrière Cable de alimentación Vista trasera Conector de entrada de sincronización y opciones Conector Ethernet (red) Pantalla LCD + botones Salida impulsional 230V;50-60Hz;0,1A FUSE 1A Fusible de salida impulsional 1 A Salida AFNOR...
  • Page 138 ► Nomenclatura del rack 1U RTCP09 Cable de alimentación Conector de entrada de sincronización y opciones Conector Ethernet (red) Pantalla LCD + botones Salida impulsional Fusible de salida impulsional 1 A Salida AFNOR Conector de antena (Salida radio DHW) 1.ª salida relé: ABCD 10.
  • Page 139: Conexiones

    2.2. CONEXIONES Conexión de la entrada de sincronización Versión mural, parte trasera Versión rack, parte trasera FUSE 1A ETHERNET IMPULS Conector ASCII CODE IMPULS El conector de entrada de sincronización permite conectar las entradas siguientes: • IRIG B / AFNOR NFS 87500 •...
  • Page 140: B/ Gps

    Nota: Si el LED no parpadea (queda apagado o permanentemente encen- dido), verificar la correcta orientación de la antena y su conexión. B/ GPS: ► El parpadeo verde indica una buena recepción de la señal GPS, el parpadeo rojo indica la transmisión de la información horaria al RTCP09. ☛...
  • Page 141: Opción Ntp

    2.2.5. Opción NTP Conexión del RTCP09 a la red informática RTCP09 debe conectarse a la red informática en tres casos: ► Para acceder a la interfaz web. ► Para la programación de salidas por relé (si están disponibles). ► Permanentemente para el buen funcionamiento del servidor o cliente NTP, en función de las opciones disponibles.
  • Page 142: Conexiones Eléctricas

    Klingel z;0,1A 230V;50-60Hz;0,1A 230V;50-60Hz;0,1A FUSE 1A FUSE 1A RESET RESET IMPULS. OUT IMPULS. OUT 2.3. CONEXIONES ELÉCTRICAS AFNOR OUT AFNOR OUT ► La primera imagen muestra el cableado que no se debe realizar. En este montaje, la salida del relé está conectada directamente a la alimentación del RTCP09. El segundo montaje es correcto, pues la alimentación del RTCP09 está...
  • Page 143: Parametrización De La Dirección Ip

    Nota Para los usuarios de Windows Vista o Windows 7, es recomendable ejecutar el programa como administrador. Para ello, hacer clic con el botón derecho en el acceso directo y seleccionar «Ejecutar como administrador». Si el programa no se ejecuta como administrador, la configuración automática puede fallar.
  • Page 144: Configuración Automática

    ► Para utilizar el RTCP09, haga clic en «Ejecutar Mozilla Sunbird con el RTCP09». 2.5.1. Configuración automática ► El software de parametrización automá- tica detecta todos los RTCP09 pres- entes en la red. ► Elija el RTCP09 a utilizar. En el caso que el RTCP09 no apareciera en la...
  • Page 145 ► El software configura Mozilla Sunbird asociándolo con el RTCP09 previa- mente seleccionado. ► A partir de ahora, puede utilizar Mozilla Sunbird para planificar y programar la conmutación de las salidas por relés del RTCP09. ► Ejecute Mozilla Sunbird para empezar a configurar los calendarios.
  • Page 146 2.5.2. Configuración sin detección de red También es posible efectuar una configuración del RTCP09 sin detección de red. Esto puede ser útil en el caso de que los parámetros de la red sean demasiado restrictivos y bloqueen la comunicación entre el software y el RTCP09. ►...
  • Page 147: Configuración Manual

    2.5.3. Configuración manual El usuario puede ajustar manualmente los parámetros de Mozilla Sunbird, si bien es reco- mendable utilizar la programación automática siempre que sea posible. ► Para efectuar una parametrización ma- nual, primero hay que instalar Mozilla Su nbird y, a continuación, crear uno a uno los calendarios correspondientes a cada salida.
  • Page 148: Programación De Los Relés

    2.5. PROGRAMACIÓN DE LOS RELÉS Véase la sección 5. Utilización general del calendario (Mozilla Sunbird). 2.6. CONFIGURACIÓN DEL RTCP09 RTCP09 se suministra con unos ajustes predeterminados que permiten su funciona- miento inmediato en la mayoría de las situaciones. La totalidad de los ajustes del RTCP09 se realiza desde su interfaz web, accesible por medio de un navegador de Internet (Internet Explorer, Firefox, Google Chrome,...) introdu-...
  • Page 149: Interfaz Lcd

    INTERFAZ LCD Flèches Touche d'annulation directionnelles 3.1. DESCRIPCIÓN GENERAL La pantalla LCD de la parte frontal del RTCP09 y los seis botones constituyen una interfaz que permite configurar ciertos parámetros del RTCP09. Botón de validación Botón Flechas de dirección de anulación Tras la conexión del equipo a la red eléctrica, un logo en la pantalla indica la inicialización del aparato.
  • Page 150 ► El usuario puede bloquear la pantalla LCD presionando durante 5 segundos en el botón “ESC”. El desbloqueo se realiza de la misma manera. Cuando el RTCP09 LCD esté bloqueado, aparecerá un pequeño candado en la parte inferior derecha de la pantalla. ►...
  • Page 151 Sinóptico de navegación OK / ESC Reinicio OK / ESC Activación del inicio rápido (Ver sección 4 INICIO RÁPIDO) MDE-RTCP09-3060V2.2...
  • Page 152: Menú Principal

    3.2. MENÚ PRINCIPAL ► Hay varias opciones disponibles en el menú principal. Es posible navegar por ellas utilizando las teclas «▲» o «▼». ► Cuando el usuario presiona el botón «OK», accede a la pantalla indicada. Por regla general, una página se compone de textos y de campos ajustables.
  • Page 153: Cambiar Dirección Ip

    ► Ejemplo: para España, los campos válidos son «+1» y «Europa» (lo que corres- ponde a una hora UTC+1 con un cambio de hora europeo). Es muy importante configurar correctamente los campos del huso horario y del cambio de hora. Una configuración incorrecta en es- tos campos introducirá...
  • Page 154: Salida Impulsión (Si Está Disponible)

    3.7. SALIDA IMPULSIÓN (SI ESTÁ DISPONIBLE) Si el RTCP09 posee una salida impulsional, esta pantalla permite efectuar tareas simples de sincronización de relojes. Introduciendo una hora, que corresponde a la hora mostrada en los relojes a sincronizar, RTCP09 va a enviar automáticamente el número correcto de impulsos para sincronizar de nuevo la red de relojes.
  • Page 155: Alarma En La Pantalla Lcd

    3.9. ALARMA EN LA PANTALLA LCD El RTCP09 puede señalar varias alarmas: ► MANTENIMIENTO ► RECUPERACIÓN DE IMPULSO ► ESPERA DE IMPULSO ► ERROR: IMPULSE CC ► ERROR: IMPULSE CO ► Mantenimiento: Para conocer el procedimiento a seguir, contacte con nuestro servicio técnico (datos de contacto en el reverso del documento).
  • Page 156: Inicio Rápido

    INICIO RÁPIDO El inicio rápido permite configurar rápidamente el RTCP09. Las diferentes etapas son las siguientes: ► Activación del inicio rápido ► Elección del idioma ► Configuración de la fecha y de la hora ► Configuración de la dirección IP ►...
  • Page 157 Sinóptico de funcionamiento SI + OK NO + OK NO + OK SI + OK OK + salida impulsión OK + Sin salida impulsión 10 s MDE-RTCP09-3060V2.2...
  • Page 158: Activación Del Inicio Rápido

    4.1 ACTIVACIÓN DEL INICIO RÁPIDO Después de la pantalla de inicialización, po- drá elegir si desea ejecutar el inicio rápido. 4.2 ELECCIÓN DEL IDIOMA En esta pantalla se elige el idioma de la interfaz (INGLÉS, FRANCÉS, ESPAÑOL, ALEMÁN). 4.3 CONFIGURACIÓN DE LA FECHA Y DE LA HORA La primera pantalla pregunta si el usuario desea configurar la hora del RTCP09 ma- nualmente.
  • Page 159: Configuración De La Dirección Ip

    4.4 CONFIGURACIÓN DE LA DIRECCIÓN IP La primera pantalla pregunta si el usua- rio desea configurar la dirección IP del RTCP09 manualmente. Si el usuario desea configurar la dirección IP del RTCP09, aparece la pantalla de configuración. En la primera línea se escribe la dirección IP, en la segunda, la máscara de subred y en la última, la pasarela (o gateway) prede- terminada.
  • Page 160: Validación De La Configuración

    4.6 VALIDACIÓN DE LA CONFIGURACIÓN Cuando haya configurado todos los pará- metros, aparece la pantalla de validación de la configuración. Cuando se confirma, aparece la pantalla de guardado siguiente. Una vez guardada la configuración, el RTCP09 se reinicia. Si la pantalla LCD del RTCP09 se queda bloqueada en la pantalla de inicio durante...
  • Page 161: Interfaz Web

    INTERFAZ WEB 5.1. ACCESO A LA INTERFAZ WEB La interfaz web presenta varias páginas dedicadas a la configuración del RTCP09. Para acceder a esta interfaz, hay que abrir un navegador de Internet e introducir la direc- ción IP del RTCP09 en la barra de direcciones.
  • Page 162: Página Principal

    5.2. PÁGINA PRINCIPAL La página principal proporciona informaciones sobre el estado del RTCP09. Puede leerse la hora del reloj interno, el estado de la sincronización externa... La navegación por las diferentes páginas se realiza con ayuda del menú que se encuentra a la izquierda de la interfaz.
  • Page 163: Parámetros Del Calendario

    5.4. PARÁMETROS DEL CALENDARIO Esta página permite configurar los parámetros del calendario. En función del número de salidas disponibles, aparecen las líneas correspondientes. Hay disponibles varios ajustes: ► El nombre de la salida (ejemplo: tonos de llamada, calefacción, etc.). Este nombre será utilizado en Mozilla Sunbird a partir de la próxima ejecución del software de parametri- zación automática.
  • Page 164: Parámetros De Red

    En caso de interrupción de suministro en la red eléctrica, los relés se abren independientemente de los ajustes realizados en esta página. En esta página aparece también información sobre el estado actual de los relés: ► Su estado de activación, que indica si hay en curso un evento asociado al relé. ►...
  • Page 165: Entradas / Salidas Horarias

    5.6. «ENTRADAS / SALIDAS HORARIAS» Esta página permite modificar los ajustes de todos los módulos horarios del RTCP09. Por omisión, un RTCP09 solamente lleva un reloj interno. En función de las opciones, este puede contener además una fuente de sincronización externa (ejemplo: radio, GPS, etc.) y una o varias salidas horarias, permitiendo redistribuir la información horaria a otros aparatos.
  • Page 166 ► En la parte (ver figura anterior) se halla la fuente de sincronización, la referencia para el RTCP09. Esta fuente puede ser el reloj interno o un módulo opcional (radio, IRIG, etc.). Si hay una fuente de sincronización externa, hay disponibles los siguientes ajustes: Casilla «Forzar el reloj interno»: esta opción permite forzar el uso del reloj in- •...
  • Page 167: Descripción Detallada De Las Entradas Horarias

    5.6.1. Descripción detallada de las entradas horarias A. Versión autónoma No hay ajustes específicos para esta versión. El ajuste del tiempo se hace en la parte 2 de las "Entrada / Salida de los tiempos" ► B. Entrada NTP Un enlace da acceso a la página específica de configuración de la entrada NTP. Esta página viene detallada en la parte «5.7.
  • Page 168: Entrada Dcf / Tdf

    C. Entrada DCF / TDF No hay ajustes específicos para esta entrada. D. Entrada ASCII Aquí puede configurar el enlace serie de entrada del RTCP09. Debe elegirse el protocolo, la velocidad de comunicación y las opciones de control. E. Entrada AFNOR El usuario debe precisar si el código de entrada es del tipo IRIG/B o AFNOR NFS 87500.
  • Page 169: Entrada Gps

    F. Entrada GPS No hay ajustes específicos para esta entrada. 5.6.2. Descripción detallada de las salidas horarias A. Salida AFNOR El usuario puede seleccionar si desea que la salida suministre un código del tipo IRIG/B o AFNOR NFS 87500. B. Salida impulsos El usuario puede ajustar la frecuencia de los impulsos de salida: ►...
  • Page 170 ► Ajuste automático: el usuario señala la casilla y a continuación indica en los cam- pos la hora mostrada actualmente en los relojes. El RTCP09 determina automáti- camente el número de impulsos a enviar en función de los husos horarios, tipo de cambio de horario y hora actual.
  • Page 171: Salida Ascii

    C. Salida ASCII El usuario establece aquí el enlace serie de salida del RTCP09. Debe elegir el pro- tocolo, la velocidad de comunicación y las opciones de control. D. Salida NTP Un enlace da acceso a la página específica de configuración de la salida NTP. Esta página está...
  • Page 172: Parámetros Ntp

    5.7. PARÁMETROS NTP Esta página da acceso a los ajustes de las opciones NTP del RTCP09. (Opción servidor NTP y/o Opción Cliente NTP) ► La primera parte concierne a la parametrización del cliente NTP, es decir, cuando el RTCP09 obtiene información horaria a partir de un servidor distante. Esta parte no es visible si el RTCP09 no está...
  • Page 173: Parametrización Snmp

    Las claves utilizadas por los módulos cliente o servidor NTP pueden anotarse en la última parte de la página. 5.8. PARAMETRIZACIÓN SNMP Puede introducirse la información específica del protocolo SNMP para la supervisión del RTCP09, así como las direcciones a las que serán enviadas las alarmas (traps). 5.9.
  • Page 174 ► a página «Actualización del firmware» de la interfaz web del RTCP09 posee una doble utilidad. Proporciona las diferentes versiones de los módulos integrados en el RTCP09 y permite además actualizar el firmware del RTCP09. ► Para actualizar el RTCP09, haga clic en el botón "Examinar..." y seleccione el archivo "image.bin"...
  • Page 175: Reinicio

    ► Tras la actualización, el RTCP09 se reinicia automáticamente. Si la pantalla LCD del RTCP09 se queda bloqueada en la pantalla de inicio durante más de 10 segundos, se debe entonces proceder a un reinicio manual (Véase el apartado 8 REINICIO DEL RTCP09).
  • Page 176: Utilización General Del Calendario

    UTILIZACIÓN GENERAL DEL CALENDARIO (MOZILLA SUNBIRD) 6.1. GLOSARIO: ► Calendario: un calendario corresponde a una salida por relé. Hay tantos calendarios como salidas por relé. Para controlar un relé, deberán crearse los eventos en el calen- dario correspondiente. ► Evento: un evento corresponde a una actuación sobre un relé. Se caracteriza por una fecha de inicio (año, mes, día, hora, minuto) y una fecha final.
  • Page 177: Planificación De Un Evento

    6.2. PLANIFICACIÓN DE UN EVENTO Mozilla Sunbird, elija un calendario en la parte izquierda de la pantalla, haciendo clic en su nombre. ► Ejemplo: El calendario D, que corres- ponde a la 4.ª Salida (o relé 4). ► Es posible crear un nuevo evento ha- ciendo clic en un día cualquiera.
  • Page 178 Para eventos con una duración inferior a un minuto, utilice el campo «Descripción» para introducir la duración del evento en segundos. ► Ejemplo: para activar el relé número 4 el 26 de marzo de 2010 a las 12h00 du- rante 15 segundos, la ventana de crea- ción debe ser la que se muestra: Nota Cuando se indica una duración...
  • Page 179 ► Si se produce un error de comunicación entre el ordenador que está ejecutando Mozilla Sunbird y el RTCP09, es posible que los calendarios se bloqueen (pasan al modo de «Sólo lectura»). Si esto se produjera, aparece un pequeño sím- bolo de atención al lado del nombre del calendario.
  • Page 180: Planificación De Un Evento Recurrente

    6.3. PLANIFICACIÓN DE UN EVENTO RECURRENTE ► Repita el procedimiento de añadir un nuevo evento y en la ventana de crea- ción de un nuevo evento, hagar clic en la lista desplegable «Repetir» ► El usuario dispone de diversas opciones para establecer la repetición de este evento.
  • Page 181: Excepciones A Las Reglas De Repetición

    6.4. EXCEPCIONES A LAS REGLAS DE REPETICIÓN 6.4.1. Excepciones puntuales ► Es posible definir excepciones a las ► Dado que el 5 de abril es festivo, no se reglas de recurrencia. En este ejemplo, desea encender la iluminación este día. se ha programado la iluminación exte- Para añadir una excepción a la regla rior de un edificio para que las personas...
  • Page 182 ► Eligiendo «Eliminar sólo esta aparición», se elimina la acción sólo para el 5 de abril, pero se mantiene para todas las demás. Con ello se ha creado una regla de excepción puntual asociada a este evento. Vista Multisemana Nota Haciendo clic en «Eliminar todas las apariciones»...
  • Page 183: Rangos De Excepciones

    6.4.2. Rangos de excepciones ► Es posible programar los períodos durante los cuales la programación de los relés será ignorada por el RTCP09. Esto puede ser útil para desactivar la conmutación de los relés, por ejemplo durante los períodos de vacaciones. ►...
  • Page 184 ► Pueden configurarse hasta 10 rangos de excepción para cada RTCP09. Para eligir una, haga clic en «Editar». ☛ Se abre una ventana que permite definir los parámetros de la excepción: Viernes, 01 de enero 2010 Viernes, 01 de enero 2010 Relé...
  • Page 185: Ejemplo De Eventos Posibles Para Una Escuela

    Nota Para suspender las conmutaciones de los relés durante un cierto período, también es posible forzarlos a su estado de desactivación, utilizando la inter- faz frontal o la interfaz web. ¡Atención! En caso de puesta a cero a los valores de fábrica, los calendarios de los relés se conservan, pero los rangos de excep- ciones se pierden.
  • Page 186: Guardar Calendarios

    6.6. GUARDAR CALENDARIOS ► Ejecute el software Sunbird utilizando la aplicación RTCP09. A continuación, haga clic con el botón derecho sobre el calendario a guardar y elija la opción «Exportar calendario...». Guárdelo en su ordenador en forma de archivo .ics. Repita la operación para cada uno de sus calendarios (= salidas).
  • Page 187: Solución De Problemas

    SOLUCIÓN DE PROBLEMAS SÍNTOMAS CAUSAS POSIBLES SOLUCIONES RTCP09 no se El cable de alimentación está Conectar el cable de alimentación a la ilumina. desconectado. red. El cable de red no está Comprobar la conexión del cable de red conectado correctamente al al RTCP09.
  • Page 188 SÍNTOMAS CAUSAS POSIBLES SOLUCIONES Corregir el fallo de la fuente de sincronización o forzar la utilización del La fuente externa de reloj interno a través de la página «base sincronización está de tiempo» de la interfaz web, casilla: desajustada. «forzar RTC». RTCP09 Introducir entonces la hora exacta a través muestra una hora...
  • Page 189: Reinicio Del Rtcp09

    REINICIO DEL RTCP09 Si el RTCP09 no responde a las órdenes o la pantalla se queda congelada, es posible reiniciarlo. RESET (Reinicio) ► Presione el botón «RESET» situado en la parte posterior del RTCP09, al lado del conector de red RJ-45. Esta operación conserva todos los parámetros del RTCP09. Solamente se pierde la información horaria.
  • Page 190 MDE-RTCP09-3060V2.2...
  • Page 191 NOTAS MDE-RTCP09-3060V2.2...
  • Page 192: Soporte Técnico

    GORGY TIMING. ® ® ® ® Gorgy Timing RC74B38 Cualquier modificación de orden técnico, estético o de color pueden realizarse sin previo aviso. Número de declaración de actividad de prestatario de formación: : 82 38 04877 38 MDE-RTCP09-3060V2.2...
  • Page 193 H A U P T U H R & S C H A L T U H R RADIO TIMING CP09 ® BEDIENUNGSANLEITUNG MDE-RTCP09-3060V2.2...
  • Page 194 Sollte die RTCP09 nach einem Stromausfall die Uhrzeit nicht mehr gespeichert haben, weist dies auf eine leere Sicherungsbatterie hin. Wenden Sie sich zum Austausch der Sicherungs- batterie an den Kundendienst von Gorgy Timing. (Siehe Rückseite der vorliegenden Anlei- tung) Sollten am Gerät Änderungen vorgenommen oder dieses geöffnet worden sein, ohne dass ein vorheriges Einverständnis seitens des Kundendienstes vorliegt, können Gewährleistung-...
  • Page 195 ZUSAMMENFASSUNG ALLGEMEINES ......................197 1.1. Funktion Hauptuhr ......................198 1.2. Funktion Schaltuhr ......................199 1.3. Parametrierung ......................... 199 INSTALLATION UND ANSCHLÜSSE ............... 200 2.1. Installation der Hardware ....................200 2.1.1. Befestigung (bei Ausführung für Wandmontage) ..........200 2.1.2. Abmessungen und Beschreibung ................. 201 2.2.
  • Page 196 WEB-INTERFACE ..................... 225 5.1. Zugriff auf das Web-Interface ................... 225 5.2. Startseite .......................... 226 5.3. LCD-Anzeige an der Vorderseite ..................226 5.4. Kalender-Parameter ......................227 5.5. Netzwerk-Parameter ......................228 5.6. Zeiteingänge / -ausgänge ....................229 5.6.1. Ausführliche Beschreibung der Zeiteingänge ............231 A.
  • Page 197: Allgemeines

    ALLGEMEINES RTCP09 hat zwei Hauptfunktionen: ► Hauptuhr ► Schaltuhr Das Gerät ist in zwei Ausführungen verfügbar: ► Gehäuse für die Wandmontage ► Rack-Ausführung 1U DER GERÄTESATZ ENTHÄLT (SCHRAUBEN SIND NICHT IM LIEFERUMFANG ENTHALTEN) A N T E N N E N ( o p t i o n a l ) A N T E N N E N ( o p t i o n a l ) TDF, DCF, GPS TDF, DCF, GPS...
  • Page 198: Funktion Hauptuhr

    1.1. FUNKTION HAUPTUHR Bei der RTCP09 handelt es sich um eine Hauptuhr, die sich auf eine externe Quelle ein- takten kann und dann ihrerseits Zeitinformationen an andere Empfänger (Nebenuhren) weiterleitet. Die Hauptuhr kann sich je nach Ausstattungsoptionen mit verschiedenen Quellen (z. B. NTP-Zeitserver, Funksignal usw.) synchronisieren (d.
  • Page 199: Funktion Schaltuhr

    1.2. FUNKTION SCHALTUHR Sofern die entsprechende Ausstattungsoption verfügbar ist, können Relais-Schaltaus- gänge aktiviert und damit weitere Nebenuhren angesteuert werden. (Abschaltvermögen: 250 VAC, 10 A). 1.3. PARAMETRIERUNG Die Grundeinstellungen können über die LCD-Schnittstelle vorgenommen werden. LCD-Display + Tasten ► Zur Konfigurierung der RTCP09 über die Webschnittstelle und der Programmierung der Relaisschaltausgänge ist ein PC erforderlich.
  • Page 200: Installation Und Anschlüsse

    INSTALLATION UND ANSCHLÜSSE 2.1. INSTALLATION DER HARDWARE ☛ Obligatorisch bei der Inbetriebnahme der Hauptuhr 2.1.1. Befestigung (bei Ausführung für Wandmontage) Wandhalterung als Schablone zur Kennzeichnung der Bohrlöcher verwenden. Wandhalterung mitsamt Scharnieren mit Hilfe der Schrauben Ø 5 mm (nicht im Liefe- rumfang enthalten) befestigen.
  • Page 201: Abmessungen Und Beschreibung

    2.1.2. Abmessungen und Beschreibung ► Aufbau der RTCP09 (Ausführung für Wandmontage) Face avant Vorderseite RTCP09 Face arrière Rückseite 1. Netzkabel 2. Steckplatz für Synchronisationseingang und Optionen 3. Steckplatz Ethernet (Netzwerk) 4. LCD-Display + Tasten 230V;50-60Hz;0,1A FUSE 1A 5. Impulsausgang 6. Impulssicherung 1 A RESET IMPULS.
  • Page 202 ► Aufbau der RTCP09 (Rack-Ausführung) 1. Netzkabel 2. Steckplatz für Synchronisationseingang und Optionen 3. Steckplatz Ethernet (Netzwerk) 4. LCD-Display + Tasten 5. Impulsausgang 6. Impulssicherung 1 A 7. AFNOR Ausgang 8. Antennenanschluss (Ausgang DHW-Funk) 9. Erster Relaisausgang: ABCD 10. Zweiter Relaisausgang: EFGH 11.
  • Page 203: Anschlüsse

    2.2. ANSCHLÜSSE Anschluss für Synchronisationseingang Ausführung Schaltgehäuse, Ausführung Rack, an der Rückseite an der Rückseite FUSE 1A ETHERNET IMPULS Steckplatz ASCII CODE IMPULS Am Synchronisationseingang können folgende Eingänge angeschlossen werden: • IRIG B / AFNOR NFS 87500 • ASCII • DCF / TDF •...
  • Page 204: B/ Gps

    Hinweis Sollte die LED nicht blinken (sondern permanent leuchten bzw. nicht leuchten), Ausrichtung oder Anschluss der Antenne überprüfen. B/ GPS ► Ein grünes Blinken zeigt den korrekten Empfang des GPS-Signals an, ein rotes Blinken die Weitergabe der Zeitinformation an die Hauptuhr. ☛...
  • Page 205: Option Ntp

    2.2.5. Option NTP Netzwerkanschluss der RTCP09 In folgenden drei Fällen muss die Hauptuhr an das Datennetz angeschlossen sein: • für den Zugriff auf das Web-Interface. • für die Programmierung der Relais-Schaltausgänge (falls verfügbar). • dauerhaft für eine korrekte Funktionsweise über NTP-Server oder NTP-Client, je nach verfügbaren Optionen.
  • Page 206: Elektrische Verdrahtung

    2.3. ELEKTRISCHE VERDRAHTUNG ► In der ersten Abbildung wird eine nicht korrekt vorgenommene Verdrahtung gezeigt. Im Rahmen dieser Montage ist der Relaisausgang direkt an die Stromversorgung der RTCP09 angeschlossen. Die zweite Montage ist Konform da die Stromversorgung der Hauptuhr RTCP09 und die Stromversorgung der Relaisausgänge getrennt sind.
  • Page 207: Parametrierung Der Ip-Adresse

    HINWEIS Windows Vista- oder Windows 7-Benutzern wird empfohlen, das Programm als Administrator auszuführen. Klicken Sie dazu mit der rechten Maustaste auf die Verknüpfung und wählen Sie „Als Administrator ausführen“. Wenn das Programm nicht mit Administratorrechten ausgeführt wird, kann die automatische Konfigurierung fehlschlagen. 2.4.3.
  • Page 208: Automatische Konfiguration

    ► Klicken Sie zur Nutzung der RTCP09 auf „Mozilla Sunbird mit RTCP09 aus- führen“. 2.5.1. Automatische Konfiguration ► automatische Parametrierungs- programm sucht nach der oder den im Datennetz integrierten RTCP09. ► Wählen Sie die entsprechende RTCP09 aus. Sollte diese nicht in der Liste aufge- führt sein, korrekte Konfiguration der dazugehörigen IP-Adresse überprüfen (siehe entsprechende Abschnitte in der...
  • Page 209 ► Durch ein Pairing mit der zuvor aus- gewählten Hauptuhr wird die Konfigu- rierung von Mozilla Sunbird ausgeführt. ► Nun kann Mozilla Sunbird für die Planung und Auslösung der Relais- Schaltausgänge der RTCP09 genutzt werden. ► Mozilla Sunbird starten, um mit der Konfigurierung der Kalender zu begin- nen.
  • Page 210: Konfiguration Ohne Netzwerkerkennung

    2.5.2. Konfiguration ohne Netzwerkerkennung RTCP09 kann auch ohne vorherige Netzwerkerkennung konfiguriert werden. Das kann nützlich sein, sollten die Netzparameter mit zu starken Restriktionen belegt sein und damit die Kommunikation zwischen Programm und RTCP09 blockieren. ► Im vorherigen Bildschirm auf „Manuelles Konfigurieren“...
  • Page 211: Manuelle Konfiguration

    2.5.3. Manuelle Konfiguration Der Benutzer kann Mozilla Sunbird manuell parametrieren; es wird jedoch empfohlen, diese Parametrierung, sofern möglich, automatisch vorzunehmen. ► Für eine manuelle Parametrierung muss zunächst Mozilla Sunbird installiert wer- den. Dann wird für jeden Relais-Schalt- ausgang der entsprechende Kalender erstellt.
  • Page 212: Konfiguration Der Rtcp09

    2.6. KONFIGURATION DER RTCP09 Die RTCP09 ist bei Lieferung bereits werksseitig mit Standardeinstellungen versehen, die in den meisten Fällen eine sofortige Inbetriebnahme erlauben. Sämtliche Einstellungen der RTCP09 können über das Web-Interface vorgenommen wer- den, das über Internet-Browser zugänglich ist (Internet Explorer, Firefox, Chrome usw.). Dazu die IP-Adresse der RTCP09 ins Adressfeld eingeben (eine korrekte Verbindung zum...
  • Page 213: Lcd-Anzeige

    LCD-ANZEIGE Touche Cancel Flèches Directional directionnelles d'annulation arrows button 3.1. ALLGEMEINE BESCHREIBUNG Das LCD-Display an der Vorderseite der RTCP09 und die dazugehörigen 6 Tasten stellen eine Schnittstelle dar, über die gewisse Parameter der RTCP09 eingestellt werden können. Botón Bestätigen de validación Flechas Botón nach oben/unten...
  • Page 214 ► Um das LCD-Display zu sperren, drücken Sie bitte 5 sek. die "ESC"-Taste. Entriegelung erfolgt auf die gleiche Art. Wenn das Bedienfeld gesperrt ist, erscheint ein kleines Vorhängeschloss unten rechts. ► Wenn die Hauptuhr RTCP09 ankommende Ereignisse berechnet, erscheinen nachei- nander die Zeichen "/"...
  • Page 215 Navigationsschema OK / ESC Neustart OK / ESC Schnellstart Aktivierung (Siehe Absatz 4 SCHNELLSTART) MDE-RTCP09-3060V2.2...
  • Page 216: Hauptmenü

    3.2. HAUPTMENÜ ► Im Hauptmenü können mehrere Einstel- lungen vorgenommen werden. Mit den Tasten „▲“ und „▼“ kann zwischen den Menüpunkten geblättert werden. ► Durch Drücken auf „OK“ wird der an- gezeigte Menüpunkt aufgerufen. Generell werden unter einem Menüpunkt die Beschreibung desselben sowie Eingabefel- der angezeigt.
  • Page 217: Ip-Adresse Einstellen

    ► Beispiel: Für Frankreich muss in diesen Feldern „+1“ und „Europa“ eingetragen werden (dies entspricht einer UTC+1 und einer für Europa gültigen Umstellung auf Sommerzeit (DST)). Es ist sehr wichtig , die Eingabefelder für UTC und Sommer-/Winterzeit korrekt auszufüllen. Eine fehlerhafte Parametrierung dieser Eingaben kann zu falschen Uhrzeitangaben führen bzw.
  • Page 218: Impulsausgang (Falls Verfügbar)

    3.7. IMPULSAUSGANG (FALLS VERFÜGBAR) Verfügt die RTCP09 über einen Impulsausgang, kann unter diesem Menüpunkt eine ein- fache Parametrierung der Uhrensynchronisation vorgenommen werden. Dazu wird die Uhrzeit eingegeben, die auf den von der Synchronisation betroffenen Uhren angezeigt werden soll. Die RTCP09 sendet automatisch die entsprechende Anzahl von Impulsen, um das Uhrennetz erneut zu synchronisieren.
  • Page 219: Alarm Auf Dem Lcd

    3.9. ALARM AUF DEM LCD Die RTCP09 kann verschiedene Alarmmeldungen ausgeben: ► WARTUNG ► IMPULS NACHSTELLEN ► IMPULS WARTEN ► FEHLER IMPULSE CC ► FEHLER IMPULSE CO ► WARTUNG Wenden Sie sich an unseren technischen Kundendienst, um nähere Informationen zu den Wartungsverfahren zu erhalten (Adresse auf der Rückseite des vorliegenden Dokuments).
  • Page 220: Schnellstart

    SCHNELLSTART Über den Schnellstart kann die RTCP09 in kurzer Zeit konfiguriert werden. Dabei werden die folgenden Schritte ausgeführt: ► Schnellstart aktivieren ► Menüsprache auswählen ► Datum und Uhrzeit einstellen ► IP-Adresse einrichten ► Ausgänge aktivieren ► Einstellungen bestätigen ☛ Anmerkung: Die Einstellungen werden erst durch die endgültige Bestätigung am Ende des Schnellstartmenüs gespeichert.
  • Page 221 Funktionsschema JA + OK NEIN + OK NEIN + OK JA + OK OK + Minutenimpuls Ausgang OK + Keinen Minutenimpuls Ausgang 10 s MDE-RTCP09-3060V2.2...
  • Page 222: Schnellstart Aktivieren

    4.1. SCHNELLSTART AKTIVIEREN Nach der Bildschirmanzeige mit der Initiali- sierung des Gerätes wird ein neuer Menü- punkt angezeigt, der erlaubt, einen Schnell- start einzuleiten. 4.2. MENÜSPRACHE AUSWÄHLEN Unter diesem Menüpunkt wird die Menüs- prache ausgewählt (ENGLISCH, FRANZÖ- SISCH, SPANISCH, DEUTSCH). 4.3.
  • Page 223: Ip-Adresse Einrichten

    4.4. IP-ADRESSE EINRICHTEN Unter diesem Menüpunkt gibt der Benutzer an, ob er die IP-Adresse der RTCP09 nuell einrichten möchte. Bestätigt der Benutzer die manuelle Ein- richtung der IP-Adresse, wird ein Einstel- lungsfenster geöffnet. In der ersten Zeile wird die IP-Adresse ein- getragen, in der zweiten die Subnetz-Masc und Gateway als Default-Einstellungen.
  • Page 224: Einstellungen Speichern

    4.6 EINSTELLUNGEN SPEICHERN Sind alle Einstellungen vorgenommen, wird ein Bildschirm zur Bestätigung dieser Einstel- lungen angezeigt. Sobald die Seite validiert wurde, wird ein Speicher-Bildschirm angezeigt. Nach abgeschlossener Speicherung startet RTCP09 wieder neu hoch. Sollte die LCD-Anzeige auf dem Neustart- Bildschirm länger als 10 Sekunden blockiert bleiben, muss ein Neustart manuell eingelei- tet werden.
  • Page 225: Web-Interface

    WEB-INTERFACE 5.1. ZUGRIFF AUF DAS WEB-INTERFACE Das Web-Interface stellt mehrere Menüseiten zur Konfigurierung der RTCP09 bereit. Für den Zugriff auf diese Schnittstelle muss ein Internet-Browser geöffnet und in der Adresszeile die IP-Adresse der RTCP09 eingetragen werden. Die IP-Adresse der RTCP09 wird entweder automatisch zugeteilt oder durch den Benutzer definiert.
  • Page 226: Startseite

    5.2. STARTSEITE Die Navigation in den einzelnen Menüseiten erfolgt mit Hilfe des links in der Schnittstelle eingeblendeten Menüs. Die Startseite enthält alle Angaben zum Status der RTCP09. Hier wird die Uhrzeit der inter- nen Uhr, der Synchronisationsstatus mit dem externen Zeitgeber usw. angezeigt. 5.3.
  • Page 227: Kalender-Parameter

    5.4. KALENDER-PARAMETER In diesem Menü können die Kalender-Parameter eingestellt werden. Die angezeigten Zei- len entsprechen der Anzahl der verfügbaren Schaltausgängen. Mehrere Einstellungen sind möglich: ► Name des Ausgangs (z. B.: Klingelton, Heizung usw.). Diese Bezeichnung wird von Mo- zilla Sunbird beim nächsten Mal, wenn das automatische Parametrierungsprogramm ausgeführt wird, übernommen.
  • Page 228: Netzwerk-Parameter

    Bei einem Stromnetzausfall werden die Relais ungeachtet der Eins- tellungen unter diesem Menü geöffnet. Unter diesem Menü sind auch Informationen zum aktuellen Status der Relais verfügbar: ► „aktivierter/deaktivierter Zustand“, wodurch angezeigt wird, ob das entsprechende Re- lais mit einem aktuellen Ereignis belegt ist. ►...
  • Page 229: Zeiteingänge / -Ausgänge

    5.6. ZEITEINGÄNGE / -AUSGÄNGE Unter diesem Menü können die Einstellungen zu sämtlichen Zeitmodulen der RTCP09 geändert werden. Standardmäßig ist eine RTCP09 mit nur einer internen Uhr ausgestattet. Je nach Optionen kann sie zudem noch eine externe Synchronisationsquelle einbeziehen (z. B. Funk, GPS usw.) und über einen oder mehrere Zeitschaltausgänge verfügen, über die Zeitinformationen an weitere Geräte weitergegeben werden können.
  • Page 230 ► Im Abschnitt (siehe obige Abbildung) ist die Synchronisationsquelle aufgeführt, von der die Hauptuhr die relevante Zeitinformation bekommt. Diese Quelle kann die interne Uhr oder ein optionales Modul (Funksender, IRIG-Timecode usw.) sein. Bei Vorhanden- sein einer externen Synchronisationsquelle sind folgende Einstellungen verfügbar: •...
  • Page 231: Ausführliche Beschreibung Der Zeiteingänge

    5.6.1. Ausführliche Beschreibung der Zeiteingänge A. Ausführung „Autonom“ Für diese Ausführung gibt es keine spezifischen Einstellungen. B. NTP-Eingang Über einen Link hat man Zugriff auf ein spezielles Konfigurationsmenü für den NTP-Eingang. Genauere Angaben zu diesem Menü finden Sie im Abschnitt „5.7.
  • Page 232: Dcf/Tdf-Eingang

    C. DCF/TDF-Eingang Für diesen Eingang gibt es keine spezifischen Einstellungen. D. ASCII-Eingang Hier wird die Serienschaltung am Eingang der RTCP09 parametrisiert. Dazu empfiehlt sich, das Übertragungsprotokoll, die Übertragungsgeschwindigkeit und die Sicherheitsoptionen auszuwählen. E. AFNOR-Eingang Der Benutzer muss den entsprechenden Modus festlegen: IRIG-B oder AFNOR NFS87500 ist.
  • Page 233: Gps-Eingang

    F. GPS-Eingang Für diesen Eingang gibt es keine spezifischen Einstellungen. 5.6.2. Ausführliche Beschreibung der Zeitausgänge A. AFNOR-Ausgang Der Benutzer kann die IRIG Signal Art festlegen: IRIG-B oder AFNOR NFS87500 ausgang. B. Impulsausgang Der Benutzer kann an dieser Stelle die Impulsfrequenz am Ausgang einstellen: ►...
  • Page 234 ► Automatische Anpassung der Uhren: Der Benutzer aktiviert das Kontrollkästchen und trägt in den Eingabefeldern die aktuell von den Uhren angezeigte Uhrzeit ein. RTCP09 sendet dann automatisch in Abhängigkeit von Zeitzone, Sommerzeitab- weichung und aktueller Uhrzeit die erforderliche Anzahl von Impulsen aus. ►...
  • Page 235: Ascii-Ausgang

    C. ASCII-Ausgang Hier wird die Serienschaltung am Ausgang der RTCP09 parametrisiert. Dazu empfiehlt sich, das Übertragungsprotokoll, die Übertragungsgeschwindigkeit und die Sicherheitsoptionen auszuwählen. D. NTP-Ausgang Über einen Link hat man Zugriff auf ein spezielles Konfigurationsmenü für den NTP- Ausgang. Genauere Angaben zu diesem Menü finden Sie im Abschnitt „5.7. NTP-Pa- rameter“...
  • Page 236: Ntp-Parameter

    5.7. NTP-PARAMETER Über dieses Menü wird auf die Einstellungen der NTP-Optionen der RTCP09 zugegriffen. (Option NTP-Server und/oder Option NTP-Client) ► Im ersten Abschnitt werden die Parameter für den NTP-Client eingestellt, d. h. wenn die RTCP09 die Zeitinformation von einem externen Server erhält. Dieser Abschnitt wird nur bei einer entsprechenden optionalen Ausstattung der RTCP09 angezeigt.
  • Page 237: Snmp-Einstellungen

    Die vom NTP-Client oder NTP-Server verwendeten MD5-Schlüssel können im letzten Ab- schnitt eingetragen werden. 5.8. SNMP-EINSTELLUNGEN Hier werden die spezifischen Einstellungen für das SNMP-Protokoll zur Überwachung der Haup- tuhr sowie die IP-Adressen festgelegt, an die die Alarmmeldungen gesandt werden sollen (Traps). 5.9.
  • Page 238 ► Das Menü „Firmware aktualisieren“ auf dem Web-Interface der RTCP09 erfüllt eine Doppelfunktion. Zum einen sind hier die verschiedenen Versionen der in der RTCP09 integrierten Module aufgeführt, zum anderen kann hier die Firmware der RTCP09 aktualisiert werden. ► Zum Update der RTCP09, auf die Taste „Durchsuchen..." drücken und die Datei „image.bin"...
  • Page 239: Neustart

    ► Nach dem Update startet die RTCP09 neu. Sollte die LCD-Anzeige länger als 1 Minute auf dem Bildschirm blockiert bleiben, muss ein Neustart manuell eingeleitet werden. (Siehe Abschnitt 8 NEUSTART DER RTCP09) 5.10. NEUSTART ► Zum Neustarten der RTCP09, Taste „Neustart" drücken. Die RTCP09 zeigt folgende Seite an.
  • Page 240 6.1. BEGRIFFSERKLÄRUNG: ► Kalenderliste/Datum: Datum/Kalender oder Kalenderliste, dem/der Relaisausgänge zugeordnet sind. Es gibt genauso viel Kalender/Daten bzw. Kalenderlisten wie Relaisausgänge. Zur Ansteuerung eines Relais werden Ereignisse in dem entsprechenden Kalender oder der entsprechenden Kalenderliste eingetragen. ► Ereignis/Termin: Bei einem Ereignis/Termin wird ein Relais ausgelöst. Das Ereignis/der Termin wird durch einen Anfang (Jahr, Monat, Stunde, Minute) und ein Ende definiert.
  • Page 241: Allgemeine Hinweise Zur Benutzung Des Kalenders

    ALLGEMEINE HINWEISE ZUR BENUTZUNG DES KALENDERS (MOZILLA SUNBIRD) 6.2. EREIGNISPLANUNG Wählen Sie in Mozilla Sunbird links oben einen entsprechenden Kalender aus. Klic- ken Sie dazu auf den Namen. ► Beispiel: Agenda D, der dem 4. Relais- ausgang entspricht. ► Sie können auch durch einen Doppel- klick auf ein Datum einen neuen Termin eintragen.
  • Page 242 Tragen Sie bei Ereignissen/Terminen, die weniger als eine Minute dauern, unter „Be- schreibung“ die Dauer des Ereignisses in Sekunden ein. ► Beispiel: Zur Aktivierung des Relais Nr. 4 am 29. März 2010 um 12h00 für eine Dauer von 15 Sekunden, müssen die Fel- der wie nebenstehend ausgefüllt sein: HINWEIS Wurde unter „Beschreibung“...
  • Page 243 ► Sollten Kommunikationsprobleme zwischen Rechner, Mozilla Sunbird ausgeführt wird, und der Hauptuhr auftreten, können Kalender gesperrt werden (Übergang Status „schreibgeschützt“). In diesem Fall erscheint neben dem Kalendernamen entsprechendes Symbol. ► Sind die Störungen behoben, muss der Schreibschutz des Kalenders wieder aufgehoben werden.
  • Page 244: Planung Eines Sich Wiederholenden Ereignisses

    6.3. PLANUNG EINES SICH WIEDERHOLENDEN EREIGNISSES ► Gehen Sie genau so vor wie bei der Option Neuen Termin erstellen, und zeigen Sie die Dropdown-Liste „Wiederholung“ an. ► In dieser Liste können Sie unter verschiedenen Einträgen Bezug auf die Wiederholung des Ereignisses auswählen.
  • Page 245: Ausnahmen Im Wiederholungsschema

    6.4. AUSNAHMEN IM WIEDERHOLUNGSSCHEMA 6.4.1. Punktuelle Ausnahmen ► In Bezug auf das Wiederholungssche- ► Da der 5. April ein Feiertag ist, möchte ma können Ausnahmeregeln definiert man die Beleuchtung an diesem Tag werden. In unserem Beispiel ist die nicht einschalten. So kann in das Wie- Außenbeleuchtung eines Gebäudes so derholungsschema eine...
  • Page 246 ► Wird „Nur dieses Ereignis löschen“ ausgewählt, wird nur das eine wiederholte Ereignis am 5. April gelöscht. Die anderen Wiederholungen bleiben programmiert. So wurde in Bezug auf das programmierte Wiederholungsschema für dieses Ereignis eine Ausnah- meregel erstellt. Monatsansicht Anmerkung Wird die Option „Alle Ereignisse löschen“ ausgewählt, wird das Ereignis mit allen programmierten Wiederholungen gelöscht.
  • Page 247: Ausnahmeperioden

    6.4.2. Ausnahmeperioden ► Es können Ausnahmeperioden für die Hauptuhr programmiert werden. In die- sen Zeiträumen werden die von der RTCP09 angesteuerten Relais nicht aktiviert. Dies kann nützlich sein, um zum Beispiel während der Ferienzeit die Auslösefunktion für ein Relais zu deak- tivieren.
  • Page 248 ► Für eine RTCP können maximal 10 Aus- nahmeperioden konfiguriert werden. Dazu eine Ausnahme wählen und auf „Bearbeiten“ klicken. ☛ Ein Fenster wird geöffnet, in dem die Ausnahme parametrisiert werden kann: Freitag, 1. Januar, 2010 Freitag, 1. Januar, 2010 Relay A Relay B Relay C Relay D...
  • Page 249: Beispiele Für Die Ereignisplanung Einer Schule

    HINWEIS Um die Schaltfunktion der Relais über einen bestimmten Zeitraum hinweg auszusetzen, können die Relais zwangsgeführt werden und damit deaktiviert bleiben. Dies geschieht über das Web-Interface oder die Schnittstelle an der Vorderseite. Achtung! Bei einer Rückstellung auf die werkseitigen Voreinstel- lungen bleiben die Relais-Kalender erhalten, aber die Ausnahmepe- rioden gehen verloren.
  • Page 250: Speichern Von Kalendern

    6.6. SPEICHERN VON KALENDERN ► Starten Sie Sunbird über die RTCP09- Anwendung. Klicken Sie mit der rechten Maustaste auf den zu speichernden Ka- lender und dann in dem sich öffnenden Fenster auf die Option „Kalender expor- tieren“. Speichern Sie den Kalender auf Ihrem Rechner in Form einer *.ics-Datei ab.
  • Page 251: Fehlerbehebung

    FEHLERBEHEBUNG MÖGLICHE FEHLERANZEIGE FEHLERBEHEBUNG FEHLERURSACHEN Die RTCP09 lässt sich Das Netzkabel ist Das Netzkabel in die Steckdose stecken. nicht einschalten. ausgesteckt. Korrekten Anschluss des Datenübertragungskabel Datenübertragungskabels an der RTCP09 ist nicht korrekt an der überprüfen. RTCP09 angeschlossen. Das Web-Interface lässt sich nicht Der RTCP09 wurde keine Menü...
  • Page 252 MÖGLICHE FEHLERANZEIGE FEHLERBEHEBUNG FEHLERURSACHEN Fehler bei der externen Synchronisationsquelle Die externe beheben oder einen zwangsgeführten Betrieb Synchronisationsquelle der Uhr über das Menü „Grundeinstellungen“ gibt falsche Zeitsignale einstellen, dazu Option „RTC forcieren“ aus. aktivieren. RTCP09 gibt eine Korrekte Uhrzeit über diese Webseite eingeben. falsche Uhrzeit an.
  • Page 253: Reset Der Rtcp09

    RESET DER RTCP09 Sollte die RTCP09 nicht mehr auf Eingaben reagieren oder die Displayanzeige blockiert sein, kann ein Reset der Hauptuhr vorgenommen werden. RESET (Neustart) ► Drücken Sie auf der Rückseite der RTCP09 gleich neben der RJ-45-Netzwerk-Steck- verbindung auf „RESET“. In der Folge bleiben alle Einstellungen der Hauptuhr erhalten, nur die Zeiteinstellung geht verloren.
  • Page 254 MDE-RTCP09-3060V2.2...
  • Page 255 NOTIZEN MDE-RTCP09-3060V2.2...
  • Page 256 +33 476 30 48 20 support@gorgy-timing.de RADIO TIMING®, LEDI®, LEDICA®, HANDI® Marke und Modelle geschützt GORGY TIMING. GORGY TIMING RC 74 B 38 - Änderungen der Technik und Gestaltung vorbehalten Numéro de déclaration d’activité de prestataire de formation : 82 38 04877 38 MDE-RTCP09-3060V2.2...
  • Page 257 MDE-RTCP09-3060V2.2...
  • Page 258 GORGY TIMING. ® ® ® ® GORGY TIMING RC 74 B 38 - Cualquier modificación de orden técnico, estético o de color pueden realizarse sin previo aviso. RADIO TIMING , LEDI , LEDICA , HANDI Marke und Modelle geschützt GORGY TIMING.

Table des Matières