Télécharger Imprimer la page

Publicité

Les langues disponibles
  • FR

Les langues disponibles

  • FRANÇAIS, page 46

Liens rapides

All manuals and user guides at all-guides.com
Manual de instrucciones
Instruction manual
Manuel d'instructions
Bedienungsanleitung
Manuale di istruzioni
Manual de instruções
Handleiding
Instrukcja obsługi
Návod k použití

Publicité

loading

Sommaire des Matières pour cecotec CONGA 2690

  • Page 1 All manuals and user guides at all-guides.com Manual de instrucciones Instruction manual Manuel d’instructions Bedienungsanleitung Manuale di istruzioni Manual de instruções Handleiding Instrukcja obsługi Návod k použití...
  • Page 2 All manuals and user guides at all-guides.com...
  • Page 3 All manuals and user guides at all-guides.com ÍNDICE INDEX 1. Instrucciones de seguridad 1. Safety instructions 2. Piezas y componentes 2. Parts and components 3. Antes de usar 3. Before use 4. Instalación 4. Installation 5. Funcionamiento 5. Operation 6. App móvil y conexión wi-fi 6.
  • Page 4 All manuals and user guides at all-guides.com SOMMAIRE INHOUDSTAFEL 1. Instructions de sécurité 1. Veiligheidsvoorschriften 2. Pièces et composants 2. Onderdelen en componenten 3. Avant utilisation 3. Voor u het toestel gebruikt 4. Installation 4. Installatie 5. Fonctionnement 5. Werking 6.
  • Page 5 All manuals and user guides at all-guides.com Fig./Img./Abb./Afb./ Rys./Obr. 1 Fig./Img./Abb./Afb./ Rys./Obr. 2...
  • Page 6 All manuals and user guides at all-guides.com Fig./Img./Abb./Afb./ Rys./Obr. 3 Fig./Img./Abb./Afb./ Rys./Obr. 4 Fig./Img./Abb./Afb./ Rys./Obr. 5 Fig./Img./Abb./Afb./ Rys./Obr. 6 Fig./Img./Abb./ Fig./Img./Abb./ Fig./Img./Abb./ Afb./ Rys./Obr. 7 Afb./ Rys./Obr. 8 Afb./ Rys./Obr. 9 Fig./Img./Abb./Afb./ Rys./Obr.11 Fig./Img./Abb./Afb./ Rys./Obr.10...
  • Page 7 All manuals and user guides at all-guides.com Fig./Img./Abb./Afb./ Rys./Obr. 12 Fig./Img./Abb./Afb./ Rys./Obr. 13 Fig./Img./Abb./Afb./ Rys./Obr. 14 Fig./Img./Abb./Afb./ Rys./Obr. 15 Fig./Img./Abb./Afb./ Rys./Obr. 16...
  • Page 8 All manuals and user guides at all-guides.com Fig./Img./Abb./Afb./ Rys./Obr. 17 Fig./Img./Abb./Afb./ Rys./Obr. 18 Fig./Img./Abb./Afb./ Rys./Obr. 19-20 Fig./Img./Abb./Afb./ Rys./Obr. 21 Fig./Img./Abb./Afb./ Rys./Obr. 22 Fig./Img./Abb./Afb./ Rys./Obr. 23 Fig./Img./Abb./Afb./ Rys./Obr. 24 Fig./Img./Abb./Afb./ Rys./Obr. 25...
  • Page 9 All manuals and user guides at all-guides.com Fig./Img./Abb./Afb./ Rys./Obr. 26 Fig./Img./Abb./Afb./ Rys./Obr. 27 Fig./Img./Abb./Afb./ Rys./Obr. 28 Fig./Img./Abb./Afb./ Rys./Obr. 29 Fig./Img./Abb./Afb./ Rys./Obr. 30 Fig./Img./Abb./Afb./ Rys./Obr. 31...
  • Page 10 Guarde este manual para referencias futuras o nuevos usuarios. Este producto debe utilizarse conforme a lo indicado en este manual de instrucciones. Cecotec no se hará responsable de ningún daño o accidente que sea consecuencia del uso inapropiado del producto.
  • Page 11 All manuals and user guides at all-guides.com ESPAÑOL temperatura sea inferior a 0 ºC o superior a 40 ºC. El dispositivo únicamente funciona con la batería y el cargador proporcionados. El uso de otros componentes o accesorios podría conllevar riesgo de incendio, electrocución o dañar el producto.
  • Page 12 All manuals and user guides at all-guides.com ESPAÑOL Cuerpo principal y sensores Fig. 2. Tapa superior 2. Botones 3. Sensor receptor de infrarrojos 4. Sensor anticolisión 5. Rueda omnidireccional 6. Bornes de carga Batería 8. Cepillos laterales 9. Sensor anticaída 10.
  • Page 13 Asegúrese de que todas las piezas y componentes están incluidas y en buen estado. Si se observara algún daño visible, contacte de forma inmediata con el Servicio de Atención Técnica oficial de Cecotec. Advertencias: Retire todos los objetos alrededor del robot, como prendas de ropa, papeles, cables, cortinas u otros objetos frágiles.
  • Page 14 All manuals and user guides at all-guides.com ESPAÑOL 4. INSTALACIÓN Instalación del robot y de la base de carga Conecte la base de carga a una toma de corriente y guarde el cable restante. Es importante guardar el cable restante en la parte inferior de la base de carga para evitar desconectar o arrastrar el cable.
  • Page 15 All manuals and user guides at all-guides.com ESPAÑOL Aviso: No utilice la función de fregado cuando el robot no esté siendo supervisado. Retire el depósito mixto cuando el robot se esté cargando o cuando no se vaya a utilizar. Añada unas gotas de producto de limpieza si fuera necesario. Fig.21.
  • Page 16 All manuals and user guides at all-guides.com ESPAÑOL activarlo, el robot volverá a la base de carga de forma automática. Advertencia: asegúrese de no cargar el robot con el depósito mixto instalado cuando contenga agua. Mando a distancia Fig.23. Programación Niveles de potencia (Turbo/Normal/Eco) Vuelta a casa Reloj...
  • Page 17 All manuals and user guides at all-guides.com ESPAÑOL Hora actual Mantenga pulsado el botón del reloj. Los primeros 2 dígitos, correspondientes a la hora, parpadearán. Utilice los botones de dirección de arriba y abajo para configurar la hora actual. Luego, utilice los botones de dirección de derecha e izquierda para cambiar de horas a minutos y repita el paso anterior.
  • Page 18 All manuals and user guides at all-guides.com ESPAÑOL y luego otra en modo bordes. Una vez finalizado, volverá a la base de carga. Es el modo de limpieza más frecuente y se utiliza para limpiar la totalidad de la superficie recorrida de la casa.
  • Page 19 All manuals and user guides at all-guides.com ESPAÑOL 6. APP MÓVIL Y CONEXIÓN WI-FI Para acceder a todas las funciones de su robot desde cualquier lugar, se recomienda descargar la App Conga 2000. Podrá controlar el robot de la forma más eficaz y disfrutar de la excelencia en la limpieza.
  • Page 20 All manuals and user guides at all-guides.com ESPAÑOL Desde el modo standby, pulse el botón de modo Auto en la App para que el robot inicie la limpieza de forma automática. Llevará a cabo un ciclo de limpieza completo en zigzag y luego otra en modo Bordes.
  • Page 21 All manuals and user guides at all-guides.com ESPAÑOL Modo Manual Utilice los botones de dirección del mando a distancia o de la App para dirigir el robot a puntos específicos que desea limpiar. Modo de Vuelta a casa Este modo se puede activar desde el robot, desde el mando a distancia y desde la App en cualquier momento y durante cualquier modo de limpieza.
  • Page 22 All manuals and user guides at all-guides.com ESPAÑOL (dependiendo de la frecuencia y el tipo de uso). Fig.25. Tapa del cepillo central 2. Pestaña 3. Cepillo central 4. Compartimento Depósito de suciedad Abra la tapa del robot y saque el depósito de suciedad. Fig.26.
  • Page 23 ESPAÑOL Cambio y carga de la batería No utilice baterías, cargadores o bases de carga diferentes a las proporcionadas por Cecotec. No utilice baterías no recargables. No retire, desmonte o trate de reparar la batería ni la base de carga.
  • Page 24 All manuals and user guides at all-guides.com ESPAÑOL El robot no funciona correctamente. Apague el robot, desconecte el interruptor y enciéndalo de nuevo. vez encendido el robot y estando fuera de la base de carga, mantenga pulsado el botón del robot “Vuelta a casa” hasta que emita un pitido.
  • Page 25 All manuals and user guides at all-guides.com ESPAÑOL El robot no vuelve a la base de carga después El robot mapeará y calculará una nueva de finalizar la limpieza puntual o de haber ruta después de limpiar en modo puntual cambiado la posición inicial.
  • Page 26 All manuals and user guides at all-guides.com ESPAÑOL 9. ESPECIFICACIONES TÉCNICAS Referencia del producto: 05409 Producto: Conga 2690 100-240 V~ 50/60 Hz Bateria: 14,8 V, 3200 mAh Bandas de Frecuencia: 2.412-2.472 GHz 5.150- 5.250 5.250-5.350 GHz 5.470-5.725 GHz Potencia Máxima de Emisión: 16 dBm Made in China | Diseñado en España...
  • Page 27 Si en alguna ocasión detecta una incidencia con el producto o tiene alguna consulta, póngase en contacto con el Servicio de Asistencia Técnica oficial de Cecotec a través del número de teléfono +34 96 321 07 28.
  • Page 28 Keep this instruction manual for future reference or new users. This product must be used in accordance with the directions in this instruction manual. Cecotec cannot be held liable or responsible for any damages or injuries caused by improper use.
  • Page 29 All manuals and user guides at all-guides.com ENGLISH and power adapter. The use of other components or accessories could cause risk of fire, electric shock or product damage. Do not use the device to vacuum flammable or burning objects such as cigarettes, matches or ash. Before operating the robot, please remove any object on the floor such as clothing, papers, power cords or other items that may obstruct the device.
  • Page 30 All manuals and user guides at all-guides.com ENGLISH 2. PARTS AND COMPONENTS Main body Fig. 1. 1. Tank cover 2. Power/automatic cleaning button 3. Back home button 4. Camera Network configuration (Back home and power button) Main body and sensors Fig.
  • Page 31 All manuals and user guides at all-guides.com ENGLISH 1. Signal transmission area 2. Charging terminal 3. Charge indicator 4. Cable slot 5. Charging terminal Fig. 6. 1. Mop 2. Mop bracket 3. Velcro Clip Main brush Fig. 7. Brush made of silicone and bristles, designed to clean all types of surfaces. Silicone brush Fig.
  • Page 32 All manuals and user guides at all-guides.com ENGLISH Warnings: Remove all objects around the robot such as clothing, papers, cables, curtains or other fragile objects. Fig. 12. If the area to be cleaned has a balcony or stairs, a physical barrier must be placed in order to prevent product damage and ensure safe operation.
  • Page 33 All manuals and user guides at all-guides.com ENGLISH Install the tank in the robot following the indicated direction. Make sure the clip is properly fastened. Fig. 18. Attach the mop to the bottom part of the mop bracket with the Velcro. Fig.
  • Page 34 All manuals and user guides at all-guides.com ENGLISH as it features memory and gyroscopic navigation supported by its camera. Moreover, it changes direction when it finds obstacles throughout its route and it returns to the charging base in a smart and direct way once the cleaning is over. It includes Total Surface function, through which the robot cleans the whole surface and, if necessary, returns to the charging base to recharge its battery and finish cleaning.
  • Page 35 All manuals and user guides at all-guides.com ENGLISH Schedule Warning: The robot cannot be scheduled from more than one device at a time. Make sure to schedule it either from the mobile phone App or from the remote control. The robot is provided with a schedule function in order to provide a maximum-efficiency cleaning.
  • Page 36 All manuals and user guides at all-guides.com ENGLISH Modes The following modes can be activated from the remote control: Auto mode From the standby mode, press the power button on the remote control and the robot will automatically start operating. It will carry out a cleaning cycle in zigzag motion and then another one in Edge mode.
  • Page 37 All manuals and user guides at all-guides.com ENGLISH neither will it resume cleaning or perform scheduled cleaning tasks. Note: If any error occurs to the robot, the red indicator light will blink fast. Do not operate the robot for 5 minutes, allow it to enter standby mode before operating it again. See the troubleshooting section to solve the problem.
  • Page 38 All manuals and user guides at all-guides.com ENGLISH Your Smartphone’s data are on. In this case, turn them off. * This Conga model is compatible with Alexa and Google Assistant virtual assistants. The following modes can be activated from the App: Auto cleaning mode: From standby mode, press the Auto mode button on the App and the robot will automatically start operating.
  • Page 39 All manuals and user guides at all-guides.com ENGLISH Use the App to enter the water intensity mode and select between low, medium or high. Warnings: Do not use the mop outdoors. Remove the carpets before operating the robot under this mode. During operation, control the water level on the Wet &...
  • Page 40 All manuals and user guides at all-guides.com ENGLISH * The Smart Area mode and de Spot mode are the only modes that can be activated in any of the 3 previously created and saved maps. 7. CLEANING AND MAINTENANCE Main brush Turn the robot around and press the main brush’s release button to take the cover out.
  • Page 41 Battery replacement and charging Do not use any other battery, power adapter or charging base than the one officially provided by Cecotec. Do not use non-rechargeable batteries. Do not remove, dismantle or attempt to repair the battery or the charging base.
  • Page 42 All manuals and user guides at all-guides.com ENGLISH The robot cannot charge or return to the There are too many obstacles near the charging base. charging base, relocate the charging base to an area free of obstacles. Clean the charging terminals. Make sure the power switch is turned on.
  • Page 43 All manuals and user guides at all-guides.com ENGLISH The robot did not carry out the scheduled Check if the robot is in Night mode and switch cleaning task. mode. The robot does not carry out scheduled cleaning cycles under this mode. Make sure the robot is connected to the network, it will not be able to carry out scheduled cleaning tasks without being...
  • Page 44 The product has been disassembled, modified, or repaired by persons, not authorised by the official Technical Support Service of Cecotec. Faults deriving from the normal wear and tear of its parts, due to use.
  • Page 45 In the event of misuse, the warranty will not apply. If at any moment you detect any problem with your product or have any doubt, do not hesitate to contact Cecotec Technical Support Service at +34 963 210 728.
  • Page 46 Gardez bien ce manuel pour de futures références ou pour tout nouvel utilisateur. Cet appareil doit être utilisé conformément aux instructions de ce manuel d’instructions. Cecotec ne se fera responsable d’aucun dommage ni accident qui soit dû à une utilisation inappropriée de l’appareil.
  • Page 47 All manuals and user guides at all-guides.com FRANÇAIS déplacer le robot. Ne placez pas l’appareil en fonctionnement dans des endroits où la température est inférieure à 0 ºC ou supérieure à 40 ºC. L’appareil fonctionne uniquement avec la batterie et le chargeur fournis.
  • Page 48 
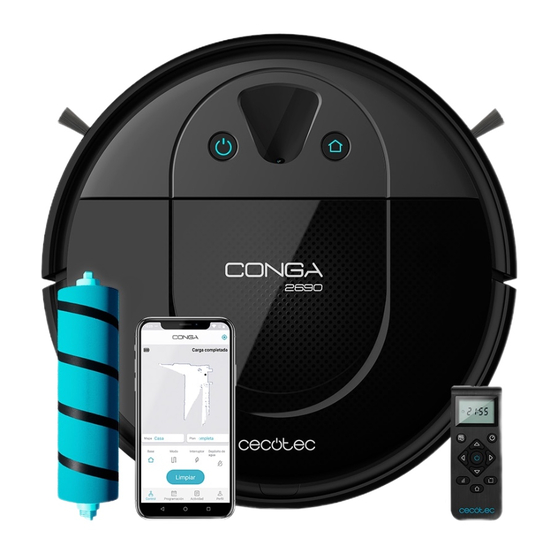
All manuals and user guides at all-guides.com FRANÇAIS 2. PIÈCES ET COMPOSANTS Unité principale Img. 1. 1. Couvercle du réservoir 2. Bouton de connexion/Nettoyage automatique 3. Bouton Retour à la base 4. Appareil photo 5. Configuration du réseau (Bouton Retour à la base et de connexion) Unité...
  • Page 49 Sortez l’appareil de sa boîte et retirez tout le matériel qui compose l’emballage. Assurez-vous que toutes les pièces et les composants soient bien inclus et en bon état. Si vous observez un dommage visible, contactez immédiatement le Service Après-Vente Officiel de Cecotec.
  • Page 50 All manuals and user guides at all-guides.com FRANÇAIS Avertissements : retirez tous les objets qui se trouvent autour du robot, comme les vêtements, les papiers, les câbles ou autres objets fragiles. Img. 12. Si la pièce à nettoyer se trouve près d’un balcon ou des escaliers, placez une barrière physique pour éviter d’abîmer l’appareil et pour assurer un fonctionnement sécurisé.
  • Page 51 All manuals and user guides at all-guides.com FRANÇAIS Img. 17. Installez le réservoir mixte dans le robot en suivant la direction indiquée sur le dessin. Assurez- vous qu’il soit bien fermé. Img. 18. Utilisez le scratch de la serpillère pour le coller à la partie inférieure de son support. Img.
  • Page 52 All manuals and user guides at all-guides.com FRANÇAIS C’est le mode de nettoyage le plus fréquent et il s’utilise pour nettoyer toute la surface de la maison. Le robot aspire la saleté du sol automatiquement, de manières organisée et efficace grâce à...
  • Page 53 All manuals and user guides at all-guides.com FRANÇAIS secondes après. Configurer l’heure et la programmation Programmation Avertissement : le robot ne peut pas être connecté depuis plus d’un seul dispositif en même temps. Assurez-vous de le programmer depuis l’App ou depuis la télécommande. Le robot possède une fonction Programmation pour offrir un nettoyage à...
  • Page 54 All manuals and user guides at all-guides.com FRANÇAIS Appuyez sur le bouton de la puissance d’aspiration depuis la télécommande ou l’App pour sélectionner le niveau de puissance souhaité. Sélectionnez Eco (puissance faible), Moyenne (puissance moyenne) ou Turbo (puissance élevée). Modes Les opérations et modes suivants peuvent être activés depuis la télécommande sans fil : Mode Auto En mode Standby, appuyez sur le bouton de connexion depuis la télécommande pour que le...
  • Page 55 All manuals and user guides at all-guides.com FRANÇAIS programmés pendant ces heures-là. Notes : s’il y a une erreur au niveau du robot, le témoin lumineux s’allume en rouge et clignote rapidement. Laissez le robot sans fonctionnement pendant 5 minutes, laissez-le entrer en ide Standby avant de le réutiliser.
  • Page 56 All manuals and user guides at all-guides.com FRANÇAIS Si la connexion échoue à nouveau, vérifiez que : Le robot ne soit pas trop éloigné du router. Le mot de passe Wi-Fi soit correct. Les données mobiles sont allumées. Dans ce cas, désactivez-les. *Ce modèle Conga est compatible avec les assistants virtuels vocaux Google Assistant et Alexa.
  • Page 57 All manuals and user guides at all-guides.com FRANÇAIS Sur l’App, entrez dans les paramètres de l’intensité de l’eau puis sélectionnez l’intensité souhaitée : faible, moyenne ou élevée. Avertissements : N’utilisez pas la serpillère en extérieurs. Retirez les tapis avant de mettre le robot en fonctionnement avec ce mode. Lorsque l’appareil est en fonctionnement, contrôlez la quantité...
  • Page 58 All manuals and user guides at all-guides.com FRANÇAIS 7. NETTOYAGE ET ENTRETIEN Brosse centrale Retournez le robot, appuyez sur le bouton de libération de la brosse centrale et retirez son couvercle. Extrayez la brosse centrale et nettoyez son compartiment. Nettoyez la brosse centrale avec les outils fournis et lavez-la avec de l’eau et du savon si nécessaire.
  • Page 59 Charger et remplacer la batterie N’utilisez pas de batteries, de chargeurs ou de bases de charge différents de ceux fournis par Cecotec. N’utilisez pas de batteries non rechargeables. Ne retirez pas, ne démontez pas et ne réparez pas la batterie ni la base de charge vous-même.
  • Page 60 All manuals and user guides at all-guides.com FRANÇAIS Le robot ne charge pas ou ne retourne pas à Il y a trop d’obstacles près de la base de sa base de charge. charge, déplacez-la dans un lieu dégagé. Nettoyez les bornes de charge. Assurez-vous que l’interrupteur de connexion soit bien allumé.
  • Page 61 All manuals and user guides at all-guides.com FRANÇAIS Le robot n’a pas réalisé le nettoyage Vérifiez que le robot ne soit pas en mode Nuit programmé. et changez de mode si c’est le cas. Le robot ne réalise pas les nettoyages programmés lorsqu’il est en mode Nuit.
  • Page 62 Passez un chiffon propre sur le capteur correctement. antichute et déplacez le robot. 9. SPÉCIFICATIONS TECHNIQUES Référence : 05409 Modèle : CONGA 2690 100-240 V~ 50/60 Hz Batterie : 14,8 V, 3200 mAh Bandes de fréquence : 2.412-2.472 GHz 5.150- 5.250 5.250-5.350 GHz 5.470-5.725 GHz Puissance maximale d’émission : 16 dBm...
  • Page 63 Si vous détectez un incident ou un problème avec le produit, vous devez contacter le Service Après-Vente Officiel de Cecotec au +34 9 63 21 07 28.
  • Page 64 Produkt verwenden. Bewahren Sie die Bedienungsanleitung für künftige Benutzer oder zum Nachschlagen gut auf. Befolgen Sie diese Anweisungen, um das Gerät zu betreiben. Cecotec übernimmt keine Haftung für Schäden bzw. Unfälle, die durch unsachgemäße Handhabung entstehen. Vergewissern Sie sich, dass die Netzspannung mit der auf dem Typenschild des Gerätes angegebenen Spannung...
  • Page 65 All manuals and user guides at all-guides.com DEUTSCH Verwenden Sie die Lasersicherung nicht als Griff, um den Roboter zu bewegen. Stellen Sie das Gerät nicht in Orten, wo die Temperatur niedriger als 0 ºC oder höher als 50 ºC ist. Das Gerät funktioniert nur mit dem mitgelieferten Akku und Ladegerät.
  • Page 66 All manuals and user guides at all-guides.com DEUTSCH 2. TEILE UND KOMPONENTEN Hauptteil Abb. 1. 1. Deckel des Behälters 2. Ein- und Ausschalter / Automatische Reinigung 3. Back-Home-Taste 4. Kamera 5. Netzeinstellungen (Back-Home und On-Taste) Hauptgerät und Sensoren Abb. 2. 1.
  • Page 67 All manuals and user guides at all-guides.com DEUTSCH Abb. 5. 1. Signalübertragung Bereich 2. Ladekontakt Akkuanzeiger Schlitz für das Kabel Ladekontakt Wischtuch Abb. 6. 5. Wischtuch 6. Wischtuchhalter Kletterverschluss 8. Lasche Hauptbürste Abb. 7. Bürste aus Silikon und Borsten, für jede Bodenart geeignet. Silikon-Bürste Abb.
  • Page 68 All manuals and user guides at all-guides.com DEUTSCH Kundendienst von Cecotec. Hinweise: Entfernen Sie alle Gegenstände um den Roboter herum, z. B. Kleidung, Papiere, Kabel, Vorhänge oder andere zerbrechliche Gegenstände. Abb. 12. Wenn das Zimmer, das Sie reinigen möchten, in der Nähe von Balkonen oder Treppen befindet, stellen Sie ein physisches Hindernis, um Schaden zu vermeiden und eine sichere Verwendung zu sichern.
  • Page 69 All manuals and user guides at all-guides.com DEUTSCH Öffnen Sie den Silikondeckel des Behälters, füllen Sie ihn mit Wasser und schließen Sie ihn wieder. Abb. 17. Setzen Sie den Saugbehälter in den Roboter ein, indem Sie die passende Richtung folgen. Beachten Sie, dass er richtig abgeschlossen ist.
  • Page 70 All manuals and user guides at all-guides.com DEUTSCH automatisch zu reinigen beginnt. Der Roboter wird einen vollständigen Reinizungszuklys im Zig-Zag und im Edge-Modus durchführen. Nach dem Reinigungsvorgang wird der Roboter zur Ladestation zurückkehren. Dies ist der am meisten verwendete Reinigungsmodus. Es wird verwandt, um die gesamte zurückgelegte Oberfläche zu reinigen.
  • Page 71 All manuals and user guides at all-guides.com DEUTSCH Modus umschalten. Der Roboter wird das Signal der Fernbedienung bekommen und die Fernbedienung wird wieder in den Normalzustand zurückkehren. Der Bildschirm zeigt, dass der Verknüpfungsprozess abgeschlossen ist. Sollte die Verknüpfung fehlgeschlagen wird die Fernbedienung 8888 anzeigen und den Verknüpfung-Modus nach 30 Sekunden verlassen.
  • Page 72 All manuals and user guides at all-guides.com DEUTSCH Saugleistungstufe Drücken Sie den Saugkraft-Knopf auf der Fernbedienung oder App, um die gewünschte Leistungsstufe auszuwählen. Wählen Sie Eco (niedrige Leistung), Mittel (mittlere Leistung) oder Turbo (hohe Leistung) aus. Betriebsarten Die folgende Funktionen und Betriebsarten können über die Fernbedienung aktiviert werden: Auto Modus Im Standby-Modus, drücken Sie den Einschalter auf der Fernbedienung, damit der Roboter automatisch zu reinigen beginnt.
  • Page 73 All manuals and user guides at all-guides.com DEUTSCH Nacht-Modus Wenn Sie diesen Modus auswählen, wird der Roboter zwischen 22:00-7:00 nicht funktionieren. In diesem Modus wird der Roboter keinen Reinigungszyklus wiederaufnehmen und wird keine programmierte Reinigung durchf¨uhren. Hinweis: Sollte ein Problem auftreten wird das rote Licht des Roboters aufleuchten und blinken.
  • Page 74 All manuals and user guides at all-guides.com DEUTSCH Falls die Verbindung erneut aufgetreten ist, überprüfen Sie, ob: Der Roboter zu weit vom Router ist. Das Wi-Fi-Passwort falsch ist. Ihre Telefondaten sind eingeschaltet. In diesem Fall schalten Sie sie aus. * Dieser Conga-Modell ist mit virtuellen Sprachassistenten Google Home und Alexa kompatibel. Sie können die folgenden Betriebsarten mit der App benutzen: Auto-Modus Im Standby-Modus, drücken Sie das Auto Modus in der App, damit der Roboter automatisch...
  • Page 75 All manuals and user guides at all-guides.com DEUTSCH entlädt wird, bevor er den Reinigungsvorgang beendet, wird er zur Ladestation zum Aufladen zurückkehren und die Reinigung fortsetzen, bis er die Reinigung komplett durchf¨uhrt. Zugreifen Sie in der App auf Wassermenge und wählen Sie die gewünschte Intensität aus: niedrig, mittel oder hohe Intensität.
  • Page 76 All manuals and user guides at all-guides.com DEUTSCH Der Intelligenter-Bereich Modus und der Pünktlicher Modus sind die einzigen, die in jeder der 3 zuvor erstellten und gespeicherten Karten aktiviert werden können. 7. REINIGUNG UND WARTUNG Hauptbürste Mit dem Roboter auf den Kopf gestellt drücken Sie die Freigabetaste der Hauptbürste, um den Deckel zu entnehmen.
  • Page 77 All manuals and user guides at all-guides.com DEUTSCH Entnehmen und reinigen Sie die Seitenbürsten regelmäßig. Hinweis: Um eine perfekte Reinigung zu versichern, wird es empfohlen, die seitlichen Bürstes jede 3 Monate zu ersetzen. Absturzsensoren Abb. 32. Reinigen Sie regelmäßig die Absturzsensoren mit einem weichen Tuch. Empfehlung: Reinigen Sie die Kamera regelmäßig mit einen weichen Tuch.
  • Page 78 All manuals and user guides at all-guides.com DEUTSCH Der Roboter lädt sich nicht auf und kann nicht Es gibt zu viele Gegenstände in der Nähe der zur Ladestation zurückkehren. Ladestation. Platzieren Sie die Ladestation in einem Ort frei von Gegenständen. Reinigen Sie den Ladekontakte.
  • Page 79 All manuals and user guides at all-guides.com DEUTSCH Der Roboter kann sich nicht mit dem Wi-Fi- Das Wi-Fi-Signal ist schlecht. Überprüfen Sie Netzwerk verbinden. Die WLAN-Verbindung ist instabil. Starten Sie Sie den Router erneut, überprüfen Sie die App für Updates und versuchen Sie es erneut. Stellen Sie sicher, dass die mobilen Datenverkehr auf Ihrem Handy deaktiviert sind um den verbindungsprozes zu...
  • Page 80 Reinigen Sie den Sensor mit einem Tuch und stellen Sie den Roboter an einem anderen Standort. 9. TECHNISCHE SPEZIFIKATIONEN Produktreferenz: 05409 Produkt: Conga 2690 100-240 V~ 50/60 Hz Akku: 14,8 V, 3200 mAh Frequenzbänder: 2.412-2.472 GHz 5.150- 5.250 5.250-5.350 GHz 5.470-5.725 GHz...
  • Page 81 Verbraucher zugerechnet werden kann. Das Produkt von Personen demontiert, repariert oder modifiziert wurde, die nicht vom offiziellen Technischen Kundendienst durch Cecotec autorisiert worden sind. Der Grund hierfür durch die normale Abnutzung und Verschleiß der Teile und des Zubehörs entstanden ist.
  • Page 82 Conservare questo manuale per riferimenti futuri o nuovi utenti. Questo prodotto deve essere utilizzato secondo le istruzioni di questo manuale. Cecotec non si farà responsabile di nessun danno o incidente che sia la conseguenza dell’uso inappropriato del prodotto. Verificare che la tensione di rete coincida con la tensione specificata sull’etichetta di classificazione del prodotto e che...
  • Page 83 All manuals and user guides at all-guides.com ITALIANO il robot. Non mettere il prodotto in funzionamento in luoghi dove la temperatura è inferiore a 0 ºC o superiore a 50 ºC. Il dispositivo funziona solamente con la batteria e il caricabatterie forniti.
  • Page 84 All manuals and user guides at all-guides.com ITALIANO 2. PARTI E COMPONENTI Corpo principale Fig. 1. 1. Coperchio del serbatoio 2. Tasto di accensione/ pulizia automatica 3. Tasto di ritorno alla base 4. Fotocamera 5. Configurazione di rete (tasto di ritorno alla base e di modalità di accensione) Corpo principale e sensori Fig.
  • Page 85 All manuals and user guides at all-guides.com ITALIANO 1. Zona di trasmissione del segnale 2. Poli di ricarica 3. Indicatore di ricarica 4. Fessura per il cavo 5. Poli di ricarica Panno Fig. 6. 1. Panno 2. Supporto del panno 3.
  • Page 86 All manuals and user guides at all-guides.com ITALIANO ufficiale di Cecotec. Avvertenze: Ritirare tutti gli oggetti attorno al robot, come indumenti, carta, fili, tende o altri oggetti fragili. Fig. 12. Se la stanza da pulire si trova vicino a balconi o scale, collocare una barriera fisica per prevenire danni al prodotto e assicurare un funzionamento sicuro.
  • Page 87 All manuals and user guides at all-guides.com ITALIANO Installare il serbatoio nel robot seguendo la direzione indicata nell’illustrazione. Verificare che sia ben chiuso. Fig. 18. Utilizzare il velcro del panno per attaccarlo nella parte inferiore del supporto del panno. Fig. 19. Premere manualmente le linguette situate su entrambi i lati del panno e spingere fino a collocarlo in posizione corretta.
  • Page 88 All manuals and user guides at all-guides.com ITALIANO efficiente grazie alla memoria e alla navigazione giroscopica assistita mediante fotocamera. Inoltre, cambia la direzione quando si imbatte in ostacoli durante il percorso, e, una volta terminata la pulizia, torna direttamente e in modo intelligente alla base di ricarica. Include la funzione Total Surface, mediante la quale pulisce completamente l’intera superficie, tornando alla base qualora necessario per ricaricarsi e terminare la pulizia.
  • Page 89 All manuals and user guides at all-guides.com ITALIANO Configurazione dell’ora e della programmazione Programmazione Avvertenza: il robot non si può programmare da più di un dispositivo allo stesso tempo. Verificare di programmarlo dall’App del cellulare o dal telecomando a distanza. Il robot è...
  • Page 90 All manuals and user guides at all-guides.com ITALIANO Modalità Le seguenti operazioni e modalità possono essere attivate dal telecomando a distanza: Modalità Auto Dalla modalità standby, premere sul telecomando a distanzail tasto di accensione per far sì che il robot cominci a pulire automaticamente. Il robot effettuerà un ciclo di pulizia completo a zig-zag e in seguito in modalità...
  • Page 91 All manuals and user guides at all-guides.com ITALIANO 6. APP E CONNESSIONE WI-FI Per accedere a tutte le funzioni del robot da qualsiasi luogo, si consiglia di scaricare la App Conga 2000. Potrà monitorare il robot in modo più efficace e godere di una pulizia eccellente. Benefici della App: Controlla il suo robot in modo facile e intuitivo.
  • Page 92 All manuals and user guides at all-guides.com ITALIANO poi in modalità Bordi. Una volta terminato, tornerà alla base di ricarica. È la modalità di pulizia più frequente e si utilizza per pulire l’intera superficie percorsa della casa. Il robot aspira automaticamente lo sporco del pavimento in modo organizzato ed efficiente grazie alla memoria e alla navigazione giroscopica assistita mediante fotocamera.
  • Page 93 All manuals and user guides at all-guides.com ITALIANO punti specifici che si desidera pulire. Modalità ritorno alla base Questa modalità si può attivare dal robot, dal telecomando a distanza e dalla App in qualsiasi momento e da qualunque modalità di pulizia. Attivandola, il robot tornerà automaticamente alla base di ricarica.
  • Page 94 All manuals and user guides at all-guides.com ITALIANO 1. Coperchio della spazzola centrale 2. Linguetta 3. Spazzola centrale 4. Scomparto Serbatoio delllo sporco Aprire il coperchio del robot e rimuovere il serbatoio dello sporco. Fig.26 Aprire il serbatoio dello sporco, rimuovere il filtro altamente efficiente e svuotare il serbatoio. Fig.27 Pulire il filtro altamente efficiente con la spazzola per la pulizia.
  • Page 95 All manuals and user guides at all-guides.com ITALIANO Non utilizzare batterie, caricabatterie o basi di ricarica distinte da quelle fornite da Cecotec. Non utilizzare batterie non ricaricabili. Non rimuovere, smontare o cercare di riparare la batteria né la base di ricarica.
  • Page 96 All manuals and user guides at all-guides.com ITALIANO Il robot non funziona correttamente. Spegnere il robot, scollegare l’interruttore e accenderlo di nuovo. Una volta acceso il robot e fuori dalla base di ricarica, mantenere premuto il tasto del robot “Ritorno alla base” fino a sentire un bip. Rilasciare immediatamente il tasto e tornare a premerlo fino a sentire di nuovo il bip del robot.
  • Page 97 All manuals and user guides at all-guides.com ITALIANO Il robot non torna alla base di ricarica dopo Il robot disegnerà una mappa e calcolerà un aver terminato la pulizia in un punto o dopo nuovo percorso dopo la pulizia in un punto aver cambiato la sua posizione iniziale.
  • Page 98 Qualora ci fosse un problema con il prodotto o avere una consulenza, contattare il Servizio di Assistenza Tecnica ufficiale di Cecotec attraverso il numero di telefono +34 96 321 07 28.
  • Page 99 Guarde este manual para referências futuras ou novos usuários. Este produto deve ser usado conforme indicam as instruções deste manual. Cecotec não se responsabiliza de nenhum dano ou acidente que seja consequência do uso inapropriado do produto. Certifique-se de que a voltagem de rede coincide com a voltagem especificada na etiqueta de classificação do produto...
  • Page 100 All manuals and user guides at all-guides.com PORTUGUÊS proporcionados. O uso de outros componentes ou acessórios poderá levar ao risco de incêndio, eletrocussão ou danificar o produto. Não utilize o dispositivo para aspirar objetos inflamáveis ou beatas de cigarros, brasas ou cinzas. Antes de pôr o robot em funcionamento, retire do chão peças de roupa, papeis, cabos ou outros elementos que possam obstruir o dispositivo.
  • Page 101 All manuals and user guides at all-guides.com PORTUGUÊS 2. PEÇAS E COMPONENTES Corpo principal Fig. 1. 1. Tampa do depósito 2. Botão de ligar / limpeza automática 3. Botão de regresso à base 4. Câmara 5. Configuração de rede (botão de regresso à base e de ligar) Corpo principal e sensores Fig.
  • Page 102 Tire o produto da caixa e retire todo o material de embalagem. Certifique-se de que todas as peças e componentes estão incluídas e em bom estado. Se observar algum dano visível, entre em contacto imediatamente com o Serviço de Assistência Técnica oficial de Cecotec.
  • Page 103 All manuals and user guides at all-guides.com PORTUGUÊS Advertências: Retire os objetos que tenha ao redor do robot, como peças de roupa, papéis, cabos, cortinas ou outros objetos frágeis. Fig. 12. Se o espaço a limpar se encontra perto de uma varanda ou escadas, coloque uma barreira física para prevenir que o produto se danifique e para garantir um funcionamento seguro.
  • Page 104 All manuals and user guides at all-guides.com PORTUGUÊS Instale o depósito no robot seguindo a direção indicada. Certifique-se de que está bem fechado. Fig. 18. Utilize o velcro da mopa para colá-la à parte inferior do suporte da mopa. Fig. 19. Pressione manualmente as linguetas situadas em ambos lados da mopa e empurre até...
  • Page 105 All manuals and user guides at all-guides.com PORTUGUÊS carga de forma inteligente e direta uma vez tenha terminado a limpeza. Inclui função Total Surface, na qual o robot limpa toda a superfície por completo, voltando à base de carga se for necessário para carregar a bateria e voltar para finalizar a limpeza.
  • Page 106 All manuals and user guides at all-guides.com PORTUGUÊS Advertência: o robot não pode ser programado desde mais de um dispositivo ao mesmo tempo. Certifique-se de programar desde a App ou desde o comando a distância. O robot conta com uma função de programação para oferecer uma limpeza de máxima eficiência.
  • Page 107 All manuals and user guides at all-guides.com PORTUGUÊS Modos As seguintes funções e modos podem ser ativados desde o comando a distância: Modo Auto Desde o modo standby, pressione o botão de ligar no comando a distância para que o robot comece a limpar de forma automática.
  • Page 108 All manuals and user guides at all-guides.com PORTUGUÊS 6. APP TELEMÓVEL E CONEXÃO WI-FI Para aceder a todas as funções do seu robot desde qualquer lugar, é recomendável descarregar a App Conga 2000. Poderá controlar o robot da forma mais eficaz e desfrutar da excelência na limpeza.
  • Page 109 All manuals and user guides at all-guides.com PORTUGUÊS Desde o modo standby, pressione o botão Auto desde a App para que o robot comece a limpar de forma automática. Iniciará um início de limpeza completo em ziguezague e depois em modo Bordas.
  • Page 110 All manuals and user guides at all-guides.com PORTUGUÊS Modo manual Utilize os botões de direção do comando a distância ou desde a App para dirigir o robot aos pontos que deseja limpar. Modo de regresso à base Este modo pode ser ativado desde o robot, desde o comando a distância e desde a App em qualquer momento e durante qualquer modo de limpeza.
  • Page 111 All manuals and user guides at all-guides.com PORTUGUÊS 1. Tampa da escova central 2. Lingueta 3. Escova central 4. Compartimento Depósito de sujidade Abra a tampa do robot e tire o depósito de sujidade. Fig. 26. Abra o depósito de sujidade, tire o filtro de alta eficiência e esvazie o depósito. Fig.
  • Page 112 All manuals and user guides at all-guides.com PORTUGUÊS Não utilize baterias, carregadores ou bases de carga diferentes ou as proporcionadas por Cecotec. Não utilize baterias não recarregáveis. Não retire, desmonte ou trate de reparar a bateria nem a base de carga.
  • Page 113 All manuals and user guides at all-guides.com PORTUGUÊS O robot emite um ruído estranho durante a A escova central, as escovas laterais ou a limpeza. roda omnidirecional podem estar enredados, pare o robot e limpe. O robot não limpa eficientemente ou perde a O depósito de sujidade está...
  • Page 114 Passe um pano pelo sensor anti queda e leve corretamente. o robot a uma nova posição. 9. ESPECIFICAÇÕES TÉCNICAS Referência: 05409 Modelo: Conga 2690 100-240 V~ 50/60 Hz Bateria: 14.8V, 3200 mAh Bandas de Frequência: 2.412-2.472 GHz 5.150- 5.250 5.250-5.350 GHz 5.470-5.725 GHz Potência máxima de Emissão: 16 dBm...
  • Page 115 Se em alguma ocasião deteta uma ocorrência com o produto ou tem alguma consulta, entre em contacto com o Serviço de Assistência Técnica oficial de Cecotec através do número de telefone +34 96 321 07 28.
  • Page 116 Bewaar deze handleiding voor toekomstig(e) gebruik of gebruikers. Gebruik het toestel volgens de Instructies in deze handleiding. Cecotec is niet aansprakelijk voor schade of ongevallen te wijten aan een foutief gebruik van het product. Zorg ervoor dat de netspanning overeenkomt met de spanning vermeld op het classificatielabel van het toestel en dat het stopcontact geaard is.
  • Page 117 All manuals and user guides at all-guides.com NEDERLANDS onder 0 ºC of boven 40 ºC. De robot werkt alleen met de meegeleverde batterij en oplader. Andere onderdelen of accessoires gebruiken kan een risico op brand, elektrocutie of schade aan het product met zich mee brengen.
  • Page 118 All manuals and user guides at all-guides.com NEDERLANDS 2. ONDERDELEN EN COMPONENTEN Behuizing Fig. 1. 1. Deksel van het reservoir 2. Aan/uit-knop / automatische schoonmaak 3. Back home-knop 4. Camera 5. Instellingen wifi-netwerk (Back home- en aan/uit-knop) Behuizing en sensoren Fig.
  • Page 119 All manuals and user guides at all-guides.com NEDERLANDS 1. Signaalzender 2. Oplaadpoort 3. Oplaadindicator 4. Kabelsleuf 5. Oplaadpoort Dweil Fig. 6. 1. Dweil 2. Dweilhouder 3. Klittenband 4. Klepje Centrale borstel Fig. 7. Borstel gemaakt van rubber en haren, ontworpen om alle soorten oppervlakken schoon te maken.
  • Page 120 All manuals and user guides at all-guides.com NEDERLANDS Als u schade ziet, contacteer onmiddellijk de technische dienst van Cecotec. Waarschuwingen: Verwijder alle objecten rond de robot, zoals kleding, papier, kabels, gordijnen of andere breekbare objecten. Fig. 12. Als de te reinigen kamer zich in de buurt van een balkon of trap bevindt, plaats een fysieke barrière om te voorkomen dat het toestel valt en om een veilige werking te garanderen.
  • Page 121 All manuals and user guides at all-guides.com NEDERLANDS Fig. 17. Installeer het reservoir van de robot door de instructies te volgen. Zorg ervoor dat het reservoir goed gesloten is. Fig. 18. Gebruik de klittenband van de dweil om hem te bevestigen aan de dweilsteun. Fig.
  • Page 122 All manuals and user guides at all-guides.com NEDERLANDS Het is het meest voorkomende schoonmaakprogramma waarmee u uw gehele woning schoon kan maken. De robot maakt automatisch en op een georganiseerde en efficiënte manier schoon dankzij het geheugen en de gyroscopische navigatie met behulp van de camera. De robot verandert van richting indien hij op zijn route obstakels tegenkomt en na de schoonmaak keert hij automatisch en rechtstreeks terug naar het oplaadstation.
  • Page 123 All manuals and user guides at all-guides.com NEDERLANDS scherm zal weergeven dat het verbindingsproces voltooid is. Als het verbindingsproces niet is gelukt, dan zal het scherm van de afstandsbediening 8888 weergeven. De afstandsbediening zal uit de verbindingsmodus gaan na 30 seconden. Instellen van de het uur en programmering Programmering Waarschuwing: de robot kan slechts vanaf 1 apparaat tegelijk geprogrammeerd worden.
  • Page 124 All manuals and user guides at all-guides.com NEDERLANDS Druk op de powerknop op de afstandsbediening om de gewenste niveau te kiezen. Kies Eco (laag vermogen), Gemiddeld (gemiddeld vermogen) of Turbo (maximaal vermogen). Menu’s De onderstaande handelingen en menu’s kunnen geactiveerd worden via de afstandsbediening. Automatische schoonmaak Vanuit standby drukt u op de powerknop op de afstandsbediening om de robot een automatische schoonmaak te laten starten.
  • Page 125 All manuals and user guides at all-guides.com NEDERLANDS tussen 22:00 en 7:00 uur. In dit menu zal de robot de schoonmaak niet hervatten of zal hij geen geprogrammeerde taken uitvoeren. Opmerking: Indien zich een fout voordoet zal het rode indicatielampje branden en snel knipperen.
  • Page 126 All manuals and user guides at all-guides.com NEDERLANDS de robot niet te ver verwijderd is van de router. of het wifiwachtwoord juist is. uw mobiele data uitgeschakeld zijn. Schakel uw mobiele data uit in dit geval. * Dit Conga-model is compatibel met de virtuele spraakassistenten Google Home en Alexa. U kunt de volgende menu’s vanaf applicatie gebruiken: Automatische schoonmaak Vanuit standby drukt u op het Automenu in de applicatie om de robot automatisch te laten...
  • Page 127 All manuals and user guides at all-guides.com NEDERLANDS opgeladen, dan zal hij verder gaan met schoonmaken tot hij klaar is. Kies vanuit de applicatie de de intensiteit van de waterstroom: laag, gemiddeld of hoog. Waarschuwingen: Gebruik de dweil niet buitenshuis. Haal tapijten weg voordat u de robot inschakelt in dit menu.
  • Page 128 All manuals and user guides at all-guides.com NEDERLANDS 7. SCHOONMAAK EN ONDERHOUD Centrale borstel Draai de robot om en druk op de openingsknop van de centrale borstel om het deksel te openen. Haal de centrale borstel eruit en maak het compartiment schoon. Maak de centrale borstel schoon met de verstrekte hulpmiddelen.
  • Page 129 De batterij verwisselen en opladen Gebruik geen batterijen, opladers of laadstations die niet door Cecotec verstrekt werden. Gebruik geen herlaadbare batterijen. Probeer de batterij en het oplaadstation niet uit elkaar te halen, te openen of te repareren.
  • Page 130 All manuals and user guides at all-guides.com NEDERLANDS De robot laadt niet op of keert niet terug naar Er bevinden zich te veel obstakels in de het oplaadstation. buurt van het oplaadstation. Verplaats het oplaadstation naar een plaats zonder obstakels. Maak de oplaadpoorten schoon.
  • Page 131 All manuals and user guides at all-guides.com NEDERLANDS De robot kan geen verbinding maken met het Het wifisignaal is slecht, controleer het wifinetwerk. signaal. De wifiverbinding is niet stabiel. Start de router opnieuw op, controleer of er updates zijn voor de app en probeer het opnieuw. Zorg ervoor dat de mobiele gegevens in uw apparaat worden losgekoppeld om het koppelingsproces te verbeteren.
  • Page 132 Maak de anti-valsensor schoon met een doek en zet hem op een nieuwe positie. 9. TECHNISCHE SPECIFICATIES Productreferentie: 05409 Product: Conga 2690 100-240 V~ 50/60 Hz Batterij: 14,8 V, 3200 mAh Frequentiebanden: 2.412-2.472 GHz 5.150- 5.250 5.250-5.350 GHz 5.470-5.725 GHz...
  • Page 133 Als u in elk geval een incident met het product detecteert of als u een vraag heeft, neem dan contact op met de technische dienst van Cecotec via het telefoonnummer +34 96 321 07 28.
  • Page 134 Zachowaj tę instrukcję na potrzeby późniejszych konsultacji i dla nowych użytkowników. Urządzenie powinno być używane wyłącznie zgodnie z instrukcją. Cecotec nie bierze odpowiedzialności za szkody spowodowane niewłaściwym użytkowaniem produktu. Przed podłączeniem urządzenia do gniazdka upewnij się, czy napięcie w gniazdku odpowiada napięciu na tabliczce znamionowej urządzenia oraz czy gniazdko posiada uziemienie.
  • Page 135 All manuals and user guides at all-guides.com POLSKI ładowarki. Użycie innych sprzętów do zasilania urządzenia grozi pożarem, porażeniem prądem lub uszkodzeniem urządzenia. używaj urządzenia odkurzania łatwopalnych przedmiotów, jak np. niedopałki papierosów, żar czy zapałki. Usuń z podłogi wszystkie przedmioty, które mogą blokować ruch urządzenia lub zakłócić...
  • Page 136 All manuals and user guides at all-guides.com POLSKI 2. CZĘŚCI I KOMPONENTY Główny korpus. Rys. 1. 1. Pokrywa zbiornika 2. Przycisk zasilania/Automatyczne sprzątanie 3. Przycisk: Powrót do stacji 4. Kamera Konfiguracja sieci Wi-Fi (przycisk powrotu do stacji i przycisk zasilania) Korpus urządzenia i czujniki Rys.
  • Page 137 3. PRZED URUCHOMIENIEM Wyjmij produkt z opakowania i rozpakuj. Upewnij się, czy w zestawie znajdują się wszystkie części i sprawdź ich stan. Jeśli zauważyłeś jakieś uszkodzenia, natychmiast skontaktuj się z oficjalnym Serwisem Pomocy Technicznej firmy Cecotec.
  • Page 138 All manuals and user guides at all-guides.com POLSKI Uwaga: Usuń wszystkie przedmioty wokół robota, takie jak odzież, papiery, kable, zasłony lub inne delikatne przedmioty. Rys. 12. Jeśli czyszczone pomieszczenie znajduje się w pobliżu balkonu lub schodów, umieść barierę fizyczną, aby zapobiec uszkodzeniu produktu i zapewnić bezpieczne działanie. Rys.
  • Page 139 All manuals and user guides at all-guides.com POLSKI Rys. 18. Użyj rzepa mopa do przyczepienia go do dolnej części uchwytu. Rys. 19. Naciśnij zatrzaski znajdujące się po obu stronach mopa i dociskaj dopóki nie znajdą się w odpowiedniej pozycji. Usłyszysz kliknięcie, które poinformuje cię, że został poprawnie zainstalowany.
  • Page 140 All manuals and user guides at all-guides.com POLSKI stacji ładowania najkrótszą możliwą drogą. Zawiera funkcję Total Surface, dzięki której robot całkowicie czyści całą powierzchnię, w razie potrzeby wracając do podstawy ładowania, aby naładować i zakończyć czyszczenie. Program Powrót do stacji Tryb Powrót do stacji można uruchomić...
  • Page 141 All manuals and user guides at all-guides.com POLSKI użyj aplikacji lub pilota zdalnego sterowania. Możesz stworzyć harmonogram pracy robota na kolejne dni tygodnia. Po zaprogramowaniu robot będzie czyścił automatycznie każdy wybrany dzień. Ostrzeżenie: programując robota za pomocą pilota, możesz programować go tylko o tej samej porze każdego dnia.
  • Page 142 All manuals and user guides at all-guides.com POLSKI Za pomocą pilota zdalnego sterowania, można włączyć następujące programy i funkcje: Program Auto W trybie gotowości naciśnij przycisk zasilania na pilocie, aby robot automatycznie zaczął czyścić. Przeprowadzi pełny cykl czyszczenia w zygzaku, a następnie w trybie krawędzi. Kiedy skończy sprzątanie wróci do bazy ładowania.
  • Page 143 All manuals and user guides at all-guides.com POLSKI 6. APLIKACJA MOBILNA I POŁĄCZENIE Z SIECIĄ Aby uzyskać dostęp do wszytskich funkcji urządzenia, zaleca się pobranie aplikacji mobilnej Conga 2000. Umożliwi ci to wygodną mobilną kontrolę robota i jego wydajniejsze użytkowanie. Zalety aplikacji: Kontrolujesz robota w łatwy i intuicyjny sposób.
  • Page 144 All manuals and user guides at all-guides.com POLSKI czyścić. Skończy kompletny cykl sprzątania w truybie zygzag a potem przejdzie do trybu krawędzie. Kiedy skończy sprzątanie wróci do bazy ładowania. Jest to najbardziej uniwersalny program, który umożliwia wysprzątanie całego domu. Robot automatycznie odkurza brud z podłogi, organizując swoją...
  • Page 145 All manuals and user guides at all-guides.com POLSKI Tryb Manualny Tryb Manualny: aby zrealizować sprzątanie w tym trybie używaj przycisków ze strzałkami na pilocie lub w aplikacji mobilnej, aby sterować robotem. Program Powrót do stacji Tryb Powrót do stacji: można aktywować ten tryb za pomocą przycisku na korpusie robota, pilocie zdalnego sterowania lub z aplikacji mobilnej w każdym momencie.
  • Page 146 All manuals and user guides at all-guides.com POLSKI Rys. 25. 1. Osłonka środkowej szczotki 2. Zacisk 3. Środkowa szczotka 4. Przegroda Zbiornik na brud Otwórz pokrywę robota i wyjmij zbiornik brudu. Rys. 26. Otwórz zbiornik brudu, wyjmij wysoko wydajny filtr o opróżnij zbiornik. Rys.
  • Page 147 All manuals and user guides at all-guides.com POLSKI ZMIANA I ŁADOWANIE BATERII Nie używaj baterii ani ładowarek innych niż oryginalne dostarczone przez Cecotec. Nie używaj baterii bez możliwości naładowania. Nie wyrzucaj, nie demontuj, ani nie próbuj naprawiać baterii ani stacji ładowania.
  • Page 148 All manuals and user guides at all-guides.com POLSKI Urządzenie nie działa poprawnie. Wyłącz urzadzenie przyciskiem zasilania i włącz ponownie. Po włączeniu robota i wyłączeniu stacji ładującej naciśnij i przytrzymaj przycisk robota„ Powrót do domu ”, aż wyemituje sygnał dźwiękowy. Natychmiast zwolnij przycisk i naciśnij go ponownie, aż...
  • Page 149 All manuals and user guides at all-guides.com POLSKI Robot nie wraca do stacji ładowania po Urządzenie stworzy mapę i przeliczy zakończonym sprzątaniu lub po zmianie jego nową trasę po zakończeniu pracy w trybie położenia wyjściowego. punktowym lub po zmianie jego położenia wyjściowego.
  • Page 150 Urządzenie nie było używane przez użytkownika w odpowiedni sposób. W przypadku wykrycia ewentualnego defektu urządzenia lub w razie potrzeby konsultacji skontaktuj się z Serwisem Obsługi Technicznej Cecotec pod numerem +34 96 321 07 28.
  • Page 151 Tento přístroj se musí používat v souladu s tímto návodem na použití. Cecotec není zodpovědný za žádné škody nebo nehody způsobené nevhodným používáním. Ujistěte se, že elektrická síť má stejné napětí jako je uvedené na etiketě...
  • Page 152 All manuals and user guides at all-guides.com ČEŠTINA Nepoužívejte přístroj na vysávání hořlavých předmětů nebo předmětů zapálených, jako jsou cigarety, zápalky nebo popel. Než robota zapnete, seberte z podlahy oblečení, papíry, kabely nebo jiné předměty, které by mohly robotovi překážet. Přístroj by neměl být používán dětmi do 8mi let.
  • Page 153 All manuals and user guides at all-guides.com ČEŠTINA 2. ČÁSTI A SLOŽENÍ Základní tělo Obr. 1. 1. Kryt tělesa 2. Tlačítko zapnutí / Automatické čištění 3. Tlačítko návratu domů 4. Kamera 5. Konfigurace sítě (Tlačítko návratu domů a zapnutí) Základní tělo a senzory Obr.
  • Page 154 3. PŘED POUŽITÍM Vyjměte přístroj z krabice a odstraňte všechny obaly. Ujistěte se, že jsou obsaženy všechny části a díly, a že jsou v dobrém stavu. Pokud najdete nějaké viditelné poškození, okamžitě volete oficiální Technický servis Cecotec.
  • Page 155 All manuals and user guides at all-guides.com ČEŠTINA Upozornění: Odstraňte z okolí robota všechny předměty, jako například oblečení, papíry, kabely, záclony a jiné křehké předměty. Obr. 12. Pokud se místnost, kterou chcete uklízet, nachází v blízkosti balkónu nebo schodů, umístěte na toto místo fyzickou překážku, abyste zabránili poškození...
  • Page 156 All manuals and user guides at all-guides.com ČEŠTINA Vložte nádobu do robota podle uvedeného směru. Ujistěte se, že je dobře zavřená. Obr. 18. Použijte suchý zip mopu pro jeho přichycení na spodní stranu držáku na mop. Obr. 19. Ručně stiskněte příruby na okrajích mopu a lehce tlačte, dokud je nedostanete do správné pozice.
  • Page 157 All manuals and user guides at all-guides.com ČEŠTINA celý povrch, a vrátí se nabít, pokud je to potřeba, aby úklid dokončil. Program návratu domů Program návratu domů se může aktivovat kdykoli během jakéhokoli cyklu úklidu. Po aktivování se robot automaticky vrátí na nabíjecí základnu. Upozornění: ujistěte se, že robota nenabíjíte s instalovanou nádobou na směsný...
  • Page 158 All manuals and user guides at all-guides.com ČEŠTINA Robota je možné naprogramovat, aby zajistil co nejvyšší efektivitu úklidu. Po naprogramování bude robot automaticky uklízet každý den. Upozornění: pokud robota naprogramujete z dálkového ovládání, budete ho moct nastavit na stejný čas každý den v týdnu. Aktuální...
  • Page 159 All manuals and user guides at all-guides.com ČEŠTINA okraje. Po skončení se vrátí na nabíjecí základnu. Toto je nejčastější způsob úklidu a je vhodný k uklizení celého povrchu podlahy vaší domácnosti. Robot vysaje z podlahy automaticky veškeré nečistoty organizovaně a efektivně díky paměti a gyroskopické...
  • Page 160 All manuals and user guides at all-guides.com ČEŠTINA Konfigurujte a programujte každý den. Užijte si různé programy úklidu. Auto, okraje, náhodný, dvakrát, drhnutí, manuální, návrat domů, spirála, přesnost, inteligentní oblast a omezený prostor. Vizualizace toho, jak robot vytváří interaktivní mapu během úklidu. Zkontrolujte vyčištěný...
  • Page 161 All manuals and user guides at all-guides.com ČEŠTINA Program Okraje Vyberte v aplikaci nebo na dálkovém ovládání tento program, robot bude čistit podél stěn a poté, co skončí, se inteligentně vrátí na základnu. Pokud není základna, vrátí se na výchozí místo.
  • Page 162 All manuals and user guides at all-guides.com ČEŠTINA Pokud vyberte tento program, robot pořádně uklidí jedno místo. Začne úklidem jednoho místa. Začne se pohybovat ve spirále směrem ven a pak se ve spirále vrátí znovu na začátek. Znovu se bude pohybovat ve spirále. Jakmile se vrátí na původní místo, vrátí se na nabíjecí základnu. Program Inteligentní...
  • Page 163 že funguje správně. Výměna a nabití baterie Nepoužívejte baterie, nabíječky nebo nabíjecí základny odlišné od těch poskytnutých firmou Cecotec. Nepoužívejte baterie, které se nedají znovu nabít. Nevytahujte, nerozebírejte nebo se nesnažte baterie ani nabíjecí základnu opravit. Neumisťujte nabíjecí základnu blízko zdrojů tepla.
  • Page 164 All manuals and user guides at all-guides.com ČEŠTINA 8. ŘEŠENÍ PROBLÉMŮ Problém Řešení Robot se nezapne nebo nezačne uklízet. Robot nemůže fungovat s nízkým stupněm nabití. Nechejte ho před použitím nabít. Teplota místnosti musí být vyšší než 0 ºC nebo nižší než 50 ºC. Používejte robota v místech, kde je pokojová...
  • Page 165 Senzor proti pádu nefunguje správně. Setřete senzor hadříkem a odneste robota na jiné místo. 9. TECHNICKÉ SPECIFIKACE Reference produktu: 05409 Produkt: Conga 2690 100-240 V~ 50/60 Hz Baterie: 14,8 V, 3200 mAh Kmitočtová pásma: 2.412-2.472 GHz 5.150- 5.250 5.250-5.350 GHz 5.470-5.725 GHz Maximální...
  • Page 166 V případě špatného zacházení ze strany spotřebitele není záruční servis odpovědný za opravu. Pokud se stane, že na výrobku najdete závadu nebo budete mít dotaz, spojte se s oficiálním zákaznickým servisem Cecotec na telefonním čísle +34 96 321 07 28.
  • Page 167 All manuals and user guides at all-guides.com...
  • Page 168 Robot se nevrátí na nabíjecí základnu po Robot zmapuje a spočítá novou cestu po dokončení přesného úklidu anebo změní dokončení přesného úklidu anebo změní Grupo Cecotec Innovaciones S.L. počáteční místo. počáteční místo. C/de la Pinadeta s/n, 46930 Quart de Poblet, Valencia, Spain Pokud je nabíjecí...