Publicité
Les langues disponibles
Les langues disponibles
Liens rapides
Publicité

Sommaire des Matières pour KALIREL Cyclope
- Page 1 VOTRE INSTALLATEUR - YOUR INSTALLER - SU INSTALADOR - VOSSO INSTALADOR...
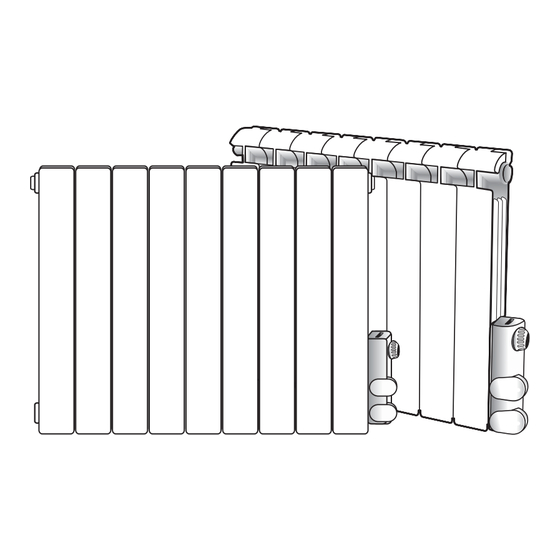
- Page 2 Radiateurs électriques aluminium à fluide thermodynamique avec Thermostat Cyclope ou Classic ® Emplacement KALIREL Installation 71000 Mâcon Branchement France Tél. 03 85 205 999 Fax 03 85 205 990 Sécurité contact@kalirel.com www.kalirel.com Utilisation...
- Page 3 Pour votre confort et votre sécurité, nous vous invitons à suivre les consignes et les conseils de la présente notice. Pour toute information complémentaire, consultez www.kalirel.com Sommaire P A G E CONSIGNE D’INSTALLATION...
- Page 4 Le radiateur que vous venez d’acheter est soumis à la réglementation européenne sur l’élimination et la valorisation des équipements électriques entrée en application le 15 novembre 2006 (Directive 2002/96/CE). Le symbole de la poubelle barrée indique que votre appareil au terme de son utilisation doit être éliminé par des filières spécialisées dans son recyclage et sa valorisation et non par la filière traditionnelle des ordures ména- gères.
- Page 5 CONSIGNES D’INSTALLATION ET DE RACCORDEMENT ÉLECTRIQUE DU RADIATEUR ALU ■ RACCORDEMENT ÉLECTRIQUE ■ MISE EN SERVICE 1- L’appareil est de la classe II double isolation 1- Vérifier que l’appareil est bien alimenté par le réseau électrique puis tester les différentes fonctions du 2- L’appareil ne possède pas de fil de terre et il est thermostat et procéder au réglage de la température de formellement interdit de le relier à...
- Page 6 INSTALLATION ET FIXATION DU RADIATEUR ■ EMPLACEMENT DU RADIATEUR Pour un bon fonctionnement du radiateur et pour la sécurité des usagers : 1- Les cotes minimales indiquées sur la figure 2 devront être respectées - Hauteur entre le sol et le dessous du radiateur : mini 100 mm maxi 150 mm - Distance entre le côté...
- Page 7 Figure 3 CONSOLES OTES DE PERÇAGE POUR CONSOLE A = mini. 215 mm - maxi 265 mm B = 360 mm X (TB) = 215 mm C = 5 éléments = 240 mm 6 éléments = 320 mm 7 éléments = 400 mm 9 éléments = 560 mm...
- Page 8 MONTAGE DU RADIATEUR FIGURE 4 FIGURE 8 FIGURE 5 FIGURE 6 FIGURE 9 Dès que le radiateur est en place, bloquer celui-ci en vissant. FIGURE 7...
- Page 9 THERMOSTATS ÉLECTRONIQUES CYCLOPE ® Thermostat radio Notice d’emploi 3.1 Installation 1.1 Configuration 3.1.1 Emplacement ➀ Voyants indicateurs d’état Le thermostat doit être installé ➁ Molette de réglage de la température suivant la figure : ➂ Sélecteur de mode Tablette OUI !
- Page 10 Voyant allumé Utiliser le Fil Pilote. Raccorder le câble commandé par le signal transmis bleu électrique à une centrale de programmation par la radiocommande Cyclope ® dotée d’un fil pilote. Le mode choisi est signalé par le voyant indicateur d’état.
- Page 11 Notice d’emploi 5.1 Cas du délestage Si vous avez fait le choix de ne pas utiliser la fonction Cyclope OptiPower™, vous pouvez utiliser un délesteur fil pilote. Dans ce cas, relier le fil noir au délesteur fil pilote. L’ordre fil pilote « Arrêt » est prioritaire et met en position «...
- Page 12 THERMOSTATS ÉLECTRONIQUES CLASSIC Thermostat fil pilote Notice d’emploi 3.1 Installation 1.1 Configuration 3.1.1 Emplacement ➀ Voyants indicateurs d’état Le thermostat doit être installé ➁ Molette de réglage de la température suivant la figure : ➂ Sélecteur de mode ④ Serrure électronique Tablette ➄...
- Page 13 CLASSIC ® THERMOSTATS ÉLECTRONIQUES Notice d’emploi MODE AUTO 3.1.3 Raccordement à un système de commande externe Si le Fil Pilote est raccordé, le mode Voyant allumé de fonctionnement est commandé Utiliser le Fil Pilote. Raccorder le câble bleu par le signal transmispar la centrale électrique à...
- Page 14 CLASSIC ® THERMOSTATS ÉLECTRONIQUES Notice d’emploi 4.1.5 Désactivation du thermostat BLOCAGE 2 Toute action sur le bouton ➂ et sur la molette Appuyer sur le bouton pendant de réglage de la température ➁ est inefficace. 5 secondes et le relâcher. Le fonctionnement s’arrête.
- Page 15 CLASSIC ® THERMOSTATS ÉLECTRONIQUES Notice d’emploi 5.1.3 Réglage de la luminosité des LED (voyants) ➀. Régler la luminosité désirée au Approcher la clé. ➁ moyen de la molette du bouton Eloigner la clé. Clignotement du voyant bleu. Arrêt du clignotement du voyant bleu. Appuyer sur le bouton jusqu’à...
- Page 16 Thermo-dynamic fluid-filled electric radiators with electronic thermostat Cyclope or Classic ® Location Installation Connection Safety...
- Page 17 You have just acquired one or several of our electric radiators. Thank you for having chosen Kalirel and for your trust in our products. For your comfort and safety, we invite you to read the manual instructions and the advices carefully.
- Page 18 AMBÉLIA AND JAVA ALUMINIUM ELECTRIC RADIATOR INSTALLATION INSTRUCTIONS ■ INSTALLATION RULES ■ ELECTRICAL INSTALLATION ELECTRIC RADIATORS IN THE WET ROOMS 1- The electric installation must be in conformity with the (kitchens, bathrooms...). standards and the code of practice currently used in the •...
- Page 19 2- The radiator is not equipped with an earth wire and it is the temperature you want to get. For this operation, refer to strictly forbidden to connect it to the ground. the Cyclope ® electronic thermostat user’s manual. 3- For thermostats equipped with a pilot wire to be connected...
- Page 20 RADIATOR INSTALLATION AND WALL MOUNTING ■ WHERE TO INSTALL THE RADIATOR For the radiator correct operation and the users’ safety: 1- The minimal dimensions indicated on figure 2 will have to be respected - Height between the ground and the lower part of the radiator: minimum 100 mm, maximum 150 mm.
- Page 21 Figure 3 BRACKETS RILLING DIMENSIONS FOR WALL MOUNTING BRACKETS A = mini. 215 mm - maxi 265 mm B = 360 mm X (TB) = 215 mm C = 5 elements = 240 mm 6 elements = 320 mm 7 elements = 400 mm 9 elements = 560 mm...
- Page 22 RADIATOR WALL MOUNTING FIGURE 4 FIGURE 8 FIGURE 5 FIGURE 9 FIGURE 6 Once the radiator is mounted, tighten it in the screws. FIGURE 7...
- Page 23 CYCLOPE ® ELECTRONIC THERMOSTATS Radio-controlled thermostat User instructions 3.1 Installation 1.1 Configuration 3.1.1 Where to install it ➀ Status indicator lights The thermostat must be installed in ➁ Temperature control knob ➂ accordance with the diagram: Mode selector Shelf Read these instructions carefully before using the radiator.
- Page 24 The operating mode is controlled by Blue light on Use the pilot wire. Connect the electric wire to the signal emitted by the Cyclope ® the programming base unit fitted with a pilot radio control. The selected mode is indicated by the status light.
- Page 25 In this case, connect the black wire to the load-shedding pilot wire. The pilot wire ‘stop’ position overrides the system and switches the Cyclope ® thermostat to ‘stop’ position whatever the status of the thermostat.
- Page 26 CLASSIC ELECTRONIC THERMOSTATS Thermostat with pilot wire User instructions 3.1 Installation 1.1 Configuration 3.1.1 Where to install it ➀ Status indicator lights The thermostat must be installed in ➁ Temperature control knob accordance with the diagram: ➂ Mode selector ④ Electronic lock Shelf ➄...
- Page 27 In no event If the thermostat is connected to the should it be connected to the earth. Cyclope ® radio control, the operating mode is controlled by the signal emitted by the radio control.
- Page 28 CLASSIC ® ELECTRONIC THERMOSTATS User instructions 4.1.5 Turning the thermostat off FUNCTION LOCK 2 Button ➂ and the temperature control knob ➁ for 5 seconds Hold down button then release it. The thermostat are deactivated. stops. Place the key near the circle. To turn the thermostat on again press button briefly.
- Page 29 CLASSIC ® ELECTRONIC THERMOSTATS User instructions 5.1.3 Controlling the LED intensity (lights) ➀. Set the desired intensity using the Place the key near the circle. ➁ knob on button Move the key away. Flashing blue light. The blue light stops flashing. The LED intensity has been set.
- Page 30 Radiadores eléctricos en aluminio con fluido termodinámico con termostato electrónico Cyclope ® o Clásico Emplazamiento Instalación Conexión Seguridad Utilización...
- Page 31 INSTALACIÓN Y FIJACIÓN DEL RADIADOR Emplazamiento del radiador ........33 Montaje ................33 Instauración del radiador ...........35 P Á G I N A PARA SU SEGURIDAD RADIADOR IMPORTANTE – ADVERTENCIA P A G E TERMOSTATO ELECTRÓNICO hasta CLASICO - CYCLOPE ® Manual de utilización...
- Page 32 CONSIGNA DE INSTALACIÓN Y DE CONEXIÓN ELÉCTRICA DEL RADIADOR ■ NORMAS DE INSTALACIÓN ■ INSTALACIÓN ELÉCTRICA RADIADORES ELÉCTRICOS EN LAS 1- La instalación eléctrica debe ajustarse a la norma NF C 15.100 y a las normas actuales. HABITACIONES HÚMEDAS (Salas de agua, cuartos de baño...) 2- La conexión eléctrica del aparato debe efectuarse con una caja normalizada •...
- Page 33 CONSIGNA DE INSTALACIÓN Y DE CONEXIÓN ELÉCTRICA DEL RADIADOR ■ CONEXIÓN ELÉCTRICA ■ PUESTA EN SERVICIO 1- El radiador está en classe II doble aislamiento 1- Comprobar que el aparato esta bien conectado a la red eléctrica, luego probar las distintas funciones del 2- El aparato no tiene conexión a tierra y está...
- Page 34 INSTALACIÓN Y FIJACIÓN DEL RADIADOR ■ EMPLAZAMIENTO DEL RADIADOR Para un buen funcionamiento del radiador y para la seguridad de los usuarios: 1- Las costas mínimas indicadas sobre la figura 2 deberán respetarse - Altura entre el suelo y la parte inferior del radiador: mini 100 mm max.
- Page 35 Figura 3 CONSOLAS COSTAS DE PERFORACION PARA CONSOLA A = mini. 215 mm. - máx 265 mm. B = 360 mm X (TB) = 215 mm C = 5 elementos = 240 mm 6 elementos = 320 mm 7 elementos = 400 mm 9 elementos = 560 mm...
- Page 36 INSTAURACIÓN DEL RADIADOR FIGURA 4 FIGURA 5 FIGURA 8 FIGURA 6 FIGURA 9 En cuanto el radiador esté colocado, bloquearle, y atornillándole. FIGURA 7...
- Page 37 TERMOSTATOS ELECTRÓNICOS CYCLOPE ® Termostato radio Modo de empleo 3.1 Instalación 1.1 Configuración 3.1.1 Ubicación ➀ Indicadores luminosos de estado ➁ Se deberá instalar el termostato según la figura: Perilla de ajuste de la temperatura ➂ Selector de modos Estante ¡SI!
- Page 38 El modo de funcionamiento está Indicador Use el Hilo Piloto. Conecte el cable eléctrico a comandado por la señal transmitida luminoso azul por el control remoto Cyclope ® una central de programación que tenga un encendido El modo elegido está indicado por el hilo piloto.
- Page 39 Modo de empleo 5.1 Caso de delestaje Si ha elegido no utilizar la función Cyclope OptiPower™, puede usar un dispositivo de corte del hilo piloto. En este caso, una el cable negro al dispositivo de corte del hilo piloto. La orden hilo piloto “Parada”...
- Page 40 TERMOSTATOS ELECTRÓNICOS CLASSIC Termostato hilo piloto Modo de empleo 3.1 Instalación 1.1 Configuración 3.1.1 Ubicación ➀ Indicadores luminosos de estado Se deberá instalar el termostato según ➁ Perilla de ajuste de la temperatura la figura: ➂ Selector de modo ④ Cerradura electrónica Estante ➄...
- Page 41 En ningún caso debe Confort y el indicador rojo se enciende. estar conectado a tierra. Si el termostato está conectado al control remoto Cyclope ® , el modo de funcionamiento está comandado por 4.1 Uso la señal transmitida por el control remoto.
- Page 42 CLASSIC ® TERMOSTATOS ELECTRÓNICOS Modo de empleo 4.1.5 Desactivación del termostato BLOQUEO 2 Cualquier acción sobre el botón ➂ y sobre la durante Pulse el botón perilla de ajuste de la temperatura ➁ es ineficaz. 5 segundos y suéltelo. El funcionamiento se detiene.
- Page 43 CLASSIC ® TERMOSTATOS ELECTRÓNICOS Modo de empleo 5.1.3 Ajuste de la luminosidad de los pilotos LED (indicadores luminosos) ➀. Regule la luminosidad deseada por Acerque la llave. ➁ medio de la perilla del botón Aleje la llave. El indicador azul parpadea. El indicador azul deja de parpadear.
- Page 44 Radiadores aluminio eléctricos à liquido termodinâmico com termóstato electrónico Cyclope ® ou Classic Lugar Instalação Ligação Segurança Utilização...
- Page 45 Lugar do radiador ............... 47 Montagem ................47 Instalação do radiador............49 P Á G I N A PARA A VOSSA SEGURANÇA RADIADOR IMPORTANTE - AVISO P Á G I N A TERMÓSTATO ELECTRÓNICO 50 até 56 CYCLOPE ® & CLASSIC MANUAL TÉCNICO...
- Page 46 INSTRUÇÃO DE INSTALAÇÃO E CONEXÃO ELÉCTRICA DO RADIADOR ■ INSTALAÇÃO ELÉCTRICA RADIADOR 1- A instalação eléctrica deve ser conforme com a norma NF C 15.100 e as regras da arte. 2- A conexão eléctrica do aparelho deve ser efectuada numa caixa normalizada. 3- A alimentação eléctrica do aparelho está...
- Page 47 1- Verificar que o aparelho é bem alimentado pela rede eléctrica seguidamente controlar as diferentes funções do termóstato e proceder ao ajustamento da temperatura de instrução. Para esta operação, consultar o manual de ajustamento do termóstato electrónico Cyclope. 2- No caso de anomalia de funcionamento, verificar que o aparelho é bem alimentado pela rede eléctrica.
- Page 48 INSTALAÇÃO E FIXAÇÃO DO RADIADOR ■ LUGAR DO RADIADOR Para um bom funcionamento do radiador e para a segurança dos utentes: 1- As medidas mínimas indicadas sobre a figura 2 deverão ser respeitadas - Altura entre o chão e o baixo do radiador: mini 100 mm máx. 150 mm - Distância entre o lado do radiador e um ângulo de muro: mini 100 mm.
- Page 49 Figura 3 CONSOLAS LOCALIZAR A CONSOLA DIREITA E ESQUERDA A = mini. 215 mm - máx 265 mm B = 360 mm X (TB) = 215 mm C = 5 elementos = 240 mm 6 elementos = 320 mm 7 elementos = 400 mm 9 elementos = 560 mm 10 elementos = 640 mm 11 elementos = 720 mm...
- Page 50 INSTAURACIÓN DEL RADIADOR FIGURA 4 FIGURA 8 FIGURA 5 FIGURE A FIGURA 9 Logo que o radiador estiver instalado, bloquear aparafusando. FIGURA 7...
- Page 51 TERMÓSTATOS ELECTRÓNICOS CYCLOPE ® Termóstato rádio Instruções de utilização 3.1 Instalação 1.1 Configuração 3.1.1 Local ➀ Sinais luminosos de estado O termóstato deve ser instalado de acordo ➁ Selector de regulação da temperatura com o esquema: ➂ Selector de modo...
- Page 52 Utilizar o fio piloto. Conectar o cabo eléctrico comandado pelo sinal transmitido azul aceso a uma central de programação dotada de um por rádio controlo Cyclope ® fio piloto. O modo escolhido é assinalado pelo sinal luminoso indicador de estado.
- Page 53 Instruções de utilização 5.1 Caso de rejeição de carga Se escolher não utilizar a função Cyclope OptiPower™, pode utilizar um deslastrador fio piloto. Neste caso, ligar o fio preto ao deslastrador fio piloto. A ordem fio piloto “Paragem” é prioritária e coloca em posição “Paragem”...
- Page 54 TERMÓSTATOS ELECTRÓNICOS CLASSIC Termóstato fio piloto Instruções de utilização 3.1 Instalação 1.1 Configuração 3.1.1 Local ➀ Sinais luminosos indicadores de estado O termóstato deve ser instalado de acordo ➁ Selector de regulação da temperatura com o esquema: ➂ Selector de modo ④...
- Page 55 Conforto e o sinal luminoso vermelho o isolamento do mesmo. Não deve, em caso acende-se. algum ser conectado à terra. Se o termóstato for conectado ao rádio controlo Cyclope ® , o modo de 4.1 Utilização funcionamento é comandado pelo sinal transmitido pelo rádio controlo.
- Page 56 CLASSIC ® TERMÓSTATOS ELECTRÓNICOS Instruções de utilização 4.1.5 Desactivação do termóstato BLOQUEIO 2 ➂ Qualquer acção sobre o botão ➂ e sobre o Pressionar o botão durante 5 selector de regulação da temperatura ➁ é ineficaz. segundos e deixá-lo em seguida. O radiador deixa de funcionar.
- Page 57 CLASSIC ® TERMÓSTATOS ELECTRÓNICOS Instruções de utilização 5.1.3 Regulação da luminosidade dos LED (sinais luminosos) ➀. Regular a luminosidade desejada Aproximar a chave. ➁ através do regulador do botão Afastar a chave. Sinal luminoso azul pisca. Paragem do pisca do sinal luminoso azul.