Toshiba RAV-SP404AT-E Manuel D'installation
Climatiseur (type split)
Table des Matières
Les langues disponibles
Les langues disponibles
AIR CONDITIONER (SPLIT TYPE)
Installation manual
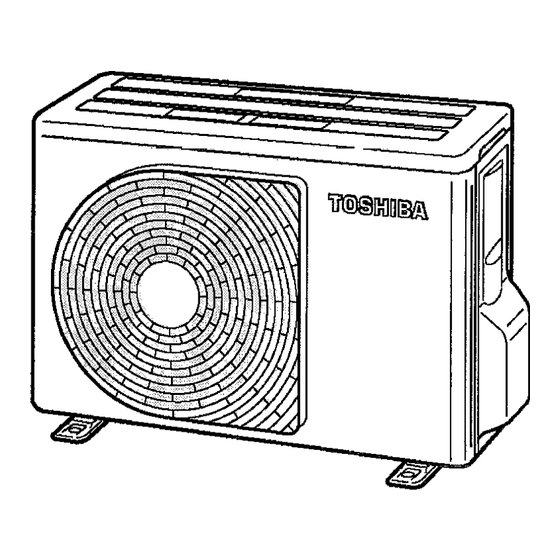
Outdoor Unit
Model name:
RAV-SP404AT-E
RAV-SP404ATZ-E
RAV-SP404ATZG-E
RAV-SP454AT-E
RAV-SP454ATZ-E
RAV-SP454ATZG-E
RAV-SP564AT-E
RAV-SP564ATZ-E
RAV-SP564ATZG-E
Installation manual
Air conditioner
(Split type)
Manuel d'installation
Climatiseur
(Type split)
Installationshandbuch
Klimagerät
(Split-typ)
Manuale di installazione
Condizionatore d'aria
(Tipo split)
Manual de instalación
Aire acondicionado
(Tipo split)
Manual de instalação
Ar condicionado
(Tipo split)
Installatiehandleiding
Airconditioner
(Gesplitst type)
(
(
-
)
Montaj kılavuzu
Klima
(Split tip)
English
1
Français
25
Deutsch
49
Italiano
73
Español
97
Português
121
Nederlands
145
169
)
193
Türkçe
217
Chapitres
Table des Matières

Manuels Connexes pour Toshiba RAV-SP404AT-E


Sommaire des Matières pour Toshiba RAV-SP404AT-E
- Page 26 Super Digital Inverter Lisez attentivement ce Manuel d’installation avant d’installer le climatiseur. • Ce manuel décrit la méthode d’installation de l’unité extérieure. • Pour installer l’unité intérieure, reportez-vous au Manuel d’installation fourni avec l’unité intérieure. ADOPTION D’UN NOUVEAU FLUIDE FRIGORIGENE Ce climatiseur est de type nouveau adoptant un nouveau réfrigérant HFC (R410A) au lieu du réfrigérant R22 traditionnel afin de préserver la couche d’ozone.
-
Page 27: Pieces Accessoires
Super Digital Inverter PIECES ACCESSOIRES Pièces accessoires Nom de pièce Q’té Forme Utilisation Manuel d’installation Ce manuel (Remettez-le directement au client.) Raccord d’évacuation Bouchon en caoutchouc étanche... -
Page 28: Mesures De Securite
Super Digital Inverter MESURES DE SECURITE • Assurez-vous de respecter toutes les réglementations locales, nationales et internationales. • Lisez attentivement ces « MESURES DE SECURITE » avant l’installation. • Les précautions décrites ci-dessous comprennent des points importants concernant la sécurité. Observez-les scrupuleusement. -
Page 29: Installation Du Climatiseur A Nouveau Refrigerant
Super Digital Inverter • N’installez pas le climatiseur dans un endroit qui peut être soumis à un risque d’explosion de gaz combustible. Un incendie peut se produire si un gaz combustible fuit et se concentre autour de l’unité. • Installez solidement le tuyau de réfrigérant pendant les travaux d’installation avant d’utiliser le climatiseur. Si le compresseur fonctionne avec la soupape ouverte et sans tuyau de réfrigérant, le compresseur aspire de l’air et le cycle de réfrigération est surpressurisé, ce qui peut provoquer un éclatement ou une blessure. -
Page 30: Outils/Équipements Nécessaires Et Précautions D'utilisation
Super Digital Inverter Outils/équipements nécessaires et précautions d’utilisation Préparez les outils et les équipements indiqués dans le tableau suivant avant de commencer les travaux d’installation. Des outils et des équipements nouvellement préparés doivent être exclusivement utilisés. Légende : Nouvellement préparé (Utilisation pour le R410A seulement. Ne l’utilisez pas pour le réfrigérant R22 ou R407C, etc.) : Les outils/équipements traditionnels sont disponibles Outils/équipements Utilisation... - Page 31 Super Digital Inverter Tuyauterie de réfrigérant Nouveau réfrigérant (R410A) Utilisation de la tuyauterie traditionnelle • Lors de l’utilisation d’une tuyauterie traditionnelle qui ne porte aucune indication des types de réfrigérant applicables, assurez-vous que son épaisseur de paroi est de 0,8 mm pour Ø6,4 mm et Ø12,7 mm. N’utilisez pas une tuyauterie traditionnelle avec une épaisseur de paroi inférieure à...
-
Page 32: Conditions D'installation
Super Digital Inverter CONDITIONS D’INSTALLATION Avant l’installation Essai d’étanchéité 1. Avant de commencer un essai d’étanchéité, serrez Assurez-vous de prévoir les éléments suivants avant encore les soupapes d’axe sur les côtés gaz et liquide. l’installation. 2. Pressurisez le tuyau avec du gaz azote alimenté depuis l’orifice de service jusqu’à... -
Page 33: Emplacement D'installation
Super Digital Inverter Essai de fonctionnement • Si l’unité extérieure est installée en hauteur, assurez- vous de fixer ses pieds. Mettez le disjoncteur sous tension au moins 12 heures avant • Un endroit où l’eau évacuée pose un problème. de commencer un essai de fonctionnement afin de protéger le compresseur pendant la mise en marche. -
Page 34: Espace Nécessaire Pour L'installation (Unité : Mm)
Super Digital Inverter Espace nécessaire pour l’installation Obstacle à l’avant (Unité : mm) Le dessus de l’unité est libre 1. Installation d’une seule unité Obstacle à l’arrière Le haut est libre 1. Installation d’une seule unité 2. Installation en série de deux unités ou plus 2. -
Page 35: Installation De L'unité Extérieure
Super Digital Inverter Installation en série à l’avant et à l’arrière Installation de l’unité extérieure Laissez un espace libre au-dessus, et à droite et à gauche • Avant l’installation, vérifiez la résistance et l’horizontalité de l’unité. de la base de sorte que des sons anormaux ne soient La hauteur d’un obstacle à... -
Page 36: Pour Référence
Super Digital Inverter Pour référence • Lorsque l’eau doit être évacuée par le flexible d’évacuation, mettez en place le raccord d’évacuation et Si le chauffage doit être utilisé continuellement pendant le bouchon en caoutchouc étanche suivants, et utilisez longtemps alors que la température extérieure est de 0 °C un flexible d’évacuation (diam. -
Page 37: Tuyauterie De Refrigerant
Super Digital Inverter TUYAUTERIE DE REFRIGERANT Pièces d’installation en option Evasement (fournies sur place) 1. Coupez le tuyau avec un coupe-tubes. Assurez-vous d’éliminer les ébarbures car elles peuvent provoquer une fuite du gaz. Nom des pièces Q’té 2. Insérez un écrou évasé dans le tuyau, puis évasez le Tuyauterie de réfrigérant tuyau. -
Page 38: Serrage Du Raccord
Super Digital Inverter Serrage du raccord ATTENTION 1. Alignez les centres des tuyaux de raccordement et serrez complètement l’écrou évasé avec les doigts. Puis 1. Ne placez pas la clé à molette sur le capuchon ou le fixez l’écrou avec une clé comme illustré sur la figure et couvercle. -
Page 39: Longueur Des Tuyaux De Réfrigérant
Super Digital Inverter Longueur des tuyaux de réfrigérant Installation simple Longueur de tuyau Différence de hauteur (Intérieure-Extérieure H) (m) admissible (m) Model Longueur totale L Unité intérieure : Supérieure Unité extérieure : Inférieure SP40, 45 SP56 Diamètre de tuyau (mm) Model Nombre de parties cintrées Côté... -
Page 40: Purge De L'air
Super Digital Inverter PURGE DE L’AIR Essai d’étanchéité Pompe à vide Avant de commencer un essai d’étanchéité, serrez encore Comme illustré sur la figure, raccordez le flexible de charge les soupapes d’axe sur le côté gaz et le côté liquide. après que la soupape du collecteur est complètement Pressurisez le tuyau avec du gaz azote alimenté... -
Page 41: Comment Ouvrir La Soupape
Super Digital Inverter Comment ouvrir la soupape Remplissage du réfrigérant Ouverture ou fermeture de la soupape Ce modèle est de type 20 m sans charge qui ne nécessite pas de remplissage de réfrigérant pour des tuyaux de Côté liquide, côté gaz réfrigérant de jusqu’à... -
Page 42: Travaux D'electricite
Super Digital Inverter TRAVAUX D’ELECTRICITE 1. Déposez la vis du couvercle de soupape. Câblage entre l’unité intérieure et 2. Tirez le couvercle de soupape vers le bas pour le l’unité extérieure déposer. Les lignes pointillées indiquent le câblage sur le site. Couvercle de soupape (Câbles de connexion unités (Circuit... - Page 43 Super Digital Inverter Comment effectuer le câblage ATTENTION 1. Branchez les câbles de connexion aux bornes identifiées par leur numéro respectif sur le bornier des unités • Un fusible d’installation doit être utilisé pour la ligne intérieure et extérieure. d’alimentation de ce climatiseur. H07 RN-F ou 60245 IEC 66 (1,5 mm ou plus) •...
-
Page 44: Mise A La Terre
Super Digital Inverter MISE A LA TERRE AVERTISSEMENT • Veillez à raccorder le fil de terre. (travaux de mise à la terre) Une mise à la terre incomplète peut provoquer une décharge électrique. Raccordez correctement la ligne de terre selon les normes techniques applicables. Le raccordement de la ligne de terre est essentiel pour éviter une décharge électrique et pour réduire le bruit et les charges électriques sur la surface de l’unité... -
Page 45: Fonctions A Executer Localement
Super Digital Inverter FONCTIONS A EXECUTER LOCALEMENT Utilisation d’un tuyau existant Récupération du réfrigérant Lors de l’utilisation d’un tuyau existant, vérifiez • Lors de la récupération du réfrigérant pendant la soigneusement les points suivants : réinstallation de l’unité intérieure ou extérieure, etc., •... -
Page 46: Fonctions De Commande D'unite Exterieure Applicables
Super Digital Inverter FONCTIONS DE COMMANDE D’UNITE EXTERIEURE APPLICABLES Vous pouvez utiliser les fonctions suivantes en montant le “Kit de commande d’application” (TCB-PCOS1E2) vendu séparément. Fonction de commande d’appel de puissance • La capacité de refroidissement/chauffage de l’unité extérieure est économisée en recevant/convertissant des signaux d’appel de puissance externes, en fonction des conditions de pointe-réduction temporaires. -
Page 47: Annexe
Super Digital Inverter ANNEXE Instructions pour les travaux : 6. Lorsque le climatiseur existant est déposé après avoir Les tuyauteries R22 et R407C peuvent être réutilisées pour récupéré le réfrigérant. nos installations de produits R410A à inverseur numérique. Vérifiez si l’huile semble être nettement différente de l’huile normale. - Page 48 Super Digital Inverter Y a-t-il des éraflures ou bossellements sur les Tuyaux existants : Ne peuvent pas être utilisés. tuyaux existants ? • Utilisez des tuyaux neufs. Est-il possible de faire fonctionner le climatiseur existant ? • Après avoir fait fonctionner le climatiseur existant en mode de refroidissement pendant environ 30 minutes ou plus,* Pression du gaz azote 0,5 MPa récupérez le réfrigérant.
- Page 49 Pour tout renseignement supplémentaire, contactez l’administration municipale, le commerçant/distributeur/installateur qui a vendu le produit ou encore le fabricant. Pays Nom de la société responsable WEEE. AIRCOND, Klimaanlagen GT Phelan Unit 30 Southern Toshiba Carrier UK Ltd Handelsgesellshcaft m.b.H Irlande Cross Business Park Bray Co Porsham Close, Belliver Ind. Autriche...
- Page 50 EH99861001- a...