Toshiba RAV-SM1603AT-E Manuel D'installation
Table des Matières
Les langues disponibles
Les langues disponibles
Liens rapides
AIR CONDITIONER (SPLIT TYPE)
Installation manual
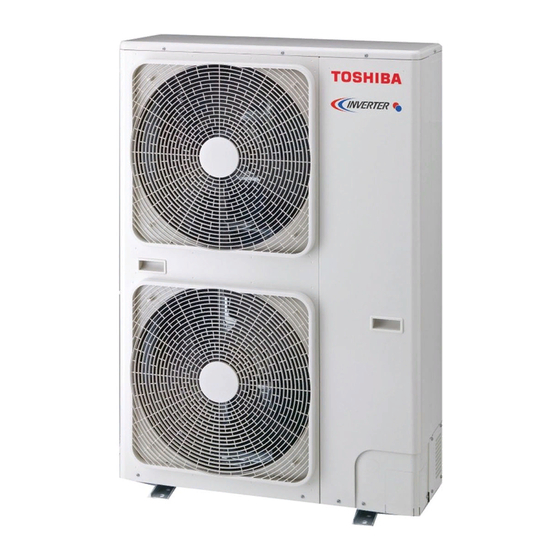
Outdoor Unit
Model name:
RAV-SM1603AT-E
RAV-SM1603ATZ-E
RAV-SM1603ATZG-E
Not accessible to the general public
Vente interdite au grand public
Kein öffentlicher Zugang
Non accessibile a clienti generici
No destinado al público en general
Não acessível ao público em geral
Niet geschikt voor huishoudelijk gebruik
Genel eri ime açık de ildir
Installation manual
Air conditioner
(Split type)
Manuel d'installation
Climatiseur
(Type split)
Installations-handbuch
Klimagerät
(Split-typ)
Manuale di installazione
Condizionatore d'aria
(Tipo split)
Manual de instalación
Aire acondicionado
(Tipo split)
Manual de Instalação
Ar condicionado
(Tipo split)
Installatiehandleiding
Airconditioner
(Gesplitst type)
(
Split)
(
-
)
Montaj Kılavuzu
Klima
(Split tip)
English
1
Français
25
Deutsch
49
Italiano
73
Español
97
Português
121
Nederlands
145
169
193
Türkçe
217
Chapitres
Table des Matières
Dépannage

Manuels Connexes pour Toshiba RAV-SM1603AT-E


Sommaire des Matières pour Toshiba RAV-SM1603AT-E
- Page 26 Outdoor Unit Installation Manual Digital Inverter Avant d’installer le climatiseur, veuillez lire attentivement ce Manuel d’installation. • Ce manuel décrit la méthode d’installation de l’unité extérieure. • Pour l’installation de l’unité intérieure, reportez-vous au Manuel d’installation fourni avec l’unité intérieure. ADOPTION DU NOUVEAU REFRIGERANT Ce climatiseur est un nouveau type qui adopte un nouveau réfrigérant HFC (R410A) au lieu du réfrigérant traditionnel R22 en vue d’éviter la destruction de la couche d’ozone.
-
Page 27: Pieces Accessoires Et Refrigerant
Outdoor Unit Installation Manual Digital Inverter PIECES ACCESSOIRES ET REFRIGERANT Pièces accessoires Nom de la pièce Quantité Forme Emploi Manuel d’installation de (Remettez celui-ci directement au client.) l’unité extérieure Raccord d’évacuation Bouchon en caoutchouc étanche Manchon de protection Pour la protection des câbles (protection des tuyaux) Matériau de protection Pour la protection des passages (protection des tuyaux) pour passages... -
Page 28: Mesures De Securite
Outdoor Unit Installation Manual Digital Inverter MESURES DE SECURITE • Assurez-vous de respecter toutes les règles locales, nationales et internationales. • Lisez attentivement ces « MESURES DE SECURITE » avant l’installation. • Les mesures décrites ci-après comprennent des points importants concernant la sécurité. Observez-les scrupuleusement. -
Page 29: Installation Du Climatiseur Utilisant Le Nouveau Refrigerant
Outdoor Unit Installation Manual Digital Inverter AVERTISSEMENT • Lorsque le climatiseur ne peut pas refroidir ou chauffer convenablement une pièce, contactez le revendeur chez lequel vous avez acheté le climatiseur si une fuite de réfrigérant est susceptible d’être la cause. En cas de réparation requérant le remplissage de réfrigérant, demandez les détails de la réparation au personnel chargé... -
Page 30: Outils/Équipements Nécessaires Et Mesures D'utilisation
Outdoor Unit Installation Manual Digital Inverter Outils/équipements nécessaires et mesures d’utilisation Préparez les outils et les équipements repris dans le tableau ci-dessous avant de commencer l’installation. Les outils et les équipements récemment préparés doivent être utilisés de manière exclusive. Légende : Outil récemment préparé... -
Page 31: Choix De L'installation
Outdoor Unit Installation Manual Digital Inverter CHOIX DE L’INSTALLATION Avant l’installation Mise à la terre Veillez aux points suivants avant l’installation AVERTISSEMENT Assurez-vous que la mise à la terre appropriée Longueur du tuyau de réfrigérant est fournie. Longueur du tuyau Une mise à... -
Page 32: Lieu D'installation
Outdoor Unit Installation Manual Digital Inverter Lieu d’installation ATTENTION 1. Installez l’unité extérieure dans un endroit AVERTISSEMENT où l’air refoulé n’est pas bloqué. 2. Lorsque l’unité extérieure est installée dans Installez correctement l’unité extérieure dans un endroit constamment exposé au vent un lieu assez durable pour le poids de l’unité... -
Page 33: Espace Nécessaire À L'installation
Outdoor Unit Installation Manual Digital Inverter Espace nécessaire à l’installation (Unité : mm) Obstacle à l’arrière Obstacle à l’avant ▼ Le haut est libre ▼ Le haut est libre 1. Installation d’une seule unité 1. Installation d’une seule unité 2. Obstacles à droite et à gauche 2. -
Page 34: Installation De L'unité Extérieure
Outdoor Unit Installation Manual Digital Inverter 2. Installation en série de deux unités ou plus • Comme indiqué sur la figure ci-dessous, installez la base et les caoutchoucs résistants aux vibrations pour soutenir directement la surface inférieure de la patte de fixation qui est en contact avec la plaque inférieure de l’unité... -
Page 35: Référence
Outdoor Unit Installation Manual Digital Inverter • En cas d’évacuation par tuyau d’évacuation, fixez le raccord d’évacuation et le bouchon en caoutchouc étanche ci-après, puis utilisez un tuyau d’évacuation (diam. intérieur : 16 mm) que vous trouverez dans le commerce. Scellez également les vis avec du silicone, etc. -
Page 36: Tuyaux De Refrigerant
Outdoor Unit Installation Manual Digital Inverter TUYAUX DE REFRIGERANT Expulsion de la protection Pièces d’installation en des tuyaux option (non fournies) Nom des pièces Quantité Tuyaux de réfrigérant Côté liquide : Ø9,5 mm Un chacun Côté gaz : Ø15,9 mm Matériau isolant pour tuyaux (polyéthylène expansé, 10 mm d’épaisseur) -
Page 37: Serrage Des Raccords
Outdoor Unit Installation Manual Digital Inverter Serrage des raccords Cependant, les outils traditionnels peuvent être utilisés en réglant la marge 1. Centrez les tuyaux de raccordement et serrez de saillie du tuyau en l’écrou évasé le plus possible à la main. Serrez cuivre. -
Page 38: Longueur Des Tuyaux De Réfrigérant
Outdoor Unit Installation Manual Digital Inverter • La pression du R410A est supérieure à celle du ATTENTION R22 (d’environ 1,6 fois). Par conséquent, serrez les sections de 1. Ne mettez pas la clé sur le chapeau ou le raccordement des tuyaux évasés reliant les couvercle. -
Page 39: Purge D'air
Outdoor Unit Installation Manual Digital Inverter PURGE D’AIR Essai d’étanchéité Avant de commencer un essai d’étanchéité, serrez encore les soupapes d’axe côté gaz et côté liquide. Pressurisez le tuyau à l’azote gazeux par l’orifice de service à la pression spécifiée (4,15 Mpa) pour effectuer l’essai d’étanchéité. -
Page 40: Remplissage Du Réfrigérant
Outdoor Unit Installation Manual Digital Inverter Remplissage du Mode d’ouverture des soupapes Vérifiez le type de structure avant d’ouvrir ou réfrigérant fermer la soupape. Ce modèle est du type 30 m sans charge qui ne ▼ Côté liquide nécessite pas le remplissage de réfrigérant pour Ouvrez la soupape à... -
Page 41: Installation Electrique
Outdoor Unit Installation Manual Digital Inverter INSTALLATION ELECTRIQUE En outre, assurez-vous de fixer ces câbles sur les AVERTISSEMENT serre-fils situés sur la plaque de fixation des soupapes des tuyaux et le boîtier électrique. 1. Assurez-vous de raccorder les câbles spécifiés et de les fixer solidement de sorte que la tension externe sur les câbles Boîtier électrique n’affecte pas le raccord des bornes. - Page 42 Outdoor Unit Installation Manual Digital Inverter Mode de raccordement Schéma de câblage 1. Branchez les câbles de raccordement aux * Pour les détails concernant le raccordement/ l’installation de la télécommande, reportez-vous bornes identifiées par leur numéro respectif et au Manuel d’installation fourni avec la situées sur le bornier de l’unité...
-
Page 43: Longueur De Dénudement Du Cordon D'alimentation Et Du Câble De Raccordement
Outdoor Unit Installation Manual Digital Inverter ▼ Système simple Longueur de dénudement du cordon d’alimentation et du câble de raccordement Bornier Vers le bornier de d’alimentation l’unité intérieure 1 2 3 Vis de terre Ligne (mm) Ligne Vis de terre de terre de terre Câble... - Page 44 Outdoor Unit Installation Manual Digital Inverter <2. Fixer le filtre à fixer> CN301 CN300 Câble du moteur du ventilateur (Côté inférieur) Bande de baguage Filtre à fixer Fixer le filtre à fixer fourni au câble du moteur du ventilateur extérieur inférieur. •...
-
Page 45: Mise A La Terre
Outdoor Unit Installation Manual Digital Inverter MISE A LA TERRE AVERTISSEMENT • Veillez à raccorder les fils de terre. (mise à la terre) Une mise à la terre incomplète provoque une électrocution. Raccordez correctement la ligne de terre selon les normes techniques applicables. Il est essentiel de raccorder une ligne de terre pour éviter une électrocution et pour réduire le bruit et la charge d’électricité... -
Page 46: Fonctions A Executer Localement
Outdoor Unit Installation Manual Digital Inverter FONCTIONS A EXECUTER LOCALEMENT Manipulation des tuyaux Récupération du réfrigérant existants • Utilisez le commutateur de récupération du réfrigérant SW802 sur la carte à circuits Lorsque vous utilisez les tuyaux existants, vérifiez imprimés de l’unité extérieure pour récupérer le attentivement les points suivants : réfrigérant lorsque l’unité... -
Page 47: Depannage
Outdoor Unit Installation Manual Digital Inverter DEPANNAGE Outre par les codes de vérification affichés sur la télécommande avec fil, les erreurs de l’unité extérieure peuvent être diagnostiquées par les LED de la carte à circuits imprimés de l’unité intérieure. Utilisez-les pour différentes vérifications. Les détails des codes de vérification affichés sur la télécommande avec fil de l’unité... -
Page 48: Annexe
• Dans le système double et le système triple concurrent, il * Diamètre et épaisseur du tuyau (mm) peut être réutilisé lorsque TOSHIBA spécifie le tuyau de raccordement utilisé. Diamètre extérieur du tuyau Ø6,4 Ø9,5 Ø12,7 Ø15,9 Ø19,0... - Page 49 Outdoor Unit Installation Manual Digital Inverter Tuyaux existants : Ne peuvent pas être Y a-t-il des égratignures ou des bosses sur les tuyaux utilisés. existants ? • Utilisez des tuyaux neufs. Pouvez-vous faire fonctionner le climatiseur existant ? • Pour nettoyer les tuyaux et récupérer l’huile •...
- Page 50 EH99861901...