
Manuels Connexes pour Horizon Hobby Apprentice S 2 1.2m


Sommaire des Matières pour Horizon Hobby Apprentice S 2 1.2m
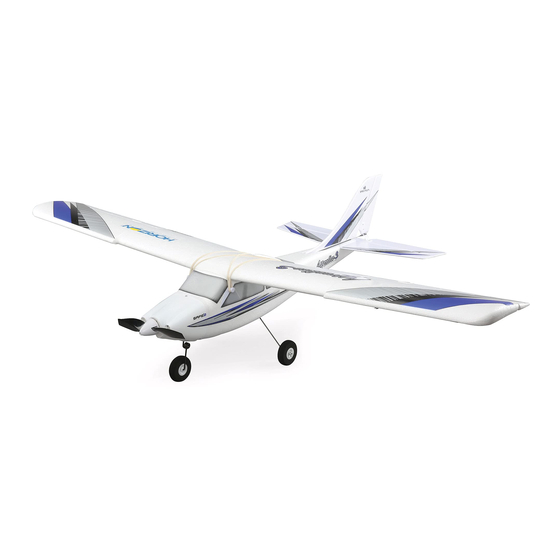
- Page 1 Apprentice S 2 1.2m ® HBZ31000, HBZ31500 Instruction Manual | Bedienungsanleitung Manuel d’utilisation | Manuale di Istruzioni...
- Page 2 NOTICE All instructions, warranties and other collateral documents are subject to change at the sole discretion of Horizon Hobby, LLC. For up-to-date product literature, visit www.horizonhobby.com or www.towerhobbies.com and click on the support or resources tab for this product. Meaning of Special Language:...
-
Page 3: Table Des Matières
Box Contents Table of Contents Specifications ....................3 Flying Tips ....................15 Charging Warnings..................4 Takeoff ......................16 Charge the Flight Battery ................4 Flying ......................17 Installing the Transmitter Batteries (RTF) ............5 Landing ......................17 Turning the Transmitter ON and OFF ..............5 Post Flight..................... -
Page 4: Charging Warnings
Charging Warnings CAUTION: All instructions and warnings must be followed exactly. • Always inspect the battery before charging and never charge dead or Mishandling of Li-Po batteries can result in a fire, personal injury, and/ damaged batteries. or property damage. •... -
Page 5: Installing The Transmitter Batteries (Rtf)
WARNING: Before proceeding further, remove the propeller and spinner from the motor shaft. Never attempt to program the radio components, assemble the aircraft or perform maintenance of any kind without removing the propeller. Serious injury could result if the motor starts inadvertently with the propeller still attached. 1. -
Page 6: Sensor Assisted Flight Envelope (Safe) Technology
Sensor Assisted Flight Envelope (SAFE) Technology Activating SAFE Technology You control the help SAFE technology provides while you learn to fly. As ® your flying skills grow, decrease SAFE technology assistance. Change aircraft SAFE technology is not active until you advance the throttle past 25%. Once the response at any time by moving the Channel 5 (SAFE Flight mode) switch on SAFE technology is active, the control surfaces may move on the aircraft. -
Page 7: Hi/Low Rate Switch (Dual Rates)
® Pitch Roll Horizon Hobby has always made RC sport, scale and unique aircraft with the kind of performance experts appreciate. Now the exclusive Artificial Stability 3 aXis (AS3X) system helps take performance expectations in aircraft a quantum • Natural Flight Experience: The pilot experiences natural AS3X flight for leap higher. -
Page 8: Binding
Binding The receiver must be bound to your transmitter before it will operate. Binding is the process of teaching the receiver the specific code of the transmitter so it will only connect to that specific transmitter. The included RTF transmitter is bound to the aircraft at the factory. If you need to re-bind for any reason, follow the binding procedure as shown. -
Page 9: Control Horn And Servo Arm Settings
Wing Installation 1. Connect the aileron servo connectors to the included Y-harness (A) in the fuselage. The left and right servos can be connected to either side of the Y-harness. Ensure the Y-harness is connected to port 2 of the receiver. 2. -
Page 10: Control Surface Centering And Clevis Installation On A Control Horn
Control Surface Centering And Clevis Installation On A Control Horn Always check to ensure your control surfaces (Rudder, Elevator and Ailerons) are centered with the rest of the surface before every flight.. If the control surfaces are not centered, centering can be achieved by following the steps below: •... -
Page 11: Lvc (Low Voltage Cutoff)
LVC (Low Voltage Cutoff) LVC is a feature built into your ESC to protect the battery from over-discharge. When the battery charge is too low, LVC limits power supplied to the motor. The aircraft will begin to slow and you will hear the motor pulse. When the motor power decreases, land the aircraft immediately and recharge the flight battery. -
Page 12: Control Direction Test
Control Direction Test IMPORTANT: All trimming and control test should be done before throttle is to adjust control surfaces. Move the transmitter control sticks so the model’s advanced and in Experienced Mode. rudder, elevator and ailerons move as shown (illustrations show a view from the rear of the aircraft). -
Page 13: Flight Control
Flight Control TIP: For the first flights, make sure Flight Mode switch is set to Beginner mode, the best flight mode to help you learn to fly. For smooth control of your aircraft, always make small control moves. All directions are described as if you were sitting in the aircraft. For example, when the aircraft’s nose is pointing toward you, left steering (rudder) will turn the aircraft left (your right while holding the transmitter). -
Page 14: Trimming The Aircraft
Trimming the Aircraft Manually Adjusting Trim It is recommend that the SAFE flight mode switch is set to Experienced mode (position 2) before manually adjusting trim. Perform manual adjustment of trim before increasing the throttle above 25% or the control surfaces will move when the aircraft is moved. Return any trim setting on the transmitter to neutral by pushing the trim slider to the middle position, then adjusting the clevis on that control surface to position it the same as it was with the trim slider offset. -
Page 15: Range Test
5. If control issues exist, do not attempt to fly. Refer to the contact table at the 28 meters (90 feet) end of the this manual to contact Horizon Hobby product support. Also, see the Spektrum website for more information. -
Page 16: Takeoff
Takeoff For video assistance regarding assembly, visit the Apprentice product page at www.horizonhobby.com Flying Conditions A good flying day is calm, with winds that are less than 5–7 mph (8–11km/h). Flying in faster winds than this could make flying difficult and result in a crash. Wind near the ground can be less than the wind at the elevation where your aircraft flies. -
Page 17: Flying
Flying Let the aircraft climb at full throttle, into the wind, until the aircraft gets about 200 feet (61meters) above the ground, then decrease the throttle to half (50%). Try to make only small and gentle movements of the control sticks so you can see how the aircraft responds. -
Page 18: Post Flight
Post Flight NOTICE: When you are finished flying, never keep the aircraft in the sun. Do not store the aircraft in a hot, enclosed area such as a car. Doing so can damage the foam. Post Flight Checklist 1. Disconnect Flight Battery 2. -
Page 19: Service Of Power Components
Service of Power Components CAUTION: Always disconnect the flight battery from the model before removing the propeller. Disassembly 1. Remove the screw (A) and spinner (B) from the spinner backplate (C). 2. Remove the hex nut (D), propeller (E), and the spinner backplate from the collet (F). -
Page 20: Optional Transmitter Setup
Optional Transmitter Setup If using any DSMX transmitter other than the included DXS (3 pos gear switch) Computerized Transmitter Setup the radio will have to be configured correctly for the SAFE system to work Start all transmitter programming with a blank ACRO model properly. -
Page 21: Trouble Shooting Guide
Trouble Shooting Guide Problem Possible Cause Solution Reset controls with throttle stick and throttle trim at Throttle not at lowest position or throttle trim too high lowest setting Aircraft will not respond Throttle servo travel is lower than 100% Make sure throttle servo travel is 100% or greater to throttle but responds to other controls Throttle channel is reversed... -
Page 22: Ama National Model Aircraft Safety Code
What this Warranty Covers of the Product, purchaser is advised to return the Product immediately in new and Horizon Hobby, LLC, (Horizon) warrants to the original purchaser that the product unused condition to the place of purchase. purchased (the “Product”) will be free from defects in materials and workmanship at the date of purchase. -
Page 23: Contact Information
Horizon Technischer Service service@horizonhobby.eu Hanskampring 9 European Union D 22885 Barsbüttel, Germany Sales: Horizon Hobby GmbH +49 (0) 4121 2655 100 FCC Information Contains FCC ID: BRWKATY1T NOTE: This equipment has been tested and found to comply with the limits for a Class B digital device, pursuant to part 15 of the FCC Rules. -
Page 24: Compliance Information For The European Union
EU Importer of Record: Directive - Amending 2011/65/EU Annex II 2015/863. Horizon Hobby, GmbH HBZ Apprentice S 2 BNF (HBZ31500); Hereby, Horizon Hobby, LLC declares Hanskampring 9 that the device is in compliance with the following: Radio Equipment Directive 22885 Barsbüttel Germany (RED) 2014/53/EU;... - Page 25 Grundfähigkeiten. Wird dieses Produkt nicht auf eine sichere und verantwortungsvolle Weise betrieben, kann dies zu Verletzungen oder Schäden am Produkt oder anderen Sachwerten führen. Versuchen Sie nicht ohne Genehmigung durch Horizon Hobby, LLC, das Produkt zu zerlegen, es mit inkompatiblen Komponenten zu verwenden oder auf jegliche Weise zu erweitern.
-
Page 26: Spezifikationen
Packungsinhalt Inhaltsverzeichnis Spezifikationen ..................... 26 Reichweitencheck ..................38 Akku-Warnhinweise ..................27 Checkliste vor dem Fliegen ................38 Flug-Akku laden ................... 27 Tipps zum Fliegen ..................38 Einsetzen der Sender-Akkus (RTF) ..............28 Starten ......................39 Ein- und Ausschalten des Senders ..............28 Fliegen ...................... -
Page 27: Akku-Warnhinweise
Akku-Warnhinweise ACHTUNG: Alle Anweisungen und Warnhinweise müssen genau • Laden Sie die Akkus immer weit entfernt von brennbaren Materialien. befolgt werden. Falsche Handhabung von Li-Po-Akkus kann zu Brand, • Überprüfen Sie immer den Akku vor dem Laden und laden Sie niemals Personen- und/oder Sachwertschäden führen. -
Page 28: Einsetzen Der Sender-Akkus (Rtf)
WARNUNG: Bauen Sie vor weiteren Schritten zunächst den Propeller und den Spinner von der Motorwelle ab. Versuchen Sie niemals, die Funkkomponenten zu programmieren, das Fluggerät zusammenzubauen oder Wartungseingriffe irgendeiner Art vorzunehmen, ohne zuvor den Propeller zu entfernen. Sollte der Motor unbeabsichtigt mit dem noch befestigten Propeller starten, kann dies zu schweren Verletzungen führen. -
Page 29: Sensorunterstützte Flughüllentechnologie (Safe)
Sensorunterstützte Flughüllentechnologie (SAFE) Aktivieren der SAFE Technologie Die SAFE Technologie unterstützt Sie aktiv beim Fliegen lernen. Je weiter ihre Fähigkeiten wachsen, desto mehr können Sie diese Unterstützung reduzieren. Die SAFE Technologie ist solange nicht aktiv bis das Gas über 25% gestellt Mit dem Umschalten des Kanal 5 (SAFE Flug Mode) an ihrem Sender können wird. -
Page 30: Hi/Lo Dual Rate Schalter
Steuerknüppel gehalten werden. Selbst mit gezogenem Panikschalter wird ein kleiner Teil der Steuerbefehle noch genutzt. AS3X Technologie Horizon Hobby hat immer schon RC Sport, Scale und einzigartige Luftfahrzeuge entwickelt die Experten überzeugen und lieben. Nun sorgt das einzigartige Pitch Roll AS3X Stabilisierungssystem für einen Quantensprung in der Leistung der... -
Page 31: Binden
Binden Für den ordnungsgemäßen Betrieb müssen Sie den von Ihnen gewählten Sender an den Empfänger „binden“. Das Binden ist der Vorgang, bei dem der Empfänger den speziellen Code des Senders lernt, sodass er sich nur mit diesem speziellen Sender verbindet. Der mitgelieferte RTF-Sender wird werkseitig an das Fluggerät gebunden. -
Page 32: Ruderhorn Und Servoarmeinstellungen
Montage der Tragflächen 1. Schließen Sie die Servoanschlüsse des Querruders an das im Rumpf befindliche Y-Kabel an. Die linke und rechte Seite kann dabei wahlfrei angeschlossen werden. Stellen Sie sicher, dass das Y-Kabel an Port 2 des Empfänger angeschlossen ist. 2. -
Page 33: Anschluß Der Gabelköpfe Am Ruderhorn Und Zentrieren Der Ruder
Anschluß der Gabelköpfe am Ruderhorn und zentrieren der Ruder Prüfen Sie vor jedem Flug ob die Seiten- Höhen- und Querruder zentriert sind. Sollten die Ruder nicht zentriert sein, können Sie diese mit der folgenden Anleitung zentrieren. • Ziehen Sie die Hülse vom Gabelkopf zum Anlenkgestänge. •... -
Page 34: Lvc (Niederspannungsabschaltung)
LVC (Niederspannungsabschaltung) Die Niederspannungsabschaltung LVC in dem Regler schützt den Akku vor Tiefentladung. Ist die Akkuspannug zu niedrig reduziert die Schaltung die Spannung und Sie hören den Motor pulsieren. Landen Sie unverzüglich wenn die Motorleistung nachlässt und laden den Akku auf. Trennen Sie nach Gebrauch den LiPo und nehmen ihn aus dem Flugzeug um eine Tiefentladung zu vermeiden. -
Page 35: Kontrolltest
Information. Sollten Sie weitere Unterstüzung benötigen kontaktieren ist und die Gastrimmung ganz unten. Schalten Sie das Modell ein. Stellen Sie Sie bitte den technischen Service von Horizon Hobby. Sollten Sie den Mode sicher, dass die Ruder (Seitenruder, Höhenruder und Querruder auf Neutral oder ihres DXe Senders ändern wollen, lesen Sie bitte in der Schritt für Schritt... -
Page 36: Flugkontrolle
Flugkontrolle TIPP: Stellen Sie für die ersten Flüge den Flug Modeschalter auf den Anfänger (Beginner) Mode. Dieser Mode ist besten zum Lernen geeignet. Führen Sie für die präzise Kontrolle des Modells nur kleine Korrekturen durch. Alle Steuerrichtungen sind beschrieben als ob Sie im Flugzeug sitzen würden. Zeigt die Flugzeugnase in ihre Richtung läßt der Steuerbefehl linkes Querruder das Flugzeug nach links kippen, was aus ihrer Sicht nach rechts ist. -
Page 37: Trimmung
Trimmung Manuelle Einstellung der Trimmung Wir empfehlen den SAFE Flugmodeschalter auf den Expertenmode (Position 2) zu schalten bevor Sie die Trimmung manuell ändern. Führen Sie die manuelle Einstellung der Trimmung durch bevor Sie über 25% Gas gegeben haben, da sich sonst die Ruder bewegen wenn das Flugzeug bewegt wird. -
Page 38: Checkliste Vor Dem Fliegen
Reichweitencheck ACHTUNG: Bitte halten Sie bei dem Reichweitentest alle Körperteile und lose Gegenstände weg vom Propeller. Ein nicht befolgen könnte zu Verletzungen führen. Vor jeder Flugsession, insbesondere mit einem neuen Modell, sollten Sie einen Reichweitentest durchführen. Die DXS ist dazu mit einem Testsystem ausgestattet. -
Page 39: Starten
Starten Für eine Videoanleitung des ersten Fluges besuchen Sie bitte die Apprentice S 2 Produktseite unter www.Horizonhobby.com Wetterbedingungen Ideal für den ersten Flug ist ein Tag mit Windgeschwindigkeiten unter 8-11 km/h. Je höher die Windgeschwindigkeit ist, desto schwieriger ist es besonders für unerfahrene Piloten, sicher zu fliegen. -
Page 40: Fliegen
Fliegen Lassen Sie das Flugzeug bei Vollgas gegen den Wind steigen bis Sie in ca. 61 Meter über dem Grund sind und reduzieren dann das Gas auf die Hälfte (50%). Versuchen Sie sanfte und kleine Steuerbewegungen zu machen so dass Sie sehen wie das Flugzeug reagiert. -
Page 41: Nach Dem Fliegen
Nach dem Fliegen HINWEIS: Lassen Sie das Flugzeug nach dem Fliegen niemals in der Sonne. Lagern Sie es nicht in heißer, geschlossener Umgebung wie einem Auto. Dieses könnte den Schaum beschädigen. Checkliste nach dem Fliegen 1. Trennen Sie den Flugakku 2. -
Page 42: Wartung Der Antriebskomponenten
Wartung der Antriebskomponenten ACHTUNG: Trennen Sie stets den Flugakku vom Modell bevor Sie den Propeller entfernen. Demontage 1. Entfernen Sie die Schraube (A) und Spinner (B) von der Spinner Rückplatte (C). 2. Entfernen Sie die Mutter (D), den Propeller (E) und die Spinnerrückplatte vom Mitnehmer (F). -
Page 43: Optionale Sendereinstellungen
Optionale Sendereinstellungen Sollten Sie einen anderen DSMX Sender verwenden, als der aus dem Programmierung Computersender Lieferumfang (mit 3-Positions Kanal 5 Schalter) muß dieser für den korrekten Beginnen Sie die Programmierung mit einem leeren ACRO Modellspeicher. Führen Betrieb des SAFE Systemes konfiguriert werden. Sie gegebenenfalls ein Modellreset durch und benennen dann das neue Modell. -
Page 44: Leitfaden Zur Problemlösung
Leitfaden zur Problemlösung Problem Mögliche Ursache Lösung Das Gas befindet sich nicht im Leerlauf, und/oder die Steuerungen mit Gassteuerknüppel und Gastrimmung auf niedrigste Das Fluggerät Gastrimmung ist zu hoch Einstellung zurücksetzen reagiert nicht auf Gas-Servoweg ist niedriger als 100% Sicherstellen, das der Gas-Servoweg 100% oder mehr beträgt Gaseingaben, aber auf Gaskanal ist reversiert (umgedreht) Reversieren (drehen) Sie den Gaskanal am Sender... -
Page 45: Garantie Und Service Informationen
Dieses ist ein hochwertiges Hobby Produkt und kein Spielzeug. Es muss mit Garantiezeitraum Vorsicht und Umsicht eingesetzt werden und erfordert einige mechanische wie Exklusive Garantie Horizon Hobby LLC (Horizon) garantiert, dass dasgekaufte auch mentale Fähigkeiten. Ein Versagen, das Produkt sicher und umsichtig Produkt frei von Material- und Montagefehlern ist. Der Garantiezeitraum zu betreiben kann zu Verletzungen von Lebewesen und Sachbeschädigungen... -
Page 46: Rechtliche Informationen Für Die Europäische Union
Horizon Hobby, GmbH Änderung 2011/65 / EU-Anhang II 2015/863. Hanskampring 9 HBZ Apprentice S 2 BNF (HBZ31500); Hiermit erklärt Horizon Hobby, LLC, 22885 Barsbüttel Germany dass das Gerät den folgenden Richtlinien entspricht: EU-Richtlinie über Funkanlagen 2014/53/EU; RoHS 2-Richtlinie 2011/65 / EU; RoHS 3-Richtlinie - WEEE-HINWEIS: Änderung 2011/65 / EU-Anhang II 2015/863. - Page 47 REMARQUE Toutes les instructions, garanties et autres documents de garantie sont sujets à la seule discrétion de Horizon Hobby, LLC. Veuillez, pour une littérature produits bien à jour, visiter www.horizonhobby.com ou www.towerhobbies.com et cliquer sur l’onglet de support de ce produit.
- Page 48 Contenu de la boîte Table des matières Caractéristiques .................... 48 Checklist d’avant vol ..................60 Avertissements relatifs à la charge ............... 49 Conseils relatifs au vol .................. 60 Charger la batterie de vol ................49 Décollage ..................... 61 Installation des piles de l’émetteur (RTF) ............50 Durant le vol ....................
-
Page 49: Avertissements Relatifs À La Charge
Avertissements relatifs à la charge ATTENTION: Toutes les instructions et les précautions doivent être • Chargez toujours les batteries à l’écart de tout matériau inflammable. suivies. Une erreur de manipulation d’une batterie Li-Po peut causer un • Contrôlez toujours l’état de la batterie avant la charge. incendie entraînant des dégâts matériels avec risques de blessures. -
Page 50: Installation Des Piles De L'émetteur (Rtf)
AVERTISSEMENT : avant de continuer, retirez l’hélice et le cône de l’arbre du moteur. N’essayez jamais de programmer les composants de radio, de monter l’appareil ou d’effectuer quelques travaux d’entretien que ce soit sans retirer l’hélice. Démarrer le moteur par inadvertance alors que l’hélice est encore fixée peut entraîner des blessures graves. -
Page 51: Technologie Safe
Technologie SAFE Activation de la technologie SAFE Vous contrôlez l’assistance fournie par la technologie SAFE durant l’apprentissage du pilotage. Au fur et à mesure de votre progression, diminuez Le système SAFE ne s’active que lorsque que la valeur des gaz dépasse le niveau d’assistance du système SAFE. -
Page 52: Interrupteur De Double-Débattements
Technologie AS3X Horizon Hobby a toujours fabriqué des avions de loisir, maquettes et uniques qui offrent des performances appréciées par les experts. D’abord utilisé dans les Ultra micro hélicoptères flybarless, le système AS3X (stabilisation artificielle Roulis 3 axes) utilise des capteurs MEMS très sophistiqués, le logiciel de contrôle a... -
Page 53: Affectation
Affectation Le récepteur doit être affecté à l’émetteur pour fonctionner. L’affectation est le processus qui consiste à apprendre au récepteur le code spécifique de l’émetteur afin qu’il se connecte uniquement à cet émetteur particulier. L’émetteur prêt-à-voler inclus est affecté à l’appareil dans l’usine. Si vous devez le réaffecter pour une quelconque raison, suivez la procédure d’affectation comme indiqué. -
Page 54: Position Des Tringleries Sur Les Bras De Servo Et Les Guignols
Installation de l”aile 1. Connectez les prises des servos d’ailerons au cordon Y (A) situé dans le fuselage. Le servo gauche et le droit peuvent être connectés de n’importe quel côté du cordon Y. Vérifiez que le cordon Y est relié au port 2 du récepteur. -
Page 55: Centrage Des Gouvernes Et Installation Des Chapes Sur Les Guignols
Centrage des gouvernes et installation des chapes sur les guignols Avant chaque vol, vérifiez toujours que vos gouvernes (Dérive, Profondeur et Ailerons) sont bien alignées avec les parties fixes. Si les gouvernes ne sont pas centrées, suivez les étapes suivantes: •... -
Page 56: Coupure Basse Tension (Lcv)
Coupure basse tension (LCV) Le LVC est un système intégré au contrôleur qui empêche la décharge trop importante de la batterie. portante de la batterie. Quand la charge de la batterie devient trop faible, le LVC limite la puissance fournie au moteur. L’avion va commencer à... -
Page 57: Test De Direction Des Gouvernes
Pour obtenir une assistance supplémentaire, veuillez Mettez l’émetteur sous tension. Vérifiez que le manche des gaz et son trim sont contacter le service technique Horizon Hobby. en position basse. Mettez le modèle sous tension. Vérifiez que les gouvernes (Dérive, Profondeur et Ailerons) sont au neutre ou à 0°. L’idéal est d’avoir Cependant, si vous souhaitez changer le mode de votre émetteur DXe,... -
Page 58: Commandes De Vol
Commandes de vol CONSEIL: Pour les premiers vols, vérifiez que l’interrupteur de mode de vol est en position mode Débutant, qui est le mode le plus adapté pour votre apprentissage. Pour un pilotage en douceur de votre avion, Déconnectez et retirez toujours de petites corrections. Toutes les directions sont décrites comme si vous étiez à l’intérieur de l’avion. -
Page 59: Réglage Des Trims De L'avion
Réglage des trims de l’avion Réglage manuel des trims Il est recommandé de sélectionner le Mode Expérimenté (position 2 de l’inter SAFE ) avant d’effectuer le réglage manuel. Effectuez ce test avant d’activer le SAFE, si vous augmentez les gaz au dessus de 25%, les gouvernes bougeront seules en fonction des mouvements de l’avion. -
Page 60: Test De Portée
5. Si des perturbations sont présentes dans les commandes, ne tentez pas d’effectuer un vol. Référez-vous aux coordonnées présentes à la fin du manuel pour contacter le Service Technique Horizon Hobby. Vous pouvez également consulter le site internet Spektrum pour obtenir des informations complémentaires. -
Page 61: Décollage
Décollage Pour une assistance vidéo pour le premier vol, visitez la page produit du Mini Apprentice sur www.Horizonhobby.com Conditions de vol Un bon jour pour voler est un jour où le vent est inférieur à 8-11km/h. Voler avec un vent plus fort rendra le pilotage plus difficile avec un risque de crash. Le vent en altitude peut être bien plus élevé... -
Page 62: Durant Le Vol
Durant le vol Laissez l’avion prendre de l’altitude plein gaz, face au vent, jusqu’à ce que l’avion atteigne une altitude d’environ 61 m au-dessus du sol, puis passez à mi-gaz. Effectuez de légers mouvements des manches pour découvrir les réactions de votre modèle. -
Page 63: Aprés Le Vol
Aprés le vol REMARQUE : Quand votre vol est terminé, ne laissez pas l’avion exposé au soleil. Ne stockez pas l’avion dans un endroit fermé et chaud comme une voiture par exemple. Risque d’endommagement de la mousse. Checklist d’après vol 1. -
Page 64: Maintenance De La Motorisation
Maintenance de la motorisation ATTENTION: Déconnectez toujours la batterie de votre modèle avant de retirer l’hélice. Démontage 1. Retirez la vis (A) et le cône (B) du flasque arrière (C). 2. Retirez l’écrou (D), l’hélice (E) et le flasque arrière de l’adaptateur (F). Un outil sera peut-être nécessaire pour retirer l’écrou. -
Page 65: Paramétrage D´un Émetteur Optionnel
Paramétrage d´un émetteur optionnel Si vous utilisez un autre émetteur DSMX que la DXS incluse (interrupteur à 3 Configuration numérisée de l’émetteur positions), la radio doit être correctement configurée pour un fonctionnement Démarrez toutes les programmations de l’émetteur avec un modèle vierge approprié... -
Page 66: Guide De Dépannage
Guide de dépannage Problème Cause possible Solution La manette des gaz n’est pas au ralenti (idle) et/ou le Réinitialisez les commandes avec la manette des gaz et mettez le trim des gaz L’aéronef ne répond trim des gaz est régléà une valeur trop élevée à... -
Page 67: Garantie Et Réparations
Durée de la garantie Indications relatives à la sécurité Garantie exclusive - Horizon Hobby, LLC (Horizon) garantit que le Produit acheté (le Ceci est un produit de loisirs perfectionné et non un jouet. Il doit être utilisé avec « Produit ») sera exempt de défauts matériels et de fabrication à sa date d’achat précaution et bon sens et nécessite quelques aptitudes mécaniques ainsi que... -
Page 68: Informations Ic
RoHS 2 2011/65/U ; Directive RoHS 3 - Modifiant 2011/65/UE Annexe II Horizon Hobby, GmbH 2015/863. Hanskampring 9 HBZ Apprentice S 2 BNF (HBZ31500); Par la présente, Horizon Hobby, LLC 22885 Barsbüttel Germany déclare que cet appareil est conforme aux directives suivantes : Directive relative aux équipements radioélectriques 2014/53/UE ; Directive RoHS 2 DIRECTIVE DEEE: 2011/65/U ;... - Page 69 Non utilizzare componenti incompatibili o modificare il prodotto in maniera diversa da quanto riportato nelle istruzioni fornite da Horizon Hobby, LLC. Il presente manuale contiene le istruzioni per la sicurezza, l’uso e la manutenzione del prodotto.
-
Page 70: Specifiche
Contenuto della scatola Indice Specifiche ..................... 70 Test di portata ....................82 Avvertenze per la carica ................71 Controlli prevolo .................... 82 Caricare la batteria di bordo ................71 Consigli per il volo ..................82 Installazione delle batterie della trasmittente (RTF) ........72 Delcollo ...................... -
Page 71: Avvertenze Per La Carica
Avvertenze per la carica ATTENZIONE: seguire attentamente tutte le istruzioni e avvertenze. • Caricare sempre le batterie lontano da materiali infiammabili. L’uso improprio delle batterie LiPo può provocare incendi, lesioni alle • Controllare sempre la batteria prima di caricarla. persone e/o danni alle cose. •... -
Page 72: Installazione Delle Batterie Della Trasmittente (Rtf)
AVVERTENZA: prima di procedere, rimuovere l’elica e l’ogiva dall’albero motore. Non tentare mai di programmare i componenti radio, assemblare l’aeromodello o eseguire qualsiasi tipo di manutenzione senza prima rimuovere l’elica. Se il motore si avvia accidentalmente con l’elica montata, potrebbe provocare lesioni gravi. 1. -
Page 73: Tecnologia Safe (Volo Assistito Da Un Sensore)
Tecnologia SAFE (volo assistito da un sensore) Attivazione della tecnologia SAFE Voi potete controllare l’aiuto che vi fornisce la tecnologia SAFE mentre imparate a volare. Man mano che la vostra abilità aumenta, diminuite l’assistenza della La tecnologia SAFE non è attiva finché non si porta lo stick del motore oltre tecnologia SAFE. -
Page 74: Interruttore Per Riduzione Di Corsa (D/R)
“Panic” attivato. Tecnologia AS3X Horizon Hobby ha sempre prodotto aerei RC sport, riproduzione e particolari con un certo tipo di prestazioni apprezzate dagli esperti. Ora, il sistema di stabilità artificiale su 3 assi, AS3X, aiuta ad avere delle aspettative di prestazioni di un grado superiore. -
Page 75: Binding (Connessione)
Binding (Connessione) Il ricevitore deve essere associato alla trasmittente per consentirne il funzionamento accoppiato. Il binding è il processo usato per configurare il ricevitore con il codice individuale della trasmittente, in modo che il ricevitore possa collegarsi solo a quella specifica trasmittente. La trasmittente RTF inclusa viene fornita già... -
Page 76: Impostazioni Squadrette Parti Mobili E Servi
Installazione dell´ala 1. Collegare i connettori dei servi alettoni a qualsiasi lato della prolunga a Y (A) fornita, all’interno della fusoliera. Accertarsi che la prolunga a Y sia collegata alla presa 2 della ricevente. 2. Installare l’ala sulla fusoliera. ATTENZIONE: quando si fissa l’ala alla fusoliera, NON pizzicare o danneggiare in qualsiasi modo i cablaggi. -
Page 77: Centraggio Delle Superfici Mobili E Installazione Delle Forcelle
Centraggio delle superfici mobili e installazione delle forcelle Prima di ogni volo verificare che le superfici di controllo (Timone, Elevatore e Alettoni) siano centrate con il resto della superfici. Se le superfici di controllo non fossero centrate, bisogna farlo osservando i passi seguenti: •... -
Page 78: Lvc (Spegnimento Per Bassa Tensione)
LVC (spegnimento per bassa tensione) La funzione LVC è inserita nell’ESC per proteggere la batteria dalla sovra- scarica. Se la carica della batteria scende troppo, l’LVC limita la potenza fornita al motore. L’aereo inizia a rallentare e si sente il motore pulsare. Appena ci si accorge che la potenza del motore diminuisce, far atterrare immediatamente l’aereo e caricare la batteria di bordo. -
Page 79: Controllo Della Direzione Dei Comandi
Controllo della direzione dei comandi IMPORTANTE: tutti i trimmaggi e i test di controllo devono essere fatti prima specifico. Muovendo i comandi sul trasmettitore, timone, elevatore e alettoni di portare in avanti lo stick del motore e in modalità Esperto. si dovrebbero muovere come illustrato. -
Page 80: Controlli In Volo
Controlli in volo CONSIGLIO: Per i primi voli, bisogna accertarsi che l’interruttore delle modalità di volo sia posizionato su Principiante, che è il modo migliore per imparare il pilotaggio. Per controllare dolcemente l’aereo, è necessario fare delle piccole correzioni ai comandi. Tutte le direzioni sono indicate come se si fosse seduti sull’aereo. Se l’aereo punta verso il pilota, un comando alettoni a sinistra farà... -
Page 81: Trimmaggio Dell'aereo
Trimmaggio dell’aereo Regolazione del trim manuale Prima di regolare manualmente i trim, si consiglia di posizionare la modalità di volo del SAFE su Esperto (posizione 2). Eseguire la regolazione manuale dei trim prima di aumentare il motore oltre il 25% altrimenti le superfici di controllo si muoveranno ad ogni movimento dell’aereo. -
Page 82: Test Di Portata
Test di portata ATTENZIONE: mentre si trattiene il modello durante questa prova, si abbia cura di tenere lontano dall’elica parti del corpo, vestiti svolazzanti e altri oggetti vaganti. In caso contrario si potrebbero subire delle lesioni personali. Prima di ogni sessione di voli, e specialmente con un nuovo modello, bisognerebbe eseguire una prova di portata del radiocomando. -
Page 83: Delcollo
Delcollo Per visualizzare un video dimostrativo del montaggio visitare il sito del prodotto Apprentice S 2 su www.Horizonhobby.com Condizioni Per Il Volo La miglior condizione è in aria calma o con un vento inferiore a 8-11 km/h. Volare con un vento più forte rende difficoltoso il volo e si rischia di far precipitare l’aereo. -
Page 84: Volo
Volo Lasciar salire l’aereo con il motore al massimo, sempre contro vento, finché raggiunge una quota di circa 61 metri dal suolo e poi ridurre il motore al 50%. Conviene cominciare con piccoli e dolci movimenti sugli stick per vedere come risponde l’aereo. -
Page 85: Dopo Il Volo
Dopo il volo AVVISO: quando si termina di volare, non lasciare l’aereo al sole. Non riporre l’aereo in un posto caldo come un’auto esposta al sole, altrimenti si potrebbe danneggiare il materiale espanso di cui è fatto. Controlli dopo il volo 1. -
Page 86: Manutenzione Del Gruppo Propulsore
Manutenzione del gruppo propulsore ATTENZIONE: scollegare sempre la batteria dal modello orima di smontare l’elica. Smontaggio 1. Togliere la vite (A) e l’ogiva (B) dal suo fondello (C). 2. Togliere dall’adattatore conico (F) il dado esagonale (D), l’elica (E) e il fondello dell’ogiva. -
Page 87: Impostazione Del Trasmettitore Opzionale
Impostazione del trasmettitore opzionale Se si usa un trasmettitore DSMX diverso dal DXe fornito (interruttore del Impostazione di una trasmittente computerizzata carrello a 3 posizioni), bisogna configurarlo correttamente per far funzionare il Iniziare la programmazione della trasmittente con modello ACRO non programmato sistema SAFE. -
Page 88: Guida Alla Soluzione Dei Problemi
Guida alla soluzione dei problemi Problema Possibile causa Soluzione Resettare i comandi con stick e trim motore completamente Lo stick motore e/o il suo trim non sono posizionati in basso in basso L’aereo non risponde al La corsa del servo è minore del 100% Regolare la corsa ad almeno il 100% comando motore, ma gli altri Il canale del motore è... -
Page 89: Garanzia
Periodo di garanzia Indicazioni di sicurezza La garanzia esclusiva - Horizon Hobby, LLC (Horizon) garantisce che i prodotti Questo è un prodotto sofisticato di hobbistica e non è un giocattolo. Esso deve acquistati (il “Prodotto”) sono privi di difetti relativi ai materiali e di eventuali errori essere manipolato con cautela, con giudizio e richiede delle conoscenze basilari di montaggio. -
Page 90: Dichiarazione Di Conformità Per L'unione Europea
Hanskampring 9 2011/65 / UE allegato II 2015/863. 22885 Barsbüttel Germany HBZ Apprentice S 2 BNF (HBZ31500); Con la presente, Horizon Hobby, LLC dichiara che il dispositivo è conforme a quanto segue: Direttiva europea sulle AVVISO RAEE: apparecchiature radio (RED) 2014/53/UE; Direttiva RoHS 2 2011/65 / UE;... -
Page 91: Pezzi Di Ricambio
Replacement Parts • Ersatzteile • Pièces de rechange • Pezzi di ricambio Description Beschreibung Description Descrizione 30-Ampere-telemetriefähiger ESC con capacità di telemetria EFLA1030FB 30-Amp Telemetry Capable ESC 30 ampères avec télémétrie Regler da 30 Amp HBZ3101 Wing Set Tragflächen Set Ailes Set ala HBZ3102... - Page 92 HobbyZone, the HobbyZone logo, Apprentice, SAFE, the SAFE logo, AS3X, DSM, DSM2, DSMX, IC3, Bind-N-Fly, the BNF logo, the Smart Technology logo, and the Horizon Hobby logo are trademarks or registered trademarks of Horizon Hobby, LLC. The Spektrum trademark is used with permission of Bachmann Industries, Inc.