Table des Matières

Publicité

Les langues disponibles
  • FR

Les langues disponibles

  • FRANÇAIS, page 62

Liens rapides

Instruction Manual
EN
Benutzerhandbuch
DE
Manual de instrucciones
ES
Manuel d'instructions
FR
Manual de instruções
PT
Manuale d'uso
IT

Publicité

Table des Matières
loading

Sommaire des Matières pour ECOVACS ROBOTICS DEEBOT MINI

  • Page 1 Instruction Manual Benutzerhandbuch Manual de instrucciones Manuel d'instructions Manual de instruções Manuale d'uso...
  • Page 2 Instruction Manual, please contact our Customer Service Center where a technician can address your specific problem or question. For more information, please visit the ECOVACS ROBOTICS official website: www.ecovacs.com The company reserves the right to make technological and/or design changes to this product for continuous improvement.
  • Page 3: Table Des Matières

    Contents 1. Important Safety Instructions...............2 2. Package Contents and Technical Specifications........5 2.1 Package Contents..................5 2.2 Specifications....................5 2.3 Product Diagram..................6 3. Operating and Programming................8 3.1 Notes Before Cleaning................8 3.2 Quick Start....................9 3.3 Cleaning Mode Selection.................12 3.4 Intelligent Scheduling................13 3.5 Alarm Indicator and Sounds..............14 4.
  • Page 4: Important Safety Instructions

    1. Important Safety Instructions When using an electrical appliance, basic precautions should always be followed, including the following: READ ALL INSTRUCTIONS BEFORE USING THIS APPLIANCE. SAVE THESE INSTRUCTIONS 1. This Appliance is not intended to be used by children under 8 or anyone lacking knowledge on proper use.
  • Page 5 1. Important Safety Instructions 14. Do not allow the Appliance to pick up large objects like stones, large pieces of paper or any item that may clog the Appliance. 15. Do not use Appliance to pick up flammable or combustible materials such as gasoline, printer or copier toner, or use in areas where they may be present.
  • Page 6 1. Important Safety Instructions 29. The Appliance must be used in accordance with the directions in this Instruction Manual. ECOVACS ROBOTICS cannot be held liable or responsible for any damages or injuries caused by improper use. WARNING: For the purposes of recharging the battery, only use the detachable supply unit CH1465A provided with this Appliance.
  • Page 7: Package Contents And Technical Specifications

    2. Package Contents and Technical Specifications 2.1 Package Contents Instruction Manual Remote Control with Robot Charging Dock Instruction Manual Button Cell Battery (4) Side Brushes (2) Washable/ Cleaning Cloth Plate Replacement High Reusable Microfiber Efficiency Filter+ Cleaning Cloths Sponge Filter 2.2 Specifications Model DK560...
  • Page 8: Product Diagram

    2. Package Contents and Technical Specifications 2.3 Product Diagram Robot 1. Anti-Collision Sensors 8. Side Brushes 2. Control Panel 9. Suction Intake 3. Top Cover 10. Driving Wheels 4. Infrared Receiver for Remote Control 11. Bottom Power Switch 5. Anti-Drop Sensors 12.
  • Page 9: Remote Control

    2. Package Contents and Technical Specifications Remote Control 1. AUTO Mode Button 2. Direction Control Buttons 3. START/PAUSE Button 4. Return to Charger Mode Button 5. Spot Cleaning Mode Button 6. Edge Cleaning Mode Button 7. Intelligent Scheduling Button 8. Infrared Emitter Dust Bin 1.
  • Page 10: Operating And Programming

    3. Operating and Programming 3.1 Notes Before Cleaning Before operating DEEBOT, take a few moments to survey the area to be cleaned and remove any obstacles. Remove power cords and small objects from The product is not suitable for use on carpet. the floor that could entangle the product.
  • Page 11: Quick Start

    3. Operating and Programming 3.2 Quick Start Charging Dock Placement Place the Charging Dock on a level floor surface against the wall with the base perpendicular to the ground. Keep the immediate area 1.5m (5') in front of the charger and 0.5m (1.6') on both sides of the charger clear of objects and reflective object surfaces such as mirrors etc.
  • Page 12 3. Operating and Programming Charge DEEBOT Place DEEBOT on the Charging Dock making sure the Charging Contacts on DEEBOT and the Charging Dock Pins make a connection. Charge DEEBOT for at least 4 hours before the first use. Make sure the robot’s Bottom Power Switch is ON before charging.
  • Page 13: Power Off

    3. Operating and Programming Start Press the AUTO Mode Button on DEEBOT or on the Remote Control. DEEBOT starts to work immediately in AUTO Cleaning Mode. To choose another Cleaning Mode, please refer to section 3.3 Cleaning Mode Selection for details. Pause Pause DEEBOT by pressing the AUTO Mode Button on DEEBOT or the START/PAUSE...
  • Page 14: Cleaning Mode Selection

    3. Operating and Programming 3.3 Cleaning Mode Selection DEEBOT has several Cleaning Modes to choose from to effectively clean different floors. Cleaning Modes are selected with the Remote Control. AUTO Cleaning Mode Edge Cleaning Mode This is the most commonly used mode. In This mode is good for cleaning the edges and AUTO Cleaning Mode, DEEBOT cleans in corners of a room.
  • Page 15: Intelligent Scheduling

    3. Operating and Programming 3.4 Intelligent Scheduling DEEBOT has an Intelligent Scheduling function. DEEBOT can be scheduled to clean once per day at the same time, even If nobody is at home. * All scheduled cleanings are performed in AUTO Cleaning Mode. Set Intelligent Scheduling Press the Auto Mode Button on DEEBOT twice or press the Intelligent Scheduling Button on the Remote Control to set the current time as the scheduled cleaning time.
  • Page 16: Alarm Indicator And Sounds

    3. Operating and Programming 3.5 Alarm Indicator and Sounds If DEEBOT detects a problem and needs your assistance, it emits alarm beeps and the AUTO Mode Button flashes RED. Alarm Sound Problems Solution Check Driving Wheels for tangled hair or One Beep Driving Wheel Malfunction debris and clean as described in section...
  • Page 17: Maintenance

    4. Maintenance * Before performing cleaning and maintenance, power OFF DEEBOT and unplug the Charging Dock. 4.1 Dust Bin and Filters Open the robot’s Top Cover and remove the Remove the filters. Pat the High Efficiency Dust Bin. Open the Dust Bin Lock and empty Filter clean.
  • Page 18: Washable/Reusable Microfiber Cleaning Cloth And Cleaning Cloth Plate

    4. Maintenance 4.2 Washable/Reusable Microfiber Cleaning Cloth and Cleaning Cloth Plate Remove the Cleaning Cloth Plate from Wash the Cleaning Cloth by hand, and lay DEEBOT and remove the Cleaning Cloth. flat to dry. Wipe the Cleaning Cloth Plate with a dry cloth.
  • Page 19: Suction Intake And Side Brushes

    4. Maintenance 4.3 Suction Intake and Side Brushes Wipe the Suction Intake with a dry cloth. Remove the Side Brushes and wipe the Side Brushes and their slots with a clean cloth. 4.4 Other Components Clean the Universal Wheel by removing any Wipe the Anti-Drop Sensors with a dry cloth hair tangled around it.
  • Page 20: Troubleshooting

    5. Troubleshooting Please use this chart to troubleshoot common problems using DEEBOT. Malfunction Possible Causes Solutions DEEBOT is not powered ON. DEEBOT will not charge unless it is powered Move the robot's Bottom Power Switch ON while on the Charging to the ON position.
  • Page 21 5. Troubleshooting Malfunction Possible Causes Solutions Intelligent Scheduling Please refer to section 3.4 Intelligent function is cancelled. Scheduling Function for details. DEEBOT is powered OFF. Power ON DEEBOT. Keep DEEBOT powered ON and on DEEBOT will not The robot's battery is low. the Charging Dock to make sure it clean automatically has full battery to work at any time.
  • Page 22 Herzlichen Glückwunsch zum Kauf Ihres neuen DEEBOT von ECOVACS ROBOTICS! Wir hoffen, dass er viele Jahre lang zu Ihrer vollen Zufriedenheit arbeiten wird. Wir sind sicher, dass er Ihnen dabei helfen wird, Ihr Zuhause sauber zu halten, während Sie Ihre wertvolle Zeit für die angenehmen Dinge im Leben nutzen.
  • Page 23 Inhalt 1. Wichtige Sicherheitshinweise..............22 2. Packungsinhalt und technische Daten............25 2.1 Packungsinhalt..................25 2.2 Technische Daten..................25 2.3 Produktübersicht..................26 3. Bedienung und Programmierung..............28 3.1 Vor dem Reinigen..................28 3.2 Kurzanleitung...................29 3.3 Wahl des Reinigungsmodus..............32 3.4 Intelligente Programmierung..............33 3.5 Alarmanzeigen und -töne................34 4. Wartung......................35 4.1 Staubbehälter und Filter................35 4.2 Wasch- und wiederverwendbares Mikrofaser-Reinigungstuch und Reinigungstuchplatte................36 4.3 Einsaugöffnung und Seitenbürsten............37...
  • Page 24: Wichtige Sicherheitshinweise

    1. Wichtige Sicherheitshinweise Beim Gebrauch eines elektrischen Gerätes sind einige grundlegende Sicherheitshinweise zu beachten. Dazu gehören auch die folgenden Hinweise: LESEN SIE ALLE ANWEISUNGEN VOR GEBRAUCH DIESES GERÄTES. BEWAHREN SIE DIESE ANWEISUNGEN AUF. 1. Dieses Gerät ist zur Verwendung durch Kinder ab 8 Jahren und Personen mit eingeschränkten physischen, sensorischen oder geistigen Fähigkeiten oder fehlenden Erfahrungen und Kenntnissen geeignet, sofern sie beaufsichtigt werden oder angeleitet werden,...
  • Page 25 1.Wichtige Sicherheitshinweise 13. Verwenden Sie das Gerät nicht auf nassen Flächen oder auf Flächen, auf denen Wasser steht. 14. Achten Sie darauf, dass das Gerät keine größeren Gegenstände wie Steine, große Papierstückchen oder sonstige Gegenstände, die das Gerät verstopfen könnten, aufnimmt. 15.
  • Page 26 28. Wenn die Ladestation für längere Zeit nicht verwendet wird, ist sie vom Stromnetz zu trennen. 29. Verwenden Sie das Gerät immer gemäß den Anweisungen in dieser Bedienungsanleitung. ECOVACS ROBOTICS übernimmt keine Haftung für Verletzungen und Schäden, die durch unsachgemäße Nutzung entstehen.
  • Page 27: Packungsinhalt Und Technische Daten

    2. Packungsinhalt und technische Daten 2.1 Packungsinhalt Instruction Manual Fernbedienung mit Roboter Ladestation Knopfzelle (4) Seitenbürsten (2) Wasch- und Reinigungstuchplatte Austauschbarer wiederverwendbare Feinstaubfilter + Mikrofaser- Filterschwamm Reinigungstücher 2.2 Technische Daten Modell DK560 Betriebsspannung 12V DC Nennleistung Ni-MH 12 V DC, Akkumodell DK560-BYD Akkuspezifikationen...
  • Page 28: Produktübersicht

    2. Packungsinhalt und technische Daten 2.3 Produktübersicht Roboter 1. Kollisionsschutzsensoren 8. Seitenbürsten 2. Bedienfeld 9. Einsaugöffnung 3. Obere Abdeckung 10. Antriebsräder 4. Infrarot-Empfänger für Fernbedienung 11. Betriebsschalter auf der Unterseite 5. Absturzsensoren 12. Öffnungen für Reinigungstuchplatte 6. Universalrad 13. Akkufachabdeckung 7.
  • Page 29 2. Packungsinhalt und technische Daten Fernbedienung 1. Taste für Reinigung im AUTO-Modus 2. Richtungssteuerungstasten 3. START-/PAUSE-Taste 4. Taste für Rückkehr zur Ladestation 5. Taste für Punktreinigung 6. Taste für Randreinigung 7. aste zur intelligenten Programmierung 8. Infrarotsender Staubbehälter 1. Staubbehältergriff 4.
  • Page 30: Bedienung Und Programmierung

    3. Bedienung und Programmierung 3.1 Vor dem Reinigen Nehmen Sie sich vor Gebrauch des DEEBOT einen Moment Zeit, um den zu reinigenden Bereich sorgfältig zu kontrollieren und eventuell vorhandene Hindernisse zu entfernen. E n t f e r n e n S i e S t r o m k a b e l u n d k l e i n e Das Gerät ist nicht für den Einsatz auf Gegenstände, in denen sich das Gerät verfangen Teppichen geeignet.
  • Page 31: Kurzanleitung

    3. Bedienung und Programmierung 3.2 Kurzanleitung Aufstellen der Ladestation Stellen Sie die Ladestation auf einer ebenen Bodenfläche senkrecht an die Wand. Halten Sie die unmittelbare Umgebung in einem Abstand von 1,5 m vor der Ladestation und 0,5 m seitlich davon frei von Gegenständen und reflektierenden Oberflächen von Objekten wie zum Beispiel Spiegeln usw.
  • Page 32 3. Bedienung und Programmierung Aufladen des DEEBOT Setzen Sie den DEEBOT in die Ladestation und vergewissern Sie sich, dass sich die Kontakte der Ladestation und die Ladekontakte des DEEBOT berühren. Laden Sie den DEEBOT vor dem ersten Gebrauch mindestens 4 Stunden lang auf. Stellen Sie vor dem Laden sicher, dass der Betriebsschalter auf der Unterseite des Roboters auf EIN steht.
  • Page 33: Ausschalten Des Geräts

    3. Bedienung und Programmierung Start D r ü c k e n S i e d e n S c h a l t k n o p f A U T O - Modus auf dem DEEBOT oder auf der Fernbedienung.
  • Page 34: Wahl Des Reinigungsmodus

    3. Bedienung und Programmierung 3.3 Wahl des Reinigungsmodus Um unterschiedliche Böden möglichst effektiv mit dem DEEBOT reinigen zu können, sind verschiedene Reinigungsmodi wählbar. Die Reinigungsmodi werden über die Fernbedienung angewählt. Reinigung im AUTO-Modus Randreinigungs-Modus Dies ist der gebräuchlichste Reinigungsmodus. Diese Betriebsart eignet sich besonders gut für die Im AUTO-Modus bewegt sich der DEEBOT Reinigung von Ecken und Rändern in einem Raum.
  • Page 35: Intelligente Programmierung

    3. Bedienung und Programmierung 3.4 Intelligente Programmierung Der DEEBOT verfügt über eine Funktion zur intelligenten Programmierung. Der DEEBOT kann so programmiert werden, dass er einmal pro Tag immer zur selben Uhrzeit reinigt, selbst wenn niemand zu Hause ist. * Sämtliche programmierten Reinigungsvorgänge erfolgen im AUTO-Modus. Intelligente Programmierung aktivieren Drücken Sie auf dem DEEBOT zweimal den Schaltknopf Auto-Modus oder drücken Sie die Taste Intelligente Programmierung auf der Fernbedienung, um die aktuelle Uhrzeit als programmierte...
  • Page 36: Alarmanzeigen Und -Töne

    3. Bedienung und Programmierung 3.5 Alarmanzeige und -töne Falls der DEEBOT eine Störung entdeckt und Ihre Unterstützung benötigt, wird ein Alarmton ausgegeben und der Schaltknopf AUTO-Modus blinkt ROT. Alarmton Störung Lösung Prüfen Sie die Antriebsräder auf verknotete Haare und Verunreinigungen Ein Piepton Antriebsradstörung und reinigen Sie diese wie in Abschnitt 4...
  • Page 37: Wartung

    4. Wartung * Schalten Sie den DEEBOT aus und trennen Sie die Ladestation vom Netz, bevor Sie Reinigungs- oder Wartungsarbeiten am Gerät durchführen. 4.1 Staubbehälter und Filter Öffnen Sie die obere Abdeckung des Roboters Entfernen Sie die Filter. Klopfen Sie den und nehmen Sie den Staubbehälter heraus.
  • Page 38: Wasch- Und Wiederverwendbares Mikrofaser-Reinigungstuch Und

    4. Wartung 4.2 Wasch- und wiederverwendbares Mikrofaser-Reinigungstuch und Reinigungstuchplatte Entfernen Sie die Reinigungstuchplatte Waschen Sie das Reinigungstuch von v o m D E E B O T u n d n e h m e n S i e d a s Hand und breiten Sie es anschließend zum Reinigungstuch ab.
  • Page 39: Einsaugöffnung Und Seitenbürsten

    4. Wartung 4.3 Einsaugöffnung und Seitenbürsten Wischen Sie die Einsaugöffnung mit einem Entfernen Sie die Seitenbürsten und wischen Sie die Seitenbürsten und die dazugehörigen trockenen Tuch ab. Öffnungen mit einem sauberen Tuch ab. 4.4 Sonstige Bauteile Reinigen Sie das Universalrad, indem Sie Haare Wischen Sie die Absturzsensoren mit einem trockenen entfernen, die sich daran verfangen haben.
  • Page 40: Fehlerbehandlung

    5. Fehlerbehandlung Diese Übersicht dient der Behebung allgemeiner Störungen am DEEBOT. Funktionsstörung Mögliche Ursachen Fehlerbehebung Der DEEBOT ist nicht eingeschaltet. Der DEEBOT wird nicht aufgeladen, wenn er sich auf der Schalten Sie den Betriebsschalter auf der Ladestation befindet und Unterseite des Roboters EIN. nicht eingeschaltet ist, selbst wenn der Schaltknopf AUTO- Modus blinkt.
  • Page 41 5. Fehlerbehandlung Funktionsstörung Mögliche Ursachen Fehlerbehebung Die Funktion Intelligente Weitere Einzelheiten hierzu finden Programmierung wurde Sie in Abschnitt 3.4 Intelligente deaktiviert. Programmierung. Der DEEBOT ist Schalten Sie den DEEBOT EIN. ausgeschaltet. Der DEEBOT Lassen Sie den DEEBOT startet den eingeschaltet in der Ladestation, Der Akkuladestand ist Reinigungsvorgang um sicherzugehen, dass der Akku...
  • Page 42 Si encuentra algún problema al usar su robot, póngase en contacto con el servicio de atención al cliente. Un técnico atenderá su problema o duda específica. Para obtener más información, visite la web oficial de ECOVACS ROBOTICS: www.ecovacs.com La compañía se reserva el derecho a realizar cambios tecnológicos o de diseño en sus productos para una continua mejora.
  • Page 43 Índice 1. Instrucciones importantes de seguridad..........42 2. Contenido de la caja y especificaciones técnicas........45 2.1 Contenido de la caja................45 2.2 Especificaciones..................45 2.3 Esquema del producto................46 3. Funcionamiento y programación...............48 3.1 Observaciones antes de limpiar...............48 3.2 Inicio rápido.....................49 3.3 Selección del modo de limpieza...............52 3.4 Programación inteligente.................53 3.5 Indicador de alarma y sonidos..............54 4.
  • Page 44: Instrucciones Importantes De Seguridad

    1. Instrucciones importantes de seguridad Al usar un dispositivo eléctrico, observe siempre las precauciones básicas de seguridad, incluidas las que se indican a continuación: ANTES DE USAR ESTE DISPOSITIVO, LEA ATENTAMENTE TODAS LAS INSTRUCCIONES.CONSERVE ESTAS INSTRUCCIONES 1. Este aparato puede ser utilizado por niños mayores de 8 años y personas con capacidades físicas, sensoriales o mentales reducidas, o cualquier persona sin experiencia y conocimiento sobre este tipo de dispositivos, siempre que se les supervise o se les haya instruido sobre...
  • Page 45 1. Instrucciones importantes de seguridad 13. No use el dispositivo sobre superficies mojadas ni con agua estancada. 14. No permita que el dispositivo aspire objetos de gran tamaño, como piedras, trozos grandes de papel o cualquier otro objeto que pueda causar obstrucciones.
  • Page 46 28. Si no prevé usar la estación de carga durante un tiempo prolongado, desenchúfela. 29. El dispositivo se debe usar respetando lo establecido en este manual de usuario. ECOVACS ROBOTICS no asume ninguna responsabilidad por los daños o lesiones causados por un uso inadecuado. AVISO: Para cargar la batería, utilice únicamente la unidad de...
  • Page 47: Contenido De La Caja Y Especificaciones Técnicas

    2. Contenido de la caja y especificaciones técnicas 2.1 Contenido de la caja Instruction Manual Mando a distancia Robot Estación de carga Manual de con pila de botón instrucciones (4) Cepillos laterales (2) Paños de limpieza Bandeja del paño de Filtro de alta de microfibra lavables y limpieza...
  • Page 48: Esquema Del Producto

    2. Contenido de la caja y especificaciones técnicas 2.3 Esquema del producto Robot 1. Sensores anticolisión 8. Cepillos laterales 2. Panel de control 9. Entrada de polvo 3. Tapa 10. Rueda universal 4. Receptor de infrarrojos 11. Interruptor de alimentación inferior para el mando a distancia 12.
  • Page 49: Mando A Distancia

    2. Contenido de la caja y especificaciones técnicas Mando a distancia 1. Botón del modo automático 2. Botones del control de dirección 3. Botón de INICIO/PAUSA 4. Botón del modo de retorno al cargador 5. Botón del modo de limpieza localizada 6.
  • Page 50: Funcionamiento Y Programación

    3. Funcionamiento y programación 3.1 Observaciones antes de limpiar Antes de utilizar el DEEBOT, dedique un momento a inspeccionar el área que va a limpiar y retire cualquier obstáculo presente. Retire del suelo los cables de alimentación Este producto no es apto para alfombras. Antes y los objetos pequeños que puedan quedar de utilizar este producto en un área cercana a una enredados en el dispositivo.
  • Page 51: Inicio Rápido

    3. Funcionamiento y programación 3.2 Inicio rápido Colocación de la estación de carga Coloque la estación de carga contra la pared, sobre una superficie nivelada y con la base en posición perpendicular al suelo. Deje un espacio libre de 1,5 m (5') delante del cargador y de 0,5 m (1,6') a ambos lados de este y cerciórese de que la zona esté...
  • Page 52 3. Funcionamiento y programación Carga del DEEBOT Coloque el DEEBOT en la estación de carga y compruebe que la conexión entre los contactos de carga del DEEBOT y los de la estación de carga sea correcta. Antes de utilizar el DEEBOT por primera vez, cárguelo al menos durante 4 horas.
  • Page 53 3. Funcionamiento y programación Arranque Pulse el botón de modo automático en el mando a distancia. El DEEBOT comenzará a funcionar inmediatamente en el modo de limpieza automática. Para seleccionar otro modo de limpieza, consulte el apartado 3.3 "Selección del modo de limpieza"...
  • Page 54: Selección Del Modo De Limpieza

    3. Funcionamiento y programación 3.3 Selección del modo de limpieza El DEEBOT ofrece varios modos de limpieza para limpiar de manera eficiente distintos tipos de suelos. Los modos de limpieza se seleccionan mediante el mando a distancia. Modo de limpieza automática Modo de limpieza de rincones Este es el modo que más se utiliza de forma Este modo es adecuado para la limpieza de...
  • Page 55: Programación Inteligente

    3. Funcionamiento y programación 3.4 Programación inteligente El DEEBOT dispone de una función de programación inteligente. El DEEBOT puede programarse para limpiar una vez al día, a una hora determinada, incluso si no hay nadie en casa. * Todas las limpiezas programadas se llevan a cabo en el modo de limpieza automática. Ajuste de la programación inteligente Pulse el botón de modo automático del DEEBOT dos veces o el botón de programación inteligente del mando a distancia para ajustar la hora de limpieza programada.
  • Page 56: Indicador De Alarma Y Sonidos

    3. Funcionamiento y programación 3.5 Indicador de alarma y sonidos Si el DEEBOT detecta un problema para el que requiera la intervención del usuario, emitirá unos pitidos de alarma y el botón de modo automático parpadeará de color rojo. Sonido de la alarma Problemas Solución Compruebe las ruedas de propulsión en...
  • Page 57: Mantenimiento

    4. Mantenimiento * Antes de realizar cualquier tarea de limpieza y mantenimiento, apague el DEEBOT y desenchufe la estación de carga. 4.1 Recipiente para el polvo y filtros Abra la tapa superior del robot y extraiga Extraiga los filtros. Golpee suavemente con el recipiente para polvo.
  • Page 58: Paño De Limpieza De Microfibra Lavable Y Reutilizable Y Bandeja Del Paño De

    4. Mantenimiento 4.2 Paño de limpieza de microfibra lavable y reutilizable y bandeja del paño de limpieza Retire la bandeja del paño de limpieza del Lave a mano el paño de limpieza y extiéndalo DEEBOT y extraiga el paño. para que se seque al aire. Limpie la bandeja del paño de limpieza con un trapo seco.
  • Page 59: Entrada De Polvo Y Cepillos Laterales

    4. Mantenimiento 4.3 Entrada de polvo y cepillos laterales Limpie la entrada de polvo con un trapo Retire los cepillos laterales y limpie los cepillos laterales y sus ranuras con un trapo seco. limpio. 4.4 Otros componentes Limpie la rueda universal retirando los pelos Limpie los sensores anticaída con un trapo que pueda tener enredados.
  • Page 60: Solución De Problemas

    5. Solución de problemas Consulte la tabla siguiente para solucionar problemas habituales del DEEBOT. N.º Problema Posibles causas Soluciones El DEEBOT no está encendido. El DEEBOT no se carga si no está Coloque el interruptor de alimentación encendido y colocado inferior del robot en la posición de en la estación de carga, encendido.
  • Page 61 5. Solución de problemas N.º Problema Posibles causas Soluciones La función de Consulte la sección 3.4 programación inteligente Programación inteligente para más se ha cancelado. detalles. El DEEBOT está apagado. Encienda el DEEBOT. Mantenga el DEEBOT encendido y El DEEBOT en la base de carga para asegurarse no funciona La batería está...
  • Page 62 élicitations pour l'achat de votre robot ECOVACS ROBOTICS DEEBOT ! Nous espérons qu'il vous apportera entière satisfaction pendant de nombreuses années. L'achat de ce nouveau robot vous aidera à entretenir votre maison et vous permettra de libérer du temps pour d'autres activités.
  • Page 63 Table des matières 1. Consignes de sécurité importantes............62 2. Contenu de l'emballage et spécifications techniques......65 2.1 Contenu de l'emballage................65 2.2 Spécifications..................65 2.3 Schéma du produit...................66 3. Fonctionnement et programmation............68 3.1 Remarques avant le nettoyage..............68 3.2 Démarrage rapide..................69 3.3 Sélection du mode de nettoyage..............72 3.4 Planification intelligente................73 3.5 Indicateur d'alarme et sons..............74 4.
  • Page 64: Consignes De Sécurité Importantes

    1. Consignes de sécurité importantes Lors de l'utilisation d'un appareil électrique, des précautions de base doivent toujours être respectées, dont les suivantes : LIRE TOUTES LES INSTRUCTIONS AVANT D'UTILISER CET APPAREIL. CONSERVER CES INSTRUCTIONS 1. Cet appareil peut être utilisé par des enfants à partir de 8 ans, ainsi que par des personnes dont les facultés physiques, sensorielles ou mentales sont diminuées, ou bien qui manquent d'expérience et de connaissances, à...
  • Page 65 1. Consignes de sécurité importantes 14. Ne pas laisser l'appareil ramasser des objets volumineux comme des pierres, de gros morceaux de papier ou tout élément susceptible de l'obstruer. 15. Ne pas utiliser l'appareil pour ramasser des matériaux inflammables ou combustibles (essence et toners d'imprimante ou de photocopieur, par exemple) ni dans des endroits où...
  • Page 66 1. Consignes de sécurité importantes 29. L'appareil doit être utilisé conformément aux instructions figurant dans ce manuel d'instructions. ECOVACS ROBOTICS ne peut être tenu responsable de tout dommage ou préjudice causé par une utilisation incorrecte. AVERTISSEMENT: N’utiliser que l'unité d'alimentation amovible CH1465A fournie avec cet appareil pour recharger la batterie.
  • Page 67: Contenu De L'emballage Et Spécifications Techniques

    2. Contenu de l'emballage et spécifications techniques 2.1 Contenu de l'emballage Instruction Manual Télécommande avec Robot Station de charge Manuel d'instructions pile bouton (4) Brosses latérales (2) Chiffons de Plaque de chiffon de Filtre haute efficacité nettoyage en nettoyage + filtre éponge de microfibre lavables/ remplacement réutilisables...
  • Page 68: Entretien

    4. Entretien 4.3 Tête d’aspiration et brosses latérales Essuyer la tête d’aspiration avec un chiffon Retirer les brosses latérales et les essuyer, ainsi que leurs emplacements avec un sec. chiffon propre. 4.4 Autres composants Nettoyer la roue universelle en ôtant les Essuyer les capteurs antichute avec un cheveux ou poils qui y seraient emmêlés.
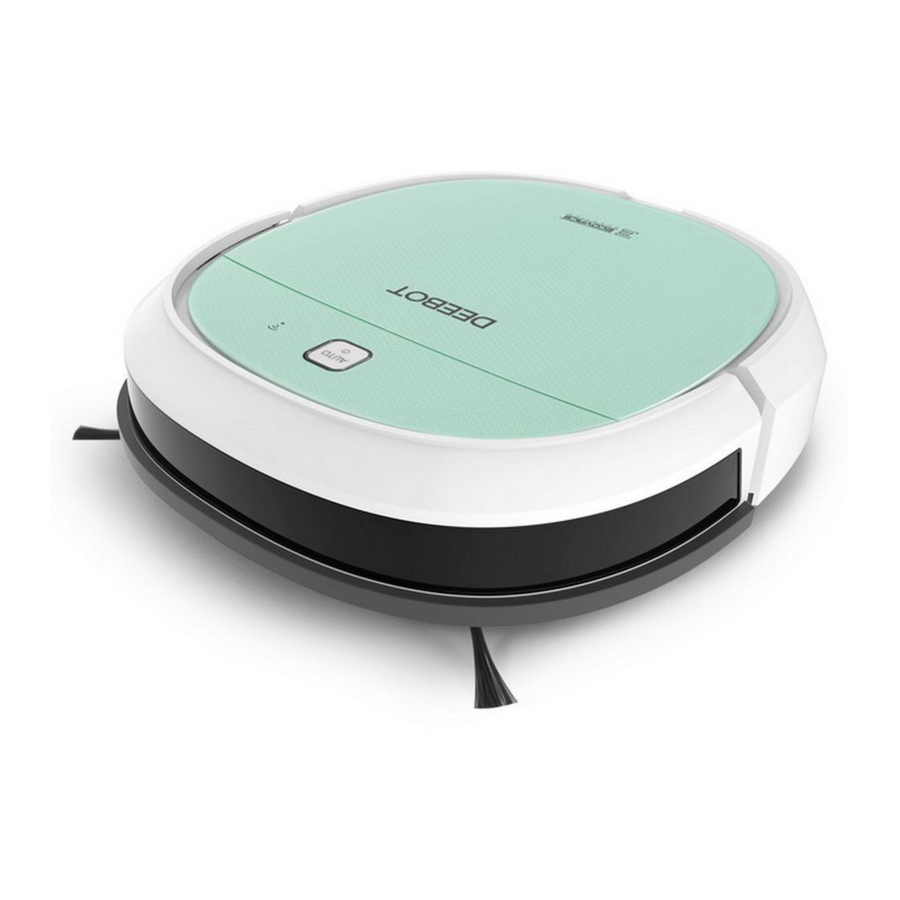
  • Page 69: Schéma Du Produit

    2. Contenu de l'emballage et spécifications techniques 2.3 Schéma du produit Robot 1. Capteurs anticollision 8. Brosses latérales 2. Panneau de commande 9. Tête d'aspiration 3. Capot supérieur 10. Roues motrices 4. Récepteur infrarouge pour télécommande 11. Commutateur d'alimentation à la base du robot 5.
  • Page 70: Télécommande

    2. Contenu de l'emballage et spécifications techniques Télécommande 1. Bouton de mode automatique 2. Boutons de commande de direction 3. Bouton MARCHE/PAUSE 4. Bouton de mode de retour au chargeur 5. Bouton de mode de nettoyage localisé 6. Bouton de mode de nettoyage des bords 7.
  • Page 71: Fonctionnement Et Programmation

    3. Fonctionnement et programmation 3.1 Remarques avant le nettoyage Avant d'utiliser le robot DEEBOT, prendre le temps d'examiner la zone à nettoyer et d'enlever tous les obstacles. Retirer les cordons d'alimentation et les petits L’appareil n'est pas adapté à une utilisation sur tapis objets présents sur le sol et susceptibles de de haute laine.
  • Page 72: Démarrage Rapide

    3. Fonctionnement et programmation 3.2 Démarrage rapide Positionnement de la station de charge PPlacer la station de charge sur une surface plane contre le mur, base perpendiculaire au sol. Ne placer aucun objet ni aucune surface réfléchissante (des miroirs, par exemple) à 1,5 m (5 pi) à...
  • Page 73 3. Fonctionnement et programmation Charge du robot DEEBOT Placer le robot DEEBOT sur la station de charge en veillant à ce que les contacts de charge du robot DEEBOT et les broches de la station de charge soient connectés. Charger le robot DEEBOT pendant au moins 4 heures avant la première utilisation.
  • Page 74: Démarrage

    3. Fonctionnement et programmation Démarrage Appuyer sur le bouton de mode automatique du DEEBOT ou sur la télécommande. Le robot DEEBOT commence à travailler immédiatement en mode de nettoyage automatique. Pour choisir un autre mode de nettoyage, se reporter à la section 3.3 « Sélection du mode de nettoyage »...
  • Page 75: Sélection Du Mode De Nettoyage

    3. Fonctionnement et programmation 3.3 Sélection du mode de nettoyage Le robot DEEBOT propose plusieurs modes de nettoyage pour nettoyer efficacement tous les sols. Les modes de nettoyage sont sélectionnés à l'aide de la télécommande. Mode de nettoyage automatique Mode de nettoyage des bords Il s'agit du mode le plus souvent utilisé.
  • Page 76: Planification Intelligente

    3. Fonctionnement et programmation 3.4 Planification intelligente Le robot DEEBOT est doté d'une fonction de planification intelligente. Le robot DEEBOT peut être programmé pour nettoyer une fois par jour, à la même heure, même si personne n'est à la maison. * Tous les nettoyages planifiés sont effectués en mode de nettoyage automatique.
  • Page 77: Indicateur D'alarme Et Sons

    3. Fonctionnement et programmation 3.5 Indicateur d'alarme et sons Si le robot DEEBOT détecte un problème et a besoin de votre aide, il émet des bips d'alarme et le bouton de mode automatique clignote en rouge. Son d'alarme Problèmes Solution Vérifier l’absence de cheveux ou autres Dysfonctionnement des débris dans les roues motrices, et si...
  • Page 78: Entretien

    4. Entretien * Pour procéder au nettoyage et à l'entretien du robot DEEBOT, le mettre hors tension et débrancher la station de charge. 4.1 Réservoir à poussière et filtres Ouvrir le capot supérieur du robot DEEBOT et Retirer les filtres. Tapoter le filtre haute retirer le réservoir à...
  • Page 79: Chiffons De Nettoyage Réutilisables/Lavables En Microfibre Et Plaque Du Chiffon De Nettoyage

    4. Entretien 4.2 Chiffons de nettoyage réutilisables/lavables en microfibre et plaque du chiffon de nettoyage Retirer la plaque du chiffon de nettoyage Laver le chiffon de nettoyage à la main et le du robot DEEBOT et retirer le chiffon de faire sécher à...
  • Page 80: Dépannage

    5. Dépannage PUtiliser ce tableau pour identifier et résoudre les problèmes courants liés à l'utilisation du robot DEEBOT. N°. Dysfonctionnement Causes possibles Solutions Le robot DEEBOT n'est pas sous tension. Sous tension. S’il n’est Mettre le commutateur d'alimentation pas sous tension, le robot situé...
  • Page 81 5. Dépannage N°. Dysfonctionnement Causes possibles Solutions Veuillez vous reporter à la section La fonction de planification 3.4 sur la fonctionnalité de intelligente est annulée. planification intelligente pour plus de détails. Le robot DEEBOT est hors Mettre le robot DEEBOT sous tension.
  • Page 82 Para obter mais informações, visite o website oficial da ECOVACS ROBOTICS: www.ecovacs.com A empresa reserva-se o direito de efetuar alterações tecnológicas e/ou de design a este produto no âmbito da melhoria contínua.
  • Page 83 Índice 1. Instruções de segurança importantes............82 2. Conteúdo da embalagem e Especificações técnicas......85 2.1 Conteúdo da embalagem................85 2.2 Especificações..................85 2.3 Diagrama do produto................86 3. Programação e funcionamento..............88 3.1 Notas - Antes de limpar................88 3.2 Início rápido.....................89 3.3 Seleção do modo Limpeza..............92 3.4 Programação inteligente................93 3.5 Indicador de alarme e sons..............94 4.
  • Page 84: Instruções De Segurança Importantes

    1. Instruções de segurança importantes Quando estiver a utilizar um aparelho elétrico, deverão ser sempre tomadas precauções básicas, incluindo o seguinte: LEIA TODAS AS INSTRUÇÕES ANTES DE UTILIZAR ESTE APARELHO. GUARDE ESTAS INSTRUÇÕES 1. Este aparelho pode ser utilizado por crianças a partir dos 8 anos de idade e pessoas com capacidades físicas, sensoriais ou mentais reduzidas ou falta de experiência e conhecimentos, desde que tenham supervisão ou tenham recebido instruções relativamente à...
  • Page 85 28. Quando não utilizar a base de carregamento durante um longo período de tempo, desligue-a. 29. O aparelho deve ser utilizado de acordo com as indicações incluídas neste Manual de instruções. A ECOVACS ROBOTICS não pode ser considerada responsável por quaisquer danos ou ferimentos causados pela utilização inadequada.
  • Page 86 1. Instruções de segurança importantes 30. AVISO: Para recarregar a bateria, utilize apenas a unidade de alimentação amovível CH1465A fornecida com este aparelho. 31. O robô contém baterias que só podem ser substituídas por técnicos qualificados. 32. O telecomando utiliza uma pilha tipo botão CR2032 não recarregável.
  • Page 87: Conteúdo Da Embalagem E Especificações Técnicas

    2. Conteúdo da embalagem e Especificações técnicas 2.1 Conteúdo da embalagem Instruction Manual Telecomando com Robô Base de Manual de pilha tipo botão carregamento instruções (4) Escovas laterais (2) Panos de limpeza Placa do pano de Filtro + filtro de microfibras laváveis/ limpeza da esponja de reutilizáveis...
  • Page 88: Diagrama Do Produto

    2. Conteúdo da embalagem e Especificações técnicas 2.3 Diagrama do produto Robô 1. Sensores anticolisão 8. Escovas laterais 2. Painel de controlo 9. Entrada de sucção 3. Tampa superior 10. Rodas 4. Recetor de infravermelhos para o 11. Interruptor de alimentação inferior telecomando 12.
  • Page 89 2. Conteúdo da embalagem e Especificações técnicas Telecomando 1. Botão do Modo AUTOMÁTICO 2. Botões de controlo direcionais 3. Botão INICIAR/PARAR 4. Botão do Modo voltar ao carregador 5. Botão do Modo de limpeza pontual 6. Botão do Modo de limpeza de arestas 7.
  • Page 90: Programação E Funcionamento

    3. Programação e funcionamento 3.1 Notas antes de limpar Antes de utilizar o DEEBOT, dedique alguns momentos a analisar a área a limpar e retire quaisquer obstáculos. Retire do chão os cabos de alimentação e O produto não é adequado para utilizar os objetos pequenos que se possam enlear em carpetes com pelos compridos.
  • Page 91: Início Rápido

    3. Programação e funcionamento 3.2 Início rápido Colocação da base de carregamento Coloque a base de carregamento numa superfície nivelada contra uma parede, com a base perpendicular ao solo. Mantenha uma área de 1,5 m imediatamente em frente ao carregador e de 0,5 m de ambos os lados livre de quaisquer objetos e superfícies refletoras, tais como espelhos, etc.
  • Page 92 3. Programação e funcionamento Carregar o DEEBOT Coloque o DEEBOT na base de carregamento, certificando-se de que os contactos de carregamento no DEEBOT e os pinos da base de carregamento estabelecem contacto. Carregue o DEEBOT durante, no mínimo, 4 horas antes da primeira utilização. Certifique-se de que o interruptor de alimentação inferior do robô...
  • Page 93 3. Programação e funcionamento Iniciar Prima o botão do modo AUTO no DEEBOT ou no telecomando. O DEEBOT começa a funcionar de imediato no modo de Limpeza AUTOMÁTICA. Para escolher outro modo de limpeza, consulte a secção 3.3 Seleção do modo de limpeza para obter mais informações.
  • Page 94: Seleção Do Modo Limpeza

    3. Programação e funcionamento 3.3 Seleção do modo de limpeza O DEEBOT possui vários modos de limpeza que pode selecionar para uma limpeza eficiente de diferentes tipos de pisos. Os modos de limpeza são selecionados utilizando o telecomando. Modo de limpeza AUTO Modo de limpeza de arestas Este é...
  • Page 95: Programação Inteligente

    3. Programação e funcionamento 3.4 Programação inteligente O DEEBOT possui uma função de Programação inteligente. O DEEBOT pode ser programado para limpar uma vez por dia à mesma hora, mesmo que ninguém esteja em casa. * Todas as limpezas programadas são executadas no modo de limpeza AUTO. Definir a Programação inteligente Prima o botão do modo Auto no DEEBOT duas vezes ou prima o botão de programação inteligente no telecomando para definir a hora atual como a hora de limpeza programada.
  • Page 96: Indicador De Alarme E Sons

    3. Programação e funcionamento 3.5 Indicador de alarme e sons Se o DEEBOT detetar um problema e necessitar de assistência, emite sinais sonoros de alarme e o botão do modo AUTO apresenta-se intermitente a VERMELHO. Som do alarme Problemas Solução Verifique a existência de cabelos enleados ou resíduos nas rodas motrizes Um sinal sonoro...
  • Page 97: Manutenção

    4. Manutenção * Antes de efetuar tarefas de limpeza e manutenção desligue (OFF) o DEEBOT e desligue a base de carregamento. 4.1 Coletor de pó e filtros Abra a tampa superior do robô e retire o Retire os filtros. Limpe o filtro de alta coletor de pó.
  • Page 98: Pano De Limpeza De Microfibras Lavável/Reutilizável E Placa Do Pano De

    4. Manutenção 4.2 Pano de limpeza de microfibras lavável/reutilizável e placa do pano de limpeza Retire a placa do pano de limpeza do Lave o pano de limpeza à mão e coloque DEEBOT e retire o pano de limpeza. numa posição plana para secar. Limpe a placa do pano de limpeza com um pano seco.
  • Page 99: Entrada De Sucção E Escovas Laterais

    4. Manutenção 4.3 Entrada de sucção e escovas laterais Limpe a entrada de sucção com um pano Retire as escovas laterais e limpe-as, bem como as respetivas ranhuras com um pano seco. seco. 4.4 Outros componentes Limpe a roda universal retirando quaisquer Limpe os sensores antiqueda com um pano cabelos enleados que existam.
  • Page 100: Resolução De Problemas

    5. Resolução de problemas Utilize este gráfico para resolver problemas comuns durante a utilização do DEEBOT. N.º Avaria Causas possíveis Soluções O DEEBOT não está ligado . O DEEBOT não carrega a menos que esteja LIGADO Mova o interruptor de alimentação enquanto estiver na base de inferior do robô...
  • Page 101 5. Troubleshooting N.º Avaria Causas possíveis Soluções Consulte a secção 3.4 Função de A função de programação programação inteligente para obter inteligente foi cancelada. detalhes. O DEEBOT está desligado. Ligue o DEEBOT. Mantenha o DEEBOT ligado e O DEEBOT na base de carregamento para não limpa A bateria do robô...
  • Page 102 Centro di assistenza: un tecnico risponderà alle vostre domande e vi aiuterà a risolvere il problema. Per ulteriori informazioni, visitate il sito Web ufficiale di ECOVACS ROBOTICS: www.ecovacs.com L'azienda si riserva il diritto di apportare modifiche migliorative tecniche o di design al prodotto.
  • Page 103 Indice 1. Importanti istruzioni sulla sicurezza ............102 2. Contenuto della confezione e specifiche tecniche.........105 2.1 Contenuto della confezione..............105 2.2 Specifiche....................105 2.3 Diagramma del prodotto................106 3. Funzionamento e programmazione............108 3.1 Note prima della pulizia................108 3.2 Avvio rapido...................109 3.3 Selezione della modalità di pulizia............112 3.4 Programmazione intelligente..............113 3.5 Indicatore e suoni di allarme..............114 4.
  • Page 104: Importanti Istruzioni Sulla Sicurezza

    1. Importanti istruzioni sulla sicurezza Quando si usa un elettrodomestico, è necessario seguire delle precauzioni di base: LEGGERE TUTTE LE ISTRUZIONI PRIMA DI UTILIZZARE L'APPARECCHIO. GUARDE ESTAS INSTRUÇÕES 1. Questo apparecchio può essere usato da bambini di almeno 8 anni e da persone con capacità fisiche, sensoriali o mentali ridotte o da persone che non ne conoscano il corretto utilizzo purché...
  • Page 105 28. Scollegare dalla presa di corrente il dock di ricarica in caso di mancato utilizzo prolungato. 29. L'apparecchio dev'essere utilizzato secondo le indicazioni di questo Manuale d'uso. ECOVACS ROBOTICS non potrà essere ritenuta responsabile per eventuali danni o infortuni causati da un utilizzo inappropriato.
  • Page 106 1. Importanti istruzioni sulla sicurezza 30. AVVISO: per ricaricare la batteria, utilizzare solo l'unità di alimentazione rimovibile CH1465A fornita con l'apparecchio. 31. Il robot contiene batterie sostituibili solo da persone competenti. 32. Il telecomando utilizza batterie a bottone CR2032 non ricaricabili. Per sostituire la batteria del telecomando, capovolgere il telecomando e svitare il coperchio della batteria utilizzando una moneta.
  • Page 107: Contenuto Della Confezione E Specifiche Tecniche

    2. Contenuto della confezione e specifiche tecniche 2.1 Contenuto della confezione Instruction Manual Telecomando con Robot Dock di ricarica Manuale d'uso batteria a bottone (4) Spazzole laterali (2) Panni di pulizia Piatto per panno Filtro di spugna in microfibra lavabili/ di pulizia + filtro ad alta riutilizzabili...
  • Page 108: Diagramma Del Prodotto

    2. Contenuto della confezione e specifiche tecniche 2.3 Diagramma del prodotto Robot 1. Sensori anticollisione 8. Spazzole laterali 2. Pannello di controllo 9. Presa di aspirazione 3. Coperchio superiore 10. Ruote motrici 4. Ricevitore a infrarossi 11. Interruttore di alimentazione inferiore per il telecomando 12.
  • Page 109 2. Contenuto della confezione e specifiche tecniche Telecomando 1. Pulsante Modalità AUTO 2. Pulsanti di controllo direzionali 3. Pulsante AVVIO/PAUSA 4. Pulsante Modalità di ritorno in carica 5. Pulsante Modalità di pulizia circoscritta 6. Pulsante Modalità di pulizia bordi 7. Pulsante di programmazione intelligente 8.
  • Page 110: Funzionamento E Programmazione

    3. Funzionamento e programmazione 3.1 Note prima della pulizia Prima di utilizzare DEEBOT, controllare l'area che andrà pulita e rimuovere qualsiasi ostacolo. Togliere dal pavimento cavi di alimentazione Il prodotto non è adatto per essere utilizzato e piccoli oggetti che potrebbero intralciare il sui tappeti.
  • Page 111: Avvio Rapido

    3. Funzionamento e programmazione 3.2 Avvio rapido Posizionamento del dock di ricarica Posizionare il dock di ricarica su una superficie piana contro il muro, con la base perpendicolare al suolo. Lasciare libero da oggetti e da superfici riflettenti (per esempio, gli specchi) uno spazio pari a 1,5 m di fronte al dock di ricarica e a 0,5 m ai suoi lati.
  • Page 112 3. Funzionamento e programmazione Ricarica di DEEBOT Posizionare DEEBOT sul dock di ricarica assicurandosi che i contatti di ricarica su DEEBOT e i pin del dock di ricarica formino una connessione. Lasciare in carica DEEBOT per almeno 4 ore prima del primo utilizzo. Verificare che l'interruttore di alimentazione inferiore del robot sia acceso (ON) prima di procedere alla ricarica.
  • Page 113 3. Funzionamento e programmazione Avvio Premere il pulsante Modalità AUTO presente su DEEBOT o sul telecomando. DEEBOT inizierà a lavorare immediatamente in modalità di pulizia AUTO. Per scegliere un'altra modalità di pulizia, consultare la sezione 3.3 Selezione della modalità di pulizia, per ulteriori dettagli. Pausa Mettere in pausa DEEBOT premendo il pulsante Modalità...
  • Page 114: Selezione Della Modalità Di Pulizia

    3. Funzionamento e programmazione 3.3 Selezione della modalità di pulizia DEEBOT dispone di molte modalità di pulizia per pulire in maniera efficace diversi tipi di pavimento. È possibile selezionare le modalità di pulizia utilizzando il telecomando. Modalità di pulizia AUTO Modalità...
  • Page 115: Programmazione Intelligente

    3. Funzionamento e programmazione 3.4 Programmazione intelligente DEEBOT è dotato di una funzione di programmazione intelligente. Può essere programmato per pulire automaticamente una volta al giorno, alla stessa ora, anche quando non c'è nessuno in casa. * Tutti gli interventi di pulizia programmati vengono eseguiti in Modalità AUTO. Impostazione della programmazione intelligente Per impostare un determinato orario come momento in cui effettuare la pulizia programmata, premere due volte il pulsante della Modalità...
  • Page 116: Indicatore E Suoni Di Allarme

    3. Funzionamento e programmazione 3.5 Indicatore di allarme e suoni Se DEEBOT rileva un problema e ha bisogno di assistenza, emette dei segnali acustici di allarme e il pulsante della Modalità AUTO lampeggia in ROSSO. Suono di allarme Problemi Soluzione Verificare se nelle ruote motrici si sono Malfunzionamento della impigliati capelli o se è...
  • Page 117: Manutenzione

    4. Manutenzione * Prima di eseguire operazioni di pulizia e manutenzione, spegnere DEEBOT e scollegare il dock di ricarica. 4.1 Cassetta di raccolta e filtri Aprire il coperchio superiore del robot e Rimuovere i filtri. Scuoti delicatamente il filtro rimuovere la cassetta di raccolta. Aprire il ad alta efficienza per pulirlo.
  • Page 118: Panno Di Pulizia In Microfibra Lavabile/Riutilizzabile E Piatto Per Panno

    4. Manutenzione 4.2 Panno di pulizia in microfibra lavabile/riutilizzabile e piatto per panno di pulizia Rimuovere il piatto per panno di pulizia da Lavare a mano il panno di pulizia e disporlo DEEBOT e rimuovere il panno di pulizia. su un piano ad asciugare. Pulire il piatto per panno di pulizia con un panno asciutto.
  • Page 119: Presa Di Aspirazione E Spazzole Laterali

    4. Manutenzione 4.3 Presa di aspirazione e spazzole laterali Pulire la presa di aspirazione con un panno Rimuovere le spazzole laterali, quindi pulire le spazzole e i loro slot con un panno pulito. asciutto. 4.4 Altri componenti Pulire la ruota universale rimuovendo Pulire i sensori anticaduta con un panno eventuali capelli aggrovigliati.
  • Page 120: Risoluzione Dei Problemi

    5. Risoluzione dei problemi Utilizzare questo grafico per risolvere i problemi di utilizzo più comuni relativi a DEEBOT. N° Malfunzionamento Possibili cause Soluzioni DEEBOT non è acceso ON. DEEBOT si ricarica solo se è acceso e posizionato sul dock di Ruotare l'interruttore di alimentazione ricarica;...
  • Page 121 5. Risoluzione dei problemi N° Malfunzionamento Possibili cause Soluzioni La funzione di Fare riferimento alla sezione 3.4 programmazione Funzione di programmazione intelligente è annullata. intelligente, per ulteriori dettagli. DEEBOT è spento. Accendere DEEBOT. Tenere DEEBOT acceso e sul dock DEEBOT non pulirà di ricarica per assicurarsi che sia La batteria del robotè...
  • Page 122: Declaration Of Conformity

    Declaration of Conformity Manufacturer: ECOVACS ROBOTICS Co.,Ltd. Address:No.18, Youxiang Road, Wuzhong District, Suzhou City, Jiangsu Province, China. We hereby declare that the following products listed below are in accordance with the provisions in the latest version of EC in this document.
  • Page 124 DK560-EU01-IM2016R01...

Table des Matières