Chapitres
Table des Matières

Manuels Connexes pour Ultraflex B 501 CH/B


Sommaire des Matières pour Ultraflex B 501 CH/B
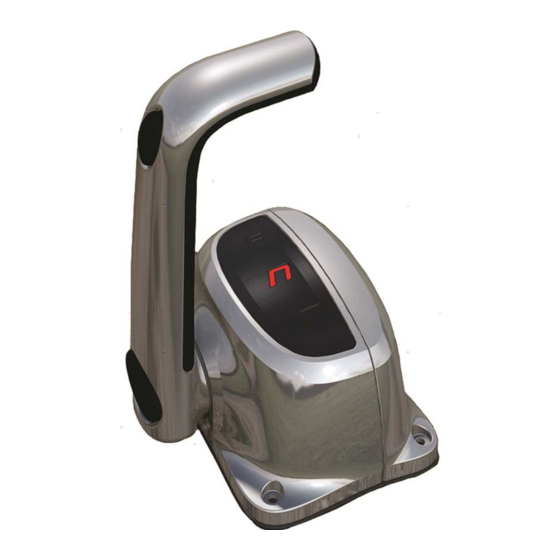
- Page 1 Installation and maintenance manual SINGLE LEVER CONTROL B 501 CHTL/BTL CHL/BL CH/B CHT/BT B 502 CHL/BL CH/B CHT/BT CHTL/BTL PARTNER pag. 25 page. 49 page. 2 (Dr. No. 31859/c 22/01/2018)
- Page 2 Products for pleasure boats are constantly tested to check their conformity with the 2013/53/EU. "ULTRAFLEX has over 80 years of experience in the marine industry and is a world leader in the production of mechanical, hydraulic and electronic steering systems, control boxes and steering wheels for any kind of pleasure, fishing or commercial boats.
-
Page 3: Table Des Matières
ULTRAFLEX Installation and maintenance manual TABLE OF CONTENTS USE OF THIS MANUAL AND SYMBOLS ......................4 INTRODUCTION..........................5 WARRANTY..........................5 SECTION 1 - PRODUCT DESCRIPTION PRODUCT DESCRIPTION AND RECOMMENDATIONS FOR USE..............6 DIMENSIONS............................6 SECTION 2 - TRANSPORT GENERAL WARNINGS..........................7 PACKAGE CONTENTS..........................7 SECTION 3 - INSTALLATION TOOLS REQUIRED............................8... -
Page 4: Use Of This Manual And Symbols
ULTRAFLEX Installation and maintenance manual USE OF THIS MANUAL AND SYMBOLS THE INSTALLATION AND MAINTENANCE MANUAL is the document accompanying the product from sale to replacement and disposal, and should be considered an integral part of the product. Read the manual before undertaking ANY ACTIVITY involving the product, including movement and unloading from the vehicle on which it is delivered. -
Page 5: Introduction
ULTRAFLEX shall not be held liable for any inaccuracies due to printing errors in the manual. Without altering the basic features of the product described ULTRAFLEX reserves the right to make any changes to descriptions, details and illustrations that it may consider appropriate for its improvement or for manufacturing or commercial reasons at any time, without being required to update this publication immediately. -
Page 6: Product Description And Recommendations For Use
They are specifically designed to operate with outboard, stern drive (I/O) and inbord marine propulsion engines. The controls can operate with all Ultraflex cables except the C4; K59 kit is included with both the controls, necessary to install Ultraflex C2, C8, C0, and Mach 0 cables. -
Page 7: General Warnings
ULTRAFLEX Installation and maintenance manual 2 TRANSPORTATION 2.1 General warnings The product and its packaging weigh about 3.4 kg (7.5 pounds) and can therefore be moved by hand. WARNING Personnel handling the load must work with safety gloves and footwear. -
Page 8: Tools Required
Connect the cables to the lever before fixing the lever control to the dashboard. CAUTION The use of a proper killing switch system is recommended for each ULTRAFLEX control system installation. 3.3 Adjustment of the lever inclination 3.3.1 CH/B and CHT/BT versions The lever angular position can be adjusted both forward and backward according to the control position. -
Page 9: Chl/Bl And Chtl/Btl Versions
ULTRAFLEX Installation and maintenance manual 3.3.2 CHL/BL and CHTL/BTL versions Controls with lock in neutral feature allow the possibility to change the lever inclination 15° backward following next steps. This configuration increases the forward stroke of the lever and as consequence raises the throttle mechanism stroke up to 76mm. -
Page 10: Connecting Control Cable
Mount the cable control box on a plane making sure surface as in the cable cylinder (11) is picture (the Ultraflex placed inside the logo on the lever must plate hole (12). be visible). Remove the cable fastener (8) from the plate (9) through the screws (10). - Page 11 ULTRAFLEX Installation and maintenance manual Remount cable fastener (8) to the plate cable fastener (8) on (9) with the screws the plate (9) aligning (10). the cylinder of the connector (11) with the hole of the cable fastener. Measure the engine shift lever stroke from the forward gear to the reverse gear.
-
Page 12: Throttle Cable Connection
ULTRAFLEX Installation and maintenance manual Mount the plate Engage the rod (H) in the way shown (15) on the pin (I). in the picture and fix it with the screw (G) on the hole (16). WARNING Check the right setting of shift cable stroke and make sure that is compliant with the following conditions. -
Page 13: Adjusting The Clutch
ULTRAFLEX Installation and maintenance manual Remount the cable Engage the rod (20) on the pin (21). fastener (8) on the plate (9) aligning the cable cylinder (11) with the hole of the cable fastener. Fix the cable fastener to the plate with the screws (10). - Page 14 ULTRAFLEX Installation and maintenance manual NOTICE FOR B502 with lock feature versions extract the lock housing (22) and disc (5) by unscrewing two ST screws (4), two philips head M screws (23) and a flathead screw (24). NOTICE For B502 with trim feature versions turn upside down the control and untight the 4 ST screws (25) in order to let the trim cover be loose.
- Page 15 ULTRAFLEX Installation and maintenance manual Screw the dowel (31) to obtain the hardening of the clutch, or unscrew it to obtain a smoother movement. To check the friction of the lever, move it clockwise and counter clockwise. THE CLUTCH ADJUSTMENT MUST BE PERFORMED WITH ENGINE TURNED OFF AND THE LEVER IN FULL THROTTLE POSITION.
-
Page 16: Lever Control Box Mounting
ULTRAFLEX Installation and maintenance manual 3.7 Lever control box mounting Put the control box selected position, then insert and thighten the four screws M5x30 (B) with washers (D) and nuts (C). B 501 B 502 3.8 Installation of the neutral safety switch This optional device allows starting the engine only with the shift in neutral position, avoiding unexepected movements of the boat. -
Page 17: Trim Electrical Connections
ULTRAFLEX Installation and maintenance manual Through the slot located on the plate (34), insert the screw (39) in the switch hole through the hole of the plate (35). Insert the nut (40) from the outer side of the plate (35) and tighten the screw (39). - Page 18 ULTRAFLEX Installation and maintenance manual WARNING Before fixing the cables definitively, check that the lever can move freely in all positions. NOTICE The following diagram is only a guideline for the most common engines. For a specific detail of the wiring refer to the manuals of your boat.
-
Page 19: Lever Use
ULTRAFLEX Installation and maintenance manual 4 USE 4.1 Lever use The lever stroke is made up of two movements: operating the shift in the first 30° and the throttle in the rest of the stroke. The boat moves forward when the lever is in forward position, and it moves backward when the lever is put in reverse position. - Page 20 ULTRAFLEX Installation and maintenance manual Twin engines version allow to trim each engine indipendently using the switches on the control body. The buttons on the lever allows to trim both engines at the same time. DOWN STARBOARD UP PORT UP...
-
Page 21: Safety Warnings
5.1 Safety warnings during installation and use OBLIGATORY FOLLOW the precautions and safety criteria indicated below. ULTRAFLEX shall not be held liable for the user's failure to observe these precautions and criteria and shall not be held liable for any negligence in use of the system. -
Page 22: Ordinary Maintenance
ULTRAFLEX Installation and maintenance manual 6 MAINTENANCE 6.1 Ordinary maintenance WARNING Failure to apply maintenance controls may result in loss of control when driving, which can result in damage to property and/or injury. Maintenance requirements will vary depending on climate and frequency and type of use. Inspections must be conducted at least every two years by an experienced nautical mechanic. - Page 23 ULTRAFLEX Installation and maintenance manual NOTES page 23 of 71 SINGLE LEVER CONTROL B501 AND B502...
- Page 24 ULTRAFLEX Installation and maintenance manual NOTES page 24 of 71 - SINGLE LEVER CONTROL B501 AND B502...
- Page 25 Manuale di installazione e manutenzione COMANDO MONOLEVA B 501 CHTL/BTL CHL/BL CH/B CHT/BT B 502 CHL/BL CH/B CHT/BT CHTL/BTL SOCIO...
- Page 26 Gentile Cliente, La ringraziamo per aver scelto un prodotto ULTRAFLEX. ULTRAFLEX è da anni un punto di riferimento nei sistemi di guida nel settore della nautica da diporto e professionale. Da sempre la produzione ULTRAFLEX è sinonimo di grande affidabilità e sicurezza.
- Page 27 ULTRAFLEX Manuale di installazione e manutenzione INDICE GENERALE USO DEL MANUALE E SIMBOLOGIA IMPIEGATA..,,................28 LETTERA INFORMATIVA.............,,,,,................29 GARANZIA..............,,,,,,,,,,,,,,,,,,,,,,,,,,,,,,,,,,,,,,,,,,,,,,,,,,,,,,...............29 SEZIONE 1 - DESCRIZIONE DEL PRODOTTO DESCRIZIONE DEL PRODOTTO E RACCOMANDAZIONI SULL'UTILIZZO..........30 DIMENSIONI............................30 SEZIONE 2 - TRASPORTO AVVERTENZE GENERALI...........................31 CONTENUTO IMBALLO..........................31 SEZIONE 3 - INSTALLAZIONE UTENSILI NECESSARI..........................32...
-
Page 28: Uso Del Manuale E Simbologia Impiegata
ULTRAFLEX Manuale di installazione e manutenzione USO DEL MANUALE E SIMBOLOGIA IMPIEGATA Il MANUALE DI INSTALLAZIONE E MANUTENZIONE è il documento che accompagna il prodotto dal momento della sua vendita fino alla sua sostituzione e smaltimento. Risulta cioè essere parte integrante dello stesso. -
Page 29: Lettera Informativa
GARANZIA ULTRAFLEX garantisce che i suoi prodotti sono costruiti a regola d'arte e che sono privi di difetti di fabbricazione e di materiali. Questa garanzia è valida per un periodo di due anni decorrenti dalla data di fabbricazione dei prodotti ad eccezione dei casi in cui questi siano installati ed usati su barche da lavoro o comunque su barche ad utilizzo commerciale, nel qual caso la garanzia è... -
Page 30: Descrizione Del Prodotto E Raccomandazioni Sull'utilizzo
Sono adatti a qualsiasi tipo d'imbarcazione con motore fuoribordo, entrobordo ed entro-fuoribordo. Le scatole di comando possono utilizzare tutti i cavi Ultraflex per il comando motore ad eccezione di C4; in dotazione con entrambi i modelli viene incluso il kit K59, necessario per il collegamento dei cavi Ultraflex C2, C8, C0, Mach 0. -
Page 31: Avvertenze Generali
ULTRAFLEX Manuale di installazione e manutenzione 2 TRASPORTO 2.1 Avvertenze generali Il peso della singola leva con il suo imballo è 3,4Kg (7,5 pounds) e quindi la sua movimentazione può essere effettuata manualmente. AVVERTENZA Il personale addetto alla manipolazione del carico deve operare con guanti protettivi e scarpe antinfortunistiche. -
Page 32: Utensili Necessari
Collegare i cavi alla scatola prima di fissare il gruppo di comando sulla plancia. ATTENZIONE Per tutte le istallazioni di scatole di comando ULTRAFLEX, si raccomanda l'utilizzo di un adeguato sistema killing switch. 3.3 Regolazione dell'inclinazione della leva 3.3.1 Versioni CH/B e CHT/BT In funzione del posizionamento del comando, è... -
Page 33: Versioni Chl/Bl E Chtl/Btl
ULTRAFLEX Manuale di installazione e manutenzione 3.3.2 Versioni CHL/BL e CHTL/BTL I comandi con blocco in neutro consentono di modificare l'inclinazione della leva di 15° indietro seguendo le fasi descritte di seguito. Tale configurazione aumenta la corsa in avanti della leva e di conseguenza anche quella del comando acceleratore fino a 76mm. -
Page 34: Posizionamento Dei Cavi Di Controllo
3.5.1 Collegamento del cavo per il controllo dell'invertitore Collocare la scato- Collegare il cavo la di comando su di un in modo che l'ele- piano (il logo Ultraflex mento cilindrico del presente sul mozzo connettore (11) sia della leva sia rivolto calzato all'interno del verso l'alto). - Page 35 ULTRAFLEX Manuale di installazione e manutenzione Ricollocare Assicurare fermaguaina (8) alla fermaguaina (8) sulla piastra (9) serrando le piastra (9) allineando viti (10). l'elemento cilindrico del connettore (11) con il foro del ferma- guaina. Misurare sul motore la corsa che compie la levetta dell'invertitore da marcia avanti a marcia indietro.
-
Page 36: Collegamento Del Cavo Per Il Controllo Del Gas
ULTRAFLEX Manuale di installazione e manutenzione Montare la pia- Innestare l'astina strina (H) nel verso (14) sul perno (I). mostrato in figura e bloccarla avvitando la vite (G) sul foro del perno (15) del bilan- ciere. AVVERTENZA Verificare la corretta regolazione della corsa dell'invertitore, accertandosi che sia rispettata la seguente... -
Page 37: Regolazione Del Dispositivo Di Frizionamento
ULTRAFLEX Manuale di installazione e manutenzione Ricollocare Innestare il puntale (20) sul perno (21). fermaguaina (8) sulla piastra (9)allineando l'elemento cilindrico del connettore (11) con il foro del fermaguaina. Assicurare il ferma- guaina alla piastra serrando le tre vit (10). Per il COMANDO... - Page 38 ULTRAFLEX Manuale di installazione e manutenzione NOTA Per i modelli B502 con blocco, estrarre la sede del blocco (22) e il disco (5) svitando le due viti autofilettanti (4), le due viti Phillips (23) e la vite a testa piatta (25).
- Page 39 ULTRAFLEX Manuale di installazione e manutenzione Mediante cacciavite stringere il grano (31) per ottenere l'indurimento della frizione, oppure svitarlo per ottenere un movimento più morbido. Per verificare il grado di frizionamento della leva, muovere la stessa alternativamente in direzione oraria e antioraria. LA REGOLAZIONE DELLE FRIZIONE DEVE ESSERE ESEGUITA A MOTORE SPENTO, PORTANDO LA LEVA IN POSIZIONE DI MASSIMA ACCELERAZIONE.
-
Page 40: Fissaggio Della Scatola Di Comando Alla Plancia
ULTRAFLEX Manuale di installazione e manutenzione 3.7 Fissaggio della scatola di comando alla plancia Inserire la scatola comando nella posizione prescelta dopodiché inserire e avvitare le quattro viti M5x30 (B) con le rela- tive rondelle (D) e dadi autobloccanti (C). -
Page 41: Collegamenti Elettrici Trim
ULTRAFLEX Manuale di installazione e manutenzione Attraverso l'asola presente sulla piastra (34), inserire la vite (39) nel foro dello switch e fissarlo sulla piastra (35). Inserire il dado (40) dal lato esterno della piastra (35) e stringere la vite (39). - Page 42 ULTRAFLEX Manuale di installazione e manutenzione AVVERTENZA Prima di fissare i cavi in modo definitivo, verificare che la leva possa muoversi liberamente in tutte le posizioni. NOTA Il seguente schema è solo una linea guida per i motori più comuni.
-
Page 43: Uso Della Leva
ULTRAFLEX Manuale di installazione e manutenzione 4 USO 4.1 Uso della leva La corsa della leva è divisa in due movimenti: nella prima fase si aziona l'invertitore; nella seconda fase l'acceleratore. Portando la leva in avanti si ottiene l'avanzamento dell'imbarcazione, mentre all'indietro si procede in retromarcia. - Page 44 ULTRAFLEX Manuale di installazione e manutenzione Il modello a doppio motore consente la regolazione di ciascun motore in modo indipendente tramite gli interruttori posti sul corpo del comando. I pulsanti sulla leva consentono la regolazione di entrambi i motori contemporaneamente.
-
Page 45: Avvertenze Di Sicurezza
RISPETTATE TASSATIVAMENTE le precauzioni ed i criteri di sicurezza indicati qui di seguito. ULTRAFLEX. declina ogni responsabilità nel caso in cui l'utilizzatore non li osservi, così come non è respon- sabile per qualsiasi tipo di negligenza che venga commessa durante l'utilizzo del sistema. -
Page 46: Manutenzione Ordinaria
ULTRAFLEX Manuale di installazione e manutenzione 6 MANUTENZIONE 6.1 Manutenzione ordinaria AVVERTENZA La mancata osservanza dei controlli di manutenzione può causare la perdita di guida con possibili danni mate- riali e/o lesioni personali. I requisiti per la manutenzione variano secondo il clima, la frequenza ed il modo d'impiego. Sono necessarie ispezioni almeno annuali effettuate da un esperto meccanico nautico. - Page 47 ULTRAFLEX Manuale di installazione e manutenzione NOTE pag. 47 di 71 COMANDO MONOLEVA B501 E B502...
- Page 48 ULTRAFLEX Manuale di installazione e manutenzione NOTE pag. 48 di 71 - COMANDO MONOLEVA B501 E B502...
- Page 49 Manuel d'installation et d'entretien MANETTE MONO-LEVIER B 501 CHTL/BTL CHL/BL CH/B CHT/BT B 502 CHL/BL CH/B CHT/BT CHTL/BTL ASSOCIE...
- Page 50 (voir annexe "Application Spare Parts"). Les Systèmes de Gestion de la Qualité ULTRAFLEX et UFLEX sont certifiés par le Det Norske Veritas - Germanischer Lloyd (DNV-GL), en conformité avec la Norme UNI EN ISO 9001:2015.
- Page 51 ULTRAFLEX Manuel d'installation et d'entretien INDEX GENERAL EMPLOI DU MANUEL ET SYMBOLES UTILISES......................52 LETTRE D'INFORMATION............................53 GARANTIE..................................53 SECTION 1 - DESCRIPTION DU PRODUIT DESCRIPTION DU PRODUIT ET RECOMMANDATIONS SUR L'EMPLOI............54 DIMENSIONS........................,,,,..,,,,,,.54 SECTION 2 - TRANSPORT AVERTISSEMENTS GENERAUX.........................55 CONTENU EMBALLAGE..........................55 SECTION 3 - INSTALLATION OUTILS NECESSAIRES..........................56...
-
Page 52: Emploi Du Manuel Et Symboles Utilises
ULTRAFLEX Manuel d'installation et d'entretien EMPLOI DU MANUEL ET SYMBOLES UTILISES Le MANUEL D'INSTALLATION ET D'ENTRETIEN est le document qui accompagne le produit de sa vente jusqu'à son remplacement et sa démolition. C'est donc une partie fondamentale du manuel lui-même. -
Page 53: Lettre D'information
GARANTIE La Société ULTRAFLEX garantit que ses produits sont fabriqués à règles d'art et qu'ils n'ont aucun défaut de fabrication et de matériels. Cette garantie a une validité de deux années à partir de la date de fabrication des produits à l'exception des cas où... -
Page 54: Description Du Produit Et Recommandations Sur L'emploi
Les manettes peuvent utiliser tous les câbles Ultraflex pour le contrôle moteur à l'exception du C4; le kit K59, nécessaire pour la connexion des câbles Ultraflex C2, C8, C0, Mach 0, est fourni avec les deux modèles. -
Page 55: Transport
ULTRAFLEX Manuel d'installation et d'entretien 2 TRANSPORT 2.1 Avertissements généraux Le poids de chaque levier avec son emballage est 3,4Kg (7,5 livres), il peut donc être manutentionné manuellement. AVERTISSEMENT Le personnel chargé de la manipulation de l'installation doit porter des gants de protection et des chaussures de sécurité. -
Page 56: Outils Necessaires
NOTE Connecter les câbles à la manette avant de fixer l'ensemble sur le tableau de bord. ATTENTION Pour toutes les installations de manettes ULTRAFLEX, on recommande d'utiliser un système adéquat de "killing switch". 3.3 Reglage de l'inclinaison du levier 3.3.1 Versions CH/B et CHT/BT On peut modifier l'inclinaison du levier aussi bien en avant qu'en arrière en fonction du positionnement de... -
Page 57: Versions Chl/Bl Et Chtl/Btl
ULTRAFLEX Manuel d'installation et d'entretien 3.3.2 Versions CHL/BL et CHTL/BTL Les commandes avec blocage au point mort permettent de changer l'inclinaison du levier de 15° en arrière selon les étapes suivantes. Cette configuration augmente la course en avant du levier et par conséquent celle de la commande d'accélération jusqu'à... -
Page 58: Positionnement Des Cables De Controle
Positionner Connecter manette câble de sorte que surface logo l'élément cylindrique Ultraflex présent sur du connecteur (11) soit le moyeu du levier doit placé à l'intérieur du être vers le haut). trou (12) de la plaque. Enlever la butée de gaine (8) de la plaque (9) en dévissant les vis... - Page 59 ULTRAFLEX Manuel d'installation et d'entretien Repositionner la Fixer la butée de gaine (8) à la plaque butée de gaine (8) sur la (9) en serrant les vis plaque (9) en alignant (10). l'élément cylindrique du connecteur (11) avec le trou de la butée de gaine.
-
Page 60: Connexion Du Cable Pour Le Controle Du Gaz
ULTRAFLEX Manuel d'installation et d'entretien Assembler Insérer la tige (14) plaquette (H) dans la dans le pivot (I). direction montrée dans la figure et la bloquer en vissant la vis (G) sur le trou du pivot (15) du balancier. AVERTISSEMENT Vérifier le réglage correct de la course de l'inverseur et s'assurer que la condition suivante soit respectée:... -
Page 61: Reglage Du Dispositif D'embrayage
ULTRAFLEX Manuel d'installation et d'entretien Repositionner la Insérer l'embout (20) dans le pivot (21). butée de gaine (8) sur la plaque (9) en alignant l'élément cylindrique du connecteur (11) au trou de la butée de gaine. Fixer la butée de gaine à la plaque en serrant les trois vis (10). - Page 62 ULTRAFLEX Manuel d'installation et d'entretien NOTE Pour B502 avec blocag, extraire le logement du blocage (22) et le disque (5) en dévissant les deux vis autotaraudeuses (4), les deux vis Phillips M (23) et la vis plate (24). NOTE Pour B502 pourvu de trim, retourner la commande et desserrer les 4 vis autotaraudeuses (25) afin que le couvercle du trim puisse se relâcher.
- Page 63 ULTRAFLEX Manuel d'installation et d'entretien A l'aide d'un tournevis serrer le goujon (31) afin d'obtenir le durcissement de l'embrayage, ou le dévisser pour obtenir un mouvement plus souple. Pour vérifier le degré de friction du levier, déplacer ce dernier alternativement dans le sens des aiguilles d'une montre et dans le sens contraire des aiguilles d'une montre.
-
Page 64: Fixation De La Manette Au Tableau De Bord
ULTRAFLEX Manuel d'installation et d'entretien 3.7 Fixation de la manette au tableau de bord Insérer la manette dans la position choisie, ensuite insérer et visser les quatre vis M5x30 (B) avec les rondelles correspondantes (D) et les écrous autofreinés correspondants (C). -
Page 65: Connexions Electriques Trim
ULTRAFLEX Manuel d'installation et d'entretien Insérer la vis (39) à travers la fente présente sur la plaque (34), dans le trou de l'interrupteur et le fixer sur la plaque (35). Insérer l'écrou (40) du côté extérieur de la plaque (35) et serrer la vis (39). - Page 66 ULTRAFLEX Manuel d'installation et d'entretien AVERTISSEMENT Avant de fixer les câbles de façon définitive, vérifier que le levier puisse bouger librement dans toutes les positions. NOTE Le schéma suivant est seulement une ligne directrice pour les moteurs les plus communs.
-
Page 67: Emploi Du Levier
ULTRAFLEX Manuel d'installation et d'entretien 4 EMPLOI 4.1 Emploi du levier La course du levier est divisée en deux mouvements: dans la première phase l'inverseur est habilité; dans la deuxième phase l'accélérateur est habilité. En positionnant le levier en avant le bateau avance, alors qu'en le positionnant à... - Page 68 ULTRAFLEX Manuel d'installation et d'entretien La version du moteur double permet le réglage de chaque moteur de façon indépendante en utilisant les boutons sur le corps de la commande. Les boutons sur le levier permettent le réglage des deux moteurs dans le même temps.
-
Page 69: Avertissements De Securite
RESPECTER RIGOUREUSEMENT les précautions et les critères de sécurité indiqués ci-dessous. La Société ULTRAFLEX décline toute responsabilité au cas où l'usager ne les respecterait pas; elle n'est pas non plus responsable pour tout type de négligence commise pendant l'emploi du système. -
Page 70: Entretien Ordinaire
ULTRAFLEX Manuel d'installation et d'entretien 6 ENTRETIEN 6.1 Entretien ordinaire AVERTISSEMENT La non-observation des contrôles d'entretien peut causer la perte de guidage avec des dommages matériels et/ou des lésions personnelles. Les conditions requises pour l'entretien varient selon le climat, la fréquence et le mode d'emploi. Des inspections au moins annuelles sont nécessaires;... - Page 71 ULTRAFLEX Manuel d'installation et d'entretien NOTES page 71 de 71 MANETTE MONO-LEVIER B501 ET B502...
- Page 72 ULTRAFLEX S.p.A. 16015 Casella (Genova) Italia - Via Crose, 2...