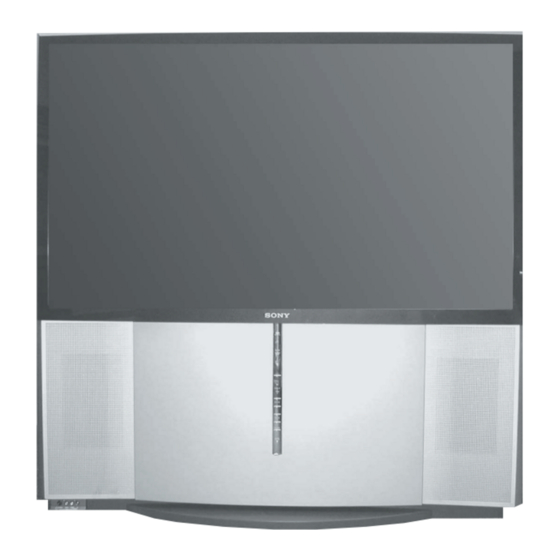
Sony KP-57WV600 Manuel D'utilisation
Table des Matières
Les langues disponibles
Les langues disponibles
Liens rapides
HISTORY INFORMATION FOR THE FOLLOWING MANUAL:
SERVICE MANUAL
MODEL NAME
KP-57WV600
KP-57WV700
KP-65WV600
KP-65WV700
ORIGINAL MANUAL ISSUE DATE: 6/2002
ALL REVISIONS AND UPDATES TO THE ORIGINAL MANUAL ARE APPENDED TO THE END OF THE PDF FILE.
REVISION DATE
6/2002
7/2002
8/2002
10/2002
9-965-926-04
REMOTE COMMANDER
RM-Y188
RM-Y188
RM-Y188
RM-Y188
REVISION TYPE
SUBJECT
No revisions or updates are applicable at this time.
Re-release Manual
Revised Service Data List (pgs. 21, 22, 25, 43, 44, 45)
Revised Circuit Boards Location (pg. 60) to include U Board and UD Board
Removed Shade(B) (pg. 110)
Correction-1
Revised Exploded View Cover diagrams to reflect
accurate position of Contrast Screen Assembly. (pgs.107 & 108)
Correction-2
Corrected PN for Rear Boards on Exploded View Cover parts list, and
added PN for Mirror Cover. (pg.107)
DA-4X
DESTINATION
CHASSIS NO.
US/CND
SCC-P92D-A
US/CND
SCC-P92B-A
US/CND
SCC-P92C-A
US/CND
SCC-P92A-A
COLOR REAR VIDEO PROJECTOR
CHASSIS
Chapitres
Table des Matières
Dépannage

Manuels Connexes pour Sony KP-57WV600


Sommaire des Matières pour Sony KP-57WV600
- Page 2 Self Diagnosis Supported model DA-4X SERVICE MANUAL CHASSIS MODEL NAME REMOTE COMMANDER DESTINATION CHASSIS NO. KP-57WV600 RM-Y188 US/CND SCC-P92D-A KP-57WV700 RM-Y188 US/CND SCC-P92B-A KP-65WV600 RM-Y188 US/CND SCC-P92C-A KP-65WV700 RM-Y188 US/CND SCC-P92A-A RM-Y188 KP-57WV600 COLOR REAR VIDEO PROJECTOR 9-965-926-04...
-
Page 5: Warnings And Cautions
Ne les remplacer que par des composants Sony dont le numero de piece est indique dans le present manuel ou dans des supplements publies par Sony. Les reglages de circuit dont l’importance est critique pour la securite du fonctionnement sont identifi... - Page 30 KP-57WV600/57WV700/ 65WV600/65WV700 SERVICE DATA LISTS MID MODE TWIN PICTURE SERVICE DATA MID MODE FREEZE SERVICE DATA RF, V1-4 RF, V1-4 MID2 0 DRHP H Pos RF, V1-4 FREEZE MID2 0 DRHP H Pos MID2 1 DRHS H Size MID2 1 DRHS...
- Page 31 KP-57WV600/57WV700/ 65WV600/65WV700 SERVICE DATA LISTS MID MODE FAVORITE CHANNEL SERVICE DATA MID MODE CHANNEL INDEX SERVICE DATA RF, V1-4 MID2 0 DRHP H Pos RF, V1-4 INDEX MID2 0 DRHP H Pos MID2 1 DRHS H Size MID2 1 DRHS...
- Page 45 KP-57WV600/57WV700/ 65WV600/65WV700 2-11-1. MODEL NVM DIFFERENCE SERVICE ITEM SERVICE ITEM ITEM 57WV600 65WV600 57WV700 65WV700 ITEM 57WV600 65WV600 57WV700 65WV700 2170P-4 8 - UBRT (VIVID) 2170P-3 4 - VMF0 (RF, VIVID) 2170P-4 10 - USHP (VIVID) 2170P-3 5 - VMDL (RF, VIVID)
- Page 46 KP-57WV600/57WV700/ 65WV600/65WV700 MODEL NVM DIFFERENCE SERVICE ITEM SERVICE ITEM ITEM 57WV600 65WV600 57WV700 65WV700 ITEM 57WV600 65WV600 57WV700 65WV700 2170P-3 6 - SHOF (720PV7, VIVID) 2170P-3 4 - VMF0 (480iV7, STANDARD) 2170P-3 14 - UCOF (720PV7, VIVID) 2170P-3 5 - VMDL (480iV7, STANDARD)
- Page 47 KP-57WV600/57WV700/ 65WV600/65WV700 MODEL NVM DIFFERENCE SERVICE ITEM SERVICE ITEM ITEM 57WV600 65WV600 57WV700 65WV700 ITEM 57WV600 65WV600 57WV700 65WV700 MID5 6 - MHYL (POP 5) PJE 16 - DFHG -100 -100 MID5 7 - MHYE (POP 5) PJE 17 - DFVG...
-
Page 61: Reference Information
KP-57WV600/57WV700/ 65WV600/65WV700 REFERENCE INFORMATION RESISTOR : RN METAL FILM Terminal name of semiconductors in silk screen : RC SOLID printed circuit ( : FPRD NONFLAMMABLE CARBON : FUSE NONFLAMMABLE FUSIBLE Device Printed symbol Terminal name Circuit : RW NONFLAMMABLE WIREWOUND... -
Page 62: 5-3. Block Diagrams
KP-57WV600/57WV700/ 65WV600/65WV700 5-3. BLOCK DIAGRAMS SIGNAL FLOW BLOCK DIAGRAM M Tu CV/Y CV/Y Y,Cb,Cr Main Chroma 3D Comb S Tu uPD64083 Decoder Switch Y,Cb,Cr V1,Y1,C1 Hs,Vs CXA2103 (480I Inputs) V2,Y2,C2 NJM2283 & V3,Y3,C3 Switch Hs,Vs Y,Cb,Cr 74LVX157 Sub Chroma CXA2069... - Page 63 KP-57WV600/57WV700/ 65WV600/65WV700 DEFLECTION BLOCK DIAGRAM IC8002 CONV.OUT1 ------------------------------------------------------------------------------------------------------------------------------------------------------------------------------------------------------------------------ IC8008 DY(B) MIX+ V.DEF ERR OUT T8004 V.MID D+200V ERR IN D8039 +135V V.RET D8022 +135V SLOW VR REG D8037 MUTE VR8001 IC8007 REF IN D8008 IC8001 MIXÐ CONV.OUT1 HD IN MIX OUT...
- Page 64 KP-57WV600/57WV700/ 65WV600/65WV700 POWER SUPPLY BLOCK DIAGRAM AC IN CN6701 T6703 IC6701 D6702 DRIVER D6SB60L AC-RECT AC(W) AC(L) D6502 UN7V CONV. VG(H) D6511 RY6701 RY6702 Q6701 UN5V D6706 CN6507 V SENSE D6514 IC6501 PH6002 D6537 D6534 D6540 +19V D6503 D6712 UN11V...
- Page 66 KP-57WV600/57WV700/ 65WV600/65WV700 [VELOCITY MOD] COMPONENT SIDE CONDUCTOR SIDE — 66 —...
- Page 71 KP-57WV600/57WV700/ 65WV600/65WV700 [AV SWITCH, TERMINAL BLOCK] [COMPONENT SIDE] [CONDUCTOR SIDE] — 71 —...
- Page 73 KP-57WV600/57WV700/ 65WV600/65WV700 [DVI DECODER] [COMPONENT SIDE] [CONDUCTOR SIDE] — 73 —...
- Page 75 KP-57WV600/57WV700/ 65WV600/65WV700 [AC/DC POWER, AUDIO POWER, TUNER] [COMPONENT SIDE] — 75 —...
- Page 76 KP-57WV600/57WV700/ 65WV600/65WV700 [AC/DC POWER, AUDIO POWER, TUNER] [CONDUCTOR SIDE] A BOARD LOCATOR LIST DIODE IC501 D503 IC502 D504 IC504 D505 IC505 D508 IC508 D-10 D509 IC901 F-11 D510 G-11 TRANSISTOR D511 G-11 Q503 D515 G-11 Q504 D516 F-11 Q505 D517...
- Page 78 KP-57WV600/57WV700/ 65WV600/65WV700 B BOARD SCHEMATIC DIAGRAM (2 OF 6) — SUBAD_CLVL IC3401 3.3V R3575 C3403 DRC RESET C3401 F:1608 3.3V F:1608 C3404 IC3403 R3410 L3402 C3405 PST9120NL :CHIP 6.3V C3410 C3406 RESET 1/16W :AL-CP 6.3V C3407 :CHIP :AL-CP F:1608 B:1608...
- Page 79 KP-57WV600/57WV700/ 65WV600/65WV700 B BOARD SCHEMATIC DIAGRAM (3 OF 6) — L8601 C8651 Q8603 C8650 — 2SC2223 BUFFER SEL Y/CR/CB R8611 SEL Y SEL Y OUT R8631 IC3606 1.5k BA033FP-E2 R8620 SEL Y 3V REG. R8628 Q8608 2SA1226 R8614 BUFFER C8654...
- Page 80 KP-57WV600/57WV700/ 65WV600/65WV700 B BOARD SCHEMATIC DIAGRAM (4 OF 6) B BOARD WAVEFORMS CN2801 CN2802 CN2803 :S-MICRO TO VM BOARD TO VM BOARD TO VM BOARD CN9002 CN9002 CN9002 1.5 Vp-p (V) 1.7 Vp-p (V). 2.9 Vp-p (H) — L2801 L2808...
- Page 81 KP-57WV600/57WV700/ 65WV600/65WV700 B BOARD SCHEMATIC DIAGRAM (5 OF 6) 5V-1 5V-2 — L3011 NRHP 1/16W :CHIP R3078 1/16W R3079 :CHIP 1/16W :CHIP Q3009 +3.3V C3615 2SD601A VCC-DROP R3050 — C3016 R3029 :AL-CP RB3011 RB3013 RB3014 RB3015 1/16W ADTB 47*4 47*4...
- Page 82 KP-57WV600/57WV700/ 65WV600/65WV700 B BOARD SCHEMATIC DIAGRAM (6 OF 6) TO MS1 CN104 CN3601 — R3601 1/16W :CHIP VCLK VCLK R3602 1/16W :CHIP VSYNC_OUT R3603 0 1/16W :CHIP SUBAD_DSYNC — RB3100 10*4 VUV7 VUV6 VUV5 VUV4 VUV3 — VUV2 IC3601 VUV1...
- Page 83 KP-57WV600/57WV700/ 65WV600/65WV700 [AD-DRC,MID-XA, HD-ADC, CRT DRIVE, A/D (DNR), DIFFERENTIAL INPUT ] [COMPONENT SIDE] — 83 —...
- Page 84 KP-57WV600/57WV700/ 65WV600/65WV700 [AD-DRC,MID-XA, HD-ADC, CRT DRIVE, A/D (DNR), DIFFERENTIAL INPUT ] [CONDUCTOR SIDE] — 84 —...
- Page 86 KP-57WV600/57WV700/ 65WV600/65WV700 MS1 BOARD SCHEMATIC DIAGRAM (2 OF 3) POWER_INT RB129 RB130 P INT 100k*4 100k*4 3.3V :CHIP :CHIP C165 R295 — :AL-CP 1/16W :CHIP R176 0 :CHIP FB109 D102 TO P1 BK1608TS601 C166 HN2D01FU R177 0 :CHIP 0.01 FB111...
- Page 87 KP-57WV600/57WV700/ 65WV600/65WV700 MS1 BOARD SCHEMATIC DIAGRAM (3 OF 3) — — 3.3V FB112 BK1608HS601 — C168 MS_DIS IC120 IC119 TC7SZ126FU TC7SZ126FU F:CHIP — 3.3V FB105 R173 BK1608TS601 :CHIP +3.3V — VCLK VCLK VCLK VBLK VPEN R199 I/O 17 C150 RB107 :CHIP 0.01...
- Page 88 KP-57WV600/57WV700/ 65WV600/65WV700 [MEMORY STICK, DECODER BOARD, JPEG ENG, MEMORY STICK MICRO] [COMPONENT SIDE] [CONDUCTOR SIDE] — 88 —...
- Page 90 KP-57WV600/57WV700/ 65WV600/65WV700 [POWER SUPPLY] [COMPONENT SIDE] [CONDUCTOR SIDE] G BOARD LOCATOR LIST IC6501 IC6502 IC6503 IC6504 IC6701 TRANSISTOR Q6502 Q6503 Q6504 Q6701 Q6702 DIODE D6501 D6502 D6503 D6504 D6505 D6507 D6511 D6514 D6515 D6517 D6518 D6519 D6522 D6523 D6524 D6525...
- Page 92 KP-57WV600/57WV700/ 65WV600/65WV700 AD BOARD SCHEMATIC DIAGRAM (2 OF 2) R9546 R9548 R9549 C9549 100k 0.001 1/16W 1/16W 1/16W :RN-CP :RN-CP :RN-CP CH:1608 C9552 0.01 C9546 F:1608 FB9404 F:1608 BLM11A601S (2/2) — :1608 DF_V C9408 CH:1608 REGI CORRECTION IC9420 NJM2068V DF FILTER...
- Page 93 KP-57WV600/57WV700/ 65WV600/65WV700 [DIGITAL REGI, PJED CPU, PJE DRIVE, REGI CORRECTION] [COMPONENT SIDE] [CONDUCTOR SIDE] — 93 —...
- Page 95 KP-57WV600/57WV700/ 65WV600/65WV700 [HV DRIVE, POWER SUPPLY, H DRIVE] [COMPONENT SIDE] — 95 —...
- Page 96 KP-57WV600/57WV700/ 65WV600/65WV700 [HV DRIVE, POWER SUPPLY, H DRIVE] [CONDUCTOR SIDE] D BOARD LOCATOR LIST DIODE IC8001 D8001 D-10 IC8002 D8002 IC8003 E-10 D8003 IC8004 D8004 IC8005 D8005 IC8006 D8006 IC8007 D8008 IC8008 D8010 IC8009 D8011 IC8010 F-12 D8012 IC8012 D8013...
- Page 98 KP-57WV600/57WV700/ 65WV600/65WV700 M BOARD SCHEMATIC DIAGRAM (2 OF 4) — L2202 :LB2016 C2226 C2227 F:1608 R2242 R2245 — Q2204 R2230 Q2215 R2222 2SB709A 1/16W 1/16W R2253 2SD601A :RN-CP BUFF C2230 :RN-CP Q2214 1/16W 1/16W BUFF 1/16W :CHIP :CHIP 2SB709A CH:1608...
- Page 99 KP-57WV600/57WV700/ 65WV600/65WV700 M BOARD SCHEMATIC DIAGRAM (3 OF 4) TO A CN525 POWERCONT CN2302 :B TO B — SYNCSW YCBCRSW0 TU2V YCBCRSW1 TU2V R2469 MIDCONT LINEMUTE TU2LR 1/16W (P.1) TU2LR :CHIP SIRCS CONTROLS ACOFF Q2314 2SB709A R2298 TU1R STBYLED ERROR-DETECT...
- Page 100 KP-57WV600/57WV700/ 65WV600/65WV700 M BOARD SCHEMATIC DIAGRAM (4 OF 4) — R2560 R2561 R2562 R2563 Q2505 2SD601A R2558 1/16W 1/16W 1/16W 1/16W DSP-CUT :CHIP :CHIP :CHIP :CHIP 1/16W :CHIP — DSPCUT (P3) R2559 1/16W :CHIP Q2506 2SD601A Q2508 DSP-CUT 2SD601A FB2512...
- Page 101 KP-57WV600/57WV700/ 65WV600/65WV700 [VIDEO PROCESSOR, 3-D COMB, MICRO (MAIN, CCD), AUDIO PROCESSOR] [COMPONENT SIDE] [CONDUCTOR SIDE] — 101 —...
-
Page 102: U Board
KP-57WV600/57WV700/ 65WV600/65WV700 HB BOARD SCHEMATIC DIAGRAM TO U BOARD R1107 CN1501 J1101 CN1101 WHT-L :S-MICRO R1103 R1106 — D1103 MTZJ-T-77-10B V2SW R1102 C1101 R1101 470k — D1101 MTZJ-T-77-10B C1100 D1100 R1100 MTZJ-T-77-10B 470k VIDEO-2 INPUT 9-965-926-01<DA4X>HB [VIDEO-2 INPUT] CONDUCTOR SIDE COMPONENT SIDE —... -
Page 106: 5-5. Semiconductors
KP-57WV600/57WV700/ 65WV600/65WV700 5-5. SEMICONDUCTORS AN77L12-TA CXA2069Q MAX4450EUK-TG069 M24C04-WMN6T(A) PST9143NL µPC393C 2SC5681-YB DTZ10B D2L20U-F FMQ-G5FMS NJM78L12A-T3 CXA2150AQ M24C32-WMN6T(A) MA111-TX ERC04-06SE PG124S15 NJM79L05A NJM2068V-TE2 UDZ-TE-17- 8.2B NJM79L05A-T3 NJM2521M(TE2) UDZ-TE-17-7.5B CATHODE NJM2903M UDZS-TE17-12B NJM2903M-TE2 UDZS-TE17-22B TOP VIEW NJM2904M UDZS-TE17-33B 1 2 3 4 5... -
Page 107: Exploded Views
Ne les remplacer que par une piece portant le numero speciÞ e. A-1603-725-A CONTRAST SCREEN ASSY 4-075-020-01 FOOT, PLASTIC KP-57WV600 ONLY * A-1400-748-A HA MOUNT 6-1. COVER (KP-57WV600/57WV700 0NLY) A-1603-723-A CONTRAST SCREEN ASSY KP-57WV700 ONLY * A-1300-323-A HM COMPLETE PC BOARD 7-685-648-79 SCREW +BVTP 3X12 4-088-638-11... -
Page 108: Cover (Kp-65Wv600/65Wv700 Only)
KP-57WV600/57WV700/ 65WV600/65WV700 REF.NO. PART NO. DESCRIPTION REF.NO. PART NO. DESCRIPTION NOTE: The components identiÞ ed by shading and mark are critical for safety. NOTE: Les composants identiÞ es per un trame et une marque sont critiques Replace only with part number speciÞ ed. - Page 109 KP-65WV700 ONLY * A-1300-407-A B COMPLETE 3-184-556-01 CASTER 4-030-850-01 SOCKET, CASTER * A-1300-408-A MS1 COMPLETE 4-075-020-01 FOOT, PLASTIC * A-1300-646-A M COMPLETE PC BOARD * A-1300-321-A U COMPLETE PC BOARD 4-081-063-01 SCREW,DOME WASHER HEX TAP 4X20 KP-57WV600/57WV700 ONLY — 109 —...
-
Page 110: 6-4. Picture Tube
Replace only with part number speciÞ ed. pour la securite. Ne les remplacer que par une piece portant le numero speciÞ e. A-1401-420-A CB MOUNT (VAR) ! 109 8-733-652-15 CR 07MVC21(G)-L(VM) KP-57WV600/57WV700 ONLY KP-57WV600/65WV600 ONLY A-1401-387-A CB MOUNT (VAR) ! 109 8-733-667-15 CR 07MVC22(G)-L 6-4. - Page 111 KP-57WV600/57WV700/ 65WV600/65WV700 SECTION 7: ELECTRICAL PARTS LIST NOTE: The components identifi ed by shading RESISTORS The components in this manual identifi ed by the following mark are critical for safety. Replace only symbol: indicate parts that have been carefully factory- •...
- Page 112 KP-57WV600/57WV700/ 65WV600/65WV700 NOTE: Les composants identifi es per un trame et une NOTE: The components identifi ed by shading marque sont critiques pour la securite. Ne les mark are critical for safety. Replace only remplacer que par une piece portant le numero specifi e.
- Page 113 METAL CHIP 0.50% 1/16W C9216 1-101-003-00 CERAMIC 0.0047µF (KP-65WV600/65WV700 ONLY) C9217 1-164-156-11 CERAMIC CHIP 0.1µF R9206 1-218-679-11 METAL CHIP 0.50% 1/16W CONNECTOR (KP-57WV600/57WV700 ONLY) R9207 1-218-694-11 METAL CHIP 1.2K 0.50% 1/16W CN9201 1-564-511-11 PLUG,CONNECTOR CN9202 1-564-511-11 PLUG,CONNECTOR R9208 1-216-825-11 RES-CHIP 2.2K...
- Page 114 CN9304 1-695-915-11 TAB (CONTACT) (KP-65WV600/65WV700 ONLY) CN9308 1-785-879-11 CONNECTOR, ONE TOUCH R9306 1-218-684-11 METAL CHIP 0.50% 1/16W CN9309 1-564-507-11 PLUG,CONNECTOR (KP-57WV600/57WV700 ONLY) CN9310 1-695-915-11 TAB (CONTACT) R9307 1-218-696-11 METAL CHIP 1.5K 0.50% 1/16W DIODE R9308 1-218-684-11 METAL CHIP 0.50% 1/16W...
- Page 115 KP-57WV600/57WV700/ 65WV600/65WV700 CB U NOTE: Les composants identifi es per un trame et une NOTE: The components identifi ed by shading marque sont critiques pour la securite. Ne les mark are critical for safety. Replace only remplacer que par une piece portant le numero specifi e.
- Page 116 KP-57WV600/57WV700/ 65WV600/65WV700 REF. NO. PART NO. DESCRIPTION VALUES REF. NO. PART NO. DESCRIPTION VALUES C1558 1-126-933-11 ELECT 100µF D1531 8-719-069-61 DIODE UDZSTE-1710B C1559 1-126-933-11 ELECT 100µF D1532 8-719-069-61 DIODE UDZSTE-1710B C1560 1-126-933-11 ELECT 100µF D1533 8-719-977-28 DIODE UDZSTE-1710B C1561 1-126-933-11 ELECT 100µF...
- Page 117 KP-57WV600/57WV700/ 65WV600/65WV700 REF. NO. PART NO. DESCRIPTION VALUES REF. NO. PART NO. DESCRIPTION VALUES Q1518 8-729-422-27 TRANSISTOR 2SD601A-QRS-TX R1543 1-216-809-11 RES-CHIP 1/10W Q1519 8-729-424-02 TRANSISTOR 2SB709A-QRS-TX R1544 1-216-830-11 RES-CHIP 5.6K 1/10W Q1520 8-729-422-27 TRANSISTOR 2SD601A-QRS-TX R1545 1-216-830-11 RES-CHIP 5.6K 1/10W...
- Page 119 KP-57WV600/57WV700/ 65WV600/65WV700 REF. NO. PART NO. DESCRIPTION VALUES REF. NO. PART NO. DESCRIPTION VALUES C7023 1-162-927-11 CERAMIC CHIP 100pF C7070 1-164-156-11 CERAMIC CHIP 0.1µF C7024 1-124-779-00 ELECT CHIP 10µF C7071 1-164-156-11 CERAMIC CHIP 0.1µF C7025 1-164-156-11 CERAMIC CHIP 0.1µF C7078...
- Page 120 KP-57WV600/57WV700/ 65WV600/65WV700 UD A NOTE: Les composants identifi es per un trame et une NOTE: The components identifi ed by shading marque sont critiques pour la securite. Ne les mark are critical for safety. Replace only remplacer que par une piece portant le numero specifi e.
- Page 121 KP-57WV600/57WV700/ 65WV600/65WV700 REF. NO. PART NO. DESCRIPTION VALUES REF. NO. PART NO. DESCRIPTION VALUES C515 1-126-947-11 ELECT 47µF C577 1-126-960-11 ELECT 1µF C516 1-162-966-11 CERAMIC CHIP 0.0022µF 10% C578 1-126-964-11 ELECT 10µF C517 1-104-665-11 ELECT 100µF C579 1-126-964-11 ELECT 10µF...
- Page 122 KP-57WV600/57WV700/ 65WV600/65WV700 NOTE: Les composants identifi es per un trame et une NOTE: The components identifi ed by shading marque sont critiques pour la securite. Ne les mark are critical for safety. Replace only remplacer que par une piece portant le numero specifi e.
- Page 123 KP-57WV600/57WV700/ 65WV600/65WV700 NOTE: Les composants identifi es per un trame et une NOTE: The components identifi ed by shading marque sont critiques pour la securite. Ne les mark are critical for safety. Replace only remplacer que par une piece portant le numero specifi e.
- Page 124 KP-57WV600/57WV700/ 65WV600/65WV700 NOTE: Les composants identifi es per un trame et une NOTE: The components identifi ed by shading marque sont critiques pour la securite. Ne les mark are critical for safety. Replace only remplacer que par une piece portant le numero specifi e.
- Page 125 KP-57WV600/57WV700/ 65WV600/65WV700 REF. NO. PART NO. DESCRIPTION VALUES REF. NO. PART NO. DESCRIPTION VALUES C3004 1-126-206-11 ELECT CHIP 100µF 6.3V C3096 1-162-970-11 CERAMIC CHIP 0.01µF C3005 1-126-204-11 ELECT CHIP 47µF C3097 1-128-359-11 ELECT CHIP 100µF C3006 1-162-970-11 CERAMIC CHIP 0.01µF...
- Page 126 KP-57WV600/57WV700/ 65WV600/65WV700 REF. NO. PART NO. DESCRIPTION VALUES REF. NO. PART NO. DESCRIPTION VALUES C3370 1-164-156-11 CERAMIC CHIP 0.1µF C3465 1-164-156-11 CERAMIC CHIP 0.1µF C3371 1-164-156-11 CERAMIC CHIP 0.1µF C3466 1-164-156-11 CERAMIC CHIP 0.1µF C3372 1-164-156-11 CERAMIC CHIP 0.1µF C3467...
- Page 127 KP-57WV600/57WV700/ 65WV600/65WV700 REF. NO. PART NO. DESCRIPTION VALUES REF. NO. PART NO. DESCRIPTION VALUES C3615 1-124-779-00 ELECT CHIP 10µF C8639 1-126-204-11 ELECT CHIP 47µF C3617 1-162-970-11 CERAMIC CHIP 0.01µF C8640 1-117-370-11 CERAMIC CHIP 10µF C3618 1-127-760-11 CERAMIC CHIP 4.7µF 6.3V...
- Page 128 KP-57WV600/57WV700/ 65WV600/65WV700 NOTE: Les composants identifi es per un trame et une NOTE: The components identifi ed by shading marque sont critiques pour la securite. Ne les mark are critical for safety. Replace only remplacer que par une piece portant le numero specifi e.
- Page 129 KP-57WV600/57WV700/ 65WV600/65WV700 REF. NO. PART NO. DESCRIPTION VALUES REF. NO. PART NO. DESCRIPTION VALUES L3011 1-469-555-21 INDUCTOR 10µH Q2822 8-729-422-27 TRANSISTOR 2SD601A-QRS-TX L3089 1-414-233-22 FERRITE 0µH Q2823 8-729-422-27 TRANSISTOR 2SD601A-QRS-TX L3102 1-469-552-21 INDUCTOR 3.3µH Q3003 8-729-422-27 TRANSISTOR 2SD601A-QRS-TX L3304 1-469-555-21 INDUCTOR 10µH...
- Page 130 KP-57WV600/57WV700/ 65WV600/65WV700 REF. NO. PART NO. DESCRIPTION VALUES REF. NO. PART NO. DESCRIPTION VALUES RESISTOR R2846 1-216-827-11 RES-CHIP 3.3K 1/10W R2847 1-216-809-11 RES-CHIP 1/10W R2801 1-218-867-11 RES-CHIP 6.8K 1/10W R2848 1-216-825-11 RES-CHIP 2.2K 1/10W R2803 1-216-829-11 RES-CHIP 4.7K 1/10W R2849...
- Page 131 KP-57WV600/57WV700/ 65WV600/65WV700 REF. NO. PART NO. DESCRIPTION VALUES REF. NO. PART NO. DESCRIPTION VALUES R2898 1-216-825-11 RES-CHIP 2.2K 1/10W R3066 1-216-809-11 RES-CHIP 1/10W R2900 1-216-829-11 RES-CHIP 4.7K 1/10W R3068 1-216-825-11 RES-CHIP 2.2K 1/10W R2901 1-216-829-11 RES-CHIP 4.7K 1/10W R3069 1-216-820-11...
- Page 132 KP-57WV600/57WV700/ 65WV600/65WV700 REF. NO. PART NO. DESCRIPTION VALUES REF. NO. PART NO. DESCRIPTION VALUES R3347 1-216-815-11 RES-CHIP 1/10W R3437 1-216-809-11 RES-CHIP 1/10W R3348 1-216-864-11 SHORT CHIP R3438 1-216-809-11 RES-CHIP 1/10W R3349 1-218-687-11 METAL CHIP 0.50% 1/16W R3439 1-216-809-11 RES-CHIP 1/10W...
- Page 133 KP-57WV600/57WV700/ 65WV600/65WV700 REF. NO. PART NO. DESCRIPTION VALUES REF. NO. PART NO. DESCRIPTION VALUES R3603 1-216-864-11 SHORT CHIP R3863 1-218-700-11 METAL CHIP 2.2K 0.50% 1/16W R3604 1-216-864-11 SHORT CHIP R3864 1-216-827-11 RES-CHIP 3.3K 1/10W R3605 1-216-864-11 SHORT CHIP R3865 1-216-809-11...
- Page 135 KP-57WV600/57WV700/ 65WV600/65WV700 REF. NO. PART NO. DESCRIPTION VALUES REF. NO. PART NO. DESCRIPTION VALUES C109 1-107-826-11 CERAMIC CHIP 0.1µF C158 1-124-779-00 ELECT CHIP 10µF C110 1-126-394-11 ELECT CHIP 10µF C159 1-107-826-11 CERAMIC CHIP 0.1µF C111 1-162-970-11 CERAMIC CHIP 0.01µF C160...
- Page 136 KP-57WV600/57WV700/ 65WV600/65WV700 NOTE: Les composants identifi es per un trame et une NOTE: The components identifi ed by shading marque sont critiques pour la securite. Ne les mark are critical for safety. Replace only remplacer que par une piece portant le numero specifi e.
- Page 137 KP-57WV600/57WV700/ 65WV600/65WV700 REF. NO. PART NO. DESCRIPTION VALUES REF. NO. PART NO. DESCRIPTION VALUES R148 1-216-839-11 RES-CHIP 1/10W R208 1-216-801-11 RES-CHIP 1/10W R149 1-216-839-11 RES-CHIP 1/10W R209 1-216-809-11 RES-CHIP 1/10W R152 1-216-833-11 RES-CHIP 1/10W R213 1-218-830-11 METAL CHIP 0.50% 1/10W...
- Page 138 KP-57WV600/57WV700/ 65WV600/65WV700 MS1 G NOTE: Les composants identifi es per un trame et une NOTE: The components identifi ed by shading marque sont critiques pour la securite. Ne les mark are critical for safety. Replace only remplacer que par une piece portant le numero specifi e.
- Page 139 KP-57WV600/57WV700/ 65WV600/65WV700 NOTE: Les composants identifi es per un trame et une NOTE: The components identifi ed by shading marque sont critiques pour la securite. Ne les mark are critical for safety. Replace only remplacer que par une piece portant le numero specifi e.
- Page 140 KP-57WV600/57WV700/ 65WV600/65WV700 NOTE: Les composants identifi es per un trame et une NOTE: The components identifi ed by shading marque sont critiques pour la securite. Ne les mark are critical for safety. Replace only remplacer que par une piece portant le numero specifi e.
- Page 142 KP-57WV600/57WV700/ 65WV600/65WV700 REF. NO. PART NO. DESCRIPTION VALUES REF. NO. PART NO. DESCRIPTION VALUES DIODE C9508 1-164-156-11 CERAMIC CHIP 0.1µF C9509 1-164-156-11 CERAMIC CHIP 0.1µF D9400 8-719-988-61 DIODE 1SS355TE-17 C9511 1-162-927-11 CERAMIC CHIP 100pF D9401 8-719-988-61 DIODE 1SS355TE-17 C9512 1-164-156-11 CERAMIC CHIP 0.1µF...
- Page 143 KP-57WV600/57WV700/ 65WV600/65WV700 REF. NO. PART NO. DESCRIPTION VALUES REF. NO. PART NO. DESCRIPTION VALUES IC9415 8-759-278-58 IC NJM4558V-TE2 R9419 1-216-839-11 RES-CHIP 1/10W IC9416 8-759-278-58 IC NJM4558V-TE2 R9420 1-216-821-11 RES-CHIP 1/10W IC9420 8-759-830-08 IC NJM2068V-TE2 R9421 1-216-821-11 RES-CHIP 1/10W IC9422 8-759-641-26...
- Page 144 KP-57WV600/57WV700/ 65WV600/65WV700 REF. NO. PART NO. DESCRIPTION VALUES REF. NO. PART NO. DESCRIPTION VALUES R9465 1-218-716-11 METAL CHIP 0.50% 1/16W R9541 1-216-827-11 RES-CHIP 3.3K 1/10W R9466 1-218-716-11 METAL CHIP 0.50% 1/16W R9542 1-218-714-11 METAL CHIP 8.2K 0.50% 1/16W R9467 1-218-700-11 METAL CHIP 2.2K...
- Page 145 KP-57WV600/57WV700/ 65WV600/65WV700 NOTE: Les composants identifi es per un trame et une NOTE: The components identifi ed by shading marque sont critiques pour la securite. Ne les mark are critical for safety. Replace only remplacer que par une piece portant le numero specifi e.
- Page 146 KP-57WV600/57WV700/ 65WV600/65WV700 NOTE: Les composants identifi es per un trame et une NOTE: The components identifi ed by shading marque sont critiques pour la securite. Ne les mark are critical for safety. Replace only remplacer que par une piece portant le numero specifi e.
- Page 147 KP-57WV600/57WV700/ 65WV600/65WV700 REF. NO. PART NO. DESCRIPTION VALUES REF. NO. PART NO. DESCRIPTION VALUES FERRITE BEAD CN8028 1-564-507-11 PLUG,CONNECTOR CN8029 1-564-510-11 PLUG,CONNECTOR FB8001 1-410-397-21 FERRITE 1.1µH CN8030 1-564-510-11 PLUG,CONNECTOR FB8002 1-410-397-21 FERRITE 1.1µH CN8031 1-779-890-11 CONNECTOR, BOARD TO BOARD 10P...
- Page 148 KP-57WV600/57WV700/ 65WV600/65WV700 NOTE: Les composants identifi es per un trame et une NOTE: The components identifi ed by shading marque sont critiques pour la securite. Ne les mark are critical for safety. Replace only remplacer que par une piece portant le numero specifi e.
- Page 149 KP-57WV600/57WV700/ 65WV600/65WV700 NOTE: Les composants identifi es per un trame et une NOTE: The components identifi ed by shading marque sont critiques pour la securite. Ne les mark are critical for safety. Replace only remplacer que par une piece portant le numero specifi e.
- Page 150 KP-57WV600/57WV700/ 65WV600/65WV700 NOTE: Les composants identifi es per un trame et une NOTE: The components identifi ed by shading marque sont critiques pour la securite. Ne les mark are critical for safety. Replace only remplacer que par une piece portant le numero specifi e.
- Page 152 KP-57WV600/57WV700/ 65WV600/65WV700 REF. NO. PART NO. DESCRIPTION VALUES REF. NO. PART NO. DESCRIPTION VALUES C2059 1-107-826-11 CERAMIC CHIP 0.1µF C2108 1-126-933-11 ELECT 100µF C2060 1-107-826-11 CERAMIC CHIP 0.1µF C2109 1-125-837-91 CERAMIC CHIP 1µF 6.3V C2061 1-107-826-11 CERAMIC CHIP 0.1µF C2111...
- Page 153 KP-57WV600/57WV700/ 65WV600/65WV700 REF. NO. PART NO. DESCRIPTION VALUES REF. NO. PART NO. DESCRIPTION VALUES C2225 1-162-917-11 CERAMIC CHIP 15pF C2322 1-164-156-11 CERAMIC CHIP 0.1µF C2226 1-164-156-11 CERAMIC CHIP 0.1µF C2323 1-164-156-11 CERAMIC CHIP 0.1µF C2227 1-126-933-11 ELECT 100µF C2324 1-164-156-11 CERAMIC CHIP 0.1µF...
- Page 154 KP-57WV600/57WV700/ 65WV600/65WV700 REF. NO. PART NO. DESCRIPTION VALUES REF. NO. PART NO. DESCRIPTION VALUES C2512 1-135-834-91 CERAMIC CHIP 2.2E+06pF 6.3V C2566 1-107-826-11 CERAMIC CHIP 0.1µF C2513 1-162-966-11 CERAMIC CHIP 0.0022µF 10% C2569 1-126-961-11 ELECT 2.2µF C2514 1-164-156-11 CERAMIC CHIP 0.1µF...
- Page 155 KP-57WV600/57WV700/ 65WV600/65WV700 REF. NO. PART NO. DESCRIPTION VALUES REF. NO. PART NO. DESCRIPTION VALUES COIL FB2516 1-414-229-11 FERRITE 0µH FB2517 1-414-229-11 FERRITE 0µH L2001 1-469-555-21 INDUCTOR 10µH FB2518 1-414-229-11 FERRITE 0µH L2003 1-469-555-21 INDUCTOR 10µH FB2519 1-414-229-11 FERRITE 0µH L2004...
- Page 156 KP-57WV600/57WV700/ 65WV600/65WV700 REF. NO. PART NO. DESCRIPTION VALUES REF. NO. PART NO. DESCRIPTION VALUES Q2016 8-729-422-27 TRANSISTOR 2SD601A-QRS-TX Q2502 8-729-424-02 TRANSISTOR 2SB709A-QRS-TX Q2018 8-729-422-27 TRANSISTOR 2SD601A-QRS-TX Q2503 8-729-422-27 TRANSISTOR 2SD601A-QRS-TX Q2019 8-729-422-27 TRANSISTOR 2SD601A-QRS-TX Q2504 8-729-422-27 TRANSISTOR 2SD601A-QRS-TX Q2200 8-729-424-02...
- Page 157 KP-57WV600/57WV700/ 65WV600/65WV700 REF. NO. PART NO. DESCRIPTION VALUES REF. NO. PART NO. DESCRIPTION VALUES R2041 1-216-837-11 RES-CHIP 1/10W R2112 1-216-809-11 RES-CHIP 1/10W R2045 1-218-686-11 METAL CHIP 0.50% 1/16W R2113 1-216-809-11 RES-CHIP 1/10W R2046 1-218-686-11 METAL CHIP 0.50% 1/16W R2114 1-216-805-11...
- Page 158 KP-57WV600/57WV700/ 65WV600/65WV700 REF. NO. PART NO. DESCRIPTION VALUES REF. NO. PART NO. DESCRIPTION VALUES R2231 1-216-819-11 RES-CHIP 1/10W R2311 1-216-809-11 RES-CHIP 1/10W R2232 1-216-821-11 RES-CHIP 1/10W R2312 1-216-809-11 RES-CHIP 1/10W R2233 1-216-821-11 RES-CHIP 1/10W R2313 1-216-809-11 RES-CHIP 1/10W R2234 1-216-820-11...
- Page 159 KP-57WV600/57WV700/ 65WV600/65WV700 REF. NO. PART NO. DESCRIPTION VALUES REF. NO. PART NO. DESCRIPTION VALUES R2358 1-216-821-11 RES-CHIP 1/10W R2402 1-216-811-11 RES-CHIP 1/10W R2359 1-216-805-11 RES-CHIP 1/10W R2403 1-216-857-11 RES-CHIP 1/10W R2360 1-216-864-11 SHORT CHIP R2404 1-218-706-11 METAL CHIP 3.9K 0.50% 1/16W...
- Page 160 KP-57WV600/57WV700/ 65WV600/65WV700 REF. NO. PART NO. DESCRIPTION VALUES REF. NO. PART NO. DESCRIPTION VALUES R2461 1-216-833-11 RES-CHIP 1/10W R2533 1-216-864-11 SHORT CHIP R2463 1-216-833-11 RES-CHIP 1/10W R2534 1-216-837-11 RES-CHIP 1/10W R2464 1-216-833-11 RES-CHIP 1/10W R2535 1-216-821-11 RES-CHIP 1/10W R2466 1-216-833-11...
- Page 162 KP-57WV600/57WV700/ 65WV600/65WV700 HM HA REF. NO. PART NO. DESCRIPTION VALUES REF. NO. PART NO. DESCRIPTION VALUES D7211 8-719-083-58 DIODE UDZSTE-173.9B R7222 1-216-809-11 RES-CHIP 1/10W D7212 8-719-800-76 DIODE MA153-TX R7224 1-216-833-11 RES-CHIP 1/10W D7213 8-719-800-76 DIODE MA153-TX R7225 1-216-845-11 RES-CHIP 100K...
- Page 164 U BOARD SCHEMATIC DIAGRAM TO M CN2305 CN1503 :B TO B — VIDEO L1502 C1540 :LB2016 — C1539 MAIN C J1501 F:1608 S TERMINAL BLOCK C1506 R1510 D1511 UDZSTE-1710B 1/16W B:CHIP :RN-CP C1533 R1589 6.3V C1505 1/16W B:1608 — :CHIP D1510 R1509 R1591...
- Page 166 V2-V IN 1/16W :CHIP R1567 1/16W :CHIP C1536 B:CHIP R1534 — R1532 R1539 C1532 C1535 L1504 1/16W 1/16W 1/16W :CHIP :LB2016 :CHIP :CHIP B:1608 MON V Q1506 R1559 C1531 2SD601A 1/16W BUFF :RN-CP J1504 V OUT C1507 D1517 R1556 D1514 UDZSTE-1710B 470k B:CHIP...
- Page 169 KP-57WV600/57WV700/ 65WV600/65WV700 UD BOARD WAVEFORMS 1.3 Vp-p (H) 1.3 Vp-p (H) 1.5 Vp-p (H) D7001 DAN202K R7126 3.3V C7001 C7017 :CHIP IC7002 PQ07VZ012ZP 3.3V REG C7004 C7005 C7006 L7002 R7003 R7004 1.6k :CHIP :CHIP R7007 2.5V IC7003 PQ07VZ012ZP 2.5V REG...
- Page 170 IOG/PB :CHIP C7067 AVDD_RPLL_33 0.01 AVDDAC_33 :CHIP AVSS_RPLL IORB AVDD_DPLL_33 C7065 C7066 IOR/Y 0.01 0.01 AVSS_DPLL C7032 C7030 :CHIP :CHIP C7037 100pF 100pF AVDDAC_25 AVDD_DDS_33 :CH-CHIP :CH-CHIP GNDA AVSS_DDS :CHIP OSD_EN VDD_33 OSD_INT FB7004 — OSD_B VBUFC2 C7033 C7031 OSD_G AVDD_SDDS_33 100pF :CH-CHIP...
- Page 171 TO M CN2304 R7117 :CHIP R7032 FL7004 17M LPF R7087 R7114 1/16W R7123 2.2k :CHIP :RN-CP 3.3k R7119 :CHIP FL7003 R7115 R7034 17M LPF R7080 2.2k 3.3k R7124 1/16W :RN-CP :CHIP R7121 0 :CHIP FL7002 34M LPF R7075 R7037 R7125 R7116 :RN-CP 2.2k...
- Page 172 A BOARD SCHEMATIC DIAGRAM TO B CN513 CN511 TO B :S-MICRO CN3203 — CN510 3.3V 5V-D TO B CN2804 +BOVP VSIN VSIN VPARA2 VPARA2 D541 D540 VPARA1 VPARA1 1SS133 1SS133 R581 — ACRLY :1608 MPPARA MPPARA EWPARA EWPARA R582 0 :1608 DFPARA DFPARA HCPARA...
- Page 174 TO D BOARD 1/10W 1SS133 :CHIP CN8031 HOLD DOWN D510 D511 1SS133 C553 D516 HVCOMP 1SS133 1000 1SS133 HDRV D535 HDRV D534 Q510 1SS133 1SS133 2SB709A R544 MUTE 4.7k 1/10W :CHIP D515 — PDAT R645 PDAT 1SS133 0 :1608 HOLDN/PCLK PCLK R533 R647...
- Page 177 KP-57WV600/57WV700/ 65WV600/65WV700 B BOARD WAVEFORMS R3302 C3329 R3303 Q3307 5.6k FL3301 1/16W 2SD601A 1/16W 7.2MHz :CHIP B:1608 BUFFER :RN-CP :LPF R3304 1/16W DRCY :CHIP Y MAIN R3372 R3371 Q3306 1/16W 2SD601A 1.3 Vp-p (H) 1.2 Vp-p (H) 1.6 Vp-p (H)
- Page 178 DICD1 DICD0 C3341 RBSL VS17 F:1608 TRST C3343 F:1608 CYD0 IC3303 — CYD1 CXD2097AQ RB3436 DRC-MF FSEL VD11 DIY7 DIY6 AVD3 DIY5 IIC1 3.3V C3349 AVS3 DIY4 Q3906 DIY3 D3309 2SK2036 F:1608 R3974 DAN202K-T-146 ORDER DIY2 LEVEL-SHIFT C3350 PROTECT — INSEL DIY1 R3928...
- Page 179 2SD601A SEL Y OUT BUFFER VDO Y PMUTE PMUTE SEL CB OUT VDO CB R3348 R3425 :1608 DRCV R3351 SEL CR OUT VDO CR 2.2k 1/16W :CHIP SEL Y/CR/CB VDO HS 3.3V 3.3V 3.3V VDOVS FB3001 3.3V BLM41P750S ABLATT ABLATT C3620 B:1608 S-VD...
- Page 180 B BOARD SCHEMATIC DIAGRAM (2 OF 6) — SUBAD_CLVL IC3401 3.3V R3575 C3403 DRC RESET C3401 F:1608 IC3403 F:1608 C3404 R3410 L3402 PST9120NL 6.3V 1/16W :CHIP C3410 RESET :AL-CP :CHIP F:1608 C3414 — C3411 C3412 C3409 F:1608 SUBAD_OUT C3408 F:1608 F:1608 6.3V F:1608...
- Page 181 KP-57WV600/57WV700/ 65WV600/65WV700 3.3V C3405 C3406 6.3V C3407 :AL-CP B:1608 B:1608 RB3425 RB3421 DQ15 VCCQ VSSQ DQ14 DQ13 VSSQ VCCQ RB3422 RB3426 DQ12 DQ11 VCCQ VSSQ DQ10 VSSQ VCCQ R3411 N.C. N.C. 1/16W R3422 R3421 :1608 C3417 :1608 :1608 DQM0 DQM1...
- Page 182 :RN CP BUFF AUXCIN1 R3037 AUXCIN0 VDD2 R3986 1/16W DTVCIN4 DSPCR4 TH-CR :CHIP 1/16W :RN-CP DTVCIN3 DSPCR5 R3040 DTVCIN2 DSPCR6 1/16W :RN-CP DTVCIN1 DSPCR7 DTVCIN0 DSPCB0 — IIC1 R3091 R3092 L3089 D3089 R3096 2.2k 2.2k R3095 MA153 1/16W 1/16W 1/16W 100k :CHIP :CHIP...
- Page 183 C3462 F:1608 MID YS 3.3V C3499 0.01 B:1608 C3473 C3496 F:1608 MID VS R3440 1/16W IC3409 :CHIP R3823 R3881 NJM2870F25 C3475 C3476 2.7k 1/16W :CHIP 1/16W :CHIP 2.5V-REG L3411 R3439 IC3413 MID Y C3501 R3441 :AL-CP TC74LVX157FT :CHIP 1/16W R3820 1/16W +3.3V :CHIP...
- Page 184 B BOARD SCHEMATIC DIAGRAM (3 OF 6) — L8601 C8651 Q8603 C8650 — 2SC2223 BUFFER SEL Y/CR/CB R8611 SEL Y SEL Y OUT R8631 1.5k R8620 SEL Y R8628 Q8608 2SA1226 R8614 BUFFER SEL CB OUT FL8603 R8624 SEL CR OUT —...
- Page 185 KP-57WV600/57WV700/ 65WV600/65WV700 IC3606 BA033FP-E2 3V REG. C8654 C8653 C8652 6.3V ADC3V ADC3V L8602 ADC3V 8632 C8638 C8634 C8637 L8603 6.3V C8639 L8604 C8643 C8647 C8641 C8645 C8649 C8640 C8642 C8644 C8646 C8648 DGNDADTTL DGNDAD3 DVCCADTTL DGNDAD3 IC8601 CXA3506R DGNDADTTL DVCCADTTL...
- Page 186 G/YCLP R8637 B/CbCLP R8636 R/CrCLP DPGND SOGIN1 B/CbIN1 C8615 AVCCAMPB SOGIN2 — B/CbIN2 C8656 AGNDAMPB C8612 C8624 DPGND R/CrIN1 AVCCAMPR C8657 R/CrIN2 C8623 AGNDAMPR G/YOUT — TEST R8645 C8630 R8648 — R8643 R8646 5.6k C863 R8653 R8647 R8652 SUBAD_PWRSV R8650 —...
- Page 187 DGNDDAD3 DGNDADTTL DGNDAD3 DVCCADTTL ISOLATED_GND C8631 C8636 8652 SUBAD_OUT ADC3V ADC3V C8633 HD-ADC 9-965-926-01<DA4X> B(3/6) —...
- Page 188 B BOARD SCHEMATIC DIAGRAM (4 OF 6) CN2801 CN2802 CN2803 :S-MICRO TO VM BOARD TO VM BOARD TO VM BOARD CN9002 CN9002 CN9002 — L2801 L2808 :LB2016 TO DBOARD C2802 C2801 R2879 CN8029 470k C2859 C2860 R2880 R2803 F:1608 :AL-CP 4.7k CN2806 1.2k...
- Page 189 KP-57WV600/57WV700/ 65WV600/65WV700 B BOARD WAVEFORMS 1.5 Vp-p (V) 1.7 Vp-p (V). 2.9 Vp-p (H) 3.0 Vp-p (V) 2.3 Vp-p (V). 2.4 Vp-p (H) R2810 C2851 C2850 4.7k 1/16W :CHIP F:1608 :AL-CP L2807 ROUT Q2803 TP88 2SB709A :LB2016 BUFF R DRV...
- Page 190 :CHIP V DRV+ V DRV+ R2848 R2846 2.2k 3.3k V TIM 1/16W 1/16W :CHIP H CENT :CHIP M PIN DF PARA H PLS R2850 EW DRV 1/16W V PARA2 H PROT :CHIP — V PARA1 V PROT D2807 V DRV- MA111-TX V DRV+ H DRV...
- Page 191 C2845 D2803 MA111 :AL-CP C2844 R2851 1/16W C2846 :AL-CP :CHIP B:CHIP R2854 :1608 D2807 R2858 R2920 111-TX 1/16W :1608 :RN-CP D2806 C2847 0.22 O2CZ5.6 LIMIT B:1608 R2860 1/16W :CHIP ABLATT R2861 1/16W :CHIP CRT DRIVE 9-965-926-01<DA4X> B(4/6) —...
- Page 192 B BOARD SCHEMATIC DIAGRAM (5 OF 6) — NRHP +3.3V — C3016 RB3011 RB3013 ADTB 47*4 47*4 F:1608 — W13ID R3013 1/16W :CHIP R3051 1/16W IC3001 :1608 IS41C16256-35K SDRAM — RB3006 RB3008 47*4 47*4 YNRM0 CNRM0 I/O0 I/O15 CNRM1 YNRM1 I/O1 I/O14 CNRM2...
- Page 193 KP-57WV600/57WV700/ 65WV600/65WV700 5V-1 5V-2 L3011 1/16W :CHIP R3078 1/16W R3079 :CHIP 1/16W :CHIP Q3009 C3615 2SD601A VCC-DROP R3050 R3029 :AL-CP RB3014 RB3015 1/16W 47*4 47*4 :CHIP 1/16W C3613 C3614 L3010 :CHIP L3009 Q3003 C3037 6.3V 1/16W D3002 2SD601A :AL-CP F:1608...
- Page 194 AL-CP L3004 IC3004 :CHIP 5V REG C3046 RB3010 D3001 C3005 C3006 C3047 0.01 C3048 47*4 — 0.01 MA111 0.01 C3014 B:1608 B:1608 AL-CP B:1608 :AL-CP 6.3V FL3001 AL-CP CKD510JB1A105ST RB3009 47*4 — L3005 +3.3V :CHIP FL3002 3.3V 3.3V CKD510JB1A105ST C3008 C3009 —...
- Page 195 6.3V B:1608 C3015 C3623 C3018 C3624 F:1608 F:1608 F:1608 F:1608 RB3012 47*4 C3017 C3019 C3021 R3014 6.3V R3020 B:1608 3.3k F:1608 F:1608 R3017 1/16W 1/16W 2.2k :CHIP :CHIP 1/16W :CHIP R3015 IIC1 1/16W :CHIP A/D (DNR) 9-965-926-01<DA4X> B(5/6) —...
- Page 196 B BOARD SCHEMATIC DIAGRAM (6 OF 6) TO MS1 CN104 CN3601 — R3601 1/16W :CHIP VCLK VCLK R3602 1/16W :CHIP R3603 0 1/16W :CHIP SUBAD_DSYNC — RB3100 10*4 VUV7 VUV6 VUV5 VUV4 VUV3 — VUV2 IC3601 VUV1 TC7SZ126FU C3601 VUV0 R3612 FB3601 100k...
- Page 197 KP-57WV600/57WV700/ 65WV600/65WV700 VSYNC_OUT DISABLE IC3602 FB3602 TC7SZ125FU BK1608HS601 BUFF C3602 F:1608 IN A OUT A...
- Page 198 MS+5V CN3602 +3.3V — SIG1 FB3610 BK1608TS601 TRST C3604 IC3603 L3601 SN65LVDS31DR PLW3216S261SQ :AL-CP DIFF-AMP C3606 DIN1 C3605 — 0.01 F:1608 DIN4 DOUT1+ B:1608 DOUT4+ DOUT1- DOUT4- L3602 PLW3216S261SQ SID3 DOUT2- R3617 SID2 DOUT3- DOUT2+ 1/16W :CHIP DOUT3+ DIN2 DIN3 IC3609 NJM2780F33-TE —...
- Page 199 3.3V fferential Input 9-965-926-01<DA4X> B(6/6) —...
- Page 201 KP-57WV600/57WV700/ 65WV600/65WV700 3.3V C169 :AL-CP 3.3V TO P2 FB102 R122 BK1608TS601 +3.3V :CHIP R123 :CHIP MS_RDY...
- Page 202 I/O1 FA18 FD15 :CHIP FA18 I/O8 FA19 FD14 FA19 RB101 I/O0 FD13 100k*4 :CHIP FD12 FD11 RB117 10*4 FD10 :CHIP FB125 RB102 BK1608TS601 100k*4 — :CHIP C118 C117 C103 IC102 0.01 0.01 SST39VF800A70- RB118 B:CHIP B:CHIP 10921A-T B:CHIP 10*4 FLASH ROM :CHIP RB103 100k*4...
- Page 203 C109 C111 0.01 R130 100k B:CHIP B:CHIP :CHIP FD15 FD14 IC105 R131 R9243 MB86189 R9242 :CHIP MS I/F 1/16W FB126 :CHIP 1/16W FD13 BK1608TS601 :CHIP SCKO SCKO BC FD12 SDIO SDIO BC FD11 R9240 BS BC 1/16W :CHIP FD10 SDIR SDIR BC R9239 SCKI...
- Page 204 MS1 BOARD SCHEMATIC DIAGRAM (2 OF 3) RB129 RB130 100k*4 100k*4 :CHIP :CHIP C165 — :AL-CP D102 C166 HN2D01FU 0.01 FB111 BK1608TS601 B:CHIP MS_RESET C152 B:CHIP — D103 HN2D01FU D104 HN2D01FU PF2/PWM2 R288 1/16W PF3/PWM3 :CHIP PF4/PWM4/SCL0 SCL_EX RB131 10k*4 PF5/PWM5/SCL1 :CHIP PF6/PWM6/SDA0...
- Page 205 KP-57WV600/57WV700/ 65WV600/65WV700 POWER_INT P INT 3.3V R295 1/16W :CHIP R176 0 :CHIP FB109 TO P1 BK1608TS601 R177 0 :CHIP C128 R154 :CHIP 0.01 R155 0 :CHIP VDD1 B:CHIP C129 VDD2 0.01 VDD3 B:CHIP C130 VDD4 0.01 VDD5 B:CHIP C131 INT0...
- Page 206 :CHIP 1/16W F-RST :CHIP ~~~~~~ ~~~~~ MS_RST SDIR TO P1 ~~~~~~ ~~~~~ MS_INS S-CS ~~~~ — USBP TXD/SO R143 :CHIP /SCS C113 CH:CHIP MCLKI X101 12.2727MHz C114 CH:CHIP MCLKO C115 1000p CH:CHIP C116 1000p CH:CHIP R136 :CHIP 3.3V — R186 RTCLKI C119 +3.3V...
- Page 207 3.3V RB122 RB123 FB104 BK1608TS601 47*4 47*4 :CHIP :CHIP IC108 C154 FB110 MT48LC8M16A2TG75 BK1608TS601 -Y95W B:CHIP SDRAM DQ15 VSSQ VCCQ RB124 DQ14 FB137 47*4 BK1608TS601 :CHIP DQ13 /RAS VCCQ VSSQ /CAS DQ12 DQ11 /DQMU VSSQ VCCQ DQML /DQML DQ10 R158 0 :CHIP SDCLK VSSQ...
- Page 208 MS1 BOARD SCHEMATIC DIAGRAM (3 OF 3) — — — MS_DIS — 3.3V R173 FB105 BK1608TS601 :CHIP — VBLK VPEN I/O 17 C150 RB107 0.01 10*4 R208 I/O 30 I/O 16 :CHIP — B:CHIP :CHIP I/O 31 TMS/NC VCLK RESET C149 IC110 RB108...
- Page 209 KP-57WV600/57WV700/ 65WV600/65WV700 3.3V FB112 BK1608HS601 C168 IC120 IC119 TC7SZ126FU TC7SZ126FU F:CHIP R173 :CHIP +3.3V VCLK VCLK VCLK R199 :CHIP R169 :CHIP FROM P2 R171 :CHIP MRESET R197 :CHIP FROM P2 VUV7 VTRIGER VUV7 VUV6 R209 TO P1 VUV6 VUV5 :CHIP...
- Page 210 R174 :CHIP VBLK :CHIP HBLK R163 :CHIP R161 PXOE TO P2 PXOE :CHIP TO P1 PCLKO MSCLK IREFC TO P2 — CVBS IREFL R195 3.3V :CHIP R217 1/16W :CHIP Q110 DTC114EKA R216 — 1/16W :CHIP MS_DIS5 3.3V R160 R159 FB108 :CHIP :CHIP BK1608TS601...
-
Page 211: Memory Stick
FB106 BLM41P750S MS+5V MS+5V MS+5V MS+5V FB140 0 1/16W :CHIP TRST TRST FB141 BK1608TS601 AD_DIS AD_DIS FB142 0 1/16W :CHIP FB143 BK1608TS601 MS_DIS MS_DIS FB144 0 1/16W :CHIP FB145 1/16W :CHIP SCL_EX FB146 FROM P2 0 1/16W :CHIP FB147 1/16W :CHIP SDA_EX FB148... - Page 212 G BOARD SCHEMATIC DIAGRAM L6518 TO A BOARD :LHL08 POWER SUPPLY CN514 — CN6701 PS6502 C6703 R6702 0.0047 250V 1/2W AC(W) AC(L) C6702 D6702 R6703 0.0047 C6704 D6SB60L 470k D6701 250V 1800 1/2W ERC04-06SE AC-RECT PS6501 — C6707 C6705 0.0047 0.22 250V 250V...
- Page 214 1SS355TE 1/16W R6731 L6521 :RN-CP 1/16W C6727 :LHL08 :RN-CP R6511 1.8k 1/10W :CHIP R6732 1/10W :CHIP — R6510 PH6001 R6513 R6733 ON3171-R MAIN CONTROL 1/10W :1608 1/10W :CHIP :CHIP — IC6503 DM-58 CONTROL 2.5V R651 — :FPR R6521 C6570 0.01 1/10W :CHIP B:1608...
- Page 217 KP-57WV600/57WV700/ 65WV600/65WV700 AD BOARD WAVEFORMS 2.1 Vp-p (V) 2.3 Vp-p (V) 2.1 Vp-p (V) IC9407 CD0031AM D/A CONVERTER C9495 0.0047 B:1608 2.5 Vp-p (V) 2.0 Vp-p (V) 2.3 Vp-p (V) BCLK MUTED WCLK DVDD DVSS DVSS VSSRH VSSBV C9486 C9461...
- Page 218 Q9407 RE_YS 2SC2412K FB9415 YS/YM OR BLM11A601S R9455 :1608 R9573 2.2k 1/16W :RN-CP 1/10W C9416 :CHIP R9404 RB9400 R9448 C9444 100*4 680p 1/10W F:1608 1/10W :CHIP -15V :CHIP CH:1608 R9454 R9422 C9409 2.2k C9410 RE_YS/YM — 1/16W R9411 1/10W R9401 Q9417 :RN-CP :CHIP...
- Page 219 9455 R9468 R9480 C9470 2.2k 2.2k 2.2k 680p /16W 1/16W 1/16W RN-CP :RN-CP :RN-CP CH:1608 C9444 680p C9502 680p R9479 R9467 H:1608 2.2k 2.2k 1/16W CH:1608 C9450 1/16W :RN-CP 9454 C9476 C9509 :RN-CP /16W F:1608 N-CP C9468 F:1608 F:1608 470p C9501 +VCC +VCC...
- Page 220 D BOARD SCHEMATIC DIAGRAM — CN8013 CN8012 CN8007 CN8008 CN8009 CN8010 CN8011 CN8006 TO G/G1: :S-MICRO :S-MICRO :S-MICRO :S-MICRO :S-MICRO :S-MICRO :S-MICRO CN6302 TO DY(R) TO DY(G) TO DY(B) TO DY(B) TO DY(R) TO DY(G) TO VM(R):CN9001 R8114 — R8101 R8116 C8145 IC8010...
- Page 221 KP-57WV600/57WV700/ 65WV600/65WV700 D BOARD WAVEFORMS 500 mVp-p (V) 53.2 Vp-p (V) CN8016 CN8015 :LARGE :S-MICRO 500 mVp-p (V) 14.7 Vp-p (H) TO HV BLOCK TO CRT BRACKET C8104 0.0015 B:1608 +135V HV (R) TO PICTURE TUBE R HV (G) TO PICTURE...
- Page 222 PSCL 1/10W L8017 C807 :CHIP +5V_OUT :LAV35 +19V R8058 :LAV35 R8234 /BINT L8007 B:16 C8032 +19V L8031 1/10W C8036 1/10W SDAT :CHIP :LHL08 :CHIP :LAV35 C8072 SCLK R8235 PS8005 C8025 C8028 3.15A R8140 1/10W :CHIP R8009 PS8003 RE_R 1/10W 1/10W :CHIP 3.15A :CHIP...
- Page 225 KP-57WV600/57WV700/ 65WV600/65WV700 M BOARD WAVEFORMS C2109 1.3 Vp-p (H) 1.3 Vp-p (H) 6.3V B:1608 C2115 F:1608 C2108 R2097 1/16W R2081 :CHIP VDOY VDOY 1/16W MCCDIN :CHIP VDOCB R2103 1/16W :CHIP (P3) VDOCB VDOCR VDOCR R2082 L2009 R2107 MIDCONT 1.7 Vp-p (H) 2.2 Vp-p (H)
- Page 226 Y CLAMP Y3IN CH:1608 STBY5V STBY5V C2085 C2043 Y IN VTIM 0.47 B:1608 FIX/VARL VARL (P4) CVCC B:1608 FIX/VARR VARR (P4) C IN HGND CN2006 :B TO B TUNER (P3) TO U CN1502 SUBC R2061 C2050 C2067 3.9k — R2055 0.47 1/16W :CHIP...
- Page 227 GND1 CTL1 3 3V (P4) C2085 1/16W C2130 C2131 :CHIP 0.47 IN1A IN1B CN2002 C2104 C2111 C2121 IC2009 B:1608 F:1608 TC74LVX157FT :B TO B F:1608 SYNC SW TO A CN523 R2076 POWERCONT :CHIP (P3) R2125 MAINCCD (P3) 1/16W R2113 :CHIP 1/16W R2124 :CHIP...
- Page 228 M BOARD SCHEMATIC DIAGRAM (2 OF 4) — C2226 C222 F:1608 Q2204 — R2230 R2222 2SB709A BUFF 1/16W 1/16W :CHIP :CHIP R2213 4.7k 1/16W :CHIP R2217 R2221 2.2k 1/16W 1/16W :CHIP :CHIP — R2229 220k 1/16W Q2202 C2224 :CHIP 2SD601A R2216 BUFF 1/16W...
- Page 229 KP-57WV600/57WV700/ 65WV600/65WV700 L2202 :LB2016 C2227 R2242 R2245 2230 Q2215 1/16W 1/16W R2253 2SD601A :RN-CP :RN-CP C2230 Q2214 /16W BUFF 1/16W CHIP 2SB709A :CHIP CH:1608 R2251 BUFF 3DV/YIN (P1) 1/16W :CHIP Q2208 R2236 2SD601A R2252 C2237 BUFF 1/16W 1/16W :CHIP CH:1608...
- Page 230 C2222 X2200 R222 C2248 C2200 Q2201 R2207 CH:1608 1/16 AGND CBPC 2SB709A C2215 F:1608 1/16W BUFF FSCO AVDD :CHIP F:1608 C2249 C2211 R2254 R2255 — F:1608 R222 R2223 C2251 C2204 FL2202 C2202 2.2k 1/16 L2207 390p 1/16W :CHI +2.5V :CHIP R2202 F:1608 F:1608...
- Page 231 BUFF :CHIP :CHIP 2SD601A R2227 3DYOUT BUFF 1/16W 3DYOUT :CHIP (P1) R2249 1/16W :CHIP R2243 R2248 R2237 C2234 1/16W 1/16W R2226 C2229 1/16W :CHIP :CHIP :CHIP 1/16W :CHIP :CHIP R2235 L2203 1.2k 1/16W 1/16W :CHIP RES-CHIP R2241 Q2210 C2238 C2236 Q2212 2SD601A 1/16W...
- Page 232 M BOARD SCHEMATIC DIAGRAM (3 OF 4) TO A CN525 POWERCONT CN2302 :B TO B — SYNCSW YCBCRSW0 TU2V YCBCRSW1 TU2V R2469 LINEMUTE TU2LR 1/16W TU2LR :CHIP SIRCS CONTROLS ACOFF Q2314 R2298 2SB709A TU1R STBYLED ERROR-DETECT 1/16W TU1R :CHIP TIMERLED —...
- Page 233 KP-57WV600/57WV700/ 65WV600/65WV700 MIDCONT (P.1) Q2311 C2347 2SD601A BUFFER C2324 F:1608 C2330 R2437 F:1608 1/16W F:1608 :1608 R2434 1/16W :CHIP R2397 TESTA R2423 1/16W D2300 SIRCS 1/16W :1608 DAN202K :1608 D2302 DAP202K SUBCCD (P.1) R2412 R2433 SCCDIN 2.2k 1/16W :CHIP 1/16W...
- Page 234 :CHIP TIMERLED Q2316 TIMERLED 2SB709A STBYLED STBYLED STBY 5V STBY 5V Q2313 2SD601A BUFF KEYWAKE C2309 R2323 L2012 1/16W F:1608 IC2305 STBY5V :LB2016 :CHIP NJM2391DL1-33 C2312 3.3V-REG C2358 C2359 Q2301 R2363 R2368 — CH:1608 2SD601A 6.3V BUFF 1/16W 1/16W C2353 F:1608 R2335 C2362...
- Page 235 C2323 +3.3V C2329 F:1608 F:1608 TESTA R2396 R2416 SIRCS 1/16W 1/16W :1608 :1608 R2411 D2301 R2430 2.2k DAN202K 2.2k MAINCCD 1/16W 1/16W :1608 :1608 (P.1) Q2305 R2427 2SD601A MCCDIN 1/16W TESTB DOTCK :CHIP (P.1) MAINH R2408 4.7k 1/16W :CHIP MAINV OSD_HS(HSYNC1) R2421 R2431...
- Page 236 M BOARD SCHEMATIC DIAGRAM (4 OF 4) — R2560 R2561 R2562 R2563 Q2505 2SD601A R2558 1/16W 1/16W 1/16W 1/16W DSP-CUT :CHIP :CHIP :CHIP :CHIP 1/16W :CHIP — DSPCUT (P3) R2559 1/16W :CHIP Q2506 2SD601A Q2508 DSP-CUT 2SD601A FB2512 DSP-CUT HM601 —...
-
Page 343: Remarque Au Sujet De Caption Vision (Affichage Des Sous-Titres)
AVERTISSEMENT Remarque au sujet de Caption Vision (affichage des Afin d’éviter tout risque d’incendie ou d’électrocution, ne pas sous-titres) exposer la télévision à projection à la pluie ou à l’humidité. Ce téléviseur permet d’afficher les sous-titres en conformité avec l’article § 15.119 des règlements de la FCC. Remarque sur le réglage de la convergence CAUTION Avant d'utiliser votre télévision à... -
Page 344: Renseignements Sur La Marque De Commerce
Pour obtenir la meilleure image possible, n'exposez pas à projection, sous le logo Sony, sur la vignette autocollante et aussi l'écran à un éclairage direct ou au soleil. Il est recommandé... -
Page 345: Importantes Consignes De Sécurité
IMPORTANTES CONSIGNES DE SÉCURITÉ Pour votre sécurité, il est recommandé de lire toutes les instructions Intrusion de liquide ou d’objet et de garder ce mode d’emploi afin de s’y référer au besoin. Ne jamais introduire d’objets dans le téléviseur Respecter les mises en garde, les avertissements et les instructions par les fentes du boîtier car ceux-ci pourraient placés sur l’appareil ou décrits dans le mode d’emploi ou le guide entrer en contact avec des points de tension... -
Page 346: Entretien
Ventilation Foudre Les fentes et les ouvertures du boîtier, situées à l’arrière et Afin de mieux protéger le téléviseur lors d’orages électriques et en au bas de l’appareil, sont essentielles à la ventilation de cas d’absence ou de période prolongée pendant laquelle l’appareil l’appareil. -
Page 347: Par Mesure De Sécurité
Par mesure de sécurité Faites attention lors du déplacement de la télévision à projection Lorsque vous placez cette dernière en position, assurez-vous de ne pas l'échapper sur vos pieds ou vos doigts. Gardez bien votre équilibre lors de l'installation de la télévision à projection. Transportez la télévision à... - Page 349 Contenu Présentation de la télévision à projection Bienvenue......................9 Contenu de l’emballage ..............9 Fonctions...................9 Réglage de la télévision Aperçu......................11 Transporter votre télévision à projection ..........12 Installation de la télévision ................12 Commandes et raccordements de la télévision ........13 Commandes vidéo avant ..............13 Panneau avant ................14 Panneau arrière ................16 Raccordements de base : comment relier un câble ou une antenne..18...
- Page 350 Utilisation du menu Parent ................80 Utilisation du menu Réglage..............83 Informations en sus Aperçu......................87 Glossaire ......................88 Remarques sur l’utilisation du support Memory Stick ......89 Comment communiquer avec Sony ............90 Guide de dépannage ..................90 Spécifications ....................95 Accessoires en option .................96 Index ......................97...
-
Page 351: Présentation De La Télévision À Projection
Présentation de la télévision à projection Bienvenue Merci d'avoir acheté la télévision à projection de Sony. Utilisez ce manuel avec les modèles suivants : KP-57WV700 KP-65WV700 Contenu de En plus de la nouvelle télévision à projection, cet emballage contient l’emballage une télécommande et deux piles de type AA. - Page 352 ™ Twin View : En utilisant le lecteur d’image composite (MIDX), la syntonisation juxtaposée vous permet de regarder deux émissions côte à côte, avec la possibilité de zoomer une image. Vous pouvez regarder des images de deux sources différentes (1080i, 720p, 480p et 480i) simultanément. (Seule la fenêtre de gauche de Twin View peut afficher des sources de 1080i, 720p et 480p.) ™...
-
Page 353: Réglage De La Télévision
Réglage de la télévision Aperçu Ce chapitre présente les illustrations pour les réglages de la télévision. Sujet Page(s) Transporter votre télévision à projection Installation de la télévision Commandes et raccordements de la télévision 13-17 Raccordements de base : comment relier un câble ou une 18-24 antenne Raccordement d’appareil en option... -
Page 354: Transporter Votre Télévision À Projection
Transporter votre télévision à projection Le transport de la télévision demande quatre personnes ou plus. Elle est munie de roulettes pour faciliter son déplacement sur des surfaces dures. S'assurer de déplacer la télévision à projection au moyen des roulettes. La télévision est aussi munie de poignées que vous pouvez utiliser pour transporter l'appareil. -
Page 355: Commandes Et Raccordements De La Télévision
Commandes et raccordements de la télévision Pour accéder au panneau vidéo avant, pousser vers le haut puis relâcher. Le panneau s'abaisse automatiquement. Pousser vers le haut et relâcher Commandes vidéo avant L(MONO) S VIDEO VIDEO AUDIO VIDEO 2 IN 1 S VIDEO Se relie à... -
Page 356: Panneau Avant
Panneau avant ACCESS MEMORY STICK POWER STAND BY TIMER CHANNEL VOLUME TV/VIDEO FLASH FOCUS... - Page 357 Si le DEL clignote de façon continue, cela peut signifier que le téléviseur a besoin d’être réparé (se reporter à « Comment communiquer avec Sony » à la page 90). 6 TIMER LED Lorsqu’allumé, indique que l’une des minuteries est réglée.
-
Page 358: Panneau Arrière
Panneau arrière... - Page 359 Permet au téléviseur de recevoir (IN) et de transmettre (OUT) des signaux par IN/OUT télécommande à d’autres appareils vidéo ou audio à commande infrarouge de Sony possédant la fonction CONTROL S. *High Bandwidth Digital Content Protection : Protection numérique du contenu en bande large...
-
Page 360: Raccordements De Base : Comment Relier Un Câble Ou Une Antenne
Raccordements de base : comment relier un câble ou une antenne Le choix de raccordement dépendra du type d’installation dans l’immeuble (câble, décodeur, antenne) et si un magnétoscope sera raccordé ou non. Si vous raccordez Se reporter à la page Câble ou antenne seulement Pas de décodeur ni de magnétoscope Câble et antenne seulement... -
Page 361: Câble Ou Antenne Seulement
Câble ou antenne Pour obtenir de meilleurs résultats, utiliser un des raccordements suivants pour raccorder un câble ou une antenne et si : seulement Vous n’avez pas besoin de décodeur pour débrouiller les canaux. (Si vous avez un décodeur, se reporter aux pages 22-24.) Vous n’avez pas l’intention de raccorder un magnétoscope. -
Page 362: Câble Et Antenne Seulement
Câble et antenne Pour obtenir de meilleurs résultats, utiliser ce raccordement si vous : Possédez un câble et une antenne. seulement (Il s’agit d’un moyen pratique si vous utilisez une antenne de toit séparée pour recevoir des canaux supplémentaires qui ne sont pas offerts par votre société... - Page 363 Remarques sur l’utilisation de ce raccord Pour faire ceci ... Faire cela ... Basculer l’entrée du téléviseur Appuyer sur pour basculer entre les entrées VHF/UHF et AUX du entre le câble et l’antenne téléviseur. Capter des canaux avec une Appuyer sur pour passer à...
-
Page 364: Décodeur Et Câble Seulement
Décodeur et câble Pour obtenir de meilleurs résultats, utiliser ce raccordement si : Votre société de câblodistribution ne brouille que certains canaux, seulement tels que les canaux de la télévision payante (qui demandent l’utilisation d’un décodeur), mais pas tous les canaux. Vous n’avez pas de magnétoscope. - Page 365 Raccorder le décodeur et le câble Raccorder le câble de votre société de câblodistribution à la prise VHF/UHF du téléviseur. Utiliser un câble coaxial pour raccorder la prise TO CONVERTER du téléviseur à la prise d’entrée du décodeur. (Le convertisseur interne du téléviseur permet de passer des signaux non brouillés arrivant directement au téléviseur aux signaux brouillés arrivant du décodeur, éliminant ainsi le besoin d’installer un diviseur...
-
Page 366: Décodeur Seulement
Décodeur Pour obtenir de meilleurs résultats, utiliser ce raccordement si : Votre société de câblodistribution brouille tous les canaux, seulement nécessitant l’utilisation d’un décodeur. Vous n'avez pas de magnétoscope. (Si vous avez un magnétoscope, se reporter aux pages 26 et 28.) Grâce à... -
Page 367: Raccordement D'appareil En Option
Raccordement d’appareil en option Utiliser les directives comprises dans cette section pour raccorder les appareils en option suivants : Pour raccorder Voir la page Magnétoscope et câble Magnétoscope et décodeur Deux magnétoscopes pour l’édition de vidéocassettes Récepteur satellite Récepteur satellite et magnétoscope Lecteur DVD avec connecteurs de composantes vidéo Lecteur DVD avec connecteurs audio et... - Page 368 Magnétoscope et Pour obtenir de meilleurs résultats, utiliser ce raccordement si: Votre société de câblodistribution n’exige pas l’utilisation d’un câble décodeur. Remarque sur l'utilisation des options d'image double (syntoniseur Twin View, etc.) avec ce raccordement Avec ce raccordement, vous pouvez utiliser toutes les options d'image double. Pour raccorder le magnétoscope et le câble Raccorder un câble CATV à...
- Page 369 à plusieurs reprises pour sélectionner l’entrée du câble (VHF/UHF dans l’illustration). Régler la télécommande pour Si votre magnétoscope n’est pas fabriqué par Sony, vous devez programmer qu’elle fasse fonctionner le la télécommande. Se reporter à « Programmation de la télécommande » aux magnétoscope...
-
Page 370: Magnétoscope Et Décodeur
Magnétoscope et Pour obtenir de meilleurs résultats, utilisez ce raccordement si : Votre société de câblodistribution brouille certains canaux, tels décodeur que la télévision payante (qui exige l’utilisation d’un décodeur), mais ne brouille pas tous les canaux. Remarque sur l'utilisation des options d'image double (syntoniseur Twin View, etc.) avec ce raccordement Avec ce raccordement, vous pouvez utiliser toutes les options d'image double. - Page 371 à plusieurs reprises pour sélectionner l’entrée du magnétoscope (VIDEO 1 dans l’illustration). Régler la télécommande pour Si votre magnétoscope n’est pas fabriqué par Sony, vous devez programmer qu’elle fasse fonctionner le la télécommande. Se reporter à « Programmation de la télécommande » aux décodeur ou le magnétoscope...
-
Page 372: Deux Magnétoscopes Pour L'édition De Vidéocassettes
Deux Le raccordement de deux magnétoscopes vous permet d'enregistrer magnétoscopes d'un magnétoscope à l'autre. En les raccordant tel qu’il est illustré ci-dessous, il est possible de vérifier l'enregistrement. pour l’édition de vidéocassettes Pour raccorder deux magnétoscopes pour l’édition de vidéocassettes Utiliser un câble A/V pour raccorder les prises de sortie A/V du magnétoscope de lecture aux prises d’entrée A/V du téléviseur. - Page 373 à plusieurs reprises pour sélectionner l’entrée du enregistré magnétoscope (VIDEO 1 dans l’illustration). Régler la télécommande pour Si votre magnétoscope n’est pas fabriqué par Sony, vous devez programmer qu’elle fasse fonctionner les la télécommande. Se reporter à « Programmation de la télécommande » aux magnétoscopes pages 51-52.
-
Page 374: Récepteur Satellite
Récepteur satellite Pour raccorder un récepteur satellite Raccorder le câble de l’antenne satellite à la prise d’entrée satellite du récepteur satellite. Vous utilisez des Utiliser un câble A/V pour raccorder les prises de sortie A/V du prises S VIDEO? récepteur satellite aux prises d’entrée A/V du téléviseur. Voir la page 25. - Page 375 à plusieurs reprises pour sélectionner l’entrée du récepteur satellite (VIDEO 1 dans l’illustration). Régler la télécommande pour qu’elle fasse Si votre récepteur satellite n’est pas fabriqué par Sony, vous fonctionner le récepteur satellite devez programmer la télécommande. Se reporter à «...
-
Page 376: Récepteur Satellite Et Magnétoscope
Récepteur satellite Pour raccorder un récepteur satellite et un magnétoscope et magnétoscope Raccorder le câble de l’antenne satellite à la prise d’entrée satellite du récepteur satellite. Raccorder le câble CATV à la prise d’entrée VHF/UHF du magnétoscope. Vous utilisez des Utiliser un câble coaxial pour raccorder la prise de sortie prises S VIDEO? VHF/UHF du magnétoscope à... - Page 377 à plusieurs reprises pour sélectionner l’entrée à laquelle le magnétoscope est raccordé (VIDEO 1 dans l’illustration). Régler la télécommande pour Si votre magnétoscope ou récepteur satellite n’est pas fabriqué par Sony, qu’elle fasse fonctionner le vous devez programmer la télécommande. Se reporter à « Programmation récepteur satellite ou le...
-
Page 378: Lecteur Dvd Avec Connecteurs De Composantes Vidéo
Lecteur DVD avec Pour obtenir de meilleurs résultats, utiliser ce raccordement si votre connecteurs de lecteur DVD possède des prises de composantes vidéo (Y, P composantes Pour raccorder un lecteur DVD avec connecteurs de composantes vidéo vidéo Utiliser trois câbles de composantes vidéo séparés pour raccorder les prises Y, P et P du lecteur DVD aux prises Y, P... - Page 379 à plusieurs reprises pour sélectionner l’entrée du DVD (VIDEO 5 dans l’illustration). Régler la télécommande pour Si votre lecteur DVD n’est pas fabriqué par Sony, vous devez programmer la qu’elle fasse fonctionner le télécommande. Se reporter à « Programmation de la télécommande » aux lecteur DVD pages 51-52.
-
Page 380: Lecteur Dvd Avec Connecteurs Audio Et S Video
à plusieurs reprises pour sélectionner l’entrée du DVD (VIDEO 1 dans l’illustration). Régler la télécommande pour Si votre lecteur DVD n’est pas fabriqué par Sony, vous devez programmer la qu’elle fasse fonctionner le télécommande. Se reporter à « Programmation de la télécommande » aux lecteur DVD pages 51-52. -
Page 381: Décodeur De Télévision Numérique Avec Raccordements De
Décodeur de Pour raccorder un décodeur de télévision numérique avec des raccordements de composantes vidéo télévision numérique avec Utiliser trois câbles de composantes vidéo séparés pour raccorder raccordements de les prises Y, P et P du lecteur DVD aux prises Y, P et P (VIDEO 5) de la télévision. -
Page 382: Caméscope
Caméscope Pour faciliter le raccordement du caméscope, les prises d'entrée audio et vidéo sont situées sur le devant du téléviseur. Cependant, si vous le désirez, il est aussi possible de faire les raccordements du caméscope aux prises d’entrée A/V situées à l'arrière du téléviseur. Vous utilisez des Pour raccorder un caméscope prises S VIDEO? -
Page 383: Récepteur Audio
Récepteur audio Pour améliorer la qualité du son, il est possible de faire jouer le son du téléviseur par votre chaîne stéréophonique. Pour raccorder une chaîne stéréophonique Utiliser un câble audio pour raccorder les prises de sortie audio du téléviseur aux prises d’entrée de ligne du récepteur audio. Câble audio Récepteur Les câbles sont souvent... -
Page 384: Utilisation De La Fonction Control S
Utilisation de la fonction CONTROL S La fonction CONTROL S vous permet de contrôler votre système et tout autre appareil Sony au moyen d’une seule télécommande. En plus de vous permettre de contrôler plusieurs appareils au moyen d’une seule télécommande, la fonction CONTROL S vous permet de toujours diriger la télécommande vers le téléviseur au lieu d’avoir à... -
Page 385: Réglage De La Liste De Canaux
Réglage de la liste de canaux Après avoir terminé les raccordements du téléviseur, vous devez lancer le programme d’auto-réglage pour régler les canaux. L’écran d’auto-réglage apparaît lorsque vous allumez le téléviseur pour la première fois après l’avoir raccordé. Si vous ne désirez pas régler les canaux dès maintenant, vous pouvez le faire plus tard en choisissant l’option du Auto programmation à... -
Page 386: Régler La Convergence Automatiquement (Flash Focus)
Régler la convergence automatiquement (Flash Focus) Le tube-image à projection apparaît à l'écran en trois couleurs (rouge, vert et bleu). Si les couleurs ne se convergent pas, la couleur est mauvaise et l'image est embrouillée. Avant d'utiliser votre télévision, s'assurer de régler la convergence. La fonction foyer éclair vous permet de régler la convergence automatiquement. -
Page 387: Régler La Convergence Manuellement
Régler la convergence manuellement La fonction convergence vous offre plus de contrôle sur la convergence de l'image que la fonction Flash Focus, vous permettant ainsi de mettre au point la convergence. Avant d'utiliser la convergence manuelle, vous devez d'abord effectuer la fonction Flash Focus (tel que décrit à... -
Page 388: Remarques Sur Le Réglage Manuel De La Convergence
Remarques sur le Pour obtenir de meilleurs résultats, se tenir à une distance réglage manuel de d'environ 0,9 à 1,5 mètre de l'image lors du réglage de la convergence. Commencer avec les croix qui se trouvent au centre la convergence de l’écran et une fois que celles-ci sont réglées, se déplacer vers les croix qui se trouvent sur les rebords de l’écran. -
Page 389: Utilisation De La Télécommande
Utilisation de la télécommande Aperçu Ce chapitre décrit la façon de régler, de programmer et d’utiliser la télécommande du téléviseur. Sujet Page Insertion des piles Descriptions des touches Panneau extérieur Panneau intérieur Programmation de la télécommande Insertion des piles Retirer le couvercle du compartiment des piles de la télécommande. - Page 390 Descriptions des touches Panneau extérieur Touche Description 1 MUTING Appuyer pour assourdir le son. Appuyer à nouveau MUTING SLEEP SAT/CABLE POWER ou appuyer sur VOL+ pour remettre le son. 2 SLEEP Appuyer à plusieurs reprises jusqu’à ce que le FUNCTION SAT/CABLE téléviseur affiche en minutes (15, 30, 45, 60 ou 90) la durée de temps pendant laquelle vous désirez que le...
- Page 391 Pour plus de détails, se reporter à la page 62. qg CODE SET Appuyer afin de programmer la télécommande à faire fonctionner des appareils non fabriqués par Sony. Pour plus de détails, se reporter à « Programmation de la télécommande » à la page 51.
-
Page 392: Panneau Intérieur
été fabriqués par Sony. Touche Description wg SYSTEM OFF Appuyer pour éteindre tous les appareils audio/vidéo de marque Sony en même temps. (Cette fonction peut ne pas fonctionner avec des appareils Sony plus anciens.) wh Touches de Rebobiner Transport Marche Enregistrer (appuyer simulannément avec N) -
Page 393: Programmation De La Télécommande
Magnétoscopes 8mm Magnétoscopes VHS Lecteur DVD MUTING SLEEP SAT/CABLE POWER Si vous désirez contrôler un appareil vidéo de marque autre que Sony TV/VCR VCR/DVD SYSTEM par la télécommande du téléviseur, suivre les étapes ci-dessous pour la programmation de la télécommande. - Page 394 Codes des fabricants Lecteurs DVD Magnétoscopes Fabricant Code Fabricant Code Fabricant Code Orion Sony Sony 301, 302, 303 Panasonic 308, 309, 306, Admiral General (M. Ward) Electric Pentax 305, 304 Aiwa 338, 344 Hitachi Philco 308, 309 Audio 314, 337...
-
Page 395: Utilisation D'autres Appareils Avec La Télécommande Du Téléviseur
Vous devez d’abord programmer la téléviseur pour qu’elle fasse télécommande la première fois que vous fonctionner un appareil non l’utilisez. Se reporter à « Programmation fabriqué par Sony de la télécommande » aux pages 51 à 52. Fonctionnement d’un Pour faire ceci ... -
Page 396: Fonctionnement D'un Lecteur Dvd
Fonctionnement Pour faire ceci ... Appuyer sur d’un décodeur Activer la télécommande SAT/CABLE FUNCTION pour qu’elle fasse fonctionner le décodeur SAT/CABLE POWER Allumer/éteindre 0-9, ENTER Choisir un canal CH +/- Changer les canaux Revenir au canal précédent JUMP Fonctionnement Pour faire ceci ... Appuyer sur d’un lecteur DVD Activer la télécommande... -
Page 397: Utilisation Des Fonctions
Utilisation des fonctions Aperçu Ce chapitre décrit l’utilisation des fonctions du téléviseur. Sujet Page Regarder le téléviseur Utilisation de l'index déroulant Utilisation du Mode Cinéma Utilisation du syntoniseur Twin View Utilisation de la fonction Canaux Préférés Utilisation de la fonction d’arrêt Utilisation du visualiseur d’images Memory Stick... -
Page 398: Regarder Le Téléviseur
Regarder le téléviseur Pour faire ceci ... Faire cela ... Activer la télécommande pour Appuyer sur TV FUNCTION Pour obtenir une liste qu’elle fasse fonctionner le complète des fonctions de la téléviseur télécommande, se reporter aux pages 47-52. Allumer/éteindre le téléviseur Appuyer sur TV POWER Passer directement à... -
Page 399: Utilisation De L'index Déroulant
Utilisation de l'index déroulant L'index déroulant vous permet de sélectionner des programmes à partir d'un index de défilement d'images vidéo. Appuyer sur INDEX L'index déroulant apparaît, avec le programme actuellement sélectionné dans la fenêtre principale (gauche) et quatre images vidéo de défilement dans la fenêtre de droite. Fenêtre de visionnement en direct Pendant que chaque image qui se trouve du côté... -
Page 400: Utilisation Du Mode Cinéma
Utilisation du Mode Cinéma Le Mode Cinéma vous permet de regarder des émissions normales 4:3 selon plusieurs modes grand écran (rapport hauteur/largeur16:9). Lors du visionnement de programmes à haute définition télédiffusés en 720p/1080i, il n'est pas possible de basculer entre les modes grand écran. Appuyer sur à... -
Page 401: Utilisation Du Syntoniseur Twin View
Utilisation du syntoniseur Twin View Le syntoniseur Twin View vous permet de voir deux images de deux sources — d’une antenne, d’un magnétoscope, d’un lecteur DVD, etc. — à l’écran en même temps. Vous n’entendrez le son que d’une des sources à... -
Page 402: Activation De L'image
Activation de Pour activer l’image dans la fenêtre de Pour activer l’image dans la fenêtre l’image droite de gauche Déplacer la manette b. Déplacer la manette B. Fonctions disponibles dans la fenêtre active (mise en évidence) Pour faire ceci ... Faire cela ... -
Page 403: Modification Du Format De L'image
Modification du La fonction zoom vous permet de varier le format relatif des images format de l’image de gauche et de droite. Déplacer la manette pour activer l’image dont vous désirez modifier le format. Déplacer la manette pour agrandir l’image. Déplacer la manette pour réduire l’image. -
Page 404: Utilisation De La Fonction Canaux Préférés
Utilisation de la fonction Canaux Préférés La fonction Canaux Préférés permet de sélectionner des émissions parmi une liste pouvant atteindre huit canaux préférés que vous avez sélectionnés. Pour créer une Appuyer sur pour afficher le menu. MENU liste de canaux Déplacer la manette pour mettre en évidence l’icône préférés... -
Page 405: Utilisation De La Fonction D'arrêt
Utilisation de la fonction d’arrêt La touche vous permet de temporairement capter l’image FREEZE d’une émission. Vous pouvez utiliser cette fonction pour écrire des renseignements, tels que des numéros de téléphone, des recettes, etc. La fonction d’arrêt n’est pas disponible lorsque le syntoniseur Twin View est utilisé. -
Page 406: Utilisation Du Visualiseur D'images Memory Stick
été enregistrées sur le support Memory Stick par des appareils photo numériques ou des caméscopes de marque Sony. Le visualiseur Memory Stick du téléviseur est compatible aux supports Memory Stick ayant une mémoire pouvant aller jusqu’à 128 MB inclusivement. -
Page 407: Types D'images Non Supportés
Au sujet des noms de fichier DCF La plupart des appareils photos et caméscopes de Sony enregistrent automatiquement des images fixes en utilisant un répertoire et des noms de fichier conformes à DCF, tel qu’il est indiqué dans l’exemple suivant : Nom du répertoire d’images... -
Page 408: Insertion Et Retrait Du Support Memory Stick
Insertion et retrait Pour insérer un support Memory Stick du support Repérer la fente Memory Stick (se reporter aux pages 14-15) et Memory Stick insérer le support Memory Stick dans celle-ci comme dans l’illustration ci-dessous. Lorsqu’il est inséré correctement, il doit se glisser sans résistance et s’enclencher en place. -
Page 409: Affichage Du Menu Du Support Memory Stick
Affichage du menu Insérer le support Memory Stick qui contient les images que vous du support désirez regarder. Pour plus de détails, se reporter à la page 66. Memory Stick Appuyer sur la touche qui se trouve sur la MEMORY STICK télécommande. -
Page 410: Utilisation De L'index Du Support Memory Stick
Utilisation de L’index du support Memory Stick vous laisse voir les images qui se l’index du support trouvent sur le support Memory Stick sous forme d’images minuscules. Memory Stick Il n’y a pas de signal audio lors du visionnement des images qui se trouvent sur le support Memory Stick. -
Page 411: Utilisation Du Diaporama Du Support Memory Stick
Utilisation du Le diaporama du support Memory Stick vous permet de regarder un diaporama des images qui se trouvent sur le support. diaporama du support Memory Insérer le support Memory Stick qui contient les images que vous Stick désirez regarder. Pour plus de détails, se reporter à la page 66. Appuyer sur la touche qui se trouve sur la MEMORY STICK... -
Page 412: Utilisation De L'écran Rotation De L'image
Utilisation de L’écran Rotation de l’image vous permet de faire pivoter une image à l’écran Rotation de partir de l’index d’images miniatures. l’image Vous ne pouvez pas faire pivoter les images si l’interrupteur LOCK du support Memory Stick est allumé. Pour faire pivoter les images, placer d’abord l’interrupteur à... -
Page 413: Utilisation Des Menus
Utilisation des menus Aperçu Le menu vous donne l’accès aux fonctions suivantes : Icône de Description Page menu Vous permet d’effectuer des ajustements aux réglages de l’image. Vous permet aussi de personnaliser le mode image selon le type d’émission que vous regardez, de choisir les options de Vidéo avancé... -
Page 414: Utilisation Du Menu Vidéo
Utilisation du menu Vidéo Pour choisir le menu Vidéo Appuyer sur MENU Déplacer la manette Mode: Éclatant pour aller à l'icône Vidéo et Image Luminosité appuyer sur Couleur Nuance Déplacer la manette pour Netteté Temp. couleur: Froide mettre en évidence une ClearEdge VM: Haut Vidéo avancé... - Page 415 Option Description Pour passer rapidement du Vidéo avancé Choisir Programmer pour sélectionner les options DRC Mode mode DRC à un autre mode, DRC Palette pendant le visionnement de sources NTSC. utiliser la touche DRC MODE DRC Mode Crée une image à haute résolution avec la télécommande.
-
Page 416: Utilisation Du Menu Audio
Utilisation du menu Audio Pour choisir le menu Audio Appuyer sur MENU Déplacer la manette Aigu pour aller à l'icône Audio et Grave Balance appuyer sur Volume auto: Non Effet: Simulé Déplacer la manette pour MTS: Stéréo Haut-parleur: Oui mettre en évidence une Sortie audio: Fixe option. - Page 417 Option Description Haut-parleur Choisir pour activer les haut-parleurs du téléviseur . Choisir pour désactiver les haut-parleurs du téléviseur. La trame sonore du téléviseur provient alors des haut-parleurs du système audio externe . Sortie audio Pour régler cette option, l’option Haut-parleur doit être mise Contrôle aisé...
-
Page 418: Utilisation Du Menu Écran
Utilisation du menu Écran Pour choisir le menu Écran Appuyer sur MENU Mode Cinéma: Grand Zoom Déplacer la manette 4:3/défaut: Grand Zoom Centrage vertical pour aller à l'icône Écran et appuyer sur Déplacer la manette pour mettre en évidence une V v B b Aller: Choisir:... - Page 419 Option Description 4:3/défaut Grand Zoom Choisir pour agrandir le format de l'image Si le mode 4:3 par défaut Sélectionner le 4:3, tandis que les parties supérieures et n'est pas réglé à Non, le réglage mode d'écran par inférieures de l'image sont condensées du Mode Cinéma ne change défaut pour pour s'ajuster à...
-
Page 420: Utilisation Du Menu Canal
Utilisation du menu Canal Pour choisir le menu Canal Appuyer sur MENU Canaux préférés Déplacer la manette Câble: Oui Canal fixe: Non pour aller à l'icône Canal et Auto programmation Saut/Ajout canal appuyer sur Légende de canal Déplacer la manette pour mettre une option en V v B b Aller:... - Page 421 Option Description Saut/Ajout canal Permet de personnaliser la liste de canaux qui apparaît Les canaux qui sont réglés lorsque vous utilisez les touches CH+/-. de façon à être omis ne Déplacer la manette pour faire défiler les peuvent être accédé que par canaux jusqu'au canal à...
-
Page 422: Utilisation Du Menu Parent
Utilisation du menu Parent Le menu Parent permet de régler le téléviseur afin de bloquer des émissions selon leur contenu ou leur classement. Mot de passe: _ _ _ _ Pour choisir le menu Parent Appuyer sur+ pour Appuyer sur MENU entrer le mot de passe V v B b... -
Page 423: Visionnement D'émissions Bloquées
Modèle américain : Pour les modèles américains, le menu Classement spécifique sélection des comprend les options suivantes. (Pour les modèles canadiens, se reporter à la page 82.) options de Classement Option Description spécifique Classement des Tous les enfants et tout public. films Surveillance parentale conseillée. - Page 424 Modèles Pour les modèles canadiens, le menu Classement spécifique canadiens : comprend les options suivantes. (Pour les modèles américains, se reporter à la page 81.) sélection des options de Option Description Classement Classement anglais C Tous les enfants. spécifique Enfants de 8 ans et plus. Tout public (général).
-
Page 425: Utilisation Du Menu Réglage
Utilisation du menu Réglage Pour choisir le menu Réglage Appuyer sur MENU Caption Vision: Non Déplacer la manette Étiquette vidéo Langue: Français pour aller à l'icône réglage et Horloge/Minuteries Flash Focus appuyer sur Convergence Demo Déplacer la manette pour passer en revue les différentes V v B b Aller: Choisir:... - Page 426 Option Description Étiquette vidéo Cette fonction permet d'identifier les appareils audio/vidéo raccordés au téléviseur, tels que magnétoscope, lecteur DVD, etc. Par exemple, si un lecteur DVD est raccordé à la prise VIDEO 5, vous pouvez choisir l’étiquette pour l’entrée VIDEO 5. Ensuite, lorsque vous appuyez sur TV/VIDEO pour changer les entrées,...
- Page 427 Option Description Heure Horloge/Minuteries (suite) Heure. Appuyer sur pour sélectionner Déplacer la manette pour régler l’heure actuelle (jour, heure et minutes). Appuyer sur déplacer la manette b) pour confirmer chaque réglage et passer au réglage suivant. Déplacer la manette pour revenir au réglage précédent. Appuyer sur MENU pour quitter l’écran du menu.
-
Page 429: Informations En Sus
Informations en sus Aperçu Ce chapitre présente les sujets suivants : Sujet Page Glossaire Remarques sur l’utilisation du support Memory Stick Comment communiquer avec Sony Guide de dépannage Spécifications Accessoires en option Index... -
Page 430: Glossaire
Glossaire composante vidéo La composante vidéo est transmise par trois câbles : deux signaux de teinte (chrominance) et un signal de luminosité (luminance). La composante vidéo atteint une meilleure précision de couleur que la composite vidéo ou S VIDEO en séparant la chrominance en deux portions séparées. composite vidéo La composite vidéo est transmise par un seul câble. -
Page 431: Remarques Sur L'utilisation Du Support Memory Stick
Remarques sur l’utilisation du support Memory Stick Précautions Lors de l’utilisation du support Memory Stick, veuillez prendre les relatives au précautions suivantes : support Memory Afin d’éviter d’endommager de façon permanente les données Stick d’images fixes, ne pas éteindre le téléviseur ni retirer le support Memory Stick de sa fente pendant la lecture des données (tel qu’indiqué... -
Page 432: Comment Communiquer Avec Sony
Sony, veuillez communiquer avec nos services d’informations à la clientèle en composant le 1 (416) 499-SONY (7669) (résidents du Canada seulement) ou le 1 800 222-SONY (7669) (résidents des États-Unis seulement). Guide de dépannage Si vous avez des problèmes avec votre télévision, vous pouvez... - Page 433 Il peut y avoir plus d’un code pour l’appareil que vous tentez de faire par Sony fonctionner Il est possible que certains appareils non fabriqués par Sony ne puissent pas être activés par votre télécommande Sony. Utiliser alors la télécommande originale de cet appareil Memory Stick Problème...
- Page 434 Si le téléviseur ne s’allume pas et que le voyant lumineux rouge continu à aucun son clignoter, le téléviseur pourrait avoir besoin d’entretien. Communiquer avec le centre de service Sony le plus près S’assurer que le cordon d’alimentation est bien branché POWER Appuyer sur la touche située sur le devant du téléviseur...
- Page 435 Audio Problème Solutions possibles Image correcte, aucun son MUTING Muting Appuyer sur pour faire disparaître le mot de l’écran (se reporter page 48). à la Haut-parleur S’assurer que la fonction du menu Audio est en position page 75). reporter à la Trop faible augmentation de Augmenter le volume du décodeur à...
-
Page 436: Le Stand By Led
Général Problème Solutions possibles Réinitialiser le téléviseur aux RESET Allumer le téléviseur. Tout en maintenant la touche de la télécommande, réglages du fabricant POWER appuyer sur la touche du téléviseur. (Le téléviseur s'éteindra puis se RESET. rallumera de lui-même.) Relâcher la touche Réinitialiser les réglages RESET Appuyer sur la touche... -
Page 437: Spécifications
Impédance (sortie) : 2 kilohms Accessoires fournis Télécommande RM-Y188 Piles AA (R6) 2, fournies pour la télécommande Taille de l’écran (mesuré en diagonale) KP-57WV600/700 57 po KP-65WV600/700 65 po Puissance du haut-parleur 20W x 2 Taille (L x H x P) -
Page 438: Accessoires En Option
Accessoires en option Câble A/V (VMC-810/820/830 HG) Câble audio (RKC-515HG) Câble de composante vidéo (VMC-10/30 HG) Câble de Control S (RK-G69HG) Support Memory Stick : 8 MB (MSA-8A); 16 MB (MSA-16A); 32 MB (MSA-32A); 64 MB (MSA-64A); 128 MB (MSA-128A) -
Page 439: Index
Index 0-9, touches classements, visionnement d’émissions bloquées ClearEdge VM activation/désactivation de la télévision CineMotion aigu, réglage CODE SET, touche allumer/éteindre la télévision contraste de l’image, réglage allumer le téléviseur CONTROL S ANT, touche CONTROL S, prises d’entrée et de sortie, antenne, raccordement description arrêt, touche... - Page 440 éclatant, mode éliminer, canaux préférés magnétoscope équilibrage, réglage utilisation avec la télécommande de la éteindre le téléviseur télévision 53 avec décodeur, raccordement 28 avec câble, raccordement 26 avec récepteur satellite, raccordement 34 faire pivoter l’image, support Memory Stick manette FAVORITES, touche Marche, touche film, mode MDP, utilisation avec la télécommande du...
- Page 441 – utilisation 59 SYSTEM OFF, touche netteté, réglage neutre, température de la couleur nuance, réglage taille, image du syntoniseur Twin View télécommande insertion des piles 47 Palette DRC – programmation 51 Parent, menu témoins STAND BY Pause, touche témoin TIMER PIC MODE, touche touches de transport Picture in Picture.
- Page 446 Ne les remplacer que par une piece portant le numero specifie. A-1603-725-A CONTRAST SCREEN ASSY 4-075-020-01 FOOT, PLASTIC KP-57WV600 ONLY * A-1400-748-A HA MOUNT 6-1. COVER (KP-57WV600/57WV700 0NLY) A-1603-723-A CONTRAST SCREEN ASSY KP-57WV700 ONLY * A-1300-323-A HM COMPLETE PC BOARD 7-685-648-79 SCREW +BVTP 3X12 4-088-638-11...
- Page 447 KP-57WV600/57WV700/ 65WV600/65WV700 REF.NO. PART NO. DESCRIPTION REF.NO. PART NO. DESCRIPTION NOTE: The components identified by shading and mark are critical for safety. NOTE: Les composants identifies per un trame et une marque sont critiques Replace only with part number specified.
- Page 450 Ne les remplacer que par une piece portant le numero specifie. A-1603-725-A CONTRAST SCREEN ASSY 4-075-020-01 FOOT, PLASTIC KP-57WV600 ONLY * A-1400-748-A HA MOUNT 6-1. COVER (KP-57WV600/57WV700 0NLY) A-1603-723-A CONTRAST SCREEN ASSY KP-57WV700 ONLY * A-1300-323-A HM COMPLETE PC BOARD 7-685-648-79 SCREW +BVTP 3X12 4-088-638-11...