Publicité

Les langues disponibles
  • FR

Les langues disponibles

Liens rapides

BEDIENUNGSANLEITUNG
MODE D'EMPLOI
MANUALE UTENTE
TRAMPOLINO
MANUAL DE INSTRUCCIONES
TRAMPOLIN
USER MANUAL
TRAMPOLINE
TRAMPOLINE
TRAMPOLÍN
SP-T-244
SP-T-305
SP-T-366
DE
GB
FR
IT
ES

Publicité

Table des Matières
loading

Sommaire des Matières pour Sportplus SP-T-244

  • Page 1 BEDIENUNGSANLEITUNG TRAMPOLIN USER MANUAL TRAMPOLINE MODE D'EMPLOI TRAMPOLINE MANUALE UTENTE TRAMPOLINO MANUAL DE INSTRUCCIONES TRAMPOLÍN SP-T-244 SP-T-305 SP-T-366...
  • Page 2: Table Des Matières

    Sehr geehrte Kundin, sehr geehrter Kunde, Wir gratulieren Ihnen zu Ihrem neuen SportPlus Produkt und sind überzeugt, dass Sie mit diesem Produkt zufrieden sein werden. Um eine stets optimale Funktion und Leistungsbereitschaft Ihres Produktes zu gewährleisten, haben wir eine Bitte an Sie: •...
  • Page 3: Technische Daten

    Art. Nr.: SP-T-244/305/366 Max. Benutzergewicht: 50/120/150 kg Maße (L x B x H) SP-T-244: ca. 275 x 275 x 227 cm Maße (L x B x H) SP-T-305: ca. 333 x 333 x 250 cm Maße (L x B x H) SP-T-366: ca.
  • Page 4 SICHERHEITSHINWEISE VORSICHT – Verletzungsgefahr • Benutzen Sie kein beschädigtes oder defektes Produkt. Wenden Sie sich in diesem Fall an eine Fachwerkstatt oder unser Service Center. • Prüfen Sie das Produkt vor jeder Benutzung auf einwandfreien Zustand. Defekte Teile müssen sofort ausgetauscht werden, da sonst Funktion und Sicherheit beeinträchtigt werden.
  • Page 5: Weitere Hinweise

    SICHERHEITSHINWEISE • Sorgen Sie für eine gefahrenfreie Arbeitsumgebung, lassen Sie z.B. kein Werkzeug umherliegen. Deponieren Sie Verpackungsmaterial so, dass keine Gefahren davon ausgehen können. Folien oder Kunststofftüten bergen eine Erstickungsgefahr für Kinder! • Nachdem Sie das Produkt gemäß der Bedienungsanleitung aufgebaut haben, vergewissern Sie sich, dass sämtliche Schrauben, Bolzen und Muttern richtig angebracht und festgezogen sind und das die Rahmenrohre korrekt ineinander stecken.
  • Page 6 SICHERHEITSHINWEISE WARNUNG Nicht Kopf darf jeweils eine oder Nacken landen. Es Person Trampolin besteht die Gefahr von verwenden. Trampolin Lähmung mit Todesfolge, ist für Kinder unter 6 Jahren selbst, wenn nicht geeignet. Springen Trampolinmitte gelandet mehrere Personen gleichzeitig wird. auf dem Trampolin, steigt die Keine Salti (Überschläge) Gefahr eines Kontrollverlustes, versuchen,...
  • Page 7 SICHERHEITSHINWEISE • Selbst bei Landungen auf der Sprungmatte kann es zu Verletzungen, speziell zu Rücken-, Hals- oder Kopfverletzungen kommen. Saltos und Überschläge sollten unterbleiben. Grundsätzlich darf sich immer nur ein Springer auf dem Trampolin aufhalten, auch wenn Abbildungen ggf. mehrere Kinder auf dem Trampolin zeigen. •...
  • Page 8 SICHERHEITSHINWEISE • Halten Sie das Trampolin immer sauber und trocken. Benutzen Sie das Trampolin nicht, wenn es nass oder feucht ist. • Springer sollen Socken oder Gymnastikschuhe tragen. Straßenschuhe und andere Sportschuhe dürfen nicht getragen werden. • Es ist sicherzustellen, dass die Klettverschlüsse während der Benutzung des Trampolins ordnungsgemäß...
  • Page 9 SICHERHEITSHINWEISE • Wechseln Sie sich beim Springen ab und passen Sie auf den jeweils Springenden auf. • Klettern Sie auf und vom Trampolin. Springen Sie nicht auf das oder von dem Trampolin. Verwenden Sie das Trampolin nicht als Sprungbrett zu anderen Gegenständen.
  • Page 10 3. TEILELISTE Anzahl Abbildung Beschreibung SP-T-244 SP-T-305 SP-T-366 Sprungmatte Federabdeckung Verbindungsstück Rahmenteil Standbeinbasis Standbein Bolzen Kleine Federscheibe Grosse Federscheibe Unterlegscheibe Schraube Ringschlüssel Schraubendreher Federspanner Feder Plastik-Kappe...
  • Page 11 3. TEILELISTE Anzahl Abbildung Beschreibung SP-T-244 SP-T-305 SP-T-366 Oberes Rahmenrohr, mit Schaumstoff Unteres Rahmenrohr, mit Schaumstoff Kabel Plastikabdeckung Abdeckungskappe Selbstsichernde Schraube Knauf Schnur Sicherheitsnetz Kleine Federscheibe...
  • Page 12: Aufbauanleitung

    4. AUFBAUANLEITUNG SCHRITT 1 Legen Sie alle Teile (3, 4, 5, 6) auf den Boden. SP-T-244 SP-T-305 SP-T-366...
  • Page 13 SCHRITT 2 Wiederholen Sie diesen Schritt, bis alle Standbeine (6) und Standbeinbasen (5) zusammengebaut sind. SP-T-244: 6 x Standbein / 3 x Standbeinbasis SP-T-305: 8 x Standbein / 4 x Standbeinbasis SP-T-366: 12 x Standbein / 6 x Standbeinbasis HINWEIS: ZIEHEN SIE DIE SCHRAUBEN NOCH NICHT GANZ FEST, DIES WIRD...
  • Page 14 4. AUFBAUANLEITUNG SCHRITT 3 Wiederholen Sie diesen Schritt, bis alle verbleibenden Rahmenteile (4) und Verbindungsstücke (3) zusammengebaut sind. SP-T-244: 6 Rahmenteile / 6 Verbindungsstücke SP-T-305: 8 Rahmenteile / 8 Verbindungsstücke SP-T-366: 12 Rahmenteile / 12 Verbindungsstücke...
  • Page 15 SCHRITT 4 Wiederholen Sie diesen Schritt, bis alle Rahmenteile und Standbeine zusammengebaut sind. SP-T-244: 3 x Standbein / 6 x Rahmenteil SP-T-305: 4 x Standbein / 8 x Rahmenteil SP-T-366: 6 x Standbein / 12 x Rahmenteil HINWEIS: STELLEN SIE SICHER, DASS DIE RAHMENTEILE (4) VOLLSTÄNDIG IN...
  • Page 16 4. AUFBAUANLEITUNG SCHRITT 5...
  • Page 17 4. AUFBAUANLEITUNG SCHRITT 6 HINWEIS: STELLEN SIE SICHER, DASS DIE RAHMENTEILE (4) VOLLSTÄNDIG IN DEN VERBINDUNGSSTÜCKEN (3) STECKEN.
  • Page 18 4. AUFBAUANLEITUNG Übersicht der montierten Rahmengestelle. SP-T-244 SP-T-305 SP-T-366...
  • Page 19 Sie die Sprungmatte beschädigen. WARNUNG: Verwendet Sie schwere Handschuhe, um Ihre Hände vor Quetschungen zu schützen. Eine Schutzbrille muss getragen werden, um Verletzungen der Augen zu vermeiden. SP-T-244 SP-T-305 , -*$ SP-T-366 Hinweis: Beginnen Sie die Feder-Monntage an einem Verbindungsstück.
  • Page 20 4. AUFBAUANLEITUNG SCHRITT 8 Achten Sie auf korrekte Reihenfolge bei der Federmontage. Eine falsch montierte Feder kann die Sprungmatte beschädigen. SP-T-244 SP-T-305 SP-T-366...
  • Page 21 4. AUFBAUANLEITUNG SCHRITT 9 Setzen Sie die Montage der Federn wie zuvor beschrieben fort, bis alle Federn montiert sind. SP-T-244 SP-T-305 SP-T-366 Hinweis: Ziehen Sie nach der Federmontage alle Schrauben fest.
  • Page 22 4. AUFBAUANLEITUNG SCHRITT 10 Legen Sie die Federabdeckung (2) auf die Sprungmatte (1). Achten Sie auf die Position der Öffnungen in der Abdeckung. Knoten Sie die Federabdeckung an das Rahmengestell. ÖFFNUNG IN DER ABDECKUNG...
  • Page 23 4. AUFBAUANLEITUNG SCHRITT 11 ÖFFNUNG IN DER ABDECKUNG SP-T-244 SP-T-305 SP-T-366...
  • Page 24 4. AUFBAUANLEITUNG SCHRITT 12...
  • Page 25 4. AUFBAUANLEITUNG SCHRITT 13 Kleines Loch Großes Loch...
  • Page 26 4. AUFBAUANLEITUNG SCHRITT 14...
  • Page 27 4. AUFBAUANLEITUNG SCHRITT 15 Sichern Sie das Sicherheitsnetz an der Sprungmatte, indem Sie die Schnur (H) durch die Öffnungen im Sicherheitsnetz und in der Sprungmatte führen. SP-T-244 SP-T-305 SP-T-366...
  • Page 28 4. AUFBAUANLEITUNG SICHERHEITSNETZ HERUNTERLASSEN...
  • Page 29 4. AUFBAUANLEITUNG SICHERHEITSNETZ HERUNTERLASSEN...
  • Page 30: Trainings- Und Benutzungsanleitung

    5. TRAININGS- UND BENUTZUNGSANLEITUNG DAS TRAINING AUF DEM TRAMPOLIN: Achtung: Vor Benutzung prüfen Sie bitte, ob die Federabdeckung richtig sitzt und alle Federn abgedeckt sind. Stellen Sie das Trampolin auf einem möglichst ebenen Untergrund unter Beachtung aller Sicherheitshinweise (siehe in dieser Anleitung) auf. Bevor Sie nun „richtig loslegen“...
  • Page 31 5. TRAININGS- UND BENUTZUNGSANLEITUNG Grundübungen auf dem Trampolin für Aufwärm- und Abkühlphase: Wir empfehlen, jede hier gezeigte Übung 10x hintereinander auszuführen. 1. „Contact Bounce“ Stellen Sie sich schulterbreit auf das Trampolin, beugen Sie die Knie leicht. Die Hände sind an den Hüften platziert. Starten Sie mit leichten Hüpfern, so dass Ihre Füße sich „gerade so“...
  • Page 32: Wartung & Reinigung

    6. WARTUNG & REINIGUNG WARTUNG Kontrollieren Sie das Produkt regelmäßig auf Verschleiß oder Schäden und beheben Sie diese umgehend. Sprungtuch, Sicherheitsnetz, Rahmenpolsterung und deren Befestigung sowie Federn sind Verschleißteile und müssen regelmäßig, zumindest einmal pro Saison, kontrolliert und ggf. ausgetauscht werden. Speziell das Sicherheitsnetz unterliegt durch Umwelt- und UV-Einflüsse einem erhöhten Verschleiß...
  • Page 33: Entsorgungshinweise

    Im Falle eventueller Mängel am Produkt wenden Sie sich bitte direkt an den Händler, bei dem Sie das Produkt erworben haben. Zu diesem Zweck empfehlen wir Ihnen, den Kaufbeleg sorgfältig aufzubewahren. Für weitere Fragen zum Aufbau und zur Anwendung Ihres SportPlus-Produkts sowie zur Ersatzteilbestellung steht Ihnen unser Serviceteam selbstverständlich jederzeit zur Verfügung.
  • Page 34: Service Und Ersatzteile

    Im Falle eventueller Mängel am Produkt wenden Sie sich bitte direkt an unser Serviceteam. Zu diesem Zweck empfehlen wir Ihnen, den Kaufbeleg sorgfältig aufzubewahren. Für Fragen zum Aufbau und zur Anwendung Ihres SportPlus Produkts sowie zur Ersatzteil- bestellung steht Ihnen unser Serviceteam selbstverständlich auch jederzeit zur Verfügung.
  • Page 35: Gewährleistungen

    9. GEWÄHRLEISTUNGEN SportPlus versichert, dass das Produkt, auf das sich die Gewährleistung bezieht, aus qualitativ hochwertigen Materialien hergestellt und mit äußerster Sorgfalt überprüft wurde. Sollten sich dennoch bei normaler Verwendung und Wartung innerhalb der hiernach genannten Gewährleistungsfrist Defekte ergeben, wenden Sie sich bitte an unser Service- Team.
  • Page 36 Dear Customer, Congratulations for choosing a SportPlus product. We have every expectation that you will be fully satisfied with your new purchase. To guarantee optimal function of this product, please adhere to the following instructions: • Before using this product for the first time, please read the manual carefull •...
  • Page 37: Technical Data

    1. TECHNICAL DATA PRODUCT INFORMATION Description: 44 305 366 cm Trampoline with safet net Art. o. SP-T-244/305/366 Ma . user weight 50/120/150 kg Dimensions (L W H) SP-T- 44 appro . 75 7 cm Dimensions (L W H) SP-T-305 appro . 333...
  • Page 38: Information On Assembly

    SAFETY INSTRUCTIONS CAUTION – risk of injury • Do not use the product if it is damaged or defective. In this case, contact a professional workshop or our service center. • Alwa s verif that the product is in impeccable condition before use. Defective components must be replaced immediatel as failure to do so ma impair the functioning and safet of the unit.
  • Page 39: Other Tips

    SAFETY INSTRUCTIONS • Make sure our work environment is hazard-free. For e ample, do not leave an tools l ing around. Place the packaging materials somewhere where the will not pose an hazards during assembl . Packaging foil or plastic bags pose a suffocation hazard for children •...
  • Page 40 SAFETY INSTRUCTIONS WARNING Do not land on our head one person ma or neck. There is a risk the trampoline at a time. The or paral sis and in some trampoline is not suitable for cases death even when children under 6 ears of age. ou land on the umping If more than one person is mat.
  • Page 41 SAFETY INSTRUCTIONS • Even landings on the umping mat can result in in ur , especiall in uries of the back, neck or head. Somersaults and flips are discouraged. Onl one user ma be on the trampoline at a time even if some illustrations ma show several children on the trampoline.
  • Page 42 SAFETY INSTRUCTIONS • Alwa s keep the trampoline clean and dr . Do not use the trampoline if it is wet or moist. • Users should wear socks or g mnastic shoes. Street shoes and other sport shoes ma not be worn. •...
  • Page 43 SAFETY INSTRUCTIONS • Take turns umping on the trampoline and make sure each user has a spotter. • Climb onto and off of the trampoline. Do not ump onto or off of the trampoline. Do not use the trampoline as a springboard to other ob ects. •...
  • Page 44: Part List

    3. PART LIST uantit Illustration Description SP-T-244 SP-T-305 SP-T-366 Jumping mat Spring cover Connector Frame tube Leg base Bolt Small spring washer Large spring washer Washer Screw Ring spanner Screwdriver Spring tool Spring Plastic cover...
  • Page 45 3. PART LIST uantit Illustration Description SP-T-244 SP-T-305 SP-T-366 Upper frame tube with foam Bottom frame tube with foam Cable Plastic cover Cover cap Self-tapping screw Knob String Safet net Small spring washer...
  • Page 46 4. ASSEMBLY INSTRUCTIONS STEP 1 La out the parts (3, 4, 5, 6) before ou on the ground. SP-T-244 SP-T-305 SP-T-366...
  • Page 47 4. ASSEMBLY INSTRUCTIONS STEP 2 Repeat this step until all the legs (6) and leg bases (5) are assembled. SP-T-244: 6 legs 3 leg base SP-T-305: 8 legs 4 leg base SP-T-366: legs 6 leg base NOTE: IT IS NOT RECOMMENDED TO FULLY TIGHTEN THE SCREWS UNTIL...
  • Page 48 4. ASSEMBLY INSTRUCTIONS STEP 3 Repeat this step until all the remaining frame parts (4) and connectors (3) are assembled. SP-T-244: 6 frame parts / 6 connectors SP-T-305: 8 frame parts / 8 connectors SP-T-366: 12 frame parts / 12 connectors...
  • Page 49 4. ASSEMBLY INSTRUCTIONS STEP 4 Repeat this step until all frame parts and legs are assembled. SP-T-244: 3 legs 6 frame parts SP-T-305: 4 legs 8 frame parts SP-T-366: 6 legs frame parts NOTE: MAKE SURE THAT THE FRAME PARTS (4) ARE FULLY INSERTED INTO...
  • Page 50 4. ASSEMBLY INSTRUCTIONS STEP 5...
  • Page 51 4. ASSEMBLY INSTRUCTIONS STEP 6 NOTE: MAKE SURE THAT THE FRAME PARTS (4) ARE FULLY INSERTED INTO THE CONNECTORS (3).
  • Page 52 4. ASSEMBLY INSTRUCTIONS Overview of assembled frame SP-T-244 SP-T-305 SP-T-366...
  • Page 53 Count carefull in the following steps. Incorrectl attaching a spring ma damage the umping mat. WARNING: Use heav gloves to protect our hands from pinching. Also wear protective glasses to prevent e e in uries. SP-T-244 SP-T-305 , -*$ SP-T-366 Note Begin attaching the springs on one connector.
  • Page 54 4. ASSEMBLY INSTRUCTIONS STEP 8 Make sure to observe the correct order when attaching the springs. Incorrectl attaching a spring ma damage the umping mat. SP-T-244 SP-T-305 SP-T-366...
  • Page 55 4. ASSEMBLY INSTRUCTIONS STEP 9 Continue attaching the springs as described until all the springs are attached. SP-T-244 SP-T-305 SP-T-366 Note After attaching the springs, tighten all the screws.
  • Page 56 4. ASSEMBLY INSTRUCTIONS STEP 10 La the spring cover ( ) on the umping mat ( ). Observe the position of the openings in the cover. Tie the spring cover to the frame. OPENING IN THE COVER...
  • Page 57 4. ASSEMBLY INSTRUCTIONS STEP 11 OPENING IN THE COVER SP-T-244 SP-T-305 SP-T-366...
  • Page 58 4. ASSEMBLY INSTRUCTIONS STEP 12...
  • Page 59 4. ASSEMBLY INSTRUCTIONS STEP 13 Small hole Large hole...
  • Page 60 4. ASSEMBLY INSTRUCTIONS STEP 14...
  • Page 61 4. ASSEMBLY INSTRUCTIONS STEP 15 Fasten the safet net to the umping mat b threading the string (H) through the openings in the safet net and the umping mat. SP-T-244 SP-T-305 SP-T-366...
  • Page 62 4. ASSEMBLY INSTRUCTIONS LOWERING THE SAFETY NET...
  • Page 63 4. ASSEMBLY INSTRUCTIONS LOWERING THE SAFETY NET...
  • Page 64 5. INSTRUCTONS FOR TRAINING AND USE TRAINING ON THE TRAMPOLINE: Caution: Before use, ma sure the spring cover is correctl positioned to cover all the springs. Set up the trampoline on as even a surface as possible following all the safet instructions (included in this handbook).
  • Page 65 5. INSTRUCTONS FOR TRAINING AND USE Basic trampoline warm-up and cool-down e ercises We recommend repeating each e ercise 0 times in succession. . Contact bounce Stand on the umping mat with our legs at shoulder width, our knees slightl bent. Place our hands on our hips.
  • Page 66: Maintenance / Cleaning

    6. MAINTENANCE & CLEANING MAINTENANCE Regularl check the product for wear or damage and have an problems fi ed immediatel . The umping mat, safet net, frame cover, fastenings and springs are sub ect to wear and must be checked regularl , at least once a season, and replaced if necessar . The safet net in particular is sub ect to increased wear due to environmental conditions (UV radiation) and should be replaced within two ears.
  • Page 67: Disposal Instructions

    For this purpose, we recommend that ou retain the sales receipt as proof of purchase. Our service team is naturall available at an time to assist ou with additional questions regarding the assembl and use of our SportPlus product as well as ordering spare parts.
  • Page 68: Service And Replacement Parts

    Our service team is naturall available at an time to assist ou with additional questions regarding the assembl and use of our SportPlus product as well as ordering spare parts. Service time...
  • Page 69 9. WARRANTIES SportPlus guarantees that the product under warrant has been manufactured from the highest qualit materials and has been checked with the utmost care. Should there be an defects within the hereinafter stipulated warrant period and under normal use and maintenance conditions, please contact our service team.
  • Page 70 Chère cliente, Cher client, Nous vous félicitons pour l'achat de votre nouveau produit SportPlus et sommes convaincus que vous en serez satisfait. Afin de garantir un fonctionnement parfait et un rendement tou ours plus optimal de votre produit, nous vous prions de suivre les consignes suivantes •...
  • Page 71: Données Techniques

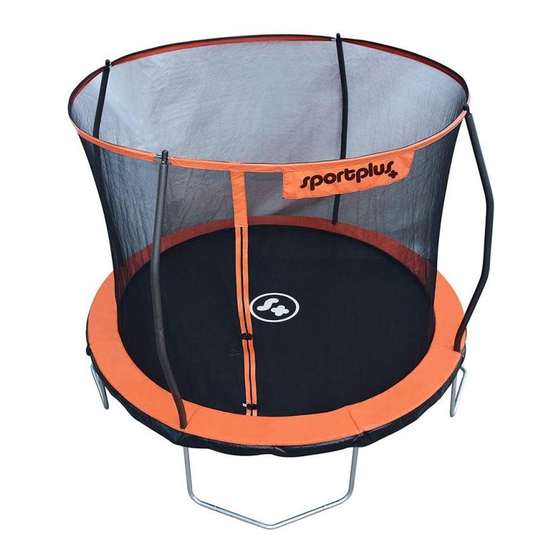
    44 305 366 cm Trampoline avec filet de s curit Art. n SP-T- 44 305 366 Poids ma i de l utilisateur 0 50 kg Dimensions (L l H) SP-T-244 env. 75 7 cm Dimensions (L l H) SP-T-305 env. 333 50 cm...
  • Page 72: Instructions Pour Le Montage

    CONSIGNES DE SECURITE ATTENTION – risque de blessure • utilisez amais le produit lorsqu il est endommag ou d fectueu Dans ce cas, adressez-vous un service technique ou notre central de services. • Avant chaque utilisation, contr lez le produit afin de v rifier son parfait tat.
  • Page 73: Autres Instructions

    CONSIGNES DE SECURITE • Veillez avoir un plan de travail d pourvu de dangers ne laissez pas tra ner quelque chose comme p. e . un outil. Afin que les mat riau d emballage ne repr sentent aucun danger, mettez-les tout de suite dans la poubelle pour le rec clage.
  • Page 74 CONSIGNES DE SECURITE AVERTISSEMENT e pas atterrir sur la Le trampoline peut tre utilis t te ou le cou. Il e iste par une seule personne un risque de paral sie fois. Le trampoline ne convient avec des cons quences pas au enfants de moins de mortelles, m me si la 6 ans.
  • Page 75 CONSIGNES DE SECURITE • M me lors des atterrissages sur la toile du trampoline, il e iste un risque de blessures, sp cialement de traumatismes au dos, au cervicales ou la t te. Des saltos et sauts dangereu ne doivent pas tre e cut s.
  • Page 76: Pour Le Surveillant

    CONSIGNES DE SECURITE • Maintenez le trampoline tou ours propre et sec. utilisez pas le trampoline lorsqu il est humide ou mouill . • Lors des sauts, vous devriez porter des chaussettes ou des chaussures de g mnastique. Des chaussures de ville et d autres chaussures de sport ne devraient pas tre port es.
  • Page 77 CONSIGNES DE SECURITE • Alternez les p riodes de saut avec les autres personnes et surveillez-vous les uns les autres. • Montez et descendez du trampoline normalement. e sautez pas sur ou du trampoline. utilisez pas le trampoline comme tremplin de saut pour aller sur d autres ob ets.
  • Page 78: Liste Des Pièces

    3. LISTE DES PIÈCES uantit Illustration Description SP-T-244 SP-T-305 SP-T-366 Toile du trampoline Rev tement prot geant des ressorts Pi ce de raccord Pi ce du cadre Base des pieds Montant des pieds Boulon Petite rondelle ressort rande rondelle ressort...
  • Page 79 3. LISTE DES PIÈCES uantit Illustration Description SP-T-244 SP-T-305 SP-T-366 Tube du cadre sup rieur, avec mat riau en mousse Tube du cadre inf rieur, avec mat riau en mousse C ble Cache en plastique Capuchon Vis autobloquante Bouton Cordeau...
  • Page 80 4. NOTICE DE MONTAGE ÉTAPE 1 Placez toutes les pi ces (3, 4, 5, 6) au sol. SP-T-244 SP-T-305 SP-T-366...
  • Page 81 R p tez cette tape usqu ce que tous les montants des pieds (6) et bases des pieds (5) soient assembl s. SP-T-244 6 montants des pieds 3 bases des pieds SP-T-305 8 montants des pieds 4 bases des pieds SP-T-366 12 montants des pieds 6 bases des pieds INDICATIONS : NE SERREZ PAS ENCORE LES VIS COMPLÈTEMENT ;...
  • Page 82 R p tez cette tape, usqu ce que toutes les pi ces du cadre (4) et les pi ces de raccord (3) soient assembl es. SP-T-244 6 pi ces du cadre 6 pi ces de raccord SP-T-305 8 pi ces du cadre 8 pi ces de raccord...
  • Page 83 R p tez cette tape usqu ce que toutes les pi ces du cadre et tous les montants des pieds soient assembl s. SP-T-244 3 montants des pieds 6 pi ces du cadre SP-T-305 4 montants des pieds 8 pi ces du cadre...
  • Page 84 4. NOTICE DE MONTAGE ÉTAPE 5...
  • Page 85 4. NOTICE DE MONTAGE ÉTAPE 6 INDICATIONS : ASSUREZ-VOUS QUE LES PIÈCES DU CADRE (4) SOIENT COMPLÈTEMENT INTRODUITES DANS LES PIÈCES DE RACCORD (3).
  • Page 86 4. NOTICE DE MONTAGE Aperçu de la structure du cadre monté. SP-T-244 SP-T-305 SP-T-366...
  • Page 87 AVERTISSEMENT Utilisez des gants pais et rigides pour prot ger vos mains des pincements. Des lunettes de protection doivent aussi tre port es afin d viter des blessures au eu . SP-T-244 SP-T-305 , -*$ SP-T-366 Indications : Commencez le montage des ressorts...
  • Page 88 4. NOTICE DE MONTAGE ÉTAPE 8 Faites attention avoir un ordre correct lors du montage des ressorts. Un ressort mal install peut endommager la toile du trampoline. SP-T-244 SP-T-305 SP-T-366...
  • Page 89 4. NOTICE DE MONTAGE ÉTAPE 9 Continuez le montage des ressorts comme d crit auparavant usqu ce que tous les ressorts soient install s. SP-T-244 SP-T-305 SP-T-366 Indications : Serrez correctement toutes les vis apr s le montage des ressorts.
  • Page 90 4. NOTICE DE MONTAGE ÉTAPE 10 Placez le rev tement prot geant des ressorts ( ) sur la toile du trampoline ( ). Tenez compte de la position des orifices dans le rev tement. ouez le rev tement prot geant des ressorts sur la structure du cadre.
  • Page 91 4. NOTICE DE MONTAGE ÉTAPE 11 ORIFICE DANS LE REVÊTEMENT SP-T-244 SP-T-305 SP-T-366...
  • Page 92 4. NOTICE DE MONTAGE ÉTAPE 12...
  • Page 93 4. NOTICE DE MONTAGE ÉTAPE 13 Petit trou rand trou...
  • Page 94 4. NOTICE DE MONTAGE ÉTAPE 14...
  • Page 95 4. NOTICE DE MONTAGE ÉTAPE 15 S curisez le filet de s curit la toile du trampoline en faisant passer le cordeau (H) au travers des orifices du filet de s curit et dans la toile du trampoline. SP-T-244 SP-T-305 SP-T-366...
  • Page 96 4. NOTICE DE MONTAGE ABAISSER LE FILET DE SÉCURITÉ...
  • Page 97 4. NOTICE DE MONTAGE ABAISSER LE FILET DE SÉCURITÉ...
  • Page 98: Guide D'entraînement Et D'exercices

    5. GUIDE D'ENTRAÎNEMENT ET D'EXERCICES ENTRAÎNEMENT SUR LE TRAMPOLINE : Attention : Avant l utilisation, veuillez e aminer si le rev tement prot geant des ressorts est correctement plac et si tous les ressorts sont bien recouverts. Positionnez le trampoline sur un sol aussi gal que possible et respectez toutes les consignes de s curit de s curit (consulter ce mode d emploi).
  • Page 99 5. GUIDE D'ENTRAÎNEMENT ET D'EXERCICES E ercices de base sur le trampoline pour phase d chauffement et de retour au calme nous vous recommandons d e cuter chaque e ercice indiqu 0 fois de suite. . « Contact Bounce » Positionnez-vous sur le trampoline les pieds suivant la largeur des paules et fl chissez l g rement les genou .
  • Page 100: Entretien & Nettoyage

    6. ENTRETIEN & NETTOYAGE ENTRETIEN Contr lez r guli rement le produit pour d tecter une usure ou des dommages et r parez- le imm diatement. La toile du trampoline, le filet de s curit , le capitonnage du cadre et les fi ations sans oublier les ressorts sont des pi ces soumises l usure et doivent tre contr l s r guli rement, au moins une fois par saison, et remplac s en cas de besoin.
  • Page 101: Conseils Pour La Mise Au Rebut/Le Recyclage

    Pour des questions concernant l assemblage et l utilisation de votre produit SportPlus ainsi que pour la commande de pi ces d tach es, veuillez contacter notre quipe du service client le qui se tient tou ours votre disposition.
  • Page 102: Service Et Pièces De Rechange

    Pour des questions concernant la mise en place et l utilisation de votre produit SportPlus ainsi que pour la commande de pi ces d tach es, veuillez contacter notre quipe du service client le qui se tient tou ours votre disposition.
  • Page 103: Garanties

    9. GARANTIES SportPlus assure, que le produit, qui se r f re la garantie, a t fabriqu avec des mat riau d e cellente qualit et v rifi avec le plus grand soin. Cependant, si avec une utilisation et un entretien normau , durant le d lai de garantie cit ici, des d fauts venaient appara tre, veuillez contacter notre quipe de service client le.
  • Page 104 Gentile Cliente, congratulazioni per l'acquisto del Suo nuovo prodotto SportPlus, che siamo certi Le garantirà la massima soddisfazione. Per garantire funzionamento e prestazioni sempre ottimali del Suo prodotto, La preghiamo di rispettare le condizioni che seguono: • Prima del primo utilizzo del prodotto, leggere con attenzione e integralmente questo manuale utente.
  • Page 105: Dati Tecnici

    N. art.: SP-T-244/305/366 Peso max. dell'utente: 50/120/150 kg Dimensioni (L x P x A) SP-T-244: ca. 275 x 275 x 227 cm Dimensioni (L x P x A) SP-T-305: ca. 333 x 333 x 250 cm Dimensioni (L x P x A) SP-T-366: ca.
  • Page 106 AVVERTENZE PER LA SICUREZZA ATTENZIONE - Pericolo di lesioni • Non utilizzare un prodotto danneggiato o difettoso. In tal caso, rivolgersi a un officina specializzata o al servizio clienti della Societ . • Prima di ogni utilizzo, esaminare il prodotto per verificare l assenza di danni. Sostituire immediatamente le parti difettose, così...
  • Page 107 AVVERTENZE PER LA SICUREZZA • Per disporre di un ambiente di lavoro privo di pericoli, ad esempio, è possibile non lasciare in giro alcuno strumento. Disporre il materiale di imballaggio in modo che non causi alcun pericolo. Pellicole o sacchetti in plastica comportano un pericolo di soffocamento per i bambini! •...
  • Page 108 AVVERTENZE PER LA SICUREZZA AVVERTENZA Non atterrare di testa o di trampolino deve essere collo. Sussiste il rischio di utilizzato da una sola persona paralisi con conseguenze alla volta. Il trampolino non è letali, anche laddove adatto a bambini di età inferiore si atterri al centro del a 6 anni.
  • Page 109 AVVERTENZE PER LA SICUREZZA • Anche scendendo dal telo da salto possibile il verificarsi di lesioni, in particolare a schiena, collo o testa. Si consiglia di evitare salti mortali e capriole. Di norma, sul trampolino è consentito saltare a una sola persona, anche in caso di illustrazioni che eventualmente mostrino più...
  • Page 110: Per L'utilizzatore

    AVVERTENZE PER LA SICUREZZA • Tenere sempre il trampolino asciutto e pulito. Non utilizzare il trampolino se bagnato o umido. • Gli utilizzatori devono indossare calzini o scarpe da ginnastica. Non indossare scarpe per tutti i giorni e altre scarpe sportive. •...
  • Page 111 AVVERTENZE PER LA SICUREZZA • Saltare a turni e supervisionare di volta in volta l'utilizzatore. • Salire e scendere dal trampolino lentamente. Non saltare per salire o scendere sul/dal trampolino. Non utilizzare il prodotto come trampolino da lancio verso altri oggetti.
  • Page 112: Elenco Delle Parti

    3. ELENCO DELLE PARTI Quantità Illustrazione Descrizione SP-T-244 SP-T-305 SP-T-366 Telo da salto Protezione delle molle Raccordo Parte telaio Base gamba Gamba Bullone Piccola rondella elastica Grande rondella elastica Rondella Vite Chiave ad anello Cacciavite Tensionatore a molla Molla Cappuccio in plastica...
  • Page 113 3. ELENCO DELLE PARTI Quantità Illustrazione Descrizione SP-T-244 SP-T-305 SP-T-366 Tubo del telaio superiore, con schiuma Tubo del telaio inferiore, con schiuma Cavo Copertura in plastica Cappuccio di protezione Vite autofilettante Pomello Corda Rete di sicurezza Piccola rondella elastica...
  • Page 114: Istruzioni Di Montaggio

    4. ISTRUZIONI DI MONTAGGIO PASSAGGIO 1 Disporre tutte le parti (3, 4, 5, 6) sul pavimento. SP-T-244 SP-T-305 SP-T-366...
  • Page 115 Ripetere questo passaggio fin quando tutte le gambe (6) e le relative basi (5) sono montate. SP-T-244: 6 x gamba / 3 x base gamba SP-T-305: 8 x gamba / 4 x base gamba SP-T-366: 12 x gamba / 6 x base gamba NOTA: NON STRINGERE ANCORA COMPLETAMENTE LE VITI;...
  • Page 116 Ripetere questo passaggio fino a quando tutte le parti rimanenti del telaio (4) e i raccordi (3) sono montati. SP-T-244: 6 parti del telaio / 6 raccordi SP-T-305: 8 parti del telaio / 8 raccordi SP-T-366: 12 parti del telaio / 12 raccordi...
  • Page 117 Ripetere questo passaggio fino a quando tutte le parti del telaio e le gambe sono montate. SP-T-244: 3 x gamba / 6 x parte del telaio SP-T-305: 4 x gamba / 8 x parte del telaio SP-T-366: 6 x gamba / 12 x parte del telaio NOTA: ASSICURARSI CHE LE PARTI DEL TELAIO (4) SIANO INSERITE COMPLETAMENTE NEI RACCORDI (3).
  • Page 118 4. ISTRUZIONI DI MONTAGGIO PASSAGGIO 5...
  • Page 119 4. ISTRUZIONI DI MONTAGGIO PASSAGGIO 6 NOTA: ASSICURARSI CHE LE PARTI DEL TELAIO (4) SIANO INSERITE COMPLETAMENTE NEI RACCORDI (3).
  • Page 120 4. ISTRUZIONI DI MONTAGGIO Panoramica del telaio montato. SP-T-244 SP-T-305 SP-T-366...
  • Page 121 è possibile arrecare danni al telo da salto. AVVERTENZA: Indossare guanti pesanti per proteggere le mani da contusioni. Gli occhiali di protezione devono essere indossati per prevenire lesioni agli occhi. SP-T-244 SP-T-305 , -*$ SP-T-366 Nota: iniziare il montaggio delle molle su un raccordo.
  • Page 122 4. ISTRUZIONI DI MONTAGGIO PASSAGGIO 8 Osservare la sequenza corretta nel montaggio delle molle. Una molla montata in modo scorretto può danneggiare il telo da salto. SP-T-244 SP-T-305 SP-T-366...
  • Page 123 4. ISTRUZIONI DI MONTAGGIO PASSAGGIO 9 Procedere al montaggio delle molle come precedentemente descritto, fin quando tutte le molle risultano assemblate. SP-T-244 SP-T-305 SP-T-366 Nota: dopo aver montato le molle, serrare tutte le viti.
  • Page 124 4. ISTRUZIONI DI MONTAGGIO PASSAGGIO 10 Posizionare la protezione delle molle (2) sul telo da salto (1). Fare attenzione alla posizione delle aperture nella protezione. Legare la protezione delle molle al telaio. APERTURA NELLA PROTEZIONE...
  • Page 125 4. ISTRUZIONI DI MONTAGGIO PASSAGGIO 11 APERTURA NELLA PROTEZIONE SP-T-244 SP-T-305 SP-T-366...
  • Page 126 4. ISTRUZIONI DI MONTAGGIO PASSAGGIO 12...
  • Page 127 4. ISTRUZIONI DI MONTAGGIO PASSAGGIO 13 Foro piccolo Foro grande...
  • Page 128 4. ISTRUZIONI DI MONTAGGIO PASSAGGIO 14...
  • Page 129 4. ISTRUZIONI DI MONTAGGIO PASSAGGIO 15 Fissare la rete di sicurezza al telo da salto infilando la corda (H) nelle aperture della rete di sicurezza e del telo medesimi. SP-T-244 SP-T-305 SP-T-366...
  • Page 130 4. ISTRUZIONI DI MONTAGGIO INSERIMENTO DELLA RETE DI SICUREZZA...
  • Page 131 4. ISTRUZIONI DI MONTAGGIO INSERIMENTO DELLA RETE DI SICUREZZA...
  • Page 132: Istruzioni Per L'allenamento E L'uso

    5. ISTRUZIONI PER L'ALLENAMENTO E L'USO ALLENAMENTO SUL TRAMPOLINO: Attenzione: prima dell'uso assicurarsi che la protezione delle molle sia correttamente in posizione e che tutte le molle siano coperte. Posizionare il trampolino su una superficie il pi possibile piana, osservando tutte le avvertenze per la sicurezza (consultare questo manuale).
  • Page 133 5. ISTRUZIONI PER L'ALLENAMENTO E L'USO Esercizi sul trampolino di base per le fasi di riscaldamento e raffreddamento: Si consiglia di eseguire ogni esercizio mostrato 10 volte di seguito. 1. „Contact Bounce“ Posizionarsi con i piedi a larghezza spalle sul trampolino, flettendo leggermente le ginocchia.
  • Page 134: Manutenzione E Pulizia

    6. MANUTENZIONE E PULIZIA MANUTENZIONE Controllare regolarmente il prodotto per verificare la presenza di segni di usura o danni, e riparare immediatamente. Il telo da salto, la rete di sicurezza, l'imbottitura del telaio e i relativi elementi di fissaggio, come pure le molle, sono parti usurabili e devono essere controllati, ed eventualmente sostituiti, regolarmente a cadenza almeno stagionale.
  • Page 135: Istruzioni Per Lo Smaltimento

    A tal fine, si consiglia di conservare lo scontrino fiscale. Per domande sull installazione e l uso del prodotto SportPlus acquistato, come pure per ordinare i pezzi di ricambio, rivolgersi in qualsiasi momento al team di assistenza...
  • Page 136: Assistenza E Pezzi Di Ricambio

    Societ . A tal fine, si consiglia di conservare lo scontrino fiscale. Per domande sull'installazione e l'uso del prodotto SportPlus acquistato, come pure per ordinare i pezzi di ricambio, rivolgersi in qualsiasi momento al team di assistenza della Società.
  • Page 137: Garanzia

    9. GARANZIA SportPlus assicura che il prodotto coperto da tale garanzia è stato fabbricato con materiali di alta qualità ed è stato controllato con la massima cura. Nel caso in cui, durante il normale utilizzo e l'ordinaria manutenzione coperti dalla garanzia di seguito indicata, emergano difetti al prodotto rivolgersi al team di assistenza della Società.
  • Page 138 Estimada cliente, estimado cliente, Le felicitamos por su nuevo producto SportPlus, y estamos convencidos de que quedará completamente satisfecho con él. Para garantizar un funcionamiento y capacidad de rendimiento óptimos de su producto, le pedimos que: • ¡Antes de usar el producto por primera vez, lea con atención el siguiente manual de instrucciones! •...
  • Page 139: Datos Técnicos

    N.º de art.: SP-T-244/305/366 Peso máx. de usuario: 50/120/150 kg Medidas (L x An x Al) SP-T-244: aprox. 275 x 275 x 227 cm Medidas (L x An x Al) SP-T-305: aprox. 333 x 333 x 250 cm Medidas (L x An x Al) SP-T-366: aprox.
  • Page 140 INDICACIONES DE SEGURIDAD CUIDADO – Peligro de lesión • No utilice un producto dañado o defectuoso. En ese caso, diríjase a un taller especializado o a nuestro centro de servicios. • Compruebe que el producto está en perfectas condiciones antes de cada uso. Las piezas defectuosas se deberán cambiar de inmediato, ya que pueden afectar a su funcionalidad y seguridad.
  • Page 141: Otras Indicaciones

    INDICACIONES DE SEGURIDAD • Proporcione un entorno de trabajo sin peligros, por ejemplo, no deje tiradas las herramientas. Guarde todo el material de embalaje, de modo que no pueda presentar riesgos. ¡Las láminas o bolsas de plástico presentan un riesgo de asfi ia para los ni os •...
  • Page 142 INDICACIONES DE SEGURIDAD ADVERTENCIA cargar sobre Solo está permitido el uso cabeza o cuello. Existe del trampolín a una persona el peligro de parálisis con a la vez. El trampolín no consecuencias mortales, apropiado para niños igual si se carga por el menores de 6 años.
  • Page 143 INDICACIONES DE SEGURIDAD • Del mismo modo, el aterrizaje sobre la lona de salto puede provocar lesiones, en especial en la espalda, cuello o cabeza. No deben realizarse volteretas. Por norma general, solo debe haber un saltador en el trampolín, aunque las imágenes muestren a varios niños.
  • Page 144 INDICACIONES DE SEGURIDAD • Mantenga el trampolín siempre limpio y seco. No utilice el trampolín si está mojado o húmedo. • Los saltadores deben llevar calcetines o zapatillas de gimnasia. No llevar calzado habitual o zapatillas de deporte. • Se deberá garantizar que el cierre velcro del trampolín esté correctamente cerrado. •...
  • Page 145 INDICACIONES DE SEGURIDAD • Va a alternando durante el salto preste atenci n a la finalizaci n. • Trepe al y desde el trampolín. No salte al o desde el trampolín. No utilice el trampolín como medio de salto hacia otros objetos. •...
  • Page 146: Lista De Piezas

    3. LISTA DE PIEZAS Cantidad Nº. Figura Descripción SP-T-244 SP-T-305 SP-T-366 Lona de salto Cubiertas del resorte Pieza de unión Pieza del cuadro Base de pata de apoyo Pata de apoyo Pernos Arandela de resorte pequeña Arandela de resorte grande...
  • Page 147 3. LISTA DE PIEZAS Cantidad Nº. Figura Descripción SP-T-244 SP-T-305 SP-T-366 Tubo de cuadro superior, con gomaespuma Tubo de cuadro inferior, con gomaespuma Cable Cubierta de plástico Cubierta Tornillo autoblocante Perilla Cuerda Red de seguridad Arandela de resorte pequeña...
  • Page 148: Manual De Montaje

    4. MANUAL DE MONTAJE PASO 1 Coloque todas las piezas (3, 4, 5, 6) sobre el suelo. SP-T-244 SP-T-305 SP-T-366...
  • Page 149 Repita este paso hasta que todas las patas de apoyo (6) y bases (5) estén montadas. SP-T-244: 6 x pata de apoyo / 3 x base patas de apoyo SP-T-305: 8 x pata de apoyo / 4 x base patas de apoyo...
  • Page 150 Repita este paso hasta que todas las patas de apoyo (4) y piezas de unión (3) estén montadas. SP-T-244: 6 piezas del cuadro / 6 piezas de unión SP-T-305: 8 piezas del cuadro / 8 piezas de unión SP-T-366: 12 piezas del cuadro / 12 piezas de unión...
  • Page 151 Repita este paso hasta que se hayan montado todas las piezas del cuadro y patas de apoyo. SP-T-244: 3 x pata de apoyo / 6 x pieza del cuadro SP-T-305: 4 x pata de apoyo / 8 x pieza del cuadro SP-T-366: 6 x pata de apoyo / 12 x pieza del cuadro NOTA: ASEGÚRESE DE QUE LAS PIEZAS DEL CUADRO (4) SE HAYAN...
  • Page 152 4. MANUAL DE MONTAJE PASO 5...
  • Page 153 4. MANUAL DE MONTAJE PASO 6 NOTA: ASEGÚRESE DE QUE LAS PIEZAS DEL CUADRO (4) SE HAYAN INTRODUCIDO POR COMPLETO EN LAS PIEZAS DE UNIÓN (3).
  • Page 154 4. MANUAL DE MONTAJE Vista general de la estructura montada. SP-T-244 SP-T-305 SP-T-366...
  • Page 155 ADVERTENCIA: Utilice guantes pesados para proteger sus manos contra aplastamientos. Se debe llevar gafas de protección para evitar lesiones en los ojos. SP-T-244 SP-T-305 , -*$ SP-T-366 Nota: Comience el montaje del resorte en una pieza de unión.
  • Page 156 4. MANUAL DE MONTAJE PASO 8 Preste atención al orden correcto de montaje del resorte. Un resorte montado incorrectamente puede dañar la lona de salto. SP-T-244 SP-T-305 SP-T-366...
  • Page 157 4. MANUAL DE MONTAJE PASO 9 Continúe el montaje de los resortes como se describe anteriormente hasta que todos los resortes estén montados. SP-T-244 SP-T-305 SP-T-366 Nota Apriete firmemente todos los tornillos despu s del monta e del resorte.
  • Page 158 4. MANUAL DE MONTAJE PASO 10 Coloque la cubierta del resorte (2) en la lona de salto (1). Preste atención a la posición de las aberturas en la cubierta. Fije la cubierta del resorte en la estructura. ABERTURA EN LA CUBIERTA...
  • Page 159 4. MANUAL DE MONTAJE PASO 11 ABERTURA EN LA CUBIERTA SP-T-244 SP-T-305 SP-T-366...
  • Page 160 4. MANUAL DE MONTAJE PASO 12...
  • Page 161 4. MANUAL DE MONTAJE PASO 13 Agujero pequeño Agujero grande...
  • Page 162 4. MANUAL DE MONTAJE PASO 14...
  • Page 163 4. MANUAL DE MONTAJE PASO 15 Asegure la red de seguridad en la lona de salto pasando la cuerda (H) por los orificios de la red de seguridad y de la lona. SP-T-244 SP-T-305 SP-T-366...
  • Page 164 4. MANUAL DE MONTAJE DESCOLGAR LA RED DE SEGURIDAD...
  • Page 165 4. MANUAL DE MONTAJE DESCOLGAR LA RED DE SEGURIDAD...
  • Page 166: Manual De Instrucciones Y Entrenamiento

    5. MANUAL DE INSTRUCCIONES Y ENTRENAMIENTO EL ENTRENAMIENTO EN EL TRAMPOLÍN: Atención: Antes del uso compruebe que la cubierta del resorte asiente correctamente y todos los resortes estén tapados. Coloque el trampol n sobre una superficie nivelada teniendo en cuenta todas las indicaciones de seguridad (véase en este manual).
  • Page 167 5. MANUAL DE INSTRUCCIONES Y ENTRENAMIENTO Ejercicios básicos sobre el trampolín para la fase de calentamiento y enfriamiento: Recomendamos realizar sucesivamente cada uno de los 10x ejercicios. 1. "Contact Bounce" Colóquese en el trampolín con el ancho de hombros y doble ligeramente las rodillas. La manos deben estar colocadas en las caderas.
  • Page 168: Mantenimiento & Limpieza

    6. MANTENIMIENTO & LIMPIEZA MANTENIMIENTO Compruebe regularmente que el producto no sufre desgaste o daños y subsánelos de inmediato. La lona de salto, la red de seguridad, el acolchado del cuadro sus fi aciones, así como los resortes son piezas de desgaste y deben ser comprobados regularmente, al menos una vez por temporada, y, en su caso, deben cambiarse.
  • Page 169: Indicaciones De Eliminación

    A este fin, le recomendamos que conserve cuidadosamente la factura de compra. Nuestro personal de servicio está a su disposición en todo momento para cualquier pregunta sobre el montaje y uso de su producto SportPlus, así como para el pedido de piezas de repuesto.
  • Page 170: Servicio Y Piezas De Repuesto

    A este fin, le recomendamos que conserve cuidadosamente la factura de compra. Nuestro personal de servicio está a su disposición en todo momento para cualquier pregunta sobre el montaje y uso de su producto SportPlus, así como para el pedido de piezas de repuesto.
  • Page 171: Garantías

    9. GARANTÍAS SportPlus garantiza que el producto, en lo que se refiere a la garant a, ha sido fabricado con materiales de alta calidad y comprobado con la máxima atención. Póngase en contacto con nuestro personal de servicio si se presentan defectos, en condiciones normales de uso y servicio dentro de los plazos de garantía que se recogen a continuación.
  • Page 172 Servicehotline: +49 (0) 40 - 780 896 – 35 (Nationales Festnetz, Gesprächsgebühren sind von Ihrem Telefonanbieter / Ihrem Telefonvertrag abhängig.) E-Mail: service@sportplus.org URL: http://www.sportplus.org Servicehotline: +44 - 203 318 4415 (Call charges depend on your phone company / your phone contract.) E-Mail: service@sportplus.org...

Ce manuel est également adapté pour:

Sp-t-305Sp-t-366

Table des Matières