Titan IMPACT 740 Mode D'emploi
Masquer les pouces Voir aussi pour IMPACT 740:
Table des Matières

Publicité

Les langues disponibles

Les langues disponibles

Liens rapides

IMPACT
740
AIRLESS, HIGH-PRESSURE
SPRAYING UNIT
GROUPE DE PROJECTION À
HAUTE PRESSION
AIRLESS EQUIPO DE ALTA
PRESIÓN PARA PULVERIZAR
MODEL
805-008
• Form No. 0552881H
0719
OPERATING MANUAL
- EN -
- F -
- ES -
MODEL
805-007
OPERATING MANUAL
MODE D'EMPLOI
INSTRUCCIONES DE USO
2
14
26

Publicité

Table des Matières
loading

Sommaire des Matières pour Titan IMPACT 740

  • Page 1 OPERATING MANUAL IMPACT - EN - OPERATING MANUAL ™ - F - MODE D’EMPLOI - ES - INSTRUCCIONES DE USO AIRLESS, HIGH-PRESSURE SPRAYING UNIT GROUPE DE PROJECTION À HAUTE PRESSION AIRLESS EQUIPO DE ALTA PRESIÓN PARA PULVERIZAR MODEL 805-007 MODEL 805-008 •...
  • Page 2 Do not aim the gun at, or spray any person or animal. IMPORTANT: When the sprayer is used with a generator or uncontrolled line voltage, the use of Titan’s “Line Surge • Keep hands and other body parts away from the discharge. For Protector”...
  • Page 3: Table Des Matières

    The United States Government Safety Standards have been adopted under the Occupational Safety and Health Act (OSHA). These standards, particularly part 1910 of the General Standards and part 1926 of the Construction Standards should be consulted. English © Titan Tool Inc. All rights reserved.
  • Page 4: General Description

    6. Allow the sprayer to run for 15–30 seconds to flush the test fluid out through the return hose and into the waste container. 7. Turn off the sprayer by moving the ON/OFF switch to the OFF position. English © Titan Tool Inc. All rights reserved.
  • Page 5: Preparing To Paint

    Be sure to follow the pressure relief procedure when shutting down the sprayer for any purpose, including servicing or adjusting any part of the spray system, changing or cleaning spray tips, or preparing for cleanup. English © Titan Tool Inc. All rights reserved.
  • Page 6: Control Panel Indicators

    This indicator is used by service centers to troubleshoot motor problems. NOTE: If the motor running and pressure indicators blink alternately, it means the motor has overheated. Turn pump OFF and allow to cool. English © Titan Tool Inc. All rights reserved.
  • Page 7: Spraying

    Shrubs next to houses should be tied back and covered with a canvas cloth. The cloth should be removed as soon as possible. Titan gun extensions are extremely helpful in these situations. Avoid arcing or holding the gun at an angle. This will result in an Nearby objects such as automobiles, outdoor furniture, etc.
  • Page 8: Cleanup

    Always contact the supplier of solvents for recommendations. 4. If you have any further questions concerning your Titan Airless Sprayer, call Titan: 6. Set the pressure to RAPID CLEAN by turning the pressure control knob to its RAPID Customer Service ..........
  • Page 9: Replacing The Filters

    RX-Pro Panel Motor Airless Gun Owner’s Manual. Ba e Belly Pan Screw Motor Ba e Motor Screw Belly Pan Shroud Screw Motor Controller Motor Controller Screw Motor Cover Motor Cover Screw English © Titan Tool Inc. All rights reserved.
  • Page 10: Replacing The Gears

    8. Slide the grommet off of the old transducer and onto the new transducer. 9. Thread the new transducer wire through the mounting plate and back to the motor controller. English © Titan Tool Inc. All rights reserved.
  • Page 11: Replacing The Prime/Spray Valve

    NOTE: During reassembly, make sure the Viton o-rings and the PTFE back-up rings between the upper housing and lower housing as well as between the lower housing and the foot valve housing are lubricated with grease and in position. English © Titan Tool Inc. All rights reserved.
  • Page 12 (see Fluid Section Assembly parts list for lower packing insertion tool P/N). 18. Place the piston insertion tool (included in the repacking kit) over the top of the piston rod. English © Titan Tool Inc. All rights reserved.
  • Page 13: Troubleshooting

    Faulty or loose wiring. Inspect or take to a Titan authorized service center. Excessive motor temperature. Allow motor to cool. ON/OFF switch is defective.
  • Page 14 MESURES PRÉVENTIVES : IMPORTANT: Quand le pulvérisateur est utilisé avec un générateur de tension de la ligne ou non, l’utilisation de Titan “Line Surge Protector” (P • Ne dirigez pas le pistolet sur et ne pulvérisez pas les personnes ou les / N 800-935) est recommandé.
  • Page 15: Specifications

    Garantie ..................50 la ventilation, la prévention d’incendies et le fonctionnement. • Les normes de sécurité du gouvernement des États-Unis ont été adoptées dans la loi Occupational safety and Health Act (OSHA). Ces Français © Titan Tool Inc. Tous droits réservés.
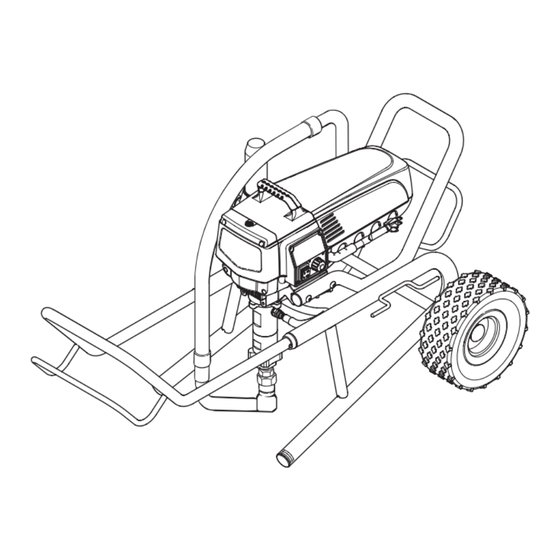
  • Page 16: Description Générale

    6. Laisser le vaporisateur fonctionner pendant 15 à 30 secondes pour évacuer le liquide d’essai par le flexible de retour, jusqu’au contenant de purge. 7. Arrêter l’appareil en mettant le commutateur à la position OFF. Français © Titan Tool Inc. Tous droits réservés.
  • Page 17: Préparation Avant De Peindre

    On doit effectuer la procédure de décompression chaque fois qu’on arrête l’appareil pour en faire la maintenance, en changer les réglages de vaporisation, en remplacer/ nettoyer les embouts ou en effectuer la préparation en vue d’un nettoyage. Français © Titan Tool Inc. Tous droits réservés.
  • Page 18: Procédure De Décompression

    NOTA : Les indicateurs de marche et de pression qui clignotent en alternance indiquent que le moteur est en surchauffe. Arrêtez la pompe (position « ARRÊT ») et laissez-la refroidir. Français © Titan Tool Inc. Tous droits réservés.
  • Page 19: Vaporisation

    Cette toile doit cependant être retirée dans les plus brefs délais. Les rallonges de pistolet Titan peuvent, elles aussi, s’avérer fort utiles dans de telles situations. Les objets comme les voitures, l’ameublement de jardin, etc. doivent être éloignés ou recouverts lorsqu’ils sont à...
  • Page 20: Nettoyage

    10. Soulever la soupape PRIME/SPRAY à la 4. Pour toute autre question relative à ce vaporisateur à position SPRAY. dépression, il suffit de communiquer avec Titan : 11. Mettre l’appareil en marche. Service à la clientèle ........... 1-800-526-5362 Télécopieur ..........1-800-528-4826 On doit mettre le pistolet à...
  • Page 21: Remplacement Des Filtres

    Vis de RX-Pro. ventre pan Vis de joint d’étanchéité Ventre pan Vis du capot du moteur Contrôleur de moteur Vis du contrôleur de moteur Carter de moteur Vis du carter de moteur Français © Titan Tool Inc. Tous droits réservés.
  • Page 22: Remplacement Du Transducteur

    Dévissez délicatement le câble du de soupape. transducteur à travers la plaque d’assemblage. 7. Insérez la goupille dans la manette de soupape à travers la tige de soupape pour verrouiller la manette de soupape. Français © Titan Tool Inc. Tous droits réservés.
  • Page 23 4. À l’aide d’une clé 3/8 po., dévissez et retirez la rondelle de retenue de soupape de sortie de la tige de piston. 7. Retirez le piston de la partie inférieure du logement supérieur. Français © Titan Tool Inc. Tous droits réservés.
  • Page 24 24. Vissez dans le sens des aiguilles d’une montre le logement supérieur dans le logement de la boîte d’engrenages. 25. Continuez à visser jusqu’à ce que l’écrou d’étranglement touche le logement de la boîte d’engrenages. Français © Titan Tool Inc. Tous droits réservés.
  • Page 25: Maintenance De La Section Des Liquides

    “Maintenance de la Section des Liquides” décrite au chapitre Maintenance de ce manuel. Le moteur démarre mais ne tourne pas. Faire réparer dans un centre d’entretien agrée par Titan. Fuite de liquide dans la partie Les tampons graisseurs supérieurs sont usés.
  • Page 26 Tapa de la caja de receptáculo conectada a tierra PREVENCIÓN: IMPORTANTE: Cuando se usa el rociador con un generador o línea o sin control, uncontrolled line voltage, se recomienda que Titan’s “Line Surge • No apunte con la pistola ni pulverice sobre ninguna persona ni animal.
  • Page 27: Especificaciones

    Ley de salud y seguridad ocupacional (OSHA). Deben consultarse tres normas, particularmente la sección 1910 de las Normas generales y la sección 1926 de las Normas sobre construcción. Español © Titan Tool Inc. Todos los derechos reservados.
  • Page 28: Descripción General

    7. Apague la unidad moviendo el interruptor de ON/OFF (ENCENDIDO/APAGADO) a la posición OFF (APAGADO). Español © Titan Tool Inc. Todos los derechos reservados.
  • Page 29: Preparación Para Pintar

    Pintura Español © Titan Tool Inc. Todos los derechos reservados.
  • Page 30: Indicadores De Panel De Control

    NOTA: Si el motor está en marcha y los indicadores de presión parpadean alternadamente, significa que se sobrecalentó el motor. Apague la bomba y deje que se enfríe. Español © Titan Tool Inc. Todos los derechos reservados.
  • Page 31: Rociado

    Los arbustos junto a las casas deben amarrarse hacia atrás y cubrirse con tela de lona. La tela debe quitarse lo más pronto posible. Las extensiones de pistola Titan son sumamente útiles en estas situaciones. Deben alejarse o cubrirse los objetos cercanos como automóviles, muebles de terraza, etc.
  • Page 32: Limpieza

    Siempre pida recomendaciones al proveedor de solventes. 10. Mueva hacia arriba la válvula PRIME/SPRAY a su posición SPRAY. 4. Si tiene otras preguntas referentes al rociador Titan, llame a Titan: 11. Encienda la unidad. Servicio al cliente ..........1-800-526-5362 Conecte a tierra la pistola apoyándola...
  • Page 33: Reemplazo De Los Filtros

    RX-Pro. de ector del Tornillo para Vientre pan la carcasa motor del motor Controlador del motor Tornillo para el controlador del motor Cubierta del motor Tornillo para la cubierta del motor Español © Titan Tool Inc. Todos los derechos reservados.
  • Page 34: Reemplazo De Los Engranajes

    7. Inserte el pasador de ranura en la manilla de la válvula y a placa de montaje. través del vástago de la válvula para fijar la manilla de la válvula en su posición. Español © Titan Tool Inc. Todos los derechos reservados.
  • Page 35 Retire la carcasa inferior. 8. Inspeccione que la biela del pistón no tenga desgaste y reemplácela si fuese necesario. Español © Titan Tool Inc. Todos los derechos reservados.
  • Page 36 25. Siga girando la carcasa superior en el sentido de las agujas del reloj hasta que la tuerca de paro esté a ras con la carcasa de la caja de engranajes. Español © Titan Tool Inc. Todos los derechos reservados.
  • Page 37: Solución De Problemas

    Gire la perilla de control de presión en el sentido de las alimentación. agujas del reloj para aumentar el ajuste de presión. Suministro de tensión inadecuado. Vuelva a conectar la tensión de entrada para 120V AC. Español © Titan Tool Inc. Todos los derechos reservados.
  • Page 38 Parts List • Liste de pièces • Lista de piezas Main Assembly • Vue d’ensemble • Ensamblaje principal © Titan Tool Inc. All rights reserved.
  • Page 39: Ensamblaje De La Sección De Líquidos

    710-046 Inlet filter Filtre d’entrée Filtro de entrada 0551972 Surge suppressor (not shown, see Protection contre les surtensions (non Supresor de sobrecarga (no se muestra, schematic) présenté, voir le schéma) consulte el esquema) © Titan Tool Inc. All rights reserved.
  • Page 40 Controlador de motor 770-099 Tie wrap Attache à tête d’équerre Amarras 9802266 Motor controller screw Vis de contrôleur de moteur Tornillo de controlador de motor 0522027 Capacitor assembly Ensemble capaciteur Conjunto de capacitor © Titan Tool Inc. All rights reserved.
  • Page 41 Washer Rondelle Arandela 0552526 Cart Chariot Carro 0294635 Plug Capuchon Tapa 9885571 Plug Capuchon Tapa 0294534 Wheel spacer Espaceur de roue Separador de rueda 0278373 Wheel Roue Rueda 9890104 Axle cap Chapeau Tapa © Titan Tool Inc. All rights reserved.
  • Page 42 © Titan Tool Inc. All rights reserved.
  • Page 43 (comprend les articles 3-4, 7-10, 13, 15, empaquetadura (incluye articulos 3-4, 16, 20 et 22) 7-10, 13, 15, 16, 20 y 22) 800-359 Piston insertion tool Outil d’insertion de piston Herramienta de inserción del pistón © Titan Tool Inc. All rights reserved.
  • Page 44: Ensamblaje Del Filtro

    Raccord Conector 700-258 Bypass valve assembly, complete Soupape de dérivation, complet Conjunto de la válvula de derivación, (includes items 9-13) (comprend les articles 9 à 13) completo (incluye los elementos 9 a 13) © Titan Tool Inc. All rights reserved.
  • Page 45: Ensamblaje De Bajo Carro

    Arandela 590-504 Handle sleeve Manche Manga de asa 9841504 Spring button Bouton d’enclenchement Botón, a presion 590-508 Roll pin Goupille rouleau Pasador de rollo 800-592 Handle assembly Ensemble de poignée Ensamblaje de mango © Titan Tool Inc. All rights reserved.
  • Page 46: Ensamblaje Del Juego De Succión (Bajo Carro)

    Étiquette du carter de moteur Etiqueta de la cubierta del motor 805-818 Warning label Etiqueta de la cubierta del motor Etiqueta de advertencia Control panel cover Couvercle de panneau de contrôle Tapa de panel de control 0552878 © Titan Tool Inc. All rights reserved.
  • Page 47 NOTA : Tous les travaux d’électricité doivent NOTA: Todo trabajo eléctrico debe performed by an authorized être effectués par le personnel d’un realizarlo un centro de service center. centre de service autorisé. servicio autorizado. © Titan Tool Inc. All rights reserved.
  • Page 48 Bypass valve assembly, complete Soupape de dérivation, complet Conjunto de la válvula de derivación, completo * Go to www.titantool.com for tip sizes / voir www.titantool.com pour les dimensions / visite www.titantool.com para conocer los tamaños © Titan Tool Inc. All rights reserved.
  • Page 49: Registro Del Producto

    Serial Number Location • Emplacement du numéro de série • Ubicación del número de serie Product Registration Register your product online at www.titantool.com. Enregistrement du produit Enregistrer votre appareil en ligne à www.titantool.com. Registro del producto Registre su producto en línea en www.titantool.com. © Titan Tool Inc. All rights reserved.
  • Page 50 Les responsabilités de Titan en vertu de cette garantie se limitent au remplacement ou à la réparation sans frais des pièces dont on aura, à la satisfaction raisonnable de Titan, démontré la défectuosité dans un délai de 12 mois après la date d’achat par l’Utilisateur.
  • Page 51: Garantía

    RECLAMOS EN CASO DE INCUMPLIMIENTO DE ESTAS GARANTÍAS. Las Hojas de Datos de Seguridad (Material Safety Data Sheets - MSDS) se encuentran disponibles en el sitio web de Titan o llamando al Servicio al Cliente. © Titan Tool Inc. All rights reserved.
  • Page 52 Enregistrer votre appareil en ligne à www.titantool.com. REGISTRO DEL PRODUCTO Registre su producto en línea en www.titantool.com. UNITED STATES SALES & SERVICE INTERNATIONAL WEB: www.titantool.com EMAIL: international@titantool.com PHONE: 1-800-526-5362 FAX: 1-763-519-3509 FAX: 1-800-528-4826 1770 Fernbrook Lane Minneapolis, MN 55447 © Titan Tool Inc. All rights reserved.

Ce manuel est également adapté pour:

805-008805-007

Table des Matières