Titan 440i Notice D'utilisation
Table des Matières
Les langues disponibles
Les langues disponibles
Liens rapides
Do not use this equipment before reading this manual!
Model Number:
Complete
700-3000
Printed in the U. S. A.
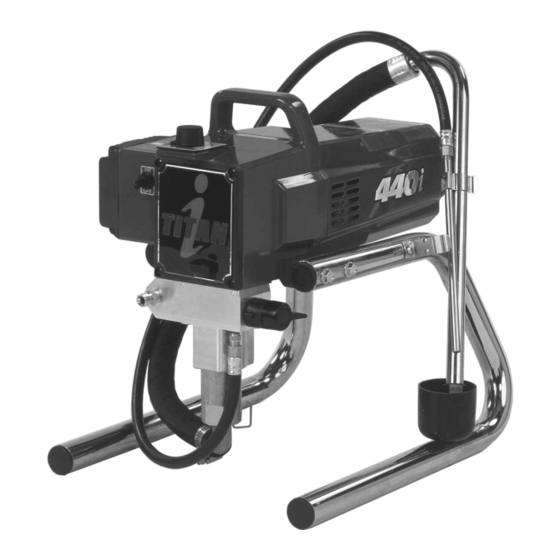
440
Airless Sprayer
Owner's Manual
Notice d'utilisation
Manual del Propietario
For professional use only
i
NOTE: This manual contains important warnings
NOTE: This manual contains important warnings
and instructions. Please read and retain for
and instructions. Please read and retain for
reference.
reference.
0707 © 2002 Titan Tool Inc. All rights reserved. Form No. 313-1632, REV E
Español
Français
English
Chapitres
Table des Matières
Dépannage

Manuels Connexes pour Titan 440i


Sommaire des Matières pour Titan 440i
-
Page 14: Importantes Consignes De Sécurité
• Se servir de la pression la plus basse possible pour vidanger s’avérer nécessaire de consulter un plasticien ou un spécialiste l’appareil. en chirurgie reconstructive de la main. • Ne pas pulvériser de produit sur la pompe. © Titan Tool Inc. Tous droits réservés. Français... -
Page 15: Instructions De Mise À La Terre
électrique de la prise avant de travailler sur l’équipement. • N’utilisez pas le tuyau pour tirer ou soulever l’équipement. • Ne pas soulever par la poignée de chariot en chargeant ou en déchargeant. © Titan Tool Inc. Tous droits réservés. Français... -
Page 16: Description Générale
6. Laisser le vaporisateur fonctionner pendant 15 à 30 l’avant de ce manuel. secondes pour évacuer le liquide d’essai par le flexible de retour, jusqu’au contenant de purge. 7. Arrêter l’appareil en mettant le commutateur à la position © Titan Tool Inc. Tous droits réservés. Français... -
Page 17: Préparation Avant De Peindre
On doit effectuer la procédure de décompression chaque fois qu’on arrête l’appareil pour en faire la maintenance, en changer les réglages de vaporisation, en remplacer/ nettoyer les embouts ou en effectuer la préparation en vue d’un nettoyage. © Titan Tool Inc. Tous droits réservés. Français... -
Page 18: Indicateurs De Pression
En tenant le pistolet plus près de la surface, on y applique produit de peinture sous ce dernier. davantage de produit, mais sur une bande plus étroite, tandis qu’en l’éloignant, on obtient une couche moins épaisse, © Titan Tool Inc. Tous droits réservés. Français... -
Page 19: Essais Préliminaires
PRIME. cependant être retirée dans les plus brefs délais. Les rallonges 6. Régler la pression pour le nettoyage par de pistolet Titan peuvent, elles aussi, s’avérer fort utiles dans pulsations en mettant le bouton de de telles situations. régulation à la position CLEAN (zone Min. -
Page 20: Maintenance
6. Verrouiller la détente du pistolet. ses recommandations à cet effet. Corps du pistolet 4. Pour toute autre question relative à ce vaporisateur à dépression, il suffit de communiquer avec Titan : Service à la clientèle (É.-U.)....1-800-526-5362 Télécopieur........1-800-528-4826 Service à la clientèle (Canada) .....1-800-565-8665 Joint de la poignée... -
Page 21: Remplacement Du Moteur
7. Mettre la coquille au-dessus du ventilateur du moteur et la fixer au moyen des deux vis prévues. 8. Glisser le carter sur le moteur en le fixant au moyen des quatre vis prévues. © Titan Tool Inc. Tous droits réservés. Français... -
Page 22: Remplacement De La Soupape Amorçage/Vaporisation
4. Retirer l’agrafe qui fixe le bloc d’aspiration à la soupape du bloc de retenue; disjoindre ces éléments. pompe 5. Incliner la pompe vers l’arrière pour accéder plus facilement à la section des liquides. © Titan Tool Inc. Tous droits réservés. Français... -
Page 23: Remplacement Des Tampons Graisseurs
Tige du l’avant jusqu’à ce piston que cette dernière sorte de la rainure en T de la bielle. © Titan Tool Inc. Tous droits réservés. Français... -
Page 24: Dépannage
3. Nettoyer Le pistolet ne vaporise pas 1. Absence de produit de peinture 1. Vérifier la source de liquide 2. Filtre ou embout obstrués 2. Nettoyer 3. Aiguille du pistolet brisée 3. Remplacer © Titan Tool Inc. Tous droits réservés. Français... - Page 25 3. Embout de vaporisation trop gros ou 3. Remplacer par un embout neuf ou plus petit usé Brevets Ces produits sont protégés par un ou plusieurs des brevets (U.S.A.) suivants : 4,500,119 4,768,929 © Titan Tool Inc. Tous droits réservés. Français...
-
Page 38: Parts Listings
313-1629 Etiqueta de la cubierta del motor 313-1673 Etiqueta de advertencia (inyección/explosión) 313-1847 Etiqueta del peligro de choque 313-1715 Etiqueta de control de presión 313-1743 Etiqueta de la luz indicadora © Titan Tool Inc. All rights reserved. English Français Español... -
Page 39: Motor Assembly
NOTA: Tous les travaux d’électricité NOTA: Todo trabajo eléctrico debe performed by an authorized doivent être effectués par le realizarlo un centro de service center. personnel d’un centre de servicio autorizado. service autorisé. © Titan Tool Inc. All rights reserved. Español Français English... - Page 41 Montaje del potenciómetro.......1 704-279 Cubierta del diodo emisor de luz .....1 765-063 Alivio de tensión ........1 704-282 Tornillo ............1 765-054 Cable de alimentación ......1 704-281 Tapón del orificio ........1 704-229 Tornillo ............1 © Titan Tool Inc. All rights reserved. Español Français English...
-
Page 42: Fluid Section Assembly
(no 700-793). NOTA: Juego de empaquetaduras N/P 730-401 incluye los artículos marcados con un *. También se incluye grasa de empaquetadura N/P 700-203 y herramienta guía de pistón N/P 700-793. © Titan Tool Inc. All rights reserved. English Français Español... - Page 43 Bola de la válvula de pie........1 tórica opcional de PTFE (700-897). Instale con 762-137 Asiento de la válvula de pie ........1 una herramienta para juntas tóricas (700-890). 762-058 Junta tórica............1 © Titan Tool Inc. All rights reserved. Español Français English...
-
Page 44: Stand Assembly
(incluye artículos 2–4 y 7) ......1 704-179 Pata, izquierda, completa 755-135 Sujetador ..........1 (incluye artículos 1 y 3-5) 700-805 Malla de entrada........1 704-178 Pata, derecha, completa (incluye artículos 3 y 6-8) © Titan Tool Inc. All rights reserved. English Français Español... -
Page 45: Electrical Schematic
Ensamblaje Placa de control de cables ROJO electrónico (704-258, Rojo) ROJO Ensamblaje de cables (765-072) ROJO NEGRO Disyuntor NOTA: Todo trabajo eléctrico debe realizarlo un centro de Interruptor servicio autorizado. © Titan Tool Inc. All rights reserved. Español Français English... -
Page 46: Accessories
314-171 ...Lubriplate, 14 ounce individual 314-171 ...Lubriplate, contenant d’environ 400 g (14 oz) 314-172 ...Lubriplate, 6 lb. can 314-172 ...Lubriplate, contenant d’environ 3 kg (6 lb) 700-1037 ..Electrostatic discharge (ESD) wrist strap © Titan Tool Inc. All rights reserved. English Français Español... -
Page 48: Warranty
Warranty • Garantie • Garantía Titan Tool, Inc., (“Titan”) warrants that at the time of delivery to the original purchaser for use (“End User”), the equipment covered by this warranty is free from defects in material and workmanship. With the exception of any special, limited, or extended warranty published by Titan, Titan’s obligation under this warranty is limited to replacing or repairing without charge those parts which, to Titan’s reasonable satisfaction, are shown to be defective within...