Table des Matières

Publicité

Les langues disponibles
  • FR

Les langues disponibles

  • FRANÇAIS, page 27

Liens rapides

USER´S MANUAL
BEDIENUNGSANLEITUNG
MANUEL D´UTILISATION
MANUAL DE USUARIO
INSTRUKCJA OBSŁUGI
MANUALE D´USO
F1 T
COMPACT FRESNEL SPOTLIGHT WITH TUNGSTEN LED
CLF1T
F1 D
COMPACT FRESNEL SPOTLIGHT WITH DAYLIGHT LED
CLF1D

Publicité

Table des Matières
loading

Sommaire des Matières pour Cameo F1 T

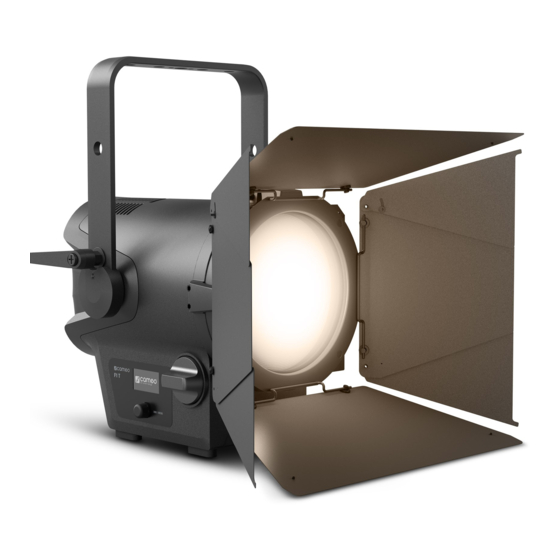
  • Page 1 USER´S MANUAL BEDIENUNGSANLEITUNG MANUEL D´UTILISATION MANUAL DE USUARIO INSTRUKCJA OBSŁUGI MANUALE D´USO F1 T COMPACT FRESNEL SPOTLIGHT WITH TUNGSTEN LED CLF1T F1 D COMPACT FRESNEL SPOTLIGHT WITH DAYLIGHT LED CLF1D...
  • Page 2: Table Des Matières

    CONTENTS / INHALTSVERZEICHNIS / CONTENU / CONTENIDO / TREŚĆ / CONTENUTO ENGLISH ESPAÑOL PREVENTIVE MEASURES MEDIDAS DE SEGURIDAD 39-40 INTRODUCTION INTRODUCCIÓN 40-41 CONNECTIONS, OPERATING AND DISPLAY ELEMENTS CONEXIONES, ELEMENTOS DE MANEJO Y ELEMENTOS OPERATION DE VISUALIZACIÓN 41-42 INSTALLATION FUNCIONAMIENTO 42-45 INSTALL/REMOVE ACCESSORIES INSTALACIÓN Y MONTAJE CARE AND MAINTENANCE –...
  • Page 3: English

    We have designed this product to operate reliably over many years. Please read this User‘s Manual carefully, so that you can begin making optimum use of your Cameo Light product quickly. Learn more about Cameo Light on our website WWW.CAMEOLIGHT.COM.
  • Page 4: Introduction

    34. Please keep a distance of at least 0.5 m to any combustible materials. 35. Power cables to power multiple devices must have a cross-section of at least 1.5 mm². Within the EU, the cables must correspond to H05VV-F, or similar. Suitable cables are offered by Adam Hall. With these cables, you can connect multiple devices via the power OUT con- nection to the power IN connection of an additional device.
  • Page 5: Connections, Operating And Display Elements

    TRUE1 compatible mains input socket. Operating voltage 100 - 240 V AC / 50 - 60Hz. POWER OUT TRUE1 compatible mains output socket for mains supply of additional CAMEO spotlights. Ensure that the total current consumption of all connected devices does not exceed the value specified on the device in amperes (A).
  • Page 6: Operation

    TIPS • As soon as the spotlight is correctly is connected to the power supply, the following will be displayed in succession: “Welcome to Cameo”, the model name and the software version. After this process, the lamp is ready for operation and starts in the previously enabled mode.
  • Page 7 CONFIGURING DMX MODE (DMX Mode) Press the encoder to access the main menu. Rotate the encoder to select the menu item “DMX Mode” (left arrow) and confirm by pushing the encoder. You can now select the desired DMX mode by rotating the encoder. Confirm the selection by pushing the encoder. Select the arrow symbol at the top of the menu for “back”...
  • Page 8 DEVICE SETTINGS (Settings) Press the encoder to access the main menu. Rotate the encoder to select the menu item “Settings” (left arrow) and confirm by pushing the encoder. This will take you to the submenu for setting the submenu items (see table, rotate the encoder to select and push the encoder to confirm selection).
  • Page 9 Adjusts fan speed  Back Auto Automatic fan speed control Max Intensity Maximum fan power for maximum brightness Low Noise Extra quiet fan with reduced brightness Factory Reset resets to factory Back  setting Reset Now! reset to factory settings DIMMER CURVES linear exponential...
  • Page 10: Installation

    SETUP AND INSTALLATION Thanks to its four plastic feet, the spotlight can be placed in a suitable location on a flat surface. Install on a crossbeam using the prein- stalled mounting bracket (A) and a suitable crossbeam clamp (available as an accessory). Make sure that the spotlight is firmly attached and secure it using a suitable safety cable on the designated location on the top of the spotlight (B).
  • Page 11: Care And Maintenance - Cleaning Lenses

    CARE AND MAINTENANCE – CLEANING LENSES The front lens (E) and its rubber frame can be cleaned by flipping the retaining bracket upwards as previously described and then drawing the front lens and its rubber frame as well as the filter frame upwards out of the retention arms. Clean the front lens with a moist, lint-free cloth, making sure not to let moisture into the device and not to scratch the surface of the lens.
  • Page 12: Dmx Technology

    DMX TECHNOLOGY DMX-512 DMX (Digital Multiplex) is the designation for a universal transmission protocol for communications between corresponding devices and controllers. A DMX controller sends DMX data to the connected DMX device(s). The DMX data is always transmitted as a serial data stream that is forwarded from one connected device to the next via the "DMX IN"...
  • Page 13: Technical Data

    TECHNICAL DATA Article number: CLF1T CLF1D Product type: LED spotlight LED spotlight Type: Fresnel spotlight with zoom function Fresnel spotlight with zoom function Color spectrum: Tungsten (warm white) 3000 K Daylight (cold white) 5600K CRI: Number of LEDs: LED type: 78 W 78 W LED PWM frequency:...
  • Page 14: Manufacturer's Declarations

    MANUFACTURER´S DECLARATIONS MANUFACTURER‘S WARRANTY & LIMITATIONS OF LIABILITY You can find our current warranty conditions and limitations of liability at: https://cdn-shop.adamhall.com/media/pdf/Manufacturers-Decla- rations-CAMEO_DE_EN_ES_FR.pdf. To request warranty service for a product, please contact Adam Hall GmbH, Adam-Hall-Str. 1, 61267 Neu Anspach / Email: Info@adamhall.com / +49 (0)6081 / 9419-0. CORRECT DISPOSAL OF THIS PRODUCT (valid in the European Union and other European countries with a differentiated waste collection system) This symbol on the product, or on its documents indicates that the device may not be treated as household waste.
  • Page 15: Deutsch

    Dieses Gerät wurde unter hohen Qualitätsanforderungen entwickelt und gefertigt, um viele Jahre einen reibungslosen Betrieb zu gewähr- leisten. Bitte lesen Sie diese Bedienungsanleitung sorgfältig, damit Sie Ihr neues Produkt von Cameo Light schnell und optimal einsetzen können. Weitere Informationen über Cameo Light erhalten Sie auf unserer Website WWW.CAMEOLIGHT.COM.
  • Page 16: Einführung

    nen verletzt werden und/oder andere Schäden auftreten können. Verlegen Sie Ihre Kabel daher immer sorgfältig. 31. Entfernen Sie Netzkabel und Netzadapter aus der Steckdose bei Gefahr eines Blitzschlags oder wenn Sie das Gerät länger nicht verwenden. 32. Das Gerät darf nur im spannungsfreien Zustand (Trennung des Netzsteckers vom Stromnetz) installiert werden. 33.
  • Page 17: Anschlüsse, Bedien- Und Anzeigeelemente

    TRUE1 kompatible Netzeingangsbuchse. Betriebsspannung 100 - 240V AC / 50 - 60Hz. POWER OUT TRUE1 kompatible Netzausgangsbuchse für die Netzversorgung weiterer CAMEO Scheinwerfer. Achten Sie darauf, dass die gesamte Stromaufnahme aller angeschlossenen Geräte den auf dem Gerät in Ampere (A) angegebenen Wert nicht überschreitet.
  • Page 18: Bedienung

    • Sobald der Scheinwerfer korrekt am Stromnetz angeschlossen ist, werden während des Startvorgangs nacheinander „Welcome to Cameo“, die Modellbezeichnung und die Software Version im Display angezeigt. Nach diesem Vorgang ist der Scheinwerfer betriebsbereit und startet in der Betriebsart, die zuvor aktiviert war.
  • Page 19 DMX BETRIEBSART EINSTELLEN (DMX Mode) Durch Drücken auf den Encoder gelangen Sie in das Hauptmenü. Durch Drehen des Encoders wählen Sie nun den Menüpunkt „DMX Mode“ aus (Auswahlpfeil links beachten) und bestätigen durch Drücken auf den Encoder. Nun können Sie die gewünschte DMX-Betriebsart durch Drehen des Encoders auswählen.
  • Page 20 GERÄTEEINSTELLUNGEN (Settings) Durch Drücken auf den Encoder gelangen Sie in das Hauptmenü. Durch Drehen des Encoders wählen Sie nun den Menüpunkt „Settings“ aus (Auswahlpfeil links beachten) und bestätigen durch Drücken auf den Encoder. Daraufhin gelangen Sie in das Untermenü zum Einstellen der Untermenü-Punkte (siehe Tabelle, Auswahl durch Drehen, bestätigen durch Drücken des Encoders).
  • Page 21 Lüftersteuerung zurück  anpassen Auto Automatische Regelung der Lüfterleistung Max Intensity Maximale Lüfterleistung für maximale Helligkeit Low Noise Extra leiser Lüfter bei reduzierter Helligkeit Factory Reset Zurücksetzen auf  zurück Werkseinstellung Reset Now! Zurücksetzen auf Werkseinstellungen Dimmerkurven linear exponentiell logarithmisch S-Kurve DMX-Wert DMX-Wert...
  • Page 22: Aufstellung Und Montage

    AUFSTELLUNG UND MONTAGE Dank seiner vier Plastikfüße kann der Scheinwerfer an einer geeigneten Stelle auf eine ebene Fläche gestellt werden. Die Montage an einer Traverse erfolgt mit Hilfe des vormontierten Montagebügels (A) und einer geeigneten Traversenklemme (optional erhältlich). Sorgen Sie für feste Verbindungen und sichern Sie den Scheinwerfer mit einem geeigneten Sicherungsseil an der dafür vorgesehenen Stelle auf der Oberseite des Scheinwerfers (B).
  • Page 23: Wartung Und Pflege - Linsen Reinigen

    WARTUNG UND PFLEGE - LINSEN REINIGEN Die in einem Gummirahmen gefasste Frontlinse (E) lässt sich reinigen, indem Sie, wie zuvor beschrieben, die Haltevorrichtung nach oben klappen und dann die Frontlinse mit Gummirahmen und den Filterrahmen nach oben aus den Haltearmen nehmen. Reinigen Sie die Frontlinse mit einem feuchten, fusselfreien Tuch und achten dabei darauf, dass Feuchtigkeit nicht in das Gerät eindringt und die Oberfläche der Linse nicht verkratzt wird.
  • Page 24: Dmx Technik

    DMX TECHNIK DMX-512 DMX (Digital Multiplex) ist die Bezeichnung für ein universelles Übertragungsprotokoll für die Kommunikation zwischen entsprechenden Geräten und Controllern. Ein DMX-Controller sendet DMX-Daten an das/die angeschlossene(n) DMX-Gerät(e). Die DMX-Datenübertragung erfolgt stets als serieller Datenstrom, der über die an jedem DMX-fähigen Gerät vorhandenen DMX IN- und DMX OUT-Anschlüsse (XLR-Steckverbinder) von einem angeschlossenen Gerät an das nächste weitergeleitet wird, wobei die maximale Anzahl der Geräte 32 nicht überschreiten darf.
  • Page 25: Technische Daten

    TECHNISCHE DATEN Artikelnummer: CLF1T CLF1D Produktart: LED-Scheinwerfer LED-Scheinwerfer Typ: Fresnel Scheinwerfer mit Zoom-Funktion Fresnel Scheinwerfer mit Zoom-Funktion Farbspektrum: Tungsten (warmweiß) 3000K Tageslicht (kaltweiß) 5600K CRI: LED Anzahl: LED Typ: 78 W 78 W LED PWM Frequenz: 800Hz, 1200Hz, 2000Hz, 3600Hz, 12kHz, 25kHz 800Hz, 1200Hz, 2000Hz, 3600Hz, 12kHz, 25kHz (einstellbar) (einstellbar)
  • Page 26: Herstellererklärungen

    HERSTELLERERKLÄRUNGEN HERSTELLERGARANTIE & HAFTUNGSBESCHRÄNKUNG Unsere aktuellen Garantiebedingungen und Haftungsbeschränkung finden Sie unter: https://cdn-shop.adamhall.com/media/pdf/Manufactu- rers-Declarations-CAMEO_DE_EN_ES_FR.pdf. Im Service Fall wenden Sie sich bitte an Adam Hall GmbH, Adam-Hall-Str. 1, 61267 Neu Anspach / E-Mail Info@adamhall.com / +49 (0)6081 / 9419-0. KORREKTE ENTSORGUNG DIESES PRODUKTS (Gültig in der Europäischen Union und anderen europäischen Ländern mit Mülltrennung) Dieses Symbol auf dem Produkt oder dazugehörigen Dokumenten weist darauf hin, dass das Gerät am Ende der Produktlebenszeit nicht zusammen mit dem normalen Hausmüll entsorgt werden darf, um Umwelt- oder Personenschäden durch unkontrollierte Abfallentsorgung zu vermeiden.
  • Page 27: Francais

    Cet appareil a été développé et fabriqué en appliquant des exigences de qualité très élevées: il garantit des années de fonctionnement sans problème.Veuillez lire attentivement ce Manuel Utilisateur : vous apprendrez rapidement à utiliser votre appareil Cameo Light de façon optimale.
  • Page 28: Introduction

    chute, de blesser quelqu‘un, ou tout autre dommage. Manipulez toujours le cordon secteur avec soin. 31. Débranchez la fiche secteur ou l‘adaptateur de la prise murale en cas d‘orage, ou si vous n‘utilisez pas l‘appareil pendant une longue période. 32. L‘appareil ne doit pas être alimenté lors de son installation (cordon secteur non relié à la prise murale). 33.
  • Page 29: Raccordements, Éléments De Commande Et D'affichage

    Prise d’entrée secteur compatible TRUE1. Tension de fonctionnement 100 - 240 V CA/50 - 60 Hz. POWER OUT Prise de sortie secteur compatible TRUE1 pour l’alimentation de projecteurs CAMEO supplémentaires. Veiller à ce que le courant absorbé total de tous les appareils connectés ne dépasse pas la valeur en ampères (A) indiquée sur l’appareil.
  • Page 30: Mode D'emploi

    REMARQUES • Dès que le projecteur est correctement raccordé à l’alimentation secteur, un message de bienvenue (« Welcome to Cameo »), la désignation du modèle et la version du logiciel s’affichent successivement à l’écran pendant la phase de démarrage. À l’issue de cette phase, le projecteur est opérationnel et passe au mode précédemment activé.
  • Page 31 CONFIGURATION DU MODE DMX (DMX Mode) Appuyer sur l’encodeur pour accéder au menu principal. Tourner l’encodeur pour sélectionner à présent l’option de menu « DMX Mode » (faire attention à la flèche de sélection à gauche) puis appuyer sur l’encodeur pour valider. Le mode DMX souhaité peut alors être sélectionné en tour- nant l’encodeur.
  • Page 32 PARAMÈTRES DE L’APPAREIL (Settings) Appuyer sur l’encodeur pour accéder au menu principal. Tourner l’encodeur pour sélectionner à présent l’option de menu « Settings » (faire attention à la flèche de sélection à gauche) puis appuyer sur l’encodeur pour valider. Cette action permet d’accéder au sous-menu pour le réglage des options de sous-menu (voir tableau, tourner pour sélectionner puis appuyer sur l’encodeur pour valider).
  • Page 33 LED Frequency Fréquence du Retour  signal PWM des 800Hz / 1200Hz / Réglage de la fréquence du signal PWM des LED 2000Hz / 3600Hz / 12kHz / 25kHz Adapter le pilotage  Retour du ventilateur Auto Régulation automatique de la puissance du ventilateur Max Intensity Puissance maximale du ventilateur pour la luminosité...
  • Page 34: Installation Et Montage

    INSTALLATION ET MONTAGE Grâce à ses quatre pieds en plastique, le projecteur peut être placé à un endroit approprié sur une surface plane. Le montage sur traverse s’effectue à l’aide d’un étrier de montage prémonté (A) et d’un dispositif de serrage spécifique (disponible en option). Veiller à ce que l’assemblage soit bien serré...
  • Page 35: Maintenance Et Entretien - Nettoyage Des Lentilles

    MAINTENANCE ET ENTRETIEN - NETTOYAGE DES LENTILLES Pour nettoyer la lentille frontale (E) sertie dans un cadre en caoutchouc, rabattre le dispositif de maintien vers le haut, comme décrit précédemment, puis extraire des bras de maintien la lentille frontale avec son cadre en caoutchouc et le cadre pour filtre en tirant vers le haut.
  • Page 36 TECHNIQUE DMX DMX-512 Le terme DMX (Digital Multiplex) désigne un protocole de transport universel permettant la communication entre des appareils et des contrôleurs à ce format. Un contrôleur DMX envoie des données DMX aux appareils DMX qui lui sont connectés. Les données DMX sont transportées sous forme d'un flux série, renvoyé...
  • Page 37: Caractéristiques Techniques

    CARACTÉRISTIQUES TECHNIQUES Référence : CLF1T CLF1D Catégorie de produit : Projecteur à LED Projecteur à LED Type : Projecteur à lentille de Fresnel avec fonction zoom Projecteur à lentille de Fresnel avec fonction zoom Spectre de couleurs : Tungstène (blanc chaud) 3000 K Lumière du jour (blanc froid) 5600 K IRC : Nombre de LED : Type de LED :...
  • Page 38 DECLARATIONS GARANTIE FABRICANT & LIMITATION DE RESPONSABILITÉ Nos conditions actuelles de garantie et de limitation de responsabilité sont disponibles à l‘adresse suivante : https://cdn-shop.adamhall.com/ media/pdf/Manufacturers-Declarations-CAMEO_DE_EN_ES_FR.pdf. Pour les réparations, veuillez contacter Adam Hall GmbH, Adam-Hall-Str. 1, 61267 Neu Anspach / E-Mail Info@adamhall.com / +49 (0)6081 / 9419-0. TRI ET MISE AUX DÉCHETS CORRECTE DE CE PRODUIT (Valid in the European Union and other European countries with waste separation) (Applicable dans l‘Union Européenne et les autres pays européens pratiquant le tri des déchets) La présence de ce symbole sur le...
  • Page 39: Español

    Este equipo está diseñado y fabricado con los estándares de calidad más exigentes, para garantizar un correcto funcionamiento durante muchos años.Lea atentamente este manual de usuario para poder aprovechar rápidamente toda la funcionalidad de su nuevo producto de Cameo Light. Más información sobre Cameo Light en la web WWW.CAMEOLIGHT.COM. USO PREVISTO Este producto es un equipo de tecnología para eventos.
  • Page 40: Introducción

    30. Si el equipo dispone de un enchufe eléctrico Volex, deberá desbloquearse el Volex del equipo para desenchufarlo. Esto implica que un tirón en el cable eléctrico puede desplazar el equipo y provocar daños personales o materiales. Por tanto, asegúrese de instalar los cables con sumo cuidado.
  • Page 41: Conexiones, Elementos De Manejo Y Elementos De Visualización

    POWER OUT Toma de salida de red compatible con TRUE1 para la alimentación de red de focos CAMEO adicionales. Compruebe que el consumo de corriente total de todos los equipos conectados no supera el valor en amperios (A) indicado en el equipo.
  • Page 42: Funcionamiento

    • En cuanto el foco esté correctamente conectado a la red eléctrica, durante el proceso de arranque se mostrarán de forma consecutiva en pantalla el mensaje «Welcome to Cameo» (Bienvenidos a Cameo), así como la denominación de modelo y la versión del software. Tras este procedimiento, el foco estará...
  • Page 43 AJUSTE DEL MODO DMX (DMX Mode) Pulsando el mando giratorio se llega al menú principal. Girando el mando giratorio, seleccione ahora la opción de menú “Modo DMX” (observar la flecha de selección en el lado izquierdo) y confirme su selección pulsando dicho mando. Ahora puede seleccionar el modo DMX deseado girando el mando giratorio.
  • Page 44 CONFIGURACIÓN DEL DISPOSITIVO (Settings) Pulsando el mando giratorio se llega al menú principal. Girando el mando giratorio, seleccione ahora la opción de menú “Settings” (observe la flecha de selección en el lado izquierdo) y confirme su selección pulsando dicho mando. Seguidamente se abre el submenú que permite ajustar las opciones del submenú...
  • Page 45 LED Frequency Frecuencia de la Atrás  modulación por ancho de pulsos 800 Hz / 1200 Hz / Ajuste de la frecuencia de la modulación por ancho de pulsos 2000 Hz / 3600 Hz (PWM) del LED (PWM) del LED / 12 kHz / 25 kHz Adaptar el control ...
  • Page 46: Instalación Y Montaje

    INSTALACIÓN Y MONTAJE Gracias a las cuatro patas de plástico, el foco puede instalarse en un lugar adecuado sobre una superficie nivelada. El montaje en un travesaño se realiza con el soporte de montaje premontado (A) y una abrazadera adecuada para travesaños (disponible opcionalmente). Asegúrese de unir firmemente los distintos elementos y de fijar el foco con un cable de seguridad adecuado en el lugar previsto a tal efecto en la parte superior del foco (B).
  • Page 47: Mantenimiento Y Cuidados: Limpieza De Las Lentes

    MANTENIMIENTO Y CUIDADOS: LIMPIEZA DE LAS LENTES La lente frontal encastrada en un marco de goma (G) se puede limpiar, tal como se ha descrito antes, abriendo el dispositivo de sujeción hacia arriba y sacando seguidamente, también hacia arriba, de los brazos de sujeción la lente frontal con marco de goma y el portafiltros. Limpie la lente frontal con un paño húmedo y sin pelusas, procure que la humedad no penetre en el equipo y tenga cuidado de no rayar la superficie de la lente.
  • Page 48: Tecnología Dmx

    TECNOLOGÍA DMX DMX512 DMX (Digital Multiplex) es el nombre de un protocolo universal utilizado como medio de comunicación entre dispositivos y controladores. El controlador DMX envía datos DMX a los equipos DMX conectados. Los datos DMX se envían como datos serie que se transmiten de equipo a equipo a través de los conectores XLR «DMX IN»...
  • Page 49: Datos Técnicos

    DATOS TÉCNICOS Número de artículo: CLF1T CLF1D Clase de producto: Foco LED Foco LED Tipo: Foco Fresnel con función de zoom Foco Fresnel con función de zoom Espectro cromático: Tungsteno (luz blanca cálida) 3000 K Luz diurna (luz blanca fría) 5600 K Índice CRI: Cantidad de LED: Tipo de LED:...
  • Page 50: Declaración Del Fabricante

    DECLARACIÓN DEL FABRICANTE GARANTÍA DEL FABRICANTE Y LIMITACIÓN DE RESPONSABILIDAD Consulte nuestras condiciones de garantía y limitaciones de responsabilidad en: https://cdn-shop.adamhall.com/media/pdf/Manufactu- rers-Declarations-CAMEO_DE_EN_ES_FR.pdf. En caso de necesitar servicio técnico, póngase en contacto con Adam Hall GmbH, Adam-Hall- Str. 1, 61267 Neu Anspach (Alemania); correo electrónico Info@adamhall.com; +49 (0)6081 / 9419-0. ELIMINACIÓN CORRECTA DE ESTE PRODUCTO (Aplicable en la Unión Europea y en los países europeos que dispongan de un sistema de recogida selectiva) El símbolo que aparece sobre el producto o en la documentación adjunta indica que al final de la vida útil del equipo, no deberá...
  • Page 51: Polski

    To urządzenie zostało zaprojektowane i wyprodukowane przy zastosowaniu najwyższych kryteriów jakościowych w celu zapewnienia wieloletniej bezawaryjnej eksploatacji. Proszę starannie przeczytać niniejszą instrukcję obsługi, aby móc jak najszybciej zacząć użytkować ten produkt marki Cameo Light. Więcej informacji na temat Cameo Light znajdą Państwo na naszej stronie internetowej pod adresem WWW.CAMEOLIGHT.COM.
  • Page 52: Wprowadzenie

    29. Aby całkowicie odłączyć urządzenie od sieci, należy wyjąć kabel sieciowy lub adapter sieciowy z gniazda. 30. Jeśli urządzenie jest wyposażone w przyłącze sieciowe Volex, konieczne jest odblokowanie odpowiedniej wtyczki urządzenia Volex, zanim będzie możliwe jej odłączenie. Oznacza to także, iż w wyniku pociągnięcia za kabel urządzenie może się przesunąć i spaść, co może spowodować...
  • Page 53: Gniazda, Elementy Obsługi I Wskaźniki

    Gniazdo wejścia sieciowego kompatybilne z TRUE1. Napięcie robocze 100–240 V AC / 50–60 Hz. POWER OUT Gniazdo wyjścia sieciowego kompatybilne z TRUE1 do zasilania z sieci dodatkowych reflektorów CAMEO. Całkowity pobór prądu wszystkich podłączonych urządzeń nie może przekroczyć wartości w amperach (A) podanej na urządzeniu.
  • Page 54: Obsługa

    WSKAZÓWKI • Po prawidłowym podłączeniu reflektora do sieci zasilania, podczas procesu uruchamiania, jest wyświetlana następująca sekwencja komunikatów: „Welcome to Cameo”, nazwa modelu oraz wersja oprogramowania. Po tej procedurze reflektor jest gotowy do pracy i przełącza się na ostatnio wybrany tryb.
  • Page 55 USTAWIANIE TRYBU PRACY DMX (DMX Mode) Naciśnij enkoder, aby przejść do menu głównego. Obracając enkoder, wybierz pozycję menu „DMX Mode” (zwróć uwagę na strzałkę wyboru po lewej), a następnie potwierdź, naciskając enkoder. Teraz możesz ustawić żądany tryb pracy DMX, obracając enkoder. Potwierdź usta- wienia, naciskając enkoder, wybierz strzałkę...
  • Page 56 USTAWIENIA URZĄDZENIA (Settings) Naciśnij enkoder, aby przejść do menu głównego. Obracając enkoder, wybierz pozycję menu „Settings” (zwróć uwagę na strzałkę wyboru po lewej), a następnie potwierdź, naciskając enkoder. Przejdziesz do podmenu, w którym możesz zmienić żądane ustawienia (patrz tabela, wybierz żądaną pozycję obracając enkoder, potwierdź naciskając enkoder). Wybierz strzałkę „powrót” na samej górze w podmenu i naciśnij enkoder.
  • Page 57 dopasowanie  wstecz sterowania wenty- latorem Auto automatyczna regulacja mocy wentylatora Max Intensity maksymalna moc wentylatora dla maksymalnej jasności Low Noise bardzo cichy wentylator przy zredukowanej jasności Factory Reset przywracanie wstecz  ustawień fabrycz- nych Reset Now! przywracanie ustawień fabrycznych KRZYWE ŚCIEMNIANIA liniowa wykładnicza...
  • Page 58: Ustawianie I Montaż

    USTAWIANIE I MONTAŻ Do ustawienia reflektora w odpowiednim miejscu na płaskiej powierzchni służą cztery plastikowe nóżki. Do montażu urządzenia na traw- ersie służy wstępnie przymocowany pałąk montażowy (A) i odpowiedni zacisk do trawersy (dostępny opcjonalnie). Należy zapewnić solidne mocowanie i zabezpieczyć reflektor odpowiednią linką zabezpieczającą w przeznaczonym do tego miejscu na górze reflektora (B).
  • Page 59: Konserwacja I Pielęgnacja - Czyszczenie Soczewek

    KONSERWACJA I PIELĘGNACJA — CZYSZCZENIE SOCZEWEK Ujętą w gumową ramę soczewkę przednią (E) można wyczyścić, odchylając uchwyt przytrzymujący do góry we wcześniej opisany sposób, a następnie wyjmując do góry soczewkę przednią z gumową ramką oraz ramkę filtra z ramion przytrzymujących. Soczewkę przednią wyczyścić wilgotną niestrzępiącą się ściereczką, upewniając się, że wilgoć nie wnika do urządzenia i powierzchnia soczewki nie jest porysowana.
  • Page 60: Technika Dmx

    TECHNIKA DMX DMX-512 DMX (Digital Multiplex) to nazwa uniwersalnego protokołu transmisji do komunikacji między odpowiednimi urządzeniami a kontrolerami. Kontroler DMX wysyła dane DMX do podłączonych urządzeń DMX. Transmisja danych DMX następuje zawsze w formie szeregowego strumienia danych, który jest przekazywany z jednego urządzenia do następnego przez znajdujące się...
  • Page 61: Dane Techniczne

    DANE TECHNICZNE Numer artykułu: CLF1T CLF1D Rodzaj produktu: Reflektor LED Reflektor LED Typ: Reflektor z soczewką Fresnela i funkcją zoom Reflektor z soczewką Fresnela i funkcją zoom Spektrum kolorów: Wolfram (ciepła biel) 3000 K Światło dzienne (zimna biel) 5600 K CRI: Liczba diod LED: Typ diod LED:...
  • Page 62: Deklaracje Producenta

    DEKLARACJE PRODUCENTA GWARANCJA PRODUCENTA I OGRANICZENIE ODPOWIEDZIALNOŚCI Nasze aktualne warunki gwarancji i informacje dotyczące ograniczenia odpowiedzialności znajdą Państwo na stronie: https://cdn-shop. adamhall.com/media/pdf/Manufacturers-Declarations-CAMEO_DE_EN_ES_FR.pdf. W razie konieczności skorzystania z serwisu proszę skontaktować się z firmą Adam Hall GmbH, Adam-Hall-Str. 1, 61267 Neu Anspach / e-mail Info@adamhall.com / +49 (0)6081 / 9419-0. PRAWIDŁOWA UTYLIZACJA NINIEJSZEGO PRODUKTU (Obowiązuje w Unii Europejskiej i innych krajach europejskich stosujących system sortowania odpadów) Niniejszy symbol na produk- cie lub związanych z nim dokumentach wskazuje, iż...
  • Page 63: Italiano

    Questo dispositivo è stato sviluppato e prodotto in conformità con elevati standard qualitativi che ne garantiscono il regolare funzionamento per molti anni. Leggete attentamente questo manuale d‘uso per utilizzare al meglio il vostro nuovo prodotto Cameo Light. Per maggiori informazioni su Cameo Light consultare la nostra pagina Web WWW.CAMEOLIGHT.COM.
  • Page 64: Introduzione

    31. In caso di pericolo di caduta di fulmine, o se il dispositivo rimane inutilizzato a lungo, staccare sempre il cavo di rete e l‘adattatore di rete dalla presa. 32. L‘installazione del dispositivo deve essere realizzata unicamente in assenza di tensione (staccare la spina dalla rete elettrica). 33.
  • Page 65: Raccordi, Elementi Di Comando E Di Visualizzazione

    Presa d’ingresso alla rete compatibile con TRUE1. Tensione di esercizio 100 - 240 V AC / 50 - 60 Hz. POWER OUT Presa di uscita di rete compatibile con TRUE1 per l’alimentazione di rete dei faretti CAMEO aggiuntivi. Assicurarsi che il totale della potenza assorbita di tutti i dispositivi collegati all’apparecchio non superi il valore indicato in Ampere (A).
  • Page 66: Utilizzo

    • Non appena il faro è correttamente allacciato alla rete elettrica, durante la procedura di avvio sul display appaiono in successione il messaggio “Welcome to Cameo”, l’indicazione del modello e la versione del software. Dopo questo processo, il proiettore è pronto per l’uso e si avvia nella modalità...
  • Page 67 IMPOSTAZIONE DELLA MODALITÀ DI FUNZIONAMENTO DMX (DMX Mode) Premendo il codificatore si accede al menu principale. Ruotare il codificatore per selezionare la voce di menu “DMX Mode” (osservare la freccia di selezione a sinistra) e confermare premendo il codificatore. Ora è possibile selezionare la modalità DMX desiderata ruotando il codificatore.
  • Page 68 IMPOSTAZIONI DEL DISPOSITIVO (Settings) Premendo il codificatore si accede al menu principale. Ruotare il codificatore per selezionare la voce di menu “Settings” (osservare la freccia di selezione a sinistra) e confermare premendo il codificatore. In seguito si accede al sottomenu per l’impostazione delle voci di sottomenu (v.
  • Page 69 Adeguare controllo indietro  ventola Auto Regolazione automatica della potenza della ventola Max Intensity Massima potenza della ventola per la massima luminosità Low Noise Ventola extra silenziosa con luminosità ridotta Factory Reset Ripristino delle  indietro impostazioni di fabbrica Reset Now! ripristino delle impostazioni di fabbrica CURVE DIMMER linear...
  • Page 70: Installazione E Montaggio

    INSTALLAZIONE E MONTAGGIO Grazie ai quattro piedini in plastica, il proiettore può essere collocato in un punto adatto su una superficie piana. Il montaggio a una traversa viene effettuato tramite la staffa di montaggio premontata (A) e un apposito dispositivo di fissaggio (disponibile come optional). Collegare saldamente il tutto e fissare il proiettore con un cavo di sicurezza idoneo nella posizione prevista sul lato superiore del proiettore (B).
  • Page 71: Manutenzione E Cura - Pulizia Delle Lenti

    MANUTENZIONE E CURA - PULIZIA DELLE LENTI La lente anteriore (E) montata in un telaio di gomma può essere pulita, come descritto in precedenza, ripiegando il dispositivo di blocco verso l'alto ed estraendo la lente anteriore con il telaio di gomma e il portafiltro dai bracci di supporto. Pulire la lente anteriore con un panno umido privo di pelucchi, evitando che l'umidità...
  • Page 72: Tecnologia Dmx

    TECNOLOGIA DMX DMX512 DMX (Digital Multiplex) è la sigla di un protocollo di trasmissione universale per la comunicazione tra dispositivi e controller. Un controller DMX invia dati DMX ai dispositivi DMX collegati. I dati DMX vengono sempre trasmessi come flusso di dati seriale, che viene inoltrato da un dispositivo collegato al successivo attraverso le connessioni (connettori XLR) DMX IN e DMX OUT presenti per ogni dispositivo DMX compatibile, per un massimo di 32 dispositivi.
  • Page 73: Dati Tecnici

    DATI TECNICI Codice articolo: CLF1T CLF1D Tipologia di prodotto: Proiettore LED Proiettore LED Tipo: Proiettore Fresnel con funzione zoom Proiettore Fresnel con funzione zoom Spettro cromatico: Tungsteno (bianco caldo) 3000 K Daylight (bianco freddo) 5600 K CRI: Numero di LED: Tipo di LED: 78 W 78 W...
  • Page 74: Dichiarazioni Del Produttore

    DICHIARAZIONI DEL PRODUTTORE MANUFACTURER’S WARRANTY & LIMITATION OF LIABILITY Le nostre attuali condizioni di garanzia e la limitazione di responsabilità sono consultabili alla pagina: https://cdn-shop.adamhall.com/media/ pdf/Manufacturers-Declarations-CAMEO_DE_EN_ES_FR.pdf. In caso di assistenza, rivolgersi a Adam Hall GmbH, Adam-Hall-Str. 1, 61267 Neu Anspach / E-mail Info@adamhall.com / +49 (0)6081 / 9419-0. CORRETTO SMALTIMENTO DEL PRODOTTO (In vigore nell‘Unione Europea e in altri Paesi europei in cui si attui la raccolta differenziata) Questo simbolo apposto sul prodotto o sui relativi documenti indica che, per evitare danni all‘ambiente e alle persone causati da uno smaltimento incontrollato dei rifiuti,...
  • Page 75: Controllo Dmx

    DMX CONTROL / DMX STEUERUNG / PILOTAGE DMX / CONTROL DMX / STEROWANIE DMX / CONTROLLO DMX 1 CH Mode 2 CH 1 Mode 2 CH 2 Mode 3 CH Mode Functions & Values Dimmer 000 - 255 0% to 100% Dimmer fine 000 - 255 0% to 100% 000 - 005 Strobe open...
  • Page 76 000 - 005 no function 006 - 063 Linear Dimmer curve 064 - 127 Exponential 128 - 191 Logarithmic 192 - 255 S-Curve 000 - 005 no function Dimmer response LED (hold 5s) 006 - 127 128 - 191 Dimmer response Halogen (hold 5s) 192 - 200 Fan Auto (hold 5s) 201 - 209 Fan Max (hold 5s) 210 - 218 Fan Silent (hold 5s)
  • Page 77 CAMEOLIGHT.COM Adam Hall GmbH | Adam-Hall-Str. 1 | 61267 Neu-Anspach | Germany Phone: +49 6081 9419-0 | adamhall.com REV: 01...

Ce manuel est également adapté pour:

F1 dClf1tClf1d

Table des Matières