Publicité

Les langues disponibles

Les langues disponibles

Liens rapides

Anleitung
Graupner Racing 65
Best.-Nr. 21009
2013/09/01
GRAUPNER/SJ GmbH. Henriettenstr.96, KG D-73230 KIRCHHEIM/TECK GERMANY

Publicité

Chapitres

Table des Matières
loading

Sommaire des Matières pour GRAUPNER Racing 65

  • Page 1 Anleitung Graupner Racing 65 Best.-Nr. 21009 2013/09/01 GRAUPNER/SJ GmbH. Henriettenstr.96, KG D-73230 KIRCHHEIM/TECK GERMANY...
  • Page 2: Table Des Matières

    Bestimungsgemäße Verwendung ........3 Technische Daten ..............3 Empfohlenes Zubehör ............4 Packungsinhalt ..............4 Bedeutung der Symbole .............5 Warn- und Sicherheitshinweise .........5 Herstellererklärung der Firma Graupner/SJGmbH ...8 Betriebsanleitung ..............9 Das Ruder einbauen ............9 Das Schwert befestigen ............10 Montage der Segel...............11 Der Mast ................12 Das Vorsegel ................12...
  • Page 3: Vorwort

    & technologie Vorwort Vielen Dank, dass Sie sich für den Kauf des Graupner Modells „GR65“ Best.-Nr. 21009 entschieden haben. Graupner/SJ Modelle stehen für hohe Qualität. Wir achten auf Stabilität an den Schlüsselstellen in der Serienproduktion. Vor der Montage und Inbetriebnahme des Modells sollten Sie unbedingt die Anleitung vollständig lesen.
  • Page 4: Empfohlenes Zubehör

    Empfohlenes Zubehör Stkz. Bezeichnung mz-10 5-Kanal HoTT Einzelsender S1001 Akku 4NH-2000 TX/RXRTU flach, JR-St. 33116.1 Packungsinhalt Graupner Racing 65 Rumpf Inklusive Segelsatz Inklusive Elektronik (2x Servo) Inklusive Akku 2000 mAh Nicht Inklusive Ladegerät Multilader 3 Best.-Nr.: 6427 Nicht Inklusive Sender MZ-10...
  • Page 5: Bedeutung Der Symbole

    Schäden oder Kosten, die sich aus dem fehlerhaften Betrieb, aus fehlerhaftem Verhalten bzw. in irgendeiner Weise mit dem Vorgenannten zusammenhängend ergeben. Soweit vom Gesetzgeber nicht zwingend vorgeschrieben, ist die Verpflichtung der Firma GRAUPNER/SJ zur Leistung von Schadensersatz, aus welchem Grund auch immer ausgeschlossen (inkl. Personenschäden, Tod, Beschädigung von Gebäuden sowie auch Schäden durch Umsatz- oder Geschäftsverlust, durch...
  • Page 6 Warnung! Das Betreiben des Modells unter Einfluss von Medikamenten, Alkohol, Drogen, usw. ist verbo- Achtung! Jegliche Abweichung von der Anleitung wirken sich eventuell auf die Funktion und Betriebssi- cherheit des Modells aus und müssen unter allen Umständen vermieden werden. Achtung! Bevor Sie ein RC-Modell in Betrieb nehmen, müssen Sie sich über die gesetzlichen Bestim- mungen informieren, denn ein RC-Modell unterliegt den hierfür geltenden Gesetzen.
  • Page 7 innovation & technologie Achtung! Beachten Sie, dass Funkgeräte oder Sendeanlagen die Funktion des Modells stark stören können. Achten Sie möglichst darauf, dass keines dieser Geräte in der Nähe betrieben wird während Sie das Modell betreiben. Achtung! Die Batterien und Akkus dürfen nicht kurzgeschlossen werden sowie nicht direkt dem Wasser ausgesetzt werden.
  • Page 8: Herstellererklärung Der Firma Graupner/Sjgmbh

    Sollten sich Mängel an Material oder Verarbeitung an einem von uns in der Bundesrepublik Deutschland vertriebenen, durch einen Verbraucher (§ 13 BGB) erworbenen Gegenstand zeigen, übernehmen wir, die Fa. Graupner/SJ GmbH , Kirchheim/Teck im nachstehenden Umfang die Mängelbeseitigung für den Gegenstand.
  • Page 9: Betriebsanleitung

    innovation & technologie Betriebsanleitung Achtung! Der Betriebsanleitung in ihren Abschnitten und Schritten ist unbedingt zu folgen. Lockern Sie die Schraube an der Mastplatte (22) damit die verschiebbar wird. Setzen Sie den Mast probehalber ein. In der Masttasche innen unten am Boden sind 2 Erhebungen in die der Mast gesteckt werde kann.
  • Page 10: Das Schwert Befestigen

    Das Schwert befestigen Als nächstes wird das Schwert (1) von unten in die Schwerttasche gesteckt (bitte auf die Richtung achten) und oben mit der Rändelmutter (2) verschrauben. Durch das Gewicht steht das Boot nun ruhiger für die weiteren Montagen. Fädeln Sie nun die Schotschnur durch das Loch (links von der Zahl 25 in der Zeichnung) zwischen den Öffnungen für Ruder und Segelservo in das Boot nachdem Sie eine Schlaufe an einem Ende...
  • Page 11: Montage Der Segel

    innovation & technologie Montage der Segel In die Löcher am Großsegelhals und am Schothorn des Großsegels je ein Stück ca 15 cm Schotschnur mit je einer sehr kleinen Schlaufe einknoten. Dann werden die Mastringe in die Löcher des Groß- segels gesteckt und dann geschlossen. Die Mastringe können mit einem winzigen Tropfen Sekundenkleber oder Nagellack gesichert werden.
  • Page 12: Der Mast

    Der Mast Jetzt stecken Sie den Mast in seine vorgesehene Position (die beiden Nocken sollen in der Mastplatte einrasten) im Boot, sichern mit einem kleinen Stück Kreppband den Großsegelhals am Mastkopfausle- ger. Mit einer Schlaufe wie am Schothorn wird der Hals am Ausleger(64) gesichert.
  • Page 13 innovation & technologie Zur leichteren Montage von Fock- und Großschot werden am Schotende kleine Wirbel eingeknotet die ein Verdrillen der Schnur verhindern und leichter in den Karabiner eingehakt werden können. Als erstes messen Sie bitten den Abstand der gespannten und auf Mitte ausgerichteten Travellerö- se vom Drehpunkt des Großbaums.
  • Page 14 Über den Zug der Fockbaumbefestigung (Rutscher beim Haken) stellen wir die Höhe des Fock- baums über Deck ein. Oben am Vorstag wird mit dem Rutscher das Stag und der Vorliekstrecker gleichmäßig leicht ge- spannt. Das Vorliek des Großsegels wird nun mit dem Clip am Mast sanft gespannt. Dann wird über den Rutscher am Achterstag der Mast fester nach hinten abgespannt und biegt sich dabei leicht.
  • Page 15: Das Segeln

    innovation & technologie Das Segeln Segeln mit Modellyachten ist nicht schwer, wenn man die Zusammenhänge zwischen Windrichtung, Bootsrichtung und entsprechender Segeleinstellung kennt. Machen Sie sich mit der Segeltheorie vertraut (z.B. durch Fachliteratur), bevor Sie das Modell das erste Mal einsetzen. Wir können Ihnen mit den folgenden Hinweisen nur eine kleine, grundsätzliche Hilfestellung geben.
  • Page 16 Wenn das Boot noch weiter abfällt (Abfallen: Boot mit dem Heck immer mehr in Windrichtung drehen(II)/Anluven: Boot mit dem Bug immer mehr in Windrichtung drehen(I)) gelangt es auf den raumen Kurs, bei dem die Segel auf ca. 60° zur Bootsmitte gefiert werden (4a/4b). Nur auf diesen beiden Kursen kann die max.
  • Page 17: Segeltrimm

    Säubern Sie das Modell nach jedem Gebrauch. Entfernen Sie evtl. eingedrungenes Wasser. Sollte Wasser in die RC-Komponenten gedrungen sein, legen Sie diese trocken und schicken Sie die RC- Komponenten zur Kontrolle an die zuständige GRAUPNER/SJ Servicestelle ein. Säubern Sie das Modell und den Sender nur mit geeigneten Reinigungsmitteln. Geeignet ist ein fusselfreies Tuch.
  • Page 18 Nun bleibt nur noch viel Spaß und Freude beim segeln mit Ihrem Model zu wünschen. Team! No liability for printing errors. Technical changes reserved! Keine Haftung für Druckfehler. Graupner/SJ GmbH Henriettenstrasse 96 Technische Änderungen vorbehalten! 73230 Kirchheim/Teck Germany...
  • Page 19: Notizen

    innovation & technologie Notizen...
  • Page 20 Manual Graupner Racing 65 Order No. 21009 2013/09/01 GRAUPNER/SJ GmbH. Henriettenstr. 96, KG 73230 KIRCHHEIM/TECK GERMANY GRAUPNER/SJ GmbH. Henriettenstr.96, KG D-73230 KIRCHHEIM/TECK GERMANY...
  • Page 21 Recommended accessories ..........23 Package content ..............23 Explanation of symbols ............24 Warning and safety notices ..........24 Manufacturer’s declaration Graupner/SJGmbH ....27 Operating instructions ............28 Install the rudder ..............28 Fix the sword ................ 29 Assembly of the sails ............30 Sailing ..................
  • Page 22: Foreword

    Follow the safety instructions in the manual for test runs and when using the model for the first time. Brief description of the product This model is one of the GRAUPNER/SJ sailboat series. These models are almost finished constructed and painted. To make the model ready to sail, just install the RC components and the battery and the model can be used.
  • Page 23: Recommended Accessories

    & technologie Recommended accessories Parts Name mz-10, 5 channel HoTT UK Vers. S1001.UK Battery 4NH-2000 TX/RXRTU 33116.1 Package content Graupner Racing 65 Hull Included Sailset Included Electronics (2x Servo)) Included Battery 2000 mAh Not Included Charger multi charger 3 Order No.: 6427...
  • Page 24: Explanation Of Symbols

    You have purchased a model that, along with the associated accessories, can be assembled to produce a functional remote control model. GRAUPNER/SJ is not able to ensure that the assembly and operating instructions for the model are followed, and cannot monitor the installation, operation use and servicing of the components associated with the model.
  • Page 25 innovation & technologie Warning! It is forbidden to operate the model under the influence of medications, alcohol or drugs Attention! Any deviations from the instructions may affect the functioning and safety of the model and must always be avoided. Attention! Before starting an RC model, you need to be familiar with the applicable laws since specific laws govern RC model.
  • Page 26 Attention! Determine the range of the remote control before operation. While the model is turned on, walk approximately 100 m away from the transmitter, and have an assistant operate the transmitter. All of the functions must be fully operable. Attention! Note that radios or transmitters can significantly impair the functioning of the model.
  • Page 27: Manufacturer's Declaration Graupner/Sjgmbh

    If material defects or manufacturing faults should arise in a product distributed by us in the Federal Republic of Germany and purchased by a consumer (§ 13 BGB), we, Graupner GmbH & Co. KG, D-73230 Kirchheim/Teck, Germany, acknowledge the obligation to correct those defects within the limitations described below.
  • Page 28: Operating Instructions

    Operating instructions Attention! Follow all the steps of the operating instructions. Loosen the screw on the mast plate (22) so that is movable. Plug in the mast for testing if the mast fitts correct. In the mast pocket at the bottom are two surveys in that the mast can be put.
  • Page 29: Fix The Sword

    innovation & technologie Fix the sword Plug the sword (1) from below into the sword bag (please pay attention to the direction) and scre- wed up with the knurled nut (2). Because of the weight the boat is now stable in the boat stand for the next steps. Now thread the cord through the hole (left of the number 25 in the drawing) between the openings for rowing and sailing servo into the boat after they...
  • Page 30: Assembly Of The Sails

    Assembly of the sails In the holes on the mainsail tack and clew of the main- sail one each of approx 15 cm knot the cord, each with a very small loop. Then, the pole rings are inserted into the holes of the main sail and then closed.
  • Page 31 innovation & technologie For easy installation of jib and mainsheet small vortices are noded at the sheets end to prevent twisting of the cord and can be hooked into the carabiner easier First please measure the distance between the tense and focused on middle traveller eyelet from the pivot point of the boom.
  • Page 32 We set the height of the jib boom above the deck over the train of jib boom mounting . About the rider during the clamping angle for hook At the top of the forestay stag and the luff is evenly slightly taut with the sliders . The luff of the mainsail is now looking forward gently with the clip on the mast.
  • Page 33: Sailing

    innovation & technologie Sailing Sailing a model yacht is not difficult once you are familiar with the inter-action between the wind direction, the boat’s heading and the appropriate sail settings. Before you sail the model for the first time, we recommend that you read all you can on the theory of sailing, e.g. by reading one of the many books on the subject.
  • Page 34 turns increasingly in the direction of the wind (II) / luffing: the boat’s bow turns increasingly towards the direction of the wind (I), it ends up on a course with free wind, where the sails are paid out to about 60° to the boat’s centreline (4a / 4b). The boat only attains its maximum speed on these two headings.
  • Page 35: Steering Characteristics

    Maintenance and Care Clean the model after each use. Remove any water seepage. If water has penetrated into the RC components, dry them out and send the RC components for the control of the competent Graupner / SJ service center.
  • Page 36 Now all that remains is to have fun flying your model. Your team! Graupner/SJ GmbH Henriettenstrasse 96 No liability for printing errors. Technical changes reserved! We assume no liability for prin- 73230 Kirchheim/Teck ting errors. We reserve the right to make technical changes!
  • Page 37: Notes

    innovation & technologie Notes...
  • Page 39 Notice Graupner Racing 65 Réf. 21009 2013/09/01 GRAUPNER/SJ GmbH. Henriettenstr.96, KG D-73230 KIRCHHEIM/TECK ALLEMAGNE GRAUPNER/SJ GmbH. Henriettenstr.96, KG D-73230 KIRCHHEIM/TECK GERMANY...
  • Page 40 Accessoire recommandé pour le 16100.HOTT ....42 Contenu de la boîte .............. 42 Signification des symboles ..........43 Avertissements et consignes de sécurité ......43 Déclaration de la Société Graupner/SJ GmbH....46 Instructions d'utilisation ............47 Installez le gouvernail ............47 Fixer l‘épée ................48 Assemblée des voiles ............
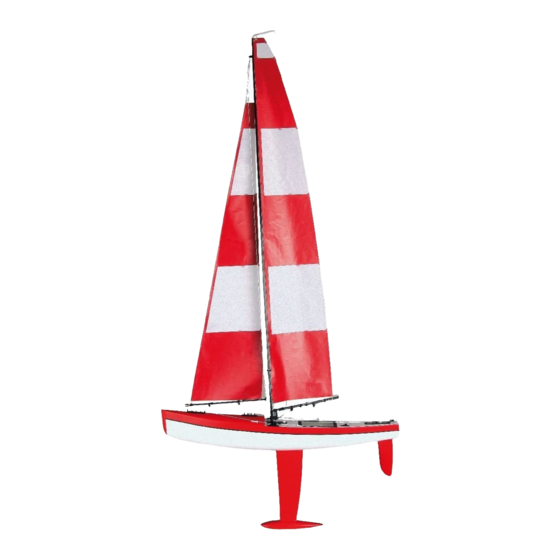
  • Page 41 & technologie Avant-propos Nous vous remercions pour l'achat de ce modèle réduit Graupner « GR 65 » réf. 21009. Les modèles réduits Graupner/SJ sont synonymes de qualité. Nous accordons une grande attention à la stabilité aux points stratégique de la production en série.
  • Page 42 Accessoire recommandé pour le 16100.HOTT Qté Description Réf. mz-10, 5 channel HoTT radio control S1001 Accu 4NH-2000 TX/RXRTU plat 33116.1 Contenu de la boîte Graupner Racing 65 Coque Inclus Ensemble de Voile Inclus Electronique (2x Servo) Inclus Batterie 2000 mAh Non Inclus Chargeur chargeur multi 3 Référence: 6427...
  • Page 43 Dans la mesure où le texte législatif ne le précise pas explicitement, la responsabilité de la société GRAUPNER/SJ ne peut être engagée en aucun cas, quelles que soient les raisons et les conséquences (y compris les blessures, décès, dégâts sur biens immeubles, pertes de chiffre d'affaires ou autres conséquences directes ou indirectes) liées à...
  • Page 44 Avertissement ! Il est interdit de faire fonctionner le modèle réduit sous l'influence de médicaments, de l'alcool, de drogues, etc. Attention ! Toute dérogation aux instructions de la notice peut affecter le fonctionnement et la fiabilité du modèle réduit et doit être évitée à tout prix. Attention ! Avant de faire fonctionner un modèle réduit télécommandé, vous devez vous informer sur les dispositions légales, car les modèles réduits télécommandés sont soumis aux lois et...
  • Page 45 innovation & technologie Attention ! La portée de la télécommande doit être vérifiée avant le début du vol. Pour ce faire, éloignez- vous de l'émetteur d'environ 100 m avec le modèle réduit allumé, pendant qu'un assistant actionne la télécommande. Toutes les fonctions doivent être disponibles sans problème. Attention ! Les appareils de radio ou les postes d'émission peuvent perturber fortement le fonctionnement du modèle réduit.
  • Page 46 Contenu de la déclaration fabricant Si une pièce, que nous avons mise sur le marché allemand, devait présenter un défaut ou un vice caché (conformément au § 13 BGB), nous, Sté Graupner/SJ GmbH, Kirchheim/Teck nous nous engageons à la remplacer dans le cadre ci-dessous.
  • Page 47 innovation & technologie Instructions d'utilisation Attention ! Suivre impérativement chaque section et étape des instructions d'utilisation. Desserrer la vis sur la plaque de mât (22), de sorte que sera déplacé. Mettez-le au mât d‘un titre d‘essai. Dans la poche de mât intérieur en bas de l‘étage, deux enquêtes dans lesquelles le mât mettra boîte.
  • Page 48 Fixer l‘épée L‘épée (1) par le bas est branché dans le sac d‘épée (s‘il vous plaît prêter attention à la direction) et vissé avec l‘écrou moleté (2) Suivant. Le poids du bateau est maintenant tranquille pour montage ultérieur. Maintenant enfiler une Schotschnur à travers le trou (à...
  • Page 49 innovation & technologie Assemblée des voiles Dans les trous sur le point d‘amure de grand-voile et d‘écoute de la grand-voile un chacun d‘environ 15 cm Nouez le Schotschnur, chacun avec une très petite boucle. Ensuite, les anneaux polaires sont insérées dans les trous de la voile principale, puis fermés.
  • Page 50 le mât Maintenant, mettez le mât dans sa position prévue (les deux cames de verrouillage dans la plaque po- laire) dans le bateau, fixez-le avec un petit morceau de ruban adhésif le point d‘amure de grand-voile sur le support de tête de mât. Avec une boucle comme le point d‘écoute du cou sur la flèche (64) est fixé.
  • Page 51 innovation & technologie Pour une installation facile de la flèche et grand-voile sont sur Scho Tende petit tourbillon noeud pour empêcher la torsion du cordon et peut être accroché dans le mousqueton facile Le premier endroit où vous demandez la distance entre le verbe et axée sur Travelleröse milieu du point de l‘explosion de pivot.
  • Page 52 Nous avons mis la hauteur de la bôme de foc -dessus du pont sur le train de Fockbaumbefesti- gung ( curseur au crochet ) . Au sommet du Cerf de l‘étai et le guindant est uniformément légèrement tendue avec les curseurs Le guindant de la grand-voile est maintenant hâte doucement avec le clip sur le mât .
  • Page 53 innovation & technologie La pratique de la voile La pratique de la voile n’est pas bien compliquée à partir du moment ou l’on sait comment position- ner les voiles en fonction de la direction et vent et de la direction du bateau. Familiarisez-vous avec la théorie de la voile (par ex.
  • Page 54 Si le bateau même des baisses supplémentaires ( baisse : Bateau avec la queue de plus en plus sous le vent tour ( II ) / guindant : bateau avec l‘arc de plus en plus sous le vent tour ( I) ) , il passe sur les raumen sûr, dans lequel les voiles sur ca .
  • Page 55 Nettoyez le modèle après chaque utilisation. Retirez toute infiltration d‘eau. Si de l‘eau a pénétré dans les éléments R, séchez-les et envoyez-les composants RC pour le contrôle du centre de ser- vice Graupner / SJ compétente. Nettoyez le modèle et l‘émetteur à l‘aide de produits de nettoyage appropriés. Bon, c‘est un chiffon non pelucheux.
  • Page 56 Il ne nous reste plus qu’à vous souhaiter bons vols avec votre modèle réduit. Team! No liability for printing errors. Technical changes reserved! Aucune responsabilité pour les Graupner/SJ GmbH Henriettenstrasse 96 erreurs d'impression. Sous réserve de modifications techniques ! 73230 Kirchheim/Teck...
  • Page 57 innovation & technologie Notes...
  • Page 58: Explosionszeichnung/Exploded View/Éclatée

    Explosionszeichnung/Exploded View/Éclatée...
  • Page 59: Stückliste / Parts / Pièces De Rechange

    innovation & technologie Stückliste / parts / Pièces de Rechange Teilnummer / Part number Bezeichnung / Description Anzahl / Quantity Kiel / Fin Mutter M3 / Nut M3 Kieltasche / Keel socket Ruder / Rudder Ruderkokker / Rudder bush reinforce- ment Servobrett / Rudder servo plate Ruderservo / Rudder Servo...
  • Page 60 Fockbaumendkappe mit Bohrung / Jib boom end cap bored Fockbaum / Jib boom Klemmwinkel kl. / Collet small Befestigungsclip 4 mm / Annullar clamp Klemmwinkel kl. / Collet small Fockbaumendkappe / Jib boom end Großbaumlager / Main boom bracket Fixierschraube + Mutter M2 / Retaining screw + nut Großbaumdrehlager / Main boom swi- vel bracket...
  • Page 61 innovation & technologie INNOVATION & TECHNOLOGIE Notes...
  • Page 62: Konformitätserklärung / Declaration Of Conformity / Déclaration De Conformité

    / Déclaration de conformité EG Konformitätserklärung Declaration of Conformity Graupner/SJ GmbH Henriettenstraße 96 D-73230 Kirchheim/Teck erklärt, dass das Produkt: Servo aus Graupner/SJ GR 65 declares that the product Verwendungszweck: Servo zur Steuerung von Modellen Intended purpose Servo to control rc-models bei bestimmungsgemäßer Verwendung den grundlegenden Anforderungen der EMV-...
  • Page 63 Pour adresses des points de service situés en dehors de Kirchheim/Teck, Germany guarantees this product for a l'Allemagne s'il vous plaît se référer à www.graupner.de/fr/. period of 24 months from date of purchase. The guarantee applies only to such material or operational defects witch are present at the time of purchase of the product.

Ce manuel est également adapté pour:

21009

Table des Matières