
Manuels Connexes pour Teac MC-DV250


Sommaire des Matières pour Teac MC-DV250
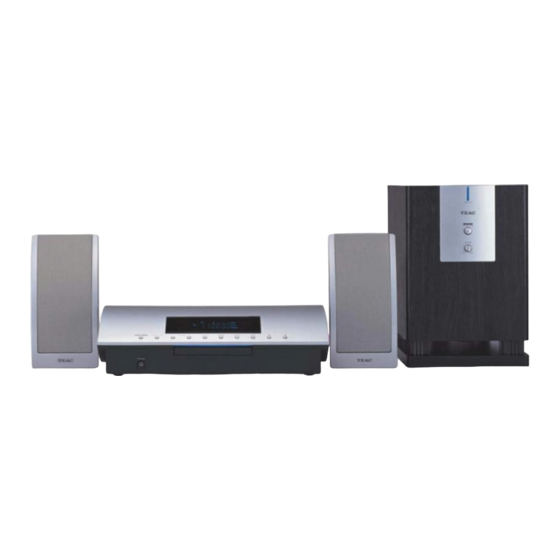
- Page 1 9A10067300 MC-DV250 DVD Home Theater System OWNER’S MANUAL MANUEL DU PROPRIÉTAIRE MANUAL DEL USUARIO...
-
Page 2: Table Des Matières
Thanks you for choosing TEAC. Read this manual carefully to get the best performance from this unit. Do not install this equipment in a confined space such as a book case or similar unit. - Page 3 Sommaire Indice Nous vous remercions pour l’achat d’un appareil TEAC. Lire Enhorabuena por la adquisición de un TEAC. Lea ce manuel avec attention pour obtenir les meilleures detenidamente este manual a fin de obtener el mejor performances possibles de cet appareil.
-
Page 4: What's In The Box
Logic” et le symbol double D sont des marques déposées de MC-DV250 using the included RC-965 remote control unit. Dolby Laboratories. The duplicate buttons on the MC-DV250 provide the same functions. Ce produit fait appel à une technologie de protection des <... -
Page 5: Avant Utilisation 1
< Ce manuel Utilisateur décrit de façon détaillée comment < Este manual del usuario describe ampliamente la forma de commander le MC-DV250 à l’aide de la télécommande controlar el MC-DV250 mediante el mando a distancia RC-965 fournie. Les touches présentes également sur le RC-965 incluido. -
Page 6: Memory Backup
Before Use 2 < Do not open the cabinet as this might result in damage to the circuitry or electrical shock. If a foreign object should get into the set, contact your dealer or service company. < When removing the power plug from the wall outlet, always pull directly on the plug, never yank the cord. -
Page 7: Sauvegarde Mémoire
Avant utilisation 2 Previo al empleo 2 < N’ouvrez jamais l’appareil pour ne pas endommager les circuits ou < No abra la carcasa de la unidad, ya que podrían dañarse los vous exposer à un risque d’électrocution. Au cas où un objet circuitos o producirse descargas eléctricas. -
Page 8: Discs
Discs Type of Discs That Can be Played on This About DVD-RW < DVD-RW discs that were recorded with copy-once only System permission cannot be played. This player can playback discs bearing any of the following logos: < When playing a DVD-RW disc that was edited on a DVD recorder, the screen may momentarily black out at the edited point. - Page 9 Copy-protected discs and other discs which do not conform to the CD standard may not play back correctly in this player. If you use such discs in this unit, TEAC Corporation and its subsidiaries cannot be responsible for any consequences or guarantee the quality of reproduction.
-
Page 10: Type De Disques Utilisables Sur Ce Système
Disques Type de disques utilisables sur ce système Remarque concernant les DVD-RW < Les disques DVD-RW, enregistrés avec autorisation de copie de Ce lecteur permet de lire tous les disques portant les logos sauvegarde unique ne peuvent pas être lus sur cet appareil. suivants : <... -
Page 11: Cet Appareil Ne Permet Pas De Lire Les Disques Suivants
ATTENTION : < Placer toujours le disque sur le plateau, la face imprimée sur le dessus (les disques compacts ne sont enregistrés que sur une < Si vous enregistrez un disque à partir d’un PC (ou un seule face.) enregistreur de DVD), même si le disque est gravé dans un <... -
Page 12: Discos
Discos Tipos de discos admitidos por el equipo Acerca de los DVD-RW < No se reproducirán los discos DVD-RW grabados con La unidad puede reproducir discos con los siguientes logotipos: autorización para una sola copia. < Cuando utilice un disco DVD-RW editado en una grabadora DVD-Vídeo: de DVD, la pantalla podría oscurecerse momentáneamente en •... - Page 13 PRECAUCIÓN: < Coloque siempre el disco en la bandeja con la cara de la < Si graba un disco con un ordenador normal (o grabadora de etiqueta hacia arriba. (Los discos compactos sólo se DVD), y aunque sea en un formato compatible, se dan casos reproducen y graban por una cara.) en los que no podrá...
- Page 14 Connection 1 (FM antenna) CAUTION: < Switch off the power to all equipment before making connections. < Read the instructions of each component you intend to use with this unit. < Be sure to insert each plug securely. To prevent hum and noise, avoid bundling the signal interconnection cables together with the AC power cord or speaker cables.
-
Page 15: Conexión
Raccordement 1 (antenne FM) Conexión 1 (Antena de FM) ATTENTION : PRECAUCIÓN: < Coupez l’alimentation de tous les appareils avant d’effectuer < Apague todos los equipos antes de realizar las conexiones. les raccordements. < Lea las instrucciones de cada equipo que intenta utilizar con <... - Page 16 Connection 2 (AM antenna) AM Indoor Loop Antenna The high-performance AM loop antenna provided with this unit is sufficient for good reception in most areas. To stand the loop antenna on a surface, fix the claw to the slot in the antenna base. Connect the loop antenna’s wires to the AM antenna terminals.
- Page 17 Raccordement 2 (antenne FM) Conexión 2 (Antena de AM) Antenne-cadre AM intérieure Antena de cuadro de AM interior L’antenne-cadre AM haute performance fournie avec cet En la mayoría de las zonas será suficiente con la antena de appareil permet une très bonne réception dans la plupart des cuadro de AM facilitada con la unidad.
-
Page 18: Speaker Connections
If the component has an DIGITAL IN terminal, connect it with the speakers. an optical cable. The red speaker terminals are + (positive), and the black DIGITAL OUT (MC-DV250) terminals are _ (negative). q DIGITAL IN (CD-R, MD, etc.) Connect the black side of the speaker cable to the black terminal and the other side to the red terminal. -
Page 19: Raccordement
Si le composant dispose d’une prise DIGITAL IN, connectez-le Si el componente cuenta con una terminal DIGITAL IN, avec un câble optique. conéctelo con un cable óptico. DIGITAL OUT (MC-DV250) DIGITAL OUT (MC-DV250) q DIGITAL IN (CD-R, MD, etc.) q DIGITAL IN (CD-R, MD, etc.) <... - Page 20 AC power cord or speaker cables. Connection to a TV Connect one of these cables. There are various ways of connecting the MC-DV250 to your TV Connectez l’un de ces câbles. Conecte uno de estos cables. set or monitor.
- Page 21 CA ou avec les câbles des haut-parleurs. Raccordement à un téléviseur Conexión a un TV Il est possible de raccorder le MC-DV250 à votre téléviseur ou à Hay varias formas de conectar el MC-DV250 al televisor o un moniteur.
-
Page 22: Ac Power Cord
Connection 5 Before Going On AC Power Cord Once a connection with the TV or monitor has been made, When all connections have been made, plug the AC power you need to set the following settings. Otherwise, distorted cord into an AC wall socket. images or no picture at all would appear on the TV screen. -
Page 23: Ventilateur
Raccordement 5 Conexión 5 Cordon d’alimentation CA Cable de alimentación (c.a.) Une fois ces différents branchements terminés, brancher le Una vez realizadas todas las conexiones, conecte el cable de cordon d’alimentation CA sur la prise murale de alimentación a una toma mural (corriente alterna). l’alimentation secteur. -
Page 24: Front Panel
Names of Each Control Front Panel Play/Pause button (G/J) Use this button to start or pause playback. STANDBY/ON switch Press this switch to turn the unit on or standby. Stop button (H) The equipment draws nominal non-operating power from Use this button to stop playback. the AC outlet with its STANDBY/ON switch in the STANDBY position. -
Page 25: Front Panel Display
Front Panel Display Subwoofer Play indicator POWER switch Press this switch to turn the unit on or off (standby). Pause indicator Noise may be generated when the unit is turned on or off. Disc type indicator The equipment draws nominal nonoperating power from the AC outlet with its POWER switch in the OFF position. -
Page 26: Remote Control Unit
Names of Each Control SELECT button This button is used to adjust BASS, TREBLE or BALANCE. Press this button repeatedly to select BASS, TREBLE or BALANCE, and then press the VOLUME button to adjust. SEARCH button Use this button to display the Search Menu on the TV screen. Numeric buttons Use these buttons to key in track numbers, passwords, etc. -
Page 27: Battery Installation
Remote Control Unit The provided Remote Control Unit allows the unit to be operated LISTENING button from a distance. Use this button to select a listening mode. When operating the remote control unit, point it towards the remote sensor on the front panel of the unit. AUDIO button (L/R) Use this button to select the desired language for audio <... -
Page 28: Panneau Avant
Désignation des commandes Panneau avant Touche de lecture/pause (G/J) Utilisez cette touche pour commencer ou suspendre la lecture. Interrupteur STANDBY/ON Appuyez sur cet interrupteur pour mettre l’appareil sous Touche d’arrêt (H) tension ou hors tension (veille). Utilisez cette touche pour arrêter lecture. L’équipement se rapproche de l’alimentation nominale de non- fonctionnement à... -
Page 29: Affichage Du Panneau Avant
Affichage du Panneau Avant Haut-parleur de basses Indicateur Play (lecture) Interrupteur d’ALIMENTATION (POWER) Pressez cet interrupteur pour brancher et débrancher l’appareil (veille). Indicateur de pause L’appareil peut faire du bruit lorsqu’on l’allume ou que l’on l’éteint. Indicateur du type de disque L’équipement se rapproche de l’alimentation nominale de Titre non-fonctionnement à... -
Page 30: Télécommande
Désignation des commandes Touche SEARCH Utilisez cette touche pour afficher le Menu de Recherche sur l’écran TV. Touches numériques Utilisez ces touches pour saisir les numéros de piste, mots de passe, etc. Touche STEP ( JG) Utilisez cette touche pour une lecture d’un seul pas. Touche SLOW ( Utilisez cette touche pour la lecture au ralenti. -
Page 31: Boîtier De Télécommande
Boîtier de télécommande Le boîtier de télécommande fourni permet la commande à Touche LISTENING distance defourni permet la commande à distance de l’appareil. Utilisez ce bouton pour sélectionner un mode d’écoute. Pour l’utilisation du boîtier de télécommande, le diriger vers le détecteusation du boîtier de télécommande, le diriger vers le Touche AUDIO (L/R) détecteur de télécommande du panneau avant de l’appareil. -
Page 32: Panel Frontal
Nombres de los controles Panel frontal Botón Reproducción/Pausa (G/J) Utilice este botón para iniciar o poner en pausa la Interruptor STANDBY/ON reproducción. Pulse este interruptor para encender o apagar la unidad (posición de espera). Botón de parada (H) El equipo extrae potencia nominal no operativa de la ficha Utilice este botón para interrumpir la reproducción. -
Page 33: Vista Del Panel Frontal
Vista del panel frontal Altavoz para sonidos graves Indicador de reproducción Interruptor POWER (encendido) Pulse este interruptor para encender o apagar la unidad Indicador de pausa (standby). Se puede generar ruido cuando se enciende o se Indicador de tipo de disco apaga la unidad. -
Page 34: Mando A Distancia
Nombres de los controles TREBLE o BALANCE y luego presione el botón VOLUME para ajustar. Botón SEARCH Utilice este botón para mostrar el Menú Search en la pantalla del televisor. Botones numériques Utilice estos botones para introducir números de pista, contraseñas, etc. -
Page 35: Instalación De Las Pilas
Mando a distancia La unidad de control remoto suministrada le permite controlar el Botón TOP MENU aparato a distancia. Utilice este botón para visualizar el menú de títulos del disco. Cuando opere con el control remoto, diríjalo hacia el sensor remoto en el panel frontal del aparato. -
Page 36: Basic Operation 1
Basic Operation 1 Press the STANDBY/ON switch to turn the unit on. < If the PLAY/PAUSE button or the OPEN/CLOSE button is pressed in the standby mode, the unit is also turned on. Select a source by pressing the FUNCTION button. The selected source is shown on the front panel’s display. -
Page 37: Opérations De Base 1
Opérations de base 1 Operación básica 1 Appuyez sur l’interrupteur STANDBY/ON pour mettre Pulse el interruptor STANDBY/ON para encender la l’appareil en service. unidad. < Si on appuie sur la touche PLAY/PAUSE ou sur la touche < Si se pulsa el botón PLAY/PAUSE o el botón OPEN/CLOSE en el OPEN/CLOSE pendant le mode attente, l’appareil est aussi mis modo standby, la unidad también se enciende. - Page 38 Basic Operation 2 Tone Control 1. Press the SELECT button to select “TRBL”, “BASS” or “BAL”. Each time the SELECT button is pressed, the mode is changed as follows: TRBL BASS To adjust the level of high frequency sound range, select “TRBL (treble)”.
- Page 39 Opérations de base 2 Operación básica 2 Correction des tonalités Control de tonalidad 1. Appuyez sur la touche SELECT pour sélectionner 1. Pulse el botón SELECT para seleccionar “TRBL”, “BASS” “TRBL”, “BASS” ou “BAL”. o “TRE”. Chaque pression sur la touche SELECT, modifie comme suit Cada vez que se pulsa el botón SELECT, el modo cambia en les indications affichées: el siguiente orden:...
-
Page 40: Listeninng Mode
Listening Mode Press the LISTENING button to select the listening mode. Each time the LISTENING button is pressed, the mode is changed as follows: < When the LISTENING button is pressed once, the current listening mode is displayed. Press the LISTENING button repeatedly to select any other mode. -
Page 41: Mode D'écoute
Mode d’écoute Modo Listening (escucha) Appuyez sur la touche LISTENING pour sélectionner le Presione el botón LISTENING para seleccionar este modo. mode d’écoute. Cada vez que se pulsa el botón LISTENING, el modo cambia de A chaque fois que la touche LISTENING est pressée, le mode la siguiente manera: change de manière suivante: <... -
Page 42: Playback 1
DVD / VCD / CD Playback 1 < Turn the TV on and set its input to the correct position for DVD viewing (VIDEO, etc.). Press the STANDBY/ON button to turn the unit on. Press the OPEN/CLOSE button (L) to open the disc tray. Place a disc on the tray with the printed label face up. -
Page 43: Lecture 1
Lecture 1 Reproducción 1 < Allumer le téléviseur et régler l’entrée sur la position < Encienda el TV y seleccione su entrada apropiada para la correspondant à la lecture d’un DVD (VIDEO etc.). visualización de DVD (VIDEO, etc.). Appuyer sur l’interrupteur STANDBY/ON pour mettre Pulse el interruptor STANDBY/ON para encender la l’appareil sous tension. - Page 44 DVD / VCD / CD / MP3 / JPEG Playback 2 Example: When playing back an MP3 disc When an MP3 disc is loaded, a list of directories appears on Exemple: Lors de la lecture d’un disque MP3 the screen. Ejemplo: Durante la reproducción de un disco MP3 Select a directory by pressing the 5 / b /g /t buttons and press the ENTER button.
- Page 45 Lecture 2 Reproducción 2 Lorsque vous insérez un disque MP3, la liste des répertoires Cuando se carga un disco MP3, aparece en la pantalla una s’affiche à l’écran. lista de directorios. Sélectionnez un répertoire à l’aide des touches /g / t Seleccione un directorio con los botones /g / t y pulse puis appuyez sur la touche ENTER.
- Page 46 DVD / VCD / CD / MP3 Playback 3 To start playback In the stop mode, press the PLAY/PAUSE button (y/J). To suspend playback temporarily (pause mode) Press the PLAY/PAUSE button (y/J) during playback. The image freezes with DVD or VCD discs, or music is interrupted with MP3 discs or CDs.
- Page 47 Lecture 3 Reproducción 3 Pour démarrer la lecture Para iniciar la reproducción A l’arrêt, appuyez sur la touche PLAY/PAUSE (y/J). Desde la posición de parada, pulse el botón PLAY/PAUSE (y/J). Pour arrêter momentanément la lecture (mode pause) Para interrumpir momentáneamente la reproducción Appuyez sur la touche PLAY/PAUSE (y /J ) en cours de (modo de pausa) lecture.
-
Page 48: Playback From A Specific Chapter/Track
DVD / VCD / CD Playback from a Specific Chapter/Track To skip to a specific chapter/track During playback, press the SKIP buttons (. or/ ) repeatedly until the desired chapter or track is found. The selected chapter/track will be played from the beginning. When the . -
Page 49: Lecture À Partir D'une Section Ou D'une Piste Précise
Lecture à partir d’une section ou d’une piste précise Reproducción desde un capítulo o pista determinada Pour positionner la tête de lecture sur une section ou Para ir directamente a un capítulo o pista une piste précise Durante la reproducción, pulse los botones SKIP (. o /) Pendant la lecture, appuyez plusieurs fois sur les touches SKIP repetidamente hasta encontrar el capítulo o la pista deseados. -
Page 50: Slow-Motion Playback
DVD / VCD Slow-Motion Playback For video discs only (DVD and VCD) To play a disc in slow motion, press the SLOW button ( ). Each time the SLOW button ( ) is pressed, the speed changes as follows: DVD: SF x SF x SF x... -
Page 51: Lecture À Vitesse Lente
Lecture à vitesse lente Reproducción a cámara lenta Pour les disques vidéo seulement (DVD et VCD) Solamente para discos de vídeo (DVD y VCD) Pour lire un disque au ralenti, appuyez sur la touche SLOW ( Para reproducir un disco a cámara lenta, pulse el botón SLOW À... -
Page 52: Search Menu (Dvd)
DVD / VCD / CD Search menu 1 The search menu lets you set the title/chapter, audio language/subtitle language/angle, playback time, repeat mode and time display. During playback of a DVD, press the SEARCH button. The search menu appears on the screen. Press the 5 and b buttons to select an item. -
Page 53: Menu De Recherche 1
Menu de recherche 1 Menú Search 1 Le menu de recherche permet d’ajuster le titre/chapitre, la langue El menú de búsqueda le permite configurar el título/capítulo, audio/la langue du sous-titre/l’angle, le temps de lecture, le mode idioma de audio/idioma del subtítulo/ángulo tiempo de de répétition et le temps de visualisation. - Page 54 Search menu 2 Time Disp. Current time mode in the bottom of this display is displayed. You can change the mode. TT Elapsed: elapsed playback time of the current title. TT Remain: remaining time of the current title. CH Elapsed: elapsed playback time of the current chapter. CH Remain: remaining time of the current chapter.
- Page 55 Menu de recherche 2 Menú Search 2 Time Disp. [Affichage (visualisation) du temps] Time Disp. (Visualización de la hora) Le mode du temps actuel au bas de cette visualisation est Aparece el modo de tiempo actual al pie del visor. Usted affiché.
-
Page 56: Display
DVD / VCD / CD Display Press the DISPLAY button to view information about the currently playing disc on the TV. The display will go off after a few seconds. Notes < When playback is stopped, the display goes off. <... -
Page 57: Affichage
Affichage Visualización Appuyez sur la touche DISPLAY pour visualiser les informations Pulse el botón DISPLAY para ver en el televisor información sobre sur le disque en cours de lecture sur l’écran du téléviseur. el disco actualmente en reproducción. La visualización L’affichage s’éteint après quelques secondes. -
Page 58: Picture Zoom
DVD / VCD Picture Zoom To zoom the picture, press the ZOOM button during playback. Each time the ZOOM button is pressed, the magnification level changes as follows: x2 w x3 w x4 w x w OFF < You can shift the zoom point by pressing the 5 / b /g /t buttons during zoom playback. -
Page 59: Zoom Sur Une Image
Zoom sur une image Zoom de imagen Pour faire un zoom sur une image, appuyez sur la touche ZOOM Para ampliar la imagen, pulse el botón ZOOM durante la pendant la lecture du disque. reproducción. À chaque pression sur la touche ZOOM, le taux d’agrandissement Cada vez que pulse el botón ZOOM, el nivel de ampliación change comme suit : cambia del modo siguiente:... -
Page 60: Select An Audio
Select an Audio To select an audio on a DVD containing multiple language soundtracks, press the AUDIO button during playback. Each time the AUDIO button is pressed, the audio will change to the next one recorded on the DVD. < When no other audio is recorded on the disc, the PROHIBIT icon will be displayed. -
Page 61: Sélection De La Partie Audio
Sélection de la partie audio Seleccione un audio Pour sélectionner la partie audio pour un DVD contenant Para seleccionar un audio en un DVD que contenga bandas plusieurs pistes sonores de langue, appuyez sur la touche AUDIO sonoras en múltiples idiomas, pulse el botón AUDIO durante la pendant la lecture. -
Page 62: Repeat Playback 1
DVD / VCD / CD Repeat Playback 1 Repeat Playback of a DVD Each time the REPEAT button is pressed during playback, the mode is changes as Chapter The chapter being played will be played repeatedly. If you select another chapter in Chapter mode, the chapter you selected will be played repeatedly. -
Page 63: Lecture Répétée 1
Lecture répétée 1 Repetición 1 Lecture répétée d’un DVD Repetición de DVD À chaque fois que vous appuyez sur la touche REPEAT (répéter) Cada vez que pulse el botón REPEAT durante la reproducción, el pendant la lecture, le mode est changé comme modo cambia como Chapter (répéter le chapitre) Chapter (repetir capítulo) -
Page 64: Random Playback
DVD / VCD / CD Repeat Playback 2 Repeat Playback of a Designated Section (A-B Repeat) Start playback and designate the point at which the A-B repeat should start (point A) by pressing the A-B button. “A TO B SET A” appears on the screen and the “A” indicator lights up in the front panel display. -
Page 65: Lecture Aléatoire
Lecture répétée 2 Repetición 2 Lecture répétée d’une section définie Repetición de un fragmento específico (A-B) (A-B Repeat) Lancez la lecture du disque puis définir le point à partir Active la reproducción y especifique el punto inicial (A) duquel vous souhaitez que commence la lecture répétée del fragmento que desea repetir, pulsando el botón A-B. -
Page 66: Programmed Playback
Programmed Playback Up to 20 tracks can be programmed in the desired order. Press the PROGRAM button in the stop mode. < To cancel the program, press 5 , b , g and tbuttons to select “EXIT” and press ENTER button. <... -
Page 67: Lecture Programmée
Lecture programmée Reproducción programada Il est possible de programmer jusqu’à 20 pistes dans un ordre Se pueden programar hasta 20 pistas en el orden deseado. défini. Appuyez sur la touche PROGRAM (programme) dans le Pulse el botón PROGRAM en el modo de parada mode arrêt. -
Page 68: Settings
Settings This chapter describes how to use the SETUP menu. Most settings and adjustments are required to be set when you first use the system. Using the SETUP menu, you can adjust the picture size, set a preferred language for audio and the OSD (on screen displays), limit playback by children, et cetera. -
Page 69: Réglages
Réglages Ajustes Ce chapitre vous indique comment utiliser le menu SETUP. La En esta sección se describe la forma de usar el menú de plupart des réglages et paramètres doivent être définis lorsque configuración (SETUP). La mayoría de los ajustes se deberán vous utilisez votre système pour la première fois. -
Page 70: Tv Type
Settings (General Setup 1) TV Type --General Setup Page-- NTSC: TV Type TV Display NTSC Select this mode if the unit is connected to an NTSC TV. Angle Mark OSD Lang SPDIF Output PAL (Default): Captions Select this mode if the unit is connected to a PAL TV. Screen Saver Last Memory Set TV Standard... -
Page 71: Réglages (Paramétrage Général 1)
Réglages (Paramétrage général 1) Ajustes (Configuración general 1) TV Type (Type de TV) TV Type (Tipo de TV) NTSC: NTSC: Sélectionnez ce mode si l’appareil est raccordé à un Seleccione este modo si el aparato está conectado a un téléviseur NTSC. televisor NTSC. -
Page 72: Spdif Output
Settings (General Setup 2) SPDIF Output --General Setup Page-- SPDIF OFF: TV Type TV Display Select this when you don’t use the DIGITAL OUT terminal. Angle Mark OSD Lang No signal is output from the DIGITAL OUT terminal. SPDIF Output SPDIF OFF Captions SPDIF/RAW... -
Page 73: Réglages (Paramétrage Général 2)
Réglages (Paramétrage général 2) Ajustes (Configuración general 2) SPDIF Output (Sortie SPDIF) SPDIF Output (Salida SPDIF) SPDIF OFF: SPDIF OFF: Sélectionnez cette option lorsque vous n’utilisez pas la borne Seleccione esto cuando no utilice el terminal DIGITAL OUT. DIGITAL OUT. No sale ninguna señal del terminal DIGITAL OUT. -
Page 74: Dynamic
Settings (Audio Setup) Dynamic (Dynamic range compression) --Audio Setup Page-- In many listening situations, you may find loud passages Dynamic FULL objectionable. Adjusting this setting allows you to compress the sounds into a range that you may find more suitable for a particular listening situation. -
Page 75: Dynamic (Compression De La Gamme Dynamique)
Réglages (Paramétrage audio) Ajustes (Configuración de audio ) Dynamic Dynamic (compresión del margen dinámico) (Compression de la gamme dynamique) En muchos entornos de audición, es posible que encuentre objetables los pasajes más altos. Esta ajuste le permite Dans la plupart des conditions d’écoute, vous risquez de comprimir los sonidos en un margen que le resulte más trouver les passages forts, imparfaits. -
Page 76: Audio
Settings (Preference Setup 1) You can access the PREFERENCES menu only when the unit is in the stop mode. Audio (Languages on DVD movies) --Preference Page-- You can select the preferred language for audio. Audio English Subtitle French Disc Menu Italian <... -
Page 77: Réglages (Configuration De Préférence 1)
Réglages (Configuration de préférence 1) Ajustes (Ajuste de la preferencia 1) Vous ne pouvez accéder au menu PREFERENCES que lorsque Puede acceder al menú PREFERENCES (Preferencias) solamente l’appareil est en mode d’arrêt. cuando el aparato esté en modo de parada. Audio (Langues des films DVD) Audio (Idioma de las películas en DVD) Vous pouvez sélectionner la langue de votre choix pour... -
Page 78: Parental
Settings (Preference Setup 2) Parental (Parental control) --Preference Page-- Playback of some DVD discs can be limited depending on the Audio 1 KID SAFE Subtitle age of the users. The parental comtrol system allows the Disc Menu 3 PG Parental 4 PG-13 playback limitation level to be set by the parent. -
Page 79: Réglages (Configuration De Préférence 2)
Réglages (Configuration de préférence 2) Ajustes (Ajuste de la preferencia 2) Parental Parental (Calificación por edades) (Niveau d’autorisation Parentale) La reproducción de algunos DVD puede estar limitada en función de la edad de los espectadores. El sistema de Il est possible de contrôler la lecture de certains DVD en calificación permite a los padres establecer el límite de edad fonction de l’âge de l’utilisateur. -
Page 80: Audio Button
Tuner Select FM or AM by pressing the FM/AM button (or the FUNCTION button of the main unit). Make sure the antennas have been connected (see page 14-16). Press the TUNING button to tune in a station. Hold down the TUNING button of the remote control unit for more than 0.5 seconds. -
Page 81: Touche Audio
Syntoniseur Sintonizador Sélectionnez FM ou AM en appuyant sur la touche Seleccione FM o AM presionando el botón FM/AM FM/AM (ou la touche FUNCTION de l’appareil principal). (o el botón FUNCTION de la unidad principal). Assurez-vous que les antennes sont branchées (voir page 15-17). Asegúrese de que las antenas estén conectadas (véase las páginas 15-17). -
Page 82: Preset Tuning
Preset Tuning You can store up to 30 stations. Manual Memory Presetting Tune in a station you want to listen to (see steps on page 80). Press the PROGRAM button. While the Preset number is blinking, select a preset channel to store the station using the PRESET buttons, and then press the PROGRAM button. -
Page 83: Syntonisation Préréglée
Syntonisation préréglée Presintonías Vous pouvez enregistrer jusqu’à 30 stations. Es posible almacenar hasta 30 emisoras en la memoria de la unidad. Préréglage de mémoire manuel Presintonización manual Réglez la station que vous souhaitez écouter (voir étapes à de la page 81). Sintonice una emisora que desee oír (véanse los pasos de la página 81). -
Page 84: Pty Search
RDS Search A station can be searched by this function. Select FM by pressing the FM/AM button (or the FUNCTION button of the main unit). Press the SEARCH MODE button. Each time the SEARCH MODE button is pressed, the search mode is changed as follows: RDS search Select “RDS SRCH”... -
Page 85: Recherche De Rds
Recherche de RDS Búsqueda RDS Il est possible de rechercher une station à l’aide de cette fonction. Mediante esta función puede buscarse una emisora. Sélectionnez FM en appuyant sur la touche FM/AM (ou Seleccione FM presionando el botón FM/AM (o el botón la touche FUNCTION de l’appareil principal). -
Page 86: Rds (Eon Pty/Eon Ta)
RDS (EON PTY/EON TA) EON PTY (EON: Enhanced Other Networks information) Use this feature to automatically search and receive the desired programme type while listening to a RDS station. While listening to a RDS station, press the EON PTY button. Current programme type is displayed. -
Page 87: Rds (Eon Pty/Eon Ta)
RDS (EON PTY/EON TA) RDS (EON PTY/EON TA) EON PTY EON PTY (EON, Enhanced Other Networks) (EON: redes de emisoras mejoradas) Utilisez cette fonction pour rechercher automatiquement et Utilice esta función para buscar y recibir automáticamente el tipo recevoir le type de programme désiré sur une station RDS. de programa deseado mientras oye una emisora RDS. -
Page 88: Pty Programs
PTY Programs NEWS : brief announcements, events, public opinion, reports, actual situations. AFFAIRS : a kind of suggestion including practical announcements other than news, documents, discussion, analysis and so on. INFO : daily information or reference such as weather forecast, consumer guide, medical assistance and so SPORT : sports related programs. -
Page 89: Programmes Pty
Programmes PTY Programas PTY (por tipo) NEWS (nouvelles) : communiqués, événements, sondages, NEWS : mensajes, convocatorias, opinión pública, informes. reportages, situations vécues. AFFAIRS : temas de actualidad, documentos, debates, análisis, AFFAIRS (informations générales) : suggestions diverses, telles etc. que des annonces pratiques, à l’exception des INFO : información cotidiana, previsión meteorológica, nouvelles, documents, débats, analyses, etc. -
Page 90: Setting The Clock
Setting the Clock Press the TIME ADJ button. The “hour” value blinks. < You can not adjust the clock when the unit is in the standby mode. < The unit uses the 24 hour “military” clock. Press the 5/b buttons to set the current hour and press the g/t buttons to set the current minute. -
Page 91: Régler L'heure
Régler l’Heure Ajuste del reloj Appuyez sur la touche TIME ADJ (Ajuster l’heure). Pulse el botón TIME ADJ. La valeur de l’”heure” clignote. El valor “hora” parpadea. < Vous ne pouvez pas ajuster l’heure quand l’appareil est en < Usted no puede ajustar el reloj cuando la unidad se encuentra mode de veille. -
Page 92: To Cancel The Sleep Timer
Sleep Timer Press the SLEEP button. Within 3 seconds, press g/t button to select one of the following preset times: OFF s w 10 (minutes) s w 20 s w 30 s w 60 s w 90 When the sleep timer is set, the display is dimmed. To confirm the remaining time of the sleep timer Press the SLEEP button after setting. -
Page 93: Arrêt Différé (Sleep Timer)
Arrêt différé (Sleep Timer) Temporizador de reposo Appuyez sur la touche SLEEP (sommeil). Pulse el botón SLEEP. Dans un délai de 3 secondes, pressez la touche g/t En tres segundos, presione el botón g /t para pour sélectionner un des temps préréglés: seleccionar uno de los siguientes tiempos prefijados: OFF s w 10 (minutos) s w 20 s w 30 s w 60 s w 90 OFF s w 10 (minutes) s w 20 s w 30 s w 60 s w 90... -
Page 94: On Timer
ON Timer Press the TIMER button for 3 seconds to enter the timer setting mode. When “TMR OFF” appears on the display, press the ENTER button to switch the display to “TMR ON”. Press the TIMER button. Press the 5 and b buttons to set the ON time (hour). Press the g and t buttons to set the ON time (minutes). -
Page 95: Minuteur On
Minuteur ON Encendido del Temporizador (ON TIMER) Appuyez sur la touche TIMER pendant 3 secondes pour Presione el botón TIMER durante 3 segundos para entrer en mode de réglage du minuteur. ingresar el modo de configuración del temporizador. Quand “TMR OFF” apparaît sur l’écran, appuyez sur la touche Cuando aparece “TMR OFF”... -
Page 96: Troubleshooting
The aspect ratio might be fixed by the disc. before you call your dealer or a TEAC service center. e Depending on the TV, you may not be able to change the aspect ratio. -
Page 97: Specifications
Specifications DVD Player Speaker system (L / R) Pickup ..Semiconductor laser, Wave length 650/790 nm Input power......30 W maximum Signal System . -
Page 98: Dépannage
Le système couleur sélectionné ne correspond pas à celui faire appel à votre revendeur ou au centre d’assistance TEAC. qu’utilise votre téléviseur. Appuyer sur la touche PAL/NTSC de la télécommande une ou deux fois. -
Page 99: Caractéristiques Techniques
Caractéristiques techniques Lecteur de DVD Général (unité Principale) Ramassage..Semi-conducteur laser, Longueur d’onde Exigences d’alimentation ....CA 230 V, 50 Hz 650/790 Signal nm Consommation électrique . -
Page 100: Aspectos Generales
El sistema de colour seleccionado no coincide con el del distribuidor o con un centro de asistencia técnica TEAC. televisor. Pulse el botón PAL/NTSC del mando a distancia una o dos veces. -
Page 101: Especificaciones
Especificaciones Reproductor de DVD Sistema de altavoz (I / D) Captación . . . Semiconductor láser, longitud de onda Señal de Potencia de entrada ..... 30 W máximo 650/790 nm Unidad . -
Page 102: Lista De Códigos
Language Code List / Liste des codes de langue / Lista de códigos Code Language Code Language Code Language 6566 Abchazian 7383 Icelandic 8388 Sindhi 6565 Afar 7378 Indonesian 8373 Singhalese 6570 Afrikaans 7365 Interlingua 8375 Slovak 8381 Albanian 7165 Irish 8376 Slovenian... - Page 103 7733 Telegraph Road, Montebello, California 90640 Phone: (323) 726-0303 TEAC CANADA LTD. 5939 Wallace Street, Mississauga, Ontario L4Z 1Z8, Canada Phone: (905) 890-8008 TEAC MEXICO, S.A. De C.V Campesinos N°184, Colonia Granjas Esmeralda, Delegacion Iztapalapa, CP 09810, México DF Phone: (525) 581-5500 TEAC UK LIMITED 5 Marlin House, Croxley Business Park, Watford, Hertfordshire, WD18 8TE, U.K.