Table des Matières
Publicité
Les langues disponibles
Les langues disponibles
Liens rapides
Publicité
Table des Matières
Dépannage

Sommaire des Matières pour ergoCentric upCentric UPMOD-2L
- Page 1 UPMOD-2L Owner’s manual Guide de l’utilisateur ergoCentric ®...
-
Page 2: Table Des Matières
English Introduction ..................2 Specifications .................2 Standard features .................3 Important information ..............5 Safety instructions .................6 Parts ....................7 Assembly instructions ..............8 Preparing the tabletop ............8 Assembling your table .............8 Retrofitting onto existing work surface ........9 Getting started ................12 Troubleshooting ................14 Disposal guidance ..............18 Warranty .................. -
Page 3: Introduction
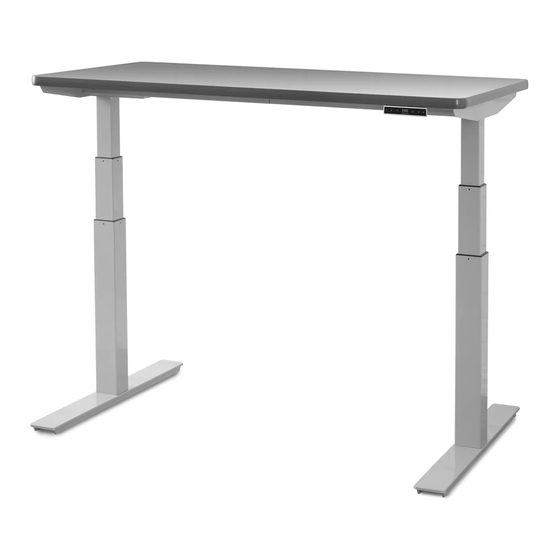
upCentric UPMOD-2L ® Introduction The upCentric electric height adjustable table allows users to easily adjust ® their work surface to the optimal working height and to alternate between seated and standing positions throughout the work day, reducing backaches, pains, stress and tension, and improving circulation throughout the body. Moving the upCentric table is intuitive with the easy-to-use up/down control. The quiet motors housed in each of the table’s legs ensure a quick, smooth transition in positions. The upCentric 2-Leg Modular frame accommodates a variety of different work surface sizes and shapes, including very small and odd shaped surfaces, making it easy to retrofit any surface into a height adjustable table. The durable open frame design provides optimal knee clearance and space for storage. Specifications UPMOD-2L UPMOD-2L-22 ( 22"... -
Page 4: Standard Features
Standard features Presettable memory positions upCentric electric height adjustable tables come standard with 4 presettable ® memory positions, allowing you to set customized seated and standing table heights, and to quickly adjust to these positions when changing between seated to standing positions. See page 12 for instructions on setting memory positions. One-touch adjustment Once you have set a memory position, you no longer have to hold the up or down button to adjust the table. Simply press the ❶, ❷, ❸ or ❹ button for your desired memory position and the table will automatically adjust to your preset position. - Page 5 Gyro-sensor anti-collision system Every upCentric electric height adjustable table has a built in gyro-sensor ® based anti-collision system. This patented anti-collision system uses precision gyroscope technology, allowing for three axis collision detection. This sensor provides enhanced safety to help prevent user injury and equipment damage. When the table is in motion, if it encounters any external resistance or unbalance in the tabletop, the gyro-sensor picks up the disturbance immediately and enacts a safety stop. The table will stop moving immediately and reverse adjustment by 1"...
-
Page 6: Important Information
Important information • Always make sure all screws are tightened before use of the table and after moving or transporting. • D uty cycle of the frame for desk is 10 %, max. 2 minutes operating / min. 18 minutes stop. • E nsure the loading on each leg is less than the maximum outlined below, otherwise it might cause permanent damage to the leg (s) during operation. Load capacity Table maximum 250 lbs ( 114 kg ) Each leg maximum 175 lbs ( 80 kg ) • W hen the motor cable is connected to the control box, the legs can maintain an adequate locking force up to the maximum load on the tabletop. However, when the cable is damaged or is disconnected from the control box, it will cause the desk to sink to the bottom within hours if the load on either leg is larger than the maximum capacity. • M ake sure that no persons or items will collide with the table, when adjusting upwards and downwards. -
Page 7: Safety Instructions
9. I f table is heavily loaded, keep load away from edges to prevent the possibility of the table tipping over. 10. A ny servicing is to be performed by an authorized service representative. Contact service@ergocentric.com or 1 866 438-3746 for more information. 11. M ake sure that no persons or items will collide with the table when adjusting upwards and downwards. 12. I f the control box or the legs make any unusual noises or smells, immediately unplug table from power supply. -
Page 8: Parts
Parts G x 1 F x 1 H x 1 I x 2 J x 2 Tools Required: K x 2 a ) Power drill Phillips head #2 bit Phillips head #3 bit b ) Phillips head #2 screwdriver Phillips head #3 screwdriver upCentric –... -
Page 9: Assembly Instructions
Assembly instructions Preparing the tabletop Step 1: Lay protective matting / sheet on floor or work surface to protect the tabletop surface. Step 2: Carefully place tabletop down on work surface with the decorative laminate facing down and brown surface facing up. Assembling your table Step 1: Place the table leg housing ( I ) on a flat surface, and insert leg ( K ) into the table leg housing. Fasten table leg housing to table leg using 4 x bolts ( B ) starting with the two holes closest to the back of the bracket. Repeat for second column. -
Page 10: Retrofitting Onto Existing Work Surface
Retrofitting onto existing work surface Step 2b: Rectangular work surfaces • Position the table leg housings at both ends of the work surface, centered front to back, and align them with the edges of the work surface, 0.5" - 1" in from the edge. • Secure table leg housings in place using screws ( C ) – 8 per leg housing. Step 3: Align handset ( H ) along the front edge of the tabletop, 1"- 3" from the desired corner, and attach handset to the tabletop with 2 x screws ( D ). upCentric –... - Page 11 Step 4: Attach control box ( F ) to tabletop using 2 x screws ( C ). The ideal location for the control box is centered left to right, and 6" from the back edge of the tabletop. TIP: Y ou can place the control box anywhere on the tabletop. Where you place the control box may depend on where you want the AC cable ( G ) to hang down from the tabletop, or if there are other items being attached to the tabletop that may interfere with the control box. Step 5: Attach All cables to the control box: • Plug the AC cable ( G ) into the port marked AC • Plug the wires from the legs ( K ) into the ports marked M1 and M2 •...
- Page 12 Step 7: Attach feet ( J ) to legs ( K ) using bolts ( A ). Step 8: Prepare table for use: • Flip table over into the upright position and plug the AC cable into a wall outlet. • Make sure the legs are correctly synchronized by performing a re-sync – see instructions on page 12. • If needed, adjust glides so that table is level and sturdy. upCentric – UPMOD-2L Owner's Manual | Guide de l’utilisateur ®...
-
Page 13: Getting Started
Getting started The first time a table is assembled, the legs must be synchronized before use. How to synchronize Press and hold the up/down buttons on the handset at the same time for 3-5 seconds, both legs will begin to lower. Continue holding the buttons until both legs reach the lowest position. When finished synchronizing, the legs will stop moving and the handset will make a beep sound and the buttons can be released. The display will show the starting height. How to set a memory position Use the buttons to adjust table to the desired height. - Page 14 How to disable a maximum height limit Move the table to the maximum height limit. Press and hold the button while simultaneously pressing button 4 times. A beeping sound will notify you that the process has completed. Note: You must press the button at the same time on the first press and you must continue to hold the button the entire time, or this setting will not work.
-
Page 15: Troubleshooting
Switching between metric and imperial units Press memory buttons ❶ ❷ and ❹ for 5 seconds. The handset display will show “C-I”. c - i For metric: Press ❷, the handset display will show “C” for centimeters. For imperial: Press ❸, the handset display will show “I” for inches. Note: Imperial units (inches) are the default UOM. Setting up parallel connectivity A Y-splitter cable is required to parallel connect two 2L frames to adjust as one. - Page 16 Synchronize table legs Prior to performing any troubleshooting, perform a re-synchronization. On occasion, the table may require a re-sync for a variety of reasons. This is normal. • Ensure there are no obstructions for the desk to move vertically. • Press and hold at the same time. • Continue to hold while the desk lowers until it reaches the bottom ( lowest point ). • Release the buttons once the system beeps. • If it does not beep, or if the desk is not level, repeat the re-sync operation. • This operation may be required a few times until the desk is at the lowest level position.
- Page 17 Continue to perform resets until both legs are at lowest position. • If the frame still does not adjust, a service technician needs to be called. Issue: Received frame without a control box • A 3-Leg main frame ( Box 1 ) was sent in error instead of a 2-Leg frame. • Contact ergoCentric to have the correct frame box sent out. Issue: Cords to handset are too short • Request extension cords from ergoCentric. Issue: Motor housing ( where leg meets frame ) is open • Lightly inspect to ensure no internal damage exists.
- Page 18 Issue: Wires are damaged • Document the damage and request new AC cable, handset, or leg as required. Issue: Handset and control box are not working • Unplug everything from control box for 10 seconds, then plug back in. • Perform re-sync ( see page 15 ). • If it lights up green, this means there is power going to the table. If not, request a new control box. • Does the handset light up and display correctly? If not, request a new handset. • Perform re-sync ( see page 15 ). • If the frame still does not adjust, a service technician needs to be called.
-
Page 19: Disposal Guidance
These warranties shall not apply to any products which must be replaced because of normal wear and tear, negligence, abuse or accident, shipping damage, or product use other than in accordance with written instructions and warnings. ergoCentric makes no warranty that any of its products are suitable for any particular purpose and makes no other warranties, expressed or implied, other than those set forth herein. In no event shall ergoCentric be liable in either tort or contract for any loss or direct, special, incidental, consequential or exemplary damages. This warranty is based on the use during an eight hour work day. upCentric – UPMOD-2L Owner's Manual | Guide de l’utilisateur ®... -
Page 20: Warranty Claims
These warranties shall be valid only during the term of these warranties; and while the products herein warranted are in the possession of the original purchaser. The original purchaser shall mean the party which first purchased the products for its own use whether from ergoCentric or an authorized ergoCentric representative. If you need assistance Please contact ergoCentric: • Phone : 1 866 GET ERGO (438-3746) • Email : service@ergocentric.com upCentric – UPMOD-2L Owner's Manual | Guide de l’utilisateur... -
Page 21: Introduction
upCentric UPMOD-2L ® Introduction La table électrique à hauteur réglable upCentric permet aux utilisateurs de ® régler facilement leur surface de travail à la hauteur optimale et d'alterner entre les positions assises et debout tout au long de la journée de travail. La modification de la hauteur de la table réduit les maux de dos, les douleurs, le stress, les tensions et améliore la circulation dans tout le corps. -
Page 22: Caractéristiques Standard
Caractéristiques standard Positions mémorisées préréglables Les tables électriques à hauteur réglable upCentric sont toutes équipées ® de quatre positions mémorisées préréglables. Cela vous permet de définir des hauteurs personnalisées pour les positions assises et debout et d’ajuster rapidement la table lorsque vous passez de la position assise à la position debout. Voir page 30 pour les instructions de réglage des positions mémorisées. -
Page 23: Option Batterie
Dans ces cas, l'affichage de la hauteur peut être ajusté de manière à ce que la hauteur de départ soit cohérente par rapport à la plus basse hauteur réelle du plan de travail. Voir page 30 pour les instructions. 2. Effectuer la conversion des mesures impériales en mesures métriques L'unité de mesure par défaut affichée sur l'affichage numérique de la hauteur est le pouce. Vous pouvez cependant changer pour les centimètres en sélectionnant l’unité de mesure de votre choix. Voir page 32 pour les instructions. -
Page 24: Informations Importantes
Combinez-le avec les roulettes optionnelles et rendez votre table upCentric ® mobile! Vous pouvez également utiliser le bloc de batterie comme batterie de secours. Si vous avez une batterie connectée au boîtier de contrôle et que le fil CA est branché dans une prise murale, la batterie se chargera à l'aide du fil CA. Votre table pourra ainsi fonctionner pleinement en cas d’arrêt ou de panne de courant. Branchement en parallèle L'UPMOD-2L upCentric est équipée d'une connectivité parallèle. Cette fonction vous permet de connecter deux tables à deux pieds ensemble et de les faire fonctionner comme une seule table à quatre pieds. Pour cela, un câble diviseur en Y est nécessaire. Informations importantes • Veillez toujours à ce que toutes les vis soient bien serrées avant d'utiliser la table ainsi qu’après son déplacement ou son transport. -
Page 25: Instructions De Sécurité
• Ne tirez pas ou ne poussez pas la table lorsque vous la réglez. • Ne soulevez pas le cadre ou la table du sol lors du réglage. Instructions de sécurité Avant l'installation-la réinstallation Assurez-vous que la table est installée comme décrit dans la section « Instructions de montage » du présent manuel. Lors de l'installation et de l'utilisation d'un équipement électrique, des précautions de sécurité de base doivent toujours être prises pour éviter tout risque d'incendie, de décharge électrique ou de blessure : 1. Si le cordon d'alimentation est endommagé, il doit être remplacé. 2. N'ouvrez aucun composant électrique ( boîtier de commande, boîtier du moteur, combiné ). 3. Ne jamais laisser tomber ou insérer un objet dans une ouverture. 4. V eillez à utiliser les bons outils et les bonnes pièces de montage lors de l'assemblage du système. -
Page 26: Pièces
10. Tout entretien doit être effectué par un représentant de service autorisé. Contactez service@ergocentric.com ou 1 866 438-3746 pour plus d'informations. 11. Assurez-vous qu'aucune personne ni aucun objet ne risque de heurter la table lors du réglage vers le haut ou vers le bas. 12. Si le boîtier de commande ou les pieds produisent des odeurs ou font des bruits inhabituels, débranchez immédiatement la table de l'alimentation électrique. -
Page 27: Instructions De Montage
Instructions de montage Préparation de la table Étape 1 : posez un tapis ou un drap de protection sur le sol ou la surface de travail pour protéger la surface de la table. Étape 2 : posez soigneusement le plateau de la table sur la surface de travail, le stratifié décoratif vers le bas et la surface marron vers le haut. Assemblage de votre table Étape 1 : placez le boîtier du pied de table ( I ) sur une surface plane et insérez le pied ( K ) dans le boîtier du pied de table. Fixez le boîtier au pied de table à l'aide de 4 boulons ( B ), en commençant par les deux trous situés à l'arrière du support. Répétez l'opération pour la deuxième colonne. - Page 28 Étape 2B : Surfaces de travail rectangulaires • Positionnez les boîtiers des pieds de la table aux deux extrémités de la surface de travail, centrés en avant et en arrière, et alignez-les avec les bords de la surface de travail, à 0,5 po - 1 po du bord. • Fixez les pieds de table en place à l'aide de vis ( C ) – 8 par pied. Étape 3 : alignez le combiné ( H ) le long du bord avant de la table, à une distance de 1 à 3 pouces du coin souhaité, et fixez le combiné à la table avec deux vis ( D ). upCentric – UPMOD-2L Owner's Manual | Guide de l’utilisateur ®...
- Page 29 Étape 4 : Afixez le boîtier de contrôle ( F ) à la table en utilisant 2 vis ( C ). L'emplacement idéal pour le boîtier de contrôle est centré à gauche et à droite et à 6 pouces du rebord arrière de la table. Conseil : v ous pouvez placer le boîtier de contrôle n'importe où sur la table. L'endroit choisi pour placer le boîtier de commande peut dépendre de l'endroit où vous voulez que le câble CA ( G ) soit suspendu au plateau de la table. Il peut aussi dépendre du fait qu’il y a d'autres éléments fixés au plateau de la table qui peuvent interférer avec le boîtier de commande.
- Page 30 Étape 7 : fixez les patins ( J ) aux pieds ( K ) à l'aide de boulons ( A ). Étape 8 : préparez la table pour son utilisation : • Retournez la table en position verticale et branchez le câble d'alimentation dans une prise murale. • Assurez-vous que les pieds sont correctement synchronisés en effectuant une resynchronisation - voir les instructions à la page 30. • Si nécessaire, réglez les patins de manière à ce que la table soit à niveau et solide. upCentric – UPMOD-2L Owner's Manual | Guide de l’utilisateur ®...
-
Page 31: Pour Commencer
Pour commencer Lors du premier assemblage de la table, les pieds doivent être synchronisés avant l'utilisation. Comment synchroniser Appuyez sur les boutons haut-bas du combiné et maintenez-les enfoncés en même temps pendant de 3 à 5 secondes. Les deux pieds commenceront à s'abaisser. Continuez à maintenir les boutons enfoncés jusqu'à ce que les deux pieds atteignent la position la plus basse. Une fois la synchronisation terminée, les pieds s'arrêtent de bouger et le combiné émet un bip sonore. Les boutons peuvent alors être relâchés. L'écran affichera la hauteur de départ. Comment définir une position mémorisée Utilisez les boutons pour ajuster la table à la hauteur souhaitée. Maintenez le bouton et le bouton de mémoire désiré ( ❶, ❷, ❸ ou ❹ ) ensemble jusqu'à ce qu'il émette un bip et que P1, P2, P3 ou P4 s'affiche sur l'écran. -
Page 32: Comment Désactiver Une Limite De Hauteur Maximale
Comment désactiver une limite de hauteur maximale Placez la table à la hauteur maximale. Appuyez sur le bouton et maintenez-le enfoncé tout en appuyant simultanément sur le bouton 4 fois. Un signal sonore vous indiquera que le processus est terminé. Note : vous devez appuyer simultanément sur lors de la pression initiale et vous devez continuer à maintenir le bouton enfoncé pendant tout ce temps, sinon ce réglage ne fonctionnera pas. Comment fixer une limite de hauteur minimale Placez la table jusqu'à la hauteur minimale souhaitée. -
Page 33: Dépannage
Passage des unités impériales aux unités métriques Appuyez sur les boutons de mémoire ❶ ❷ et ❹ pendant 5 secondes. L'écran du combiné affichera “C-I”. c - i Pour le système métrique : appuyez sur ❷, l'écran du combiné affichera “C” en centimètres. Pour les mesures impériales : appuyez sur ❸, l'écran du combiné affichera “I” pour les pouces. Note : les unités impériales ( pouces ) sont les unités utilisées par défaut. Configuration du branchement en parallèle Un câble diviseur en Y est nécessaire pour connecter en parallèle deux cadres 2L afin de les ajuster en un seul. -
Page 34: Synchroniser Les Pieds De La Table
Synchroniser les pieds de la table Avant de procéder à un dépannage, effectuez une resynchronisation. À l'occasion, la table peut nécessiter une resynchronisation pour diverses raisons. Ceci est normal. • Assurez-vous qu'il n'y a pas d'obstacle au déplacement vertical de la table. • Appuyez et maintenez en même temps. • Continuez à maintenir la touche enfoncée pendant que le bureau s'abaisse jusqu'à ce qu'il atteigne le point le plus bas. • Relâchez les boutons dès que le système émet un bip. • S'il ne fait pas de bip, ou si le bureau n'est pas à niveau, répétez l'opération de resynchronisation. -
Page 35: Problème : Pas De Mouvement Du Tout
Problème : cadre reçu sans boîtier de commande • Un cadre principal à 3 pieds ( case 1 ) a été envoyé par erreur au lieu d'un cadre à 2 pieds. • Contactez ergoCentric pour recevoir la bonne boîte de cadre. Problème : les câbles du combiné sont trop courts • Demandez des rallonges à ergoCentric. Problème : le boîtier du moteur ( à... -
Page 36: Problème : Le Boîtier De Commande Est Fissuré Ou Endommagé
être remplacé. • Si le produit a été ouvert et que le boîtier du moteur est ouvert, ignorez l’autocollant qui indique que la garantie est nulle. Problème : le boîtier de commande est fissuré ou endommagé • Notez les dommages et demandez un nouveau boîtier de contrôle à ergoCentric. Problème : des fils sont endommagés • Notez les dommages et demandez à ergoCentric un nouveau câble CA, un nouveau combiné ou un nouveau pied, selon le cas. Problème : le combiné et le boîtier de commande ne fonctionnent pas • Débranchez tous les fils du boîtier de contrôle pendant 10 secondes,... -
Page 37: Problème : Le Cadre Présente Une Fuite De Lubrifiant Au Bas D'un Pied
Problème : le cadre présente une fuite de lubrifiant au bas d'un pied • Le cadre a peut-être été trop lubrifié et le lubrifiant excédentaire fuit. • Cette situation ne causera aucun problème mécanique au cadre et celui-ci continuera à fonctionner correctement. • Essuyez tout excès de lubrifiant et le cadre ne devrait plus présenter de fuite. Problème : la partie centrale du pied ne s'ajuste pas avec l’ensemble du pied •... -
Page 38: Réclamations Au Titre De La Garantie
Seating Systems garantit par la présente toutes ses tables et tous ses accessoires contre les défauts et les défaillances fonctionnelles des matériaux. Ces garanties ne s'appliquent pas aux produits qui doivent être remplacés en raison d'une usure normale, d'une négligence, d'un abus ou d'un accident, de dommages dus au transport ou d'une utilisation du produit autre que celle conforme aux instructions et avertissements écrits. ergoCentric ne garantit pas que ses produits conviennent à un usage particulier autre et n'offre aucune autre garantie, expresse ou implicite, autre que celles énoncées dans les présentes. -
Page 39: Pour Une Aide Technique
Pour une aide technique Prière de contacter ergoCentric : • Téléphone : 1 866 GET ERGO (438-3746) • Courriel : service@ergocentric.com upCentric – UPMOD-2L Owner's Manual | Guide de l’utilisateur ®... - Page 40 ® ph: | Tél. : 1 866 GET ERGO (438-3746) | 905 696-6800 fx: | Téléc. : 1 800 848-5190 | 905 696-0899 service@ergocentric.com ergocentric.com ergoCentric and upCentric are registered trademarks of ergoCentric Inc. ® ® TiMOTION is a registered trademark of TiMOTION Technology Co. Ltd 01/28/21 v12 ®...