Sony BDV-L600 Mode D'emploi
Blu-ray disc/dvd
Table des Matières
Les langues disponibles
Les langues disponibles
Liens rapides
The software of this system may be updated in the future. To find out details on any
available updates, please visit the following URL.
http://www.sony.com/blurayhtsupport/
Il est possible que le logiciel de ce système soit mis à jour à l'avenir. Pour obtenir des
informations sur les mises à jour disponibles, veuillez vous rendre sur l'URL suivante :
http://www.sony.com/blurayhtsupport/
©2011 Sony Corporation
Printed in Malaysia
Blu-ray Disc/DVD
Home Theatre
System
(1)
BDV-L600
4-279-065-13(1)
Operating Instructions US
Mode d'emploi
FR
Chapitres
Table des Matières
Dépannage

Manuels Connexes pour Sony BDV-L600


Sommaire des Matières pour Sony BDV-L600
-
Page 80: A Propos Du Visionnage D'images Vidéo 3D
(HF) IC. lorsqu’elles regardent des images Cet appareil doit être installé et vidéo 3D. Sony conseille à tous les utilisé en maintenant une distance spectateurs de marquer des pauses minimale de 20 cm entre le régulières lorsqu’ils regardent des... -
Page 81: Pour L'émetteurrécepteur Sans Fil (Ezw-Rt50)
003 du Canada. Surround System. • , « XMB » et « xross media * Fabriqué sous licence de bar » sont des marques de Sony Dolby Laboratories. Son utilisation est soumise aux Corporation et de Sony Computer Dolby et le symbole deux préalables suivants :... - Page 82 PlayReady et/ou des contenus « PhotoTV HD » sont des d’emploi décrivent les protégés par WMDRM. Si marques de Sony Corporation. l’appareil échoue dans commandes de la • Technologie de codage audio et l’application correcte des télécommande.
- Page 83 Table des matières A propos de ce mode d’emploi ....4 Economie d’énergie en mode de Déballage ..........6 veille ..........53 Index des composants et des Navigation au sein des sites Web ..53 commandes ........8 Autres paramètres du système sans fil ............
-
Page 84: Déballage
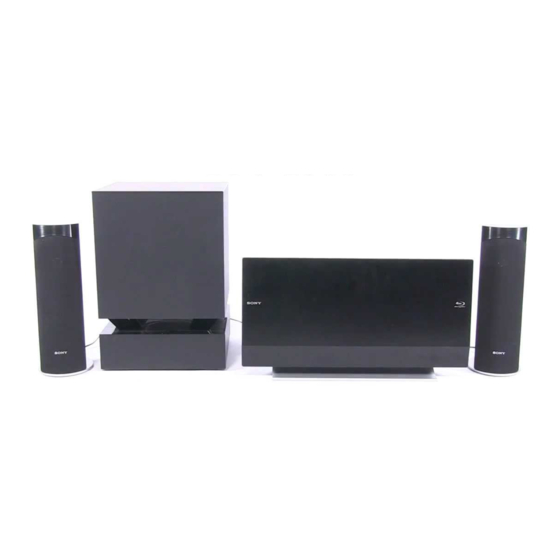
Déballage • Unité principale (1) • Socle pour iPod/iPhone • Support de fixation mural A (TDM-iP30) (1) • Cordon vidéo du Socle pour • Support de fixation mural B (1) iPod/iPhone (1) • Enceintes avant (2) • Câble USB (1) •... -
Page 85: Préparation De La Télécommande
Préparation de la télécommande Insérez deux piles R6 (AA) (fournies) en faisant correspondre les pôles 3 et # des piles avec les signes représentés à l’intérieur du compartiment. -
Page 86: Index Des Composants Et Des Commandes
Index des composants et des commandes Pour plus de détails, reportez-vous aux pages indiquées entre parenthèses. Unité principale VOLUME FUNCTION A Ouvertures de ventilation Z (éjecter) Ejecter le disque. B Fente du disque (page 34) D Capteur de télécommande C Touches à effleurement/témoins E Affichage du panneau frontal N (lire) F DEL d’éclairage (page 66) - Page 87 Panneau arrière Vue latérale (sans le cache du panneau) A Port H Port (USB) (gauche) (page 35) (USB) (arrière) (page 35) Pour le raccordement d’un périphérique Pour le raccordement d’un périphérique USB. USB. I Prise TV DIGITAL IN (OPTICAL) B "/1 (activité/veille) (page 18) Mettre l’unité...
-
Page 88: Affichage Du Panneau Frontal
Affichage du panneau frontal A propos des indications de l’affichage du panneau frontal A Affiche l’état de lecture du système. F S’allume lorsque le son est coupé. B S’allume lorsque la lecture répétée est G Affiche l’état du système (fréquence activée. -
Page 89: Caisson De Graves
Caisson de graves Panneau frontal Panneau arrière A Témoin LINK/STANDBY Témoin Etat Vous pouvez contrôler l’état de la Clignote en La protection du caisson de transmission sans fil entre l’unité principale rouge. graves est active. et le caisson de graves. B Prises SPEAKERS Témoin Etat... -
Page 90: Télécommande
A Z (éjecter) Télécommande Ejecter le disque. SPEAKERS TVyAUDIO Seules les touches liées à l’utilisation du Spécifier si le son du téléviseur est système sont décrites ci-dessous. Pour plus reproduit par les enceintes du système ou d’informations sur les touches liées à par le(s) haut-parleur(s) du téléviseur. - Page 91 E FUNCTION (pages 31, 46) Touches d’accès direct aux services en ligne Sélectionner la source de lecture. NETFLIX HOME (pages 30, 46, 49, 53, 55, 56, 61) Accède aux services en ligne « NETFLIX ». Accéder au menu d’accueil du système ou QRIOCITY le quitter.
-
Page 92: Préparation
Préparation Etape 1 : Installation du système Vous pouvez installer l’unité principale dans trois positions différentes : en position verticale, en position horizontale ou au mur. Pour plus de détails, reportez-vous à la section « Sélection de la position d’installation de l’unité principale » (page 25). Vous pouvez également fixer les enceintes avant au mur. -
Page 93: Remarque Relative À La Manipulation Du Caisson De Graves
• Laissez au moins 0,6 m entre les enceintes avant. • Placez les enceintes avant en avant par rapport au téléviseur. Vérifiez qu’aucun obstacle ne se trouve devant les enceintes. • Les deux enceintes avant doivent être dirigées vers l’avant. N’installez pas les enceintes de biais. Remarque relative à... -
Page 94: Etape 2 : Raccordement Du Système
Etape 2 : Raccordement du système Pour le raccordement du système, lisez les informations fournies aux pages suivantes. Ne raccordez pas les cordons d’alimentation de l’unité principale et du caisson de graves à une prise murale avant d’avoir effectué tous les autres raccordements. •... -
Page 95: Retrait Du Cache Du Panneau De L'unité Principale
Retrait du cache du panneau de l’unité principale Avant de raccorder les câbles, retirez le cache du panneau de l’unité principale. Appuyez délicatement sur le cache du panneau au niveau (A), puis faites-le glisser latéralement pour l’extraire. -
Page 96: Raccordement Du Téléviseur
Raccordement du téléviseur Raccordez le système à votre téléviseur pour afficher l’image du système sur le téléviseur et écouter le son du téléviseur via les haut-parleurs du système. Selon les prises et fonctions disponibles sur votre téléviseur, sélectionnez la méthode de connexion. •... - Page 97 A Raccordement à l’aide d’un câble HDMI Si votre téléviseur est doté d’une prise HDMI, raccordez l’appareil au téléviseur à l’aide d’un câble HDMI haut débit. Cela permet d’obtenir une qualité d’image supérieure à celle des autres types de raccordement. Lors du raccordement à...
-
Page 98: Raccordement Des Autres Composants Dotés D'une Prise Hdmi (Out)
Raccordement des autres composants dotés d’une prise HDMI (OUT) Vous pouvez raccorder un composant doté d’une prise HDMI (OUT), tel qu’un décodeur/récepteur ® satellite numérique, une PLAYSTATION 3, etc. à l’aide d’un câble HDMI haut débit. Un raccordement par câble HDMI haut débit peut envoyer à la fois des signaux audio et vidéo. En raccordant le système au composant à... -
Page 99: Raccordement De L'antenne
Raccordement de l’antenne Panneau arrière de l’unité principale Fil d’antenne FM (fourni) • Veillez à déplier complètement le fil d’antenne FM. • Après avoir raccordé le fil d’antenne FM, maintenez-le aussi horizontal que possible. • Si la réception FM laisse à désirer, utilisez un câble coaxial de 75 ohms (non fourni) pour raccorder l’unité principale à... -
Page 100: Connexion Au Réseau
USB réseau local sans fil à un autre endroit ou rapprochez l’adaptateur USB réseau local sans fil du routeur LAN sans fil. • Vous pouvez également obtenir les paramètres réseau à partir de la page de support Sony suivante : Anglais : http://www.sony.ca/support... -
Page 101: Insertion Des Émetteurs-Récepteurs Sans Fil
Insertion des émetteurs-récepteurs sans fil L’unité principale transmet le son au caisson de graves qui est raccordé aux enceintes avant. Pour activer la transmission sans fil, exécutez les étapes suivantes. Insérez un émetteur-récepteur sans fil dans l’unité principale en faisant correspondre les repères du panneau arrière. -
Page 102: Raccordement Du Cordon D'alimentation À L'unité Principale
Raccordement du cordon d’alimentation à l’unité principale Ne branchez pas le cordon d’alimentation de l’unité principale sur une prise murale avant d’avoir effectué tous les autres raccordements. Raccordez le cordon d’alimentation à l’adaptateur secteur. Adaptateur secteur (fourni) Cordon d’alimentation (fourni) Branchez le connecteur de l’adaptateur secteur sur le connecteur DC IN 14V situé... -
Page 103: Sélection De La Position D'installation De L'unité Principale
Sélection de la position d’installation de l’unité principale Vous pouvez installer l’unité principale dans trois positions différentes : en position verticale, en position horizontale ou au mur. • Si les signaux de la télécommande ne sont pas correctement reçus, activez le capteur de télécommande à utiliser sur l’unité... -
Page 104: Fixation Des Caches
Fixation des caches Une fois tous les raccordements terminés, procédez comme suit pour organiser les câbles et fixer le cache du panneau ainsi que le cache du support. Posez l’unité principale sur sa face. • Veillez à placer l’unité principale sur un linge doux et épais pour éviter de l’endommager. Rassemblez les câbles (à... - Page 105 Fixez le cache du panneau au dos de l’unité principale. Placez le bord gauche de la partie inférieure du cache du panneau sur (C), alignez la partie saillante inférieure du cache du panneau sur (D), puis faites-la glisser vers l’intérieur jusqu’au déclic.
-
Page 106: Pour Retirer Le Cache Du Support
Pour retirer le cache du support Posez l’unité principale sur sa face. Abaissez les loquets du support et faites glisser le cache du support dans le sens de la flèche, de la manière illustrée ci-dessous. Pour ouvrir la garniture du cache du panneau Pour organiser les câbles sur le côté... -
Page 107: Mise Sous Tension Du Système
Mise sous tension du système Lorsque vous avez effectué tous les raccordements décrits à la section « Etape 2 : Raccordement du système » (page 16), mettez le système sous tension. Appuyez sur "/1 pour mettre l’unité principale sous tension. "/1 Raccordez le cordon d’alimentation du caisson de graves à... -
Page 108: Etape 3 : Exécution Du Réglage Facile
• Raccordement à l’aide d’un cordon Etape 3 : Exécution du vidéo : Sélectionnez [16:9] ou [4:3] afin que l’image s’affiche correctement. Réglage facile Pour réafficher l’écran d’installation facile Pour réaliser les réglages de base en vue d’utiliser le système, procédez de la manière Appuyez sur HOME. -
Page 109: Etape 4 : Sélection De La Source
Etape 4 : Sélection de la source Vous pouvez sélectionner la source de lecture. FUNCTION Appuyez plusieurs fois sur FUNCTION jusqu’à ce que la fonction souhaitée apparaisse sur l’affichage du panneau frontal. A chaque pression sur FUNCTION, la fonction change comme suit. «... -
Page 110: Etape 5 : Reproduction Du Son Surround
Etape 5 : Reproduction du son surround Lorsque vous avez terminé la procédure ci-dessus et lancé la lecture, vous pouvez aisément profiter du son surround. Il est également possible de sélectionner les réglages surround préprogrammés du système adaptés à différents types de sources audio. Ils vous permettent de découvrir chez vous l’acoustique exaltante et puissante des salles de cinéma. -
Page 111: A Propos Du Son Reproduit Par Les Enceintes
Appuyez sur Le réglage est terminé. Appuyez sur OPTIONS. Le menu d’options de l’affichage du panneau frontal se désactive. • Lorsque le menu d’accueil est affiché sur l’écran du téléviseur, il est possible de modifier ce réglage en sélectionnant le réglage surround via [Réglage Surround] de [Réglages Audio] dans [Config.] (page 64). A propos du son reproduit par les enceintes Le paramètre par défaut est [Auto] («... -
Page 112: Lecture
Utilisation de BONUSVIEW/ Lecture BD-LIVE Lecture d’un disque Certains BD-ROM dotés du « Logo BD- LIVE* » proposent un contenu supplémentaire Pour connaître les disques compatibles, et d’autres données pouvant être téléchargées reportez-vous à la section « Disques pour plus de divertissement. compatibles »... -
Page 113: Utilisation De Blu-Ray 3D
D Fonctions disponibles ( angle, son, Utilisation de Blu-ray 3D sous-titres) E Informations de lecture Vous pouvez regarder des disques Blu-ray 3D Affiche le mode de lecture, la barre d’état de portant le logo 3D*. lecture, le type de disque, le codec vidéo, le débit binaire, le type de répétition, la durée écoulée et la durée de lecture totale Préparez la lecture de disques Blu-ray... -
Page 114: Utilisation D'un Ipod/Iphone
Appuyez sur X/x pour sélectionner Pour utiliser un iPod/iPhone via le [Périphér. USB (arrière)] ou système [Périphér. USB (gauche)], puis Raccordez le Socle pour iPod/iPhone appuyez sur (fourni) au port (USB) gauche ou arrière de l’appareil, puis posez l’iPod/ • Ne retirez pas le périphérique USB pendant le iPhone sur le Socle pour iPod/iPhone. -
Page 115: Pour Utiliser L'ipod/Iphone À L'aide De La Télécommande
Vous pouvez utiliser l’iPod/iPhone à l’aide des • Sony ne peut être tenu responsable de la perte ou de touches de la télécommande. Le tableau ci- l’altération de données enregistrées sur l’iPod/iPhone dessous montre un exemple de touches à... -
Page 116: Lecture Via Un Réseau
• La lecture de certains contenus Internet exige un enregistrement à l’aide d’un ordinateur. Pour plus de détails, visitez le site Web suivant : Lecture de fichiers sur un http://www.sony.com/blurayhtsupport/ réseau domestique (DLNA) Préparez la fonction Vidéo Internet Vous pouvez lire les fichiers vidéo/audio/photo BRAVIA. -
Page 117: Pour Lire Des Fichiers Distants En Utilisant Le Système (Renderer) Via Un Contrôleur Dlna
Pour lire des fichiers distants en • Contrôleur : commande le Renderer utilisant le système (Renderer) Serveur via un contrôleur DLNA Vous pouvez commander le système à l’aide d’un contrôleur certifié DLNA, tel qu’un iPhone, lors de la lecture de fichiers stockés sur un serveur DLNA. -
Page 118: Lecture De La Même Musique Dans Différentes Pièces (Party Streaming)
Vous pouvez lire la même musique puis sélectionnez [Quitter Party]. simultanément sur l’ensemble des composants Pour mettre fin à la PARTY, appuyez sur Sony compatibles avec la fonction PARTY OPTIONS, puis sélectionnez [Fermer Party]. STREAMING et connectés à votre réseau domestique. -
Page 119: Pour Rechercher D'autres Informations Associées
A Informations sur le contenu Eléments Détails Dresse la liste des informations associées, [Quitter Party] Quitter la fête à laquelle le telles que le titre, la distribution, la plage ou système participe. La l’artiste. fonction PARTY B [Historique de lecture] STREAMING reste activée avec les autres appareils Dresse la liste des titres de BD-ROM/DVD-... -
Page 120: Réglage Du Décalage Entre L'image Et Le Son
Eléments Détails Eléments Détails [Menu principal] Afficher le menu principal du [Musi. fond diapo.] • [Non] : pour désactiver la BD ou DVD. fonction. • [Ma Musique de USB] : [Menu/Menu Afficher le menu contextuel pour définir les fichiers de contextuel] du BD-ROM ou le menu du musique enregistrés dans... - Page 121 Lors de la lecture à l’aide de la fonction « HDMI1 », « HDMI2 » ou « TV » Appuyez sur OPTIONS. Le menu d’options apparaît sur l’affichage du panneau frontal. Appuyez plusieurs fois sur X/x jusqu’à ce que « A/V SYNC » apparaisse sur l’affichage du panneau frontal, puis appuyez sur ou sur c.
-
Page 122: Réglage Du Son
Sélection du format Réglage du son audio, des plages Sélection de l’effet multilingues ou du canal adapté à la source Lorsque le système lit un BD/DVD VIDEO enregistré selon plusieurs formats audio (PCM, Vous pouvez sélectionner le mode son qui Dolby Digital, MPEG audio ou DTS) ou avec convient aux films ou à... -
Page 123: Reproduction D'un Son Diffusé En Multiplex
• [ Princip./Sec.] • [ Stéréo (Son1)] et [ Stéréo (Son2)] n’apparaissent pas lorsqu’un seul flux audio est enregistré sur le disque. x CD • [ Stéréo] : son stéréo standard. • [ 1/G] : son du canal gauche (mono). •... -
Page 124: Tuner
Pour arrêter manuellement la syntonisation automatique, appuyez sur TUNING +/– ou Tuner sur x. Syntonisation manuelle Ecoute de la radio Appuyez plusieurs fois sur TUNING +/–. Le son de la radio peut être reproduit par les Réglez le volume en appuyant sur enceintes du système. -
Page 125: Pour Modifier Le Numéro Présélectionné
Appuyez sur OPTIONS. Le menu d’options apparaît sur l’écran du téléviseur. Appuyez sur X/x pour sélectionner [Mémoire présélect.], puis appuyez sur Appuyez sur X/x pour sélectionner le numéro de présélection souhaité, puis appuyez sur Répétez les étapes 2 à 5 pour enregistrer d’autres stations. -
Page 126: Fonctions Complémentaires
« BRAVIA » Commande du son du système Sync. En raccordant les composants Sony compatibles Permet d’écouter aisément le son provenant du avec la fonction Commande pour HDMI à l’aide téléviseur ou d’autres composants. -
Page 127: Commande À Distance Facile
Commande à distance facile Réglage des enceintes Vous pouvez contrôler les fonctions de base du système à l’aide de la télécommande du téléviseur lorsque la sortie vidéo du système est [Réglages Enceintes] affichée sur l’écran du téléviseur. Pour obtenir un son surround optimal, spécifiez la connexion des enceintes et leur distance par Suivi langue rapport à... -
Page 128: Utilisation De La Minuterie D'endormissement
[Avant G/D] 10 pi./3,0 m : spécifiez la distance Appuyez sur RETURN. des enceintes avant. Le système revient à l’écran précédent. [Subwoofer] 10 pi./3,0 m : spécifiez la distance Appuyez sur X/x pour sélectionner du caisson de graves. [Tonalité d’essai], puis appuyez sur •... -
Page 129: Désactivation Des Touches De L'unité Principale
Vous pouvez commander des composants La fonction de verrouillage enfant est activée et n’appartenant pas à Sony en changeant le code les touches de l’unité principale sont préréglé de la télécommande. Pour plus verrouillées. (Vous pouvez utiliser le système à... -
Page 130: Modification Du Code Préréglé De La Télécommande (Mode Préréglage)
• Si vous appuyez sur une touche autre que celles Touche Mode de la télécommande mentionnées ci-dessus alors que la télécommande est en mode TV ou STB, la touche de mode d’utilisation AV "/1 TV ou STB ne s’allume pas. Touches •... -
Page 131: Suppression Du Code Préréglé De La Mémoire De La Télécommande
10 secondes, la télécommande quitte ce mode. Vous pouvez vous connecter à Internet et visiter des sites Web, tels que la page d’accueil Sony, à l’aide du système. Suppression du code préréglé Préparez la navigation Internet. -
Page 132: Affichage Du Navigateur Internet
G Champ de saisie de texte Pour revenir à la page Appuyez sur et sélectionnez [Saisie] dans précédente le menu d’options pour afficher le clavier à Sélectionnez [Page précédente] dans le menu l’écran. d’options. Si la page précédente n’apparaît pas, H Barre de défilement même si vous sélectionnez [Page précédente], Appuyez sur C/X/x/c pour déplacer... -
Page 133: Autres Paramètres Du Système Sans Fil
Appuyez sur X/x pour sélectionner Eléments Détails [Réglages Système], puis appuyez sur [Page précédente] Permet d’accéder à la page précédemment affichée. Appuyez sur X/x pour sélectionner [Page suivante] Permet d’accéder à la page [Connexion audio sans fil], puis suivante affichée. appuyez sur [Annuler chargement] Permet d’arrêter le chargement d’une page. -
Page 134: Si La Transmission Sans Fil Est Instable
Pour le caisson de graves Maintenez enfoncée la touche SECURE LINK • La transmission peut être améliorée en modifiant le située à l’arrière du caisson de graves jusqu’à ce canal de transmission (fréquence) du (des) autre(s) que le témoin LINK/STANDBY vire au vert ou système(s) sans fil. -
Page 135: Lors De La Connexion Au Lan À L'aide D'un Câble Lan
Appuyez sur X/x pour sélectionner Internet ou qui accompagne le routeur. [Configuration à fil] dans l’écran • Pour plus d’informations, accédez à l’URL suivante. [Paramètres Réseau], puis appuyez sur Anglais : http://www.sony.ca/support Appuyez sur X/x pour sélectionner Français : http://fr.sony.ca/support [Personnalisé], puis appuyez sur... -
Page 136: Si Votre Routeur Sans Fil Est Compatible Avec La Fonction Wps
Appuyez sur X/x pour sélectionner le Vérifiez que le message [Les Réglages type de paramètre réseau, puis Internet sont maintenant terminés.] appuyez sur s’affiche, puis appuyez sur • [Auto] : le système définit La configuration est terminée. Si ce automatiquement l’adresse IP et l’écran message ne s’affiche pas, conformez-vous [Réglages DNS] s’affiche. -
Page 137: Si Votre Routeur Sans Fil N'est Pas Compatible Avec La Fonction Wps
Si votre routeur sans fil n’est pas • [WPA/WPA2-PSK] : le LAN sans fil est compatible avec la fonction WPS protégé par une clé WPA-PSK ou WPA2- PSK. Appuyez sur X/x pour sélectionner • [WPA2-PSK] : le LAN sans fil est [Configuration USB sans fil] dans protégé... - Page 138 WPA-PSK (TKIP), WPA2-PSK (TKIP) Le protocole TKIP est une technologie de sécurité développée pour remédier aux défauts de la technologie WEP. Le protocole TKIP assure un niveau de sécurité supérieur au protocole WEP. WPA-PSK (AES), WPA2-PSK (AES) Le protocole AES est une technologie de sécurité...
-
Page 139: Sélections Et Réglages
Vous pouvez configurer les options suivantes. Sélections et réglages Icône Explication Utilisation de l’écran [Guide de Réglage télécommande] (page 62) d’installation Définir les réglages de la télécommande pour l’utilisation du téléviseur ou d’autres Vous pouvez effectuer divers réglages de composants. paramètres comme l’image et le son. -
Page 140: [Guide De Réglage Télécommande]
Vous pouvez modifier le code préréglé de la tous les contenus en 2D. télécommande afin d’utiliser des composants n’appartenant pas à Sony. Pour plus de détails, • La vidéo 3D provenant de la prise HDMI IN 1 ou de reportez-vous à la section « Modification du HDMI IN 2 est reproduite indépendamment de ce... - Page 141 x [Format image DVD] x [Sortie BD/DVD-ROM 1080/24p] [Letter Box] : affiche une image large avec des [Auto] : reproduit les signaux vidéo 1920 × bandes noires en haut et en bas. 1080p/24 Hz uniquement lors du raccordement d’un téléviseur compatible 1080/24p à l’aide de la prise HDMI OUT.
-
Page 142: [Réglages Audio]
[Réglages Audio] x [Sortie audio] Vous pouvez sélectionner la méthode de sortie à utiliser pour la reproduction du signal audio. x [Réglage MIX Audio BD] [Enceinte] : reproduit le son provenant des [Oui] : reproduit le son obtenu en mixant le son enceintes du système uniquement. -
Page 143: [Réglages Visualisation Bd/Dvd]
[Réglages [Réglages Contrôle Visualisation BD/DVD] parental] Pour définir les paramètres détaillés pour la x [Mot de passe] lecture des BD/DVD. Pour définir ou modifier le mot de passe de la fonction de contrôle parental. Un mot de passe x [Menu BD/DVD] vous permet de définir une restriction pour la Vous pouvez sélectionner la langue de menu par lecture des BD-ROM, des DVD VIDEO ou des... -
Page 144: [Réglages Musique]
[Simple/Non] : les touches à effleurement et x [Vidéo Internet sans restriction] l’affichage du panneau frontal s’éteignent [Autoriser] : autorise la lecture de vidéos lorsque le système n’est pas en cours Internet sans restriction. d’utilisation. [Bloquer] : bloque la lecture des vidéos Internet sans restriction. -
Page 145: [Réglages Réseau]
(page 62). [Sélection Intélligente] : permet à un contrôleur [Non] : désactivé. DLNA Sony de détecter le système en tant que composant cible en vue d’une utilisation par x [Réglages Gracenote] rayon infrarouge. Vous pouvez activer ou [Auto] : pour télécharger automatiquement les... -
Page 146: [Régl. Facile]
x [Dispositifs Media Remote enregistrés] Affiche la liste de vos dispositifs « Media remote » enregistrés. [Régl. facile] Réexécuter la procédure Réglage facile afin de définir les paramètres de base. Conformez-vous aux instructions affichées. [Réinitialisation] x [Retour aux réglages par défaut d’usine] Vous pouvez rétablir la valeur par défaut des réglages du système en sélectionnant le groupe de réglages. -
Page 147: Informations Complémentaires
à consulter votre d’air chaud, ni à des endroits exposés à la lumière revendeur Sony le plus proche. directe du soleil, à une poussière excessive, à des vibrations mécaniques ou à des chocs. - Page 148 Disques de nettoyage, Transport du système nettoyants pour disque/lentille • Avant de déplacer le système, assurez-vous qu’il ne renferme aucun disque et débranchez les cordons • N’utilisez pas des disques de nettoyage ou des d’alimentation de la prise murale. nettoyants pour disques/lentilles (lingettes humides ou vaporisateurs).
-
Page 149: Remarques Sur Les Disques
Remarques sur les disques Manipulation des disques • Pour que les disques restent propres, tenez-les par la partie périphérique. Ne touchez jamais la surface. • Ne collez ni papier, ni ruban adhésif sur le disque. • N’exposez pas les disques au rayonnement direct du soleil ou à... -
Page 150: Dépannage
Remarquez que si le technicien remplace des pièces au cours d’une réparation, elles ne vous sont pas nécessairement rendues. En cas de problème avec la fonction audio sans fil, demandez à un revendeur Sony de vérifier le bon fonctionnement de l’intégralité du système (unité principale et caisson de graves). - Page 151 • Contactez votre revendeur Sony ou un centre de service après-vente Sony agréé l’affichage du panneau frontal. et communiquez le code d’erreur. Seul le message apparaît sur • Contactez votre revendeur Sony le plus proche ou un centre de service après- l’écran du téléviseur. vente Sony agréé. Image Symptôme Problèmes et solutions...
- Page 152 éventuels, mettez le caisson de graves sous tension. Si vous ne trouvez pas la cause du problème alors que vous avez vérifié tous les points ci-dessus, consultez le revendeur Sony le plus proche. – Clignote en vert ou en orange lentement ou vire au rouge.
- Page 153 Symptôme Problèmes et solutions Le son est parasité par un • Eloignez votre téléviseur des composants audio. bourdonnement ou des • Nettoyez le disque. interférences sont émises. Le son n’a plus l’effet stéréo • Sélectionnez le son stéréo en appuyant sur AUDIO (page 44). lorsque vous écoutez un CD.
-
Page 154: Périphérique Usb
• Il est possible d’améliorer la qualité de l’image/du son en modifiant la vitesse particulier lors d’actions rapides de connexion. Sony recommande une vitesse de connexion de 2,5 Mbps ou de scènes sombres. minimum pour les vidéos de définition standard et de 10 Mbps pour les vidéos haute définition. -
Page 155: Connexion Usb Lan Sans Fil
Connexion USB LAN sans fil Symptôme Problèmes et solutions Impossible de connecter votre • Les réglages sans fil du routeur peuvent être automatiquement modifiés si vous ordinateur à Internet après utilisez la fonction Wi-Fi Protected Setup avant de modifier les réglages du l’exécution de [Wi-Fi Protected routeur. -
Page 156: Disques Compatibles
Remarques sur les disques Disques compatibles Cet appareil est conçu pour la lecture de disques conformes a la norme Compact Disc (CD). Les DualDisc et certains disques audio encodés Blu-ray Disc BD-ROM avec des technologies de protection des droits BD-R/BD-RE d’auteur ne sont pas conformes a la norme DVD-ROM Compact Disc (CD). -
Page 157: Types De Fichiers Compatibles
Types de fichiers • Selon le format de fichier, le codage de fichier, les conditions d’enregistrement ou l’état du serveur compatibles DLNA, il se peut que certains fichiers soient illisibles. • Il se peut que certains fichiers modifiés à l’aide d’un Vidéo ordinateur soient illisibles. -
Page 158: Formats Audio Pris En Charge
Formats audio pris en charge Ce système prend en charge les formats audio suivants. Format LPCM 2ch LPCM 5.1ch Dolby Digital Dolby DTS-ES DTS-HD DTS-HD LPCM 7.1ch TrueHD, Discrete 6.1, High Master Fonction Dolby Digital DTS-ES Resolution Audio Plus Matrix 6.1, Audio DTS96/24 «... -
Page 159: Spécifications
Généralités (unité principale, adaptateur Spécifications secteur (AC-BD100)) Puissance de raccordement (adaptateur secteur) Entrée : 110 V - 240 V CA, Partie amplificateur 50/60 Hz PUISSANCE DE SORTIE (référence) Sortie : 14 V CC, 3,3 A Caisson de graves : 120 W (sous 4 ohms, Température de 80 Hz) fonctionnement : 40 °C... -
Page 160: Emetteur-Récepteur Sans Fil (Ezw-Rt50)
Emetteur-récepteur sans fil (EZW-RT50) Système de communication Spécification audio sans fil version 1.0 Sortie 46 mW Gamme de fréquences 5,736 GHz - 5,814 GHz Méthode de modulation DSSS Puissance de raccordement 3,3 V CC, 300 mA Dimensions (approx.) 30 mm × 9 mm × 60 mm (l/h/p) Poids (approx.) 10 g... -
Page 161: Liste Des Codes De Langue
Liste des codes de langue L’orthographe des langues est conforme à la norme ISO 639 : 1988 (E/F). Contrôle parental/Liste des codes de zones... -
Page 162: Index
Index Chiffres Réglage de sortie 3D 62 Réglage facile 30 3D 35 Eclairage/Affichage 66 Réglage MIX Audio BD 64 Economiseur d’écran 67 Réglage Surround 64 Effet sonore 64 Réglage taille d’écran TV pour A/V SYNC 42 Enregistrement dispositif 3D 62 Affichage automatique 67 Media Remote 67 Réglages Audio 64...