Table des Matières

Publicité

Les langues disponibles

Les langues disponibles

Liens rapides

Betriebsanleitung
Operating instruction
Mode d'emploi
KERN ALJ/ALS/PLJ/PLS
Version 4.0
04/2016
KERN & Sohn GmbH
Ziegelei 1
D-72336 Balingen
E-Mail: info@kern-sohn.com
ALJ/ALS/PLJ/PLS-BA-def-1640
Tel: +49-[0]7433- 9933-0
Fax: +49-[0]7433-9933-149
Internet: www.kern-sohn.com

Publicité

Table des Matières
loading

Sommaire des Matières pour KERN and SOHN ALJ

  • Page 1 KERN & Sohn GmbH Ziegelei 1 Tel: +49-[0]7433- 9933-0 D-72336 Balingen Fax: +49-[0]7433-9933-149 E-Mail: info@kern-sohn.com Internet: www.kern-sohn.com Betriebsanleitung Operating instruction Mode d’emploi KERN ALJ/ALS/PLJ/PLS Version 4.0 04/2016 ALJ/ALS/PLJ/PLS-BA-def-1640...
  • Page 2 Weitere Sprachversionen finden Sie online unter www.kern-sohn.com/manuals Další jazykové verze najdete na webu pod adresou www.kern-sohn.com/manuals Yderligere sprogversioner finder de online på www.kern-sohn.com/manuals Más versiones de idiomas se encuentran online bajowww.kern-sohn.com/manuals Rohkem keeli internetis aadressil www.kern-sohn.com/manuals Vous trouverez d’autres versions de langue online sous www.kern-sohn.com/manuals Further language versions you will find online under www.kern-sohn.com/manuals A használati utasítás egyéb nyelveken a www.kern-sohn.com/manuals címről tölthető...
  • Page 3: Table Des Matières

    Modelle mit externem Gewicht (KERN ALS/PLS) .............29 7.1.1 Justierung mit empfohlenem Justiergewicht (Werkseinstellung) ..........29 7.1.2 Justierung mit Gewichten anderer Nennwerte ................. 30 Modelle mit internem Gewicht (KERN ALJ/PLJ) ............32 7.2.1 Justierung Modelle PLJ-M ......................33 7.2.2 Internes Justiergewicht überschreiben ..................34 Eichung........................35...
  • Page 4 Datentransfer ......................70 11.5 Formate der Datenübertragung .................71 11.6 Fernsteuerbefehle .....................73 11.7 Drucker Betrieb ......................73 Fehlermeldungen ..................75 Wartung, Instandhaltung, Entsorgung ............75 13.1 Reinigen ........................75 13.2 Wartung, Instandhaltung ...................75 13.3 Entsorgung .......................75 Kleine Pannenhilfe ..................76 Konformitätserklärung ................78 ALJ/ALS/PLJ/PLS-BA-d-1640...
  • Page 5: Technische Daten

    Gehäuse (B x T x H) mm 210 x 340 x 330 Abmessungen Windschutz 160 x 140 x 205 (innen) (B x T x H) mm 190 x 195 x 225 (außen) Wägeplatte (Edelstahl) Ø 80 mm Gewicht kg (netto) 6.5 kg Schnittstelle RS 232C ALJ/ALS/PLJ/PLS-BA-d-1640...
  • Page 6 KERN ALJ 160-4AM ALJ 250-4AM ALJ 310-4AM Wägebereich (Max) 160 g 250 g 310 g Ablesbarkeit (d) 0.1 mg 0.1 mg 0.1 mg Reproduzierbarkeit 0.1 mg 0.1 mg 0.1 mg Linearität ± 0.3 mg ± 0.3 mg ± 0.3 mg...
  • Page 7 Gehäuse (B x T x H) mm 210 x 340 x 330 Abmessungen Windschutz 160 x 140 x 205 (innen) (B x T x H) mm 190 x 195 x 225 (außen) Wägeplatte (Edelstahl) Ø 80 mm Gewicht kg (netto) 5.7 kg Schnittstelle RS 232C ALJ/ALS/PLJ/PLS-BA-d-1640...
  • Page 8 Gehäuse (B x T x H) mm 210 x 340 x 160 Abmessungen Windschutz innen Ø 150, 60 hoch außen Ø 160, 70 hoch Wägeplatte (Edelstahl) Ø 11 cm Ø 11 cm Ø 11 cm Gewicht kg (netto) 4 kg 4.5 kg Schnittstelle RS 232C ALJ/ALS/PLJ/PLS-BA-d-1640...
  • Page 9 210 x 340 x 160 Windschutz mm innen Ø 150, 60 high nein außen Ø 160, 70 high Wägeplatte (Edelstahl) Ø 11 cm Ø 11 cm Ø 16 cm Ø 16 cm Gewicht kg (netto) 4.5 kg Schnittstelle RS 232C ALJ/ALS/PLJ/PLS-BA-d-1640...
  • Page 10 210 x 340 x 100 210 x 340 x 100 210 x 340 x 100 Windschutz mm innen Ø 150, 60 hoch nein nein nein außen Ø 160, 70 hoch Wägeplatte (Edelstahl) Ø 16 cm Ø 16 cm Ø 16 cm Gewicht kg (netto) 4.5 kg 5 kg 5.0 kg Schnittstelle RS 232C ALJ/ALS/PLJ/PLS-BA-d-1640...
  • Page 11 Gehäuse (B x T x H) mm 210 x 340 x 100 Windschutz mm innen Ø 150, 60 hoch außen Ø 160, 50 hoch Wägeplatte (Edelstahl) Ø 11 cm Ø 11 cm Gewicht kg (netto) 4 kg 4,5 kg Schnittstelle RS 232C ALJ/ALS/PLJ/PLS-BA-d-1640...
  • Page 12 Gehäuse (B x T x H) mm 210 x 340 x 100 Windschutz mm innen Ø 150, 60 hoch außen Ø 160, 70 hoch Wägeplatte (Edelstahl) Ø 16 cm Ø 16 cm Gewicht kg (netto) 4.0 kg 4.5 kg Schnittstelle RS 232C ALJ/ALS/PLJ/PLS-BA-d-1640...
  • Page 13 Gehäuse (B x T x H) mm 210 x 340 x 160 innen Ø 150, 60 hoch Windschutz mm außen Ø 160, 70 hoch Wägeplatte (Edelstahl) Ø 11 cm Gewicht kg (netto) 4 kg 4.5 kg Schnittstelle RS 232C ALJ/ALS/PLJ/PLS-BA-d-1640...
  • Page 14 210 x 340 x 160 210 x 340 x 160 210 x 340 x 160 Windschutz mm innen Ø 150, 60 hoch außen Ø 160, 70 hoch Wägeplatte (Edelstahl) Ø 11 cm Ø 11 cm Ø 11 cm Gewicht kg (netto) 4.5 kg 4.5 kg 4.5 kg Schnittstelle RS 232C ALJ/ALS/PLJ/PLS-BA-d-1640...
  • Page 15 210 x 340 x 100 Windschutz mm innen Ø 150, 60 hoch nein nein nein außen Ø 160, 70 hoch Wägeplatte (Edelstahl) Ø 16 cm Ø 16 cm Ø 16 cm Gewicht kg (netto) 4 kg 4 kg 4.5 kg Schnittstelle RS 232C ALJ/ALS/PLJ/PLS-BA-d-1640...
  • Page 16 Einhängeöse, serienmäßig Gehäuse (B x T x H) mm 210 x 340 x 100 210 x 340 x 100 Windschutz nein nein Wägeplatte (Edelstahl) Ø 16 cm Ø 16 cm Gewicht kg (netto) 4.5 kg 4.5 kg Schnittstelle RS 232C ALJ/ALS/PLJ/PLS-BA-d-1640...
  • Page 17 Gehäuse (B x T x H) mm 210 x 340 x 100 210 x 340 x 100 Windschutz nein nein Wägeplatte (Edelstahl) Ø 16 cm 200 x 175 mm Gewicht kg (netto) 4.75 kg 4 kg Schnittstelle RS 232C ALJ/ALS/PLJ/PLS-BA-d-1640...
  • Page 18: Erläuterung Des Grafischen Symbols

    • Nichtbeachten unserer Vorgaben in der Betriebsanleitung • Verwendung außerhalb der beschriebenen Anwendungen • Veränderung oder Öffnen des Gerätes • Mechanische Beschädigung und Beschädigung durch Medien, Flüssigkeiten, natürlichem Verschleiß und Abnützung • Nicht sachgemäße Aufstellung oder elektrische Installation • Überlastung des Messwerkes ALJ/ALS/PLJ/PLS-BA-d-1640...
  • Page 19: Prüfmittelüberwachung

    4.2 Ausbildung des Personals Das Gerät darf nur von geschulten Mitarbeitern bedient und gepflegt werden. 5 Transport und Lagerung 5.1 Kontrolle bei Übernahme Überprüfen Sie bitte die Verpackung sofort beim Eingang sowie das Gerät beim Auspacken auf eventuell sichtbare äußere Beschädigungen. ALJ/ALS/PLJ/PLS-BA-d-1640...
  • Page 20: Verpackung / Rücktransport

     Für den Rücktransport ist nur die Originalverpackung zu verwen- den.  Vor dem Versand alle angeschlossenen Kabel und losen / beweg- lichen Teile trennen.  Evtl. vorgesehene Transportsicherungen wieder anbringen.  Alle Teile z.B. Glaswindschutz, Wägeplatte, Netzteil etc. gegen Verrutschen und Beschädigung sichern. ALJ/ALS/PLJ/PLS-BA-d-1640...
  • Page 21 Beispiel Modelle ALJ/ALS: ALJ/ALS/PLJ/PLS-BA-d-1640...
  • Page 22: Auspacken, Aufstellung Und Inbetriebnahme

    Funkgeräte), bei statischen Aufladungen sowie bei instabiler Stromversorgung sind große Anzeigeabweichungen (falsche Wägeergebnisse) möglich. Der Standort muss dann gewechselt oder die Störquelle beseitigt werden. 6.2 Auspacken Die Waage vorsichtig aus der Verpackung nehmen, Plastikhülle entfernen und die Waage am vorgesehenen Arbeitsplatz aufstellen. ALJ/ALS/PLJ/PLS-BA-d-1640...
  • Page 23: Aufstellen

    6.2.1 Aufstellen Aufbau der Waage: Modelle ALS/ALJ Modelle PLS/PLJ, d = 1 mg ALJ/ALS/PLJ/PLS-BA-d-1640...
  • Page 24 Modelle PLS/PLJ, d = 100 mg Modelle PLS/PLJ, d = 10 mg Die Waage mit Fußschrauben nivellieren, bis sich die Luft- blase in der Libelle im vorgeschriebenen Kreis befindet. ALJ/ALS/PLJ/PLS-BA-d-1640...
  • Page 25: Lieferumfang/Serienmäßiges Zubehör

    Auf der linken Unterseite der Waage goldfarbene Schraube gegen silberfarbene tau- schen (siehe Aufkleber). 6.2.2 Lieferumfang/Serienmäßiges Zubehör • Waage (siehe Kap. 6.2.1) • Netzgerät • Betriebsanleitung 6.3 Geräteübersicht 6.3.1 Vorderseite der Waage Abdeckung Windschutz Libelle Windschutz LCD Display Funktionstasten Stellfüße ALJ/ALS/PLJ/PLS-BA-d-1640...
  • Page 26: Rück- Und Unterseite Der Waage

    6.3.2 Rück- und Unterseite der Waage 1. Wägeplatte 2. RS232C-Schnittstelle 3. Fussschrauben 4. Anschluss Netzadapter 5. Gehäuseschrauben (bei Modellen mit 4 Fü- ßen zunächst die hinte- ren beiden Füße her- ausschrauben) 6. Unterflurwäge- einrichtung ALJ/ALS/PLJ/PLS-BA-d-1640...
  • Page 27: Bedienungselemente

    • Justieren CAL-Taste/ • Menüpunkte anwählen - rückwärts blättern • numerische Eingabe - vorwärts blättern Pfeiltaste  • Wägedaten über Schnittstelle übermitteln PRINT-Taste • Einstellungen bestätigen / speichern • numerischer Eingabe - Ziffernanwahl Pfeiltaste  • Tarieren TARE-Taste • Nullstellen ALJ/ALS/PLJ/PLS-BA-d-1640...
  • Page 28: Stromversorgung Anschließen Und Einschalten

    Befindet sich die Waage im Akkubetrieb erscheinen folgende Symbole im Display: Akku ausreichend geladen Kapazität des Akkus bald erschöpft. Baldmöglichst Netzadapter anschließen, um den Akku zu laden. Spannung unter das vorgeschriebene Minimum abgefallen. Netzadapter anschließen, um den Akku zu laden. ALJ/ALS/PLJ/PLS-BA-d-1640...
  • Page 29: Anschluss Von Peripheriegeräten

    Messwerte zu erhalten, empfiehlt es sich zudem, die Waage auch im Wägebetrieb periodisch zu justieren.  Stabile Umgebungsbedingungen beachten. Eine Anwärmzeit (siehe Kap. 1) zur Stabilisierung ist erforderlich.  Darauf achten, dass sich keine Gegenstände auf der Wägeplatte befinden. ALJ/ALS/PLJ/PLS-BA-d-1640...
  • Page 30: Modelle Mit Externem Gewicht (Kern Als/Pls)

     Warten bis der Gewichtswert des erforderlichen Justiergewichtes blinkend ein- geblendet wird.  Während der blinkenden Anzeige erforderliches Justiergewicht vorsichtig in die Mitte der Wägeplatte stellen. Die blinkende Anzeige erlischt. Nach erfolgreicher Justierung kehrt die Waage automatisch in den Wägemodus zurück.  Justiergewicht abnehmen ALJ/ALS/PLJ/PLS-BA-d-1640...
  • Page 31: Justierung Mit Gewichten Anderer Nennwerte

    Nach erfolgreicher Justierung kehrt die Waage automatisch in den Wägemodus zurück.  Justiergewicht abnehmen Bei einem Justierfehler oder falschem Justiergewicht wird in der Anzeige eine Fehlermeldung eingeblendet. Warten bis sich die Waage wieder im Wägemodus befindet und Justiervorgang wiederholen. ALJ/ALS/PLJ/PLS-BA-d-1640...
  • Page 32 Empfohlenes Jus- Weitere messtechnisch nicht optimale Nennwerte zur Modell tiergewicht Justierung (siehe Kap. 7.1.2) (siehe Kap. 7.1.1) A-Modelle ALJ 160-4A ALJ 250-4A ALJ 310-4A ALJ 500-4A ALS 160-4A 150g 100g ALS 250-4A 200g 100g PLJ-720-3A PLJ 1200-3A PLJ 1200-3DA PLJ 2000-3A...
  • Page 33: Modelle Mit Internem Gewicht (Kern Alj/Plj)

    7.2 Modelle mit internem Gewicht (KERN ALJ/PLJ) Bei nicht geeichten Waagen stehen im Menü vier Justiermöglichkeiten zur Verfü- gung. Einstellung Im Wägemodus MENU-Taste drücken und gedrückt halten bis das im Menü akustische Signal verstummt. Der erste Menüpunkt „units“ wird ange- zeigt.
  • Page 34: Justierung Modelle Plj-M

    Automatische Justierung mit internem Gewicht. AUT-CAL Werkseinstellung bei Modellen mit Bauartzulassung. Auswahl mit PRINT-Taste übernehmen. Die Waage kehrt zurück ins Menü Zum Beenden des Menüs MENU-Taste drücken und gedrückt halten bis das akustische Signal verstummt. Die Waage kehrt automatisch in den Wägemodus zurück. ALJ/ALS/PLJ/PLS-BA-d-1640...
  • Page 35: Internes Justiergewicht Überschreiben

     PRINT – Taste drücken und gedrückt halten, bis das akustische Signal verstummt Der Kalibriervorgang wird gestartet Während diesem Vorgang wird „tEc MEM“ angezeigt Nachdem der Wert des internen Justiergewichts automatisch gespeichert wurde kehrt die Waage in den Wägemodus zurück.  Justiervorgang, wie im Kapitel 7.2 beschrieben durchführen ALJ/ALS/PLJ/PLS-BA-d-1640...
  • Page 36: Eichung

    Eichpflichtige Waagen müssen außer Betrieb gesetzt werden, wenn: Das Wägeergebnis der Waage außerhalb der Verkehrsfehlergrenze  liegt. Waage deshalb in regelmäßigen Abständen mit bekanntem Prüfge- wicht (ca. 1/3 der max. Last) belasten und mit Anzeigenwert vergleichen. Nacheichungstermin überschritten ist.  ALJ/ALS/PLJ/PLS-BA-d-1640...
  • Page 37: Basisbetrieb

    Dazu die Wage entlasten und TARE-Taste drücken. „0-t“ wird angezeigt, warten bis die Nullanzeige erscheint. Der Tariervorgang kann beliebige Male wiederholt werden, bei- spielsweise beim Einwiegen von mehreren Komponenten zu ei- ner Mischung (Zuwiegen).Die Grenze ist dann erreicht, wenn der gesamte Wägebereich ausgelastet ist. ALJ/ALS/PLJ/PLS-BA-d-1640...
  • Page 38: Unterflurwägung

    (Bruchgefahr) VORSICHT ▬ Es ist stets darauf zu achten, dass sich unter der Last keine Lebe- wesen oder Gegenstände befinden, die Schaden nehmen könnten. Nach Beendigung der Unterflurwägung muss die Öffnung am Waagenboden unbedingt wieder verschlossen werden (Staub- schutz). ALJ/ALS/PLJ/PLS-BA-d-1640...
  • Page 39: Benutzermenü

    Die Waage kehrt zurück ins Menü. Entweder bei Bedarf weite- re Einstellung im Menü vornehmen oder wie folgt zurück in den Wägemodus. Menü beenden/ MENU-Taste drücken und gedrückt halten bis das akustische zurück in den Signal verstummt. Die Waage kehrt automatisch in den Wä- Wägemodus gemodus zurück. ALJ/ALS/PLJ/PLS-BA-d-1640...
  • Page 40: Wägeeinheit

    Empfindlich und schnell, sehr Filt 2 ruhiger Aufstellungsort. Unempfindlich aber langsam, Filt 3 unruhiger Aufstellungsort. Stillstandskontroll-Anzeige Stabil Stillstandskontrolle schnell/sehr Stab 1 (siehe Kap. 9.6) ruhiger Aufstellungsort Stillstandskontrolle schnell + Stab 2 genau/ruhiger Aufstellungsort Stillstandskontrolle genau/sehr Stab 3 unruhiger Aufstellungsort. ALJ/ALS/PLJ/PLS-BA-d-1640...
  • Page 41 Justierung mit externem Ge- (siehe Kap. 7) *E-Cal wicht bei eichfähigen Geräten gesperrt) *Tec Cal nicht dokumentiert Automatische Justierung mit *Aut Cal internem Gewicht Justierung mit internem Gewicht *I-Cal nach Drücken von CAL eichfähigen Geräten gesperrt) * = modellabhängig ALJ/ALS/PLJ/PLS-BA-d-1640...
  • Page 42 Empfindlich und schnell, sehr Filt 2 ruhiger Aufstellungsort. Unempfindlich aber langsam, Filt 3 unruhiger Aufstellungsort. Stillstandskontroll-Anzeige Stabil Stillstandskontrolle schnell/sehr Stab 1 (siehe Kap. 9.6) ruhiger Aufstellungsort Stillstandskontrolle schnell + Stab 2 genau/ruhiger Aufstellungsort Stillstandskontrolle genau/sehr Stab 3 ununruhiger Aufstellungsort. ALJ/ALS/PLJ/PLS-BA-d-1640...
  • Page 43 Stand-by Modus ne Gewichtsänderung (siehe Kap. 9.9) AUTO-OFF nach 5 Minuten oh- 5 Min ne Gewichtsänderung AUTO-OFF nach 15 Minuten 15 Min ohne Gewichtsänderung Justierung Calib Automatische Justierung mit *Aut Cal (siehe Kap. 7) internem Gewicht * = modellabhängig ALJ/ALS/PLJ/PLS-BA-d-1640...
  • Page 44 Die Waage kehrt zurück ins Menü. Entweder bei Bedarf weitere Einstellungen im Menü vornehmen oder wie folgt zurück in den Wägemodus.  MENU-Taste drücken und gedrückt halten bis das akustische Signal verstummt. Die Waage kehrt automatisch in den Wägemodus zurück. ALJ/ALS/PLJ/PLS-BA-d-1640...
  • Page 45 Die Waage kehrt zurück ins Menü. Entweder bei Bedarf weitere Einstellungen im Menü vornehmen oder wie folgt zurück in den Wägemodus.  MENU-Taste drücken und gedrückt halten bis das akustische Signal verstummt. Die Waage kehrt automatisch in den Wägemodus zurück. ALJ/ALS/PLJ/PLS-BA-d-1640...
  • Page 46 Die Waage kehrt zurück ins Menü. Entweder bei Bedarf weitere Einstellungen im Menü vornehmen oder wie folgt zurück in den Wägemodus.  MENU-Taste drücken und gedrückt halten bis das akustische Signal verstummt. Die Waage kehrt automatisch in den Wägemodus zurück. ALJ/ALS/PLJ/PLS-BA-d-1640...
  • Page 47: Auto Zero

    Waage befindlichen Behälter, Verdampfungsprozesse). Bei Dosierungen mit kleinen Gewichtsschwankungen empfiehlt es sich daher, diese Funktion auszuschalten.  Im Wägemodus MENU-Taste drücken und gedrückt halten bis das akustische Signal verstummt.  MENU-Taste wiederholt drücken  Mit PRINT-Taste bestätigen, die aktuelle Einstellung wird angezeigt. ALJ/ALS/PLJ/PLS-BA-d-1640...
  • Page 48 Menü vornehmen oder wie folgt zurück in den Wägemodus.  MENU-Taste drücken und gedrückt halten bis das akustische Signal verstummt. Die Waage kehrt automatisch in den Wägemodus zurück. Bei Modellen PLJ-M nur Einstellungen „Au0 OFF“ und „Au0 1“ möglich. ALJ/ALS/PLJ/PLS-BA-d-1640...
  • Page 49: Filter

    Die Waage kehrt zurück ins Menü. Entweder bei Bedarf weitere Einstellungen im Menü vornehmen oder wie folgt zurück in den Wägemodus.  MENU-Taste drücken und gedrückt halten bis das akustische Signal verstummt. Die Waage kehrt automatisch in den Wägemodus zurück. ALJ/ALS/PLJ/PLS-BA-d-1640...
  • Page 50: Stillstandskontroll-Anzeige

    Die Waage kehrt zurück ins Menü. Entweder bei Bedarf weitere Einstellungen im Menü vornehmen oder wie folgt zurück in den Wägemodus.  MENU-Taste drücken und gedrückt halten bis das akustische Signal verstummt. Die Waage kehrt automatisch in den Wägemodus zurück. ALJ/ALS/PLJ/PLS-BA-d-1640...
  • Page 51: Kontrast Der Anzeige Einstellen

    Die Waage kehrt zurück ins Menü. Entweder bei Bedarf weitere Einstellungen im Menü vornehmen oder wie folgt zurück in den Wägemodus.  MENU-Taste drücken und gedrückt halten bis das akustische Signal verstummt. Die Waage kehrt automatisch in den Wägemodus zurück. ALJ/ALS/PLJ/PLS-BA-d-1640...
  • Page 52: Hinterleuchtung Der Anzeige

    Die Waage kehrt zurück ins Menü. Entweder bei Bedarf weitere Einstellungen im Menü vornehmen oder wie folgt zurück in den Wägemodus.  MENU-Taste drücken und gedrückt halten bis das akustische Signal verstummt. Die Waage kehrt automatisch in den Wägemodus zurück. ALJ/ALS/PLJ/PLS-BA-d-1640...
  • Page 53: Automatische Abschaltfunktion „Auto Off" In Stand-By Modus

    Die Waage kehrt zurück ins Menü. Entweder bei Bedarf weitere Einstellungen im Menü vornehmen oder wie folgt zurück in den Wägemodus.  MENU-Taste drücken und gedrückt halten bis das akustische Signal verstummt. Die Waage kehrt automatisch in den Wägemodus zurück. ALJ/ALS/PLJ/PLS-BA-d-1640...
  • Page 54: Anwendermenü

    Die Waage kehrt zurück ins Menü. Entweder bei Bedarf weitere speichern Einstellung im Menü vornehmen oder wie folgt zurück in den Wäge- modus. Menü beenden/ MENU-Taste drücken und gedrückt halten bis das akustische Signal verstummt. Die Waage kehrt automatisch in den Wägemodus zu- zurück in den rück. Wägemodus ALJ/ALS/PLJ/PLS-BA-d-1640...
  • Page 55  So viele Zählteile auflegen, wie die eingestellte Referenzstückzahl verlangt.  Mit PRINT-Taste bestätigen und Stillstandskontrolle abwarten. Nach erfolgreicher Referenzbildung wird die aktuelle Stückzahl angezeigt.  Referenzgewicht abnehmen. Die Waage befindet sich nun im Stückzähl-Modus und zählt alle Teile, die sich auf der Wägeplatte befinden. ALJ/ALS/PLJ/PLS-BA-d-1640...
  • Page 56 Referenzgewicht abnehmen. Die gen und mit PRINT-Taste bestäti- Waage befindet sich nun im Stück- gen. Vorgang so oft wiederholen bis zähl-Modus und zählt alle Teile, die die Stückzählanzeige erscheint. sich auf der Wägeplatte befinden. Zurück in den Wägemodus  ON/OFF-Taste drücken ALJ/ALS/PLJ/PLS-BA-d-1640...
  • Page 57: Umschalten Zwischen Stückzahl- Und Gewichtsanzeige

     Die Anzahl Teile auf der Wägeplatte verdoppeln und warten bis das akustische Signal ertönt. Das Referenzgewicht wird neu berechnet.  Entweder durch Hinzufügen weiterer Teile Referenzoptimierung wiederholen (Max. 255 Teile) oder Zählvorgang starten. Die automatische Referenzoptimierung ist bei numerischer Eingabe des Referenzgewichts nicht aktiv. ALJ/ALS/PLJ/PLS-BA-d-1640...
  • Page 58: Numerische Eingabe Des Referenzgewichts

     Bei Einsatz eines Wägebehälters diesen vor Drücken der PRINT-Taste auflegen. Der Tariervorgang wird automatisch gestartet. „0-t“ wird angezeigt.  Wägegut auflegen und Stückzahl ablesen.  MENU-Taste drücken, das Gesamtgewicht der aufgelegten Teile wird angezeigt.  Zurück zur Stückzahl-Anzeige MENU-Taste erneut drücken. Zurück in den Wägemodus  ON/OFF-Taste drücken ALJ/ALS/PLJ/PLS-BA-d-1640...
  • Page 59: Dichtebestimmung (Hydrostatische Wägung)

     MENU-Taste drücken  Mit PRINT-Taste bestätigen, die aktuelle Einstellung wird angezeigt.  Mit MENU-Taste „d SoLid“ auswählen  Mit PRINT-Taste bestätigen.  Mit den Pfeiltasten    Dichte der Messflüssigkeit eingeben.  Eingabe mit PRINT-Taste bestätigen. ALJ/ALS/PLJ/PLS-BA-d-1640...
  • Page 60  Warten Sie bis die Gewichtsanzeige der Waage stabil ist, dann PRINT -Taste drücken. „WEI LIq“ wird blinkend angezeigt.  Die Dichte der Probe wird angezeigt Zurück in den Wägemodus  ON/OFF-Taste drücken  oder mit MENU-Taste neuen Messzyklus starten. Sind bei der Dichtebestimmung Fehler aufgetreten wird „d-----„ angezeigt. ALJ/ALS/PLJ/PLS-BA-d-1640...
  • Page 61: Dichtebestimmung Von Flüssigkeiten

     MENU-Taste drücken  Mit PRINT-Taste bestätigen, die aktuelle Einstellung wird angezeigt.  Mit MENU-Taste „d Liquid“ auswählen  Mit PRINT-Taste bestätigen.  Mit den Pfeiltasten    Dichte des Glassenkkörpers eingeben.  Eingabe mit PRINT-Taste bestätigen. ALJ/ALS/PLJ/PLS-BA-d-1640...
  • Page 62  Warten Sie bis die Gewichtsanzeige der Waage stabil ist, dann PRINT -Taste drücken. „WEI LIq“ wird blinkend angezeigt.  Die Dichte der Probenflüssigkeit wird angezeigt Zurück in den Wägemodus  ON/OFF-Taste drücken  oder mit MENU-Taste neuen Messzyklus starten. Sind bei der Dichtebestimmung Fehler aufgetreten wird „d-----„ angezeigt. ALJ/ALS/PLJ/PLS-BA-d-1640...
  • Page 63: Summierfunktion

    Die Waage tariert automatisch und wechselt zur Nullanzeige  Gewicht A auflegen. (Beispiel)  Mit PRINT-Taste bestätigen Der Anzeigewert wird in den Summenspeicher addiert, danach tariert die Waage erneut automatisch und wechselt zur Nullanzeige  Gewicht B auflegen. (Beispiel)  Mit PRINT-Taste bestätigen ALJ/ALS/PLJ/PLS-BA-d-1640...
  • Page 64: Wägen Mit Toleranzbereich

    Wägegut genau innerhalb der festgelegten Toleranz- grenzen liegt. Die Anzeige [L], [ok] oder [H] zeigt an, ob das Wägegut sich innerhalb der zwei To- leranzgrenzen befindet. Wägegut unterhalb unterer Toleranzgrenze Wägegut im Toleranzbereich Wägegut oberhalb oberer Toleranzgrenze ALJ/ALS/PLJ/PLS-BA-d-1640...
  • Page 65  Mit der MENU-Taste gewünschte Einstellung auswählen Beep off Signalton ausgeschaltet Beep on Signalton eingeschaltet, wenn Wägegut im Toleranzbereich  Mit PRINT-Taste bestätigen. Die Waage befindet sich nun im Kontrollwägemodus.  Wägegut auflegen, die Toleranzkontrolle wird gestartet. Zurück in den Wägemodus  ON/OFF-Taste drücken ALJ/ALS/PLJ/PLS-BA-d-1640...
  • Page 66: Prozentbestimmung

     Warten Sie bis die Gewichtsanzeige der Waage stabil ist, dann PRINT -Taste drücken, „LOAD“ blinkt. Das Gewicht wird als Referenz (100%) übernommen.  Referenzgewicht abnehmen. Ab hier befindet sich die Waage im Prozentbe- stimmungs-Modus.  Wägegut auflegen. Das Gewicht der Probe wird in Prozent, bezogen auf das Referenzgewicht, an- gezeigt. ALJ/ALS/PLJ/PLS-BA-d-1640...
  • Page 67: Numerische Eingabe Des Referenzgewichts

     Mit den Pfeiltasten    Referenzgewicht (100%) eingeben.  Eingabe mit PRINT-Taste bestätigen. Ab hier befindet sich die Waage im Pro- zentbestimmungs-Modus.  Wägegut auflegen. Das Gewicht der Probe wird in Prozent, bezogen auf das Referenzgewicht, an- gezeigt. Zurück in den Wägemodus  ON/OFF-Taste drücken ALJ/ALS/PLJ/PLS-BA-d-1640...
  • Page 68: Tierwägefunktion

     Mit PRINT-Taste bestätigen  Wenn nötig, Waage tarieren  Wägegut (Tier) auf die Wägeplatte stellen und PRINT-Taste drücken. In der An- zeige läuft ein „Countdown“. Der Mittelwert der Wägeresultate wird angezeigt und bleibt in der Anzeige ste- hen. ALJ/ALS/PLJ/PLS-BA-d-1640...
  • Page 69: Spitzenwertfunktion

    „M.  Wägeplatte belasten. Der höchste Lastwert wird angezeigt.  Der Spitzenwert bleibt solange in der Anzeige stehen, bis die TARE-Taste ge- drückt wird. Danach ist die Waage für weitere Messungen bereit. Zurück in den Wägemodus  ON/OFF-Taste drücken ALJ/ALS/PLJ/PLS-BA-d-1640...
  • Page 70: Datenausgang Rs 232C

     Baudrate wählbar auf 1200 - 9600 Baud  Bei Betrieb mit Schnittstelle ist der fehlerfreie Betrieb nur mit dem entsprechen- den KERN- Schnittstellenkabel (max. 2m) sichergestellt 11.2 Pinbelegung des Waagenausgangssteckers Pin 2 Tx Signal Pin 3 Rx Signal Pin 5 ALJ/ALS/PLJ/PLS-BA-d-1640...
  • Page 71: Schnittstelle

    Drucker Waage Dateneingang Busy Signal 11.4 Datentransfer Der Datensatz besteht auf folgenden 14 Zeichen: 1. Zeichen Vorzeichen -/Leerzeichen (Wägewert) 2-9. Zeichen Gewicht oder sonstige Daten 10-12. Zeichen Wägeeinheit 13. Zeichen Stabilitätsanzeige 14. Zeichen carriage return 15. Zeichen line feed ALJ/ALS/PLJ/PLS-BA-d-1640...
  • Page 72: Formate Der Datenübertragung

    10° 11° 12° 13° 14° 15° 16° 17° 18° 19° 20° Gewicht space Wägewert space space Durchschnittliches Teilegewicht 1°. 2° 3° 4° 5° 6° 7° 8° 9° 10° 11° 12° 13° 14° 15° 16° 17° 18° Leerzeichen Wägewert space Durchschnittliches Teilegewicht ALJ/ALS/PLJ/PLS-BA-d-1640...
  • Page 73 10° 11° 12° 13° 14° 15° 16° 17° 18° Zeit Leerz. Leerzeichen Zeitwert Sek. Leerzeichen Durchschnittswert 1°. 2° 3° 4° 5° 6° 7° 8° 9° 10° 11° 12° 13° 14° 15° 16° 17° 18° Durchschnitt Leerzeichen Durchschnittl. Gewichtswert Leerz. ALJ/ALS/PLJ/PLS-BA-d-1640...
  • Page 74: Fernsteuerbefehle

    • Waage mit einem geeigneten Kabel mit der Schnittstelle eines Druckers ver- binden. Der fehlerfreie Betrieb ist nur mit dem entsprechenden KERN- Schnittstellenkabel sichergestellt. • Baudrate von Waage und Drucker müssen übereinstimmen, siehe Kap. 9.3. Ausdruckbeispiele: Wägemodus/Spitzenwertfunktion ………. 22.000 g Dichtebestimmung d= 2.80066 g/cm3d Messwert „Dichte“ ALJ/ALS/PLJ/PLS-BA-d-1640...
  • Page 75 3.000 g Anzahl Teile Weight Gewicht der aufgelegten Teile Durchschnittliches Teilegewicht Prozentbestimmung Perc. 20 % Weight: 30.000 g Perc Anzeigewert in [%] Weight Anzeigewert in [g] Tierwägemodus Time 6 Sec Ave.: 59.446 g Summiermodus 14.156 g 18.226 g 32.382 g ALJ/ALS/PLJ/PLS-BA-d-1640...
  • Page 76: Fehlermeldungen

    Das Gerät darf nur von geschulten und von KERN autorisierten Servicetechnikern geöffnet werden. Vor dem Öffnen vom Netz trennen. 13.3 Entsorgung Die Entsorgung von Verpackung und Gerät ist vom Betreiber nach gültigem nationa- lem oder regionalem Recht des Benutzerortes durchzuführen. ALJ/ALS/PLJ/PLS-BA-d-1640...
  • Page 77: Kleine Pannenhilfe

    • Es herrschen starke Temperaturschwankungen. • Die Anwärmzeit wurde nicht eingehalten. • Elektromagnetische Felder / Statische Aufladung (anderen Aufstellort wählen / falls möglich, stören- des Gerät ausschalten ) Beim Auftreten anderer Fehlermeldungen Waage aus- und nochmals einschalten. Bleibt Fehlermeldung erhalten, Hersteller benachrichtigen. ALJ/ALS/PLJ/PLS-BA-d-1640...
  • Page 78 Quecksilber, oder Pb = Blei) des für die Einstufung als schadstoffhaltig aus- schlaggebenden Schwermetalls versehen.  Schadstoffarme Batterien nur mit einer durchgestrichenen Mülltonne. Die Rückgabemöglichkeit beschränkt sich auf Batterien der Art, die wir in unserem Sortiment führen oder geführt haben, sowie auf die Menge, deren sich Endverbrau- cher üblicherweise entledigen. ALJ/ALS/PLJ/PLS-BA-d-1640...
  • Page 79: Konformitätserklärung

    15 Konformitätserklärung Die aktuelle EG/EU-Konformitätserklärung finden Sie online unter: www.kern-sohn.com/ce Bei geeichten Waagen (= konformitätsbewerteten Waagen) ist die Konformitätserklärung im Lieferumfang enthalten. ALJ/ALS/PLJ/PLS-BA-d-1640...
  • Page 80 7.1.1 Adjustment with recommended adjustment weight (factory setting) ........29 7.1.2 Adjustment with weights of other nominal values ..............30 Models with internal weight (KERN ALJ/PLJ) ............32 7.2.1 Adjustment models PLJ-M ....................... 33 7.2.2 Overwrite internal adjustment weight ..................34 Verification ........................35...
  • Page 81 Format for data transmission ..................72 11.6 Remote control instructions..................74 11.7 Printer mode ......................74 Error messages .................... 76 Service, maintenance, disposal ..............76 13.1 Cleaning ........................76 13.2 Service, maintenance ....................76 13.3 Disposal ........................76 Instant help ....................77 Declaration of Conformity ................78 ALJ/ALS/PLJ/PLS-BA-e-1640...
  • Page 82: Technical Data

    210 x 340 x 330 Dimensions of windshield 160 x 140 x 205 (inside) (B x D x H) mm 190 x 195 x 225 (outside) Weighing plate (stainless Ø 80 mm steel) Weight kg (net) 6.5 kg Interface RS 232C ALJ/ALS/PLJ/PLS-BA-e-1640...
  • Page 83 KERN ALJ 160-4AM ALJ 250-4AM ALJ 310-4AM Weighing range (max) 160 g 250 g 310 g Readability (d) 0.1 mg 0.1 mg 0.1 mg Reproducibility 0.1 mg 0.1 mg 0.1 mg Linearity ± 0.3 mg ± 0.3 mg ± 0.3 mg...
  • Page 84 210 x 340 x 330 Dimensions of windshield 160 x 140 x 205 (inside) (B x D x H) mm 190 x 195 x 225 (outside) Weighing plate (stainless steel) Ø 80 mm Weight kg (net) 5.7 kg Interface RS 232C ALJ/ALS/PLJ/PLS-BA-e-1640...
  • Page 85 210 x 340 x 160 Windshield mm inside Ø 150, 60 high outside Ø 160, 70 high Weighing plate Ø 11 cm Ø 11 cm Ø 11 cm (stainless steel) Weight kg (net) 4 kg 4.5 kg Interface RS 232C ALJ/ALS/PLJ/PLS-BA-e-1640...
  • Page 86 210 x 340 x 160 Windshield mm inside Ø 150, 60 high outside Ø 160, 70 high Weighing plate Ø 11 cm Ø 11 cm Ø 16 cm Ø 16 cm (stainless steel) Weight kg (net) 4.5 kg Interface RS 232C ALJ/ALS/PLJ/PLS-BA-e-1640...
  • Page 87 210 x 340 x 100 210 x 340 x 100 210 x 340 x 100 Windshield mm inside Ø 150, 60 high outside Ø 160, 70 high Weighing plate Ø 16 cm Ø 16 cm Ø 16 cm (stainless steel) Weight kg (net) 4.5 kg 5 kg 5.0 kg Interface RS 232C ALJ/ALS/PLJ/PLS-BA-e-1640...
  • Page 88 Housing (B x D x H) mm 210 x 340 x 100 Windshield mm inside Ø 150, 60 high outside Ø 160, 70 high Weighing plate Ø 11 cm Ø 11 cm (stainless steel) Weight kg (net) 4 kg 4.5 kg Interface RS 232C ALJ/ALS/PLJ/PLS-BA-e-1640...
  • Page 89 Housing (B x D x H) mm 210 x 340 x 100 Windshield mm inside Ø 150, 60 high outside Ø 160, 70 high Weighing plate Ø 16 cm Ø 16 cm (stainless steel) Weight kg (net) 4.0 kg 4.5 kg Interface RS 232C ALJ/ALS/PLJ/PLS-BA-e-1640...
  • Page 90 Housing (B x D x H) mm 210 x 340 x 160 Windshield mm inside Ø 150, 60 high outside Ø 160, 70 high Weighing plate Ø 11 cm (stainless steel) Weight kg (net) 4 kg 4.5 kg Interface RS 232C ALJ/ALS/PLJ/PLS-BA-e-1640...
  • Page 91 210 x 340 x 160 210 x 340 x 160 210 x 340 x 160 Windshield mm inside Ø 150, 60 high outside Ø 160, 70 high Weighing plate Ø 11 cm Ø 11 cm Ø 11 cm (stainless steel) Weight kg (net) 4.5 kg 4.5 kg 4.5 kg Interface RS 232C ALJ/ALS/PLJ/PLS-BA-e-1640...
  • Page 92 210 x 340 x 100 Windshield mm inside Ø 150, 60 high outside Ø 160, 70 high Weighing plate Ø 16 cm Ø 16 cm Ø 16 cm (stainless steel) Weight kg (net) 4 kg 4 kg 4.5 kg Interface RS 232C ALJ/ALS/PLJ/PLS-BA-e-1640...
  • Page 93 Housing (B x D x H) mm 210 x 340 x 100 210 x 340 x 100 Windshield mm Weighing plate Ø 16 cm Ø 16 cm (stainless steel) Weight kg (net) 4.5 kg 4.5 kg Interface RS 232C ALJ/ALS/PLJ/PLS-BA-e-1640...
  • Page 94 Housing (B x D x H) mm 210 x 340 x 100 210 x 340 x 100 Windshield mm Weighing plate Ø 16 cm 200 x 175 mm (stainless steel) Weight kg (net) 4.75 kg 4 kg Interface RS 232C ALJ/ALS/PLJ/PLS-BA-e-1640...
  • Page 95: Explanation Of Graphical Symbols

    Information is available on KERN’s home page (www.kern-sohn.com with regard to the monitoring of balance test substances and the test weights required for this. In KERN’s accredited DKD calibration laboratory test weights and balances may be calibrated (return to the national standard) fast and at moderate cost. ALJ/ALS/PLJ/PLS-BA-e-1640...
  • Page 96: Basic Safety Precautions

    4.2 Personnel training The appliance may only be operated and maintained by trained personnel. 5 Transportation & Storage 5.1 Testing upon acceptance When receiving the appliance, please check packaging immediately, and the appliance itself when unpacking for possible visible damage. ALJ/ALS/PLJ/PLS-BA-e-1640...
  • Page 97: Packaging / Return Transport

     Only use original packaging for returning.  Prior to dispatch disconnect all cables and remove loose/mobile parts.  Reattach possibly supplied transport securing devices.  Secure all parts such as the glass wind screen, the weighing platform, power unit etc. against shifting and damage. ALJ/ALS/PLJ/PLS-BA-e-1640...
  • Page 98 Models ALJ/ALS: ALJ/ALS/PLJ/PLS-BA-e-1640...
  • Page 99: Unpacking, Setup And Commissioning

    (e.g. due to mobile phones or radio equipment), static electricity accumulations or instable power supply occur. Change location or remove source of interference. 6.2 Unpacking / placing Carefully remove the balance from the packaging, remove plastic cover and setup balance at the intended workstation. ALJ/ALS/PLJ/PLS-BA-e-1640...
  • Page 100: Placing

    6.2.1 Placing Design layout of weighing balance: Models ALS/ALJ Models PLS/PLJ, d = 1 mg ALJ/ALS/PLJ/PLS-BA-e-1640...
  • Page 101 Models PLS/PLJ, d = 100 mg Models PLS/PLJ, d = 10 mg Level balance with foot screws until the air bubble of the water balance is in the prescribed circle. ALJ/ALS/PLJ/PLS-BA-e-1640...
  • Page 102: Scope Of Delivery / Serial Accessories

    6.2.2 Scope of delivery / serial accessories • Balance (See chpt. 6.2.1) • Mains power supply • Operating Manual 6.3 Appliance overview 6.3.1 Front side of the balance Cover windshield Bubble level Windshield LCD display Function keys Adjustable feet ALJ/ALS/PLJ/PLS-BA-e-1640...
  • Page 103: Back And Bottom Side Of The Balance

    6.3.2 Back and bottom side of the balance 1. Weighing plate 2. RS232C interface 3. Foot screws 4. Mains adapter connection 5. Housing screws (in models with four feet first screw out the two rear feet) 6. Underfloor weighing device ALJ/ALS/PLJ/PLS-BA-e-1640...
  • Page 104: Controls

    • Select menu items – scroll backward Arrow button  • Numerical input – scroll forward • Calculate weighing data via interface PRINT button • Confirm / store settings Arrow button • Numerical input – cipher selection  • Taring TARE button • Zeroing ALJ/ALS/PLJ/PLS-BA-e-1640...
  • Page 105: Connect And Switch-On Power Supply

    When the balance is in battery mode the following symbols appear on the display: Battery charge sufficient Battery very low. Connect mains adapter as soon as possible to load the rechargeable battery. Voltage has dropped below prescribed minimum. Connect mains adapter to load the rechargeable battery. ALJ/ALS/PLJ/PLS-BA-e-1640...
  • Page 106: Connection Of Peripheral Devices

     Observe stable environmental conditions. A warming up time (see chapter 1) is required for stabilization.  Ensure that there are no objects on the weighing plate. ALJ/ALS/PLJ/PLS-BA-e-1640...
  • Page 107: Models With External Weight (Kern Als/Pls)

     Wait until the weighed value for the required adjustment weight appears flashing.  During the flashing display put the required adjustment weight carefully in the center of the weighing plate. The flashing display disappears. After successful adjustment the balance automatically returns to weighing mode.  Take away adjustment weight ALJ/ALS/PLJ/PLS-BA-e-1640...
  • Page 108: Adjustment With Weights Of Other Nominal Values

    After successful adjustment the balance automatically returns to weighing mode.  Take away adjustment weight An error message will be displayed in the event of an adjustment error or incorrect adjustment weight. Wait until the balance is again in weighing mode and repeat the adjustment procedure. ALJ/ALS/PLJ/PLS-BA-e-1640...
  • Page 109 Recommended Other measurement-technically not optimal nominal Model adjustment weight values for adjustment (see chap. 7.1.2) (see chap. 7.1.1). A-models ALJ 160-4A ALJ 250-4A ALJ 310-4A ALJ 500-4A ALS 160-4A 150g 100g ALS 250-4A 200g 100g PLJ-720-3A PLJ 1200-3A PLJ 1200-3DA...
  • Page 110: Models With Internal Weight (Kern Alj/Plj)

    7.2 Models with internal weight (KERN ALJ/PLJ) For non verified balances four adjustment possibilities are available in the menu. Menu settings In weighing mode press the MENU button and keep it pressed until the acoustic signal gets mute. The first menu item „units“ is displayed.
  • Page 111: Adjustment Models Plj-M

    Factory setting for models with type approval. Take over selection using the PRINT button. The balance returns to menu. To finish the menu press the MENU button and keep it pressed until the acoustic signal gets mute. The balance returns automatically into weighing mode. ALJ/ALS/PLJ/PLS-BA-e-1640...
  • Page 112: Overwrite Internal Adjustment Weight

    The calibrating process is started During this process „tEc MEM“ is displayed After having automatically saved the value of the internal adjustment weight, the balance will return into weighing mode.  Carry out the adjustment process as described in chapter 7.2 ALJ/ALS/PLJ/PLS-BA-e-1640...
  • Page 113: Verification

     The weighing result of the balance is outside the error limit. Therefore, in regular intervals load balance with known test weight (ca. 1/3 of the max. load) and compare with displayed value.  The reverification deadline has been exceeded. ALJ/ALS/PLJ/PLS-BA-e-1640...
  • Page 114: Basic Operation

    The tare procedure can be repeated as many times as necessary, for example with initial weighing of several components for a mix (add-on weighing). The limit is reached when the total weighing range capacity is full. ALJ/ALS/PLJ/PLS-BA-e-1640...
  • Page 115: Underfloor Weighing

    (danger of breaking) CAUTION ▬ Always ensure that there are no persons, animals or objects that might be damaged underneath the load. After completing the underfloor weighing the opening on the bottom of the balance must always be closed (dust protection). ALJ/ALS/PLJ/PLS-BA-e-1640...
  • Page 116: User Menu

    Weighing balance returns to menu. Either make more settings in the menu or go back to menu mode as follows. Exit menu/ Press the MENU button and keep it pressed until the acoustic back to signal gets mute. The balance returns automatically into weighing mode weighing mode. ALJ/ALS/PLJ/PLS-BA-e-1640...
  • Page 117: Weighing Unit

    Filt 3 locatio Standstill control display Stabil Standstill control fast – very Stab 1 (see chap. 9.6) quiet set-up location Standstill control fast + exact – Stab 2 quiet set-up location Standstill control exact – very Stab 3 set-up location ALJ/ALS/PLJ/PLS-BA-e-1640...
  • Page 118 *E-Cal (see chap. 7) locked for verifiable units *Tec Cal not documented Automatic adjustment with *Aut Cal internal weight. Adjustment with internal weight *I-Cal after having pressed CAL, locked in verifiable units. * = not available in all models ALJ/ALS/PLJ/PLS-BA-e-1640...
  • Page 119 Filt 3 locatio Standstill control display Stabil Standstill control fast – very Stab 1 (see chap. 9.6) quiet set-up location Standstill control fast + exact – Stab 2 quiet set-up location Standstill control exact – very Stab 3 set-up location ALJ/ALS/PLJ/PLS-BA-e-1640...
  • Page 120 AUTO-OFF after 5 minutes 5 Min without changing the weight AUTO-OFF after 15 minutes 15 Min without changing the weight Adjustment Calib Automatic adjustment with *Aut Cal (see chap. 7) internal weight. * = not available in all models ALJ/ALS/PLJ/PLS-BA-e-1640...
  • Page 121: Weighing Unit

    Weighing balance returns to menu. Either make more settings in the menu or go back to weighing mode as follows.  Press the MENU button and keep it pressed until the acoustic signal gets mute. The balance returns automatically into weighing mode. ALJ/ALS/PLJ/PLS-BA-e-1640...
  • Page 122: Data Output Type

    Weighing balance returns to menu. Either make more settings in the menu or go back to weighing mode as follows.  Press the MENU button and keep it pressed until the acoustic signal gets mute. The balance returns automatically into weighing mode. ALJ/ALS/PLJ/PLS-BA-e-1640...
  • Page 123 Weighing balance returns to menu. Either make more settings in the menu or go back to weighing mode as follows.  Press the MENU button and keep it pressed until the acoustic signal gets mute. The balance returns automatically into weighing mode. ALJ/ALS/PLJ/PLS-BA-e-1640...
  • Page 124: Auto Zero

    When apportioning involves small variations of weight, it is advisable to switch off this function.  In weighing mode press the MENU button and keep it pressed until the acoustic signal gets mute.  Press MENU button repeatedly  Acknowledge using PRINT button, the current setting is displayed. ALJ/ALS/PLJ/PLS-BA-e-1640...
  • Page 125  Press the MENU button and keep it pressed until the acoustic signal gets mute. The balance returns automatically into weighing mode. For models PLJ_M settings are restricted to “Au0 OFF“ and „Au0 1“ ALJ/ALS/PLJ/PLS-BA-e-1640...
  • Page 126: Filter

    Weighing balance returns to menu. Either make more settings in the menu or go back to weighing mode as follows.  Press the MENU button and keep it pressed until the acoustic signal gets mute. The balance returns automatically into weighing mode. ALJ/ALS/PLJ/PLS-BA-e-1640...
  • Page 127: Standstill Control Display

    Weighing balance returns to menu. Either make more settings in the menu or go back to weighing mode as follows.  Press the MENU button and keep it pressed until the acoustic signal gets mute. The balance returns automatically into weighing mode. ALJ/ALS/PLJ/PLS-BA-e-1640...
  • Page 128: Setting The Contrast Of The Display

    Weighing balance returns to menu. Either make more settings in the menu or go back to weighing mode as follows.  Press the MENU button and keep it pressed until the acoustic signal gets mute. The balance returns automatically into weighing mode. ALJ/ALS/PLJ/PLS-BA-e-1640...
  • Page 129: Display Background Illumination

    Weighing balance returns to menu. Either make more settings in the menu or go back to weighing mode as follows.  Press the MENU button and keep it pressed until the acoustic signal gets mute. The balance returns automatically into weighing mode. ALJ/ALS/PLJ/PLS-BA-e-1640...
  • Page 130: Automatic Switch-Off Function „Auto Off" In Stand-By Mode

    Weighing balance returns to menu. Either make more settings in the menu or go back to weighing mode as follows.  Press the MENU button and keep it pressed until the acoustic signal gets mute. The balance returns automatically into weighing mode. ALJ/ALS/PLJ/PLS-BA-e-1640...
  • Page 131: User Menu

    Weighing balance returns to menu. Either make more settings in the menu or go back to menu mode as follows. Exit menu/ Press the MENU button and keep it pressed until the acoustic signal gets mute. The balance returns automatically into weighing mode. back to weighing mode ALJ/ALS/PLJ/PLS-BA-e-1640...
  • Page 132: Parts Counting

     Place as many pieces to add-up as required by the set reference piece number.  Acknowledge using PRINT button and wait for standstill control. After successful reference determination the current quantity is displayed.  Remove reference weight. The balance is now in parts counting mode counting all units on the weighing plate. ALJ/ALS/PLJ/PLS-BA-e-1640...
  • Page 133 Remove reference weight. The acknowledge using the PRINT balance is now in parts counting button. Repeat the procedure until mode counting all units on the the piece counter display appears. weighing plate. Return to weighing mode  Press the ON/OFF key. ALJ/ALS/PLJ/PLS-BA-e-1640...
  • Page 134: Switching Over Between Quantity And Weight Display

    The reference weight is calculated anew.  Either repeat the reference optimisation by adding more pieces (max. 255 pieces) or start the counting process. The automatic reference optimisation is not active when the reference weight is entered numerically. ALJ/ALS/PLJ/PLS-BA-e-1640...
  • Page 135: Numeric Entering Of The Reference Weight

     Place load on pan and read the number of pieces.  Press MENU button, the total weight of the placed parts is displayed.  Back to quantity display press MENU button again. Return to weighing mode  Press the ON/OFF key ALJ/ALS/PLJ/PLS-BA-e-1640...
  • Page 136: Density Determination (Hydrostatic Weighing)

     Acknowledge using PRINT button, the current setting is displayed.  Using MENU button select „d SoLid“  Confirm by pressing the PRINT button.  Use the arrow buttons    to enter density of the measuring fluid.  Confirm input by pressing the PRINT button. ALJ/ALS/PLJ/PLS-BA-e-1640...
  • Page 137  The density of the sample is shown Return to weighing mode  Press the ON/OFF key  or use the MENU button to start a new measuring cycle. If at the density determination errors have appeared, „d-----„ is displayed. ALJ/ALS/PLJ/PLS-BA-e-1640...
  • Page 138: Determining Density Of Liquids

     Acknowledge using PRINT button, the current setting is displayed.  Using MENU button select „d Liquid“  Confirm by pressing the PRINT button.  Use the arrow buttons    to enter density of the glass sinker.  Confirm input by pressing the PRINT button. ALJ/ALS/PLJ/PLS-BA-e-1640...
  • Page 139  The density of the sample fluid is shown Return to weighing mode  Press the ON/OFF key  or use the MENU button to start a new measuring cycle. If at the density determination errors have appeared, „d-----„ is displayed. ALJ/ALS/PLJ/PLS-BA-e-1640...
  • Page 140: Adding Function

     Confirm by pressing the PRINT button The displayed value is added into the total adding memory, after that the balance will automatically tare anew and change over to the zero display  Put on weight B. (Example)  Confirm by pressing the PRINT button ALJ/ALS/PLJ/PLS-BA-e-1640...
  • Page 141  Press the MENU button, the sum of all single weighings will be displayed.  Press the MENU button again, the number of weighings will be displayed  Leave the function via the ON/OFF button and return to the weighing mode ALJ/ALS/PLJ/PLS-BA-e-1640...
  • Page 142: Checkweighing

     Confirm using the PRINT button, the display to enter the upper tolerance limit appears.  Enter the upper limit value using the arrow buttons     Confirm using the PRINT button, the display to adjust the signal tone appears.  Select the desired settings by pressing the MENU button ALJ/ALS/PLJ/PLS-BA-e-1640...
  • Page 143 Signal tone on, if weighed goods are within tolerance range  Confirm by pressing the PRINT button. The balance is now in checkweighing mode.  Put on goods to be weighed, tolerance control is started Return to weighing mode  Press the ON/OFF key ALJ/ALS/PLJ/PLS-BA-e-1640...
  • Page 144: Percent Determination

    PRINT button. The weight is adopted as reference (100%).  Remove reference weight. From now the balance is in percent determining mode.  Place goods to be weighed on balance. The weight of the sample is displayed in percentage in terms of the reference weight. ALJ/ALS/PLJ/PLS-BA-e-1640...
  • Page 145: Numeric Entering Of The Reference Weight

     Confirm input by pressing the PRINT button. From now the balance is in percent determining mode.  Place goods to be weighed on balance. The weight of the sample is displayed in percentage in terms of the reference weight. Return to weighing mode  Press the ON/OFF key ALJ/ALS/PLJ/PLS-BA-e-1640...
  • Page 146: Animal Weighing Function

    The average value of the weighing results is displayed and remains displayed on the screen.  In order to carry out an other measurement, press the ON/OFF button 1x Return to weighing mode:  Press the ON/OFF key 2x ALJ/ALS/PLJ/PLS-BA-e-1640...
  • Page 147: Peak Value Function

     Load weighing plate. The maximum load value is displayed.  The peak value remains in the display until the TARE button is pressed. Then the balance is ready for further measurements. Return to weighing mode  Press the ON/OFF key ALJ/ALS/PLJ/PLS-BA-e-1640...
  • Page 148: Data Output Rs 232C

    Baud rate optional from 1200 - 9600 Baud • For operation with interface faultless operation is only ensured with the correct KERN – interface cable (max. 2m) 11.2 Pin allocation of balance output plug Pin 2 Tx Signal Pin 3 Rx Signal Pin 5 ALJ/ALS/PLJ/PLS-BA-e-1640...
  • Page 149: Interface

    11.4 Data transfer The data set consists of the following 14 characters: 1. Character sign -/ blank (weighing value) 2-9. Character weight or other data 10-12. Character weighing unit 13. Character stability display 14. Character carriage return 15. Character line feed ALJ/ALS/PLJ/PLS-BA-e-1640...
  • Page 150: Format For Data Transmission

    10° 11° 12° 13° 14° 15° 16° 17° 18° 19° 20° Weight space Measuring Value space space Average parts weight 1°. 2° 3° 4° 5° 6° 7° 8° 9° 10° 11° 12° 13° 14° 15° 16° 17° 18° Blank Measuring Value space average piece weight ALJ/ALS/PLJ/PLS-BA-e-1640...
  • Page 151 10° 11° 12° 13° 14° 15° 16° 17° 18° Time Blank Blank Time value Sec. Blank Average value 1°. 2° 3° 4° 5° 6° 7° 8° 9° 10° 11° 12° 13° 14° 15° 16° 17° 18° Average Blank Average Weight value Blank ALJ/ALS/PLJ/PLS-BA-e-1640...
  • Page 152: Remote Control Instructions

    • The Baud rates of balance and printer must agree, see chap. 9.3. Printout examples: Weighing mode/peak value function ………. 22.000 g Density determination d= 2.80066 g/cm3d Measuring value „Density“ Parts counting Weight: 300.000 g PMU: 3.000 g Number of pieces Weight Weight of placed pieces Average parts weight ALJ/ALS/PLJ/PLS-BA-e-1640...
  • Page 153 Percent determination Perc. 20 % Weight: 30.000 g Perc Display value in [%] Weight Display value in [g] Animal weighing mode Time 6 Sec Ave.: 59.446 g Add-up mode 14.156 g 18.226 g 32.382 g ALJ/ALS/PLJ/PLS-BA-e-1640...
  • Page 154: Error Messages

    The appliance may only be opened by trained service technicians who are authorized by KERN. Before opening, disconnect from power supply. 13.3 Disposal Disposal of packaging and appliance must be carried out by operator according to valid national or regional law of the location where the appliance is used. ALJ/ALS/PLJ/PLS-BA-e-1640...
  • Page 155: Instant Help

    • Great fluctuations in temperature. • Warm-up time was ignored. • Electromagnetic fields / static charging (choose different location/switch off interfering device if possible) Should other error messages occur, switch balance off and then on again. If the error message remains inform manufacturer. ALJ/ALS/PLJ/PLS-BA-e-1640...
  • Page 156: Declaration Of Conformity

    15 Declaration of Conformity To view the current EC/EU Declaration of Conformity go to: www.kern-sohn.com/ce The scope of delivery for verified weighing balances (= conformity- rated weighing balances) includes a Declaration of Conformity. ALJ/ALS/PLJ/PLS-BA-e-1640...
  • Page 158 7.1.1 Ajustage en utilisant un poids d’ajustage recommandé (réglage d’usine) ....... 29 7.1.2 Ajustage avec les poids d’autres valeurs nominales ..............30 Ajustage avec le poids intérieur (KERN PLJ/ALJ) ..........32 7.2.1 Ajustage des modèles PLJ-M ....................33 7.2.2 Surcharger poids d’ajustage interne ..................34 Etalonnage ......................35...
  • Page 159 Commandes à distance ..................72 11.7 Fonctionnement de l’imprimante ................73 Messages d’erreur ..................74 Maintenance, entretien, élimination ............75 13.1 Nettoyage ........................75 13.2 Maintenance, entretien ...................75 13.3 Elimination ......................75 Aide succincte en cas de panne ..............76 Déclaration de conformité ................77 ALJ/ALS/PLJ/PLS -BA-f-1640...
  • Page 160: Caractéristiques Techniques

    210 x 340 x 330 Dimensions brise-vent 160 x 140 x 205 (intérieur) (l x L x h) mm 190 x 195 x 225 (extérieur) Plateau de pesée (acier inox) Ø 80 mm Poids kg (net) 6.5 kg Interface RS 232C ALJ/ALS/PLJ/PLS -BA-f-1640...
  • Page 161 KERN ALJ 160-4AM ALJ 250-4AM ALJ 310-4AM Plage de pesée (max) 160 g 250 g 310 g Lisibilité (d) 0.1 mg 0.1 mg 0.1 mg Reproductibilité 0.1 mg 0.1 mg 0.1 mg Linéarité ± 0.3 mg ± 0.3 mg ± 0.3 mg Echelon d’étalonnage (e)
  • Page 162 210 x 340 x 330 Dimensions brise-vent 160 x 140 x 205 (intérieur) (l x L x h) mm 190 x 195 x 225 (extérieur) Plateau de pesée (acier inox) Ø 80 mm Poids kg (net) 5.7 kg Interface RS 232C ALJ/ALS/PLJ/PLS -BA-f-1640...
  • Page 163 Pare-brise mm à l’intérieur Ø 150, 60 haut à l’extérieur Ø 160, 70 haut Plateau de pesée (acier inox) Ø 11 cm Ø 11 cm Ø 11 cm Poids kg (net) 4 kg 4.5 kg Interface RS 232C ALJ/ALS/PLJ/PLS -BA-f-1640...
  • Page 164 Pare-brise mm à l’intérieur Ø 150, 60 haut à l’extérieur Ø 160, 70 haut Plateau de pesée (acier inox) Ø 11 cm Ø 11 cm Ø 16 cm Ø 16 cm Poids kg (net) 4.5 kg Interface RS 232C ALJ/ALS/PLJ/PLS -BA-f-1640...
  • Page 165 à l’intérieur Ø 150, 60 haut à l’extérieur Ø 160, 70 haut Plateau de pesée (acier inox) Ø 16 cm Ø 16 cm Ø 16 cm Poids kg (net) 4.5 kg 5 kg 5.0 kg Interface RS 232C ALJ/ALS/PLJ/PLS -BA-f-1640...
  • Page 166 210 x 340 x 100 Pare-brise mm à l’intérieur Ø 150, 60 haut à l’extérieur Ø 160, 70 haut Plateau de pesée (acier inox) Ø 11 cm Ø 11 cm Poids kg (net) 4 kg 4,5 kg Interface RS 232C ALJ/ALS/PLJ/PLS -BA-f-1640...
  • Page 167 210 x 340 x 100 Pare-brise mm à l’intérieur Ø 150, 60 haut à l’extérieur Ø 160, 70 haut Plateau de pesée (acier inox) Ø 16 cm Ø 16 cm Poids kg (net) 4.0 kg 4.5 kg Interface RS 232C ALJ/ALS/PLJ/PLS -BA-f-1640...
  • Page 168 Boîtier (larg x prof x haut) mm 210 x 340 x 160 Pare-brise mm à l’intérieur Ø 150, 60 high à l’extérieur Ø 160, 70 high Plateau de pesée (acier inox) Ø 11 cm Poids kg (net) 4 kg 4.5 kg Interface RS 232C ALJ/ALS/PLJ/PLS -BA-f-1640...
  • Page 169 à l’intérieur Ø 150, 60 haut à l’extérieur Ø 160, 70 haut Plateau de pesée (acier inox) Ø 11 cm Ø 11 cm Ø 11 cm Poids kg (net) 4.5 kg 4.5 kg 4.5 kg Interface RS 232C ALJ/ALS/PLJ/PLS -BA-f-1640...
  • Page 170 à l’intérieur Ø 150, 60 haut à l’extérieur Ø 160, 70 haut Plateau de pesée Ø 16 cm Ø 16 cm Ø 16 cm (acier inox) Poids kg (net) 4 kg 4 kg 4.5 kg Interface RS 232C ALJ/ALS/PLJ/PLS -BA-f-1640...
  • Page 171 Boîtier (larg x prof x haut) mm 210 x 340 x 100 210 x 340 x 100 Pare-brise Plateau de pesée Ø 16 cm Ø 16 cm (acier inox) Poids kg (net) 4.5 kg 4.5 kg Interface RS 232C ALJ/ALS/PLJ/PLS -BA-f-1640...
  • Page 172 Boîtier (larg x prof x haut) mm 210 x 340 x 100 210 x 340 x 100 Pare-brise Plateau de pesée Ø 16 cm 200 x 175 mm (acier inox) Poids kg (net) 4.75 kg 4 kg Interface RS 232C ALJ/ALS/PLJ/PLS -BA-f-1640...
  • Page 173: Explication Des Symboles Graphiques

    • de modification ou d´ouverture de l´appareil • de dommages mécaniques et de dommages occasionnés par les produits, les liquides, l’usure naturelle et la fatigue • de mise en place ou d´installation électrique inadéquates • de surcharge du système de mesure ALJ/ALS/PLJ/PLS -BA-f-1640...
  • Page 174: Vérification Des Moyens De Contrôle

    L´appareil ne doit être utilisé et entretenu que par des collaborateurs formés à cette fin. 5 Transport et stockage 5.1 Contrôle à la réception de l´appareil Nous vous prions de contrôler l´emballage dès son arrivée et de vérifier lors du déballage que l´appareil ne présente pas de dommages extérieurs visibles. ALJ/ALS/PLJ/PLS -BA-f-1640...
  • Page 175: Emballage / Réexpédition

     Avant expédition démontez tous les câbles branchés ainsi que toutes les pièces détachées et mobiles.  Evtl. remontez les cales de transport prévues.  Calez toutes les pièces p. ex. pare-brise en verre, plateau de pesée, bloc d’alimentation etc. contre les déplacements et les dommages. ALJ/ALS/PLJ/PLS -BA-f-1640...
  • Page 176 Modèles ALJ/ALS: ALJ/ALS/PLJ/PLS -BA-f-1640...
  • Page 177: Déballage, Installation Et Mise En Service

    Il faut alors changer de site ou éliminer la source parasite. 6.2 Déballage Sortir avec précaution la balance de l’emballage, retirer la pochette en plastique et installer la balance au poste de travail prévu à cet effet. ALJ/ALS/PLJ/PLS -BA-f-1640...
  • Page 178: Implantation

    6.2.1 Implantation Structure de la balance: Modèles ALS/ALJ Modèles PLS/PLJ, d = 1 mg ALJ/ALS/PLJ/PLS -BA-f-1640...
  • Page 179 Modèles PLS/PLJ, d = 100 mg Modèles PLS/PLJ, d = 10 mg Procéder à la mise à niveau de la balance à l´aide des vis des pieds, jusqu´à ce que la bulle d´air du niveau se trouve dans le cercle prescrit. ALJ/ALS/PLJ/PLS -BA-f-1640...
  • Page 180: Etendue De La Livraison / Accessoires De Série

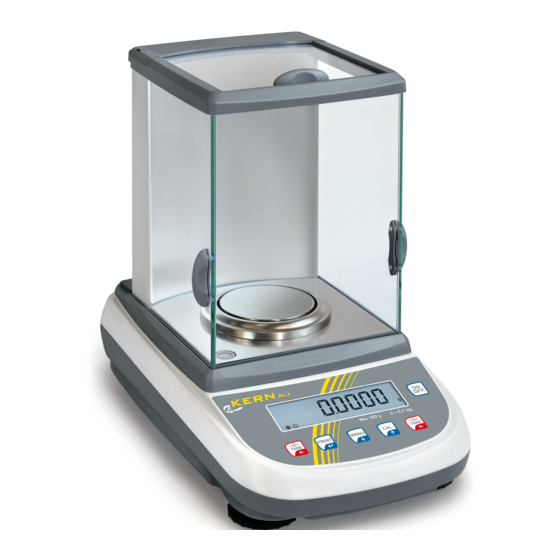
    6.2.2 Etendue de la livraison / accessoires de série • Balance (voir chap. 6.2.1) • Bloc d'alimentation • Mode d’emploi 6.3 Aperçu de l’appareil 6.3.1 Côté antérieur de la balance Couverture du brise-vent Bulle d’air Pare-brise Ecran LCD Touches de fonctionnement Pieds de réglage ALJ/ALS/PLJ/PLS -BA-f-1640...
  • Page 181: Côté Postérieur Et Inférieur De La Balance

    6.3.2 Côté postérieur et inférieur de la balance 1. Plateau de pesée 2. Interface RS232C 3. Vis de pied 4. Raccord adaptateur secteur 5. Vis du boîtier (s’il s’agit des modèles à quatre pieds, dévisser d’abord les deux pieds postérieurs) 6. Dispositif de pesage sous-sol ALJ/ALS/PLJ/PLS -BA-f-1640...
  • Page 182: Éléments De Commande

    • Saisie numérique – feuilleter en avant Touche fléchée  • Rechercher les données de pesée par l’interface Touche PRINT • Confirmer / mémoriser les réglages • Saisie numérique / sélection de chiffres Touche fléchée  • Tarage Touche TARE • Remise à zéro ALJ/ALS/PLJ/PLS -BA-f-1640...
  • Page 183: Brancher Et Allumer L'approvisionnement De Courant

    Capacité de l’accumulateur bientôt épuisée. Brancher le bloc d’alimentation du secteur le plus tôt possible pour charger l’accumulateur. La valeur de la tension est passée au dessous du minimum prescrit. Brancher le bloc d’alimentation du secteur pour charger l’accumulateur. ALJ/ALS/PLJ/PLS -BA-f-1640...
  • Page 184: Raccordement D'appareils Périphériques

     Veillez à avoir des conditions environnementales stables. Un temps de préchauffage (voir au chap. 1) est nécessaire pour la stabilisation.  Aucun objet ne doit se trouver sur le plateau de pesage. ALJ/ALS/PLJ/PLS -BA-f-1640...
  • Page 185: Ajustage Avec Un Poids Externe (Kern Pls/Als)

     Pendant l’affichage clignotant mettre le poids d’ajustage nécessaire soigneusement sur le centre du plateau de pesage. L’affichage clignotant s’éteint. Une fois l’ajustage correctement réalisé la balance revient automatiquement en mode de pesée.  Oter le poids d’ajustage ALJ/ALS/PLJ/PLS -BA-f-1640...
  • Page 186: Ajustage Avec Les Poids D'autres Valeurs Nominales

     Oter le poids d’ajustage En cas d’erreur d’ajustage ou d’un faux poids d’ajustage apparaît un message d’erreur sur l’affichage. Attendre jusqu’à ce que la balance se trouve dans le mode de pesage et répéter le processus d’ajustage. ALJ/ALS/PLJ/PLS -BA-f-1640...
  • Page 187 Poids d’ajustage Autres valeurs nominales non optimales au point de Modèle conseillé vue métrologique pour l’ajustage (voir au chap. 7.1.2) (voir chap. 7.1.1) Modèles A ALJ 160-4A ALJ 250-4A ALJ 310-4A ALJ 500-4A ALS 160-4A 150g 100g ALS 250-4A 200g...
  • Page 188: Ajustage Avec Le Poids Intérieur (Kern Plj/Alj)

    7.2 Ajustage avec le poids intérieur (KERN PLJ/ALJ) En cas de balances non étalonnées il y a quatre possibilités d’ajustage dans le menu. Réglage dans le Dans le mode de pesage appuyer longtemps sur la touche MENU menu jusqu’à ce que le signal acoustique s’éteigne. Le premier point de menu „units“...
  • Page 189: Ajustage Des Modèles Plj-M

    Reprendre le choix en appuyant sur la touche PRINT. La balance retourne au menu Pour finir le menu appuyer longtemps sur la touche MENU jusqu’à ce que le signal acoustique s’éteigne. La balance revient automatiquement en mode de pesée. ALJ/ALS/PLJ/PLS -BA-f-1640...
  • Page 190: Surcharger Poids D'ajustage Interne

    Le processus de calibrage démarre Pendant ce processus „tEc MEM“ est affiché Après avoir enregistré la valeur du poids d’ajustage interne automatiquement, la balance retourne en mode de pesée.  Réaliser le processus d’ajustage comme décrit au chap. 7.2 ALJ/ALS/PLJ/PLS -BA-f-1640...
  • Page 191: Etalonnage

    Chargez de ce fait à intervalles réguliers la balance avec un poids de contrôle connu (env. 1/3 de la charge max.) et comparez le résultat avec la valeur affichée.  L’échéancier pour l’étalonnage périodique est dépassé. ALJ/ALS/PLJ/PLS -BA-f-1640...
  • Page 192: Opérations De Base

    Le tarage peut être répété à volonté, par exemple pour peser plusieurs composants en un mélange (par tâtonnements). La limite est atteinte lorsque la totalité de la plage de pesée est sollicitée. ALJ/ALS/PLJ/PLS -BA-f-1640...
  • Page 193: Pesage En Sous-Sol

     Veillez toujours, à ce qu’il n’y ait pas d’être vivant ou d’objet sous la charge, qui risquerait d’être lésé ou endommagé. A la fin du pesage en sous-sol, il faut obligatoirement refermer la trappe dans le fond de la balance (protection contre la poussière). ALJ/ALS/PLJ/PLS -BA-f-1640...
  • Page 194: Menu Usager

    Finir le menu / Appuyer longtemps sur la touche MENU jusqu’à ce que le rentrer dans le signal acoustique s’éteigne. La balance revient mode de pesage automatiquement en mode de pesée. ALJ/ALS/PLJ/PLS -BA-f-1640...
  • Page 195: Unité De Pesée

    Contrôle de la stabilité rapide - Stab 1 la stabilité lieu d’implantation très calme (voir chap. 9.6) Contrôle de la stabilité rapide + Stab 2 exact - lieu d’implantation calme Contrôle de la stabilité exact – Stab 3 lieu d’implantation très instable ALJ/ALS/PLJ/PLS -BA-f-1640...
  • Page 196 étalonnables. *Tec Cal non documenté Ajustage automatique avec un *Aut Cal poids interne. Ajustage à l’aide d’un poids interne après avoir appuyé sur *I-Cal CAL, bloqué auprès d’appareils étalonnables. * = pas disponible dans tous les modèles ALJ/ALS/PLJ/PLS -BA-f-1640...
  • Page 197 Contrôle de la stabilité rapide - Stab 1 la stabilité lieu d’implantation très calme (voir chap. 9.6) Contrôle de la stabilité rapide + Stab 2 exact - lieu d’implantation calme Contrôle de la stabilité exact – Stab 3 lieu d’implantation très instable ALJ/ALS/PLJ/PLS -BA-f-1640...
  • Page 198 AUTO-OFF après 5 minutes sans 5 Min changement de poids AUTO-OFF après 15 minutes 15 Min sans changement de poids Ajustage Calib Ajustage automatique avec un *Aut Cal (voir chap. 7) poids interne. * = pas disponible dans tous les modèles ALJ/ALS/PLJ/PLS -BA-f-1640...
  • Page 199: Unité De Pesée

    La balance retourne au menu. Ou en cas de besoin faire d’autres réglages dans le menu ou comme suit rentrer dans le mode de pesage.  Appuyer longtemps sur la touche MENU jusqu’à ce que le signal acoustique s’éteigne. La balance revient automatiquement en mode de pesée. ALJ/ALS/PLJ/PLS -BA-f-1640...
  • Page 200: Type Émission De Données

    La balance retourne au menu. Ou en cas de besoin faire d’autres réglages dans le menu ou comme suit rentrer dans le mode de pesage.  Appuyer longtemps sur la touche MENU jusqu’à ce que le signal acoustique s’éteigne. La balance revient automatiquement en mode de pesée. ALJ/ALS/PLJ/PLS -BA-f-1640...
  • Page 201: Taux Baud

    La balance retourne au menu. Ou en cas de besoin faire d’autres réglages dans le menu ou comme suit rentrer dans le mode de pesage.  Appuyer longtemps sur la touche MENU jusqu’à ce que le signal acoustique s’éteigne. La balance revient automatiquement en mode de pesée. ALJ/ALS/PLJ/PLS -BA-f-1640...
  • Page 202: Auto Zero

     Dans le mode de pesage appuyer longtemps sur la touche MENU jusqu’à ce que le signal acoustique s’éteigne.  Appuyer plusieurs fois sur la touche MENU  Valider sur la touche PRINT, le réglage actuel est affiché. ALJ/ALS/PLJ/PLS -BA-f-1640...
  • Page 203  Appuyer longtemps sur la touche MENU jusqu’à ce que le signal acoustique s’éteigne. La balance revient automatiquement en mode de pesée. Sur les modèles PLJ-M sont seuls possibles les réglages „Au0 OFF“ et „Au0 1“. ALJ/ALS/PLJ/PLS -BA-f-1640...
  • Page 204: Filtre

    La balance retourne au menu. Ou en cas de besoin faire d’autres réglages dans le menu ou comme suit rentrer dans le mode de pesage.  Appuyer longtemps sur la touche MENU jusqu’à ce que le signal acoustique s’éteigne. La balance revient automatiquement en mode de pesée. ALJ/ALS/PLJ/PLS -BA-f-1640...
  • Page 205: Affichage Du Contrôle De La Stabilité

    La balance retourne au menu. Ou en cas de besoin faire d’autres réglages dans le menu ou comme suit rentrer dans le mode de pesage.  Appuyer longtemps sur la touche MENU jusqu’à ce que le signal acoustique s’éteigne. La balance revient automatiquement en mode de pesée. ALJ/ALS/PLJ/PLS -BA-f-1640...
  • Page 206: Régler Le Contraste De L'affichage

    La balance retourne au menu. Ou en cas de besoin faire d’autres réglages dans le menu ou comme suit rentrer dans le mode de pesage.  Appuyer longtemps sur la touche MENU jusqu’à ce que le signal acoustique s’éteigne. La balance revient automatiquement en mode de pesée. ALJ/ALS/PLJ/PLS -BA-f-1640...
  • Page 207: Eclairage Du Fond De L'écran D'affichage

    La balance retourne au menu. Ou en cas de besoin faire d’autres réglages dans le menu ou comme suit rentrer dans le mode de pesage.  Appuyer longtemps sur la touche MENU jusqu’à ce que le signal acoustique s’éteigne. La balance revient automatiquement en mode de pesée. ALJ/ALS/PLJ/PLS -BA-f-1640...
  • Page 208: Fonction Automatique De Coupure „Auto Off" Dans Le Mode D'attente

    La balance retourne au menu. Ou en cas de besoin faire d’autres réglages dans le menu ou comme suit rentrer dans le mode de pesage.  Appuyer longtemps sur la touche MENU jusqu’à ce que le signal acoustique s’éteigne. La balance revient automatiquement en mode de pesée. ALJ/ALS/PLJ/PLS -BA-f-1640...
  • Page 209: Menu Utilisateur

    Finir le menu / Appuyer longtemps sur la touche MENU jusqu’à ce que le signal acoustique s’éteigne. La balance revient automatiquement en mode rentrer dans le de pesée. mode de pesage ALJ/ALS/PLJ/PLS -BA-f-1640...
  • Page 210: Comptage De Pièces

    Après une détermination réussie le nombre actuel de pièces est affiché.  Oter le poids de référence. La balance se trouve maintenant en mode de comptage des pièces et compte toutes les pièces, qui sont déposées sur le plateau de la balance. ALJ/ALS/PLJ/PLS -BA-f-1640...
  • Page 211 Répéter le processus jusqu’à ce mode de comptage des pièces et que apparaît l’affichage comptage compte toutes les pièces, qui sont de pièces. déposées sur le plateau de la balance. Retour en mode de pesage  Appuyez sur la touche ON/OFF. ALJ/ALS/PLJ/PLS -BA-f-1640...
  • Page 212: Commutation Entre Affichage Nombre De Pièces Et Affichage Du Poids

    Le poids de référence est calculé de nouveau.  Ou répéter l’optimisation de référence en ajoutant d’autres pièces (max. 255 pièces) ou démarrer le processus de comptage. L’optimisation automatique de référence n’est pas active lors de saisie numérique. ALJ/ALS/PLJ/PLS -BA-f-1640...
  • Page 213: Mémorisation Numérique Du Poids De Référence

     Appuyer sur la touche MENU, le poids total des pièces appliquées est affiché.  Pour rentrer à l’affichage comptage de pièces, appuyer de nouveau sur la touche MENU. Retour en mode de pesage  Appuyez sur la touche ON/OFF ALJ/ALS/PLJ/PLS -BA-f-1640...
  • Page 214: Détermination De Densité (Pesée Hydrostatique)

     Valider sur la touche PRINT, le réglage actuel est affiché.  Sur la touche MENU choisir „d SoLid“  Confirmez sur la touche PRINT.  Sur les touches fléchées    saisir la densité du liquide de mesure.  Validez la saisie sur la touche PRINT. ALJ/ALS/PLJ/PLS -BA-f-1640...
  • Page 215 Retour en mode de pesage  Appuyez sur la touche ON/OFF  ou démarrer un nouveau cycle de mesure à l’aide de la touche MENU. Si au cours de la détermination de la densité sont apparus des erreurs, „d-----„ est affiché. ALJ/ALS/PLJ/PLS -BA-f-1640...
  • Page 216: Détermination De La Densité De Liquides

     Sur la touche MENU choisir „d Liquid“  Confirmez sur la touche PRINT.  Sur les touches fléchées    saisir la densité du corps plongeant en verre.  Validez la saisie sur la touche PRINT. ALJ/ALS/PLJ/PLS -BA-f-1640...
  • Page 217 Retour en mode de pesage  Appuyez sur la touche ON/OFF.  ou démarrer un nouveau cycle de mesure à l’aide de la touche MENU. Si au cours de la détermination de la densité sont apparus des erreurs, „d-----„ est affiché. ALJ/ALS/PLJ/PLS -BA-f-1640...
  • Page 218: Fonction D'addition

     Confirmer sur la touche PRINT La valeur affichée est additionnée à la mémoire de totalisation, après la balance de nouveau tarera automatiquement et changera vers l’affichage zéro  Déposer le poids B. (exemple)  Confirmer sur la touche PRINT ALJ/ALS/PLJ/PLS -BA-f-1640...
  • Page 219: Pesée Avec Gamme De Tolérance

    L’affichage [L], [ok] ou [H] indique si le produit pesé se trouve bien entre les deux valeurs seuil extrêmes. Produit pesé au-dessous du seuil de tolérance inférieur Produit pesé est compris dans le domaine de tolérance Le produit pesé est au-delà du seuil de tolérance supérieur ALJ/ALS/PLJ/PLS -BA-f-1640...
  • Page 220  Confirmez sur la touche PRINT. La balance se trouve alors en mode de pesée de contrôle.  Déposez les matières à peser, le contrôle des tolérances est lancé. Retour en mode de pesage  Appuyez sur la touche ON/OFF ALJ/ALS/PLJ/PLS -BA-f-1640...
  • Page 221: Détermination Du Pourcentage

     Oter le poids de référence. A partir d’ici la balance se trouve en mode détermination de pourcentage.  Mettre en place le produit pesé. Le poids de l’échantillon est indiqué en pourcent, en rélation au poids de référence. ALJ/ALS/PLJ/PLS -BA-f-1640...
  • Page 222: Mémorisation Numérique Du Poids De Référence

     Validez la saisie sur la touche PRINT. A partir d’ici la balance se trouve en mode détermination de pourcentage.  Mettre en place le produit pesé. Le poids de l’échantillon est indiqué en pourcent, en rélation au poids de référence. Retour en mode de pesage  Appuyez sur la touche ON/OFF ALJ/ALS/PLJ/PLS -BA-f-1640...
  • Page 223: Fonction De Pesée Des Animaux

    La moyenne des résultats de pesée est affichée et demeure sur l’affichage.  Afin de réaliser un autre pesage, appuyer 1x sur la touche ON/OFF Retour en mode de pesage :  Appuyer 2x sur la touche ON/OFF ALJ/ALS/PLJ/PLS -BA-f-1640...
  • Page 224: Fonction Valeur De Crête

     La valeur de crête demeure affichée aussi longtemps sur le display jusqu’à ce que la touche TARE soit appelée. Ensuite la balance est prête pour d’autres mesures. Retour en mode de pesage  Appuyez sur la touche ON/OFF ALJ/ALS/PLJ/PLS -BA-f-1640...
  • Page 225: Sortie De Données Rs 232C

    œuvre d’un interface seul le recours à un câble d’interface KERN respectif de max. 2 m permet un fonctionnement irréprochable 11.2 Attribution des broches du connecteur de sortie de la balance Pin 2 Tx Signal Pin 3 Rx Signal Pin 5 ALJ/ALS/PLJ/PLS -BA-f-1640...
  • Page 226: Interface

    Le jeu de données consiste dans les 14 caractères suivants : 1. Caractères Signe arithmétique /espace (valeur de pesée) 2-9. Caractères Poids ou autres données 10-12. Caractères Unité de pesée 13. Caractères Affichage de la stabilité 14. Caractères carriage return 15. Caractères line feed ALJ/ALS/PLJ/PLS -BA-f-1640...
  • Page 227: Formats De La Transmission De Données

    Poids space Valeur de pesée space space Poids moyen de pièce 1°. 2° 3° 4° 5° 6° 7° 8° 9° 10° 11° 12° 13° 14° 15° 16° 17° 18° Espaces Valeur de pesée space poids moyen de pièce ALJ/ALS/PLJ/PLS -BA-f-1640...
  • Page 228: Commandes À Distance

    10° 11° 12° 13° 14° 15° 16° 17° 18° Valeur Espace Valeur totale moyenne Esp. moyenne 11.6 Commandes à distance instructions Fonction “T” = H54 Tarage “C” = H43 Ajustage “E” = H45 Enter “M” = H4D Menu “O” = H4F ON/OFF ALJ/ALS/PLJ/PLS -BA-f-1640...
  • Page 229: Fonctionnement De L'imprimante

    Comptage de pièces Weight: 300.000 g PMU: 3.000 g Nombre de pièces Weight Poids des pièces appliquées Poids moyen de pièce Prozentbestimmung Perc. 20 % Weight: 30.000 g Perc Valeur affichée en [%] Weight Valeur affichée en [g] ALJ/ALS/PLJ/PLS -BA-f-1640...
  • Page 230: Messages D'erreur

    Contrôler la position du plateau de pesée “CAL But” Ajuster la balance Gamme de pesée dépassée, la charge appliquée est au- dessus de la capacité de la balance. Délester la balance. Gamme de pesée non atteinte, p.ex. plateau de pesée non appliqué ALJ/ALS/PLJ/PLS -BA-f-1640...
  • Page 231: Maintenance, Entretien, Élimination

    L´appareil ne doit être ouvert que par des dépanneurs formés à cette fin et ayant reçu l´autorisation de KERN. Avant d´ouvrir l´appareil, couper ce dernier du secteur. 13.3 Elimination L´élimination de l´emballage et de l´appareil doit être effectuée par l´utilisateur selon le droit national ou régional en vigueur au lieu d´utilisation. ALJ/ALS/PLJ/PLS -BA-f-1640...
  • Page 232: Aide Succincte En Cas De Panne

    • Champs électromagnétiques/ charge électrostatique (changer de lieu d´installation/ si possible, arrêter l´appareil provoquant l´anomalie) Au cas où d´autres messages d´erreur apparaissent, arrêter puis rallumer la balance. En cas de perduration du message d’erreur, faites appel au fabricant. ALJ/ALS/PLJ/PLS -BA-f-1640...
  • Page 233: Déclaration De Conformité

    15 Déclaration de conformité Vous trouvez la déclaration de conformité CE- UE actuelle online sous: www.kern-sohn.com/ce Dans le cas de balances étalonnées (= de balances à la conformité évaluée) la déclaration de conformité est comprise dans les fournitures. ALJ/ALS/PLJ/PLS -BA-f-1640...

Ce manuel est également adapté pour:

AlsPljPls

Table des Matières