Publicité
Les langues disponibles
Les langues disponibles
Liens rapides
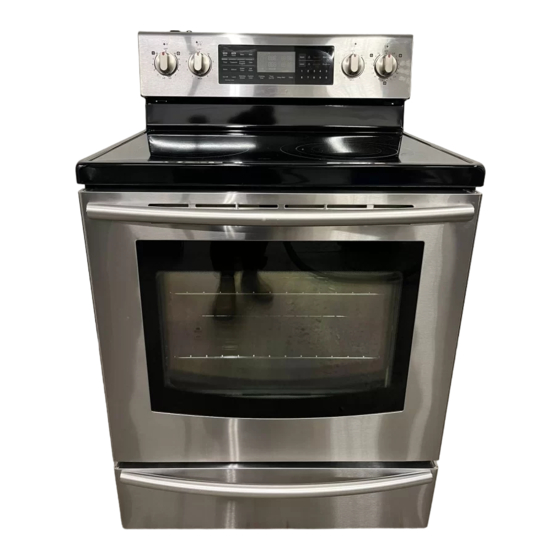
Electric Range
installation manual
This manual is made with 100% recycled paper.
imagine
the possibilities
ENGLISH
Thank you for purchasing this Samsung product.
To receive more complete service, please register
your product at
www.samsung.com/register
1-800-SAMSUNG(726-7864)
Installation_XAC_DG68-00109F-01_EN+CFR.indb 1
2012-02-21
6:48:44
Publicité

Manuels Connexes pour Samsung FE710DRS/XAC


Sommaire des Matières pour Samsung FE710DRS/XAC
- Page 1 Electric Range installation manual This manual is made with 100% recycled paper. imagine the possibilities ENGLISH Thank you for purchasing this Samsung product. To receive more complete service, please register your product at www.samsung.com/register 1-800-SAMSUNG(726-7864) Installation_XAC_DG68-00109F-01_EN+CFR.indb 1 2012-02-21 6:48:44...
- Page 2 before you begin ANTI-TIP DEVICE WARNING: To reduce the risk of tipping the appliance, the appliance must be secured by properly installed anti-tip devices packed with the appliance. WARNING a) A child or adult can tip the range and be killed. b) Install the anti-tip device to the structure and/or the range at rear right (or rear left) of the range bottom.
- Page 3 preparing to install the range REmoVE PACKAGING Remove packaging materials. Failure to remove packaging materials could result in damage to the appliance. PREPARE Tools & PARTs What tools you will need Drill Adjustable Wrench Pliers ˝ Nut Driver Phillips Screwdriver Flat Screwdriver Pencil Level...
- Page 4 ChECKING ThE INsTAllATIoN sITE Clearances and dimensions To install the range, refer to the following fi gure. For installation in CANADA, a Free-standing range is not to be installed closer than 12mm from any adjacent surface. CAUTION This range has been designed to comply with the maximum allowable wood CAUTION cabinet temperatures of 194°F.
- Page 5 connecting the power sTEP 1. mEETING ElECTRICAl CoNNECTIoN REQuIREmENTs CAUTION For personal safety, do not use an extension cord with this appliance. CAUTION Remove house fuse or open circuit breaker before beginning installation. This appliance must be supplied with the proper voltage and frequency, and connected to an individual properly grounded branch circuit, protected by a circuit breaker or fuse having amperage as specifi ed on the rating plate.
- Page 6 sTEP 2. ACCEssING ThE PoWER CoRD CoNNECTIoN Remove the rear access cover and loosen the screw with a screwdriver. The terminal block will then be accessible. Terminal block Access cover Specifi ed power-supply-cord kit rating Diameter (inches) of range Specifi ed rating of Range rating, watts connection opening power-supply-cord kit,...
- Page 7 sTEP 3. INsTAllING ThE PoWER CoRD For power cord installations, hook the strain relief over the power cord hole (1 ”) located below the rear of the drawer body. Insert the power cord through the strain relief and tighten the device. Conduit connection plate Power cord Strain relief...
- Page 8 Installing a 4-wire power cord WARNING The neutral wire of the supply circuit must be connected to the neutral terminal WARNING located in the lower center of the terminal block. The power leads must be connected to the lower left and the lower right terminals of the terminal block.
- Page 9 sTEP 4. INsTAllING ThE CoNDuIT Remove the conduit connection plate from the rear of the drawer body and rotate it as shown below. The conduit hole (1 ”) must be used. ” ” ” ” 1. Prepare the conduit cord shown in Figure 1. 2.
- Page 10 Installing a 4-wire conduit • Aluminum building wire may be used but it must be rated for the correct amperage and voltage to make the connection. Connect wires according to this Step 4 depending on the number of wires. • Wire used, location and enclosure of splices, etc., must conform to good wiring practices and local codes.
- Page 11 installing the range INsTAllING ThE ANTI-TIP DEVICE WARNING To reduce the risk of tipping, the appliance must be secured by properly WARNING installing the Anti-Tip device packed with the appliance. • Refer to the installation instructions supplied with the bracket. •...
- Page 12 3. Check your adjustments Use a spirit level to check your adjustments. Place the level diagonally on the oven rack or surface cooktop, and check each direction for level. 1. Check direction 1. 2. Check direction 2. If the spirit level doesn’t show level on the oven rack or surface cooktop, adjust the leveling legs with a wrench.
- Page 13 Ce manuel est en papier recyclé à 100%. un monde de possibilités FRANÇAIS CANADIEN Nous vous remercions d'avoir choisi ce produit Samsung. Afin de bénéficier du meilleur du service après-vente, enregistrez votre appareil sur le site suivant : www.samsung.com/register 1-800-SAMSUNG(726-7864) Installation_XAC_DG68-00109F-01_EN+CFR.indb 1...
- Page 14 avant de commencer DISPOSITIF ANTI-BASCULEMENT AVERTISSEMENT : Pour réduire le risque de basculement de l’appareil, ce dernier doit être sécurisé à l’aide des dispositifs anti-basculement correctement installés, AVERTISSEMENT fournis dans l’emballage. a) Adultes ou enfants peuvent faire basculer la cuisinière et être tués. b) Installez le dispositif anti-basculement sur la structure et/ou sur la cuisinière à...
- Page 15 préparati o n avant l ' i n stal l a ti o n de l a cui s i n i è re rETrAIT DE L'EMBALLAGE Retirez le matériel d'emballage. Tout matériel d'emballage non retiré risque d'endommager l'appareil. PrEPArATION DES OUTILS ET DES PIECES Outils nécessaires Perceuse Clé...
- Page 16 VÉrIFICATION DU LIEU D'INSTALLATION Dégagements et dimensions Pour procéder à l'installation de la cuisinière, reportez-vous au schéma suivant. Concernant les installations au CANADA, une cuisinière non encastrable ne peut pas être installée à moins de 12 mm de toute surface adjacente. ATTENTION Cette cuisinière a été...
- Page 17 Mise sous tension ETAPE 1 : rESPECT DES EXIGENCES EN MATIErE DE rACCOrDEMENTS ELECTrIQUES ATTENTION Pour votre sécurité, n'utilisez pas de rallonge pour brancher ATTENTION l'appareil. Retirez le fusible de l'installation électrique ou ouvrez le disjoncteur avant de démarrer l'installation. Cet appareil doit être alimenté par la fréquence et la tension adaptées. Il doit également être branché...
- Page 18 ETAPE 2 : ACCES AU BrANCHEMENT DU COrDON D'ALIMENTATION Retirez le panneau d'accès situé à l'arrière et desserrez la vis à l'aide d'un tournevis. Vous pourrez alors accéder au bornier. Bornier Capot d'accès Classifi cation de l'équipement nécessaire à la mise sous tension Diamètre (pouces) de l'ouverture de Classifi cation générale, watts Classifi cation de l'équipement connexion de la cuisinière...
- Page 19 ETAPE 3 : INSTALLATION DU COrDON D'ALIMENTATION Pour les installations de cordons d'alimentation, branchez le dispositif de protection de câble sur l'orifi ce du cordon d'alimentation (1 ”) situé sous la partie arrière du tiroir. Insérez le cordon d'alimentation dans le dispositif et serrez-le. Plaque de raccordement des gaines Cordon...
- Page 20 Installation d'un cordon d'alimentation à 4 fi ls AVERTISSEMENT La prise neutre du circuit d'alimentation doit être connectée à la AVERTISSEMENT borne neutre située au centre inférieur du bornier. Les câbles d'alimentation doivent être connectés aux bornes inférieures gauches et inférieures droites du bornier. Le 4ème câble de mise à la terre doit être connecté...
- Page 21 ETAPE 4 : INSTALLATION DE LA GAINE Retirez la plaque de connexion de la gaine de la partie arrière du tiroir, puis faites-la pivoter comme indiqué ci-dessous. Vous devez utiliser l'orifi ce de la gaine (1 ”). ” ” ” ” 1.
- Page 22 Installation d'un conduit à 4 fi ls • Un fi l de bâtiment en aluminium peut être utilisé mais il devra être doté de l'intensité et de la tension nominales correctes permettant d'établir la connexion. Connectez les fi ls en suivant l'étape 4 selon le nombre de fi ls utilisé.
- Page 23 Installation de la cuisinière INSTALLATION DU DISPOSITIF ANTI-BASCULEMENT AVERTISSEMENT Afi n de réduire les risques de basculement, fi xez la cuisinière en AVERTISSEMENT installant correctement le dispositif anti-basculement fourni avec cette dernière. • Reportez-vous aux consignes d'installation fournies avec le support. •...
- Page 24 3. Vérifi cation des réglages Utilisez un niveau à bulle pour vérifi er vos réglages. Placez le niveau en diagonale sur la grille du four ou la surface de la cuisinère et vérifi ez le niveau dans chaque direction. 1. Vérifi ez la direction 1. 2.