Dorman 913-430 Instructions
Les langues disponibles
Les langues disponibles
Liens rapides
INSTRUCTIONS
EVAPORATIVE
CANISTER PURGE
SOLENOID REPAIR
KIT
913-430
A
B
BEFORE YOU BEGIN:
• Always wear proper safety
equipment when performing repairs.
• Ensure at your point of purchase
that this part fits your exact
vehicle configuration.
• Reference the appropriate service
manual for your vehicle. If you do
not have a service manual, and do
not have the training or experience
to perform the necessary
procedures correctly, seek the
services of a qualified technician.
NEED HELP?
Please call our Technical Support
team for assistance from our team of
certified automotive experts.
1-866-933-2911
© 2022 No reproduction in whole or in part without prior written approval.
913-430_Instructions
Our purge valve repair kit is designed to save installation time by replacing only the
failed purge valve without the need to remove the additional tubing connections
at the source.
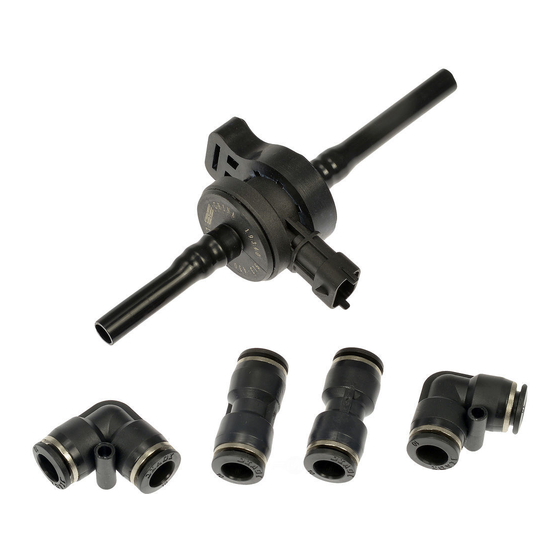
KIT CONTENTS
A
Replacement purge valve with two 10mm nylon tubes three inches long,
attached to both sides of the purge valve (Qty. 1)
B
10mm straight pipe connectors (Qty. 2)
C
10mm 90-degree pipe connectors (Qty. 2)
INSTRUCTIONS
STEP 1:
Turn vehicle off.
STEP 2:
Unplug the faulty purge valve wire harness connector.
STEP 3:
Find the best configuration of using either the 10mm straight pipe connectors,
10mm 90-degree pipe connector or a combination, based upon the layout
of your vehicle.
STEP 4:
Cut the tubing connected to the faulty purge valve. Leave enough tubing to
accommodate the repair kit purge valve. The line must be sectioned to a precise
length; improper measurement will result in a faulty repair. An angled cut could
C
result in an insufficient seal after the new purge valve has been installed.
STEP 5:
Position the pipe connectors on the newly cut tubing.
STEP 6:
Firmly insert tubing to connectors and gently tug backward to ensure the connection
is secure. Connectors have push-to-disconnect tabs if additional tubing material
needs to be removed. Push tab in and gently tug the associated tubing
to disconnect.
STEP 7:
Connect the new purge valve to the pipe connectors and reinstall the wire harness.
STEP 8:
Secure the purge valve in place on original connection point or (if applicable) secure
with zip ties.
NOTE: This purge valve is secured to a metal bracket. In some applications
the rubber on this valve that connects to the metal bracket will have
to be rotated.
Dorman Products, Inc. Corporate Office and Customer Service: 1-800-523-2492.
Disclaimer: Even though every attempt is made to ensure this information is complete and accurate, it is impossible to account for all possible
circumstances or situations. Please consult with a qualified auto technician before attempting to perform any work you are not qualified to
do. Automobiles can be hazardous to work on; be sure to take all necessary safety precautions. Failure to do so may result in property damage
or personal injury. Certain motor vehicle standards and performance requirements may apply to your motor vehicle (such as Federal Motor
Vehicle Safety Standards by the National Highway Traffic Safety Administration). Be sure that your work is performed in accordance with such
standards and that you do not disable any motor vehicle safety feature.
PAGE 1 OF 3

Manuels Connexes pour Dorman 913-430

Sommaire des Matières pour Dorman 913-430
- Page 3 1-866-933-2911 Dorman Products, Inc. Siège social et service à la clientèle : 1-800-523-2492 Clause de non-responsabilité: Malgré tous les efforts effectués pour s’assurer que l’information soit complète et exacte, il est impossible de prendre en compte toutes les situations et circonstances possibles. Veuillez consulter un technicien qualifié avant d’effectuer des travaux que vous n’êtes pas qualifié...