JVC KD-R821BT Manuel D'instructions
Table des Matières
Les langues disponibles
Les langues disponibles
Having TROUBLE with operation?
Please reset your unit
Refer to page of How to reset your unit
Vous avez des PROBLÈMES de fonctionnement?
Réinitialisez votre appareil
Référez-vous à la page intitulée Comment réinitialiser votre appareil
Dear Customer,
This apparatus is in conformance with the valid
European directives and standards regarding
electromagnetic compatibility and electrical safety.
European representative of Victor Company of
Japan, Limited is:
JVC Technical Services Europe GmbH
Postfach 10 05 04
61145 Friedberg
Germany
EN, FR
© 2011 Victor Company of Japan, Limited
Cher(e) client(e),
Cet appareil est conforme aux directives et
normes européennes en vigueur concernant la
compatibilité électromagnétique et à la sécurité
électrique.
Représentant européen de la société Victor
Company of Japan, Limited:
JVC Technical Services Europe GmbH
Postfach 10 05 04
61145 Friedberg
Allemagne
0111DTSMDTJEIN
KD-R821BT
CD RECEIVER / RÉCEPTEUR CD
For canceling the display demonstration, see page 4. / Pour annuler la démonstration des
affichages, référez-vous à la page 4.
For installation and connections, refer to the separate manual.
Pour l'installation et les raccordements, se référer au manuel séparé.
INSTRUCTIONS
MANUEL D'INSTRUCTIONS
ENGLISH
FRANÇAIS
GET0717-003A
[E/EU]
Chapitres
Table des Matières
Dépannage

Manuels Connexes pour JVC KD-R821BT


Sommaire des Matières pour JVC KD-R821BT
- Page 30 DVD d’un disque à double face sur cet effets négatifs sur l’environnement et la appareil n’est pas recommandée. santé humaine. JVC ne peut être tenu responsable pour toute Notification: perte de données dans un iPod/iPhone et/ La marque Pb en dessous du symbole des piles ou un périphérique USB à...
-
Page 31: Comment Attacher/Détacher Le Panneau De Commande
Comment attacher/détacher le TABLE DES panneau de commande MATIERES 3 Comment attacher/détacher le panneau de commande 3 Comment réinitialiser votre appareil 3 Comment forcer l’éjection d’un disque 3 Entretien Annulation des démonstrations Comment réinitialiser votre des affichages appareil Réglage de l’horloge Préparation de la télécommande Vos ajustements préréglés sont aussi effacés. -
Page 32: Annulation Des Démonstrations Des Affichages
Annulation des démonstrations des affichages Mise sous tension de l’appareil. Choisissez <Off>. DEMO SET UP SET UP [Maintenez DEMO DEMO Clock pressée] Clock Color Color (Réglage initial) Choisissez <DEMO>. Terminez la procédure. DEMO (Réglage initial) Réglage de l’horloge Mise sous tension de l’appareil. Ajustez les minutes. -
Page 33: Préparation De La Télécommande
Préparation de la télécommande Attention: Lorsque vous utilisez la télécommande pour la première fois, tirez sur la feuille isolante pour • Danger d’explosion si la pile est remplacée de la retirer. façon incorrecte. Remplacez-la uniquement avec le même type de pile ou un type équivalent. •... -
Page 34: Opérations De Base
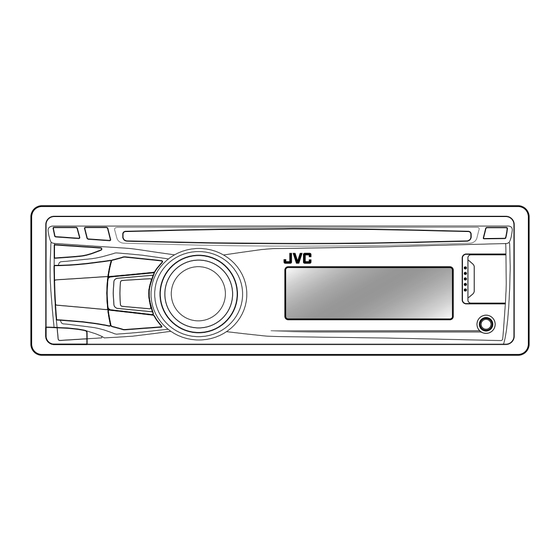
Opérations de base Fente d’insertion Molette de commande Fenêtre d’affichage Éjection d’un disque Capteur de télécommande Prise d’entrée AUX • NE l’exposez PAS à la lumière (auxiliaire) directe du soleil. Prise d’entrée USB Retrait du panneau (bus série universel) Quand vous appuyez ou maintenez pressées les touches suivantes... Appareil Télécommande Opérations générales... -
Page 35: Écoute De La Radio
Écoute de la radio • [Appuyez sur la touche] Recherche des Ÿ stations automatiquement. • [Maintenez pressée] Recherche des ] “FM” ou “AM” stations manuellement. “M” apparaît, puis appuyez sur la touche répétitivement. s’allume lors de la réception d’une émission FM stéréo avec un signal suffisamment fort. Amélioration de la réception FM Préglage manuel (FM/AM) Vous pouvez prérégler un maximum de 18... -
Page 36: Recherche De Votre Programme Fm Radio Data System Préféré
Attente de réception d’informations Les fonctionnalités suivantes sont L’attente de réception d’informations permet accessibles uniquement pour les stations à l’appareil de commuter temporairement sur FM Radio Data System. votre programme d’informations préféré à Recherche de votre programme partir de n’importe quelle source autre que AM. FM Radio Data System préféré—... -
Page 37: Écoute D'un Disque
Codes PTY: News, Affairs, Info, Sport, Educate, Drama, Culture, Science, Varied, Pop M (musique), Rock M (musique), Easy M (musique), Light M (musique), Classics, Other M (musique), Weather, Finance, Children, Social, Religion, Phone In, Travel, Leisure, Jazz, Country, Nation M (musique), Oldies, Folk M (musique), Document Écoute d’un disque Ÿ... -
Page 38: Sélection Des Modes De Lecture
• Seul les caractères existant apparaîtront sur le menu de recherche. • Maintenez pressée 5/∞ pour changer de façon continue le caractère du menu de Repeat recherche. Track : Répète la plage actuelle • Si votre disque contient beaucoup de plages, Folder : Répète le dossier actuel la recherche prend un certain temps. -
Page 39: Informations Complémentaires
Attention: • Assurez-vous que toutes les données • N’utilisez pas un périphérique USB avec 2 importantes ont été sauvegardées. partitions ou plus. • Vous ne pouvez pas connecter un ordinateur • En fonction de la forme du périphérique ou un disque dur portable à la prise d’entrée USB et du port de connexion, il se peut que USB de l’appareil. -
Page 40: Utilisation De Périphériques Bluetooth
• Quand cet appareil est mis hors tension, l’appareil extérieur est déconnecté. • Si vous souhaitez recevoir plus d’informations sur le système Bluetooth, consultez le site web de JVC suivant: <http://www.jvc.co.jp/english/car/index.html> (Site web en anglais uniquement). FRANÇAIS... -
Page 41: Connexion D'un Appareil Bluetooth
Puis, validez le code sur Utilisez le périphérique Bluetooth pour l’appareil en appuyant sur la molette rechercher et sélectionner “JVC Unit”. de commande. Utilisez le périphérique • Pour certains périphériques Bluetooth, il Bluetooth pour valider le code. -
Page 42: Pour Connecter/Déconnecter Un Périphérique Enregistré
Pour supprimer un périphérique enregistré Pour connecter/déconnecter un 1 Maintenez pressé MENU. périphérique enregistré 2 Tournez la molette de commande pour 1 Maintenez pressé MENU. choisir <Bluetooth>, puis appuyez dessus 2 Tournez la molette de commande pour pour valider. choisir <Bluetooth>, puis appuyez dessus 3 Tournez la molette de commande pour pour valider. - Page 43 Si “Settings” est sélectionné à l’étape 2... Ring Color • Tournez la molette de commande pour 29 couleurs préréglées [ Réglage choisir un élément (voir ci-après), puis initial: Color 06 ] : Quand un appel/message appuyez sur la molette de commande texte arrive, l’affichage clignote dans la couleur pour valider.
-
Page 44: Réception/Terminaison D'un Appel Téléphonique
Pour supprimer un contact (nom/numéro Utilisation de la télécommande 5 / ∞ / 2 / 3 / SOURCE : [Appuyez sur la touche] de téléphone) Répond aux appels. Uniquement quand “In Unit” est choisi pour [Maintenez pressée] “Phonebook Select”. (page 15) 1 Appuyez sur Refuse les appels. -
Page 45: Utilisation D'un Lecteur Audio Bluetooth
Utilisation d’un lecteur audio Bluetooth Les opérations et les indications de l’affichage Sélection des modes de lecture diffèrent en fonction de leur disponibilité sur le • Pour les périphériques Bluetooth compatibles périphérique connecté. avec AVRCP 1.3. ] Choisissez “BT FRONT” ou “BT REAR”. -
Page 46: Écoute D'un Ipod/Iphone
Yes : Initialise tous les réglages Bluetooth (y compris le pairage mémorisé, le répertoire téléphonique, etc.). / No : Annulation. Information My BT Name : Affiche le nom de l’appareil (JVC Unit). / My Address : Affiche l’adresse de l’adaptateur USB Bluetooth. / ConnectedPhone * : Affiche le nom du téléphone connecté. -
Page 47: Sélection D'une Plage À Partir Du Menu
Attention: • Évitez d’utiliser un iPod/iPhone s’il peut gêner une conduite en toute sécurité. • Assurez-vous que toutes les données ] Choisissez la plage souhaitée. importantes ont été sauvegardées pour éviter Répétez cette étape jusqu’à ce que la toute perte de données. plage souhaitée soit choisie. -
Page 48: Utilisation De L'application Ipod/ Iphone
(Site web en anglais uniquement). Utilisation de l’application iPod/ iPhone Vous pouvez utiliser une application originale de JVC (par exemple JVC Drive Smart) avec cet appareil en mode <Application Mode>. Pour l’utilisation de JVC Drive Smart, consultez le site Web de JVC: <http://www.jvc.co.jp/english/car/index.html>... -
Page 49: Écoute D'un Autre Appareil Extérieur
Écoute d’un autre appareil extérieur Vous pouvez connecter un appareil extérieur à la prise d’entrée AUX (auxiliaire) sur le panneau de commande. Préparation: Assurez-vous que <Show> est choisi pour le réglage <Source Select> = <Aux Source>. (page 25) • Pour plus d’informations, référez-vous aussi aux instructions fournies avec les appareils extérieurs. ] “AUX IN”... -
Page 50: Mémorisation De Votre Propre Mode Sonore
Mémorisation de votre propre Répétez les étapes 2 et 3 pour ajuster les mode sonore autres tonalités. Vous pouvez mémoriser vos propres ajustements en mémoire. ] Quittez le menu. [Maintenez pressée] Les ajustements réalisés sont mémorisé et changé sur “USER”. Bass [ Réglage initial: 50 Hz, 0, Q1.0 ] Fréquence: 50 Hz, 100 Hz, 200 Hz... - Page 51 Article de menu Réglages pouvant être choisis, [ Réglage initial: Souligné ] Button Zone 29 couleurs préréglées / User / COLORFLOW 1/ 2/ 3 : Choisit votre couleur préférée pour l’éclairage des touches (sauf pour DISP / EQ / 0) et affiche la couleur séparément.
- Page 52 Article de menu Réglages pouvant être choisis, [ Réglage initial: Souligné ] LCD Type Negative : L’affichage négatif est utilisé. / Positive : L’affichage positif est utilisé. / Auto : Un affichage positif est choisi pendant la journée * ; alors qu’un affichage négatif est utilisée pendant la nuit * Contrast Level 01 —...
- Page 53 Article de menu Réglages pouvant être choisis, [ Réglage initial: Souligné ] S’affiche uniquement quand la source est “FM”. Pour les réglages, voir page 7. IF Band Auto : Augmente la sélectivité du tuner pour réduire les interférences entre les stations adjacentes.
-
Page 54: Guide De Dépannage
Guide de dépannage Symptôme Remède/Cause Aucun son n’est entendu des enceintes. Ajustez le volume sur le niveau optimum. / Assurez-vous que le son de l’appareil n’est pas coupé et qu’il n’est pas en pause. (page 6) / Vérifiez les cordons et les connexions. Cet appareil ne fonctionne pas du tout. - Page 55 Symptôme Remède/Cause “Please Eject” apparaît sur l’affichage. Insérez un disque contenant des plages MP3/WMA. “Not Support” apparaît sur l’affichage Saute à la plage codée suivante dans le format approprié ou à la et la plage est sautée. plage WMA suivante non protégée contre la copie. “Reading”...
- Page 56 • La marque du mot et les logos Bluetooth sont la propriété de Bluetooth SIG, Inc. et toute utilisation de ces marques par Victor Company of Japan, Limited (JVC) est faite sous licence. Les autres marques et noms de commerce sont la propriété...
-
Page 57: Spécifications
Spécifications SECTION DE L’AMPLIFICATEUR Format de décodage MP3 (MPEG1/2 Audio Layer 3) : Débit binaire maximum : 320 kbps AUDIO Format de décodage WMA (Windows Media® Puissance de sortie maximum : 50 W par canal Audio) : Débit binaire maximum : 320 kbps Puissance de sortie en mode continu (RMS) : 20 W par canal pour 4 Ω, 40 Hz à... - Page 58 The countries where you may use the Bluetooth® function Die Länder, in denen Sie die Bluetooth® Funktion verwenden können Pays où vous pouvez utiliser la fonction Bluetooth® De landen waar u de Bluetooth®-functie mag gebruiken Países en los que se puede utilizar la función Bluetooth® Paesi nei quali è...